Search the Community
Showing results for tags 'conversion'.
Found 16 results
-
So I plan on doing the 4wd conversion to my 1989 2wd automatic 4.0L MJ. I obviously want the cheapest route and don't mind the work needed. I guess my question is, if i found another xj within the years 87-90 (renix) does everything swap right in? besides the rear driveshaft (I know that would have to be re-sized). I also have an automatic tranny right now and keeping it would be less costly and less work than getting a manual trans but would my ax4 be a good match up for a transfer case? Or would I have to swap the trans from a donor with a 4x4 auto? This is my first big project for me so help would be appreciated! :thumbsup:
-
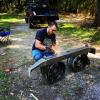
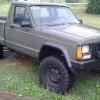
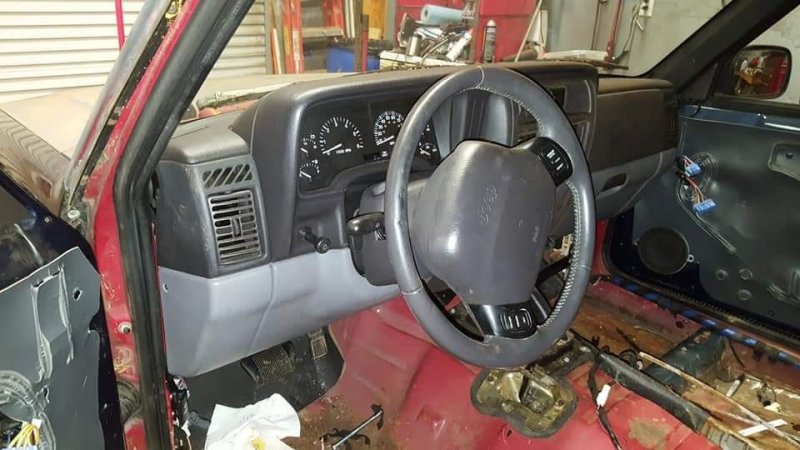
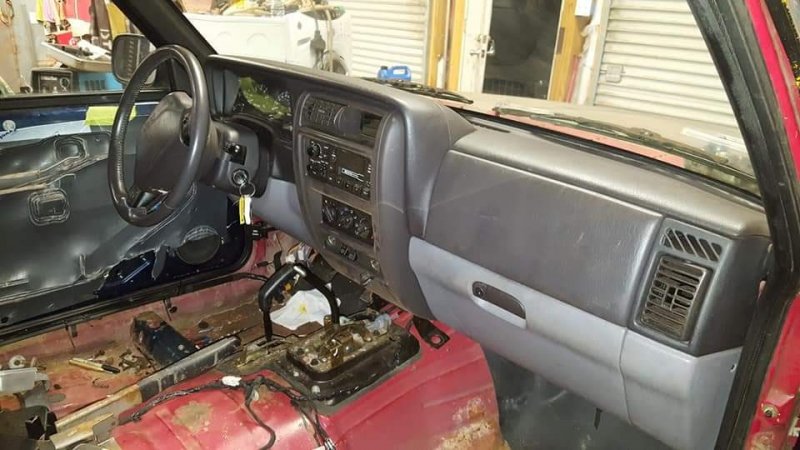
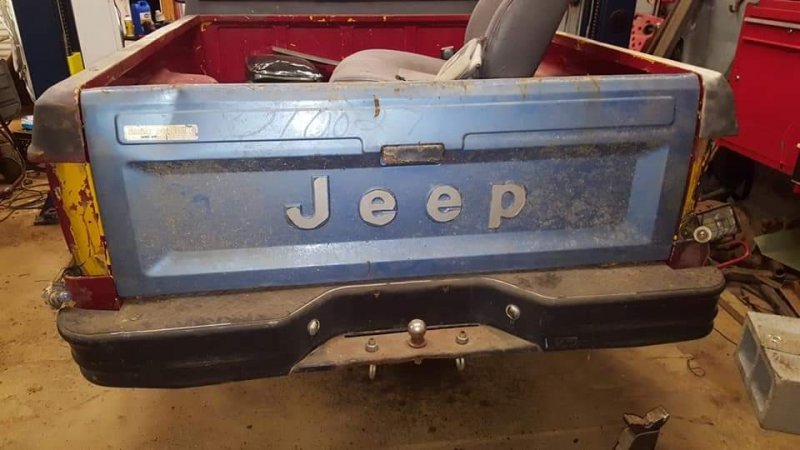
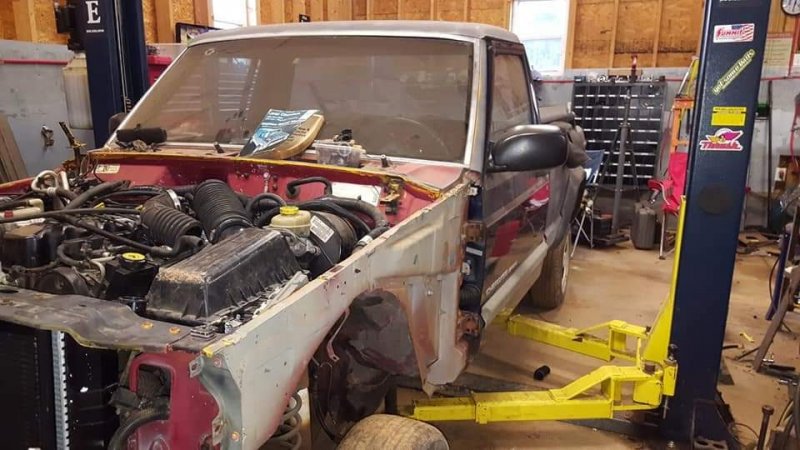
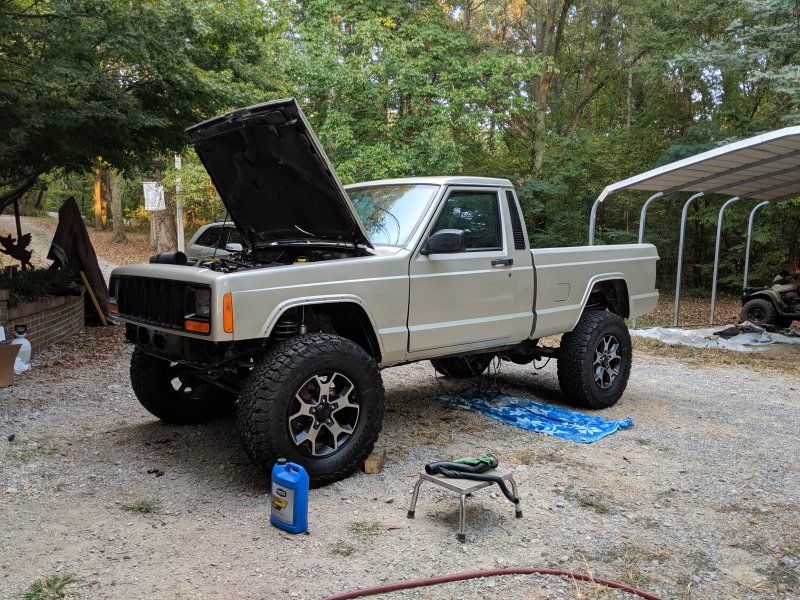
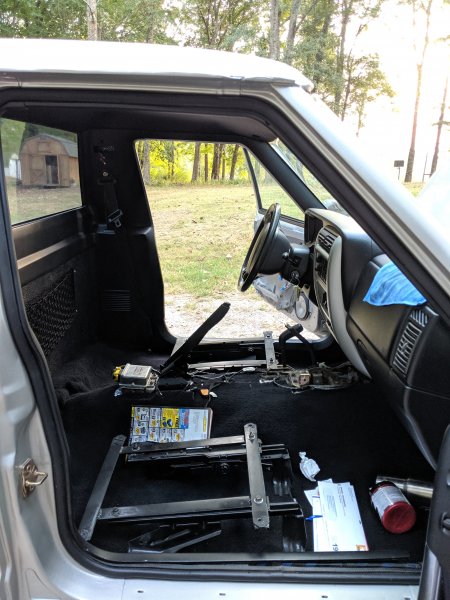
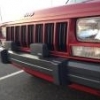
 Personal Introduction: My name is Britton and I am an addict...jk but seriously though haha. Career wise I am a mechanical engineer but I prefer to consider myself a jack of many trades and a master of none. I am constantly tinkering on something, working any number of projects, and tossing ideas around in my head constantly (both a blessing a curse). Anyways, I've been into Jeeps since I could drive and this is officially the 4th Jeep I have owned. 1999 2 door XJ 5 speed, 4.0L, 3.5" lift, 265/75/16 BFG ATs on TJ Rubicon wheels, overhead console, cruise control. She was a street queen and truly hated to see it go. Especially since it was my first car with a lot of memories. 1999 XJ 4 door, 4.5" lift, 33x12.5x15 Federal MTs, doorless mod, bedliner floors and headliner. Nothing special made for the woods but not a true beater and I still took care of it Sold both and bought a stock 2005 TJ/LJ Unlimited 6 speed with 78,000 miles. Installed 2.5" suspension lift, 1.25" body lift, 305/70/17 Goodyear MTR/K on JK Moab wheels. Kept it otherwise stock and clean because I started to venture away from tearing things up off-road and prefer mild trail riding and camping now. Then I stumbled into this project...1989 Jeep Comanche MJ. Drivetrain and dash were swapped but not finished and virtually rust free with 4/5 star floor boards compared to a lot of other Comanches. The back story: December 2018: Me: "Dude look at this Comanche! Its half way converted, you think I should buy it?" Friend: "Do it! You always said you wanted to build one. It'll be fun." It is not fun. Well sometimes it was but never again will I take on a project like this. It might just be the straw that broke the camels back. Still undecided... I have a bad habit of getting started on a task and becoming completely focused on completing it then forgetting to take before and after pictures. I usually remember about halfway through that I should've taken before pictures so I apologize in advance and I'll try to explain each picture/process in detail to give the full picture. As bought condition 12/1/18 (Previous owners shop, but wish it was mine): Build Plans: -Full 2000 XJ swap interior, exterior, and drivetrain -Dual gas tanks ~40+ gallons (TJ gas tank behind axle and Dakota gas tank in stock location) -Metallic silver paint -Ford 8.8 rear axle -4.10 gears -Spring over rear -4.5" Rubicon Express front coils (possible spacer to level out) -Rubicon Express control arm drop brackets -JKS Quick Diconnects -ZJ V8 tie rod and draglink -Ten Factory Dana 30 axle seals -JL Rubicon wheels with 285/75/17 BFG KO3s -1.5" wheel spacer adapters (5x4.5 to 5x5) -Rancho 9000XL adjustable shocks -WJ control arms -Raptor Liner or LineX bedliner -Custom bed rack -Custom bed rails Teaser shot of the current status as of 9/29/19: I will be posting a full start to finish timeline/explanation/how-to of the build in the days to come to walk everyone through the long process this has been. So stay tuned for that. As of right now (10/10/19) it is currently my daily driver while the LJ is being worked on. Here is a list of things I still need to do on the MJ to make it "100% finished": -Bedliner (probably Raptor Liner) -Restore tailights (maybe LED bulb swap) -Modify and install overhead console (shorten, graft, LED bulbs, and determining mounting) -Reupholster visors to match new headliner, LED bulbs, and install (matching material was provided with it) -Install tailgate (at sand blasting 10/8/19) -Install Dirtbound Manta Ray rear bumper (ordered on 10/7/19) -Replace clock spring (possible WJ steering wheel swap at the same time) -Mount/Install emergency brakes with 8.8 adapter clevis -Fender flares (Very undecided on this. Napier or Notch or just stock trimmed with rubber edging) -Front bumper (JCR Crusader or Dirtbound Mojave. Really like the thought of a hidden winch front bumper and hope these could be modified for that) -Gear swap to 4.10 (front Dana 30 is 3.55 and rear 8.8 is 4.10 so 2WD until then)
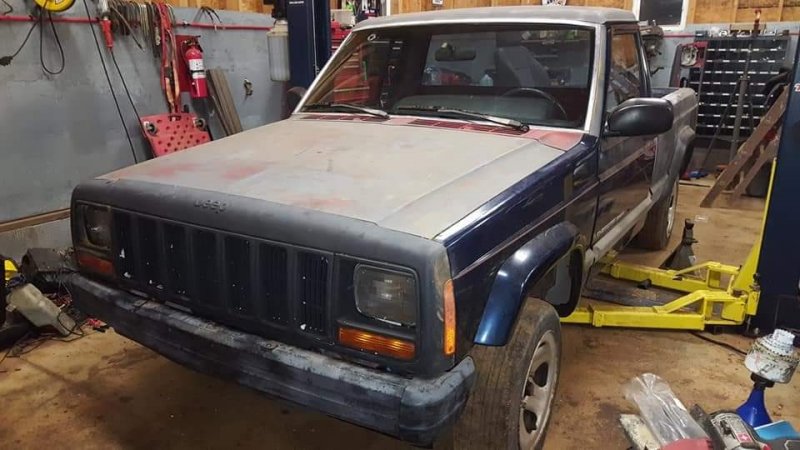

-
So first, lemme preface this by saying that i have always wanted to build a 97+ converted MJ, in fact i have spent a few years researching the swap and i finally had things lined up to do the swap, including 2001 XJ and an 89 MJ... But life happened and i had to relocated from Florida to Kansas. I had spent several months using a website the searches all of craigslist looking for something interesting to pick up when i came across this. It was 1,000 miles away in New Mexico, made the 26 hour drive in 30. A built Comanche that had been converted to the 99 XJ drivetrain with a 2001 XJ Limited interior. Literally my dream swap. I believe that the 99' is is the best year of the 4.0. So these are the specs the day i bought her: ****Motor**** - Freshly rebuilt 99 4.0 bore over .30 - Bored throttle body - High Volume Melling oil pump - Eddlebrock duel outlet header - High flow intake manifold - Brown Dog motor mounts - IranMan4x4 Brackets ****Drivetrain**** -AX15 5 speed with a new clutch - Np231 transfer case with Chevy HD widechain and gears - 6 pinion planetary ****Suspension**** - 6.5 inch lift - SOA in rear - Spartan lockers - 3.55 gears - 29 spline shafts - Terra Flex high steer - Rubicon Express lower arms - Adjustable Rough Country upper arms - Rubicon Express double sheer track bar - BDS Shocks ****Exterior**** - Loans Metal Products front bumper - Warn 9.5ti winch - 4 LED Pod lights - Bushwacker fender flares ****Interior**** - Interior from a 1999 XJ limited - Heated leather power adjustable seats from a 2001 XJ - Wood grain interior - Correct two window switch installed Some pictures from the day i bought her: Things I have done since having her: - Fox 2.0 shocks up front - Fox 2.0 Steering stabilizer - Rebuilt the winch by replacing the solenoids and cleaning and re-greasing the gears - Reqired the LED lights so they are not a fire hazard and work with the factory fog light switch - Installed a WJ Overland wooden steering wheel with radio controls - Installed IronMan4x4 steering box brace with sector shaft support - IronMan4x4 Steering box bracket / spacer - Rough Country Floor mats - Spooled up some synthetic winch line Here are some pictures of what i have done since having her: And this is what I am currently in the process of doing (I have the parts ready to install): - Installing my OR-Fab bumper and warn M8000-S winch with Rigid LED lights installed on the bumper (from my old 99 XJ) - Creating a new headboard with overhead speakers and the full length XJ limited overhead console - Installing the stock XJ Limited tweeters - Getting the steering wheel radio controls to work with a WJ clock spring Some of my long term plans: - Rear mounted winch - X-Max fender flares - Two tone gloss black and Rhino Line matte black - 4 link suspension - 4.7 stroker - Dana 44 front and rear - Creating a logic board to make my steering wheel radio controls be able to select between front or rear winch, then be able to winch out and in Thank you very much for viewing!! I hope it was worth your time and id love to hear some thoughts and ideas!
-
I've got a 1987 Jeep Comanche Pioneer RWD with a 4.0 I6. Just as a little project for fun, I was wanting to convert it from automatic to manual. I am interested in converting it to 4 wheel drive as well, but that shouldn't be too terrible. The only issue I have is that my truck is a column shifter. Would it be extremely difficult to pull off this kind of a conversion, or is it somewhat possible?
-
 I know there are many threads that explain this procedure but another won't hurt from someone elses experience. So, this weekend I am starting the dual diaphragm conversion on my 1989 MJ. To start off, here are the tools and equipment I have so far: 1996 XJ Brake Booster and Master Cylinder (bought off of JC Whitney) $170 (2) 3/16 diameter bubble flared with 10mm fitting brake lines STANDARD flare tool (rented from auto parts store) (1) 12mm thread 3/16 diameter line, fitting (1) Vacuum Tool (4) 10mm stop or lock nuts (1) Line cutter The four 10mm nuts are for the brake booster. The other two bolts on the other side can use the nuts off of the stock MJ booster. I chose to buy the bubble flare lines because the 1996 MC takes bubble flare ends and not double flared. The MJ distribution valve body DOES take double flare though. So, I am going to have to flare one end of each line using the standard flare tool. Also, one of the ports on the 1996 MC takes a 12mm fitting which I will have to slide on the line before flaring again. 1996 XJ brake booster 1996 XJ master cylinder currently being bench bled using vacuum tool Vacuum tool This tool made the bleeding process a little easier. There are many ways to do it. Putting each of the hoses from both fittings into the bottle and pushing the rod in, will have the same effect. I did both methods just to be sure. That is where I am at right now. Tomorrow I will start the upgrade!! :wrench: Also there will be lots of more pictures! :clapping: :thumbsup:
 -
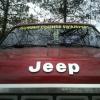
Hey everybody, my name is Dan, and this is my first post. I've been lurking a while now and I have to say, this is one of the best forums I've ever come across. The vast amounts of information and inspiration are very helpful to new owners. And there is a shocking abscence of bickering, oversensitivity and internet tough guys that seem all too common on other forums. With that said, it's about damn time to start talkn bout Comanches... I've had my eye on getting a Comanche for a couple years. Started seriously looking last January, had a few slip through my fingers, but finally got one in March. Got lucky and found an 87 SWB 2wd 5spd with just under 130k and completely stock. Picked it up for $1800. ;) It had some water leaks(carpet was wet) and needed tires. When I went to leave after sealing the deal, the starter stopped working. So the seller gave me back $60 for a new starter. So for the next day I had to give the starter some love taps to get her going. Turned out to be a loose signal wire. Score! Also, I forgot how much I like driving midsize trucks with a manual trans. Here she is a few days after I bought her: Unfortunately, I didn't take any pics before I started wrenching on it.. Was just really excited. I installed a tool box that I had on a couple other trucks and bought those wheels/tires on craigslist. $70 with pretty worn BFG A/Ts. But they weren't dry rotted like the tires that came on the truck, so that's something.
-
DIY convert from closed to open cooling. This Write up is how I converted from closed to open cooling. You may choose other parts to achieve the same end result. I am converting because I am tired of messing with the pressure bottle, to remove the heater flow valve, and replace old hoses. Parts: Radiator with filler neck $82.57 * Part number: CU1193 Radiator cap $24.99 * (I bought a fancy cap with built in thermometer.) Part number: 2471S 2 Gallons antifreeze coolant $14.99 ea ($24.98 for 2) *** Item number: 7020022 10' 5/16 hose $19.90 *** $1.99 per foot Item number: 5194083 4' 3/4 heater hose $5.56 *** $1.39 per foot item number: 5192978 4' 5/8 heater hose $5.56 *** $1.39 per foot Item number: 5192951 Two 3/4 to 5/8 hose adaptors $2.99 ea ($5.98 for 2)*** Part number: 80424 A junkyard radiator bottle (I think mine was from a ZJ or WJ dad snagged it for me) Total conversion cost: $169.54 + S&H and tax Optional Parts: Later model thermostat housing with temperature switch new water pump Dual Fan Controller Second Electric fan for dual conversion Wire Relay or Fan Controller Power Switch MJ or XJ 2.5L Radiator Bottle $16.99 ** Part number: 52003213 MJ or XJ Bottle Cap $7.97 ** Part number: J3223202 Ordered from: Amazon.com * Morris4x4.com ** Advanced Auto Parts *** Tools: Gloves Safety glasses Knife or box cutter Phillips and flat head screwdrivers Bucket T-25 T-30 8mm Socket and or wrench 10mm Socket and or wrench Getting Started Start by draining out the old radiator fluid, removing the upper and lower radiator hoses, fan temperature switch, and if you have an auto transmission the transmission cooler lines from the radiator. Use an 8mm socket or wrench to remove the electric fan and clutch fan shroud. The radiator support is held on by several bolts 10mm and T-25 or T-30 (sorry mine where all stripped before I started not exactly sure the actual size). The bolts removed connect the support to the frame and front clip, then they are all out remove the radiator support. The radiator should come out without much fuss. With the radiator out of the way now would be the perfect time to convert to Dual electric fans and replace the water pump. Sadly I was running out of time due to fighting with stripped bolts so i was not able to do ether.... Depending on the radiator you get you may not need to change the thermostat housing. My thermostat housing is from a later model XJ, and can use a temperature switch. However the radiator I purchased has the hole for the fan temperature switch. Remove the 3/4 hose and the 5/8 hose from the thermostat housing and the water pump. Remove the old coolant pressure bottle and the hoses going to the heater core. Cutting the hose may be needed. The new hoses will need to be adapted from 3/4 to 5/8, the reason for this is the thermostat housing outlet is 3/4 connecting to the heater core that is 5/8, and the heater core outlet is 3/4 connecting to the water pump inlet that is 5/8. After all the old hoses are removed take your new 3/4 and 5/8 hose and route it however you like, then measure where to cut the hose in half. Use the 3/4 to 5/8 adapters as needed. Again the hose routing is: 3/4 from thermostat housing 3/4 to 5/8 adapter 5/8 to heater core inlet 3/4 from heater core outlet 3/4 to 5/8 adapter 5/8 to water pump The new coolant bottle is the next challenge. I ordered a 2.5L MJ/XJ coolant bottle that should fit on the drivers side fender, I will likely need to go back to a cone air filter to make room for it. Till I decide for sure what bottle I am sticking with I used one from a Junk yard Jeep and slightly modified it to work. I had to remove the old pressure bottle "shelf" to make room. I used a self tapping screw to attach the radiator bottle to the back of the engine bay where the old bottle was located. I routed the 5/16 hose around the back of the bottle and used the heater hoses as a bridge, ending where the radiator filler neck will be. Install the new radiator and reconnect the upper and lower radiator hoses. Reattach the radiator support. Connect the Coolant bottle hose to the filler neck. For good measure I zip tied all the new hoses in place. Fill the radiator system with 12 quarts (3 Gallons) of coolant. Must be a 50/50 mix, you can use pre-mix or concentrate with distilled water. you may not be able to fit all 12 quarts as there will likely be some coolant still in the engine. Bleed the air out of the system, Renix engines have a coolant temperature sensor on the back of the head accessible from the engine compartment. Clean up and all done Prior to this conversion My Jeep would boil over in 20 minuets and interstate travel was a no go. Now the temperature has yet to pass the 210 mark while traveling 75 mph on the interstate. A side note, my A/C seems to be blowing cooler as well now....
-
Hello club, Prospecting a 87 4cyl standard mj that's priced right and in good shape,also a friend of mine has a really nice 01 xj4.0 auto with low miles and a damaged rear end, but everything is in good shape to swap over to the mj, i was wondering if theres any problems or thing to know when swapping everything from an xj to an mj i plan on taking everything including motor,axles,drivetrain, front end body swap,full interior, ecu wiring ect. Just looking for some tips before i make the purchases. Thanks anyone willing to give me some imput
-
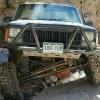
I just picked up a 2wd 88 eliminator and id like to do a 4x4 conversion. What all will i need to do to accomplish this task? I believe all i will need will be a front axle trans and matching t-case all linage involved a bell housing and a front driveshaft. Now this is my plan: I'd like to do a Dana 30 with 4:10 gear ratio, a bell housing from a late 93+ Cherokee with the external slave, an AX15 trans with matching NP231 t-case 23 spline, a new center console to account for the 4x4 shifter lever, and a custom front driveshaft. Now am i able to keep my original rear axle or will i have to swap that as well, And if i can keep it how can i change it to make it work with the 4:10 gear ratio i'm seeking? Let me know if i'm missing or forgetting anything. I'm also looking to give it a 3"-4.5" lift. With that lift what size tire would you recommend? I'm thinking of running 35's. :driving:
-
Hey guys sorry if this is already a topic, I can't find it if it is. But I'm doing the 97+ front clip swap on my 89 Comanche and not sure what to do about the header panel wiring harness. Should I use the older one so it plugs in to the plug on the driver side or do I use the newer style harness? If I have to use the newer style harness how would I change the plug to fit the one on my jeep?
-
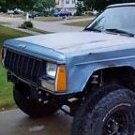
90k miles (less than 100 on rebuild). No rust (faded paint) striaght Clean title I kind of like the fact that it has never been wheeling. I want to convert this bad boy to 4wd. I have never taken on a project like this. But I want to make this my project rig i'll work on for years to come. Not having worked on cars much, would I be getting myself in over my head to convert it to 4x4?
-
I have a dana 35 rear end right now and i am currently redoing all my brake lines after this past winter the negative 30 days were cold enough to burst my brake line. i figure since I'm going through all this work i might aswell convert my rear brake drums to disk brakes. I know some of the grand cherokees later came with rear disk brakes i just want to know what all do i need to grab from the grand cherokee at a junk yard to convert them I'll end up buying brand new calipers and rotors and pads from the store but i still need all the mounting hardware. any suggestions or advice from anyone who has done this?
-
Title says it. lookin for a diesel instrument panel for a xj or MJ platform. Must be from a diesel, and I would like one with a tach. Ill take any year up to 1996. I need this to finish off my diesel conversion, hoping some guys on the other side of the pond can supply me.
-
In a few I am going down to a buddy's shop and attempt to install the Novak Cable shifter. I will have to drop the tranny a few inches to get it installed. i will take pics and add commentary. Be back soon! http://www.novak-adapt.com/catalog/shifters/sk2xc.htm
-

Disc Brake Conversion... Doing It Right?
NotMatt posted a topic in MJ Tech: Modification and Repairs
So here's something I've been mulling over in my head for a bit here. I have an 89 comanche with a drum brake 35 in the rear. I have an XJ balance valve installed and one line running to the rear brakes, instead of the funky factory level prop valve setup. The rear brakes have been nothing but trouble. They grab and lock the rear tires occasionally when they are damp, or during hard braking. And now the brake light has started to come on when I step on the brakes hard, indicating that the rear brakes are leaking or need adjustment (balance is out between front and rear). So, given the crappiness of the rear drums and the crappiness of the rear model 35, I'm planning on finding an explorer 8.8 with discs to put in the back. That part I have covered, fabrication-wise... the actual disc conversion is easy My question is, if you were doing this, and wanted to mimic a factory setup as close as possible, how would you do it? Obviously the master cylinder and balance valve on the XJ/MJ was not designed to have rear discs. I've heard people talk about the rear brakes over powering the front brakes during hard stops after disc brake swaps. This is absolutely the worst scenario, especially for winter driving, with a lightweight rig like the comanche. So, there's talk of installing an adjustable proportioning valve for the rear brakes... maybe a residual valve (I am uncertain of how this part actually works or what it's purpose is)... should I put it back to the dual line height based prop valve that came factory? Should I replace the entire balance valve assembly and/or master cylinder with one from a rig that came factory with disc brakes? If so, which rig would work the best? Maybe Jeep Liberty or JK? I want this to be a safe, good performing setup that works like it would have came that way from the factory. Any input?
.thumb.jpeg.ed73b1c17f124ea7c74aabe80cbe7574.jpeg)