Search the Community
Showing results for tags 'lines'.
Found 3 results
-
 I know there are many threads that explain this procedure but another won't hurt from someone elses experience. So, this weekend I am starting the dual diaphragm conversion on my 1989 MJ. To start off, here are the tools and equipment I have so far: 1996 XJ Brake Booster and Master Cylinder (bought off of JC Whitney) $170 (2) 3/16 diameter bubble flared with 10mm fitting brake lines STANDARD flare tool (rented from auto parts store) (1) 12mm thread 3/16 diameter line, fitting (1) Vacuum Tool (4) 10mm stop or lock nuts (1) Line cutter The four 10mm nuts are for the brake booster. The other two bolts on the other side can use the nuts off of the stock MJ booster. I chose to buy the bubble flare lines because the 1996 MC takes bubble flare ends and not double flared. The MJ distribution valve body DOES take double flare though. So, I am going to have to flare one end of each line using the standard flare tool. Also, one of the ports on the 1996 MC takes a 12mm fitting which I will have to slide on the line before flaring again. 1996 XJ brake booster 1996 XJ master cylinder currently being bench bled using vacuum tool Vacuum tool This tool made the bleeding process a little easier. There are many ways to do it. Putting each of the hoses from both fittings into the bottle and pushing the rod in, will have the same effect. I did both methods just to be sure. That is where I am at right now. Tomorrow I will start the upgrade!! :wrench: Also there will be lots of more pictures! :clapping: :thumbsup:
 -
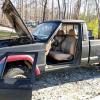
I tried searching for the answer to this, but I've had no luck. I tried starting my truck today, and it wouldn't start. So I opened the hood, and noticed gasoline sprayed around the passenger side firewall area. I'm at work right now, so i havn't had a chance to really check it out. Does anyone have any clue what could be going on? If any of you have seen my build thread, you probably read that the PO put gasoline in the master cylinder. So I'm terrified about what else he did.
-
So I am just about DONE with these vaccum leaks. So I have decided that I would replace all the hard vaccum line with new rubber vaccum line. I have found some Gates vaccum line from O'Reillys that seems would work. I am asking if anyone else has done this and if so what brand did they use? Here is the lines I'm looking at: http://www.oreillyauto.com/site/c/search/Vacuum+Hose/N0890/C0222.oap Hopefully this will fix my rough idle issue. I also plan on moving that vaccum canister more towrads the back firewall.