

Salvagedcircuit
-
Posts
1389 -
Joined
-
Last visited
Content Type
Profiles
Forums
Gallery
Everything posted by Salvagedcircuit
-
1992 Jeep Comanche "Maria"
Salvagedcircuit replied to MariaManche's topic in Member Projects: Your Comanches
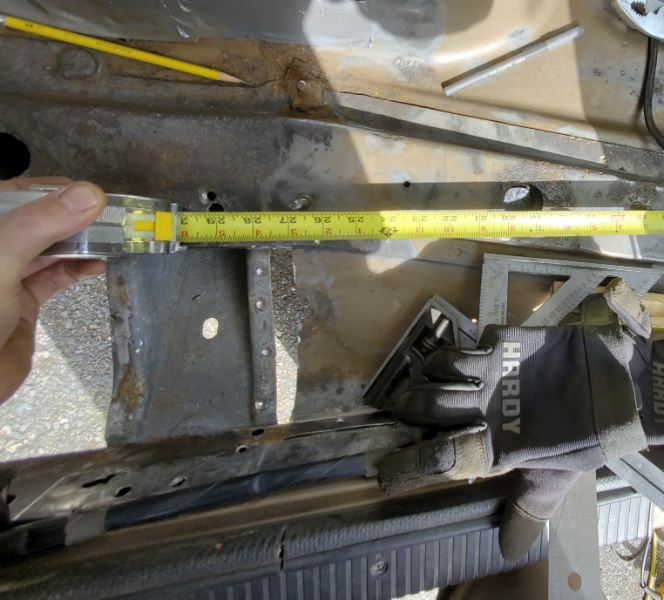
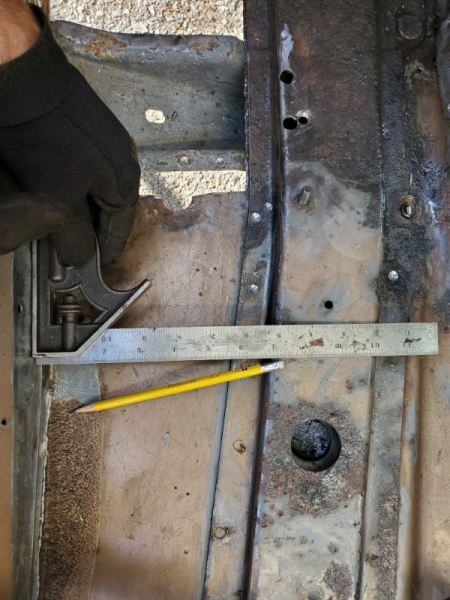
If you removed all the spot welds in the top uniframe support, you can always try using a large prybar and prying a bit between the top uniframe support and the floor. It seems that stud is not welded to the uniframe. It looks like something is pressed on over the stud into the uniframe support. Mine looked like a pile of rust, and I could not tell. I tried to remove my stud from the cab and it just snapped clean off. It may be easier to remove the stud from the bottom side, but be careful of your brake and fuel lines. If you plan to reuse them, it's not good idea to heat up brake lines. The fluid does not like extreme temperatures and I'm sure the old lines are not up for it either. There's a few of those plastic fuel / brake line clips around that location. Un-clip them all and try to push the lines out of the way. That should give you more room to work. Obviously moving the fuel lines as far away from the torch as possible is also good piece of mind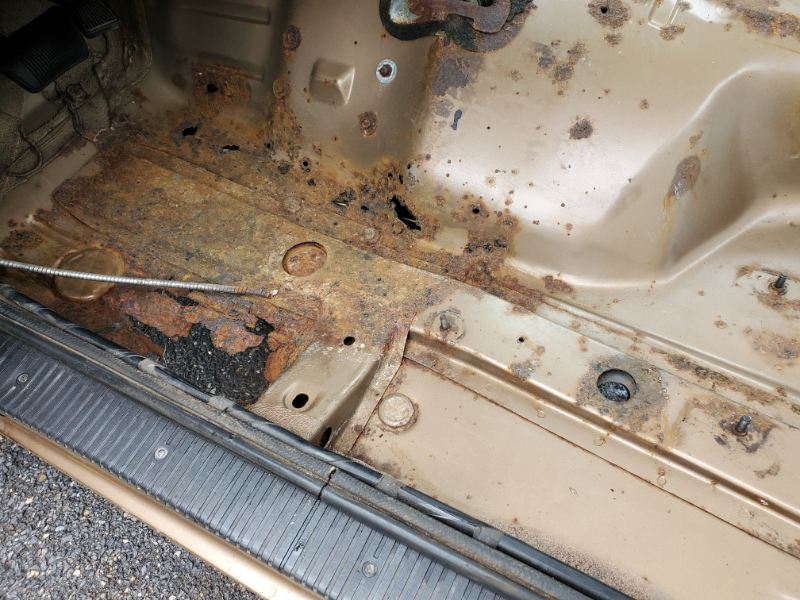
-
What Do You Say to "You should Sell the Jeeps"
Salvagedcircuit replied to Drahcir495's topic in The Pub
A jeep is not sold if it stays in the family I don't plan on purchasing any modern FCA/Stellantis Jeep product until ownership changes. They have completely lost the way. -
1992 Jeep Comanche "Maria"
Salvagedcircuit replied to MariaManche's topic in Member Projects: Your Comanches
That is an important stud that holds in the seat. To remove it, apply some PB blaster, grab a map torch, heat it, apply some vise grips and twist. It should hopefully come out. If it snaps (which mine did) you'll have to weld some nuts to whatever bit is left and use an extended length wrench to get it out. It took 2 weldments to get that stud out. -
Chunk, A 1984 XJ
Salvagedcircuit replied to eaglescout526's topic in Member Projects: Other Cool Stuff
Hell yeah! Excellent job. It must have been painstaking to drill and tap holes for some of the sensors. -
Wanted: Broken Ash Tray, Front Bumper Endcap Brackets
Salvagedcircuit replied to Salvagedcircuit's topic in Wanted
@eaglescout526 @schardein You guys are the best! -
This is one of the best builds on here. Awesome job and excellent narration
-
You are one talented dude Jesse, keep on going and best of luck to you
-
Chunk, A 1984 XJ
Salvagedcircuit replied to eaglescout526's topic in Member Projects: Other Cool Stuff
Aww yeah, the wood grain. Mmmmm. So 80s -
It's possible my hood was an after market or from a different year cherokee. It was painted. PO decided to spray paint can overhaul just the hood, so it's making me think it was swapped.
-
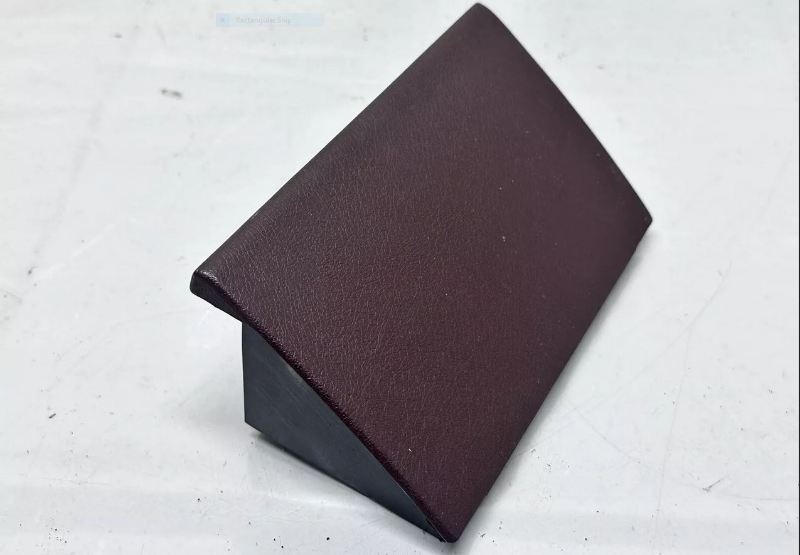
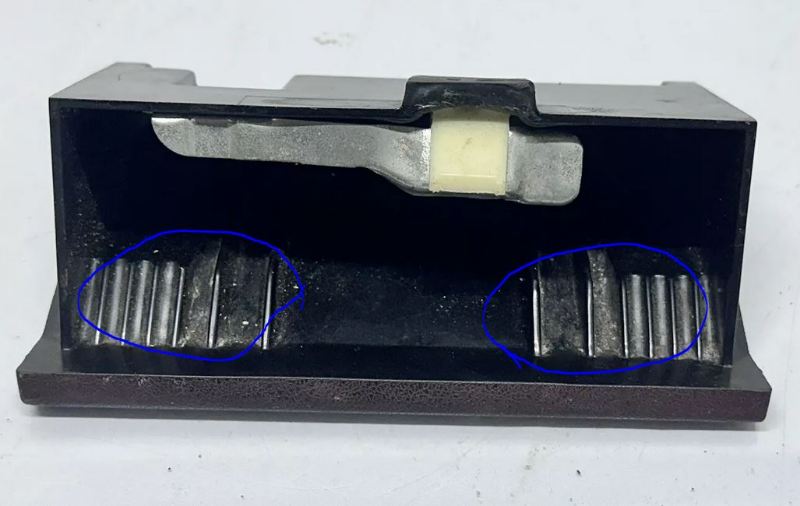
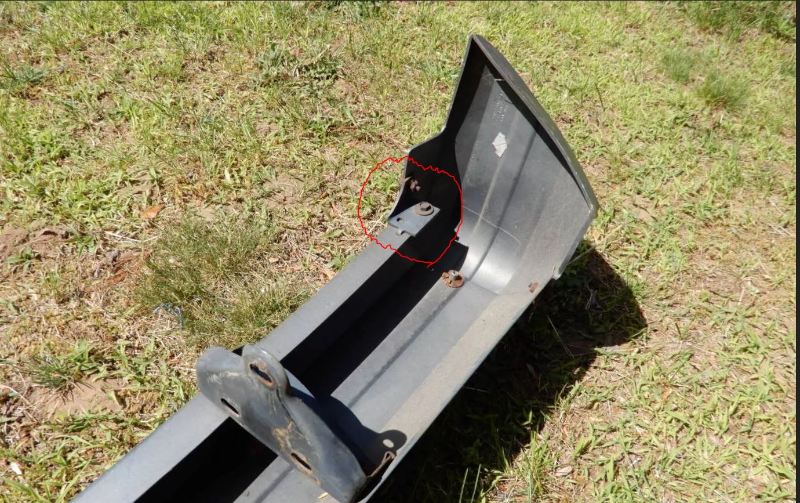
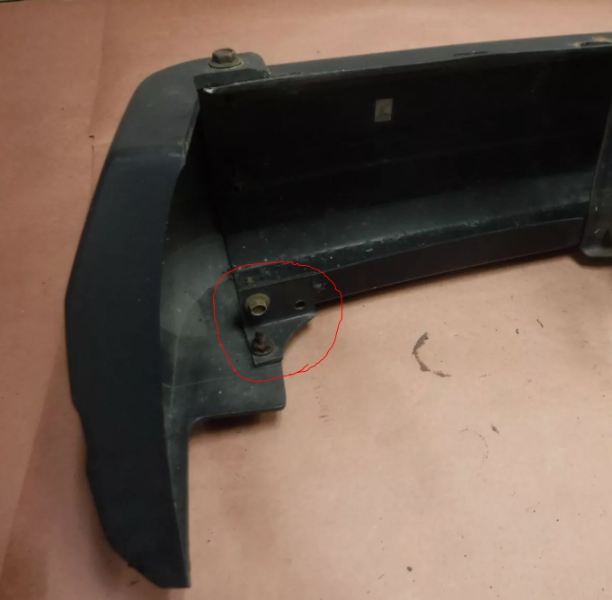
Looking for a broken ash tray for the 84-96 style interior. I am testing to see if I can grind the inside of ash tray or heat gun it to make it slightly bigger. I'm not sure of it's solid or hollow inside. I don't want to destroy mine to find out. Yeah I know I can buy one on ebay, but I want a broken one so I'm not wasting a good part. I don't care the color. Thanks! End cap brackets
-
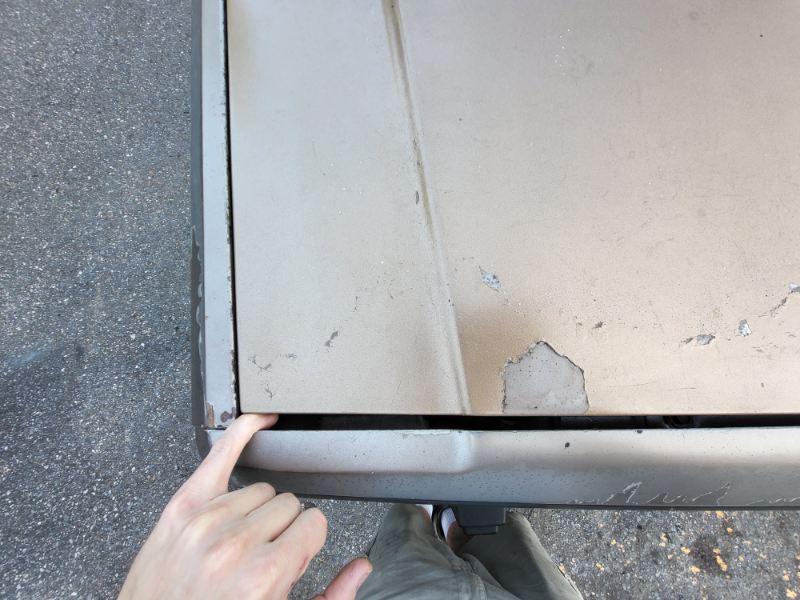
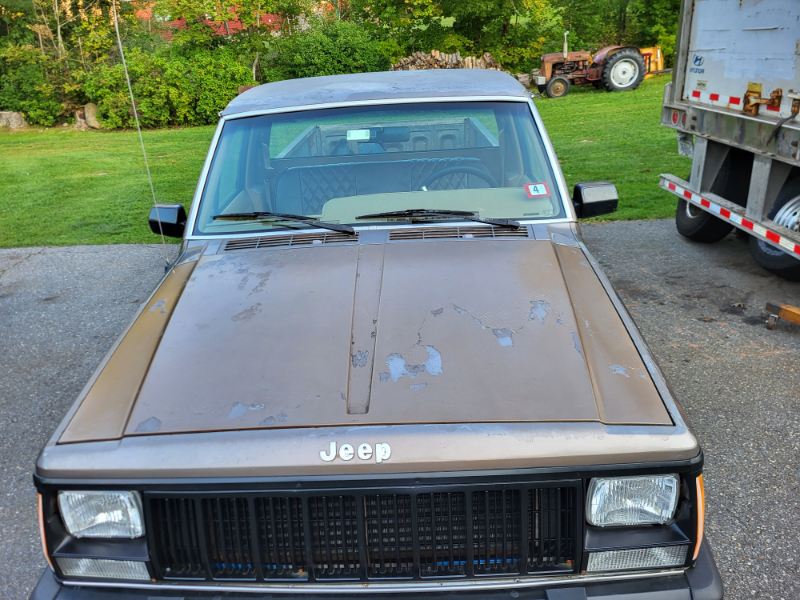
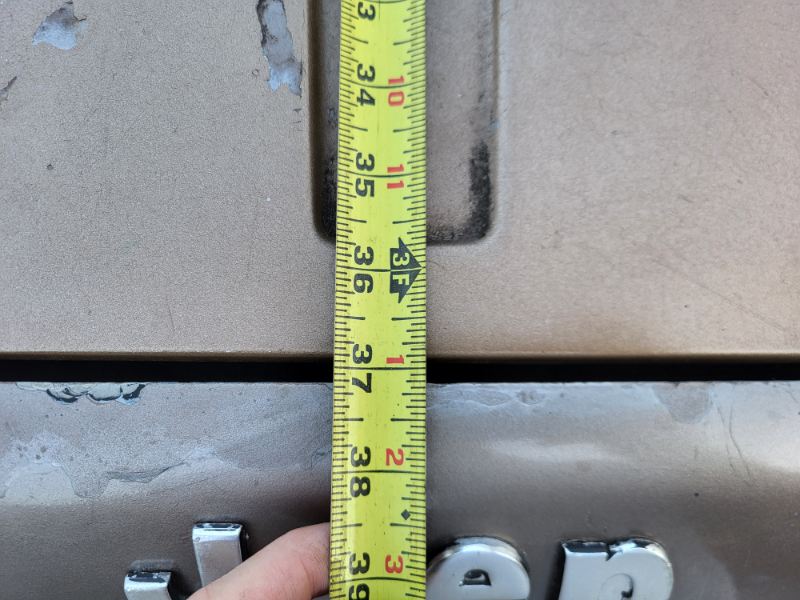
My MJ was very much a misfit toy when I picked it up. Every front panel is not flush and the panel gap is variable. I re-mounted my passenger side fender and the panel gap and fit has greatly improved. However, there is now a huge gap between the front of the hood and the front clip. I can fit my entire pinky inside the gap. I'll be adjusting the driver fender soon but it looks mostly correct. The hood looks to be sitting correctly and even on the rear cowl seal. Is there anyway to tell if my hood is factory or aftermarket? Is there a dimension discrepancy between the two? My left and right fender are AMC parts with the 1987 date visible on both inside faces. I could not find any part number emboss on my hood. Thanks!
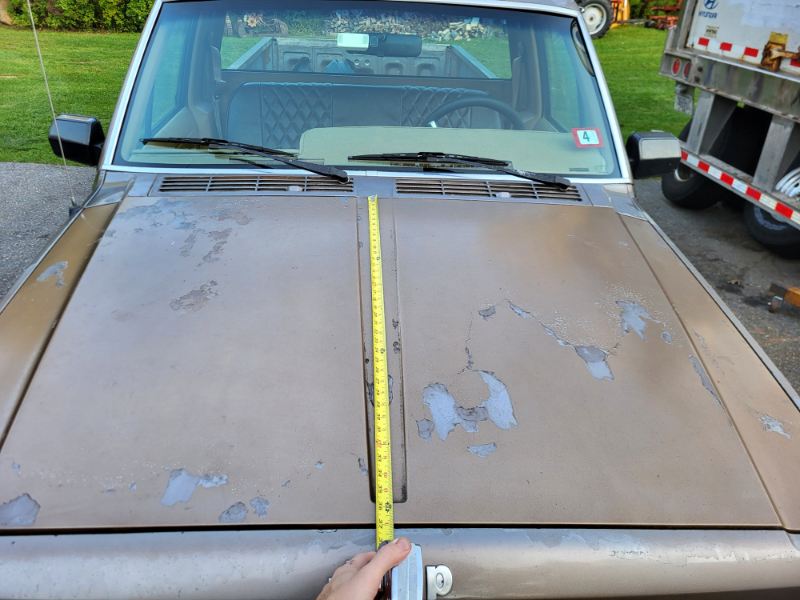
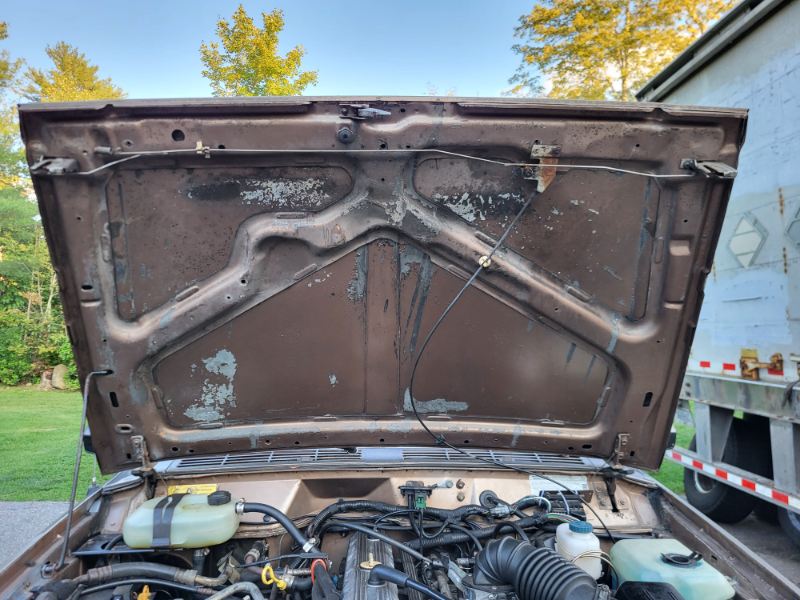
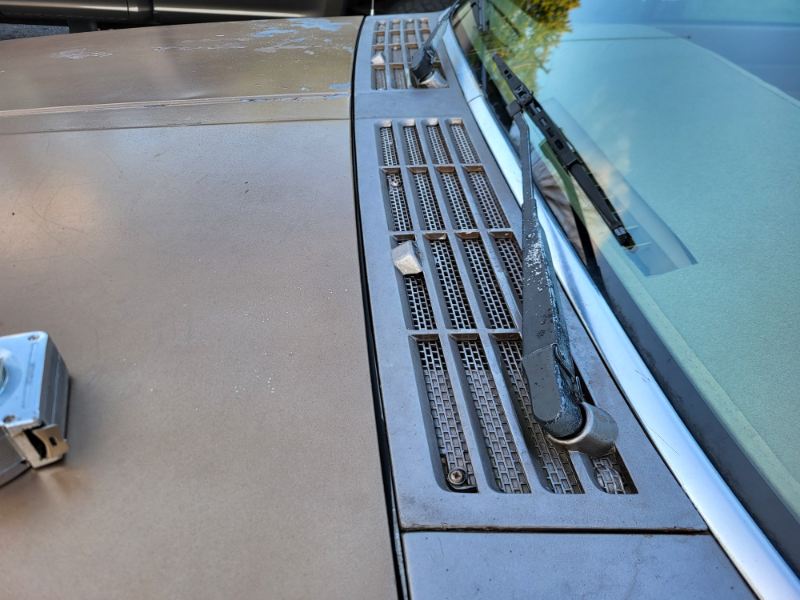
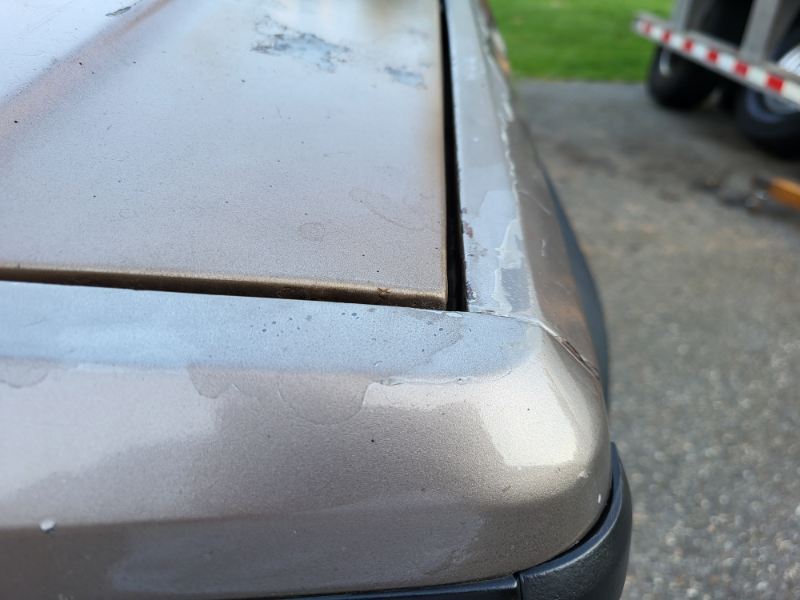
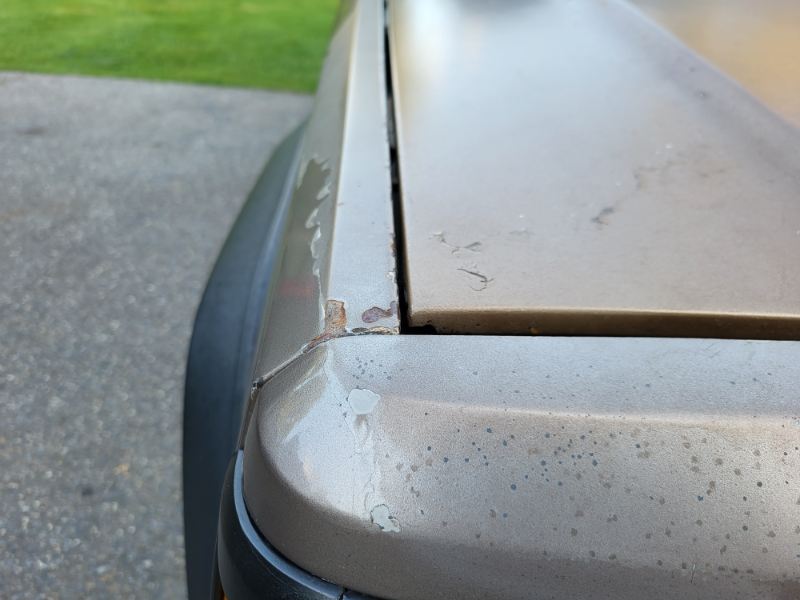
-
Little Red Wagon
Salvagedcircuit replied to eaglescout526's topic in Member Projects: Your Comanches
One of my brake pads started separating like that when I noticed one slide pin was longer than the other.. . -
Acceleration Thud Problem
Salvagedcircuit replied to Salvagedcircuit's topic in MJ Tech: Modification and Repairs
@Islander@Pete M@gogmorgo Somehow it's not hitting the crossmember. There's ~1/16in between the muffler and crossmember. There is a rust spot where it could be hitting. I'm going to grab my gopro and investigate again. I tried paint but it left no marks on the muffler My motor mounts and transmission mounts are ~8 months old. I did not replace that rubber block that holds the catalytic converter hanger. Does replacing this rubber block solve the problem? Is there anyway other way to add clearance besides adding spacers between the crossmember bolts and the frame? Edit: I ran across this guy's post: https://there4.io/2021/07/26/Jeep-XJ-Crossmember-Exhaust-Hanger/ Maybe I'll try to add a half-pipe copper or steel pipe shim below the C-shaped hanger for the exhaust. That may give me some more clearance in case the muffler is rubbing. That seems to be the mos reasonable solution without having to spend 3-4hours removing the crossmember to get to the small lil rubber block.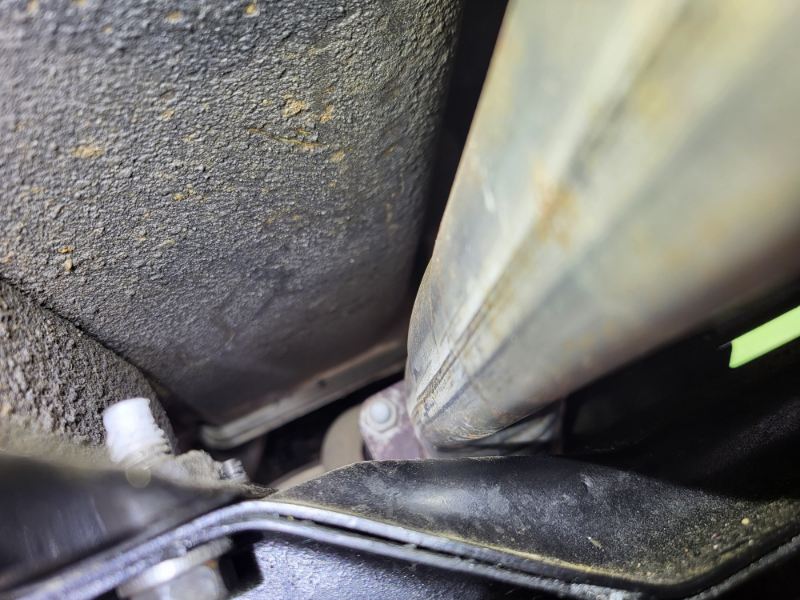
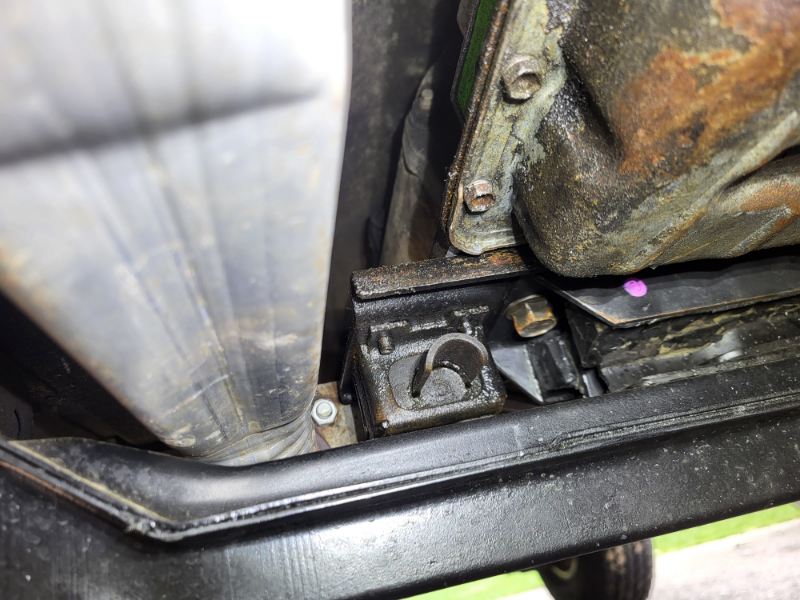
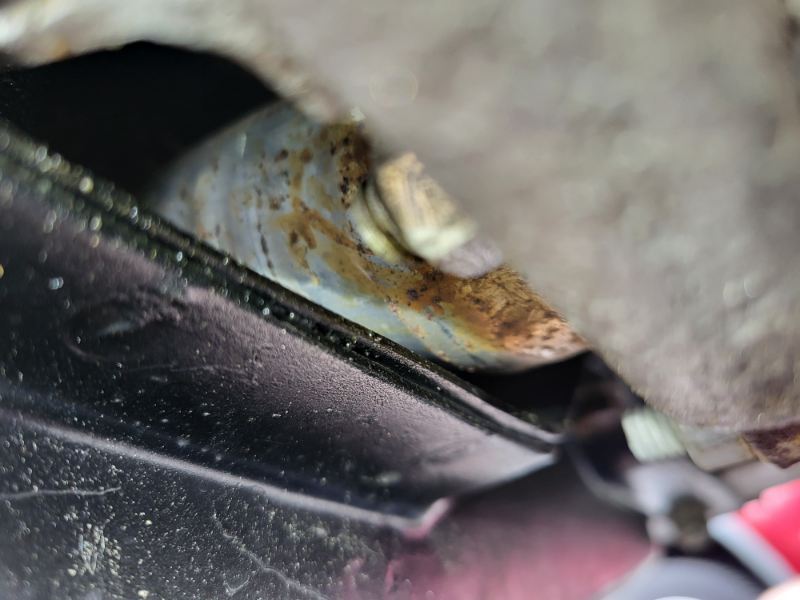
-
found the oil leak... new question
Salvagedcircuit replied to Pete M's topic in MJ Tech: Modification and Repairs
Oof. What a find Hopefully a new gasket and oil and you'll be home free. -
What an update! Excellent work!
-
1990 shortbed with 2000 swap
Salvagedcircuit replied to grainofsalt's topic in MJ Hardcore Tech: Epic Journeys to Greatness
Looking like glass! Gosh I want to do this to mine if only I could find the time -
It is an awesome color. I think it's Spinnaker Blue. I was between that and my original MJ color, medium bronze metallic.
-
I believe teraflex sells the spacer separately. Something like one of these: https://www.amazon.com/TeraFlex-8636-Pre-Load-Spacer-Brake/dp/B00ZJB9XOE https://teraflex.com/tj-rear-disc-brake-preload-spacer-each.html If you call them and ask them nicely I they will let you buy it direct from them.
-
Now those are the 80's vibes I'm talkin about. Nice
-
2-door Cherokee with an unusual hood prop
Salvagedcircuit replied to kentsu66's topic in Member Projects: Other Cool Stuff
Hahaha. excellent -
I did the WJ booster upgrade. You need to check over every part of your braking system with a fine tooth comb. Check: -brake bleeder screws. They can get clogged or in my case deformed from over torquing. the bleed hole should be circular not oval. They will no longer flow brake fluid properly when deformed. Thus your system will not bleed. -brake bleeder screw threads in the calipers. If there are only a few threads, it's no good. The after market calipers have incredibly poor quality control. I went through 4 sets of calipers before I found one that was rebuilt properly. -correct length caliper slide pins. Mine were from a different caliper and punctured the back of the brake pads. -teflon sleeve on the caliper slide pins. They are necessary for the proper function of renix era brake calipers. They are often omitted on rebuilt calipers. -grease up slide pins generously with brake lube -check the caliper piston for pitting. A newly rebuilt caliper came with a piston so badly pitted the surface looked like swiss cheese. I found brake bleeding to be significantly easier using speed bleeders. These have a ball bearing inside the bleeder to reduce air in the system on the brake pedal return swing. To me it was worth the ~$14 to not have to bug someone else for an hour or so while debugging.
-
2-door Cherokee with an unusual hood prop
Salvagedcircuit replied to kentsu66's topic in Member Projects: Other Cool Stuff
That's some dedication right there. #LifeGoals -
I'm following this build thread with some eager eyes. Stainless mudguard brackets from @boxyjeep looking good in the cart....
-
Acceleration Thud Problem
Salvagedcircuit replied to Salvagedcircuit's topic in MJ Tech: Modification and Repairs
The acceleration is smooth when it makes the thudding sounds. Also, the thudding sounds are not present while decelerating. when driving 50 or 60mph there are no odd vibrations. -
Acceleration Thud Problem
Salvagedcircuit replied to Salvagedcircuit's topic in MJ Tech: Modification and Repairs
I checked my U-joints for play and they all seemed pretty solid. I'll check for play again though. Thanks.