
MancheKid86
-
Posts
1594 -
Joined
-
Last visited
1 Follower

Recent Profile Visitors
3051 profile views


MancheKid86's Achievements
MJ Junkie (6/11)
-
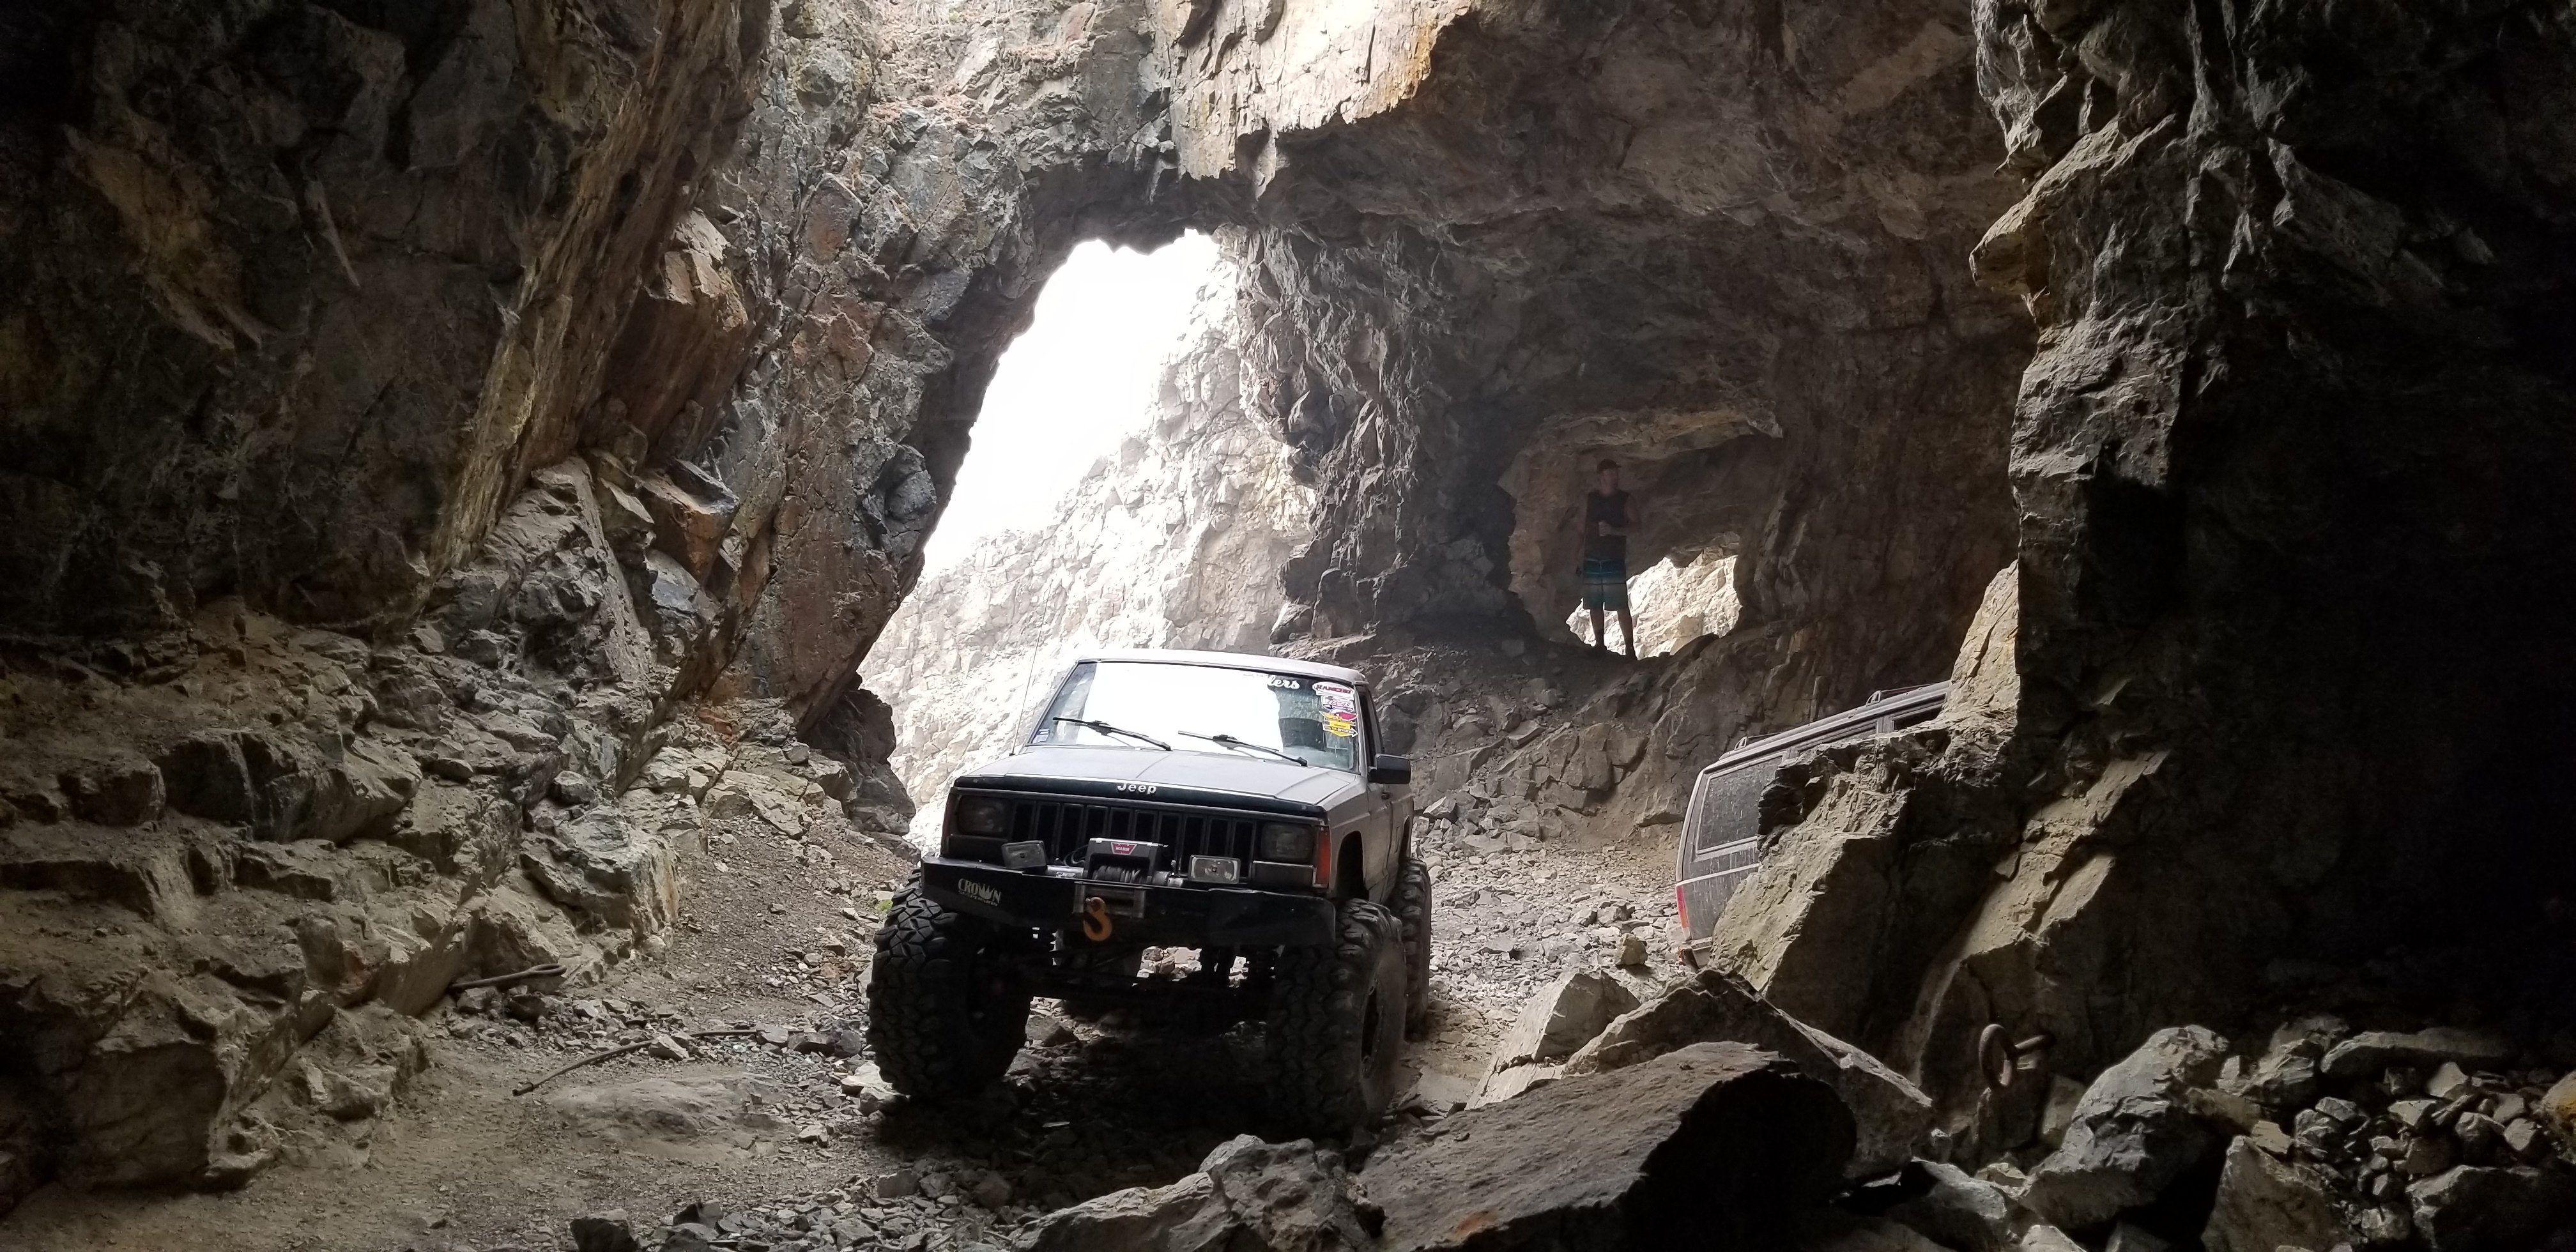
Ol’ Black & Tan Comanche This page is a culmination of many years of learning, trying, playing, breaking, and fixing parts on this truck. I sold the truck, though. Sold?! Yes. After 12.5 years, in 2001, and some some 330,000km (some 200,000 miles) it was time to let ‘er go. Through-out the years, it always got me home, and did everything I asked it to in fine form. So how could I sell such a truck, the truck that was partly a B.Sc. graduation present? It was time to move on. Having built, then rebuilt most all of the truck to achieve my performance goals, and wanting to go to the “next step”, I was faced with a delema: either rebuild the entire truck again, or start with a fresh chassis. I decided to move to a fresh chassis for a couple reasons: I was very happy with the performance of the truck, and it felt more-less “complete”. There were minor things to finish off, but to move onto the next step would mean re-doing the truck entirely from one end to another. It would be like destroying a creation – my creation – something that I was very proud of that that I just couldn’t do. I wanted something new, too. Over a decade of looking at the same dash is a long time. It was time to look at something else in the driveway, learn about a new chassis, try new ideas, and generally start fresh. I couldn’t financially afford to keep the Comanche and build another new 4×4. After some months of advertising the beast on this (www.bc4x4.com) website, someone came along and took ‘er away. I hope “Ol’ Black & Tan” will give him the same good service I got. I’ve decided to keep these pages up (relatively unchanged, originally hosted on www.bc4x4.com), though. Judging on the email I’ve received over the years, it’s served as a good reference point for lots of other people. That’s good, that’s what the information is here for. I’ll continue to answer questions about the truck, but remember, as the weeks grow into months and now a decade, since I’ve sold it, memory on details will also begin to fade. History I bought the truck new on February 16, 1989. Since then, I have put on over 307,000km on it. But let’s back up a bit… Within a year of purchasing the truck, I installed a Rugged Trail lift kit. I left the truck as-is for about 4 years, at which time I moved to the coast. The Rugged Trail kit had sagged to about 2 inches lift. Tomken had not yet come out with their tall lift kit, and I was unaware of how to lift it higher. Unable to afford another kit, I made my own front coil blocks, and had a local spring shop rebuild the rear leaf pack to match. At a full 4 inches lift, I ran 31’s and I was happy for the next couple years. Over this period of time, I was quite happy with the truck’s performance. (Actually, I’ve always been happy with its performance, just always wanting more!) I had trail rode with Larry Soo for a while now, and I was itching for some more changes. I hooked up with the core of what is now the Island Rock Crawlers, who proceeded to introduce me to trails which were pushing the Comanche’s ability. Well, the rest, as they say, is history. What follows is a detailed account of what I consider the most interesting modifications to the truck. But first off, I must thank some individuals for their help, insight, abilities, and encouragement. John Barron John Edgar Wayne Foster Andy James Robert Macdonald Vern O’Conner Richard Reimer Larry Soo Rear Axle I didn’t have many problems with the original rear Dana 35 axle, except for its appetite for Lockrights! I was running 33’s and many people told me “the Dana 35 won’t survive” although other than for Lockrights, it did. My (bad?) habit of overbuilding things insisted that I upgrade, though. A Dana 44 from a Scout was selected. Jeep runs an odd backspacing, so with standard offset rims on the Scout axle, the track width remained the same. It didn’t take long to decide that a complete rebuild was in order! The stock gears were 3.54 and I was running 4.10’s. The axle had also been neglected by the original owner. Everything was replaced – all the seals, bearings, differential guts, and brake parts. The only parts I re-used were the shafts, the housing, and the brake drums. I wanted to build it for disc brakes, but it was beyond my budget. A few months later, it was ready for install. The axle received a Lockright. Powertrax was kind enough to replace my last blown Dana 35 Lockright with a Dana 44 Lockright! Plans are to eventually replace the Lockright with a Detroit Softlocker, but this isn’t high on the priority list. Luckily, the Scout uses the same size driveshaft U-joints as my Jeep! That saved the time and expense of tracking down different yokes. I used the stock Comanche emergency brake lines as well – they were compatible with the Scout drum brakes. Install was very straight forward. It bolted in much the same as the stock axle. No gotcha’s! The axle has worked flawlessly since it was installed. I have since had to replace one rear axle shaft, because the splines were becoming twisted. I discovered this when I installed the rear disc brakes (tech article to come). Rear Suspension The rear suspension has gone through many incarnations. It has started from stock plus an add-a-leaf, to being rebuilt to give me ~4 inches of lift, to becoming sprung-over. I’ve added and since removed the blocks. Currently, I have a custom leaf pack which was built for 4 inches lift, with a sprung-over configuration and no blocks. The shocks have been remounted into a configuration that matches Toyota pickups. I am using 13.5″ travel Black Diamond XT shocks. I have also installed a 3/4-‘liptical rear suspension design and longer rear shackles to obtain more lift (in place of blocks). This combination yields me about 9 inches rear suspension lift over stock. The emergency brake cables have been replaced with ones intended for a ’86 Comanche, because the older Comanche brakes lines were about 4 inches longer. I’m sure some people don’t believe how tall my truck actually is. There seems to be only a few people who are crazy enough to lift these trucks this tall! Well, for confirmation, I decided to park my truck next to my friend’s XJ. This XJ has 31″ AT’s and runs 3″ of lift here. Judge for yourself. Remember, the truck now sits about 1-1.5 inches tall than when this picture was taken, too! Front Axle The front axle is definitely the most involved project I have ever performed on this truck! It is also the one that I’m most proud of. The front axle started life under a Scout. Since the Scout front axle has a right hand diff, this meant either swiching to a different transfer case (like a Dana 300) or moving the pumpkin from the passenger’s to the driver’s side. I chose the latter because measurements show the engine/transmission/transfer case combo is offset slightly to the passenger side. Rather than making new engine mounts, etc., etc, I thought it would be easier to just move the diff to the passenger side. And at the same time, I could reset the pinion angle and caster. It was done by a local shop, in such a way that I could re-use the stock Scout axle shafts. I considered an old Ford Bronco front Dana 44 but abandoned that option for the following reasons: I prefer the Jeep 4-link system to the Ford 2-link set-up, and conversion would have been very hard, since that would have meant removing the Ford axle welts to make room for the Jeep control arm mounts. The Ford Dana 44 diff housing is centered a bit more than the Scout one. I was worried about oil pan clearances. With the Scout axle in place, I’m glad I went with the Scout! It was a Ford part! By the way, the old Ford Bronco axle width is just about right. Rough measurements show it to be within an inch or so of the Scout axle width. As with the back axle, the front axle is also assembled with 4.09 gears, and all new seals, bearings, and gear set. Wayne Foster assembled both the front and rear axles. The carrier is a Detroit soft-locker. Yes, it’s an automatic locker. But now that I have driven a vehicle with a front locker, I wouldn’t dream of putting any other type of differential carrier up there! It’s great, amazing, super! I love it! Control arm mounts on the axle were custom made, and were moved up to give more clearance at the control arms, so I would both hit fewer things, and to improve the control arm angles. I also incorporated additional lift into the coil spring spacers. This first picture shows the new lower control arm tacked in place on the driver’s side. Notice how it’s not square with the axle tube, to match the angle found on the stock axle. The second picture shows how much the differential housing was rotated from the knuckle yokes, to both improve front driveshaft angles (to cancel out vibrations), and to get the yoke up, out of harm’s way. You can also kind of see the inner sleeve installed by the shop when they moved the housing from the passenger side to the driver’s side. The last picture shows the passenger side of the axle, with both the lower control arm mount and the shock/coil spring perch in place. I was surprised how much the shock/coil spring perch dwarfed the axle – that’s what happens when you build 2.5″ lift into it, I guess! The shock holes and the coil spring pad still have to be welded into place. One upper control arm mount had to be welded to the housing. This is very specialized welding that most welders can’t perform. John Edgar performed the surgery at Larry Soo’s shop. John Barron used a MIG welder for all the other welding. Yours truly designed the brackets – no brackets were re-used from the stock axle, since the truck remained no the road while this axle was built. All new brackets ranged from 3/16″ to 5/16″ stock, depending on the purpose of the bracket. A trick: when you are building a front axle, it doesn’t hurt to paint the insides of the axle tubes. To do this, use a spoungy paint roller on an extensions – it works slick! The axle installed easily, and the holes lined up better than the stock axle! The picture shows Vern O’Connor lining up the bolt holes for the upper control arms. The track bar and brake lines are temporarily swung out of the way, the shocks not yet hooked up. The following 3 pictures show details of various front axle components. Note, however, that these pictures are big! I debated making them smaller, but felt it’s be worth it in terms of detail to leave them high resolution. The first picture is a good general shot of the complete axle, working and under the truck. You can see the steering in relationship to the axle tube – tucked way up high and out of harm’s way (or so I thought!) There’s fresh rust on the skid plate because I notched it to clear the steering. The rust was painted shortly after the picture was taken. You can also clearly see the extra plating I put on the front diff. cover. The amount of trimming I had to do is also pretty evident. The front part of the fender is pulled forward a couple of inches. In the second picture you get up close and personal with a lot of the parts. You can see a bit of the upper control arm mount. The track bar hole has also been moved up to match the steering relocation, to avoid bump steer. You can also see the drag link come done and attach to the passenger tie rod end. The steering configuration is much like the YJ steering, but I used GM 3/4-ton steering components, so strength shouldn’t be an issue. I also had to modify the steering stabilizer mounts to a much more conventional method. Again, it’s tucked way up high so it’s out of harm’s way. The third picture shows the extra diff cover plating up close, as well as the rest of the steering. The little hole at the bottom of the coil tower is to aid in cleaning the parts with a pressure washer. Yes, that’s antifreeze on the diff cover! The lower radiator hose was replaced shortly after these pictures were taken. The fourth picture shows my custom control arms and the upper and lower control arm mounts. The shock is mounted in a manner very similar to the stock set-up. You can see the track bar and the tie rod, but not the drag link in this picture. This axle has proven to be a very successful project. No problems have really turned up, other than its appetite for wheel bearings. I attribute that mostly to a lack of maintenance on my part. If I re-pack the wheel bearings about every 4 months, then I don’t seem to have problems. Some people say I should consider changing to an internal hub design, but the Scout axle is unique with than 8-bolt spindle pattern which would make such a conversion rather difficult, and, for me, not worth the effort. Front Suspension The front suspension has also gone through many incarnations. Presently, I run 1 inch spacers on the top of Rubicon Express ZJ 4.5 inch lift coils, and 2.5″ of lift built into the axle, to give a total of about 8.5 to 9 inches of lift. XJ coils are not tall enough, since MJs (Comanches) are heavier than the XJs. I am using 12 inch travel Black Diamond XT shocks. The control arm mounts are moved up about 2 inches on the axle tube. They are also moved back, so that the control arms would continue to clear the axle tube. This had the side-effect of moving the axle forward under the truck, which I wanted to do anyway, to clear 35 inch tires. I’m now running 36″ tires without problems. The added side-effect on steering (needing to relocate the steering box to use the appropriate pitman arm) is discussed below. The control arms are very similar to Tomken’s but instead of using poly bushings, I use stock rubber bushings. The result is an extremely quiet ride and lots of flex without any load put on axle or frame components. I do, however, get a bit more front axle wrap than I did with the stock axle. I feel that this is a combination of relocating the control arm mounts on the axle, and of the soft rubber bushings. If you are building a front Dana 44 for your Cherokee or Comanche, do not relocate the arm mounts on the axle any more than I have. I spent a lot of time drawing pictures of how the arms would look at different points in the suspension travel, and this is as far as I think you can go. And I wouldn’t move the mounts this far if I wasn’t running so much lift. At full droop, the coil spring becomes completely unloaded! In fact, when I was using Explorer Pro Comp coils, you can actually remove them! Personally, I see no point in worrying about this, nor am I concerned with the arguement that “no weight on the tire means no traction.”, for a few reasons: The shock is still helping the vehicle. If the tire is off the ground and the vehicle shifts, you are entire at the mercy of gravity and any other forces there. If the tire is still on the ground, then at least your shock may help dampen the forces, hopefully giving you that moment to react. I’ve watched the tire when the spring is completely unloaded, and the applied engine torque seems to “pull” the tire into the ground. There may be no weight from the vehicle, but there is definitely more than the weight of the tire and axle forcing the tire down, when you apply torque. Even just the traction applied from the weight of the tire and the axle is infinitely greater than no traction. At full compression, the coil is asked to do strange things, as is shown in the picture! This, though, will happen on any XJ or MJ set up for lots of articulation. Note, however, how this suspension has been designed that as the suspension reaches full compression (it’s not there yet in this picture!), that the tire ends up relatively centered in the wheel-well. This means that at normal ride height, the tire is actually set back in the wheel-well a bit. A side effect is that the coil may rub against the frame rail, making a terrible noise. Unfortunately, I don’t think that there is any real cure. Steering and Track Bar With ~8.5″ front lift, the steering and track bar took a lot of thinking! As the above pictures and descriptions show, I went to Chevy steering, and remounted the steering and track bar to avoid bump steer, etc. Without playing with the coil spring perch, I’m not sure how you’d be able to move the track bar mount up higher on the stock, though. If you ran a shorter track bar, you could. But you want as long a track bar as possible. Or at least keep the track bar length and the drag link length as close as possible. I wanted to flip the steering parts as well, and use as many over-the-counter parts as I could to make replacing parts easier in the future. Second priority was to keep the “family” of parts all the same. In the end, I used strictly Chevy parts (cheaper and very heavy duty), but had to make my own tie rod and drag link (from Chevy parts, just it meant I had to weld up steering parts, which I’m not keen on, but it seems to have worked, and it’s definitely lots stronger than the stock tie rod parts.) I also had to reverse the taper on one tie rod end – where the steering stabilizer would normally mount. My setup works great! There’s a few things that you have to keep in mind, though: You have to keep the drag link (off the pitman arm to the right knuckle) parallel to the track bar, or you will create additional bump steer, because of the different arcs these parts would travel in as the suspension cycles. Also, keep them as close to the same length as possible. It’s paid off on mine. Despite all my mod’s the truck still tracks very well, rides smooth, and has minimal (but a bit) of bump steer. Less than I had with my stock axle and 5.5″ lift and 33’s. You will create a tiny bit of play in the steering, which cannot be avoided. The problem comes from how the new drag link attaches to the steering at the knuckle. Since there is an angle on the drag link, it can “turn” the tie rod ends and tie rod just a wee bit. But this is so minimal you honestly don’t notice it. It’s less than the wander you get from large tires with tall sidewalls, and less than the play in your steering box. You have to make sure that the inverted steering will clear your sway bar connects and the coil spring perches which are welded to the axle. Since I moved the sway bar connects up with the coil spring perches and everything else, mine is alright. But if you move the steering on your stock axle, you will have to do something with these sway bar links – either rebend them and extend them, replace them with something completely different, or just cut them off and run with no swaybar at all. I’m not sure about things like coil spring perches, best to check. Consider your steering stabilizer, ’cause right now it attaches to your drag link. When I changed mine around, I had complete control, so it now attaches to the tie rod about mid-way between the knuckles, and right above the track bar axle mount. The clearance between the track bar and the steering stabilizer is “tight” but everything clears, even throughout suspension and steering travel. The decision to flip the steering on top of the knuckles was mandatory for me. The decision to drop the inverted Y was arbitrary, but a good one in my opinion. The effects on the vehicle’s toe-in increases as the inverted Y angles change. And since I ‘wheel a lot I figured I might as well drop the inverted Y to keep my toe in the same regardless of what I’m asking the suspension to do. If you look closely at the above picture, you’ll notice that I’ve already managed to put a slight bend in the tie rod, near the right tie rod end. *laugh* It’s a good thing I flipped them on top of the knuckles – it would have bent up the stock steering like a pretzel for sure! I dropped the front end onto a stump from a few inches. It likely affected my toe in by about a half a millimeter – not enough to worry about! Also, Dana 44 knuckles are longer than the stock D30 ones. This means that since I’m still running the stock pitman arm, my steering doesn’t turn as sharp as it should. I’ve looked at getting a longer pitman arm, but that means relocating the steering box on the frame, which really isn’t an option. I can’t use shorter knuckles or the steering will interfere with the coil and track bar mounts. So right now I’m stuck with a poor turning radius. The flip side to this, is I have less chance of breaking a front U-joint due to extreme angles. It is also possible to break these parts. Well, I haven’t broken the Chevy steering parts yet, but have the track bar a few times. I used to always blow out the factory tie rod end on the track bars, so (as the picture shows), so I replaced the end with a 3/4-inch heim joint. Since that, I have broken the track bar once (shown, that’s now my spare), and 5 heim joints. I’ve broken most of the heim joints within the past year – since I’ve gone to the 36″ Swampers. Too much weight and traction, I guess. The quick fix worked once, but one break left me stranded on a mountain from 4am ’til 8am…good thing we had cell coverage! Lesson learned: you can’t have too many spare parts! Electrical Well, I wanted to make the truck more self-sufficient. I hate things to go wrong, especially out on the trail. And dual batteries also help for winching, so I talked to a few friends (credit goes to Vern O’Connor) and came out with a nice, cheap, simple way of hooking up two batteries. Here’s the details. Parts 1 SPDT center off toggle switch 2 continuous duty solenoids (available from an RV dealer, cheap) miscellaneous wire, heavy and light duty Destructions Hook the solenoids together in parallel so that: They will come on/off together. They work together to handle the draw from the back-up battery. They are generally rated for 60 to 80 amps, and while winching it’s easy to draw more than that from a battery. In parallel, they can handle considerably more amperage. You can just use a heavy piece of copper on each side of the solenoid pack to tie the heavy amp terminals together. Here, I call one side of the solenoid packinput and the other output. Hook the vehicle electrics (starter, what-have-you) to the output of the solenoid pack. Hook the positive of the primary battery to the output of the solenoid pack. Hook the positive of the secondary (back-up) battery to the input of the solenoid pack. Hook the output (center pin) of the SPDT switch to the solenoid pack switch terminals. Hook one throw of the SPDT switch to your ignitions switch. Hook the other throw of the SPDT switch directly to the secondary battery. Tie the two battery grounds together and to the chassis of the vehicle. Anywhere high amperage is being drawn, use good quality wire. I used 1-0 gauge wire. Remember, with two batteries, there is a potential for a lot more amperage to be drawn through the system by a winch or a start. Take standard precautions with electrical systems that are well documented almost everywhere, call the job done. I took the opportunity to relocate my main battery at the same time in preparation for the on-board air project. SInce my relocation doesn’t apply to XJ’s, I won’t mention it here. On-board Air This was a fun project. And it has been a very practical project, too. Sure, I use the heavy duty axles and the long travel suspension every time I go off-road, but I’ve used the on-board air just about everywhere. I originally sourced a few York compressors since I didn’t want to deal with oilers and separators and because it has a higher flow rating than the stock compressors. Take my advice: on a XJ or MJ, it will take a _lot_ of work to fit a York under the hood. Yorks work under YJ hoods, but for an XJ or MJ, choose the factory compressor. It’s easier to install on the vehicle and you don’t have to worry about finding a serpentine pulley for a York (tough but possible). If you notice in the picture, the battery is missing! My dual batteries project relocated the primary battery, leaving me with room for: The oiler was intended to oil air tools. It works equally well for oiling air conditioning pumps. The filter is a simple crankcase ventilation filter intended for a Chevy 350 engine. Cheap and it works. The separator’s purpose is to remove any liquids (oil and water) from the line before reaching the tank. I should have mounted this further from the compressor, as the hot air from the compressor degrades the effectiveness of the separator. Someday, I may fix this, but it traps the majority of the liquids, so I’m happy. The regulator is used to automatically engage the compressor to keep the system at a happy pressure range. Mine is set to kick in at about 115psi and kick out at about 135psi. At these pressures, I can inflate tires faster than most gas station compressors! Great for running air tools too. The check valve is located between the compressor output and the separator. Its purpose is to prevent leakage from the tanks back through the compressor when the compressor isn’t working, and so that the compressor doesn’t have to start under load. The pop valve is a good safety device. It is preset at 175psi so that the system can’t rupture from too much pressure. A pop valve preset at 150psi would be a better choice, but none were in stock when I assembled my system. I’ve seen some systems without a regulator, that only use the pop valve to regulate pressure. This is not a good idea. Most pop valves are intended only as a safety device, and not designed for continuous use. It is also inefficient, since a pop valve will often not close until the pressure has dropped considerably. And its noisey. The pressure gauge is useful for monitoring the system. Since these pictures, the underhood assembly has been slightly relocated to make room for the larger welder alternator. The shocks have also been relocated since the picture showing the tanks was taken. Here’s a few extra pointers for anyone building/using their own on-board air system: It’s unnecessary to be driving around with the system under pressure. If you’re not using it, then leave the system off. It’s good from a safety perspective, and there’s just no need to keep the system under pressure all the time. You’re not building a highway tractor with air brakes. Do not use regular air line either off the compressor exhaust, or near anything hot, such as the exhaust. The air exiting the compressor is very hot. Normal air lines cannot withstand high temperatures under pressure. Neoprene air line is available, and can easily handle the heat from the compressor. It’s the black air line in the above pictures. I have lines routed by the exhaust to route air to/from the tanks. Here, I replaced the regular air lines with steel lines. Build decent storage capacity into your system. I have two tanks mounted under the truck bed, just above the exhaust. The location is nice and tidy, and I have about 5 gallons storage. This storage lets me run air tools. Take the time and run lines to both ends of the truck. You’re not always using the compressor on your truck; your buddy’s truck may be fore or aft of yours. Put a drain on each tank. They will collect moisture and should be drained on a semi-regular basis. There is no point in letting the tanks rust out. Use the system when you’re building a camp fire. You’ll be amazed how quicker the camp fire grows with a little compressed air! Don’t try adding diesel fuel to the air line to build the camp fire even quicker. Tried it, doesn’t work effectively. I haven’t got the nerve to add gas into the air line to build a camp fire. If someone does, please let me know what degree burns you receive. Miscellaneous Now here is an easy project that is under $10! I stole this idea from some buddies with Jeep YJs. I was always worried about the engine sucking water if I get into something really deep. The factory air intake may be good in the sense that it pulls in cold air, but I really wanted it higher. And I didn’t want to pay an exorbinate amount of money for something outside the body that is waiting to get ripped off in our trees. The solution: some simple PVC pipe and a few elbows. A hole is cut into the bottom side of the air box, and the original intake is blocked off with a piece of flat plastic. The air intake has moved up some 5 inches and the water has to change direction in order to enter the air box. And it’s tidy. It won’t give me 100% protection, but in theory the ignition should die from being submerged in water before the engine can hydro itself.
-
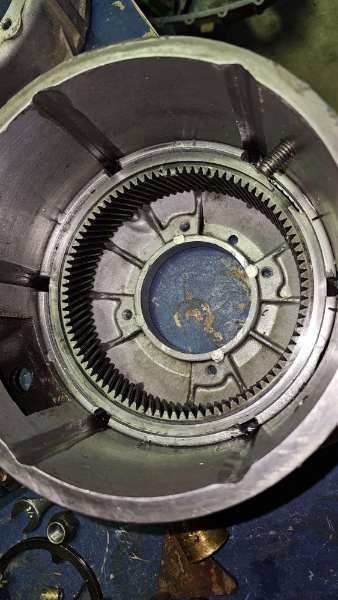
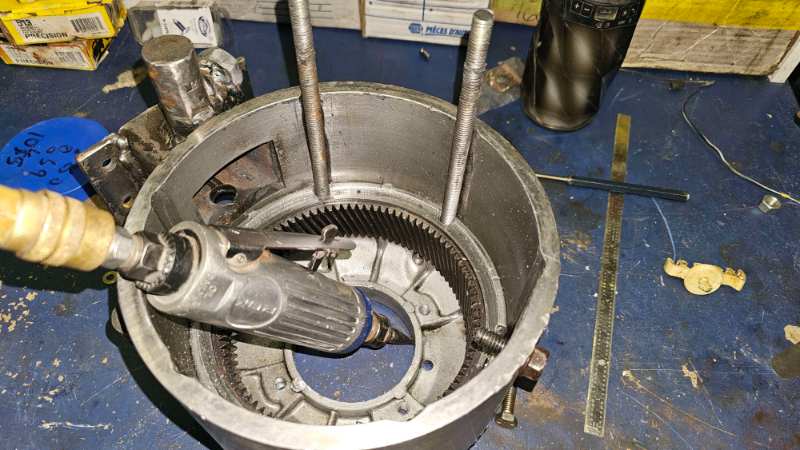
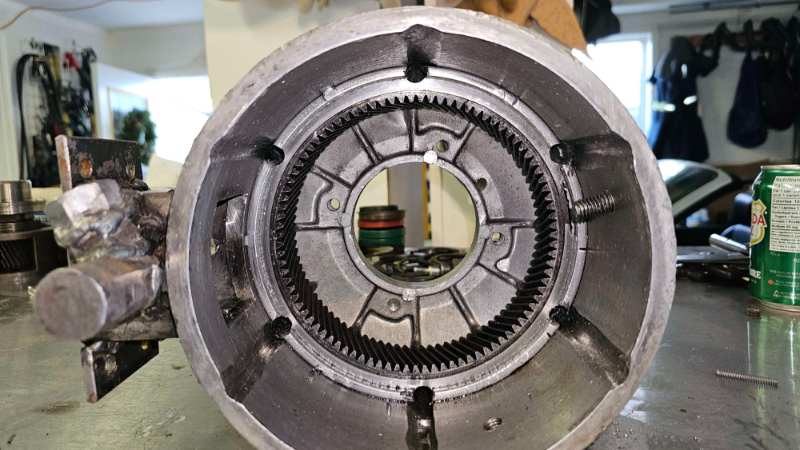
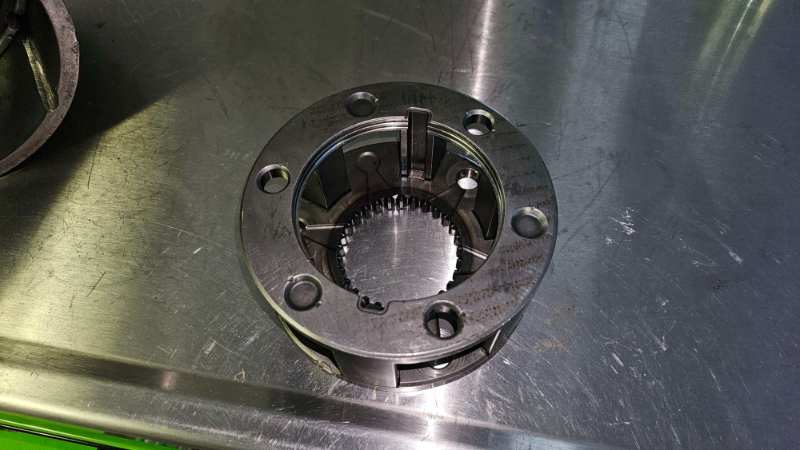
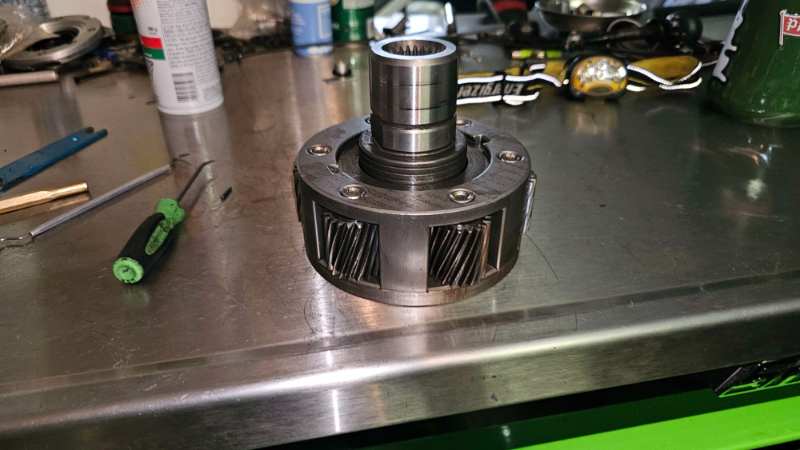
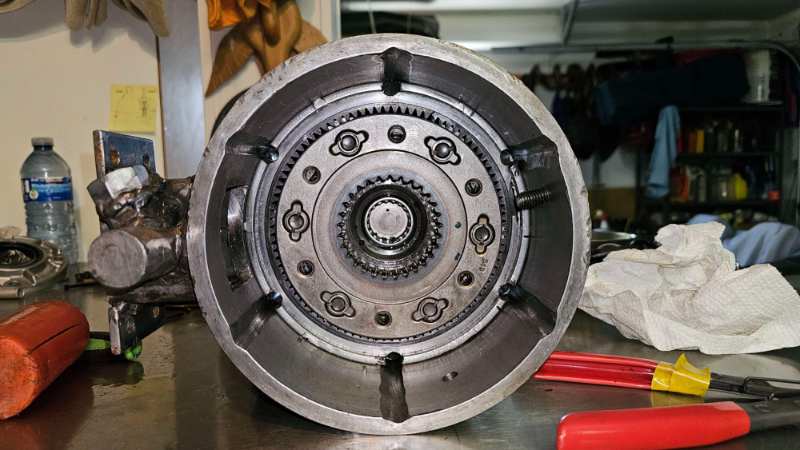
Jeep XJ/MJ Dual Transfer Cases Note, this article was first published on www.bc4x4.com, which was owned and managed by some good friends, around 1999. After about 10 years, the article is now a bit out of date and was taken down. But I’ve put it here for posterity, since I’m still proud of this project. Introduction By Robert W. Bryce Today, with the tough rocky trails, going slow is the name of the game. The problem is that there is usually a compromise involved: you gear your truck slow enough to stay happy on the trails and suffer the consequences on the pavement; or you keep good highway gears but are always wishing to be able to crawl slower off-road. This was the dilemma I was facing. With 4.10 gears, the street 33″ tires are ideal for the highway. But with 35″, and now 36″ off-road tires, my trail gearing left a lot to be desired. I wanted to avoid re-gearing the differentials; the cost is pretty steep and my highway gearing (which I use a lot) was perfect. The truck is my daily ride. In fact, it is my only ride! I was faced with four alternatives to re-gearing the differentials: Install a different transmission/transfer case combination. I looked closely at this option. An NV4500 transmission would be nice, but they are hard to find and expensive to purchase. An NV4500 would also require an almost total rebuild of the floorboards due entirely to its size. Going to a 4-speed transmission with an ultra-slow first gear was also an option, but that would have meant losing overdrive, and I do too many highway miles. Plus, all of my options for cheap 4-speed transmissions would leave me with a front driveshaft that was too short for my lift. Having the transmission shifter come up into my dash wasn’t particularly appealing, either. I could have chosen to switch to an automatic transmission, too. Larry Soo’s automatic seems to work well for him off-road in the majority of conditions. But sourcing all the parts needed to switch my truck from a manual to an automatic transmission seemed like an expensive undertaking that would still leave me with rather high gearing (despite the torque converter). Purchase a lower low-range gear-set for my NP231 transfer case. I didn’t like this option because I was getting into non-standard “hard parts”, where if I broke something, I would have to return to the original company. What if the company no longer exists when the need arises? What if they do still exist, but replacement parts are prohibitively expensive? Also, I’m not always going super-slow, and sometimes the lower low range might be too slow. This option was finally discarded for one simple reason: I considered the low-range gear-set too expensive for my wallet. Buy the dual T-case “box” that is available. I liked this option because it gives me another range for gear selection and the option of 2wd low range. But again, it involved “hard parts” that could be difficult or expensive to source to replace. And its price is about the same as the lower low-range gear-set for the NP231. Build my own dual transfer case “box”. Sure, I would be getting involved in non-standard parts, but at least I knew what those parts were, so I could reproduce them and/or make them better when the need arose. Plus, it gave me a chance to learn about another aspect of my truck and likely (hopefully) save some money. This appealed to me, so this option was chosen.Editor’s note: Rob forgot to mention that he is, by nature, a cheap bastard. It was obvious to me that he would take the do-it-yourself route. This article describes the design, build-up, mistakes, and observations of home-brew dual T-case project. It is not a project for the timid, but it can certainly be duplicated. Parts Used A cheap ’88 NP241 from a GM pickup was located and used for the project. The front half of the case was cracked, but all the parts inside were in great condition. From this case, I used the front half (modified), the planetary gear set, the shift fork and shifter rail, and the output shaft (for the rear T-case). I also used a broken NP231 output shaft (thanks, Larry), but I could have used any other output shaft. This project would have worked equally well using parts from either a spare NP231 or NP242. The primary reason for locating the NP241 was for stronger parts for the rear transfer case, though some Dodge NP231 transfer cases are also good candidates. On some Dodge NP231 transfer cases, the output shaft is equal in diameter (and strength) to the NP241. The larger shaft is said to be some 60% stronger than the Jeep shaft. The actual strength increase isn’t critical; the larger output shafts come behind big blocks and diesels from factory, that’s good enough for me. Also, the Dodge NP231 uses a 1.25″ wide chain. This is the same as the NP241, and will be stronger than the Jeep chain which is 1″ wide. The NP241 low range planetaries are also considerably stronger than any NP231. The NP231 (and NP242) cage uses 3 gears, the NP241 cage uses 6 and is a direct swap into the NP231 transfer case. This gain in strength was important to me, to handle the multiplication in torque. When intermixing these transfer case parts, be careful on the years of the T-cases, there have been changes over the years. In particular, the gear pitch on the low range planetaries changed at least once during the early 90’s to reduce gear whine. Design The original output shaft is pictured below. The new mid-shaft is above, and is part of an output shaft welded to a spare input gear The first step in this design was to build a mid-shaft. The purpose of this shaft is to transfer torque from the front gear reduction box into the rear transfer case. The broken NP231 output shaft and a spare short input gear were used for this. The broken shaft was shortened, then turned down on a lathe to fit tightly inside the spare input gear to correctly align the two pieces together. The two pieces were then TIG welded together by a local shop that has had great success welding axle shafts. The alternative here was to have the broken NP231 shortened, then re-splined for the input gear. This option wasn’t chosen because the re-splined section would have to be re-hardened, which would increase the cost of the project. This is the remains of the front half of the NP241. The cylinder surrounding it was fabricated from steel. The front half of the case from the NP241 was used to hold the planetary gear set for the gear reduction box. It was trimmed back to where the snap ring retaining the planetary ring gear is located. Next, the material that held the original shifting mechanism was removed. What is left is essentially a cylinder with a cap in one end (which holds the input gear bearing). Mating the transmission, the gear reduction box, and the rear transfer case was difficult to solve. There are studs that mate the transfer case to the transmission. These studs and the planetary ring gear were removed from the NP241 “cylinder”. Then, the stud holes were drilled right through the case. Long studs were made from grade 8 threaded rod, and put into the rear T-case. These studs run through the gear reduction box and mate the transfer cases to the transmission in much the same way as the original studs did. The gear reduction box “floats” on these long studs. The NP241 “cylinder” isn’t at all long enough to mate to the rear T-case, so a chunk of round steel tubing was located. It and the NP241 “cylinder” were lathed so that the aluminum NP241 cylinder would press fit into the steel tubing by about an inch. The steel tubing makes up the remainder of the gear reduction box housing. The length of the mid-shaft that was made at the start of this project determined the length of this housing. This required some pre-assembly before the steel tubing was pressed onto the aluminum. The inside of the steel tubing had to be notched for the long studs from the rear T-case. Longer studs were required to attach the rear NP231 to the transmission. The reduction box “floats” on the long studs. Here you can see the shifter bracketry. Also notice the grooves we milled inside the steel cylinder to accommodate the longer studs. The ring gear was also notched to clear the studs. Another view of the reduction box’s cylinder. If I were to repeat this project, I would completely enclose the aluminum with the steel ring, or even just discard all of the original aluminum housing. My solution introduced a difficult sealing problem between the aluminum and steel. In the end, it took a careful and liberal application of good quality silicon to solve the sealing problem. I could have also used a large O-ring between the aluminum and steel. Once the aluminum/steel gear reduction box housing was assembled, the planetary ring gear was re-installed. The ring gear had to be slightly notched to clear the studs that pass from the rear transfer case to the transmission. There is a 1/4-inch plate of flat steel between this gear reduction housing and the rear T-case. It is there for two reasons: to provide a better seal surface between the cases; and to provide a support for the rear T-case, so that the long studs do not bear all of the weight and torque applied to the rear T-case. The next steps involve the shifting mechanism. We took the steel shift fork from the NP241 and “flattened” it. I.e., it has many bends making it too long for the housing, so we cut the bends out. Next, the location through the steel housing for the shift fork was determined, and a hole was cut into the housing. The hole fits nicely between two of the long studs, so there were no concerns with respect to this for final assembly. The shifter fork is pinned to the shifter rail with a 1/4-inch bolt. We also cut some detents in the rail to lock the gear reduction box in the appropriate range. Care had to be taken to ensure that the shifter rail was parallel to the mid-shaft so that nothing would bind. The shifter rail is from the NP241 too, but it is luckily the same diameter shaft as the shifter rails in Dana 300 and Dana 20 transfer cases. We used a Dana 300 shifter rail seal for the seal on this box. Some of the NP241 detent mechanism was used; it took some tries to get the spring pre-load “just right” to make the shifting feel right. Stock shifter fork on left, modified on right. The shifter rail is ready to be installed. The reduction box already has the planetaries installed, and if you look close, you can see the modified shifter fork also installed. The housing for the shifting mechanism is only a combination of some square tubing, miscellaneous nuts and flat stock. Admittedly, it came out looking pretty ugly, but it works, and it’s out of sight when the gear reduction box is on the truck. More time should have been spent here, as a few small leaks have cropped up here. These leaks have been relatively easy to solve, so I won’t spend the time and energy to re-do this part of the project. The lever was fabricated from a spare shifter lever, and from some more flat stock. The shifter rail is notched, then bolted to the lever. The lever pivots on a bracket welded to the steel housing. It was actually easier to design a lever for the shifting mechanism, than it was to use a cable actuated system. A drain hole and fill hole were tapped into the steel housing. The original vent line in the NP241 aluminum piece was kept. Right now, I am using the same oil in the gear reduction box, as what the NP231 T-case uses: ATF. The gear reduction box is sealed from the rear T-case. The finished transfer case assembly. The complete drivetrain package. It’s long but the extra transfer case reduction unit only adds around 6″ to the total length. Other Costs and Details As mentioned, the NP241 has the 6-gear planetary (NP231 is a 3-gear planetary) and a larger output shaft. The 6-gear planetary is a direct swap into the NP231 rear T-case for strength. The larger output shaft is very desirable (who hasn’t heard of someone breaking an NP231 rear output shaft?! The extra gear reduction would mean even more torque on this weak shaft!) However, other parts had to be purchased to use the larger output shaft. A new output shaft bearing retainer (where the speedometer gear goes into the transfer case), and a new speedometer gear (that slips onto the larger output shaft) were purchased. Dodge part #’s are #04746266 and #04338996, respectively. I re-used the speedometer cable drive gear. I re-used the stock GM slip yoke design (which is the same as the Dodge slip yoke design). If you’ve gotten this far, then building a fixed yoke kit should be trivial. Rather than modifying the NP231 transfer case with stronger internal parts, I could have fixed the NP241 cracked housing and installed it complete. I didn’t choose this primarily because the NP241 is physically larger, making it much more difficult to fit. Adding length to the drivetrain introduces other costs. The shifter linkage for the rear transfer case had to be extended. (At the same time, I switched from the stock Jeep XJ T-case shifting mechanism to the superior Jeep YJ mechanism for the rear case.) New driveshafts also had to be built. For this application, a new crossmember also had to be designed and built. This has meant new skid plates, too. We also had to change the shape of the underside of the cab somewhat. It was not shaped in a way intended for a dual T-case! This modification even meant cutting off one of the mounts for the bench seat. If I had bucket seats, then I would have had to relocate a seat mount rather than simply removing it. At least the speedometer cable was (just) long enough that it didn’t have to be replaced! Some of the floor also had to be cut and reshaped to make room for the extra shifter through the floor. If a cable actuating system had been used for the gear reduction box, some of this would not have been required. I made a new cover for the floor to go around the shifters out of checker-plate aluminum. What remains is to source proper shifter boots for the transfer case levers. Observations and Conclusions The overall length of the gear reduction box turned out to be exactly 6.375 inches in length. This is not a concern for me; as a long-box Jeep Comanche has a wheelbase of 119″. However, looking at the design, I expect that the mid-shaft and the gear reduction box could be shortened by up to a half-inch without requiring modifications to the rear T-case. With some ingenuity, I suspect that the design could be shortened further, making it applicable for some short wheel-base Jeeps. I have now put enough high-torque off-road miles on this gear reduction box for me to consider it “proven”. Still, a primary concern continues to be the welded shaft, since all of the torque is transferred through it. When I have some spare cash, I plan on having a spare shaft built. Off-road, this gear reduction box is a dream! With the AX-15 transmission (3.83:1 1st gear), two NP231/NP241 planetaries (2.72:1), and 4.09 gears, that gives me a final reduction of 116:1! It is nice and slow, far better than the 42:1 that I was previously at. I now have 2wd low-range (not double-low), which I use far more often that I expected. It is not appreciably louder than the rear T-case, either. The extra gear reduction has shown me other areas that I have to address and strengthen in the truck. A rear anti-wrap bar is now an absolute necessity; the soft rear spring packs cannot even come close to keeping axle wrap to an acceptable range. Stock motor mounts and transmission mounts have also proven inadequate. Judging on the torque multiplication of the stroker 4.5L engine through this drivetrain, it’s a good thing I chose to put in the stronger NP241 output shaft right away; I’m confident I would have broken some Jeep NP231 output shafts by now. The total cost of this project was considerably less than what is for sale; well under 4 digits, Canadian funds. Even though there are a few gremlins left to solve (as mentioned earlier), I definitely consider this project a success! And best of all, it is “home-made”! As with any project, there are many individuals who each played an important role in the completion of this project. Many thanks to Wayne “Fozzy” Foster, Andy James, Robert “Slim” Marriot, Gordon Prichard, Richard “Tiny” Reimer, and Paul Weitlauf.
-
just documenting the original build to my truck (the hillbilly deluxe build thread) since it's an iconic piece of history, alot of things that hadn't been done before or were not that common and the aftermarket support just didn't exist back then the original website that hosted this information has long since changed its format and these articles didn't make the cut the website that re-hosted it has gone down so I had to go through waybackmachine to get all of this there used to be alot of trip reports of this truck from this 90's but I wasn't able to recover them used to love reading the old 4wd trips on the early days of the internet, never did I think I would become the owner of the truck I spent years reading about. I'm sure I am not the only one who grew up reading about it Building a Jeep 4.0L Stroker Note, this article was first published on www.bc4x4.com, which was owned and managed by some good friends, around 1999. After about 10 years, the article is now a bit out of date and was taken down. But I’ve put it here for posterity, since I’m still proud of this project. Introduction By Robert W. Bryce The Jeep 4.0L I-6, introduced in 1987, has received many praises over the years. And virtually every Jeep owner will surely agree with them. It produces very good torque, power, and throttle response from idle right to the red-line. However, this doesn’t mean that some Jeep owners still feel that there is something, well, lacking, especially if the engine is getting a little long in the tooth. There are a few options for late-model Jeep owners; these tend to follow the old adage that “there is no substitute for cubes”. One option is to swap in an entirely different engine. There are kits available to swap in most all of the popular V-8’s. However, this is not a viable option for many people since many unexpected gremlins often rear their ugly heads during these swaps. These can range from cooling, to electronics, to exhaust routing, to even oil-pan clearance. Locating the appropriate adapter to mate the engine to the transmission is usually the easy part! A second option is to build the 4.0L to produce more power. There are many options (even superchargers and turbochargers) available for this motor, and at least two companies sell stroker kits. Stroking is appealing since the power band can remain relatively low while increasing overall torque, especially if a rebuild is in order anyway. However, the price tags on these kits will make all but a very few bank accounts whimper! The following article overviews a project to build a stroker engine out of the Jeep 4.0L, but without going hungry for a few months. The 4.0L comes in 3 different flavors, the early (pre ’91) era 4.0L, the 4.0L HO version, and the current version found in the TJ. For the HO version, the factory updated the design of the intake, cylinder head, camshaft, exhaust, and EFI. The release of the TJ saw more improvements to the 4.0L, but these engines are still relatively scarce and expensive in wreckers. A great deal was found on a very fresh ’93 4.0L, which was used for the core of this project. Any 4.0L block would work, though. Before we dive into the project, I should state my goals. We are not going to try to build a high-horsepower engine. What we are looking for is a good, reliable stock replacement motor that has more low-end torque, and is equally ideal for the trail, the street, and cruising on the highway. The more low-end grunt the better. It will replace a 4.0L in an ’89 Jeep Comanche which has 280,000km on the odometer. Thank You’s Before I get into the details of the project, I must first mention that there are many people I must thank for the help and the advice and the knowledge that they contributed to this project. Without their contributions, I may not have started or completed such an undertaking. I won’t claim to remember to mention everyone but the most influential people in this project are (in alphabetical order): Rick and Alan verifying correct crankshaft end-play. Yeah, right. Wayne (Fozzy) Foster Joe Hinson Andy James Dave Kamp Richard (Tiny) Reimer Jeff (Jefe) Reynolds Ed Stevens Research The first step in any project such as this must be research. Some phone calls to companies producing stroker kits indicated that 4.2L (258ci) crankshafts can be and in fact are used. However, beyond this, information became difficult to obtain and was often contradictory. One source stated that custom rods and pistons must be used with the 258 crankshaft but refused to say why. In fact, I was told I could quote them on this! But finally after many phone calls, and faced with the research outlined below, they admitted it was possible to build a stroker using the right combination of factory parts. However, that was qualified with the statement that by using factory parts, the resulting engine would be a revver, not a torquer. This company will not be named nor mentioned in this article. Other sources suggested that the right combination of factory components should work but couldn’t produce details, or say for sure whether it was possible. So this project began by determining what combination of factory, and possibly custom parts, could be used – in theory. I state “in theory” because the actual assembly of components is needed to finally determine whether a combination of parts found on paper will actually work. Component Specifications and Clearances Using information gleaned from the “Mopar Jeep Engines Speed Secrets & Racing Modifications” book, many similarities between the 4.0L and 4.2L were determined. The 4.0L and 4.2L Jeep engines share many specifications crankshaft end play connecting rod piston pin bore diameter crankshaft main bearing journal diameter connecting rod bore crankshaft main bearing journal widths connecting rod bearing clearance crankshaft main bearing clearance connecting rod side clearance crankshaft con-rod journal diameter connecting rod maximum twist and bend crankshaft con-rod journal width piston weight (less pin) crankshaft max. out-of-round and taper piston pin bore diameter cylinder head combustion chamber volume piston pin diameter piston – to – pin clearance piston pin bore centerline – to – piston top However, another Mopar book gave different piston weights. This is just an example of the difficulty in obtaining accurate information. Nonetheless, these similarities told us that: The 4.2L crankshaft should fit the 4.0L block (at least in terms of journal sizes and clearances). Either connecting rod can be mated to either crankshaft and piston (but not necessarily work due to piston heights and compression ratios). By using the 4.2L crankshaft, the stroke would change from 87.4mm to 98.93mm, almost a half-inch increase! With the stock 4.0L bore (98.4mm), the resulting engine displacement becomes 4.51L, or 275ci! Piston Height and Deck Clearance It doesn’t matter if the crankshaft will physically fit if the rest of the components won’t. For example, care must be made to ensure that the pistons do not contact the valves or the combustion chamber. (The Mopar Performance book recommends a minimum of 2.5mm between the valve and the piston at any time.) To keep costs down, I wanted to avoid using custom pistons if at all possible. This meant that the rod length must be changed relative to the change in the stroke. A possible candidate is the 4.2L rod. The highest point that the piston can in the block reach (called TDC, or top dead center) is calculated as: For the stock 4.0L, the value is: For the 4.0L using a 4.2L crankshaft and rods the value is: The first value can be verified against the block’s specified deck height and clearance of pistons below the block deck; it checked out. The second value shows us that there is not a clearance problem when using the 4.2L crank and rods with the 4.0L pistons. However, use of the longer 4.0L rod would require a custom piston. Note that it does not tell us whether the piston will go too low in the cylinder, or if the piston will clear the crankshaft counterweights throughout the stroke. This must wait until actual trial assembly. 4.0L piston/4.2L rod at top dead center. The 4.0L rod is longer (but lighter) than the 4.2L rod. Ideally, a longer rod should be used. The rod length affects the piston acceleration and deceleration and thrust angles during the stroke, which does affect power. Generally, a longer rod does produce more power, and according to the Mopar Performance book, the 4.0L stroke/rod length ratio is ideal. However, tests on Chevy V-8’s show that the power gains are not huge and for this application any increase in power should be negligible. Static Compression The next concern was change in compression ratio with the larger displacement, assuming using stock 4.0L pistons. Compression ratio is: The change in final piston height (from above) changes the total combustion chamber volume, so that has to be accounted for during these calculations. Starting from a stock 4.0L compression ratio of 8.8:1, the new compression ratio will become approximately 9.4:1 before any resurfacing to either the block or the cylinder head. 9.4:1 is starting to get a little high, but is still within the “acceptable” range for pump gas. Various other articles, both from offroad and from street car magazines, tend to draw the line at 9.5:1. Other Concerns The 4.2L engine received some changes over its lifespan. For example, in 1981 the crankshaft reportedly became about 12 pounds lighter due the removal of some counterweights. For street performance, the newer crank is more appealing. For idling over rocks, the older, heavier crank is definitely the choice to make! In either case, the 4.2L crankshaft must be still be compared against the 4.0L crankshaft in many respects: Bolt pattern of flywheel flange on the crankshaft, so that we can use a late-model flywheel with the required fuel injection timing/trigger notches. The flywheel flange protrusion from the back of the block, to ensure a.) clearance between the flywheel and the block and b.) correct engagement by the starter. The diameter and depth of the pilot bearing hole in the crankshaft, to determine that a compatible pilot bearing (for the transmission input shaft) exists. The “snout” of the crankshafts must be the same, so that no problems with regards to the timing chain or harmonic balancer or serpentine belt will appear. Clearance between the counterweights (and rods) and the inside of the block. Clearance between the 4.2L crankshaft counterweights and the 4.0L pistons, when attached to the 4.2L rods. Also needed is a suitable camshaft to handle the increase in displacement. Likewise, the stock fuel injection was designed to handle an engine displacement of 4.0L. Mopar Performance offers a kit to install the fuel injection onto older 4.2L’s, but a 4.5L displacement may be beyond the capacity of the injectors and the throttle body. Specifications on the injectors are difficult to find. Engine Assembly Building a stroker engine certainly isn’t trivial! And at this point we haven’t even disassembled our 4.0L core! Now that we’ve done the research, it’s time to start playing with the actual engine components. An effort was made to use the best combination of high-quality name-brand components that were priced suitably. In other words, I did my best to “spend thrifty” without compromising the longevity of the motor. Parts List for the 4.5L Stroker Engine Component Part Number / Desc. Details Block 1993 H.O. No overbore required, cylinders re-honed. Cylinder Head 1993 H.O. Valves lapped, head already port-matched from factory. Pushrods, Rockers, Valves 1993 H.O. Stock, re-used. Intake Manifold 1993 H.O. Port-matched. Gaskets, Seals Mopar gasket kit P/N P4529245 Mopar valve seals P/N P4529240 Mopar rear main seal P/N #04778126 Pistons, Wrist-pins 1993 H.O. Stock, re-used. Rings Sealed Power P/N #E234X Cast, stock replacement rings. Camshaft Crane P/N #953901 Advertised to build power in the 1500-4500 rpm range. Camshaft Chain & Gears 1993 H.O. Stock, re-used. Camshaft Lifters Sealed Power P/N/ #HT2011 Crankshaft 1976 Magnafluxed, ground, polished (20-under rods, 10-under mains), rotating assembly balanced. Rods 1976 Bearing ends resized, rod bolts replaced. Rod Bolts Mopar P/N #04713086 Mains Bearings Sealed Power P/N 7211M 4.0L bearings. Rod Bearings Sealed Power P/N 6-3310CPA Oil Pump 1993 H.O. Stock, re-used. Harmonic Damper 1993 H.O. Stock, re-used. Flywheel 1989 Stock, re-used but balanced, matches EFI. Exhaust Stock Grand Cherokee H.O. Factory 2.5″ exhaust. Crankshaft The core 4.2L crankshaft came from a mid-70’s AMC car, so is the heavier style. The crankshaft did need ground, but I did not have the rod journals “offset ground” to change the stroke. A slight grind offset to decrease the stroke would have dropped the compression a bit. Left: 4.0L crank Right: 4.2L crank As you can see, the 4.2L has already been shortened in this picture to fit the serpentine balancer/pulley. With the stroker crank, there was just enough clearance between the rotating assembly and the inside of the block. This crankshaft had a longer “snout” where the harmonic damper bolts on. The machinist trimmed the end of the crankshaft to match the 4.0L crankshaft when it was being ground and polished. The flywheel flange matched the 4.0L crankshaft. The earlier concerns about clearances turned out to be non-issues! The pistons cleared the crankshaft counterweights. There were also no clearance problems between the camshaft and the crankshaft or connecting rods. The piston did not “fall” too low in the cylinder at the bottom of its stroke. And the counterweights and rods cleared the inside of the block. Pistons and Rods The history of the 4.2L rods was unknown, so the rod bolts were replaced with factory Mopar replacements. No other company could guarantee delivery time, or sometimes even delivery. The Mopar Performance book explains that the pistons can be reversed (they are stamped for which way is forward) to increase torque, but at the expense of piston noise. I chose to stay with the stock configuration to avoid a potential pitfall which may mean misdiagnosis, and which would be difficult to cure. The computer has a knock sensor and extra piston noise may be confused with knock, resulting in the timing being retarded, thus defeating the efforts of achieving a bit more power. Left: stock 4.0L piston, 4.0L rod Right: new 4.0L piston, 4.2L rod Notice that the 4.2L rod is shorter than the 4.0L. Camshaft Selection The Jeep I-6 block dates back to the ’60’s so it is no surprise that there are many camshafts available. Mopar Performance makes 5 specifically for the 4.0L. Isky, Schneider, Clifford, and Crane also offer a selection of camshafts. I could have also re-used the stock HO cam that came in our block. But, after many phone calls, and emails, I followed a recommendation and chose the Crane #753901 cam. This cam is advertised to produce power between 1500 and 4500RPM, right where we want it. The camshaft was not “degreed,” as is recommended by many performance articles. The purpose of this is to absolutely maximize the potential output of the engine. Since we are not looking for every last horsepower, we decided against this extra expense. Bearing Selection The 4.0L and 4.2L engines share the same main bearing dimensions and clearances. However, the main bearings list as different numbers. Should the 4.2L bearings that match the crankshaft be used, or should the newer 4.0L bearings be used? The tech guys from both Federal Mogul and Mopar Performance couldn’t help us here. So our machinist looked up in his bearing book, and the only difference is in one alloy. The alloy used in the newer 4.0L bearings was recommended for off-road use, so the decision was easy. Harmonic Damper I had to decide whether to use the stock 4.0L harmonic damper, or to source a 4.2L serpentine belt damper. I relied on one of the companies that builds the stroker kits here. The stock 4.0L damper can be used with their kit, so we used it in this engine. The entire rotating assembly was balanced since we were using parts from different engines. Cylinder Head The cylinder head did not receive any more work other than a simple valve lap. No expensive combustion chamber work was performed. The Mopar Performance book verified recommendations by friends that this isn’t necessary for a daily driver. In fact, performance gains on the I-6 are reportedly insufficient to warrant such an expense for even most racers. Assembly The actual block assembly was not unusual from assembling any stock engine! All tolerances were verified with plastigage. We’ve now got a complete engine ready to install and test! We still have to deal with fuel injection issues such as injector size and the fuel pressure regulator. Installation, testing and debugging, and empirical results are covered in the final section. Freshened 4.0L head, 4.0L block machined, cleaned and ready for assembly. Installation and Driving The installation of the long block itself was not unusual from any other engine swap. Since the block was the same, everything lined up as expected. One problem did arise, though. This engine is mated to a manual transmission, so a pilot bearing is needed. Sometime between 1976 and 1989, the end of the crankshaft to fit the pilot bearing was changed. This was one “gotcha” that I didn’t account for that cropped up during engine assembly. Plan for this before hand! We couldn’t source the right parts, and in the end we had to have the stock pilot bearing retainer machined to fit the appropriate pilot bearing. Luckily, the crankshaft didn’t require any modifications. Note that this problem can also occur if you are just swapping 4.0L engines from different eras. The complete assembly: 4.5L motor, AX-15 transmission, custom NP231 crawler box, NP231 transfer case. Fuel Injection The other issue that required some time was mixing different generations of EFI. The truck was 1989, non-HO. The new engine and intake was 1993. Rewiring the truck to use the HO computer was considered, but this task was considered too unwieldy. Instead, the older Renix (non-HO) EFI was retained and fitted to the HO block and intake. To get the engine running, the following tasks had to be done: Fit the older TPS onto the newer throttle body: the new TPS is not at all compatible with the older EFI. Re-wire the temperature sensor: on the non-HO block, this sensor is located on the driver’s side of the block; the HO block locates this near the thermostat, which will produce a more accurate reading. Mate the non-HO fuel lines to the HO intake: the HO intake has both the fuel feed and return lines at the front of the fuel rail; the non-HO intake places the fuel feed at the back of the fuel rail, and the return line at the front. We used all of the older engine brackets to hold the air conditioning compressor, alternator, etc. We also used the non-HO distributor and flywheel to use the non-HO sensors. This is absolutely necessary, since the non-HO and HO flywheels are keyed differently. An HO throttle cable had to be used, and a slight modification to the gas pedal was needed. The HO exhaust header is needed with the HO cylinder head; luckily the non-HO oxygen sensor fits the HO header. The HO injectors that came with my new block had been sitting too long, and every one had become completely seized, or gummed up from old gas. In the interim, I used Ford Mustang 5.0L injectors, as they are cheap and compatible replacements for Jeep injectors. These injectors will have to be replaced with larger ones. Flow testing various injectors confirmed specifications that were finally located: Stock Jeep non-HO injectors 201 cc/min; 19.7 lbs/hr Stock Mustang 5.0L injectors 194 cc/min; 19 lbs/hr Jeep/Chrysler #33007127 injectors 225 cc/min; 22 lbs/hr Jeep/Chrysler #53030778 injectors 235 cc/min; 23 lbs/hr The flow testing also indicated that Jeep injectors have a very narrow spray pattern whereas the Ford injectors spray at about a 60-degree spray pattern making them a better choice in terms of air/fuel mixture. Further research indicates that Ford injectors that should be compatible with the Jeep injector rail can be found in 22, 24, 30, and 36 lbs/hr flow rates. For this application, injectors in the range of 23-24 lbs/hr seem ideal. Driving Impressions As of this writing, I now have over 20,000km on the stroker engine. It has seen some offroad miles (it was broken in at Rock Crawl ’99), and it has seen some long distance miles (a 5000km round-trip drive in July). Simply put, this engine is a pleasure to drive! On the highway cruising, it averages between 20 and 21 miles per Imperial gallon. This is in the same ballpark as the original 4.0L. Plus, this mileage was calculated over a 5000km road trip, averaging the speed limit, with full load: full camping gear, plus hauling the Swampers (driving on street tires). Around town and on the trail, this engine isn’t quite as economical as the original 4.0L. The engine is strong! It felt “good” when it was brand new, but it has really developed a nice feel as it broke in. It feels stronger than any 4.0L that either I or some friends have driven. This is despite the engine moving around a heavy truck: 4500lbs unloaded. It doesn’t really have any hesitation in the power band, either. It pulls right from below idle to what I consider the red line: ~4500rpm. (It is still pulling strong at 4500rpm, but I have no need to push it higher.) I was told that by using the 4.2L rods, my engine will be a revver, not a torquer. This didn’t make sense, since I have yet to meet someone who considers the 4.2L a revver. Suffice to say, what I was told is wrong: this engine loves to idle around all day long. At times, it will seem to stall out, but keep rotating over and start running again, something the 4.0L was never good at doing. The engine does run hotter than the original 4.0L. People attribute this to both the larger displacement and the higher compression. This is not a concern for normal, every-day driving, but on the trail I must use the factory auxiliary electric fan to keep the gauges happy. I am already using the largest radiator available over-the-counter for my truck. The only remaining problem with this engine is locating, then installing the correct size injectors. Because the injectors are too small, warm-up is difficult and there is a steady although very weak ping, even on 94-octane gas. Another area that I will be experimenting with is the spark plugs. I am still also using stock spark plugs; a set that is 1 or 2 ranges cooler may also be in order, due to the high compression. Despite this remaining, this engine is definitely a success. Enough of a success a second stroker has already been built and installed in a friend’s Cherokee. This project has attained all of my original goals, and I recommend this to anyone with a certain amount of mechanical abilities, and who wants to do something a little different than just a regular rebuild. Epilogue Since completing this motor, various people have approached me for information on the project, and possibly to build more Jeep stroker engines. This article should present enough information to duplicate my work. In addition, I have heard rumours of a project involving longer rods and custom pistons to simultaneously combat the high compression ratio and broaden the torque curve (in theory, anyway). So, if you’re still hungry for more information, SEARCH THE INTERNET. There are all sorts of resources out there that can fill in the missing pieces to your puzzle. I no longer have the time to answer emails about the stroker project (several years of answering the same old questions is enough for me, thanks!).
-
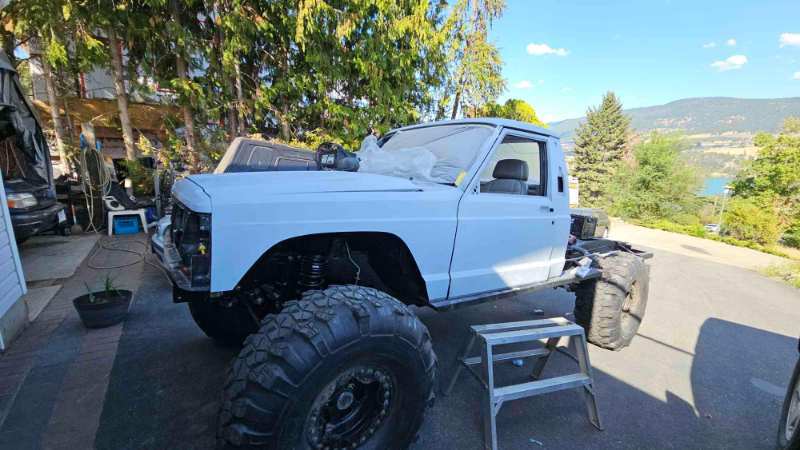
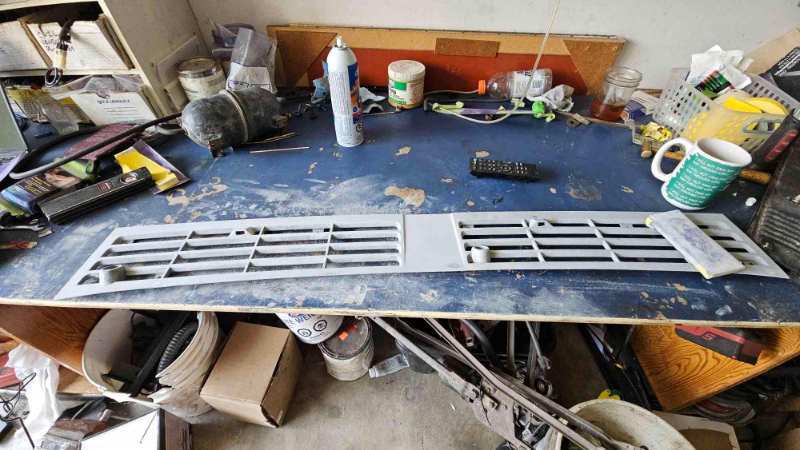
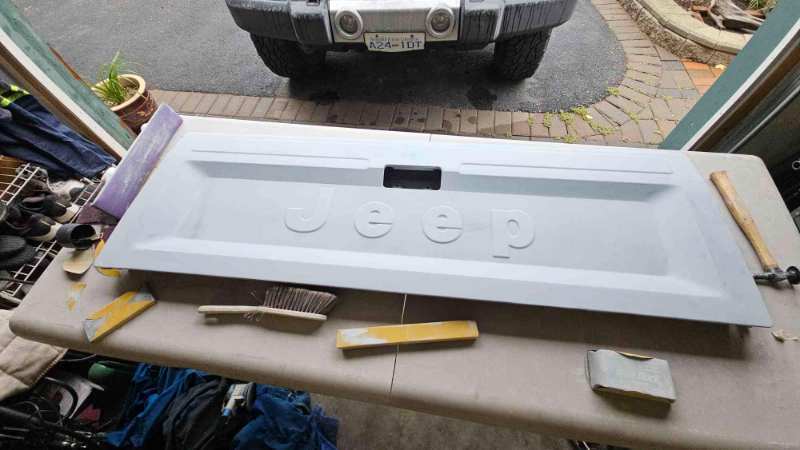
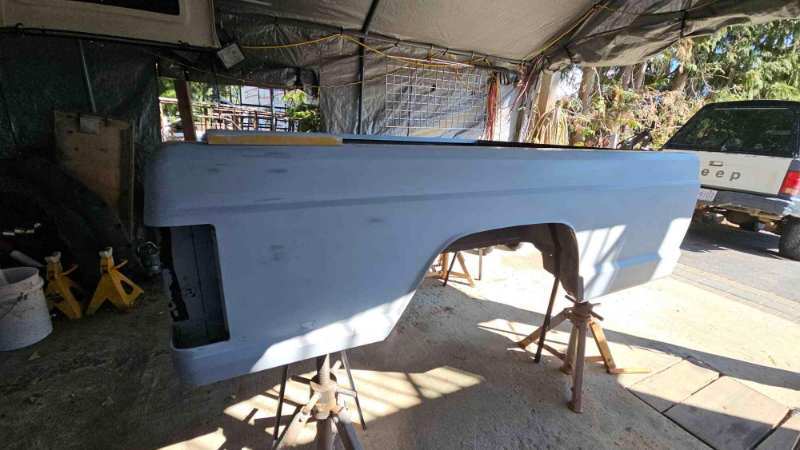
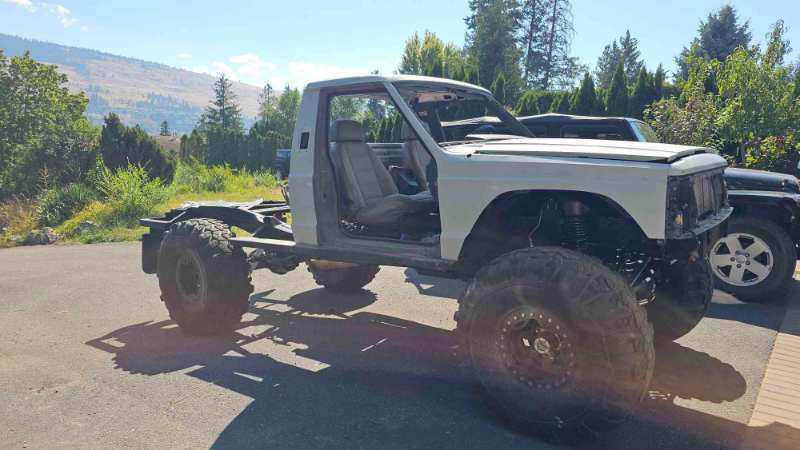
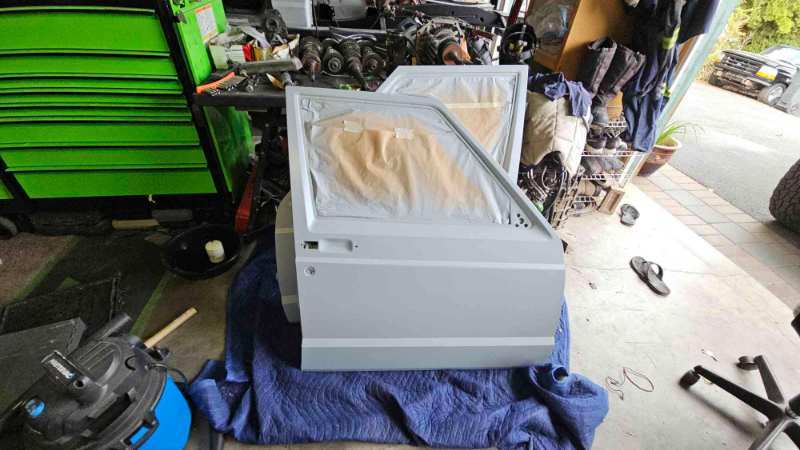
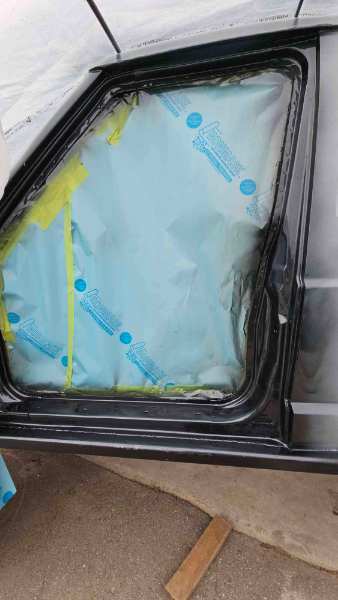
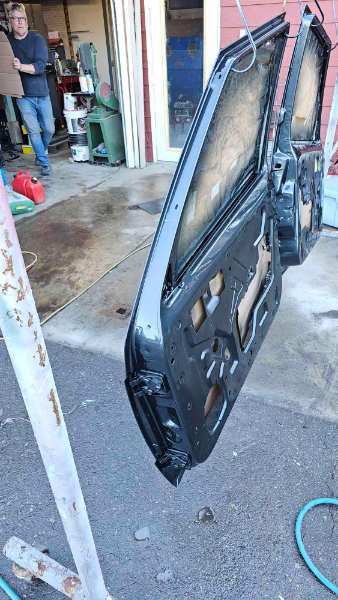
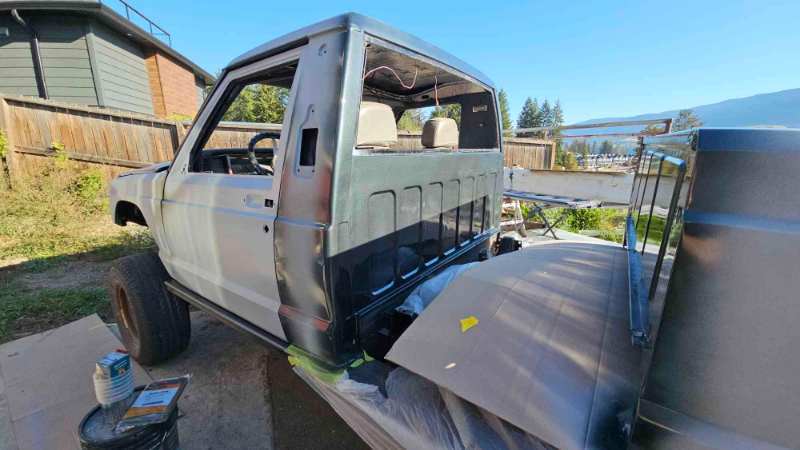
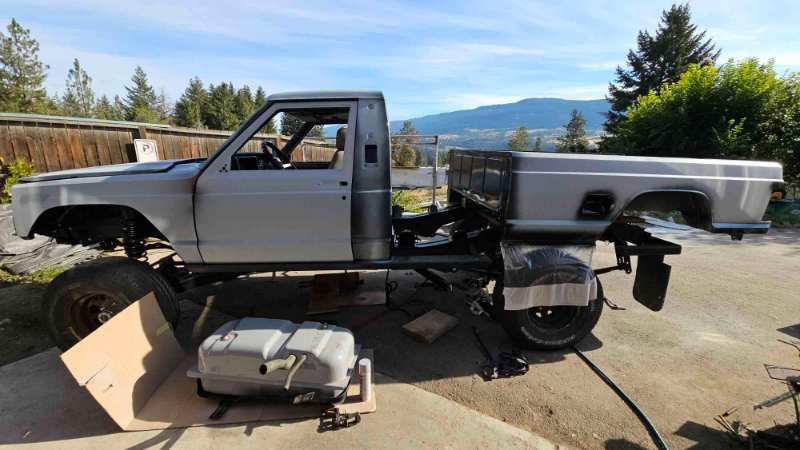
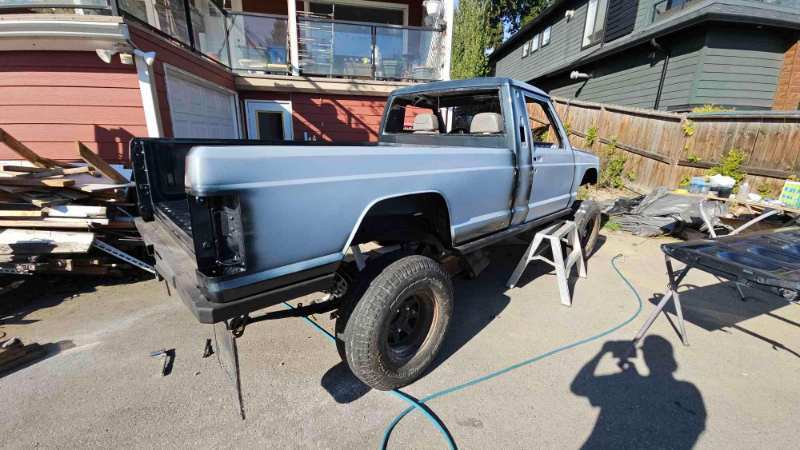
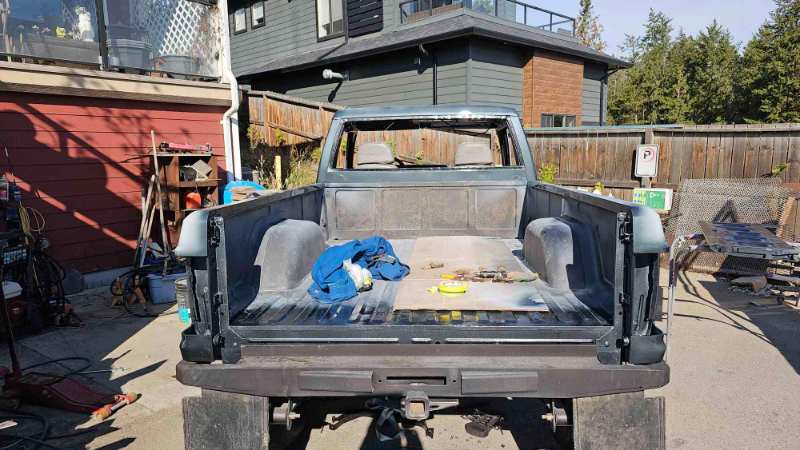
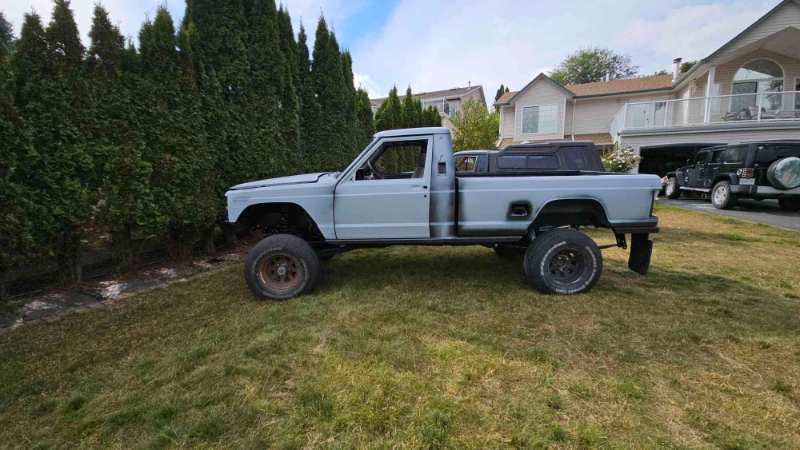
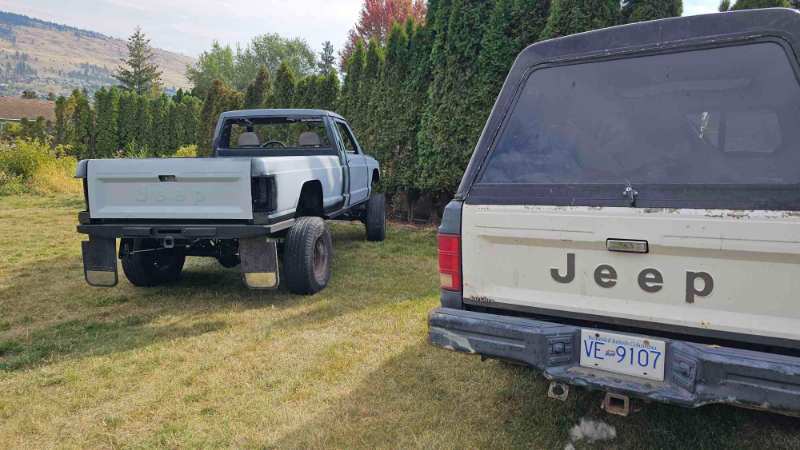
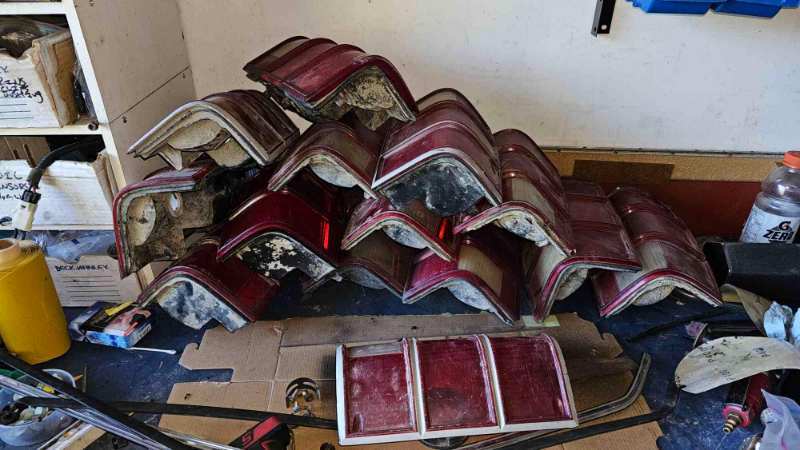
Now that were all caught up I am currently waiting for a spot in the paintbooth. the owners body guy got in a car accident a few weeks ago and crushed alot of ribs so he is by himself and swamped so cars are backed up. should be about two weeks and then I can sneak in over the weekend and get it finally painted, and then glass installed A little disappointed in my paint, i had it mixed to via paint code for cyber grey, who ever mixed it put way too much green tint it. so its more green than silver that being said, generally you can return a miss tint, but its been a few years since I purchased the paint so I am stuck with it body all blocked doors tailgate and box ended up getting reprimed door jambs and door inners paited as well as inbetween the cab and truck box and the bottom of the box quarters where I cut and folded when I fit the box to the sliders truck box is officially bolted on! as seen previously in my thread the box has been bobbed 10" and the rear arches raised roughly 2" using front fenders from a donor cherokee will be sanding everything down again the day before it goes in the booth and will get the glass and all the seals installed shortly afterwards. going to be playing around with some taillight refinishing, see what gives the best result I may have one or two laying around
-
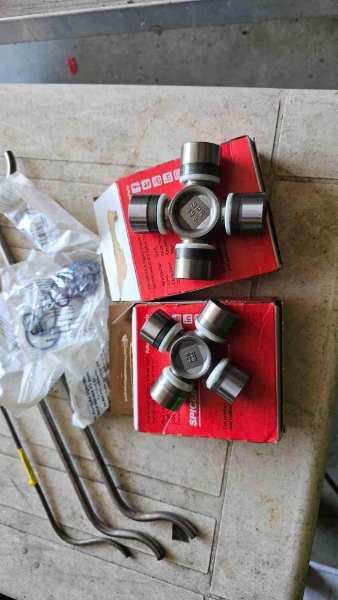
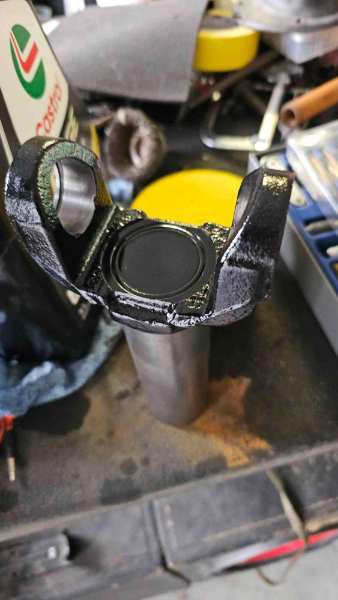
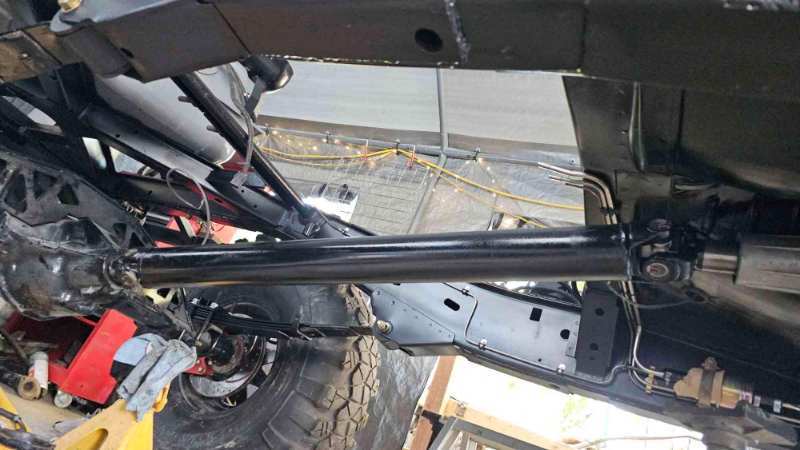
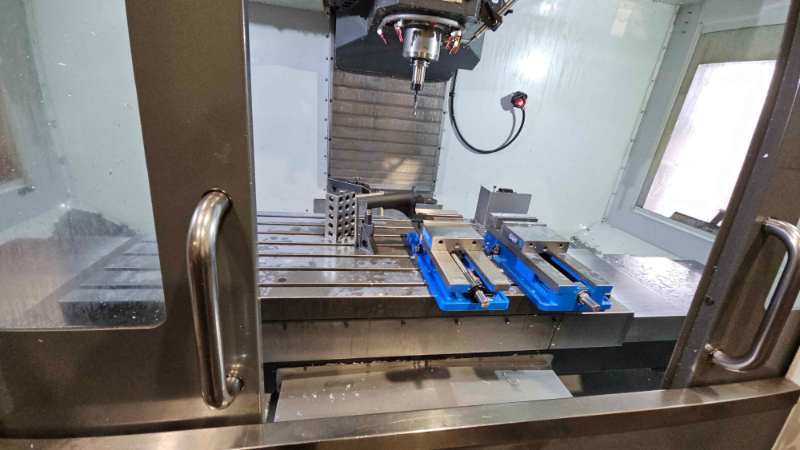
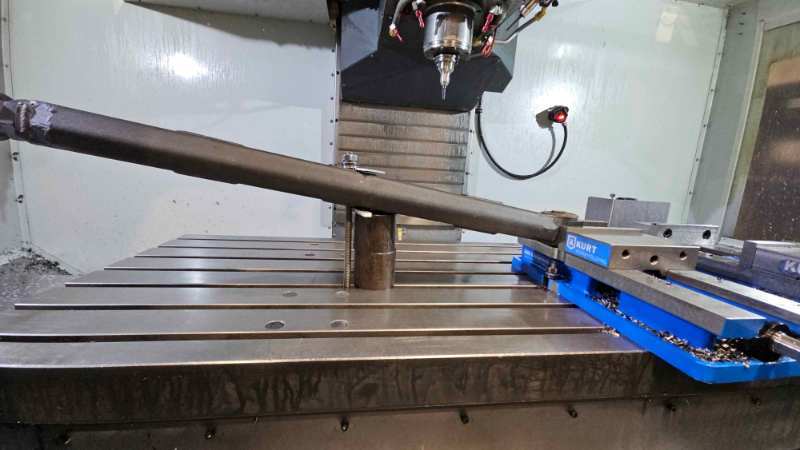
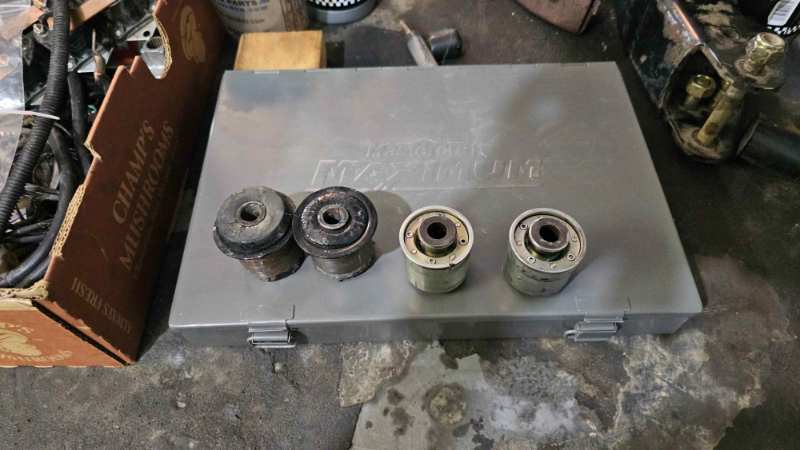
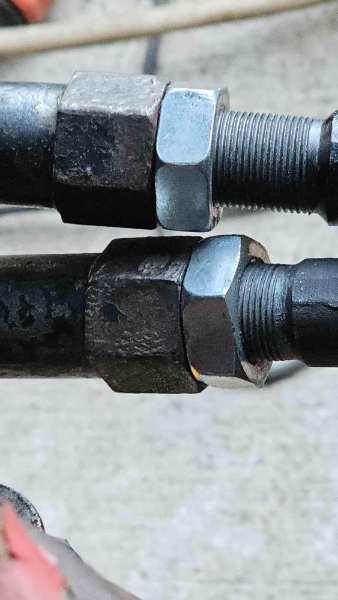
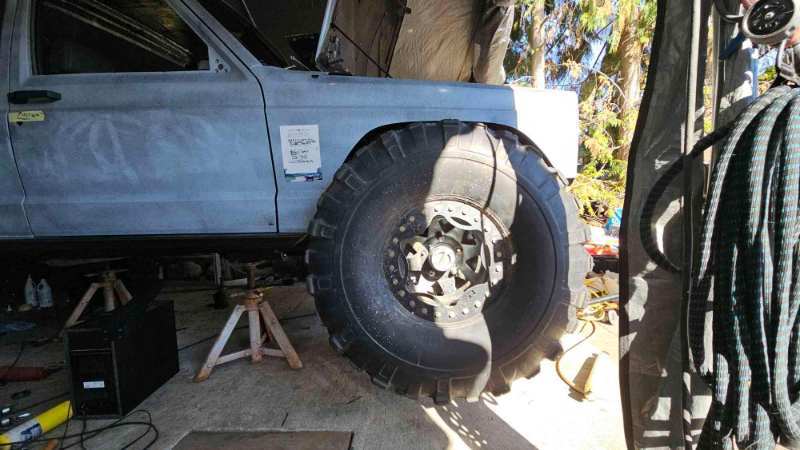
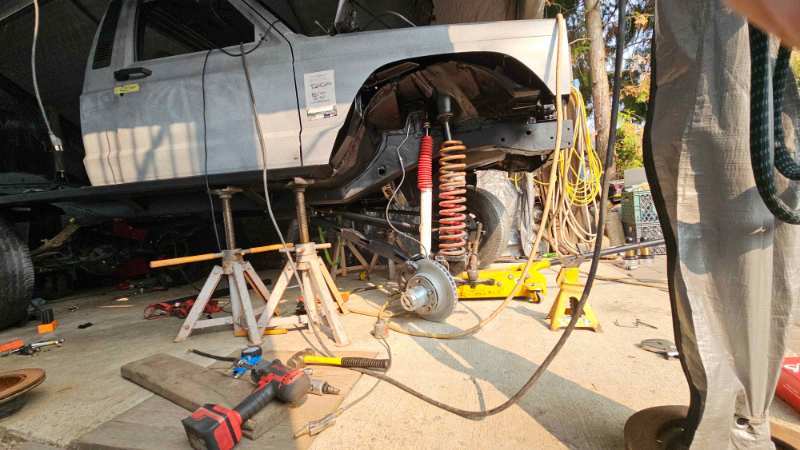
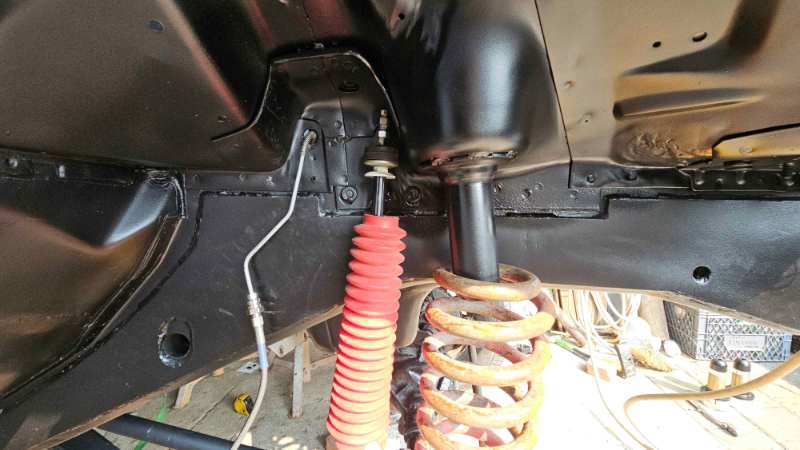
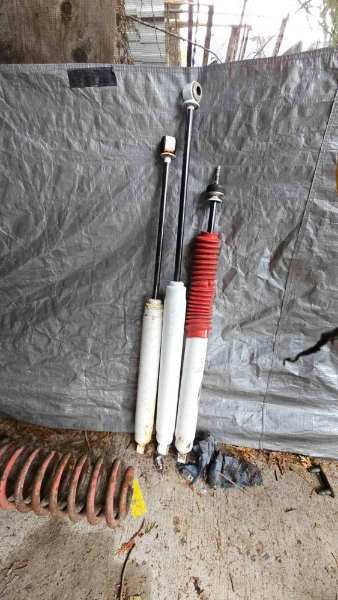
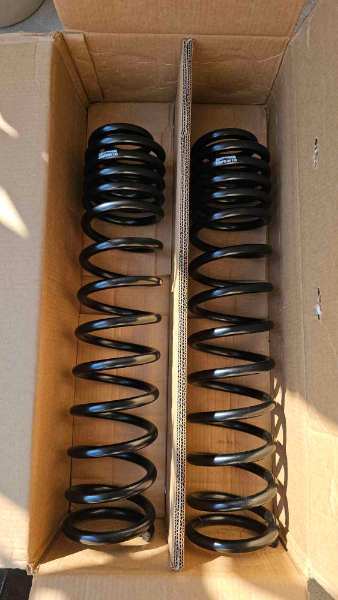
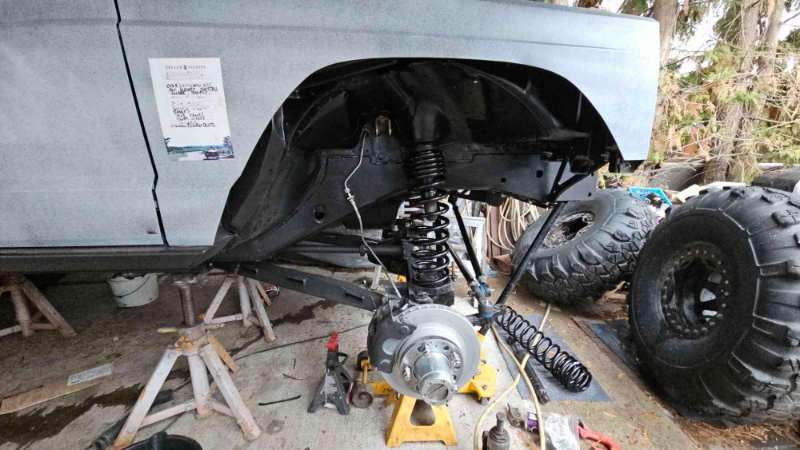
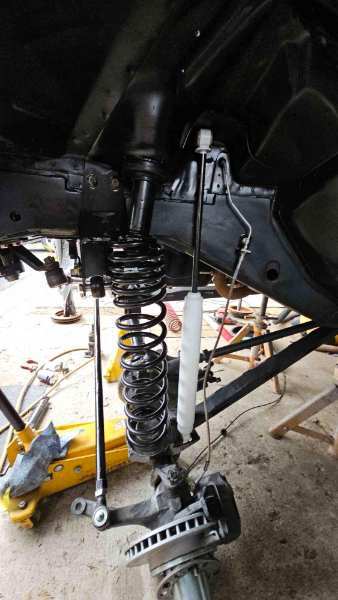
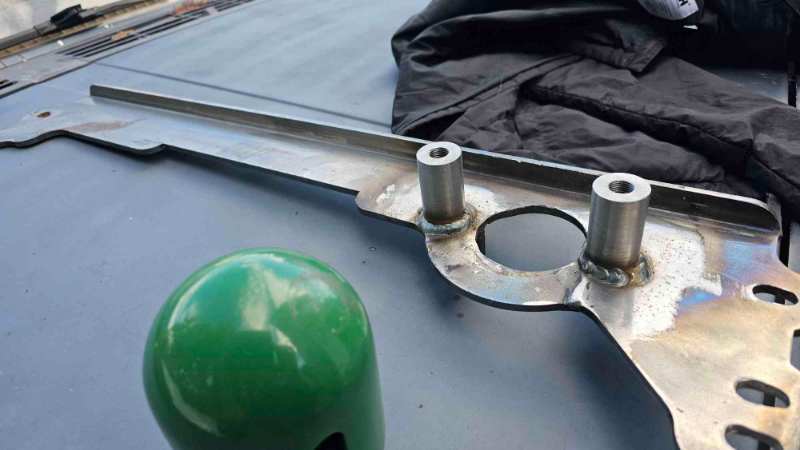
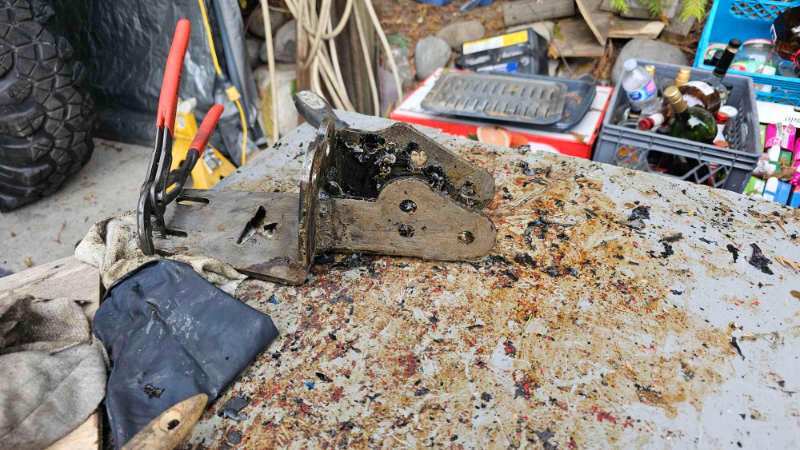
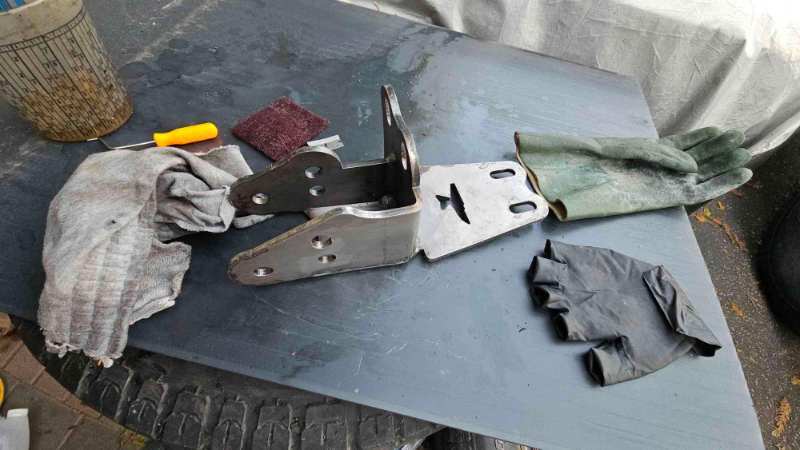
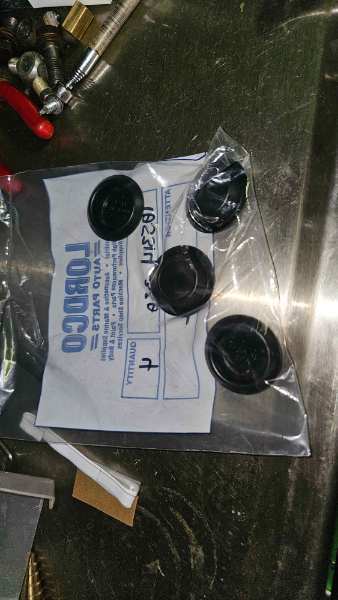
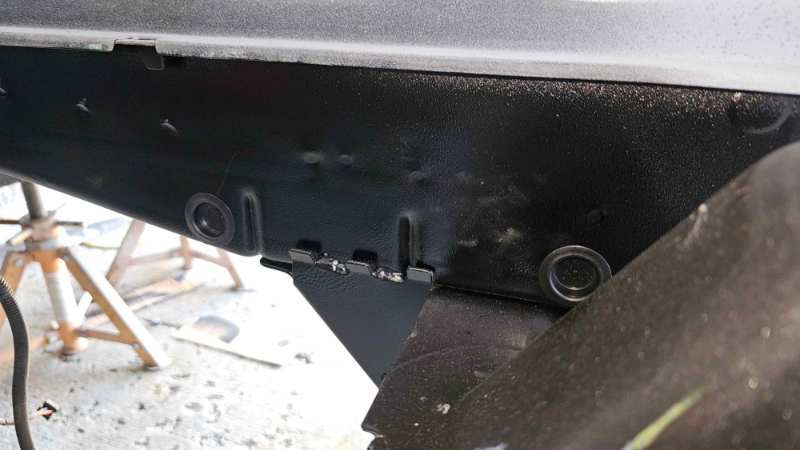
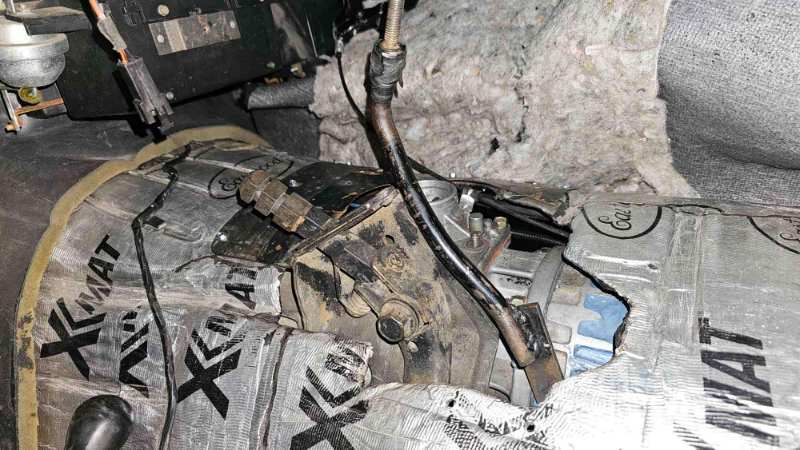
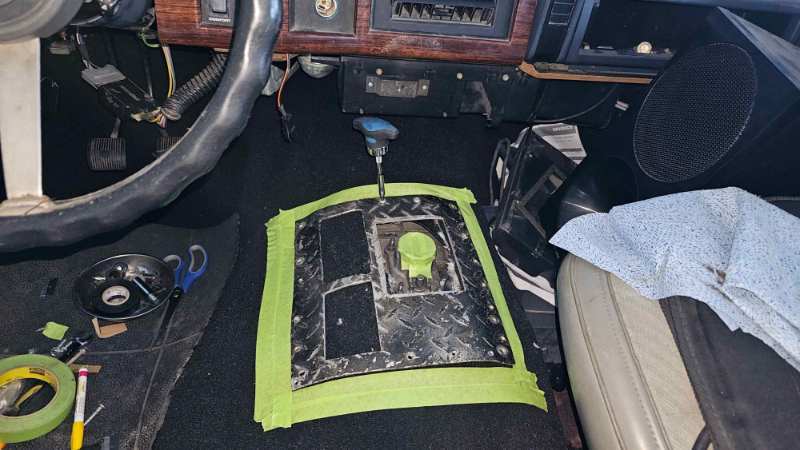
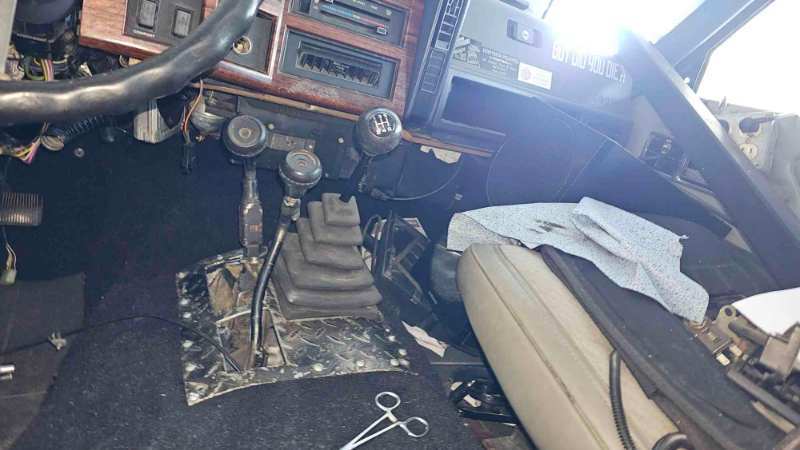
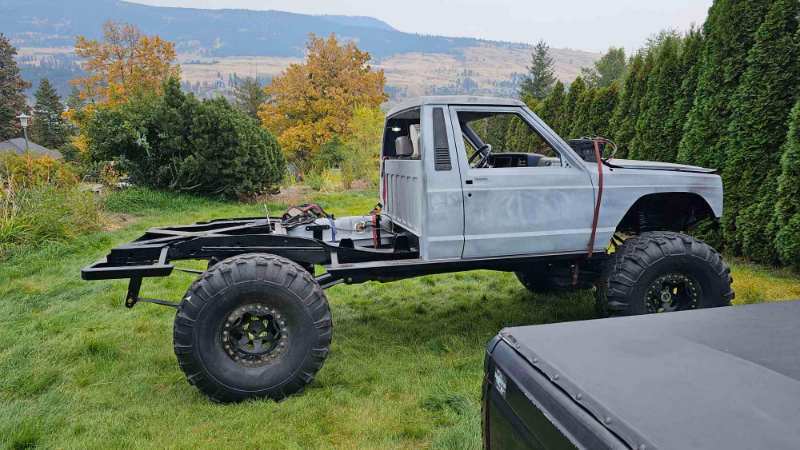
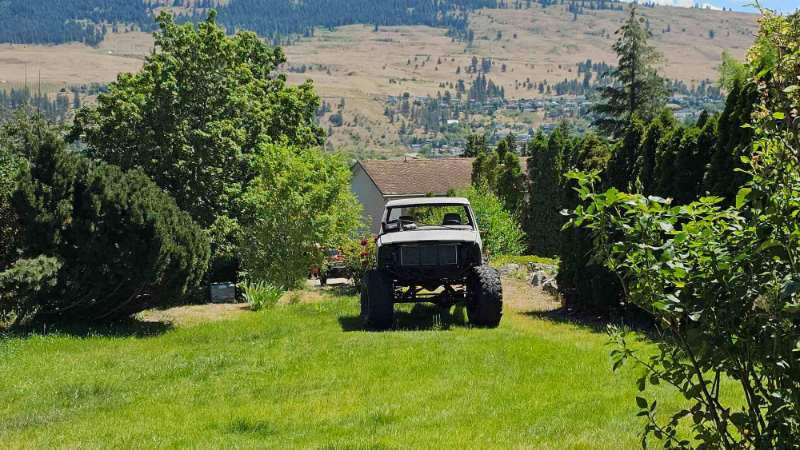
Speaking of driveshaft It was time to clean up the rear and install new ujoints went with the Spicer 7xxx SPL series again nothing wrong with the old ones, so i cleaned them up, greased them and have them as spares Visited my buddy at his work to get some more machining done big bolt upgrade on the long arms and drilling tapers for pitman arm and tireods the clamping was sketchy lmao upgraded the upper control arm bushings on the axle side to rebuildable Johnny joints clearance is clearance. full lock/down travel trimming for theoretical max bump shocks were too short, so went with some 15" travel still need to figure out where I'm going to mount them for either more up travel or down picked up some dual rate coils, and guess ive never ran coil spring isolators so I installed some of those as well ditched the thought of installed the ACOS I purchased, will probably use them on my other truck they look much better than the old ones theoretical max down paint stripped and and repainted all the front steering/braces had to reweld the entire sector shaft brace, when we put a patch on my steering box years ago it no longer fit and would just snap the sector shaft support bearings sourced new plugs for the back of the cab, was actually tough to get, only one town in all of lordco (auto parts store in my area) had some butchered my carpet to fit the shifters modified the renix steering box brace (or what ever this is) to clear the stiffener behind the box and then drove it for the first time in far too long Parked on the lawn, and in the hedges for the street to see lmao
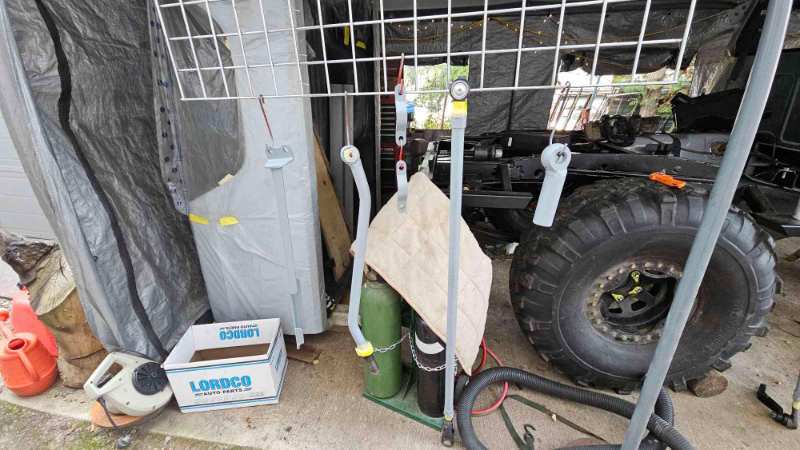
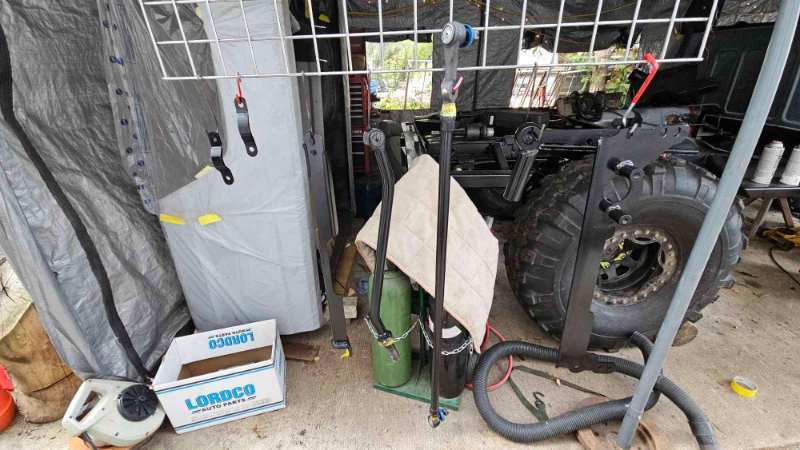
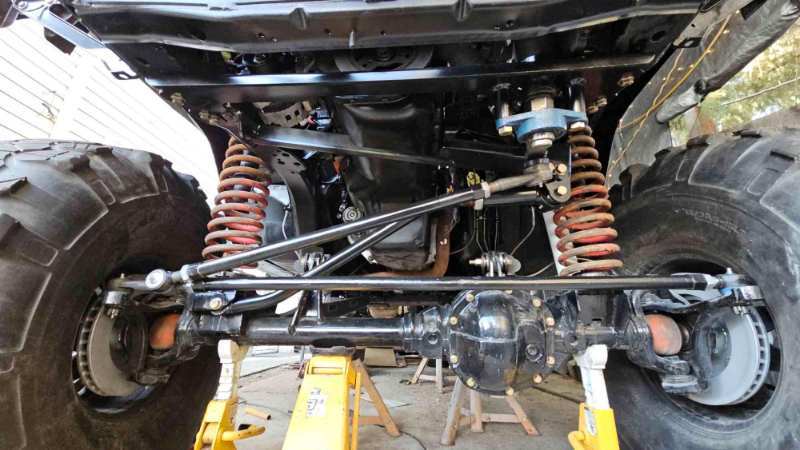
-
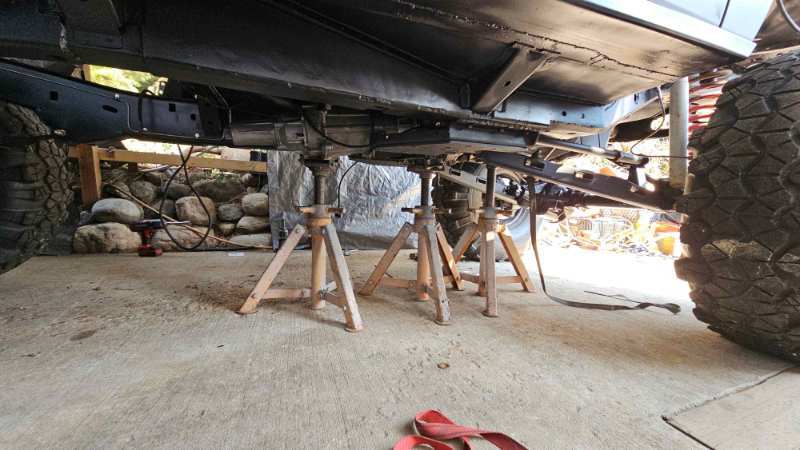
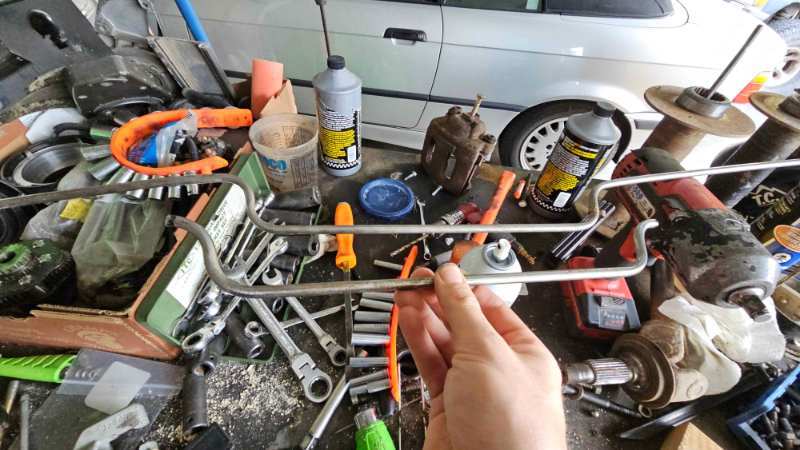
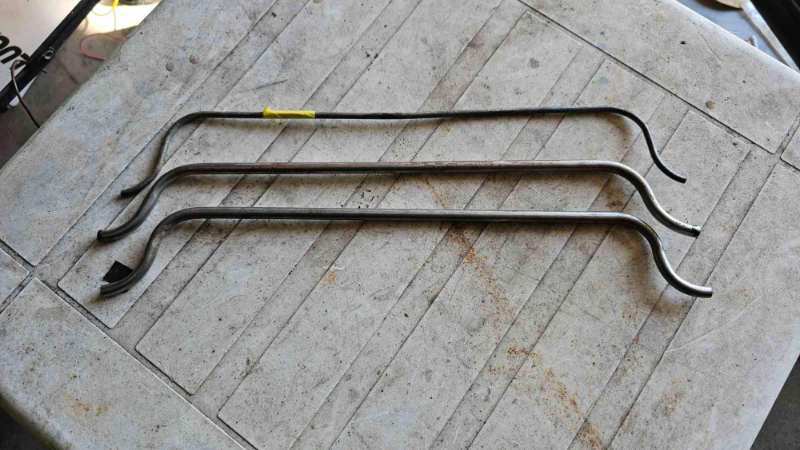
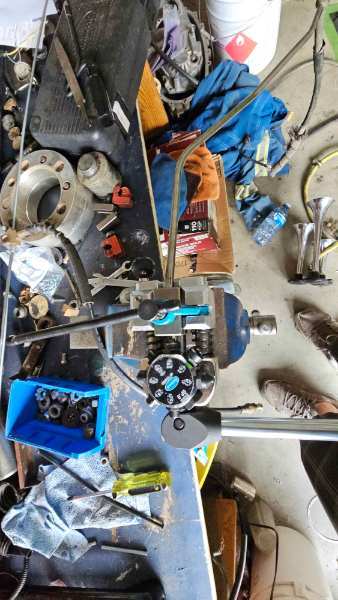
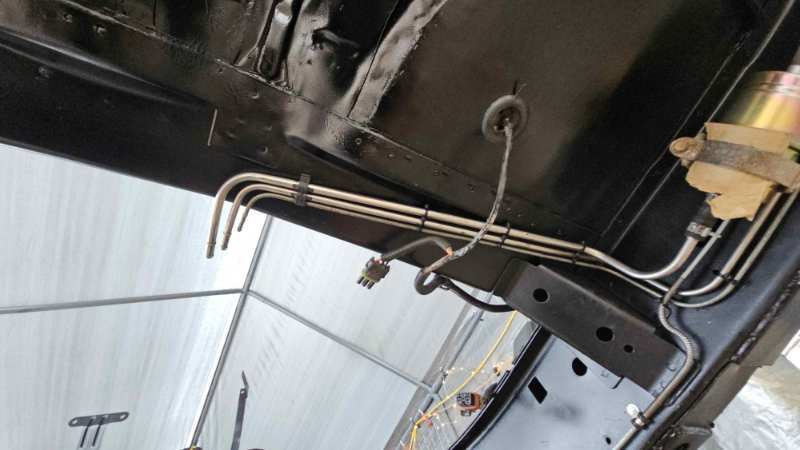
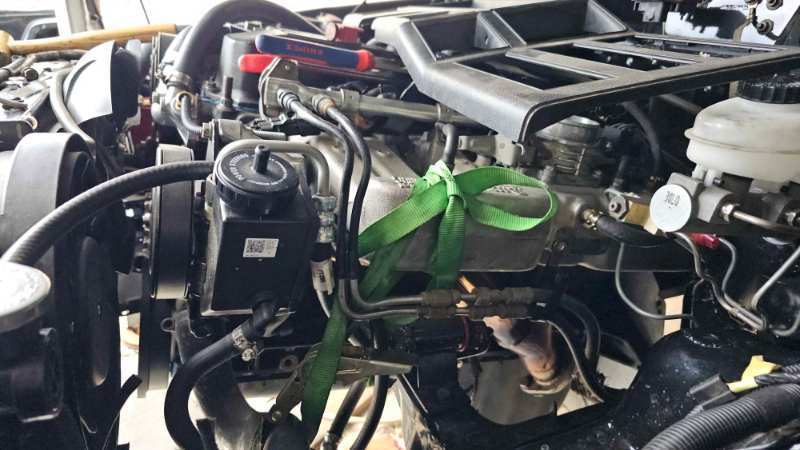
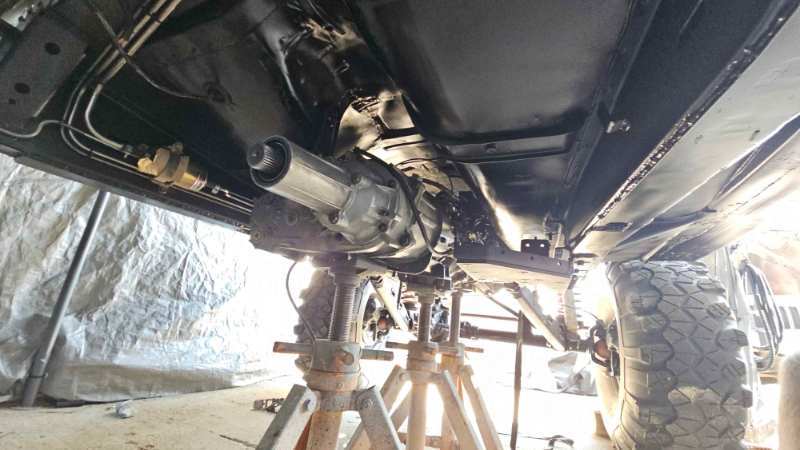
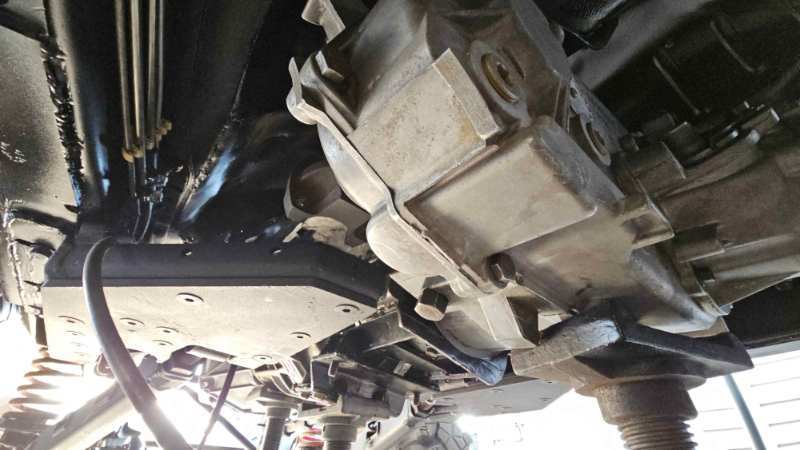
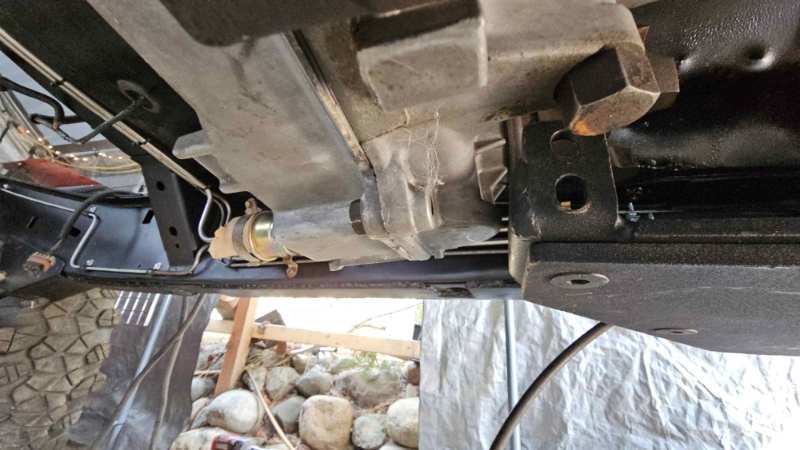
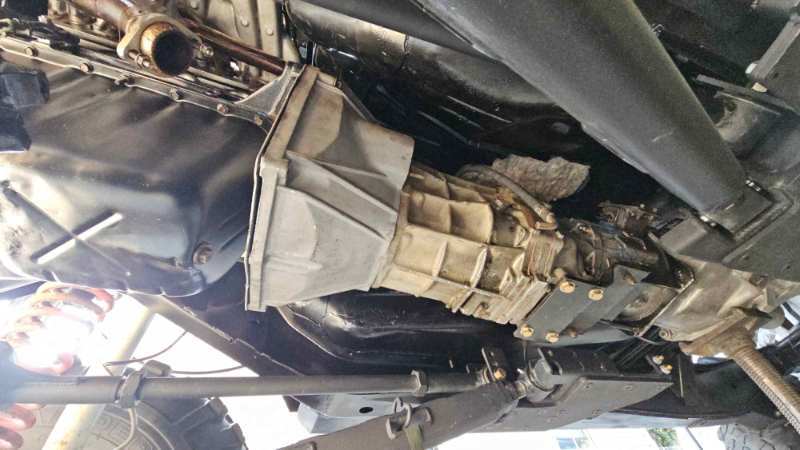
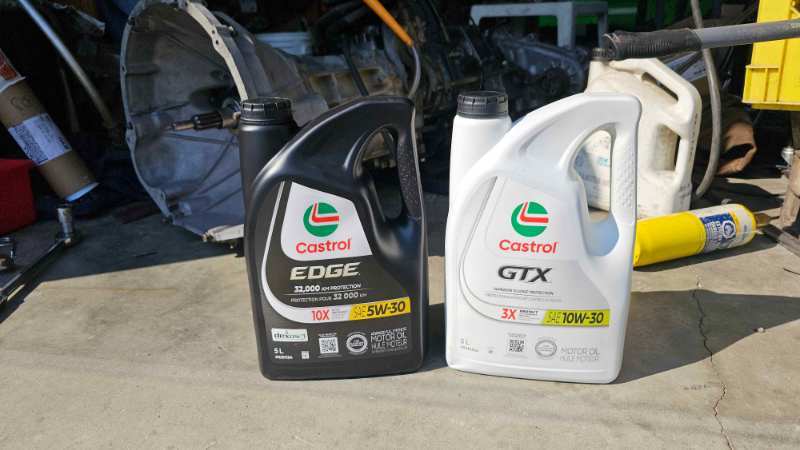
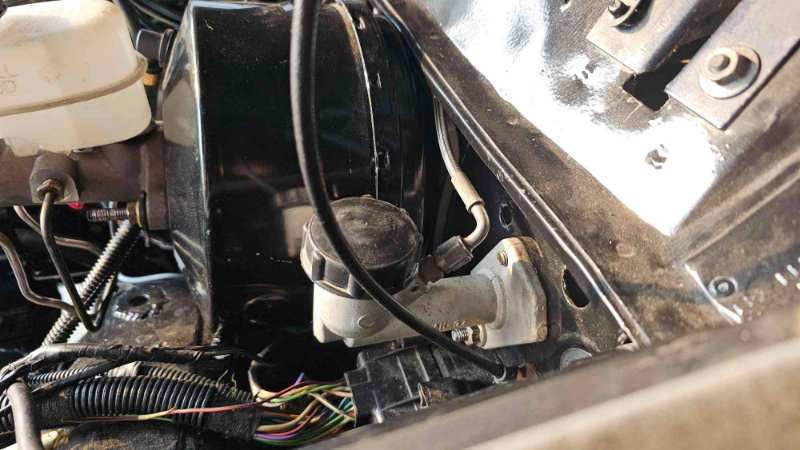
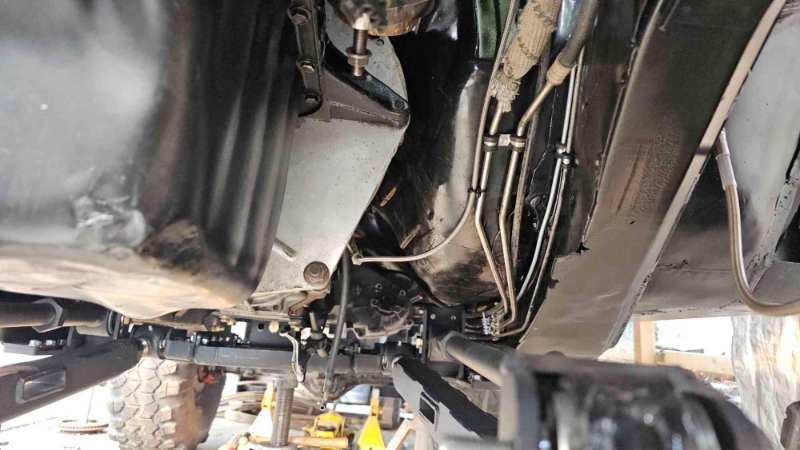
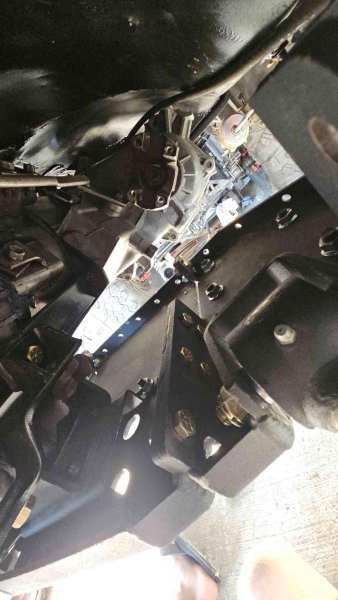
I pondered the idea of AN style braided fuel lines since the 4 link cross member was in the way of the original Found what I thought was a good deal and ordered the hose and all the fittings to go from the tank to engine, but after reading some reviews the hose that was supplied did not work with ethanol based fuel so I ended up returning it all my solution ended up being simpler and hundreds of dollars cheaper I cut the bends out of the lines that used to go around the mj specific x member brace and used a flaring tool to flare the ends, the larger diameter tubes i needed to heat with a torch before they would accept being flared don't mind the cardboard shim on the filter lmao used the fancy high pressure hose clamps on either end to not mar the fuel line and just like that there was fuel to the rails one of the quick disconnect fittings by the engine mount started leaking and spraying fuel onto the exhaust manifold, I have never had it apart, so sometime before I purchased the truck a PO had the lines apart and only put one of two O-rings on the line. I consider myself lucky it never leaked prior over the years I beat on it, would have set the truck on fire Needless to say all the lines O-rings had then been replaced it was time to install the the rest of the drivetrain, I used a bunch of ratchet straps and slowly raised my trans/doubler/tcase assy high enough that i could get the screw jacks underneath of it Never test fit with the front output yolk, so i was stressing a bit but it did clear and with a bit of a shove it slid right in preferred fluids of choice, black jug for tcases and white for transmission been running my jeeps like this for years and it makes it shift like butter installed the clutch master/slave assy with an advanced adapters SS braided line all the fluid lines clamped up out of the way going to have to get creative and make a driveshaft with a steady bearing for the front the 4 link conflicts with the driveshaft since the output is so far back
-
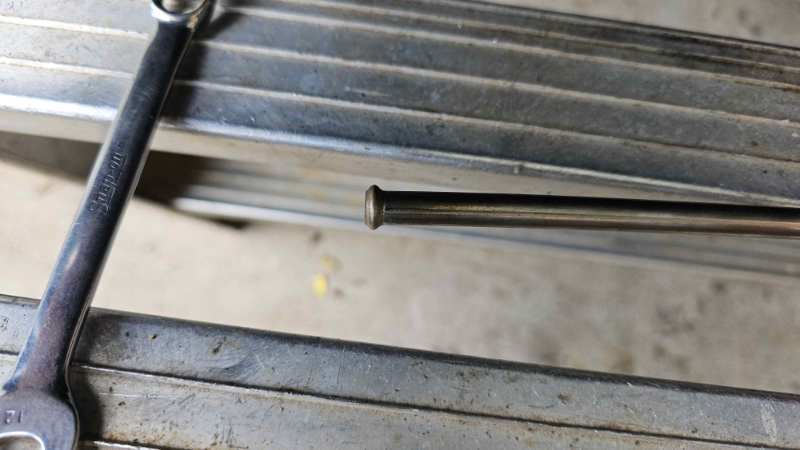
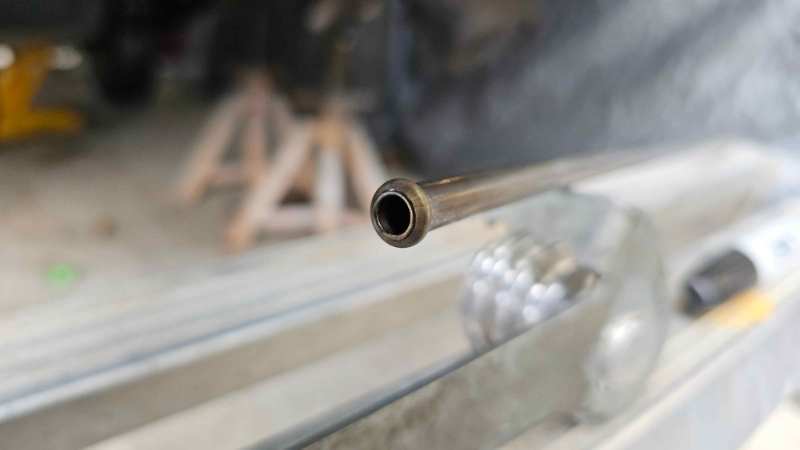
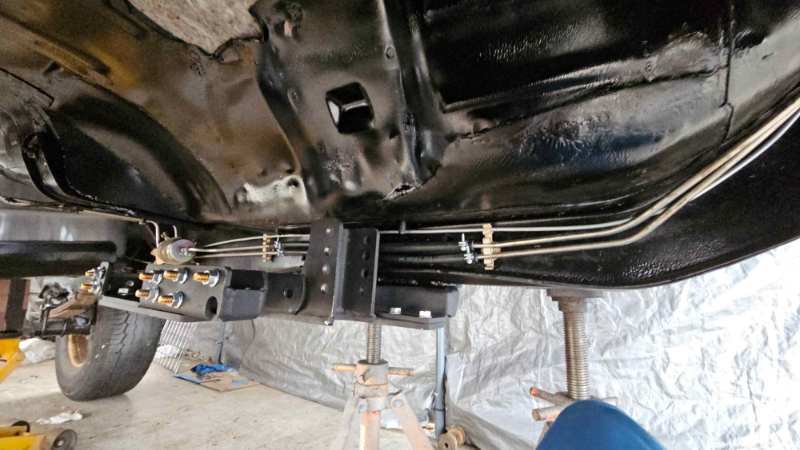
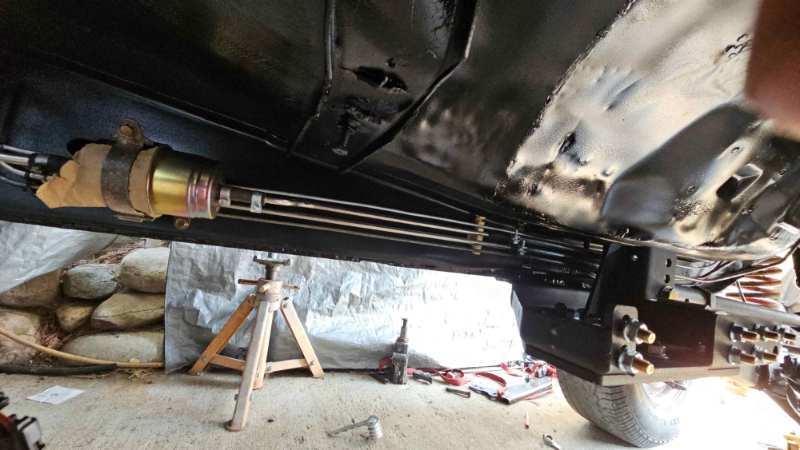
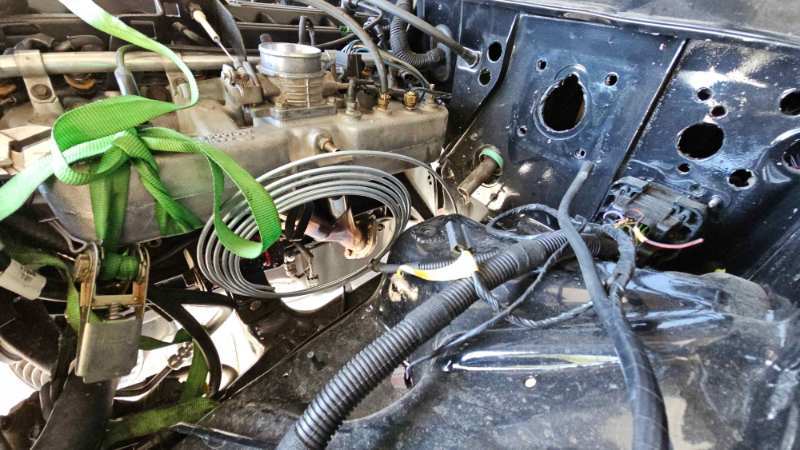
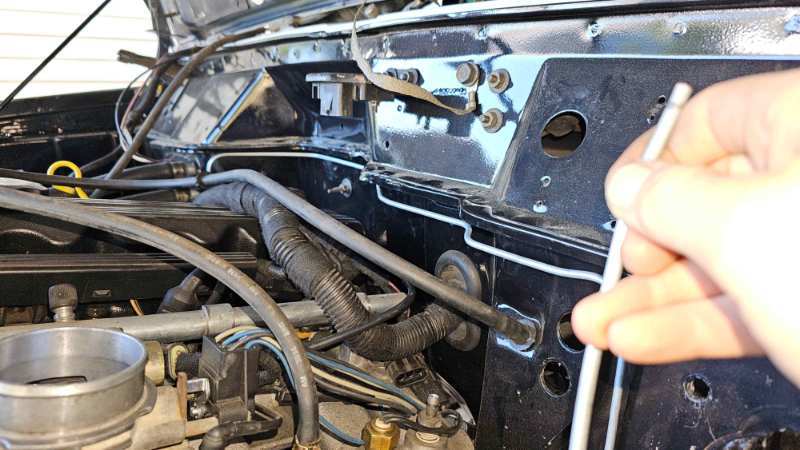
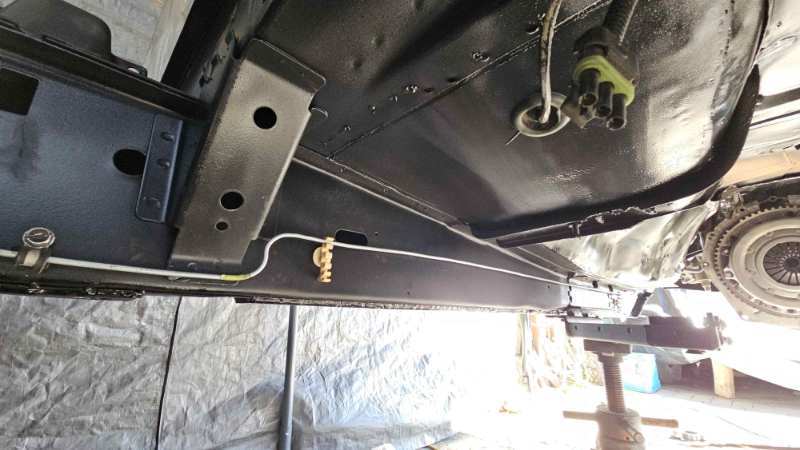
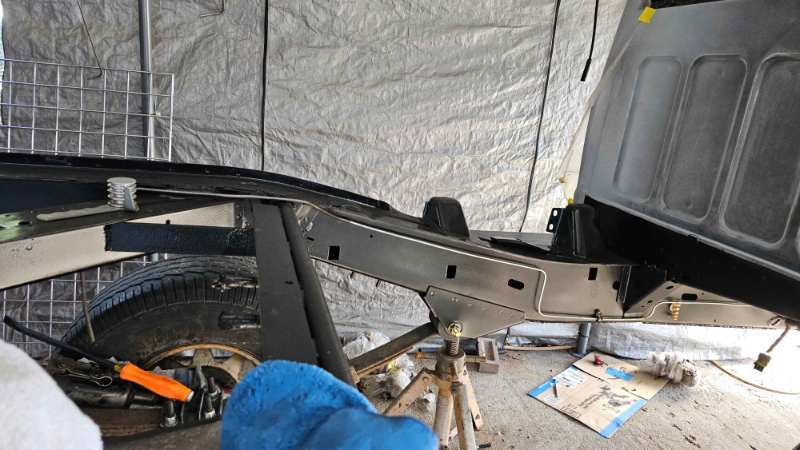
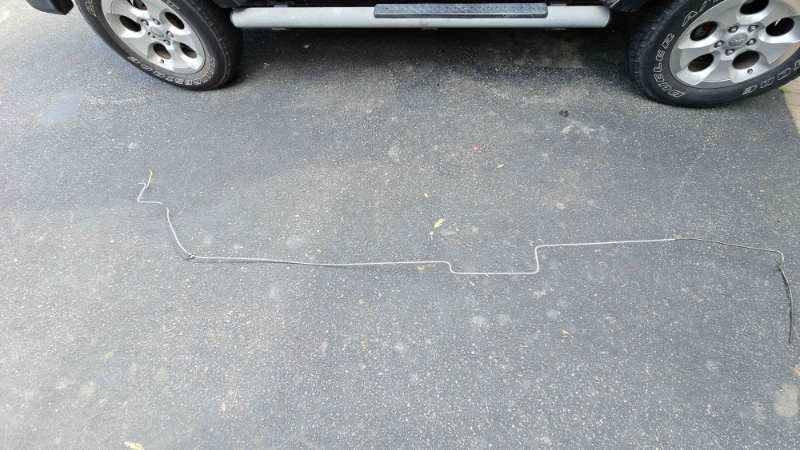
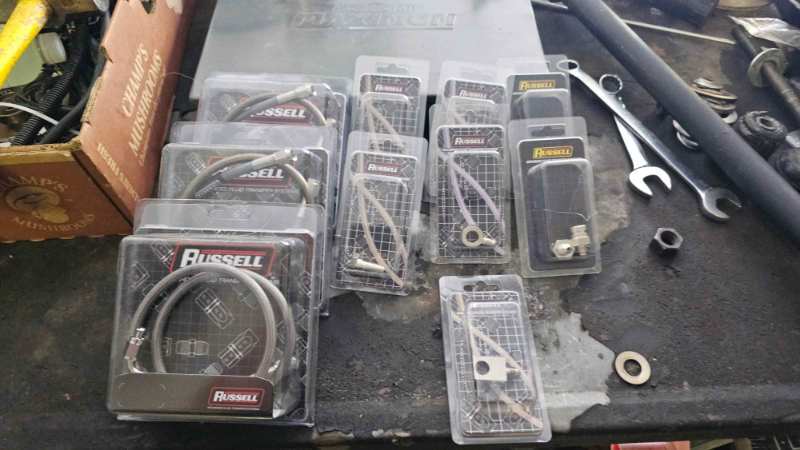
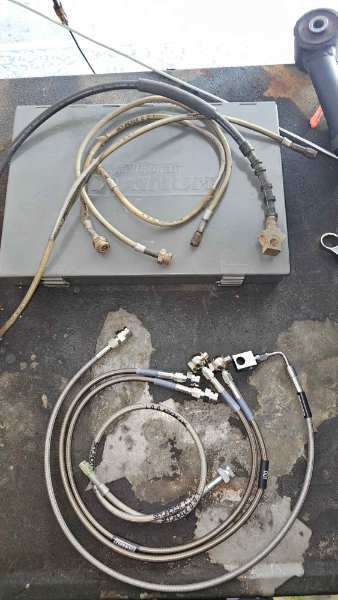
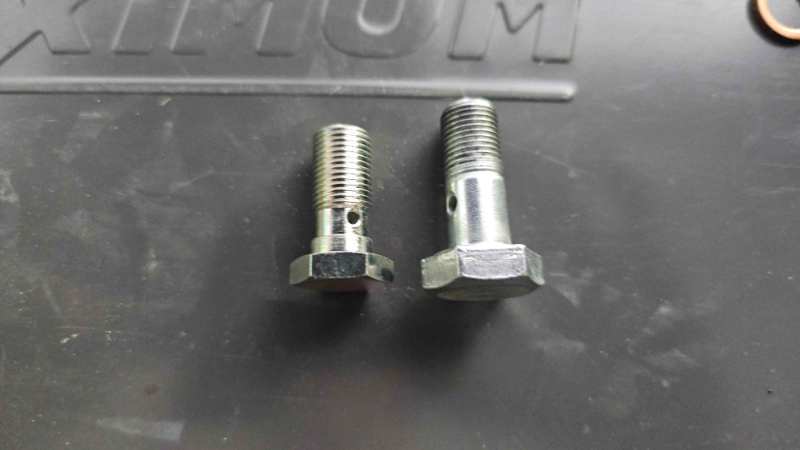
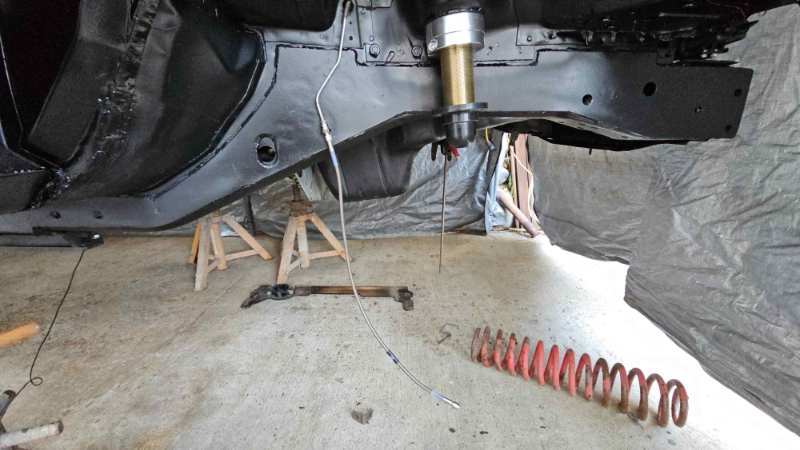
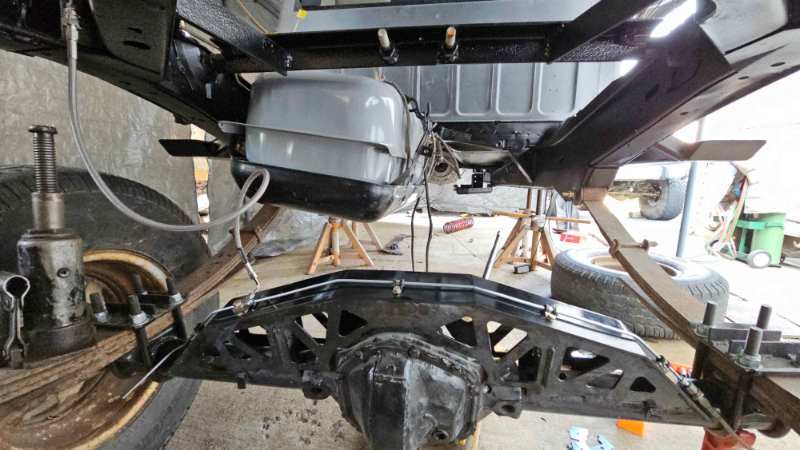
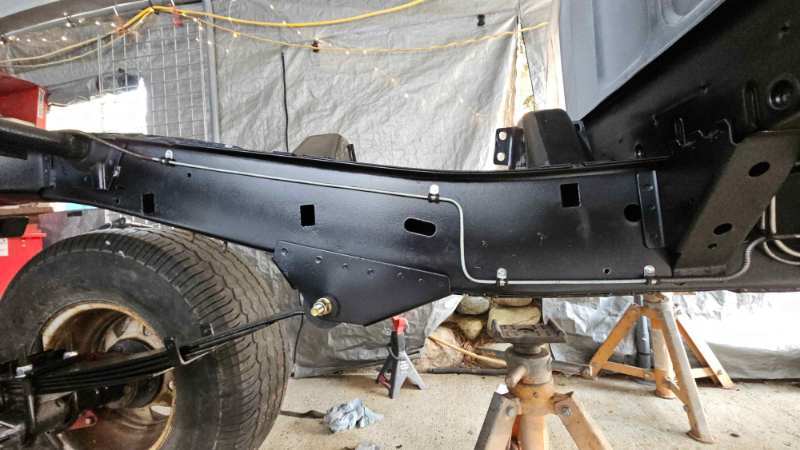
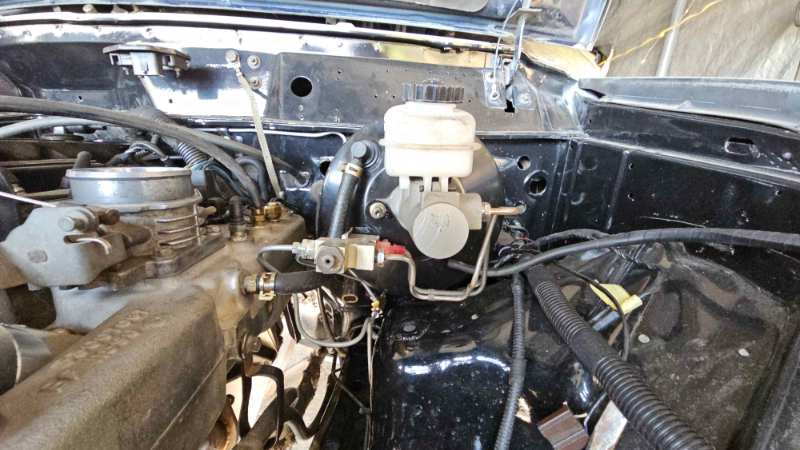
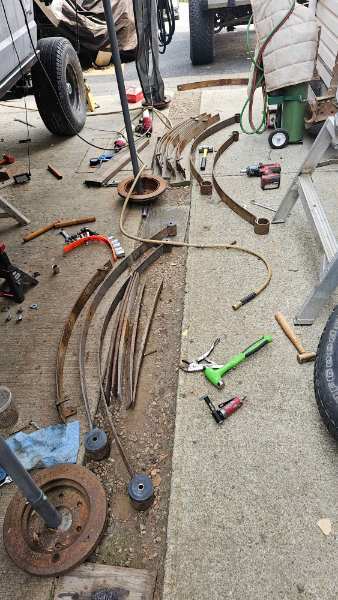
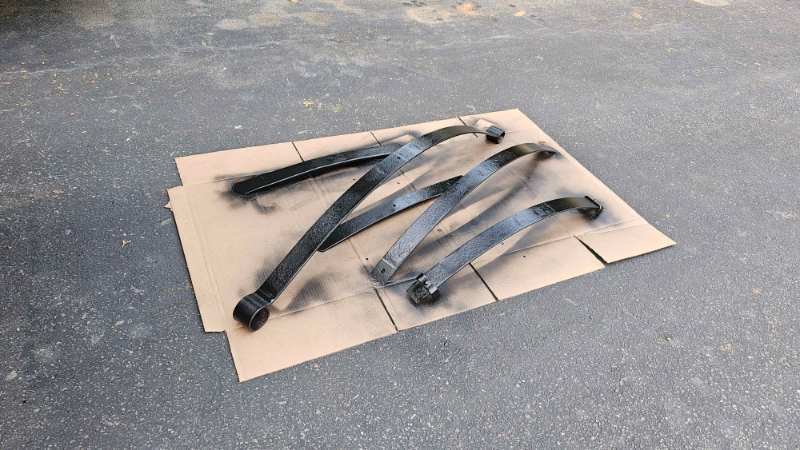
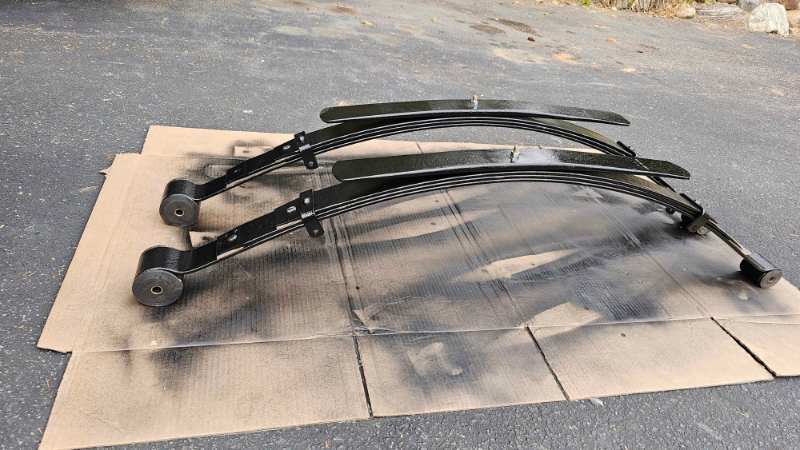
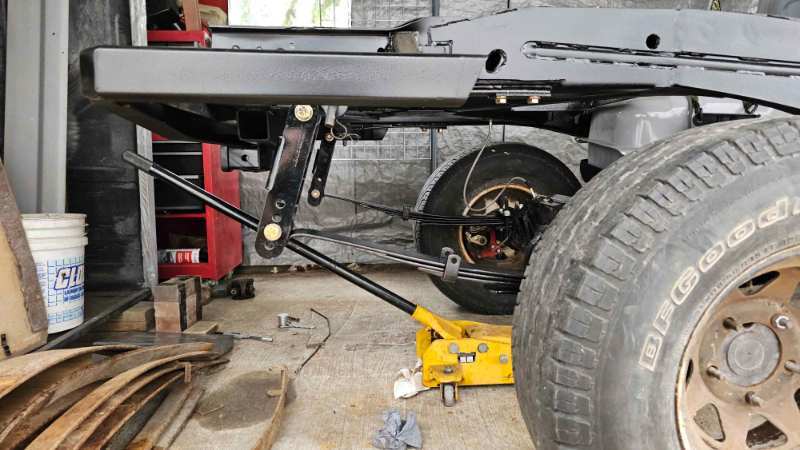
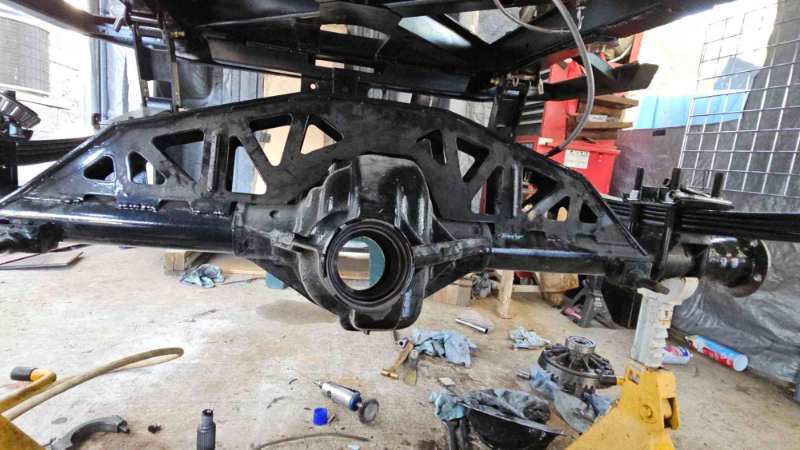
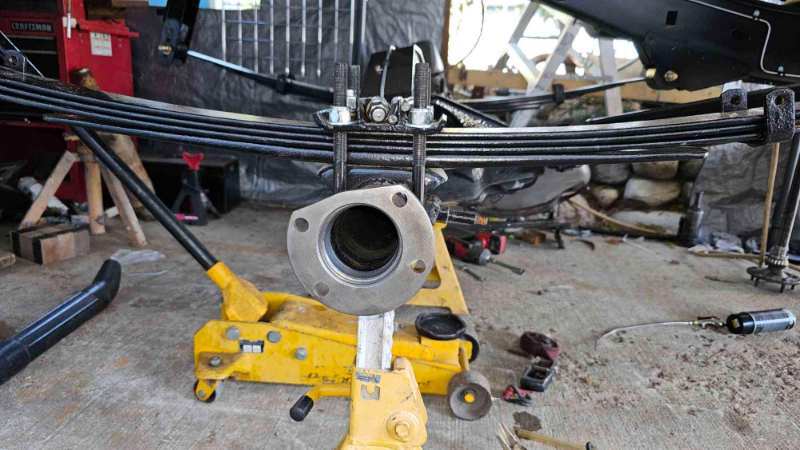
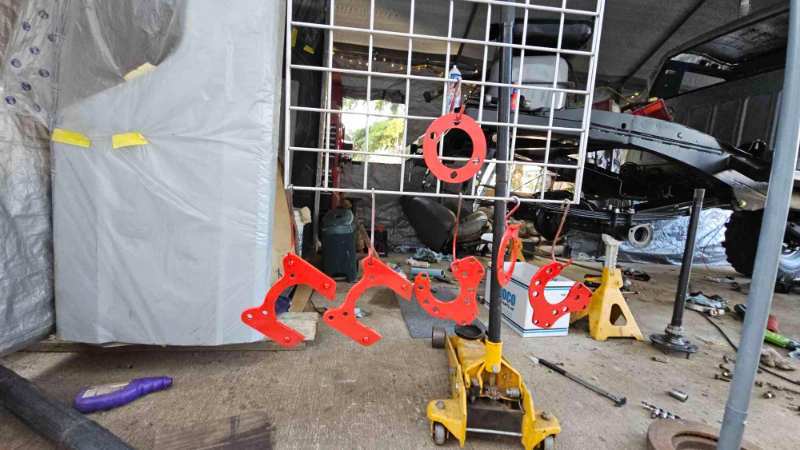
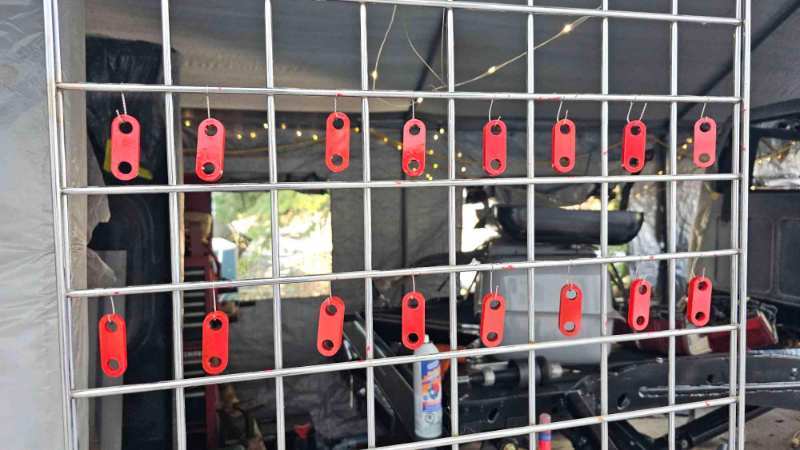
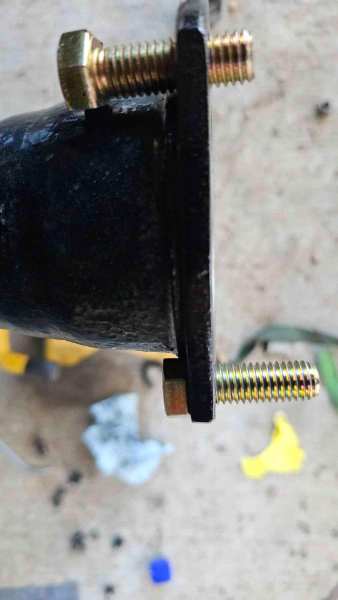
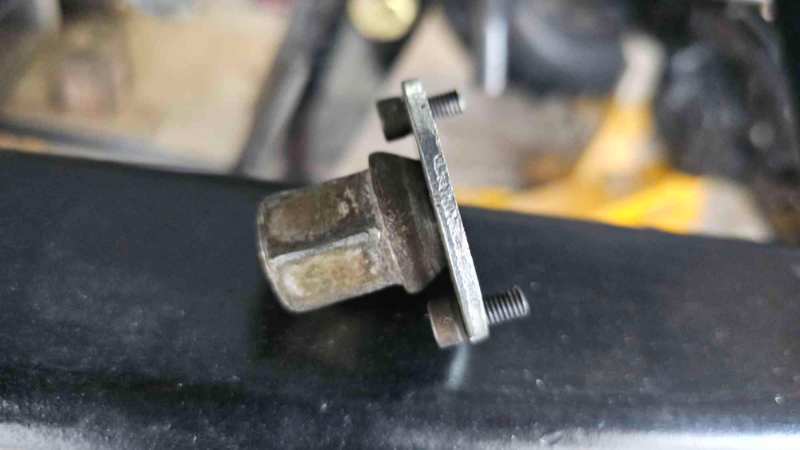
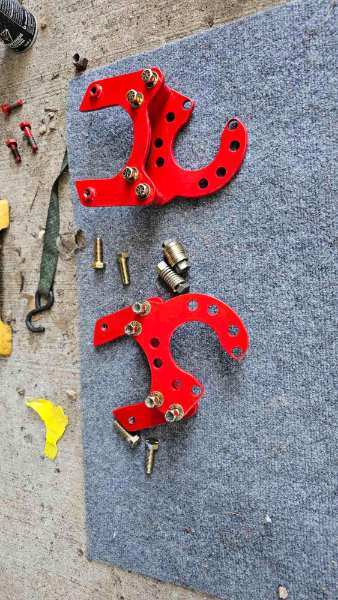
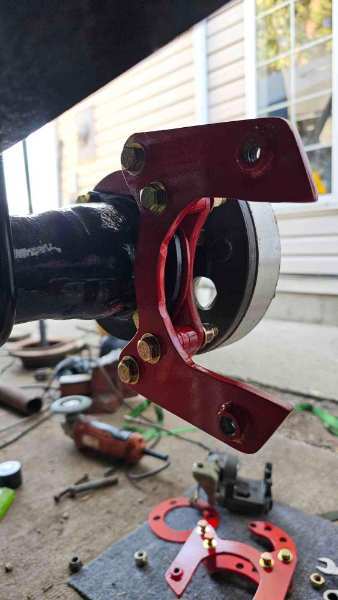
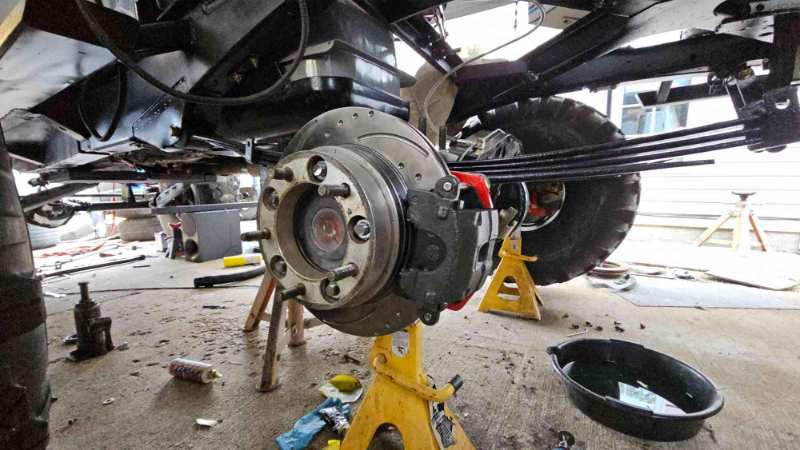
They aren't that bad, just pull the retaining clips and the pins slide out Well it seems like its been a long time since posting picked up a roll of brake line and started bending full length line from master to rear axle went with Stainless braided lines from Russel's for the flex lines Russel banjo bolt on left vs what came with my calipers flex lines installed and rear lines ran ontop of my truss used adel clamps to secure it all may have to relocate the hard lines from the master/distribution block because i plan on brining the shocks into the engine bay for a bit more up travel, may be able to get away with putting the shock mounts lower on the axle I ended up having a cracked leaf so I stripped all the packs apart and swapped them around till i had two "good" sets then cleaned them up, painted and put bunch of neverseize between the plastic liners -removed the AAL's so they are alot softer and flex alot easier afterwards I resealed the rear diff and cleaned up the disc brake brackets more new hardware grinding flats so they fit the axle flange DIY caliper winder
-
as the title says wondering about non gas charged hydraulic shocks in the front, going away from stud top mount shocks because I can't find any with 15"-16" of travel. found a set that are long enough without going to coil overs, but they are non gas charged hydraulic shocks. anyone with with experience running non gas charged hydraulic shocks in the front? unsure if stock shocks come with a charge in the front or not. I have had the current set for so long and they have a charge in them. am I over thinking things, and they will be fine. Or should there be a gas charge. if so, how come?
-
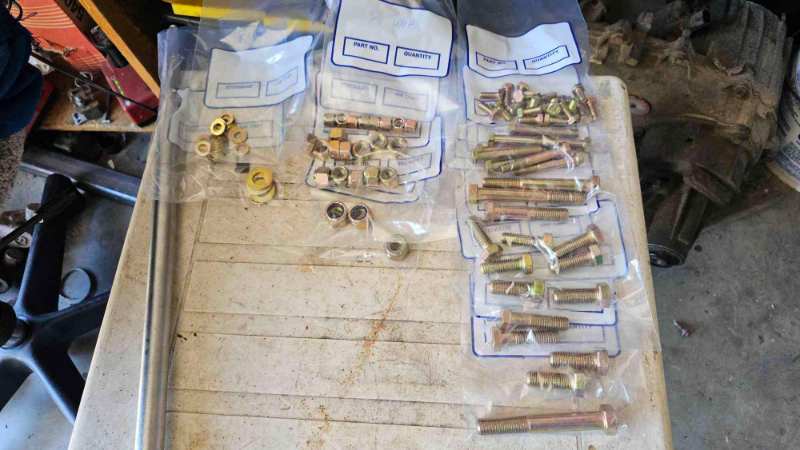
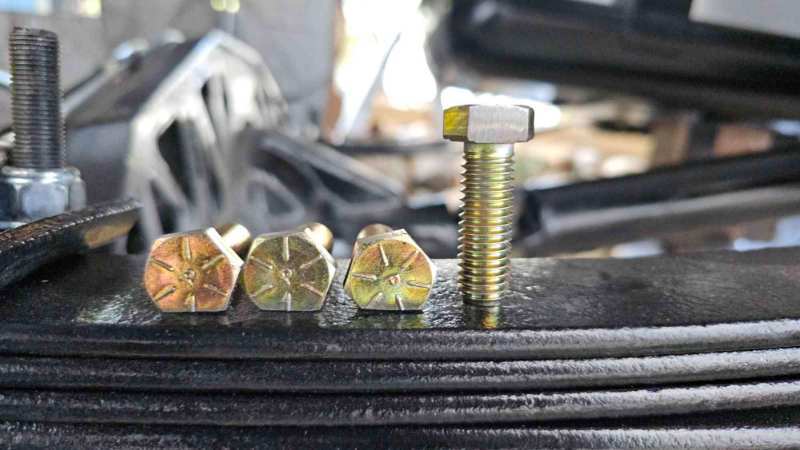
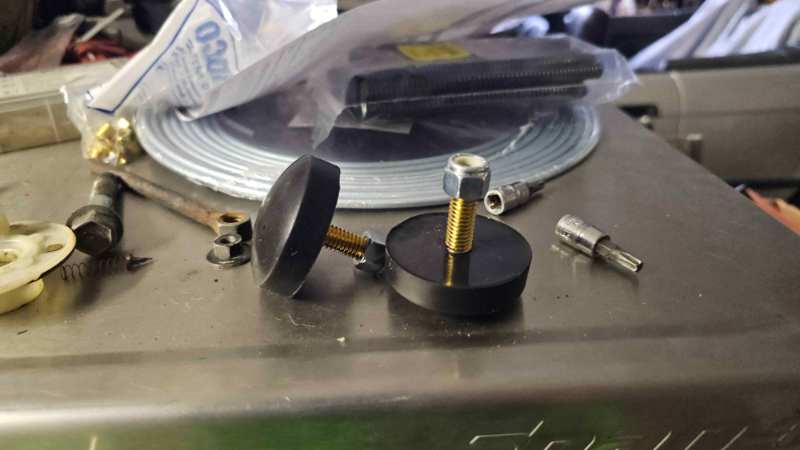
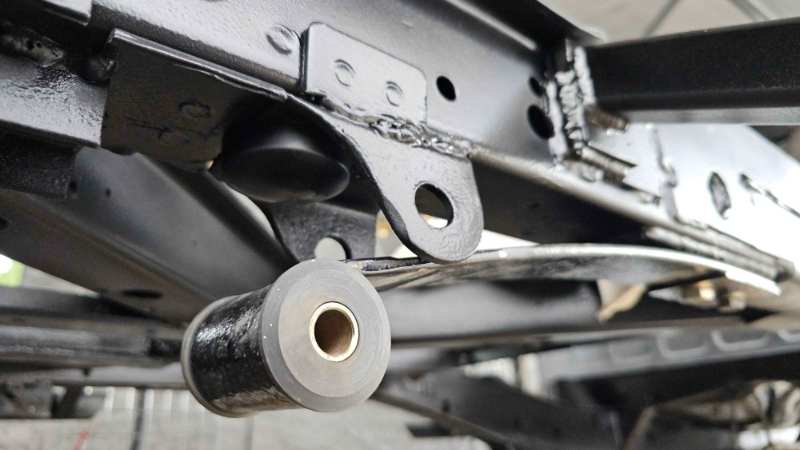
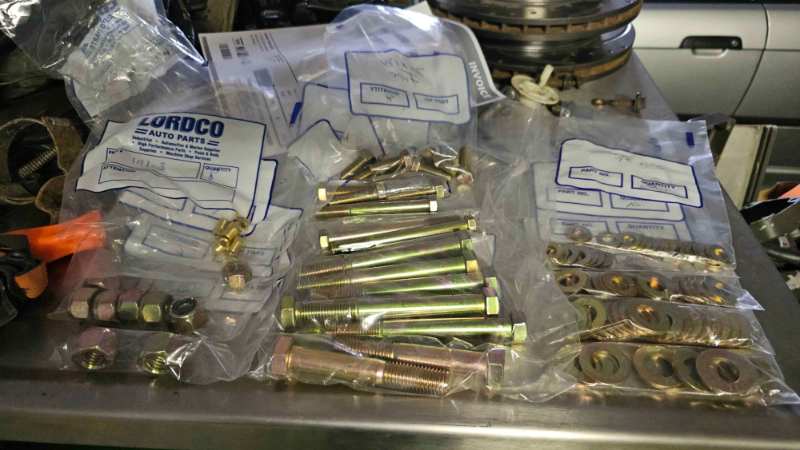
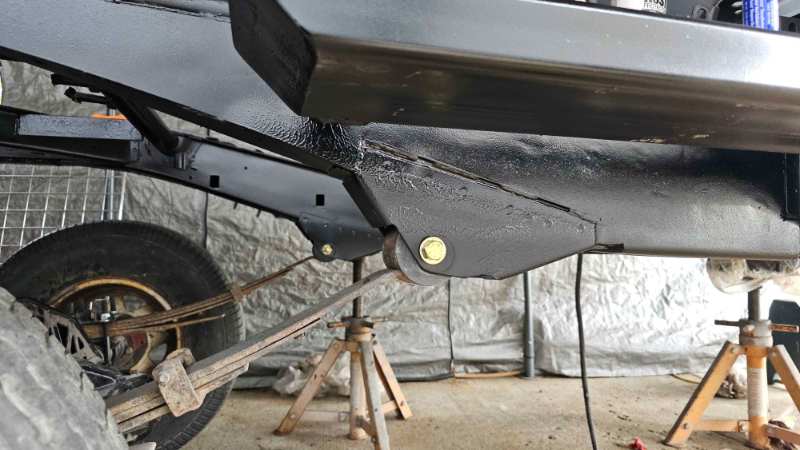
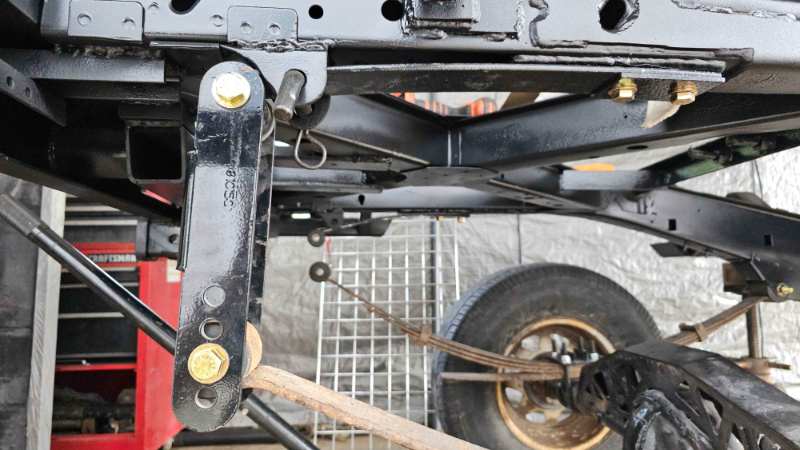
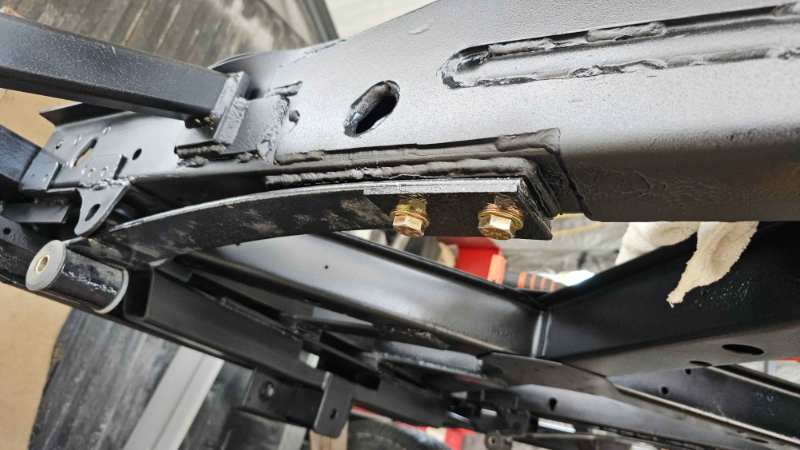
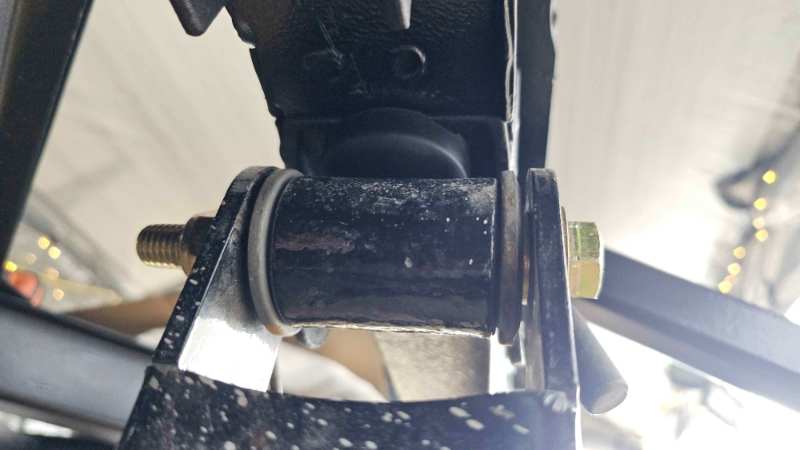
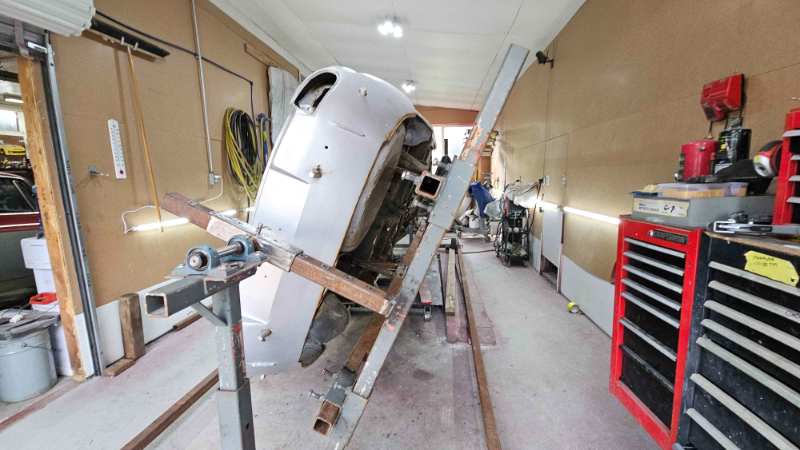
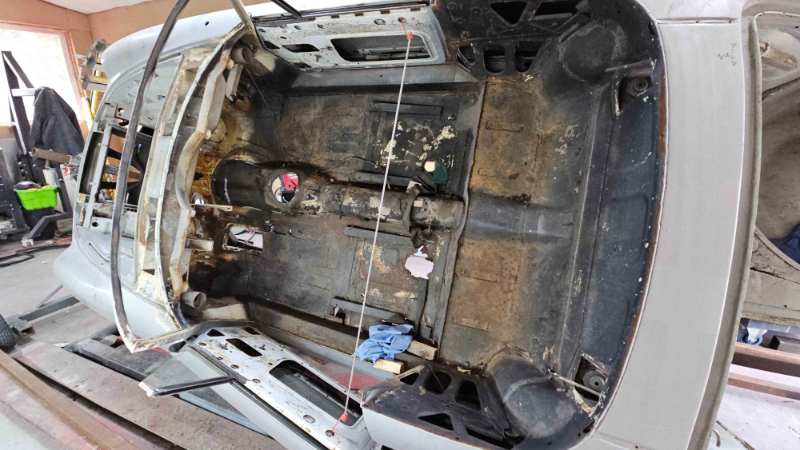
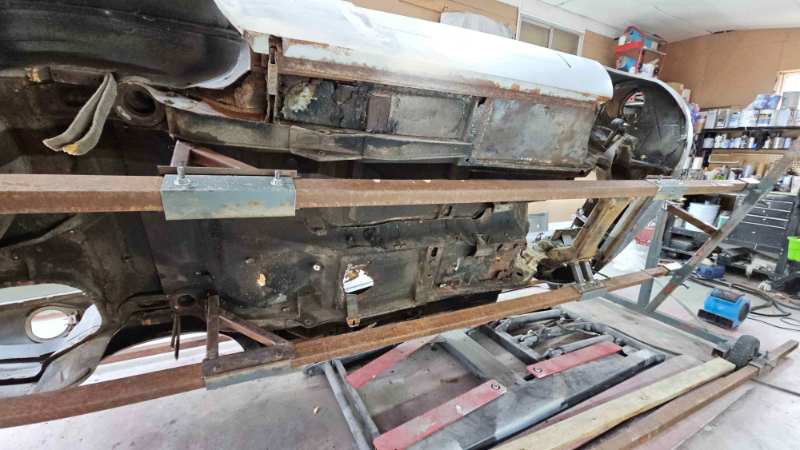
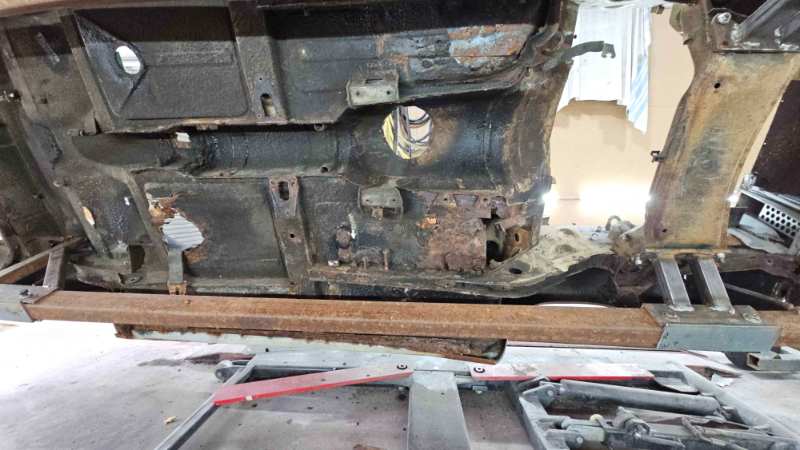
ordered some new bumpstops for the ol' elliptical setup went down to the local fastener store and picked up majority of the hardware I need to start the reassembly alot of the mods in the rear are almost as old as I am, including the elliptical suspension. looking at the quality of welds and that they have lasted for 30 years makes me think they can't be that bad lmao so with that being said, I started adding the new hardware. I even spaced out either side of the rear shackles with washers this go around instead of just giving them the ugga duggas until they conformed. speaking of rubberized undercoat, I ended up going over to help my neighbor switch his rotisserie around on the new car they have in the shop to restore. @watchamakalit this is exactly why the internet says not to use rubberized. especially if its sprayed overtop of rust. pictures don't do it justice, the thing is rotten and plagued with halfassed repairs. who ever "restored" it previously scabbed some patch panels on and just put lipstick on the pig. they are bringing it down to the local sandblasting outfit, I think there will just be the outer skins remaining afterwards
-
man this thing is sick! great work!
-
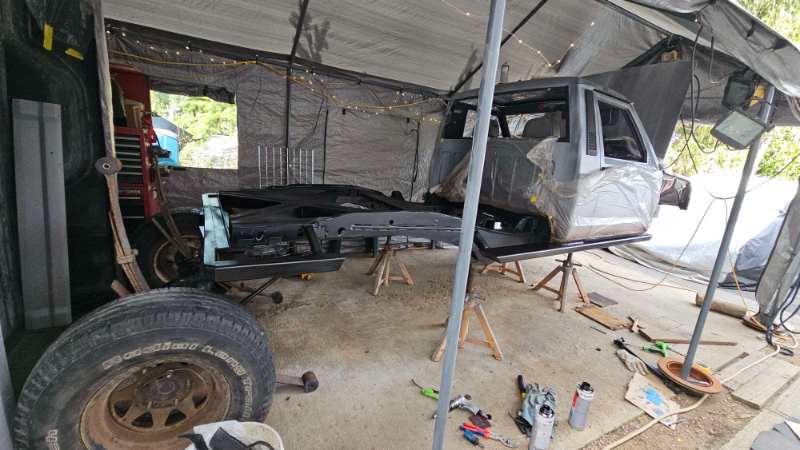
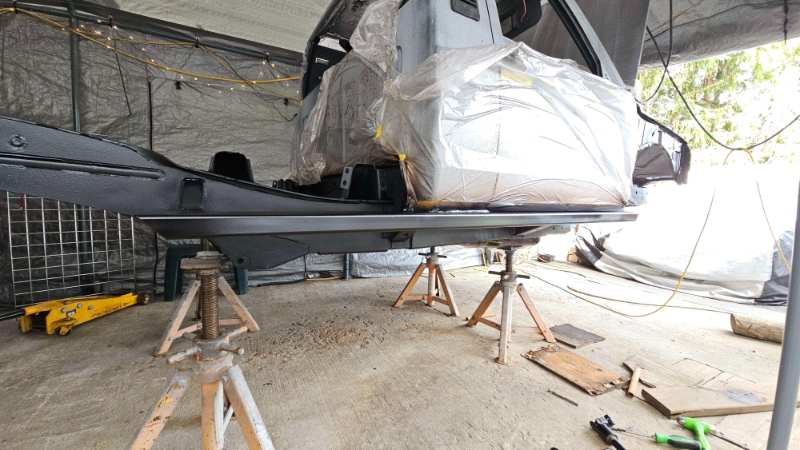
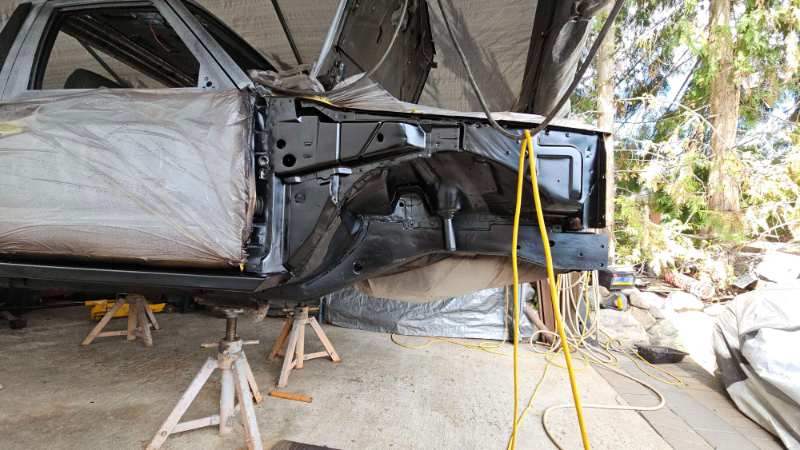
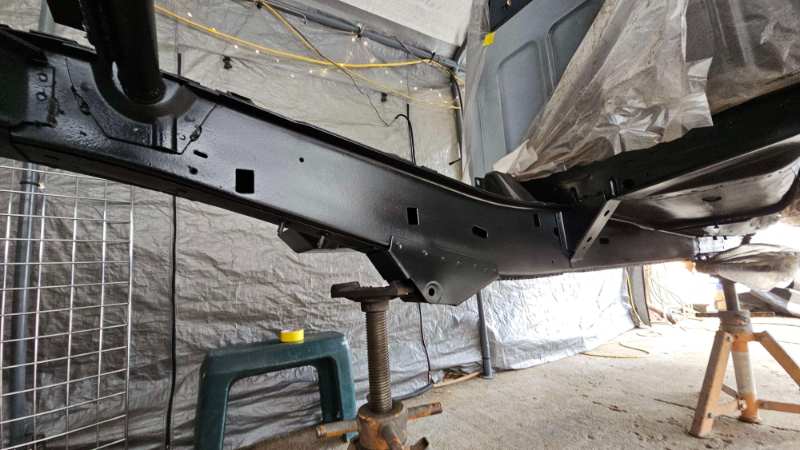
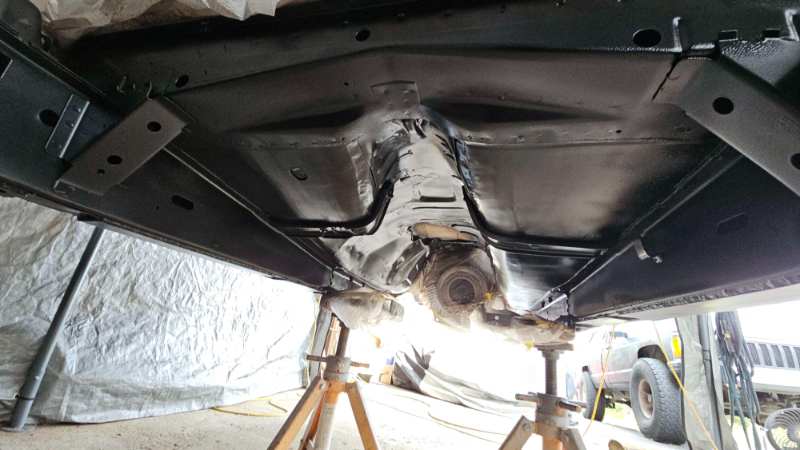
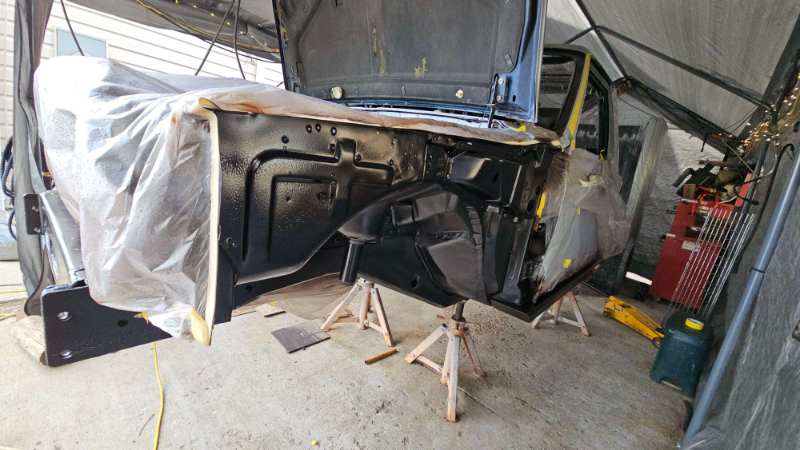
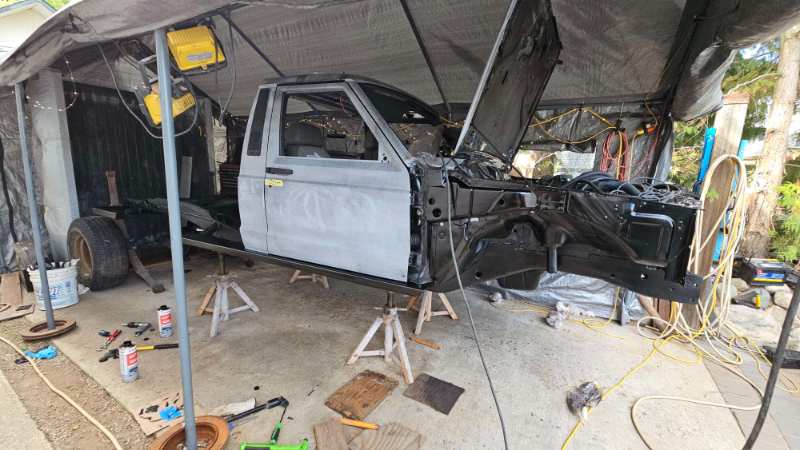
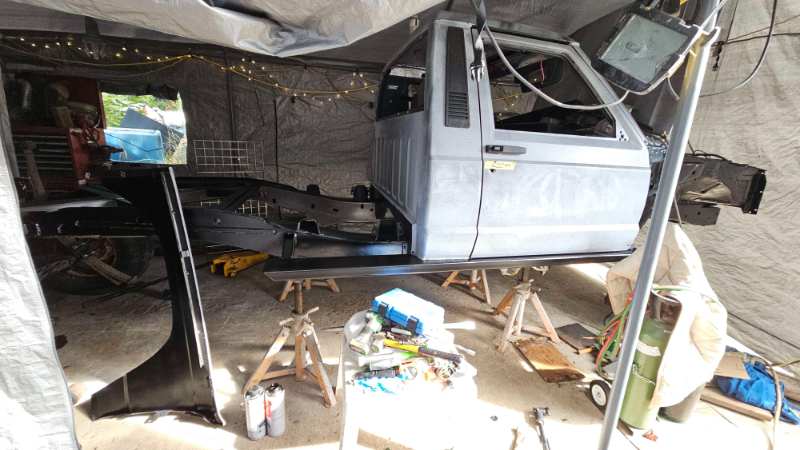
after drilling a 1.5" hole for the fuel sender wiring in the drivers floorpan I masked it all off, and went to town. it went on like paint. after reading the spreadsheet it called 500 microns/0.5mm. so that's what it ended up getting. some ripples from being too close or not properly fanning the spray but overall pleased with the results. did not do the top of the rear "frame". still contemplating it. but I don't see the need as the box covers it and there shouldn't be any high velocity stones making contact with its surface. did the sliders and rear bumper as well because why not, it is non-paintable so I can always hit it with some gun wash and it will come right off if I ever want to touch up the sliders/bumper with some rattle can after rubbing on rocks and trees. and all unmasked, did the inside of the fenders as well since I am not running any inner wheel well liners. (they tend to just get torn off when a big stick/log works its way though the wheel well anyways) wish I could figure out how to get the site to not resize the pictures to the size of a large tumbnail since I'm no where near the max upload limit per post
-
now some people may not agree with what I am about to say. every ones experience is different. it depends on your location (rust belt, living next to bodies of salt water like oceans) road conditions (if they are heavily salted) undercoat is a very controversial topic. depending on where you read online its either a yay or nay. I believe there are a few factors that ultimately dictate the overall outcome. condition of the vehicle, if its brand new. Or if it is already seen road use/rusted/dirt salt trapped in it. the composition of the undercoat itself ie. oil based, bitumen (asphalt) or rubberized the prep work (removing all grease, salts, debris ect) or lack of prep oil seems to be the go to nowadays because it extremely easy to apply with very little to zero prep and as you know oil repels water and blocks out any oxygen (aka oxidation) but it too has its drawbacks. if not properly maintained ie. washing your vehicle regularly, and not just the exterior paint, underneath as well. it can build up dust and salt just as easily since it creates a sticky surface. when the dust builds up that in turn wicks in moisture. as long as you are diligent and do thorough job of cleaning it there shouldn't be an issue. granted you need to annually re apply the oil. if you use detergents while washing it will overtime wash away the coating rubberized is 100% a no go, as it generally bubbles and creates air pockets during the application, and overtime it shrinks and cracks causes it to debond from the surface. Allowing moisture, salts, dirt ect in causing this state of rapid decay seen on the internet. Bitumen depending on the manufacturer and additives that compose it (the type I went with) isn't perfect either but doesn't shrink/crack and if applied in the correct thickness does a great job. every comanche I have owned/parted out (10 of them) has had the bitumen underseal from factory. now I am not saying that It cannot cause rot but if applied correctly then it does its intended job. granted if I lived in an area that uses salt has high humidity and bodies of salt water. it probably would be a completely different scenario Wurth underbody sealant (german made product) AFAIK is used on all the Porsches on the road #1 issue I see causing adverse affects is application thickness. A coating of ~1-2 mm MAX is adequate and does its intended purpose. any more than that and it is too thick. the misconception is thinking you want to drown the metal in it, in this circumstance less is more protection and more is less protection another misconception is that you can annually add another layer of bitumen underseal, this is a big no. you are effectively sealing in a years worth of road grime, dirt and hidden moisture. if there is any debonding chips ect it will be sealed in. causing the rot to start. the proper way which you will not find suggested online is to remove ALL old underseal, address any areas with the converter of your choice. and start fresh with that 1-2 mm coating. adding layer after layer is just negligent and promotes instead of inhibits. shops don't care and will gladly do it because they are getting paid and its not their vehicle. most important thing you can do is clean your vehicle regularly especially in the rustbelt/high salt areas. as stated earlier not just the visible body panels but ensure you wash underneath in all the nooks and crannies that can house dirt and salt. if you are diligent and take the time to clean your vehicle, it will last a very long time. its just like someone who brushes and flosses daily versus someone with poor oral hygiene who doesn't take the time to brush and floss. ones going to have cavities/missing teeth and the other one generally won't unless they have some underlying health/genetic issues. or another good example if your a hunter/marksman and shoot corrosive ammo you best bet you are meticulously cleaning everything after an outing/day at the range otherwise your barrel ect is going to start to rot going out to my base model 2wd comanche (which I 4wd ax-15 swapped) that still has its factory undercoat. it is mint underneath. as stated previously its undercoat thickness is 1-2 mm at most. the only rust on it is from moisture trapped in the factory carpets padding in the drivers footwell from leaking window seals/lack of floor mats allowing snowy muddy boots to drain directly into the floor. also stone chips on the exterior paint that I never dealt with and allowed dirt and salt to fester without washing/reapplying paint to the bare steel for extended periods of time. sorry for the long winded explanation. but that is my take on the matter. here are some pictures of my unibody after thoroughly cleaning it with Por-15 degrease in prep of applying a 1-2 mm coating of underbody sealant. it has been professionally media blasted twice, etched and coated with Endura industrial grade epoxy
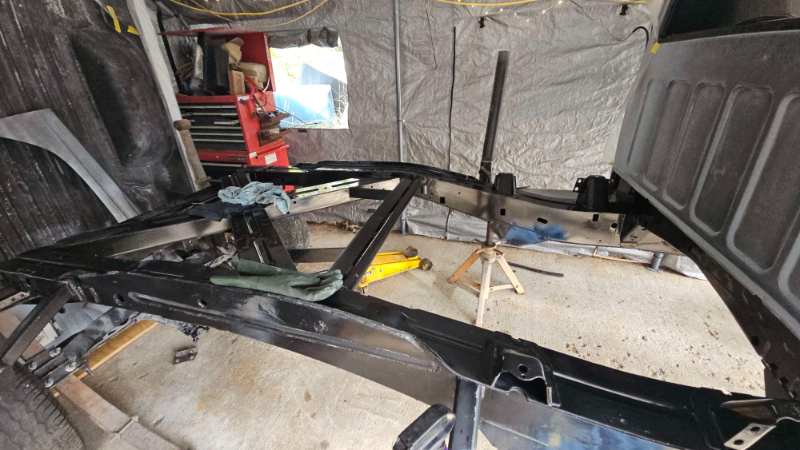
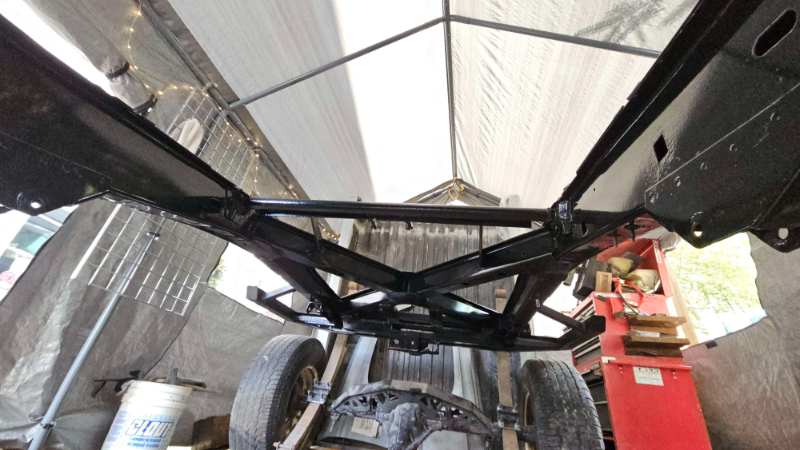
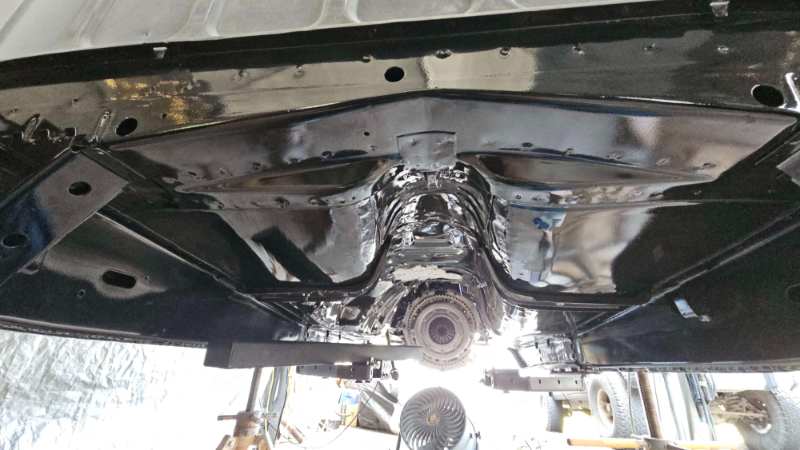
-
been looking for a deal on coil overs myself! haven't been able to decide between 14/16, doing lots of reading it online says 14 is more than enough, but in my town everyone has 46"+ tires so only 16's are on the marketplace until then I will be running my old coil springs with a sticker in the wheel well saying " I identify as a coil over"
-
for the cost of a new 6 pinion carrier it would have been just as easy to buy one, but I have alot of free time and it was a fun challenge. most tedious part was putting all the needle bearings in, which after the first two I had a pretty good rhythm. the easiest way would have been to keep the slug in the entire time and not let them fall out in the first place. took about three weeks for the grade BD threaded rod to show up, thanks to my homie who machined the carrier. his work had an account with mc master carr which actually had stock of this. no where in canada that I called had it or even knew it existed. Such a big tube for a single threaded rod! all trimmed down and installed I have a collection of gaskets from various rebuild kits so I decided to use them since the mating surface on the doubler have seen some abuse ( it may have been dropped once or twice over the years) since the studs go straight through the doubler it tends to seep fluid through them so my fix involves using copper crush washers under the nuts finally it is all together, yes it gets messy in my garage very fast lmao waiting on the undercoat my neighbor promised he was ordering (which was over a month by the way, and I ended up finding someone else in the end who was actually had a wurth account to order it, which took another two weeks) I decided to tear the into the winches. one I 100% over greased, and used an aviation grease which didn't last long, it dried right up and caused alot of drag during free spool the Warn 9000XDI it took a long time to scoop all of the dry grease out, before using solvents to clean the rest found this piled behind the pinion gear which was pushing the planets up breaking open the warn vr 8000, which has lived its entire life upside down under the box of the truck. you can tell it has been underwater once or twice it did clean up though! wire wheel and solvents and it turn out decent, not new but still useable, looks night and day better than when i cracked it open. will be getting the casings media blasted and powder coated to deal with the aluminum corrosion prior to reassembly ordered a new horn button/cap retainer assembly. the spring loaded pin did not fit so I am wondering if I put the non tilt turn signal cam in. so I will have to dig a little deeper into that or figure out something else to get it to work the previous one had a wire soldered onto the cap itself and for the life of me I can't find any of the spring loaded bits from the three steering columns I took apart my brake proportioning valve (left) vs stock (right) no load sensing valve required in the rear and finally! the day has come, the undercoat arrived so time to strip the truck down and rip the axles out to start prepping the paint for undercoat more to come, will scrub everything down, undercoat and then work on brake/fuel lines. also, A-Man thank you for taking interest in my build. there's only one other person out the twelve years of having this thread who has beat you in posts and that is Pete himself. You Pete and and Neohic have proven that there is actual interest in the stuff i post. so thank you again! here is a pic of a cj-3a my friend is finishing for a customer, which i had the pleasure of seeing while gearing some axles for his own rig
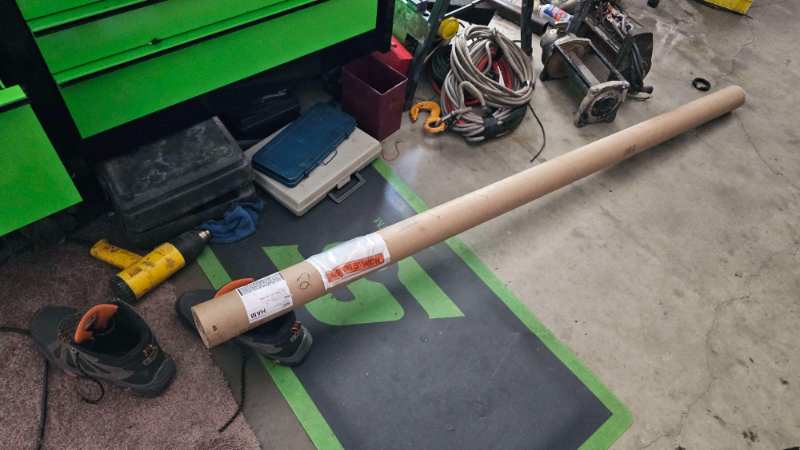
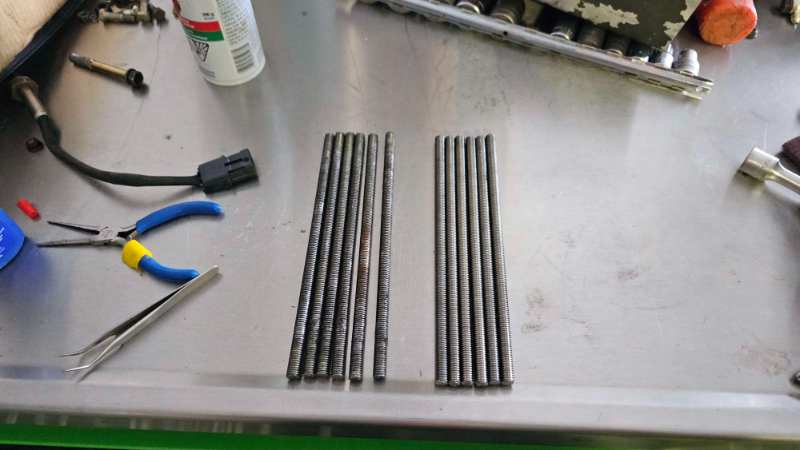
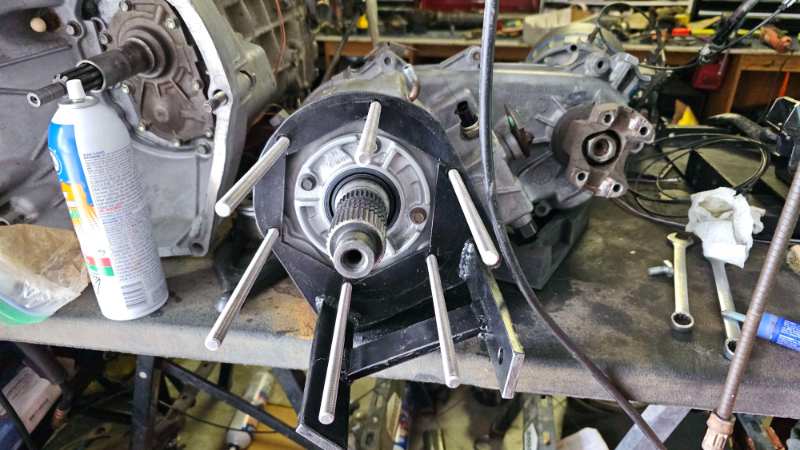
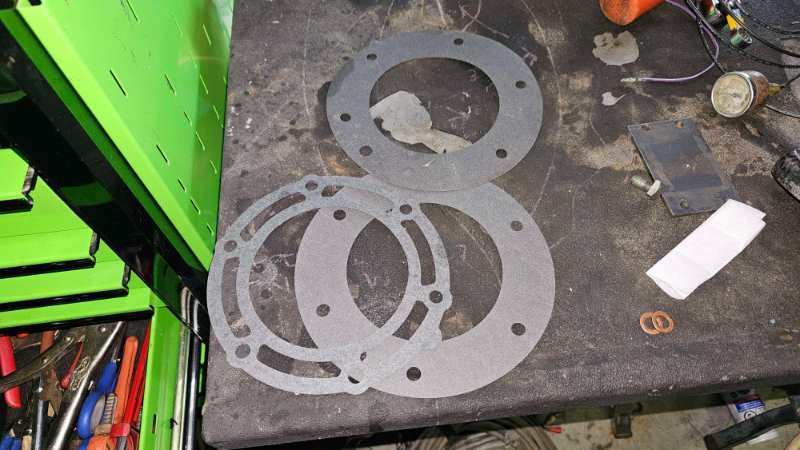
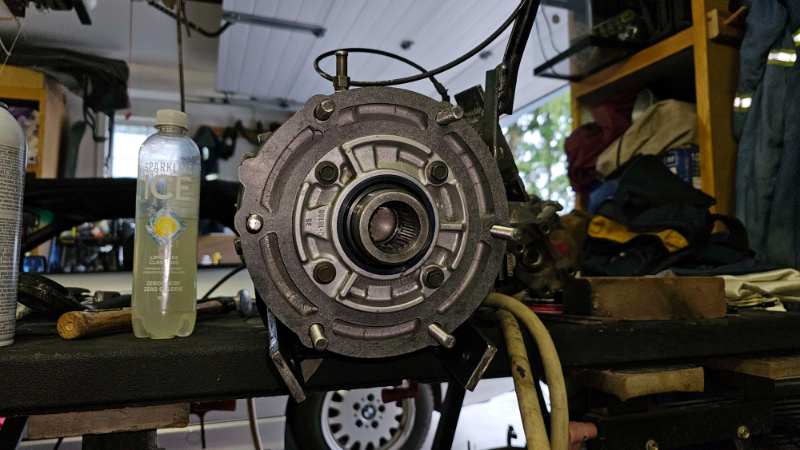
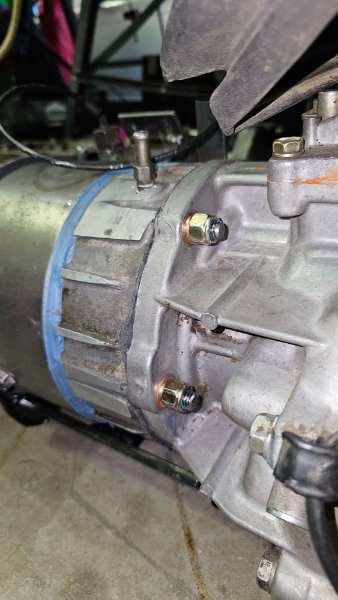
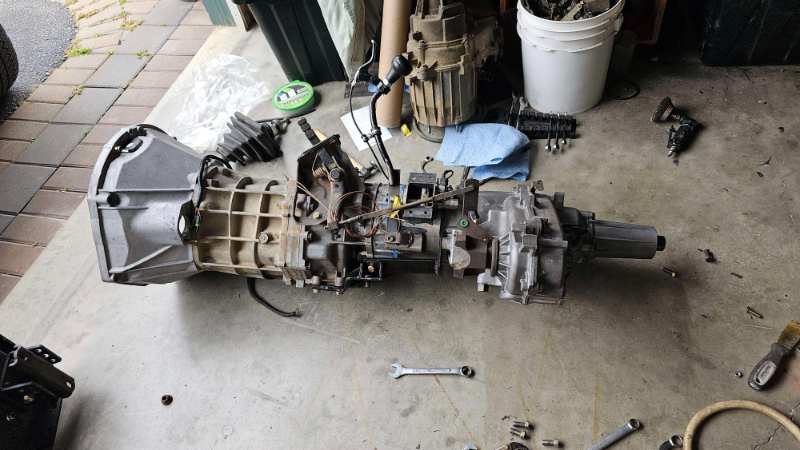
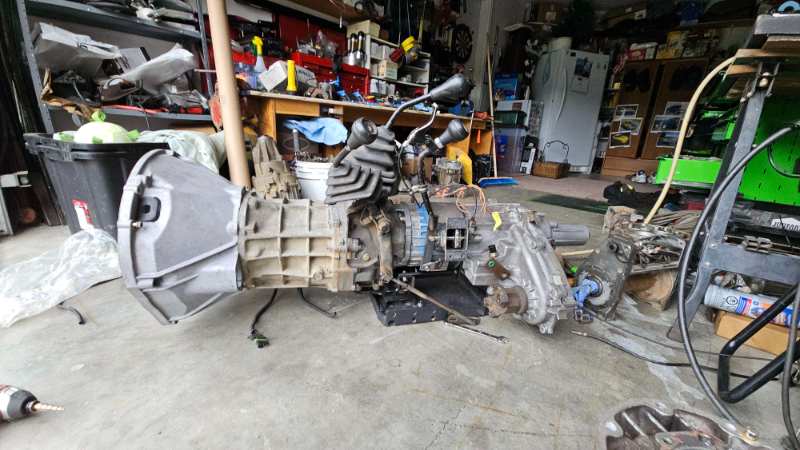
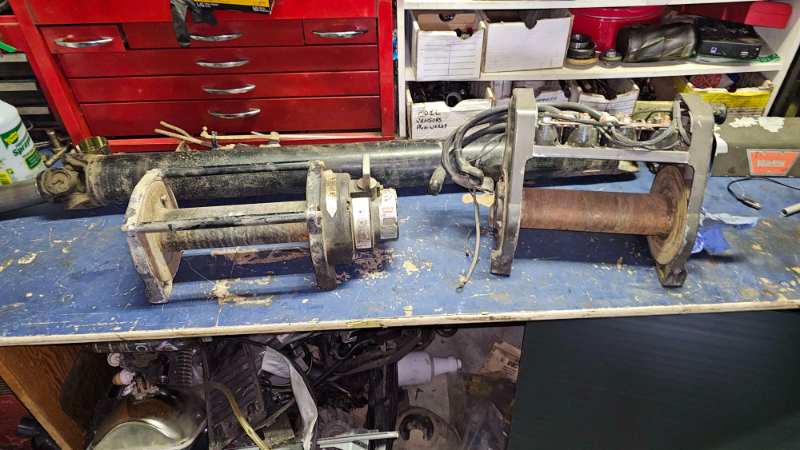
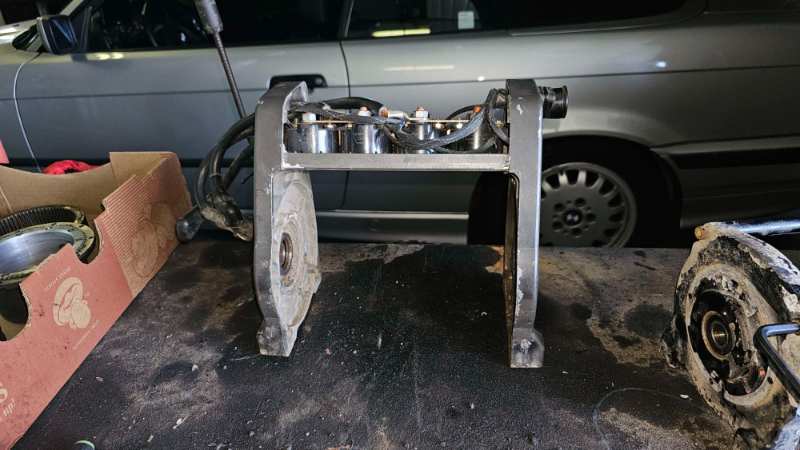
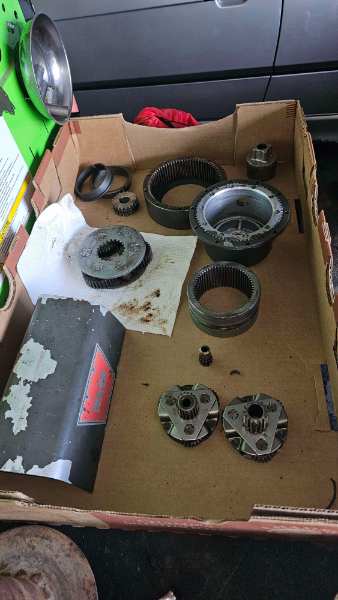
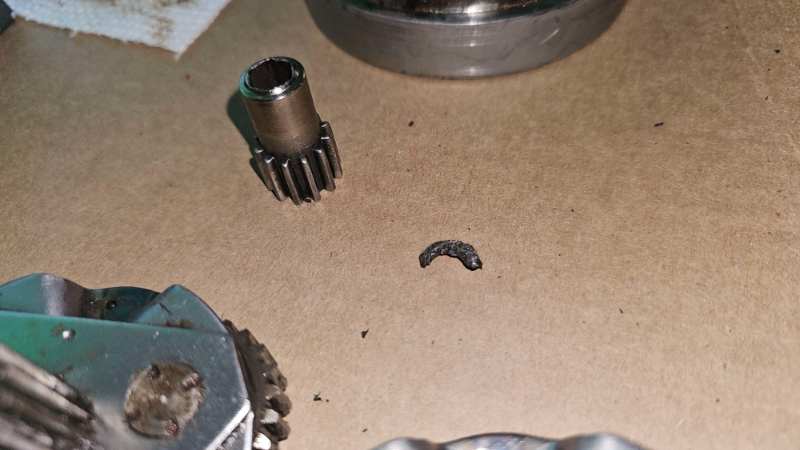
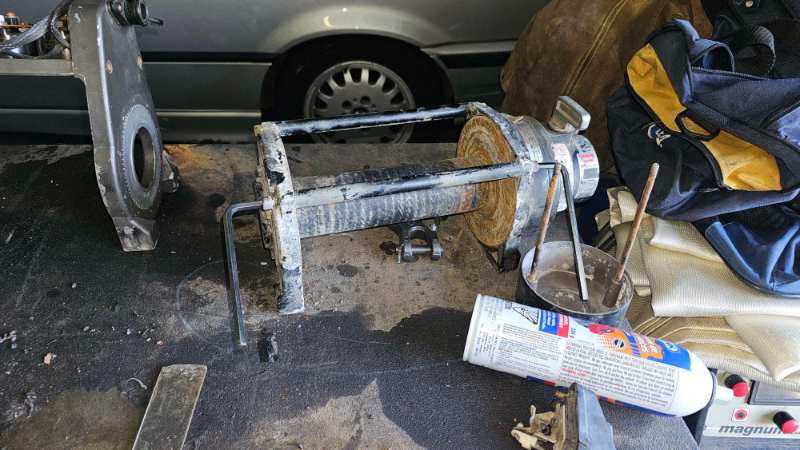
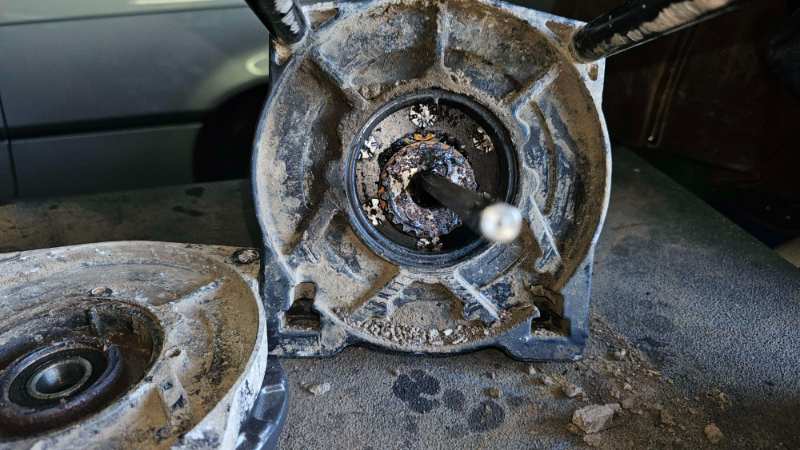
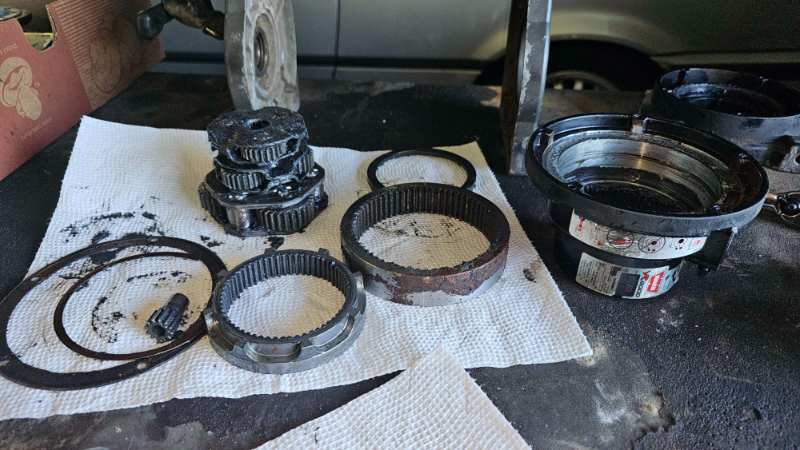
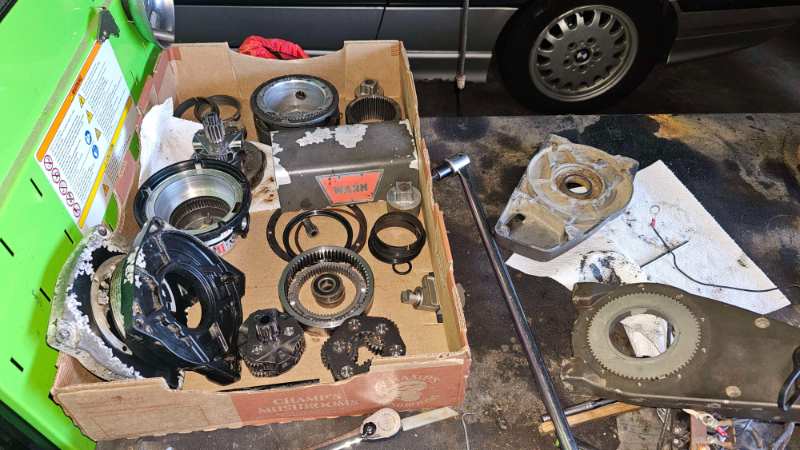
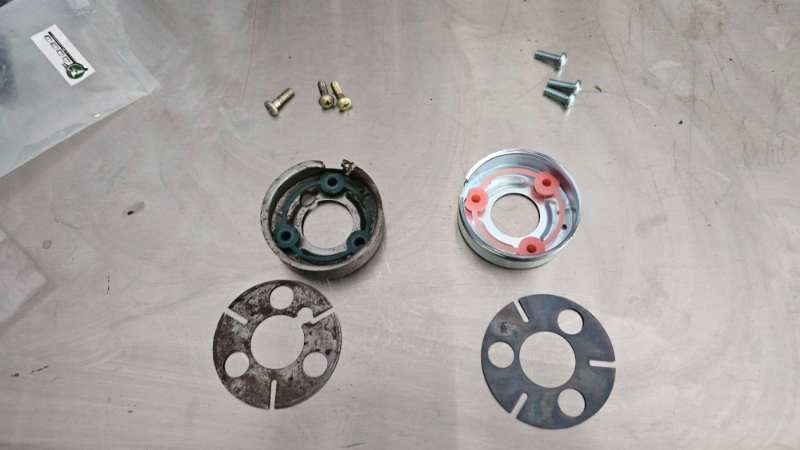
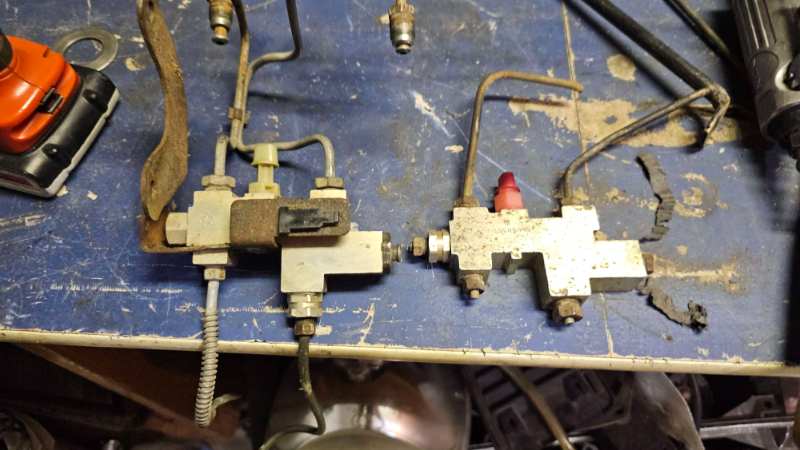
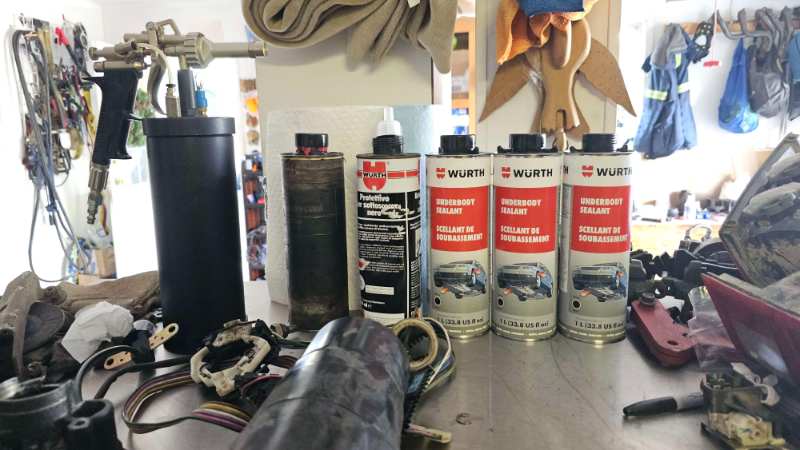
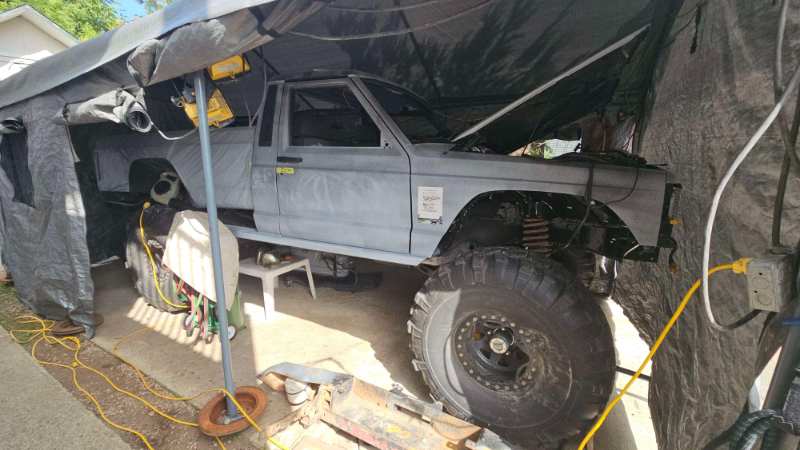
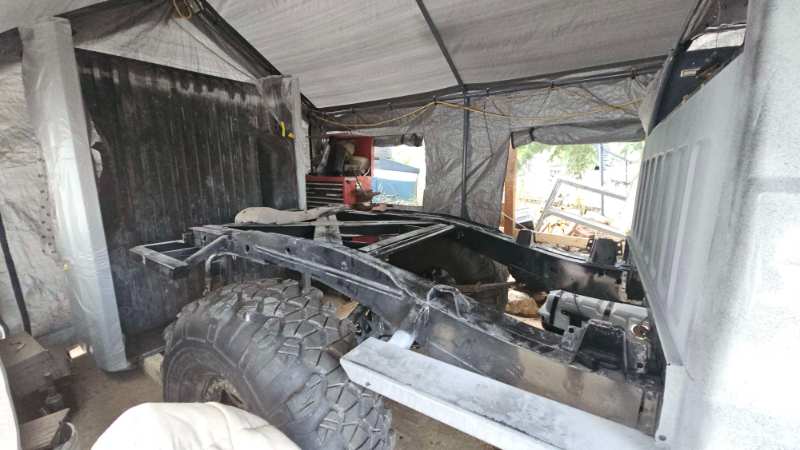
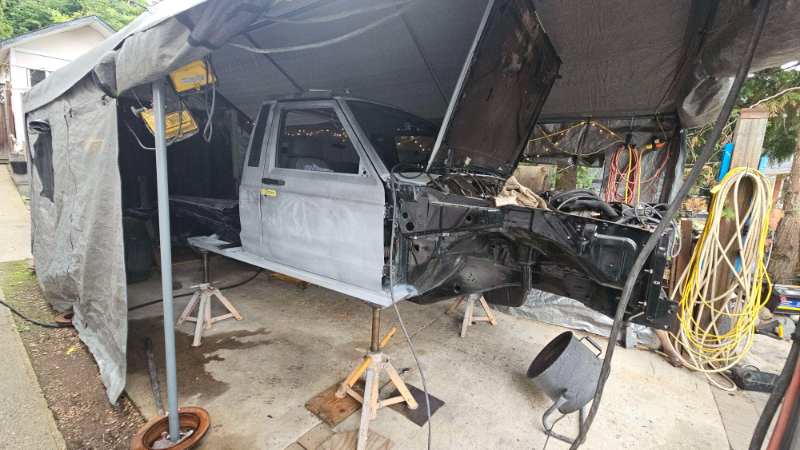
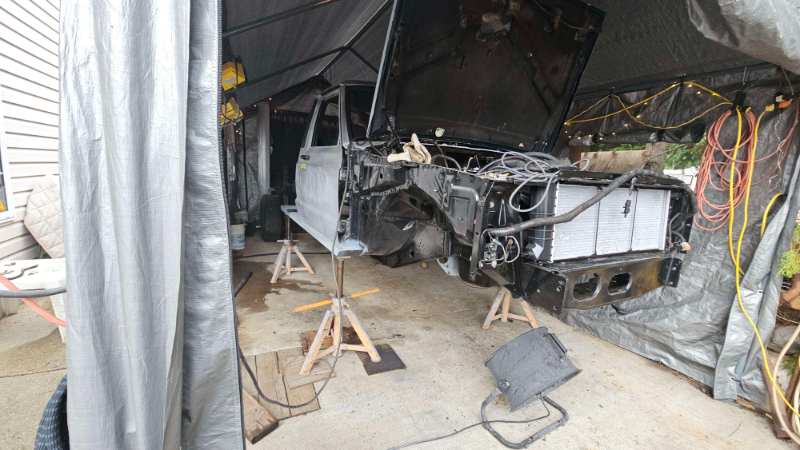
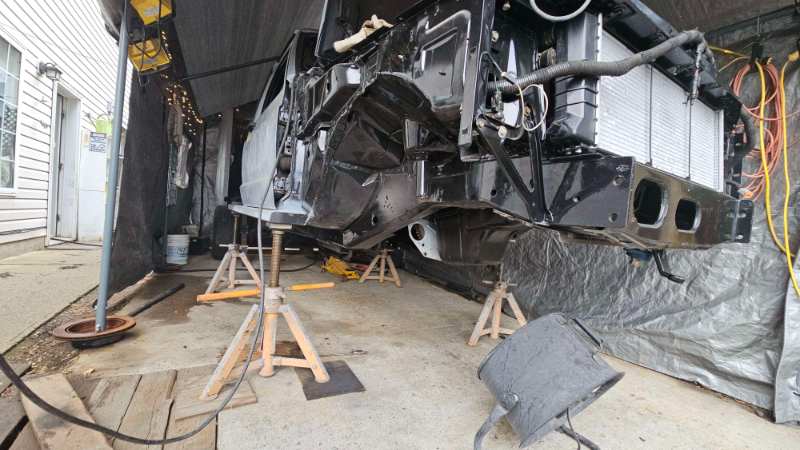

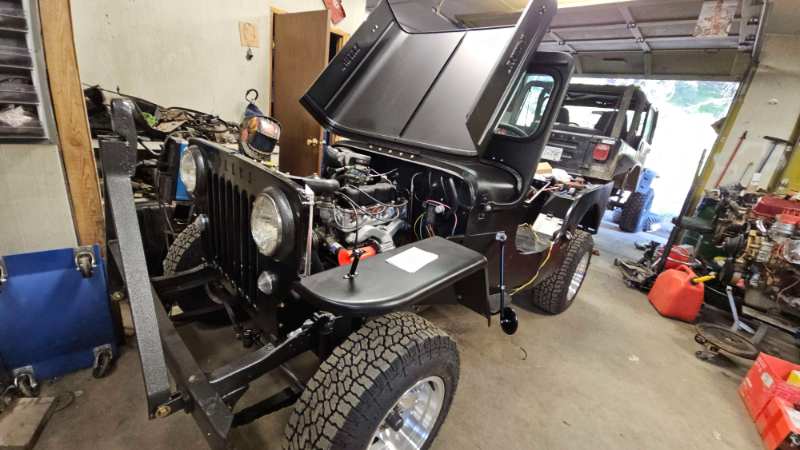
-
more into the tcase way back in 2014, the ring gear in the doubler spit out in a very sketchy spot both of my winches, plus two more and 8 people helped spin the truck around and safely down to a flat where I was able to swap tcases the next day ended up having to split a case in half to get a new ring gear donor. the way the doubler is built didnt allow for a retainer, or so it was lead to believe. put the new ring in, stake in in place good to go. fast forward to now. the ring started walking again! so in went the proper retainer and I started grinding hear me out, before anyone says it. Literally no idea why i didnt line the tangs up to one of the studs, thought about it the entire process... especially on the last hole lmao but here it is, it even retained its springtivity was cleaned afterwards to install the new bearing ran an idea past a buddy and he said come on down. 3 planet carriers are out of style but 6 planets on the other hand.... thats more like it! 3 vs 6 starting to assemble lets stand all of those bearing back up the graveyard, 3 carriers due to one being roasted, the other was already parts from when the ring gear ejected in '14 but made for good bearing slugs. and the third had good junk final planet and all together again