

Salvagedcircuit
-
Posts
1389 -
Joined
-
Last visited
Content Type
Profiles
Forums
Gallery
Everything posted by Salvagedcircuit
-
R12 to 134a conversion
Salvagedcircuit replied to kook911's topic in MJ Tech: Modification and Repairs
I thought this too, until I found out each lines rotates about the fitting on top of the compressor. you can easily fill up the low pressure size by just rotating the line. -
Replacement Relay Block Source
Salvagedcircuit replied to Salvagedcircuit's topic in MJ Tech: Modification and Repairs
WOW. Talk about saved the day! DANGG. What a find. I looked through the aptiv manuals and could not find it. Excellent, added to the mouser cart -
Replacement Relay Block Source
Salvagedcircuit replied to Salvagedcircuit's topic in MJ Tech: Modification and Repairs
The relay block is a delphi / aptiv 12033871 Available at newark and mouser It doesn't look like the part comes with the plastic mounting clip on the back, which is what I'm interested in. Bummer. The clip looks like a cross between these three, but not quite any of them: auveco 17990 auveco 21692 auveco 25542 -
Huh. Now I'm wondering what plastic the lower dash panel is made from. I was considering using ABS filament to plastic weld the crack in my lower dash.
-
my 1996 XJ El Guapo
Salvagedcircuit replied to motownXJdad's topic in Member Projects: Other Cool Stuff
That dash I have to take my tan lower dash out and plastic weld it before it snaps in half. Previous owner mounted a CB radio to it and left 4 holes and a crack. Sadness. I think I'm going to grab some tan colored ABS from microcenter and see if I can match it and just plastic weld it through the back. -
Taillight Harness Rebuild and Sockets
Salvagedcircuit replied to Torq_Shep's topic in MJ Tech: Modification and Repairs
This is the way Knowing that the certified molex crimping tools go upwards of $300 for one variant of a connector, I don't bother crimping my own. I just get a pigtail, solder and adhesive heatshrink. I try to get the pigtails from digikey, mouser or some stp part number. -
Awesome job, looks like a good time was had by all
-
Hahaha, this looks like fun!
-
Replacement Relay Block Source
Salvagedcircuit replied to Salvagedcircuit's topic in MJ Tech: Modification and Repairs
Hey! I don't mind either, I was just curious if these exist on something like digikey, mouser, delcity etc. I did not find them on delcity. I have not checked digikey or mouser yet. -
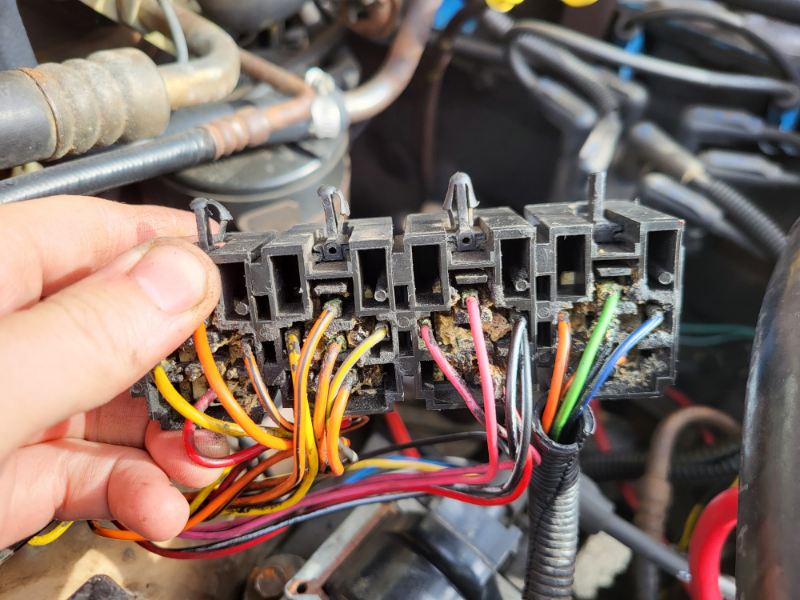
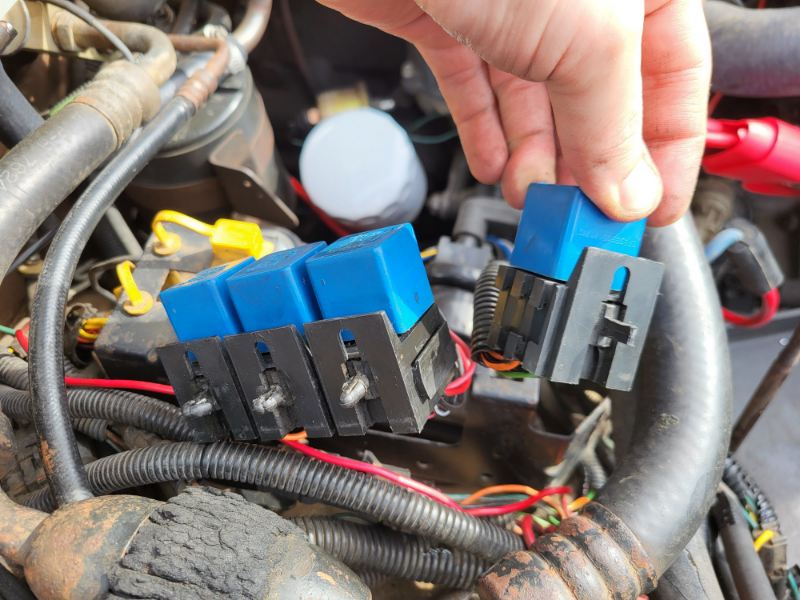
Does anyone know where I can find replacement OEM-style relay blocks with the plastic tabs on the side / bottom? Three of mine are toast. Thanks!
-
Diagnosing AC Issues
Salvagedcircuit replied to Salvagedcircuit's topic in MJ Tech: Modification and Repairs
Update 6/16 11:45pm: -Relay works -A/C relay wiring is correct, harness is not damaged other than cur out diode -Diode added from failed ionization fire alarm. -AC compressor has a rebuild tag on it with a "converted to 134a" in ~2003. -My low pressure valve was closed after I filled it on friday. I just added more refrigerant and the fan kicked on and the clutch engaged properly, but sparked near the clutch, so I shut the AC off. I believe I need some more spacing on the clutch plate. I measured it within service manual tolerance, but it's a complicated area to measure with a feeler gauge since there is a shoulder of a pulley involved. Going to increase spacing and try again. Previous tested: -A/C fan kicked in -A/C req signal shows on the REM module -A/C low pressure switch works Backup plan: Bring it to a service place to look for leak sources or use my Flir meter. Worst case: Replace the condenser, AC lines, Expansion Valve, O-rings, fill system. Don't plan to replace the evaporator core and rip apart the entire dash. Thanks! -
Diagnosing AC Issues
Salvagedcircuit replied to Salvagedcircuit's topic in MJ Tech: Modification and Repairs
Edit: the AC clutch was indeed wired correct. I manually checked the wiring again. The fun part is going to be finding a diode locally that I can put in parallel to the A/C clutch. Here's a diagram that shows the inline diode for the ac clutch: https://www.cherokeeforum.com/f2/ac-help-i-am-electrically-beyond-stupid-229318/ -
Diagnosing AC Issues
Salvagedcircuit replied to Salvagedcircuit's topic in MJ Tech: Modification and Repairs
Looking through the REM manual it shows A/C request and A/C on/off. Mine shows A/C request but the clutch never engages and obviously no cold air :/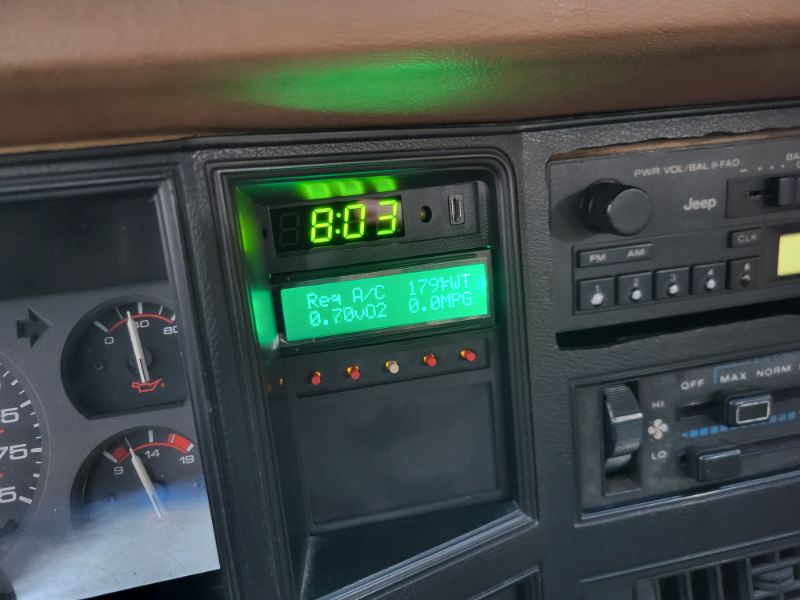
-
Diagnosing AC Issues
Salvagedcircuit replied to Salvagedcircuit's topic in MJ Tech: Modification and Repairs
Does anyone have a photo of how their AC clutch it wired? Previous owner clipped off the entire area. I have no ac clutch diode or connector. The clutch will not engage with the AC So far: -ac system officially charged and held when I opened the valve. -A/C fan kicked in -A/C req signal shows on the REM module I have tested my clutch externally with a 12v psu and the clutch does indeed work. for some reason it's not being tripped. If anyone has a photo that would be awesome. -
June 2024 - The Travelling MJ
Salvagedcircuit replied to 89 MJ's topic in Comanche of the Month (MJOTM)
HELL YEAH. Well deserved @GonzoTheGreat One excellent 6000mi series -
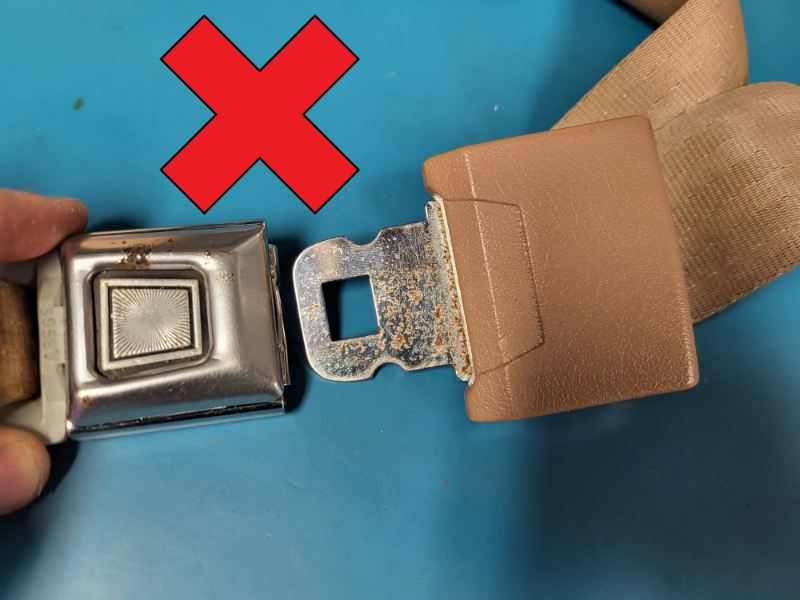
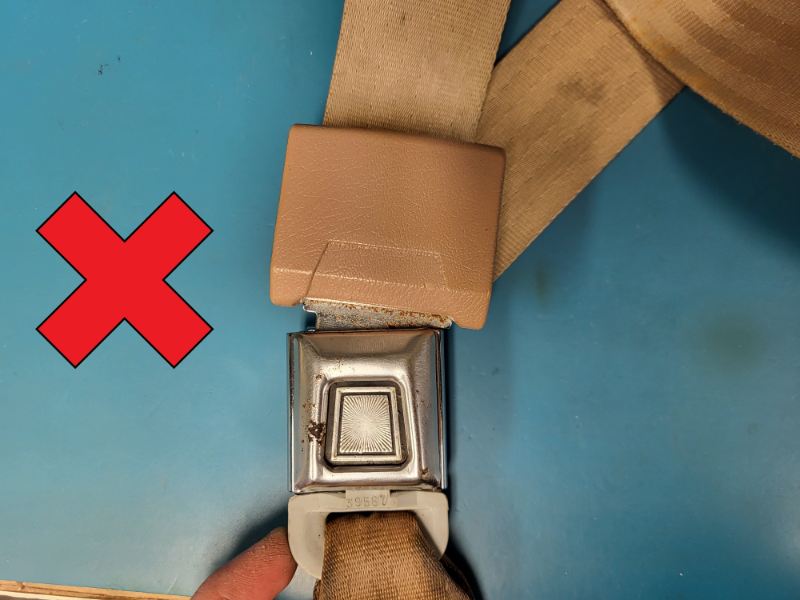
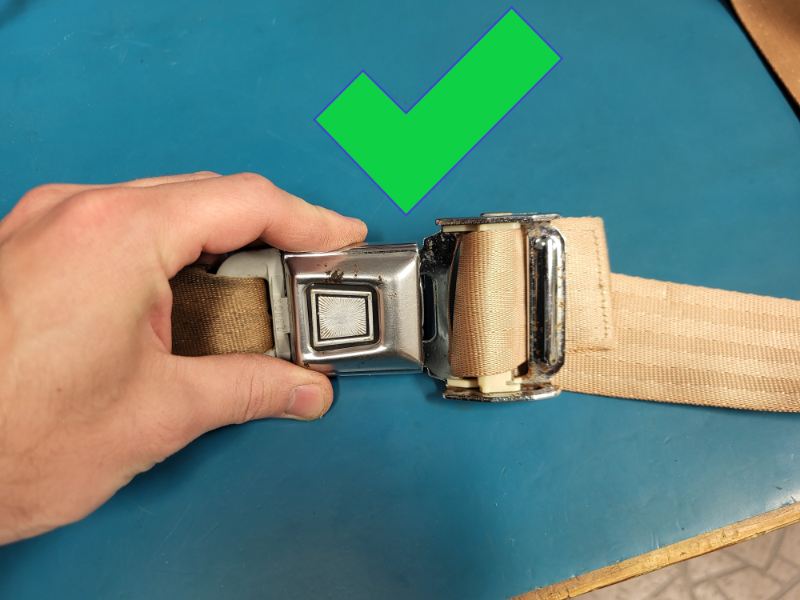
I have this exact same issue right now. These indented side style clips fit incredibly sloppy in my female clips. They have bounced out which is not cool. I believe they fit in the slightly different AMC branded ones in the last photo. I'm in the process of installing different belts.
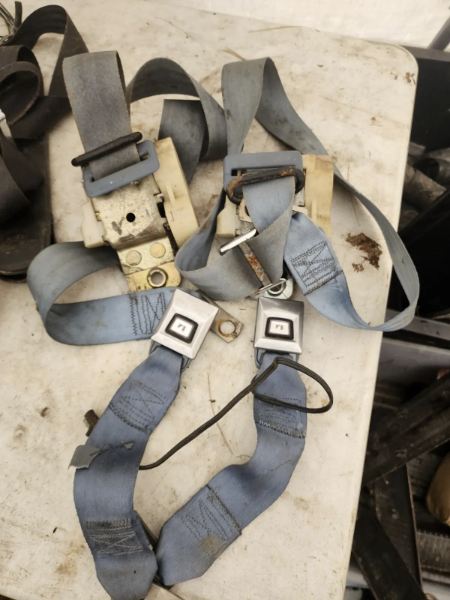
-
Nice! I grabbed a similar kit from Precision seals. I just need to commit to tearing apart both my doors to finish the job
-
I think @jdog is right. It's a technique where you place tack welds spaciously over the cutout region between the patch and the larger metal. You eventually fill the interface between the two materials, but you keep adding tack welds as far apart as possible in effort to even out the heat generated, prevent warping and lower the chances of punching through. This method is usually done on thin metals. It is tricky to get right.
-
Woah, that's properly cool.
-
TFL Comanche
Salvagedcircuit replied to neohic's topic in Craigslist/Marketplace/eBay... i.e. Not Your Stuff
Wow. It needs a new battery and the seller didn't, you know, just buy a new one? That's not a big expense when asking +17k... -
Agree with Pete. If I had a 91 and 92, I'd polish em every month I wonder if the 91 and 92 years had duct-tape splices in the engine wiring harness like the '88...
-
1984 Scrambler Rebuild
Salvagedcircuit replied to Drahcir495's topic in Member Projects: Other Cool Stuff
Ooof. That's a lot of work. Hopefully there's still usable parts in there. Excellent work -
AWW YEAHHHH
-
Wow. That is super neat!
-
Thanks! Legend has it a swift stroll by 844 East Charleston Road in Palo Alto will clear your mind