SVPete
-
Posts
344 -
Joined
-
Last visited
-
Days Won
1
Content Type
Profiles
Forums
Gallery
Everything posted by SVPete
-
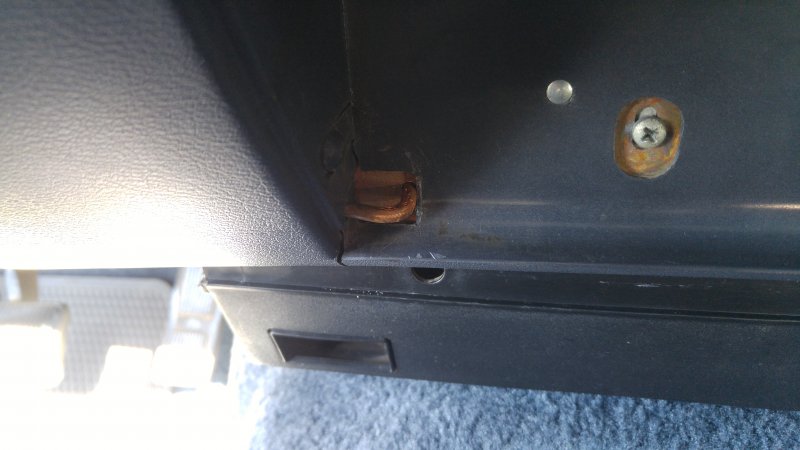
I used a piece of solid copper wire I had laying around. Drilled a hole in the metal back and in the plastic side.
-

Passenger Side window manual regulator
SVPete replied to Dylan's topic in MJ Tech: Modification and Repairs
Add this to the to-do list also: 4. Hose the lock mechanism down with de-greaser. Then hose it down some more. (then put some not 30 year old grease on it) -
Passenger Side window manual regulator
SVPete replied to Dylan's topic in MJ Tech: Modification and Repairs
Yes, the internal rod-spring thing likely has a worn spot (or corroded). You can try swapping the internal from the passenger side to the driver's side..... if it doesn't look like the bottom one in the photo attached (that was my passenger side). The only way you will know is to take it out and look. It is some work, but really not that hard. To get the window regulator out to work on it, you will have to: 1. Remove the interior door panel. 2. Roll the window down as far as you can. 3. Remove the top/rear (one piece) window glass channel (pinch and pull it right out). 4. Disconnect the glass from the regulator (a nut) and slide the glass down as far as it will go (to the bottom of the door). 5. Remove the interior window scraper seal (pulls right off). 6. Remove the triangle window (two screws on top of door and one bolt inside door...and a good tug). 7. Take the window glass out now. 8. Drill out the aluminum rivets holding the regulator in (around 6....easy) and drill out the two rivets holding the strap across the opening (you'll know). Replace with short nuts, bolts, and washers. 9. Jockey the regulator out. 10. A couple of screwdrivers and pliers will bend up the bottom of the regulator to pull the rod-spring thing out. If you jump all into it, it is a good time to: 1. Replace the outside window scraper seal since it is likely hardened and broken up. 2. Replace the roll-up window weatherstripping on the triangle window channel (called a glass division bar). Buying it new is pricey, but you can find weatherstripping that will work in the junkyard if you are willing to search. 3. If you have black metal trim around your window that is peeling, it is a good time to remove it (pry gently from the inside), and strip it down. Heat gun, putty knife, 240 grit sand paper, and a scotch-brite pad will do a good job there. In my limited observation (my truck and at the junkyard), the passenger side tends to experience the corrosion like the bottom item in the photo. The pieces in the photo are exactly the same on manual regulators...whether, left side, right side, front, or rear. You can use this internal piece from the rear window crank of a Cherokee to fix yours. I do not know if this internal piece is the same on the power windows. I haven't had a reason to check. I would recommend that you PERSONALLY look at that in a junkyard if you have no other options.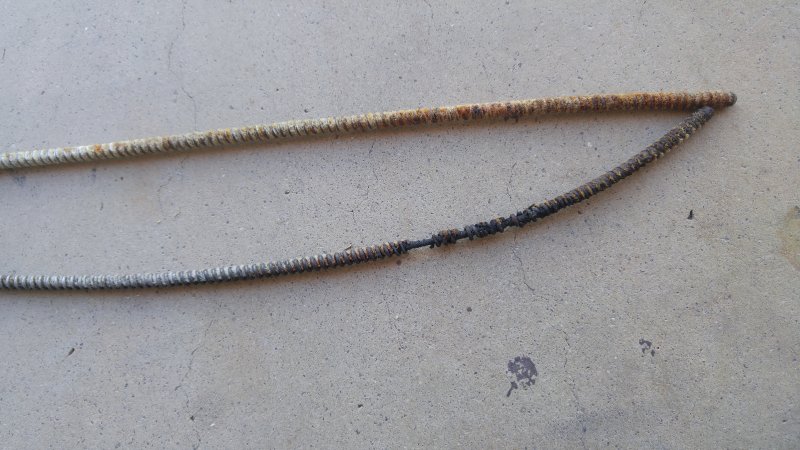
-
Pretty sure I could make something like that for the Cherokee out of a couple of my free harbor freight tarps, some broom sticks, a couple of cinder blocks, and string I have laying around. Won't exactly look all sharper image like the photo though.
-
Ba/10 5speed Peugot SQUARE Socket [Transmission]
SVPete replied to Sly_Jeeper's topic in MJ Tech: Modification and Repairs
I made mine with a bolt and a file in about 15 minutes.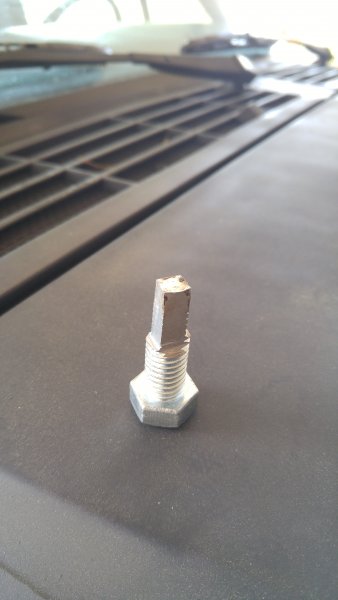
-
Sentinel Headlights Install
SVPete replied to Blaine.D's topic in MJ Tech: DIY Projects and Write-Ups
The fuse was installed all these years (not sure why though...). Maybe I wasn't holding my tongue right. I'll probably swap it into the Cherokee and see if it works (since the Cherokee has this feature already). -
Sentinel Headlights Install
SVPete replied to Blaine.D's topic in MJ Tech: DIY Projects and Write-Ups
Either I got a bad one at the pull-a-part or (which I suspect) this doesn't work with the headlight harness upgrade? -
Interior Leaking Bad - What could it be??
SVPete replied to NEO auto's topic in MJ Tech: Modification and Repairs
Take a hard look at the rear window glass where it is set in the metal frame. Mine looked like the rubber between the glass and the frame was deteriorated. I ran some silicone caulk around the glass and frame. Wouldn't be surprised if the weatherstripping on your slider was worn out too. Agree on the radio antenna grommet, although that should only affect the passenger side (mine had fallen out). There are several posts on the site in reference to water leaks. Review those if you haven't already. In them you will see a recommendation to use baby powder to help track down leaks. -
If you are looking for the metal trim around the window opening, they are the same on 4 door Cherokees. Sorry, don't have any laying around, but I see them on the now rare Cherokee in the junkyard. Next time I go, I'll look, but it may be a while.
-
The two typical reasons the lights don't work are a bad bulb (obviously), and corrosion on the bulb connection and switch contacts.
-
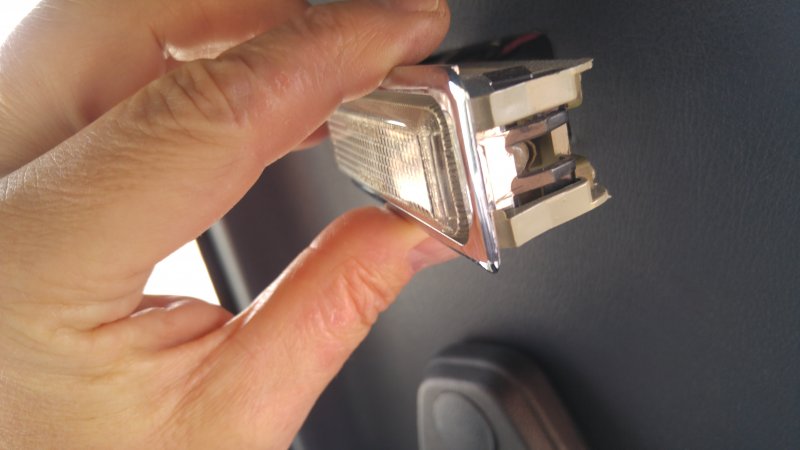
The lens does not come off, you remove the entire assembly. This photo shows the side with the flexible plastic "clips" (the tan-ish pieces in the photo), that break pretty easily (another reason for people to look for different lights).
-
Lowe's pulled the same B.S. on me two weeks ago when I tried to exchange a Craftsman ratchet and 8mm socket. They wanted me to bring in my set with original purchase receipt. I said "My whole 400 piece set that I bought 15 years ago with receipt? You must be out of your mind!" Went to Ace and they were able to order a replacement ratchet. Good old Ace. Need to go there more. They always seem to be able to help...and willing to help. Can't get 10 feet into the store without someone asking you what you need help with. Seems like Lowe's wants to sell the tools but not service them. Called Craftsman and they sent me a new 8mm socket. Effing Lowe's...I was going to go in and buy a new water heater too. Told the wife let's go, we gave Home Depot our money instead. I'm done with Lowe's.
-
Raiders of the Lost Ark. Mainly because that was the first movie my wife and I saw when we were dating. To be that young again....
-
B-Pillar Light Woes
SVPete replied to JustEmptyEveryPocket's topic in MJ Tech: Modification and Repairs
The headlight switch (dash dimmer switch) isn't rotated all the way is it? Gotta ask. -
Man....always enjoyed reading his posts. My sincere condolences to the family, friends, and Comanche Club members,
-
Start with Cruiser's tips. Cruiser54.com Another thing to check is that the electrical connector on the back of the instrument cluster in fully seated. But you gotta read and knock out many of those tips.
-
I used Rustoleum semi-gloss black on the front end (did the back bumper too). Took the bumper off, sanded it, and rattle-canned it in my car port.
-
To remove the trim from the door, you have to take all the glass out (having done it a few times, it's not that daunting), remove the inside and outside scraper seals (easy), and the window channel (easy). The trim is just wedged on around the door frame (like a pinch seal) and comes off with some gentle prying from the inside edge. Remove the lower trim first. It's kind of one of those things to do when you have another reason to be gutting the door. It could be possible to remove the lower trim without taking all the glass out, but I haven't tried that. It would seem that the triangle window would be in the way on attempting to remove and reinstall the lower trim. If you are wanting to remove all the trim around the window (probably because the black coating is peeling off or painting the door), definitely remove all the glass.
-
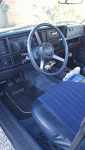
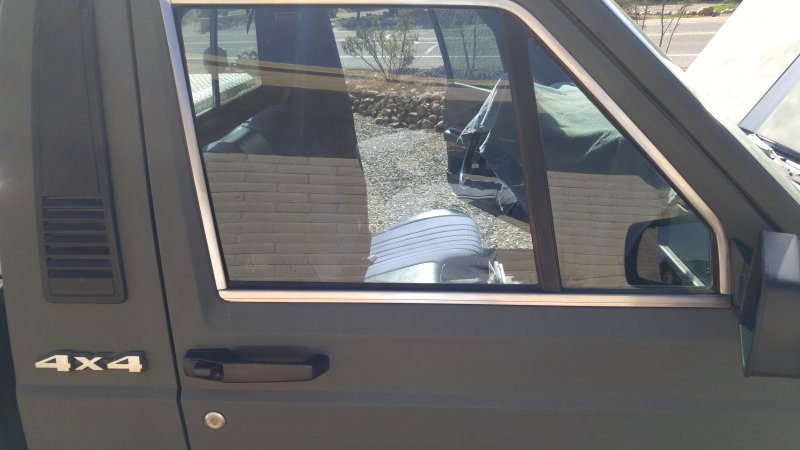
Are you talking about the lower silver metal trim in the photo (yours might be black)?
-
Sometimes I had to remove the rear bolts completely to allow the pump to move that little bit more.
-
Model, year-ish? That way I could look around the junkyard.
-
I have replaced mine twice over the years. Just got what AutoZone had. Now makes me think, it was about every 10 years.....I'm going to be due soon.
-
I would buy that.
-
Yes - To clean it off well since the black coating wraps around the edges. Sorry - no photos. But if you can envision how the seals around the door frame are held in place, it is the same concept. When you get to the point of removing the trim, stop and look for a moment. Start trying to work it up off near the ends, but go easy and slow. I retract my earlier statement....the bottom trim has to be removed first.
-
Random high idle kills me!
SVPete replied to SuperSwede's topic in MJ Tech: Modification and Repairs
I experienced high idle on start up too. My issue was solved between cleaning the electrical connector for the coolant temperature sensor and replacing the ECU with a 1990 ECU from a junkyard Cherokee. I did both at the same time, so I'm not sure which one solved my issue. That said, I don't recommend that you run out and buy a new ECU. It is something to consider if you have another one laying around or can snag one at a junkyard (or as a last resort). I am sure you have done some of the things below a few times: Recommend you check, check, and re-check TPS adjustment. Clean the throttle body. Clean the idle air control valve and ports on the throttle body (and then clean some more). Remove and clean the idle air temperature sensor (the brass thing the screwdriver is pointing at in the photo below). Do it well. Clean every electrical connector you can think of (TPS, CPS, IAC, IAT, CTS, O2, MAP, ECU, C101....just to name some). Clean and improve grounds. I feel you. It's maddening.