

Salvagedcircuit
-
Posts
1381 -
Joined
-
Last visited
Content Type
Profiles
Forums
Gallery
Everything posted by Salvagedcircuit
-

UPDATE: NTK O2 sensor 23553 (RENIX)
Salvagedcircuit replied to fiatslug87's topic in MJ Tech: Modification and Repairs
If you don't buy this, I probably should. looks genuine & correct. I don't know why there's grease on the tip but it looks right https://www.ebay.com/itm/155981924910 -
Unsprung mass is definitely a kicker. I love the turbines too much to change them though Maybe make a carbon fiber rim to look like a turbine rim and paint it silver lol.
-
Grandpa's 1940 Chevrolet Pickup
Salvagedcircuit replied to 89 MJ's topic in Member Projects: Other Cool Stuff
Excellent find! Very cool truck you have there -
Ken's Comanche project creep.
Salvagedcircuit replied to guardrail's topic in Member Projects: Your Comanches
Nice. Excellent save! Certainly won't become a tuna can now, but will one day haul a metric ton of tuna cans.... -
Most excellent!
-
Glad to have you around. Comancheclub is indeed the best club.
-
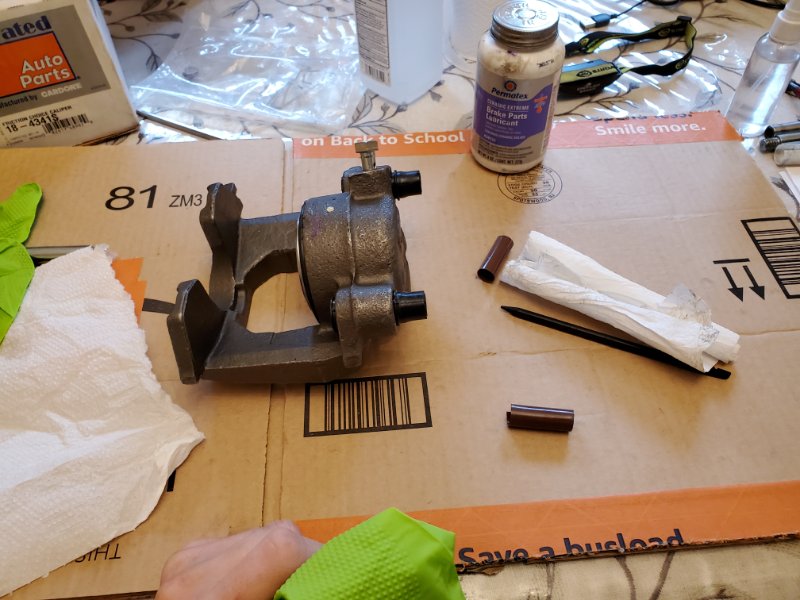
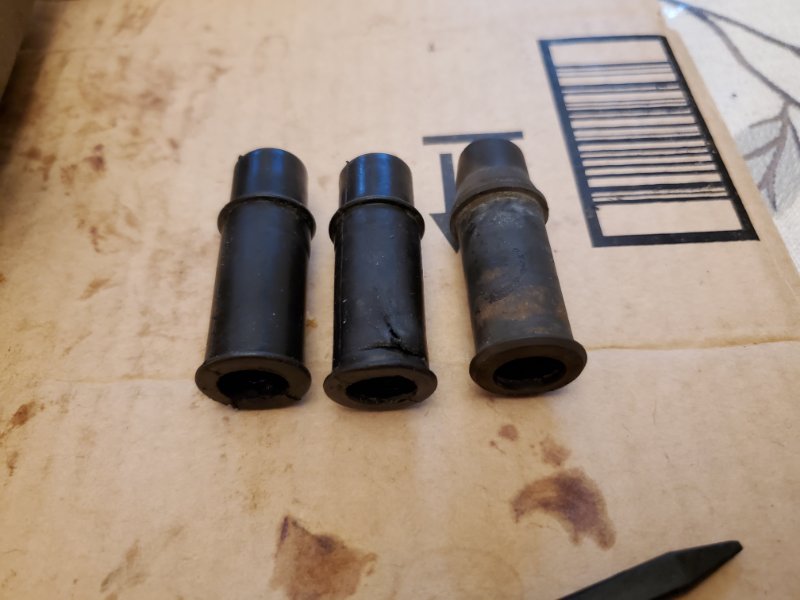
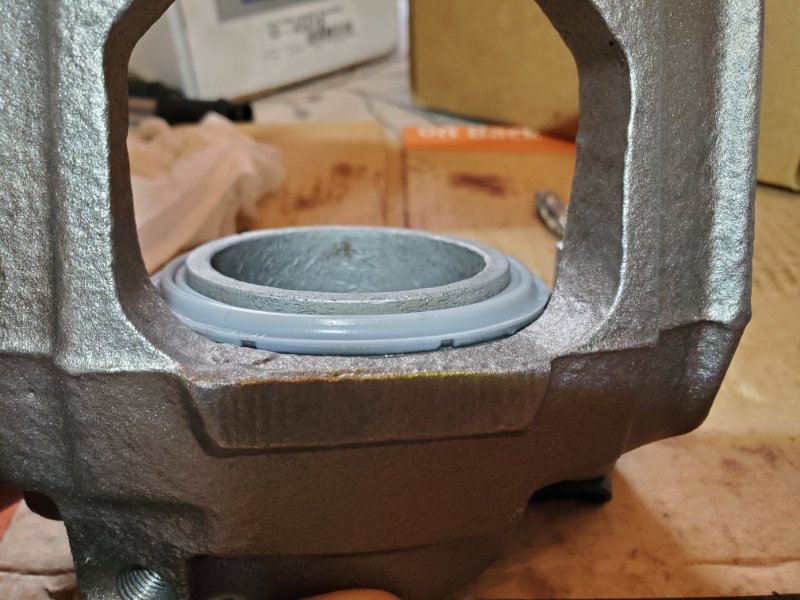
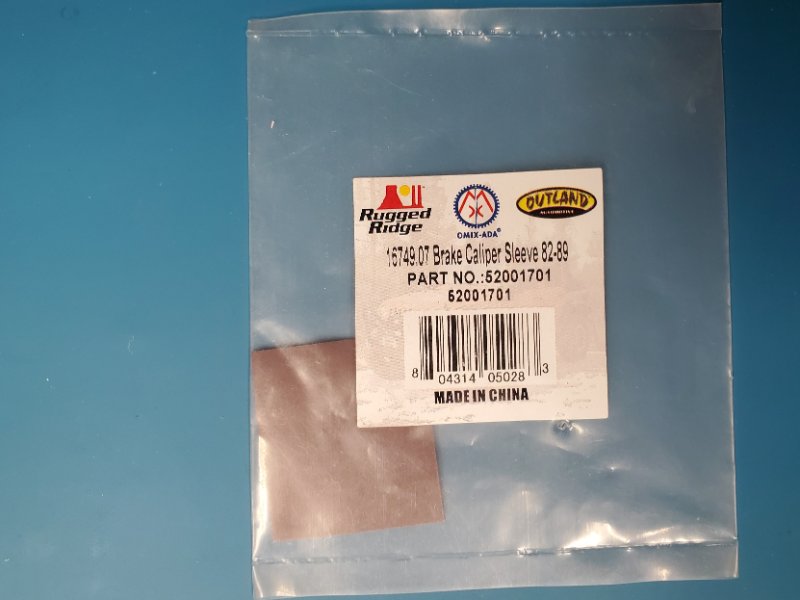
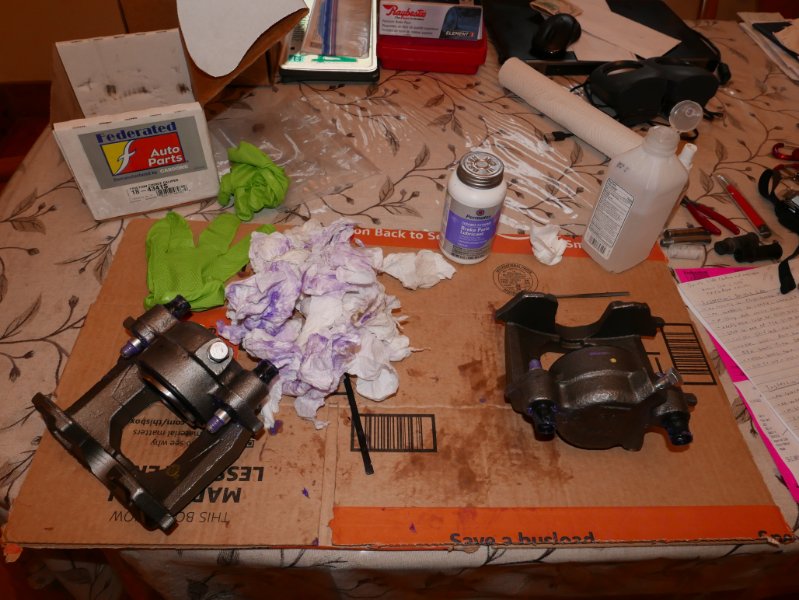
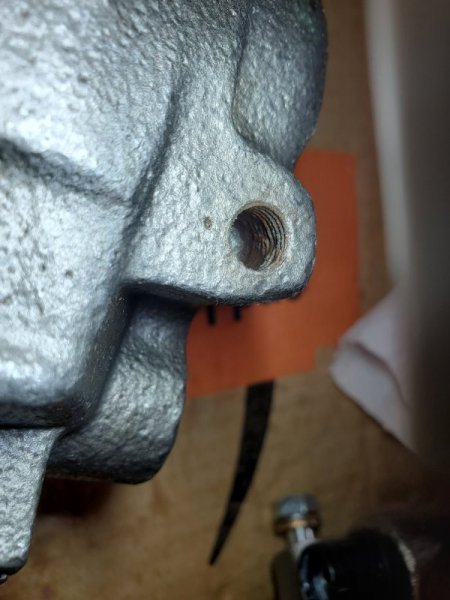
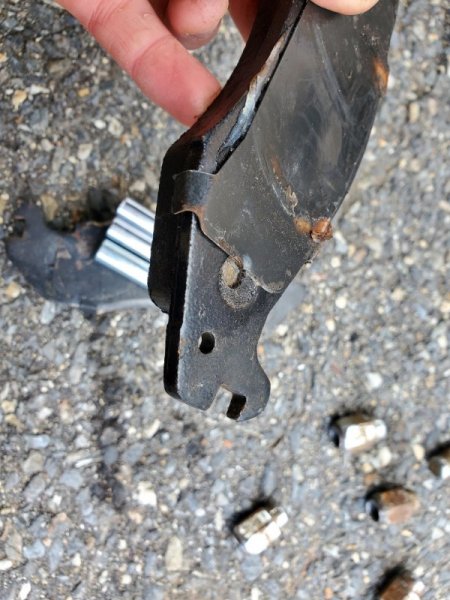
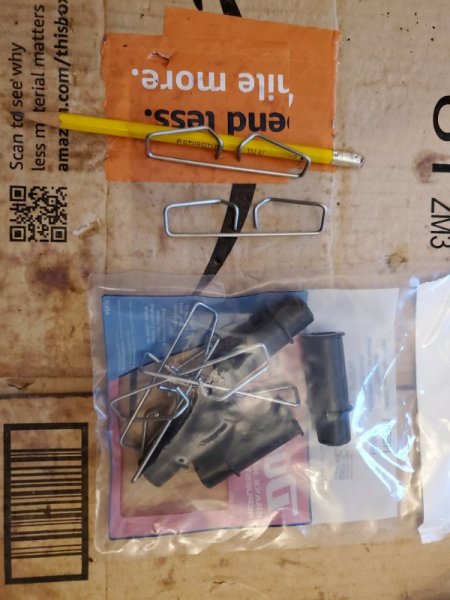
For the stock style comanche front calipers to work well you have to thoroughly inspect them. Each side should have: -a teflon sleeve per glide pin -glide pins of equal, correct length -two brake pad clips per side -glide pin rubber boot -glide pin lube Without any of these parts, your brakes will not work optimally. If your calipers were replaced recently, they may be missing teflon sleeves. I purchased several newly remanufactured ones from autozone that were missing these sleeves. I returned all three and went with one from federated auto parts, but I went through two calipers there too, because one had abysmal brake fitting threads. Without these sleeves the braking mechanism has far too much slop. This is a very bad thing. Look for any imperfections in the glide pin channel and debur it! It's not uncommon to see casting imperfections that greatly impact glide pin movement performance. Grab a file and remove these imperfections. Use purple or white silicone based glide pin lube, lube it all up but don't get any on the pads or rotors. The slide pins should move with ease through a newly lubed rubber boot and sleeve. It should take little effort to do so. If it's not smooth like melted butter, clean up that cast glide pin hole If you are missing these sleeves, rugged ridge still sells em. part# 52001701 otherwise, the inserts are 2 thousandths thick Teflon material that you can easily purchase from mcmaster-carr. I have confirmed this and purchased both, they are exactly the same thickness and surface smoothness. You can cut the Teflon sheet with a scissor. The PO of my comanche installed the wrong sized caliper pins on me that punctured the brake pads. Derp. I can go on about this for a while, which I'll writeup one day. It's honestly incredible the part quality of newly reman'd calipers. One of the photos shows a reused pitted cylinder with new seals. How would that ever seal? Returned. I had one with a rough-as-sandpaper hole for the banjo fitting to bolt up to. How would that ever seal? A1 cardone should be sanctioned, put on a stake and burned for their crimes against ASME and all automotive parts.
-
We are not worthy
-
There are plastic brake line / fuel line holders along the US drivers side frame rail. I unclipped my lines from them and shoved some thin metal flashing between the lines and the frame rail. This at least prevented any substantial damage to them. I simple removed the loose sheet when I was done welding. I ended up replacing all my brake lines though because there were multiple holes in them (not from welding, from age). They had their day in the shade.
-
Hahaha. I saw that lower bumper and said to myself, A comanche with lidar? It looks like they merged a grand cherokee lower bumper with the cherokee xj facia. An interesting look for sure.
-
He's 100% spot on. Nearly all washer and dryers use straight steel side panels and many get chucked to the curb @eaglescout526 is right on the money. Hardware stores also tend to keep stock of 16ga steel. Do it up!
-
February 2024 - The Bitchin Manchee
Salvagedcircuit replied to 89 MJ's topic in Comanche of the Month (MJOTM)
Hahaha, When I was younger I used to fiddle with my dad's stock '89 xj radio buttons and the heat / ac slider. It was the same style slider as my desk radio and had the same satisfying click when toggled. Worth it. Congrats! -
EGR ramblings and reach out
Salvagedcircuit replied to cruiser54's topic in MJ Tech: Modification and Repairs
You can just take your old egr gasket, trace it onto a piece of aluminum or steel and cut it out. It's pretty easy. If your gasket is shot, use one of the .dxf files I uploaded earlier in this thread, print it out, trace it and cut it out. -
Money's no object: -passenger side (right) short panel -driver side (left) full panel -driver side top cap Bang/buck: -driver side (left) short panel -driver side top cap -can reuse the side braces but they are fun to remove. -spare 16ga steel for passenger floor pan, the rot is mainly that right hand side rectangle. -spare 16ga steel because short driver replacement floor pans will not be long enough to replace the rotted out material that tends to extend just above the drivers side floor seam in the driver wheel well. The biggest downer is the time it takes to remove those spot welds. Some use the spot weld drills, some use air hammers, some grind it out. Take your pick, all solutions take time. The 3M panel bond is good stuff, but its expensive and you need to take your time and educate yourself on how to use it. Welding also takes time and you need to plug weld the metal sandwich to properly fix the floor. I did not realize it was plug welded and later on used bolts. I wish I plug welded instead. Before you do anything, I would seriously inspect the driver side bottom frame rail. It's not a good thing that the top frame rail cap has dissolved. Vacuum up the debris and wirewheel what's there. If there's holes or thin spots in the bottom frame rail, that needs attention first before anything else.
-
Well, believe it or not, the equipment listing is still in their records! That's your jeep! https://www.jeep.com/webselfservice/BuildSheetServlet?vin=1J4FJ67S5TL218899 I attached it as a document in case it does not generate through the website 1J4FJ67S5TL218899.pdf
-
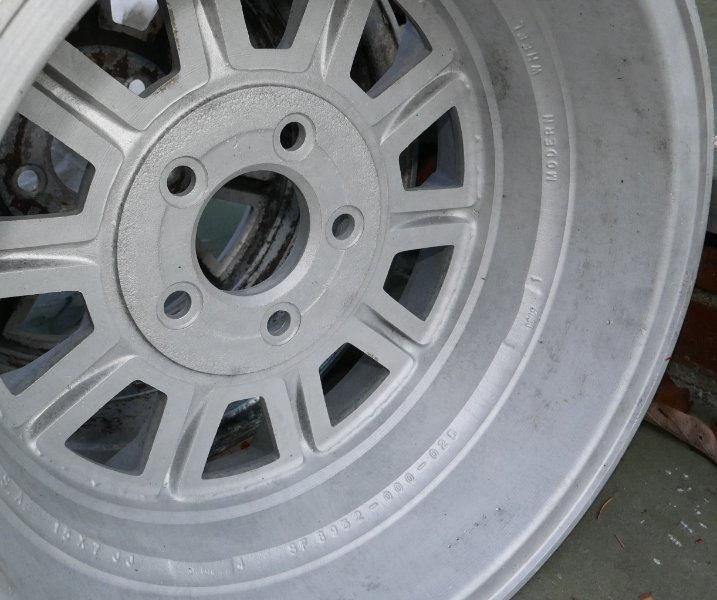
Turbine Wheel Manufacture Differences
Salvagedcircuit replied to H3ADBANG4L1F3's topic in MJ Tech: Modification and Repairs
Theres italian ones???? It should say "modern wheel" with some DOT numbers My baby is american made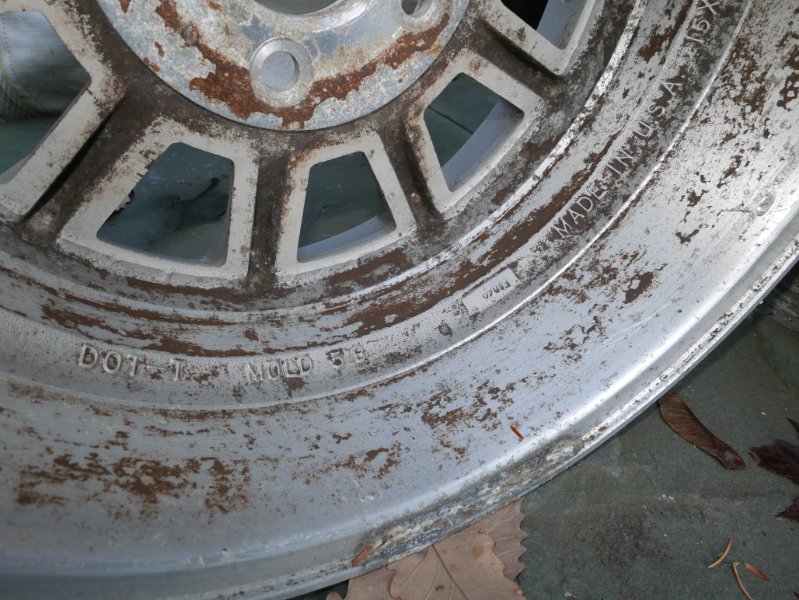
-
cheap fan shroud
Salvagedcircuit replied to motownXJdad's topic in MJ Tech: Modification and Repairs
I purchased a clone-zone fan guard for $15-20 and concur. It fits well. I deburred the edge though because it is unnecessarily sharp. -
Heck yeah man!
-
Removing rear interior molding
Salvagedcircuit replied to Spinnakerblue89's topic in MJ Tech: Modification and Repairs
Do you mean these: https://www.auveco.com/christmas-trees There are "christmas trees" on the back of the rear plastic trim panel that goes underneath the back cab window. Mine were white though. -
Hahaha, funny indeed. Flare nut wrench escaped my mind . The fittings on mine my master cylinder were rounded over, but the flare nut wrench made all the difference. I ended up replacing all the fittings anyways because my lines were shot, but its definitely an invaluable tool to have.
-
It looks like you already soaked them in penetrant, but make sure to use brake line wrenches. They do provide a lot more leverage on those tiny annoying brake line fittings.
-
Another alternative is to use a brake pedal from a 96+ that has provisions for the new style brake light switch. I did that on mine and other than having to probe out the connector to determine the right contacts, the brake light switch works so much better than the original '88 brake light switch.
-
Little Red Wagon
Salvagedcircuit replied to eaglescout526's topic in Member Projects: Your Comanches
Oh man, I wonder if that's the mysterious source of my ignition chime module not working. I was welding in the door hinges last weekend and I removed the door ajar switches so nothing melted. I cleaned up the terminals on the door ajar switches with a fiberglass pen and applied ox-guard for good measure. After everything cooled off, I assembled everything and for the first time, I head a buzzing sound when I put the key in the ignition and turned the cylinder. It did it about 3 times and then I could not replicate it. Crazy. I wonder if it's the same point of failure. -
Firefox developer mode is the answer you seek F12 > pick an element (ctrl+shift+q) It gives you the image string. Right click > open in new tab. There are nubs in the pizza wheels. It could be an eliminator.
-
Keep it Stock Stupid
Salvagedcircuit replied to GonzoTheGreat's topic in Member Projects: Your Comanches
Do you happen to know the bushing part number? Thanks Looking good!