

Salvagedcircuit
-
Posts
1381 -
Joined
-
Last visited
Content Type
Profiles
Forums
Gallery
Everything posted by Salvagedcircuit
-
 This guy just did one on his comanche, but he is very much a novice with the 2.5 and is learning a bit here. https://www.youtube.com/watch?v=NtCUx2c4TJ4
 -
Time for CAD Delete?
Salvagedcircuit replied to acfortier's topic in MJ Tech: Modification and Repairs
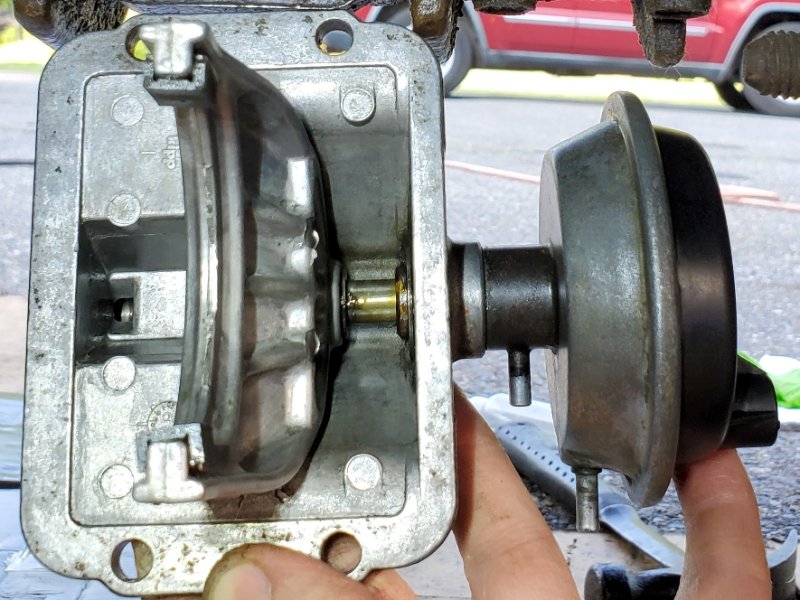
Does anyone know if this is setup correctly for the CAD delete? Thanks.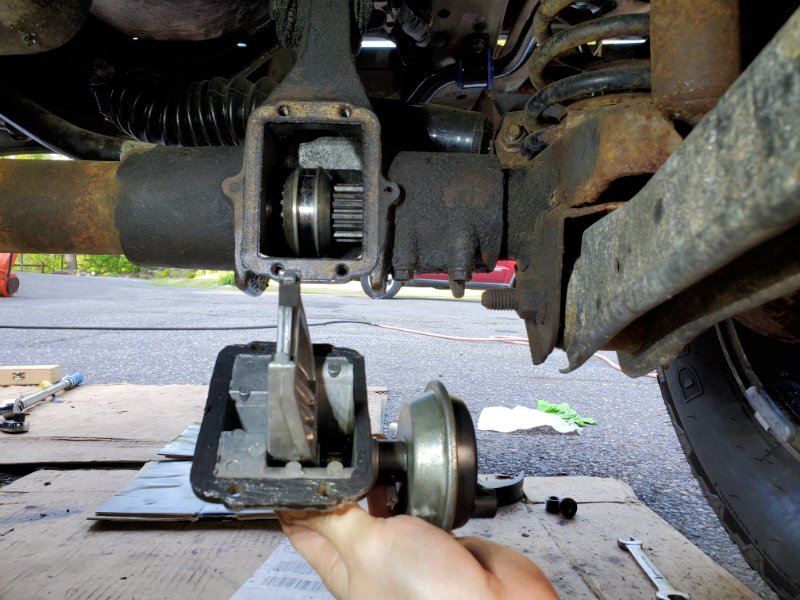

-
Wow! That's incredible innovation right there! Always wanted to flush the coolant to replace a Serpentine belt
-
1990 Big Ton Shell project
Salvagedcircuit replied to rhar_tley's topic in Member Projects: Your Comanches
What an absolute steal. Sounds like the makings of a great combo. Good luck with it! -
Time for CAD Delete?
Salvagedcircuit replied to acfortier's topic in MJ Tech: Modification and Repairs
This is mine currently. The OP said he did something to the CAD axle, but did not say what. While servicing the front axle, cleaning out the diff and adding in new fluid, I inspected the CAD axle. The collar is joining the axle halves. I did not touch any clips or the position of the fork and just put it back in place. There are currently no vacuum lines going to the CAD axle. The lines and diaphragm are capped off. I believe the fork is mating inside the collar. The vacuum diaphragm is pointing towards the passenger front wheel. Is this setup correctly as a CAD axle delete? Thanks.
-
Time for CAD Delete?
Salvagedcircuit replied to acfortier's topic in MJ Tech: Modification and Repairs
Similarly, has anyone tried the Alloy USA 451100 Differential Permanent Cable Lock Kit CAD delete? I moved the collar over on mine, but it sure would be nice knowing that the collar is not going to slide on me over time. I've seen redneck methods of using ring clamps to hold the collar, but that does not sit well with me. This method looks pretty straightforward. -
That's a lotta work right there! Hats off to you! What are you thinking of doing with the throttle body? Take an HO TB and adapt it to renix? Nice work!
-
Nice. I actually just got a 3d printer, so I'm thinking of printing one and comparing side by side to the real one. My previous 3d printer was a clone of the OG makerbot. It was pain to use every time, so I stopped using it. My new one is so, so nice. The files are still CC0, so anyone can print for any reason etc..
-
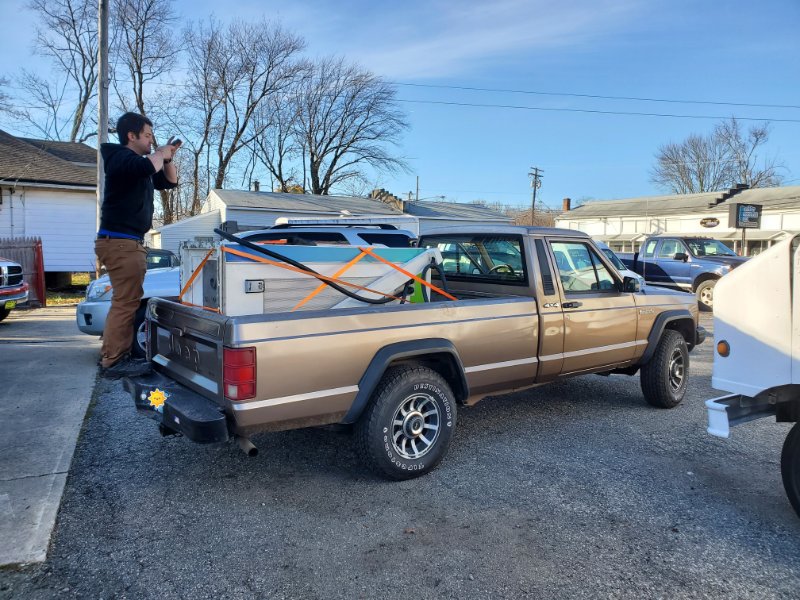
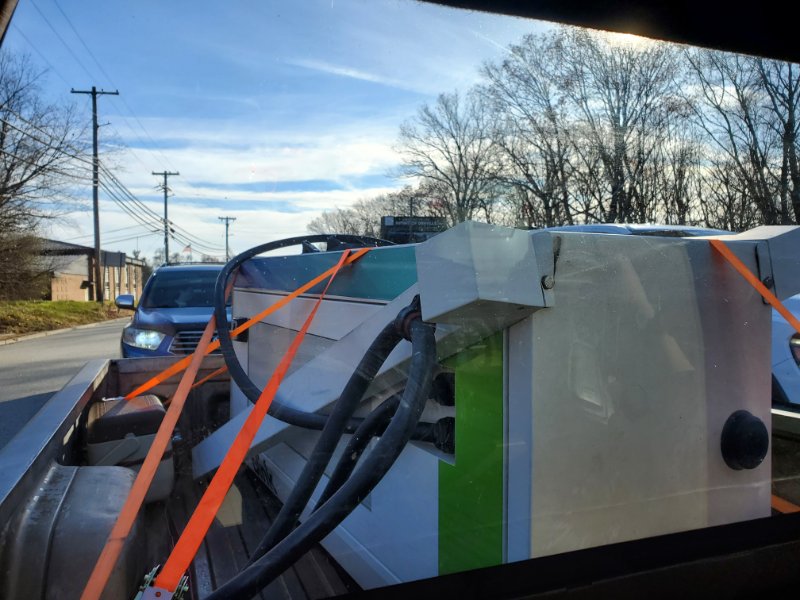
My brother and I grabbed the comanche and took it on a 600mi journey on black Friday. It's first long mile trip. New Hampshire > New Jersey > Massachusetts > New Hampshire. New leaf springs and suspension did not sweat a bit. It took it like a champ. That big ol EV charger weighs 750lbs. The charger came from the finest parts of New Jersey, as one would expect

-
If I had the room for another, I'd get it for $2500.
-
Interesting. I was debating putting small tweeters in the door A pillar corners, but I have not decided if I want the manual stick mirrors or leave the outside-adjust mirrors. The question is whether the A pillar spot is more appropriate for the tweeter than the lower dash. I'm not going after the add a 500w amp + dsp setup, just a nice stock radio setup. My current infinity kapps seem more than adequate for my needs and they were pretty cheap on ebay.
-
I have an '88. Do you know if the wiring for the tweeters are inside the dash? I did not see tweeters when I wired the radio harness. Are they wired in parallel to the speakers? I'm using Infinity Kappa 53XF and 463XF which have tweeters built into them, so I don't know how effective it will be.
-
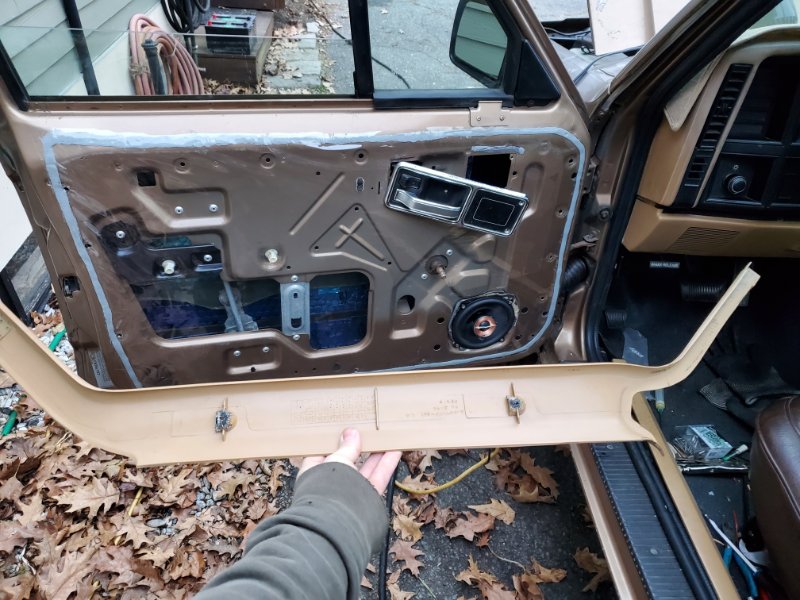
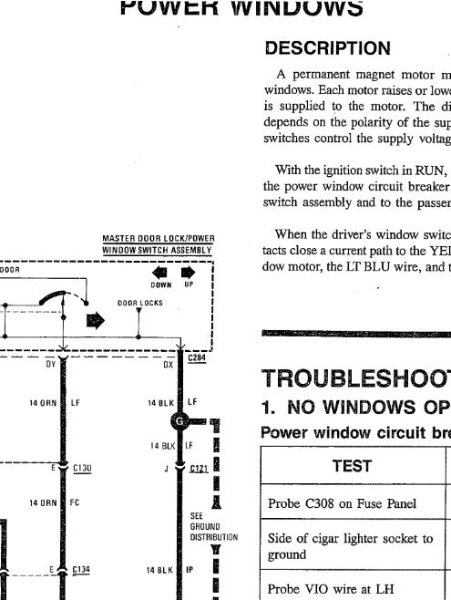
Yep. I grabbed the rubber grommets for the doors and upgraded the wire from 20awg to 16awg. My metra radio harness is 18awg, and 20awg is a bit undersized. I'm going to see if there's 16awg crimps for the radio wiring harness on digikey, so it's at least 16awg for the speakers. I found it on page 75. Thanks! I looked around and it seems that "J" is the 14awg ground for the power door locks / power door windows. Thanks a ton guys for helping me troubleshoot!


-
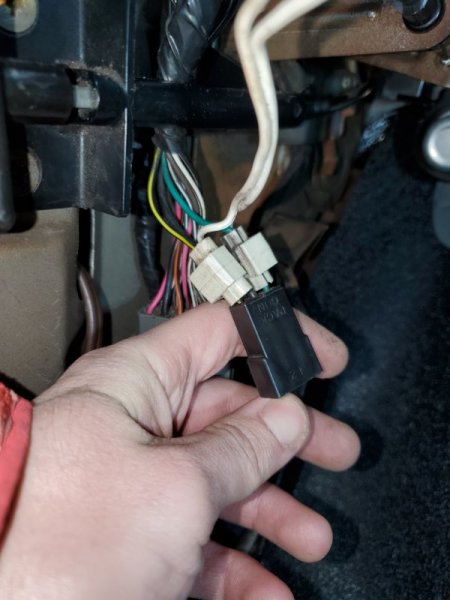
Yep! I just I don't know why it's a 3 wire connector when the electrical diagram shows it should be a 2 wire connector. unless I'm looking at the wrong diagram. Seems strange.
-
I adding in the rubber speaker grommets that were missing from my base comanche, and I noticed the PO ghost cliped the front left driver speaker to a 3 pin connector. I looked through the 88 electrical manual and I could not find a reference to a 3 pin left front speaker connector. This 3 pin connector is shown below and features a black, green and black-yellow wire. The solid black wire is not connected to the speaker. Does anyone know what this black wire connects to? Thanks!

-
Routing of factory antenna cable?
Salvagedcircuit replied to EUREKA's topic in MJ Tech: Modification and Repairs
Woah, there's a sight you don't see everyday. I was wondering how they routed wires for the power antenna. Thanks for the photos. -
Routing of factory antenna cable?
Salvagedcircuit replied to EUREKA's topic in MJ Tech: Modification and Repairs
The antenna cable has a big ol rubber cone like this. Unfortunately, some are larger than others and don't always fit. If it's smaller, you can always heatshrink the OD and shove it in the panel hole. She'll be right. Also, @fiatslug87 I did not realize the front kick panels had sound deadening juke behind them. Interesting. My radio-less base model did not.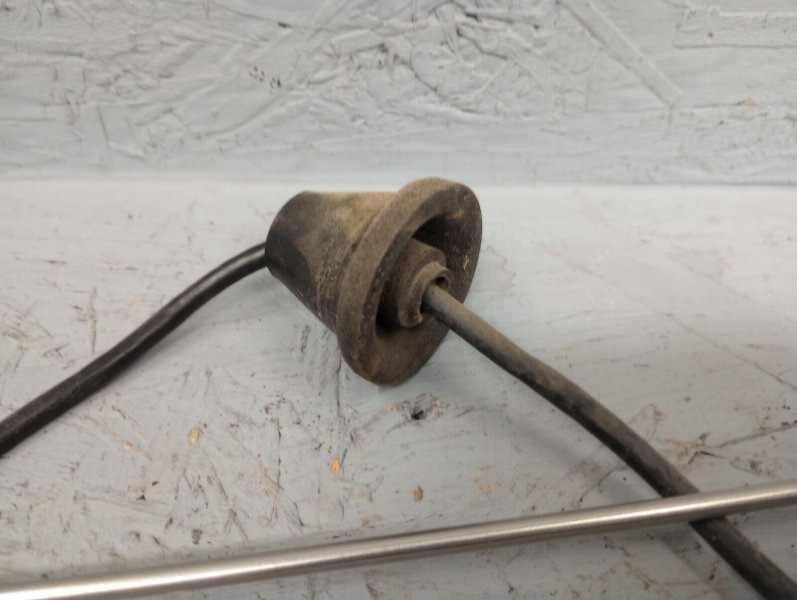
-
Routing of factory antenna cable?
Salvagedcircuit replied to EUREKA's topic in MJ Tech: Modification and Repairs
Number 4 indeed. Keep in mind there are multiple radio antenna cables that AMC / chrysler used through the years. There are different antenna connectors and different sheet metal panel rubber plugs. Make sure that hole is sealed well as it's a source of water ingress from the front fenders. Some folks have had success using these: https://www.amazon.com/gp/product/B08LGNDD2G/ Good luck -
60 MPH max speed?
Salvagedcircuit replied to Salvagedcircuit's topic in MJ Tech: Modification and Repairs
I'm going to check this thanks. I added 3/4in neoprene rubber below the new vinyl floor. no floor mats. When the pedal is fully depressed, there is still a gap between the pedal and the flooring, so I don't think the flooring is to blame. Great idea, I'm going to do this I will check this, but I don't remember hearing any strange noises I'm going to grab my vacuum tester and check this, thanks. I relocated my canister under my expansion tank, but the rubber lines to it are very old, I should probably replace them, as they are the last lines that are stock. factory air box, air filter has 50 miles on it. I have not observed any oil stains on it. Thanks tremendously for the input guys! -
60 MPH max speed?
Salvagedcircuit replied to Salvagedcircuit's topic in MJ Tech: Modification and Repairs
I can check my cat with a usb endoscope camera. Thanks. -
60 MPH max speed?
Salvagedcircuit replied to Salvagedcircuit's topic in MJ Tech: Modification and Repairs
1) I have to check this 2) 3.55 3) 235/75R15 -
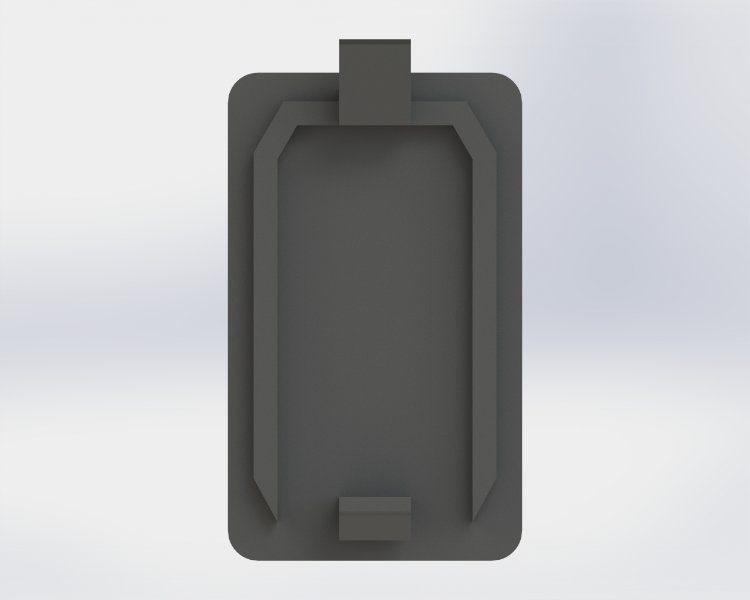
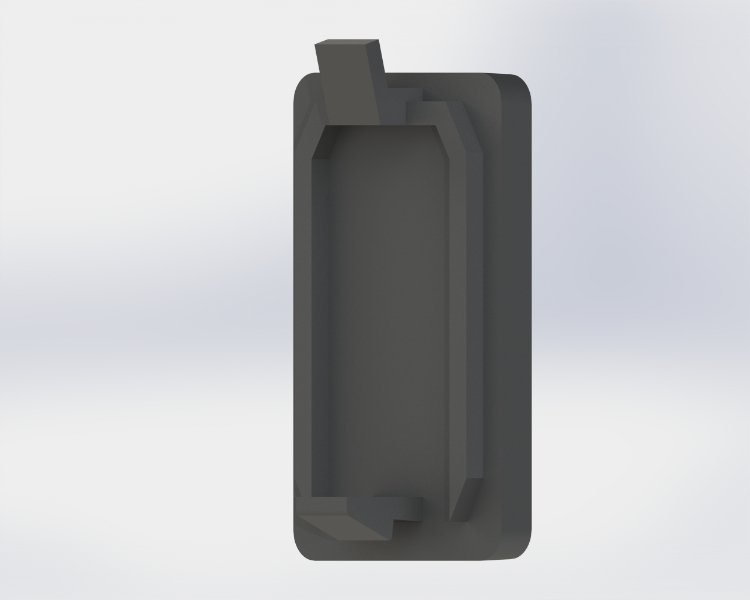
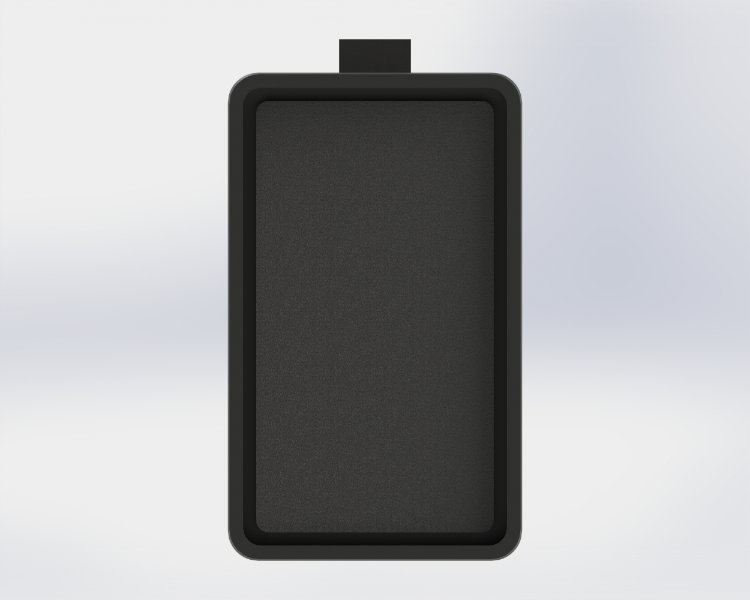
CAD: XJ MJ Dash Switch Blank
Salvagedcircuit replied to Salvagedcircuit's topic in MJ Tech: Modification and Repairs
No problem! -
Cup Holder - Another One
Salvagedcircuit replied to Ronnie's topic in MJ Tech: DIY Projects and Write-Ups
I guess it's time to CAD mine up and duplicate it. Obviously it needs a better bottom attachment mechanism, and a removal of that proud rubbermaid logo lip, but otherwise the overall design is nice. -
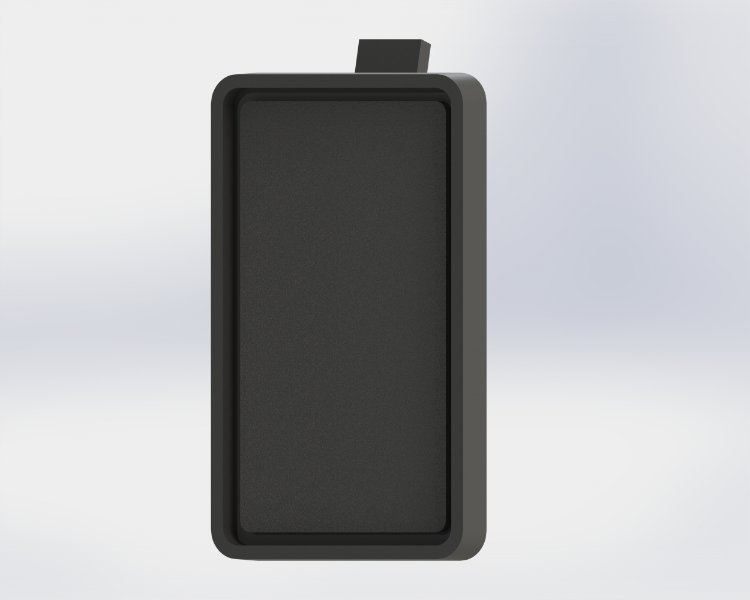
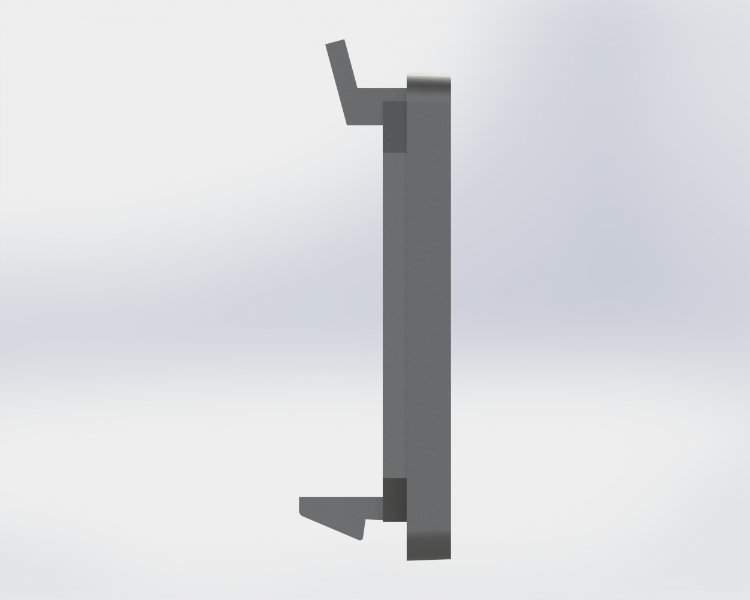
I CADed up the dash switch blank found on XJs and Mjs from 1985-1996. It is exact. These files are free to download. I declare these files as Creative Commons CC0. Anyone can use these files for any application etc... If you are in need of this switch blank, you can 3D print one using ABS or PLA. The OEM blank has a textured center, as shown in the renders. To get replicate this texture, you can tape off the switch blank border and bead blast the center ABS lightly. It should produce a decently matte finish. If there is enough demand, maybe you can convince @Dzimm to print these up and list em for sale. Enjoy! XJ-MJ-switch-blank.STEP XJ-MJ-switch-blank.STL
-
I've been slowly refurbishing my Comanche back to stock since initial purchase in 2022. The engine sounds excellent and the idle is stable around 650-800rpm. It has been decently reliable so far and I've been using it to run errands around town with no sweat. I have ironed out most of the problems with the vehicle but one remains: I can't accelerate above 60mph on flat ground. No matter what I do, I have to put my foot to the floor and hold it to approach 60mph. I'm guessing this is not normal? I know these are not speed demons, but I have to keep flooring it to maintain 60mph. I don't know why. There are no weird engine sounds, there are no strange transmission noises. The vehicle does not struggle or hesitate to accelerate from 0-60mph, it just plateaus at 60mph almost like there's a software limiter, but obviously there isn't. Where do I start troubleshooting this? Is my AW4 transmission not shifting into 3rd / 4th? Is is possible that my TPS needs adjustment? Condition: -IAC cleaned -throttle body thoroughly cleaned -new throttle body gasket -threaded fitting to throttle body for new hose to map sensor. no leaks.