Salvagedcircuit
-
Posts
1381 -
Joined
-
Last visited
Content Type
Profiles
Forums
Gallery
Everything posted by Salvagedcircuit
-
If you look through the forums, you will find that folks have found the build sheets in many areas of the vehicle. The most common are under the seat(taped or stapled to it), under one of the door cards, and under the airbox. Good luck.
-

Inner door weather dams
Salvagedcircuit replied to Tree's topic in MJ Tech: Modification and Repairs
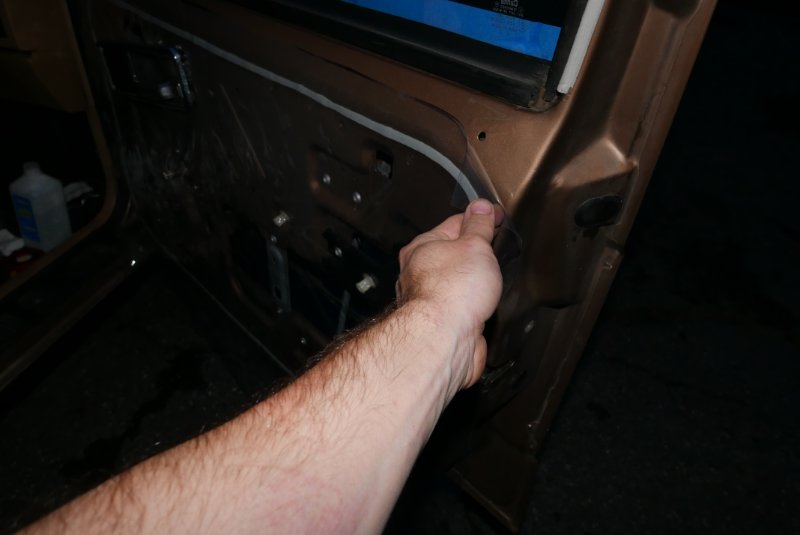
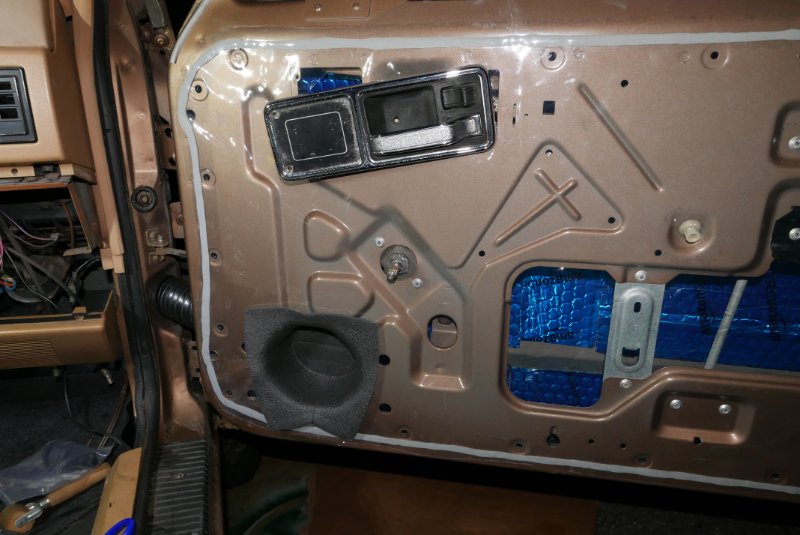
I used some clear plastic vinyl from walmart and butyl tape, similar to what @Pete M used. Any walmart that has a crafts section has multiple thicknesses of vinyl. What's nice about the butyl tape is that it's infinitely resealable, as long as the surface is clean. This way if you need to modify or change something inside the door you can just pull off the vinyl sheet and press it back into place and it's good to go. I used a little 1in roller to press the vinyl sheet to the butyl tape. Works a real treat. I'm going to post more about it in my main build page, but I havn't got up to it yet.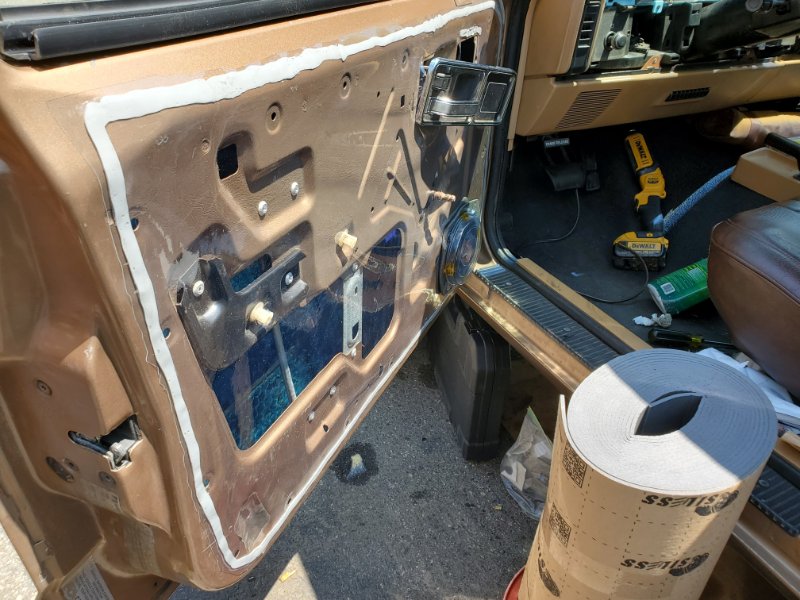
-
'88 Sport Truck
Salvagedcircuit replied to Buddy Brantley's topic in Member Projects: Your Comanches
In case you were wondering the part numbers for the fender liners are: 55175009 55175008 I have to buy a set myself! -
1992 Jeep Comanche "Maria"
Salvagedcircuit replied to MariaManche's topic in Member Projects: Your Comanches
Try using an Ozone machine. My brother purchased a smokers F250. It stank. He left the Ozone machine run for a day and afterward the smell was gone. -
GrandBoost98s Comanche 2
Salvagedcircuit replied to GrandBoost98's topic in Member Projects: Your Comanches
Absolutely! I'm just glad the ball-joints, bushings and control arms are still available and affordable. -
Power Steering Lines Leaking
Salvagedcircuit replied to Warren99's topic in MJ Tech: Modification and Repairs
I just flushed my power steering fluid. Quick blurb about the power steering fluid in case you are interested: The 1988 service manual states the Power Steering fluid for the 88 steering box is AMC# 8993342 Internet says the equivalent mopar# is MS-5931. MS-5931 = gm 9985010. It is clear in appearance, slightly amber on a paper towel. Valvoline 602241 meets gm 9985010 spec. I called up Keene, NH Jeep. mopar# 68218064ac is the current version of power steering fluid for cherokee / comanche. It is called "power steering +4" It contains no ATF. I asked them specifically. You can still get 68218064ac today. I settled on the valvoline 602241. It's been working great so far. I needed 2 quarts to properly flush my power steering pump. -
Lookin good! That's a ton of work right there!
-
Nice work! Definitely bookmarking this for future use
-
Woah did you make those speaker pods/map pockets from scratch? Lookin pretty good!
-
1990 Comanche Eliminator
Salvagedcircuit replied to pizzaman09's topic in Member Projects: Your Comanches
Nice! -
89 Pioneer | Project BlackHorse
Salvagedcircuit replied to BlackHorse's topic in Member Projects: Your Comanches
Wow That valve cover looks worse than mine and mine had 274,000 miles on the clock! Dang. -
Lucky Lucky! I grabbed my hack job one for $100 but it cost me like $100 in fuel to get it
-
1990 Comanche Eliminator
Salvagedcircuit replied to pizzaman09's topic in Member Projects: Your Comanches
Took it like a champ. #MJsEarningTheirKeep -
Excellent taste is contagious
-
89’ Pioneer MJ Barn Find
Salvagedcircuit replied to oleskool's topic in Member Projects: Your Comanches
Dang, Did you do the work? That looks exceptionally great! If so, please do a writeup! -
This is definitely good news. I'll be keeping an eye out on my mcmaster bushings, but if they prematurely fail I'll swap in the honda ones. So far no issues with my mcmaster-carr 9305K33's!
-
Hi. I'm debating moving over to a 60mm throttle body over the stock 52mm throttle body. I just recently replaced the exhaust header tube and am not in a rush to replace something I just installed. Is the exhaust modification needed? would be the back pressure be too great with the stock exhaust header tube? Will the engine run poorly in that configuration? Thanks.
-
Radio Antenna Connectors
Salvagedcircuit replied to Salvagedcircuit's topic in MJ Tech: Modification and Repairs
Wow, this is incredibly useful information. That center conductor does look very thin. Dang. I think I'll investigate creating an RG-6 direct line. Thanks a ton! -
1988 Golden Brick
Salvagedcircuit replied to Salvagedcircuit's topic in Member Projects: Your Comanches
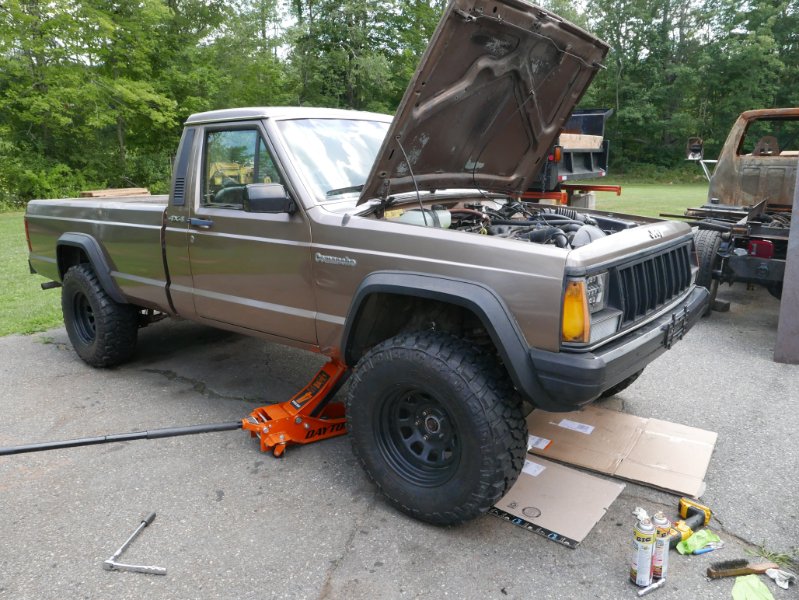
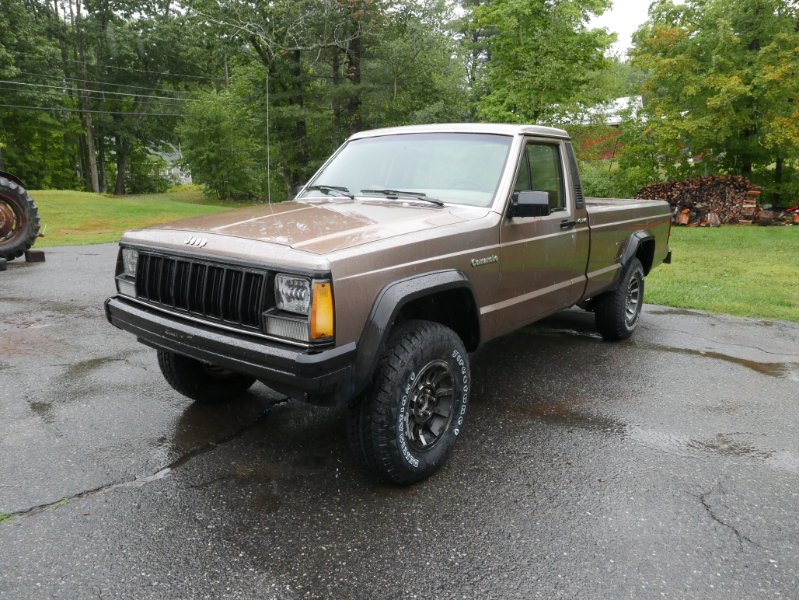
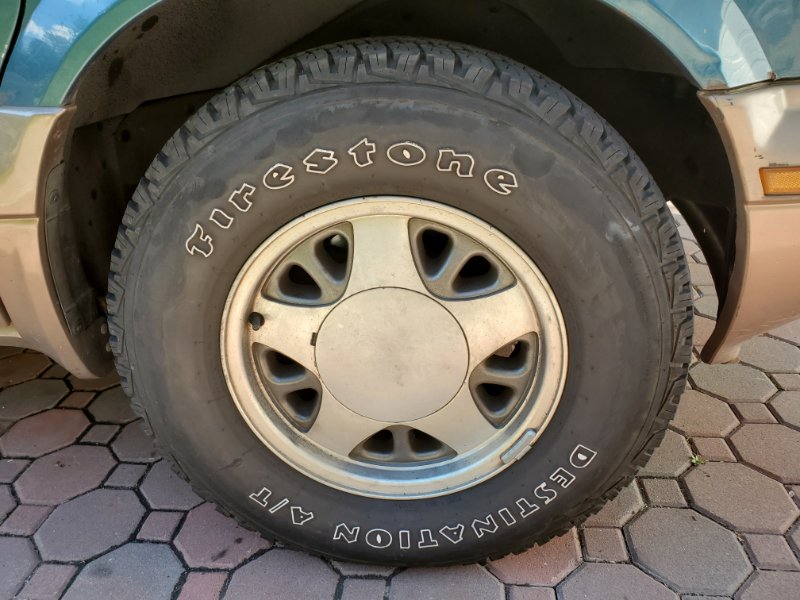
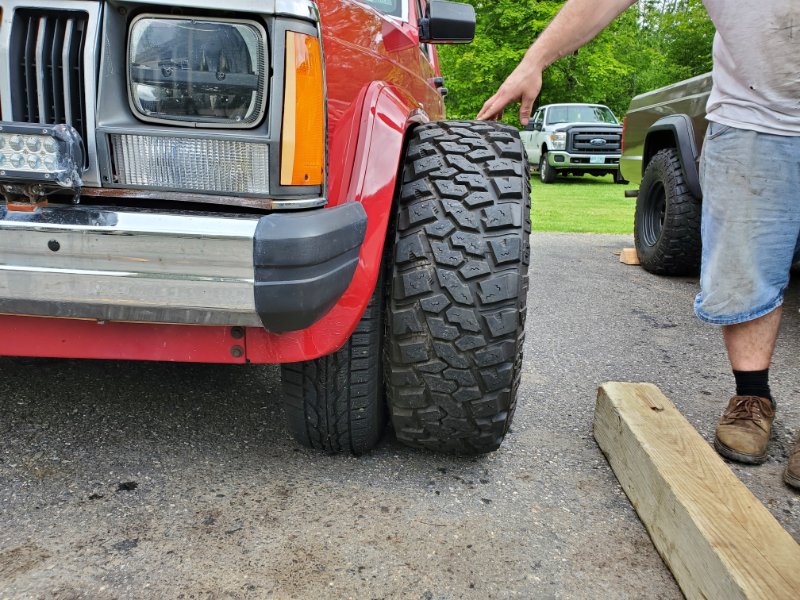
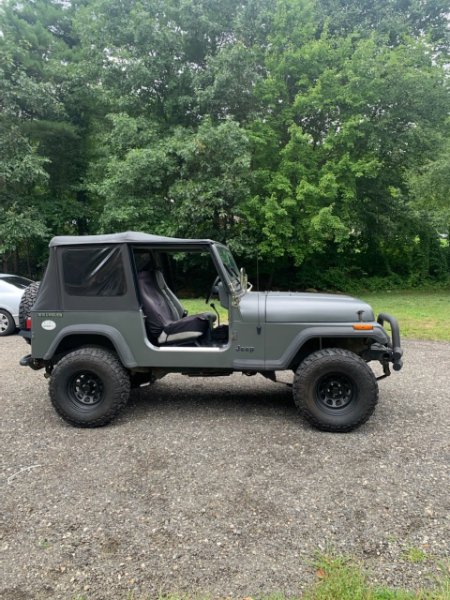
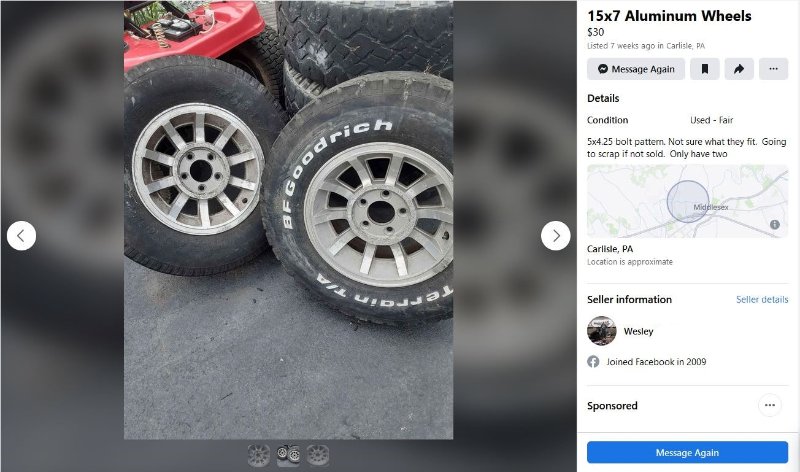
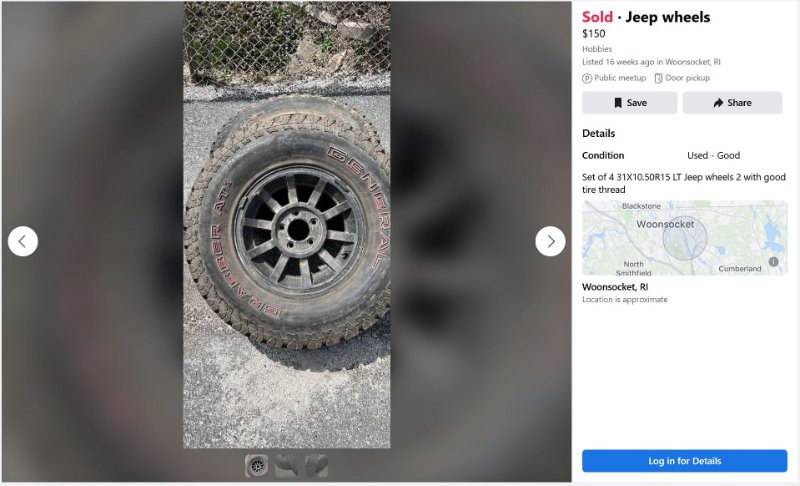
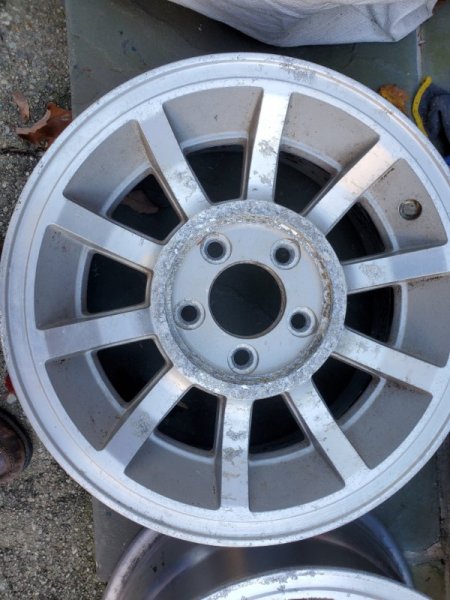
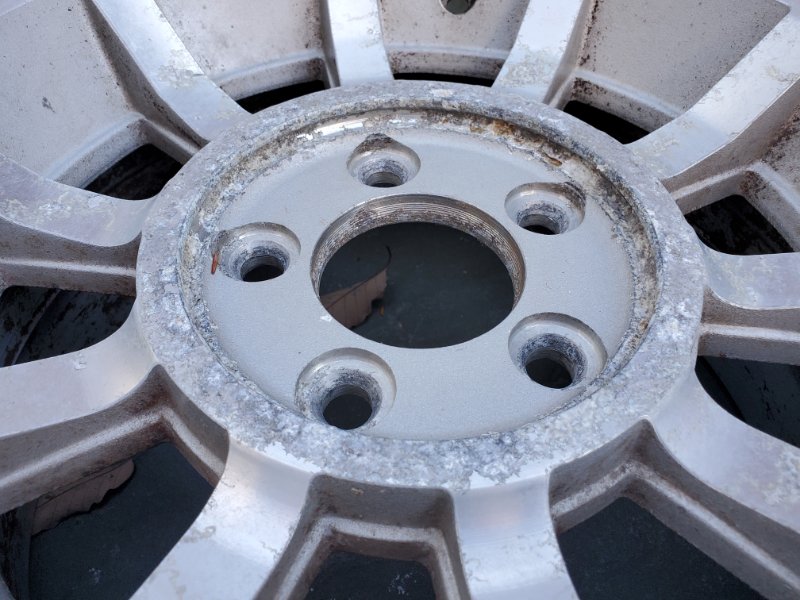
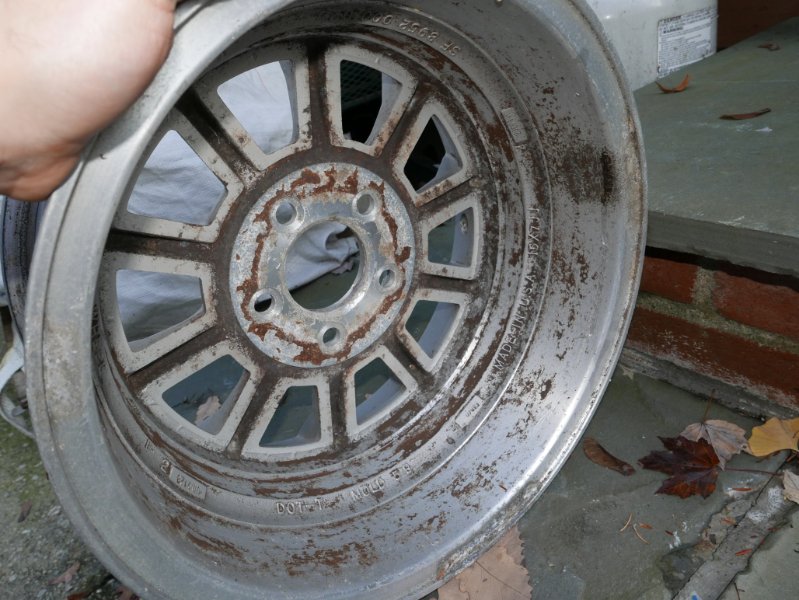
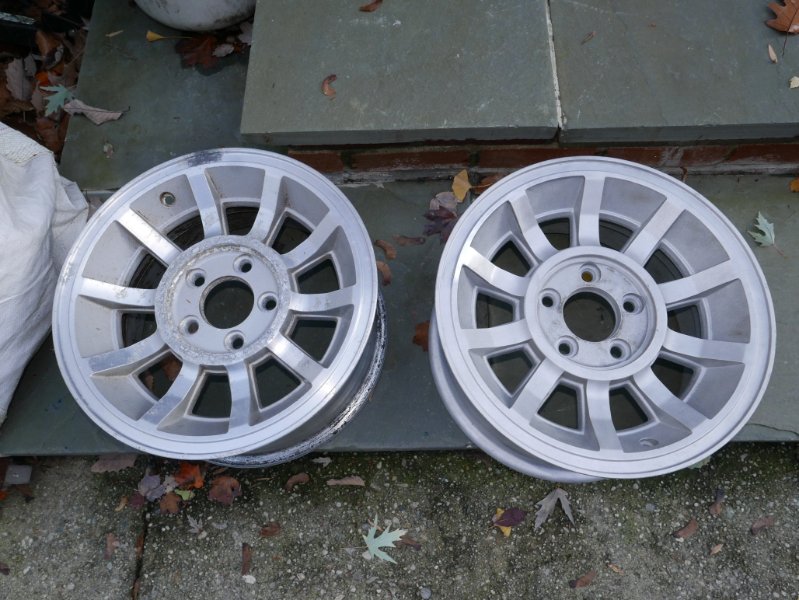
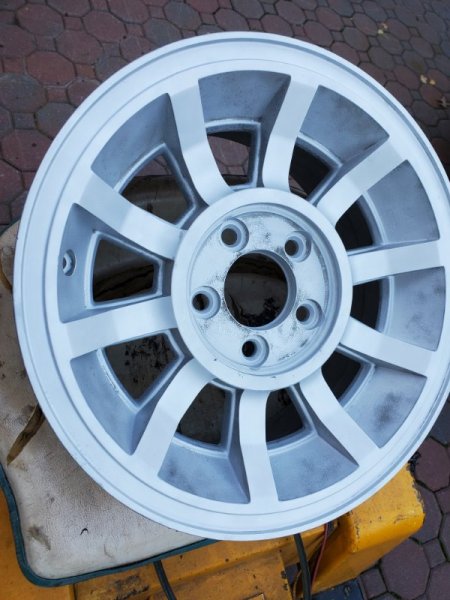
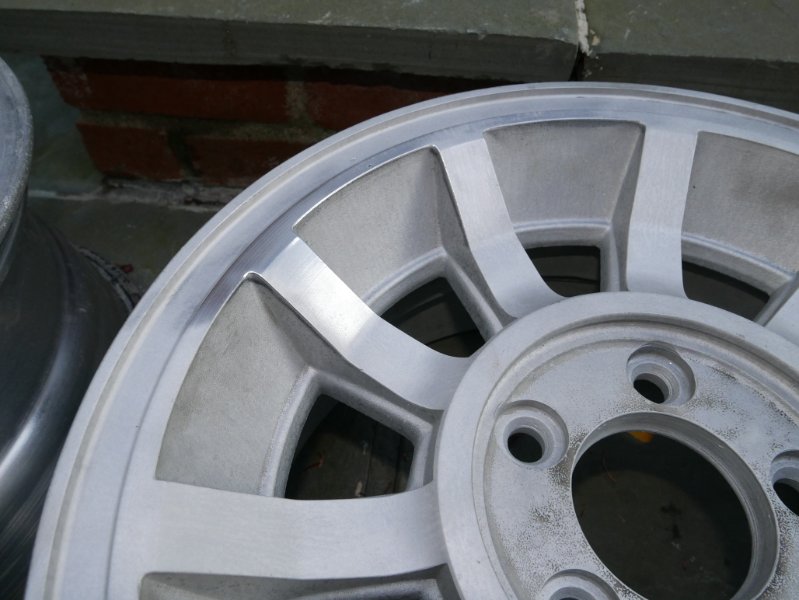
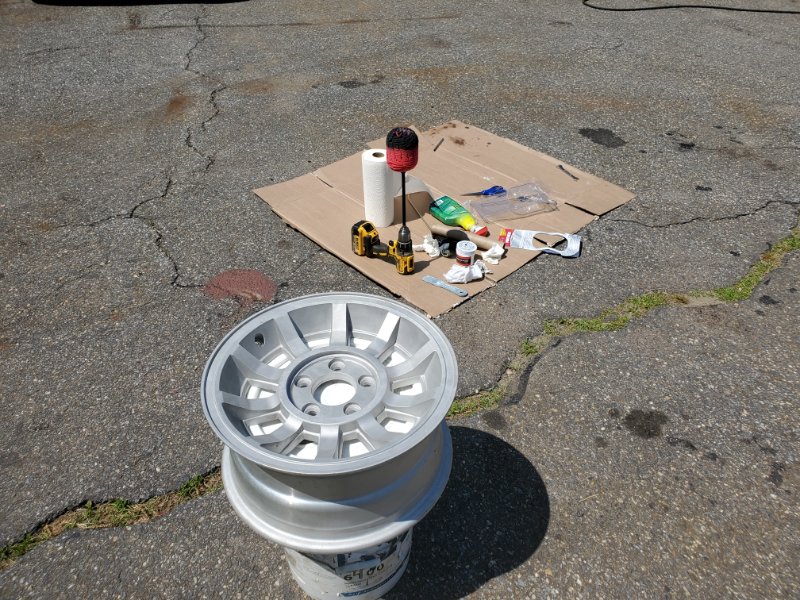
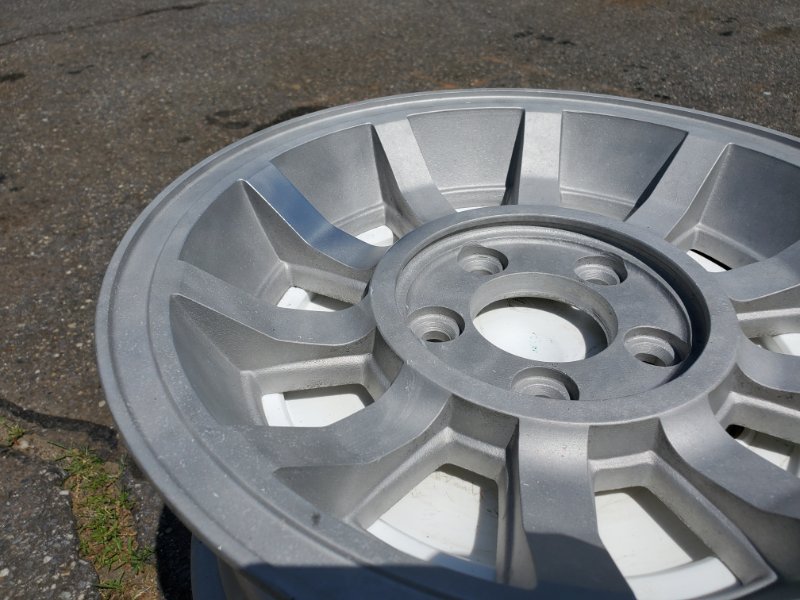
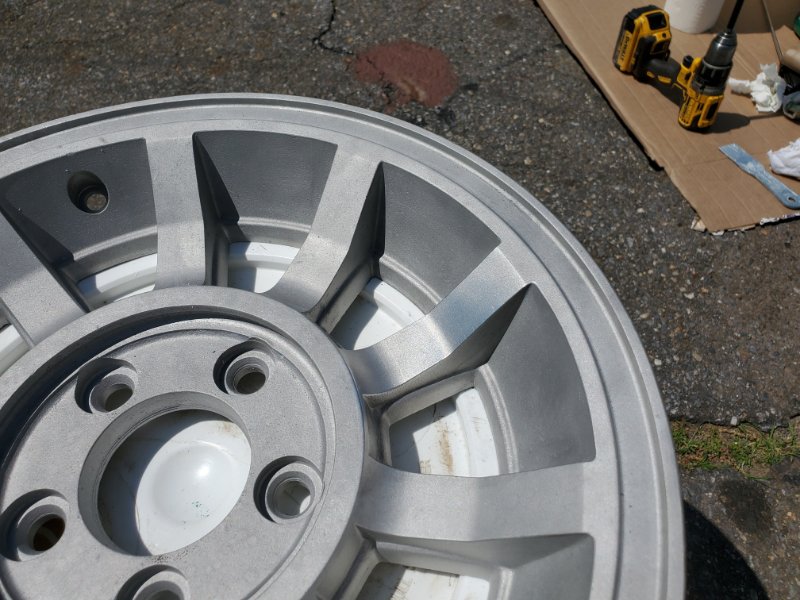
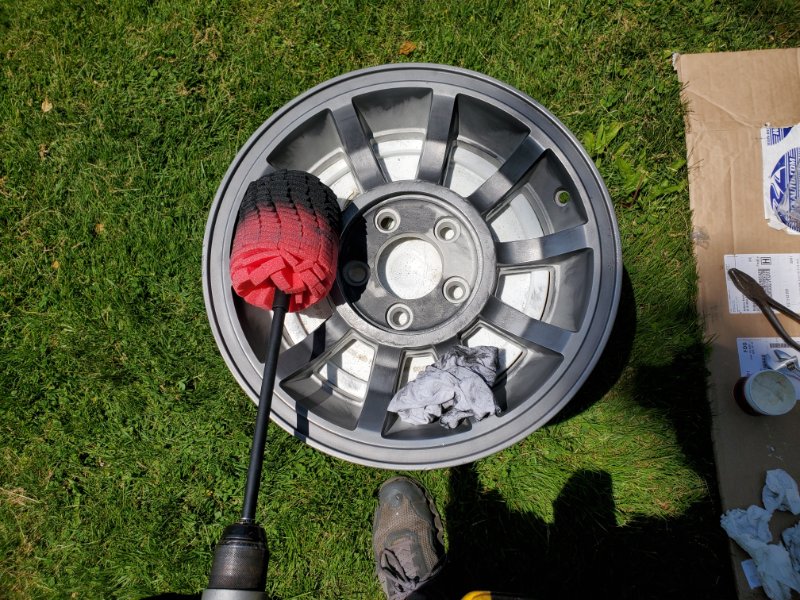
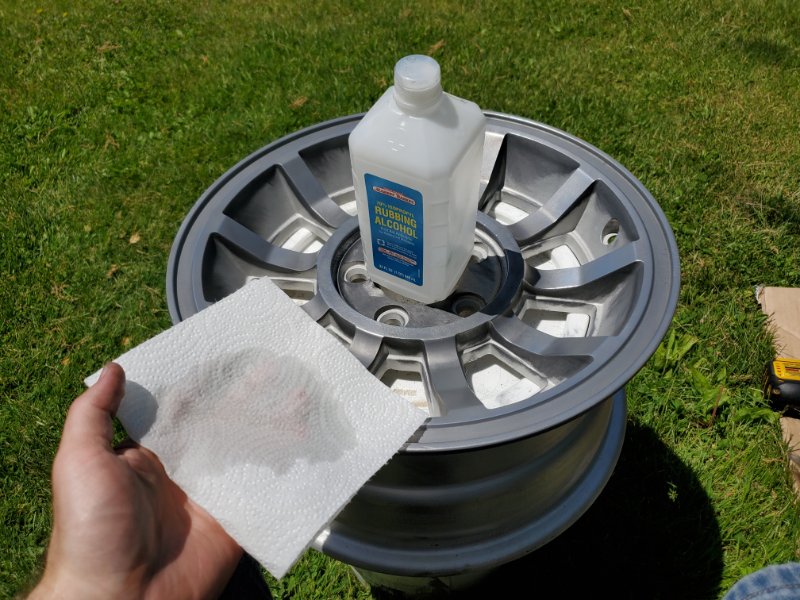
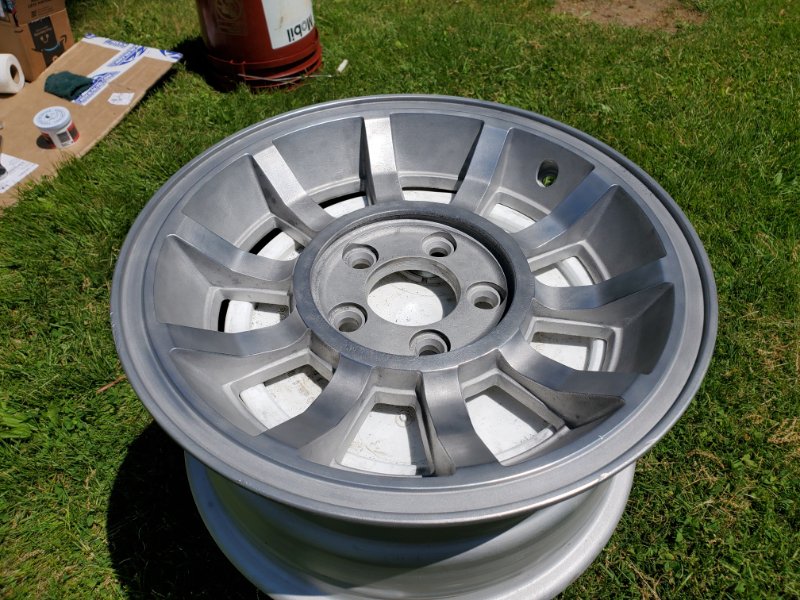
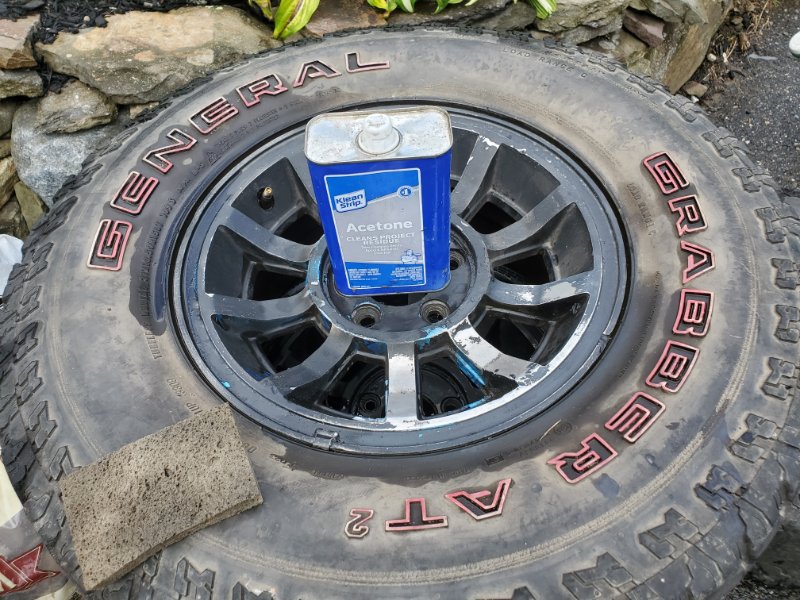
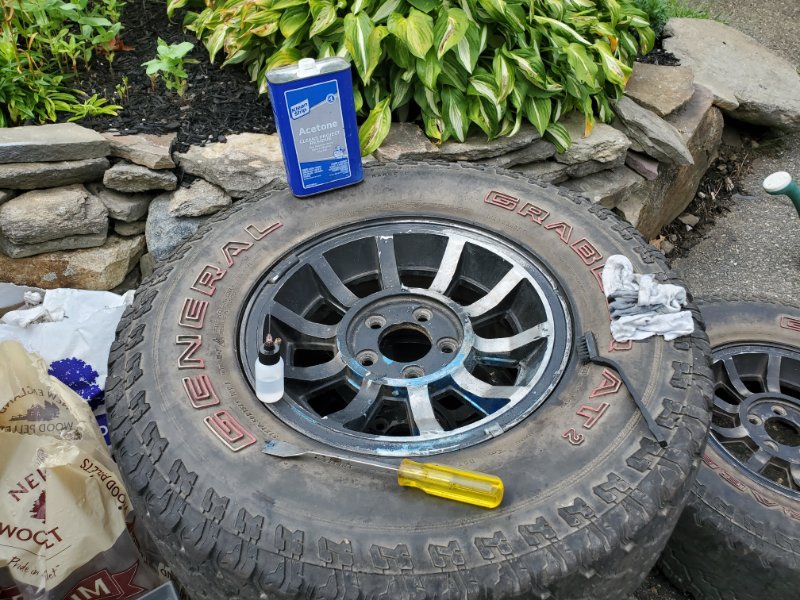
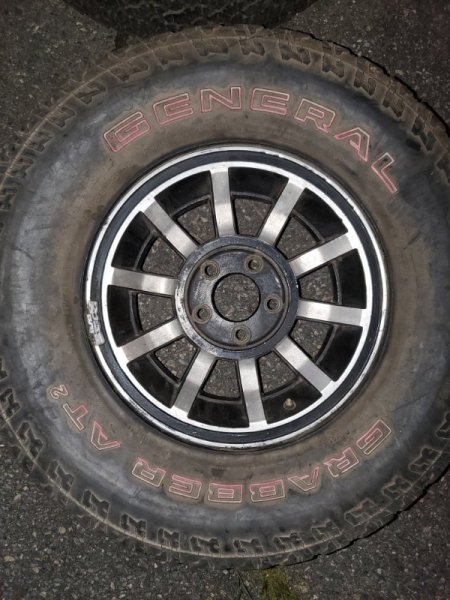
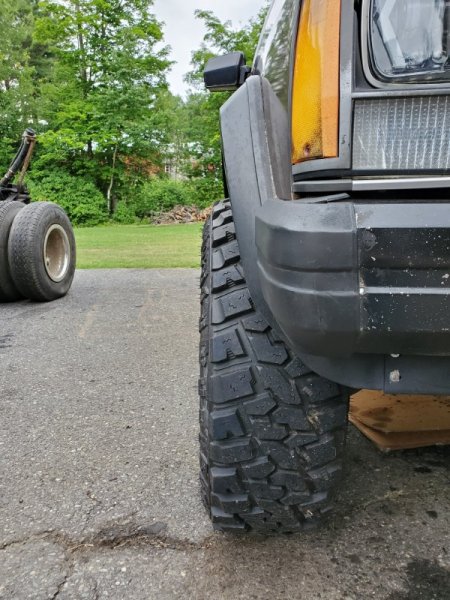
Tires and Rims Onto the most subjective part of jeep ownership. I'm very much in the "stock forever and always" camp, but there are some situations that can sway my moral compass. This is not one of them. The 10 spoke OEM rims are arguably the best rims that were available on the XJ / MJ series and have a timeless presence that is unmatched by anything I have come across since, including aftermarket. I think you can see my bias is coming out here strong. The previous owner installed a set of (5) Dick Cepek Extreme Country 31x10.5R15 Tires on 4.5x5 black gloss amazon rims with substantial backspacing. This combination filled the rear wheel wells but made the front wheels stick out considerably. I'd say they were quite cheeky indeed. There's no doubt that the offroad tires were high quality and properly chunky. Most definitely a lovely tire. They provided a rugged stance to the comanche that made the MJ look like a monster truck. Look at them against my brother's XJ. Monstrous. As cool as that looks, this is going to be my daily driver. I wanted a modest, quiet, and reliable truck. I did heed the words of comancheclub members near and far and and sized up the tires. I went with a firestone destination AT/2 235/75R15 tire and the 10 spoke rims. The combination is perfection. The destination AT series have worked a treat on my family's Astro van and that thing has close to 250,000 miles on it. Astro to the moon. I sold the Dick Cepek tires to a local New Hampshire jeeper with a YJ. He is enjoying them very much when out mudding and overall I think it's a better fit. Refurbishing the Turbines Lately, finding a complete set of 10 spoke rims is becoming a bit of a challenge. Finding a set that is not completely destroyed by the sands of time is even harder. I came across two separate poorly labeled marketplace listings. This is frankly the best way to find them. The set of two rims required bead blasting as the unforgiving east coast road salt conditions eroded the front surface of the hubs. The untouched rim is on the left. The bead blasted rim is on the right. Bead blasting removed the shiny surface finish of the spokes but cleans up the oxidation on the rim. Once bead blasted, it's like the oxidation never happened. This was the result of the first round of bead blasting. The rims were spotless the second round. Since I did not want to go through the trouble of machining down the faces of the 10 spokes, I decided to experiment with polishing. I grabbed a Mothers Power Ball and Mothers 05100 Mag & Aluminum Polish and the combination worked very well. I did not bother sanding the surface of the spokes. I bead blasted the rim, blew off the rim with compressed air and went right to polishing. The results were adequate for me. As a test, I spent a few minutes on one spoke and then used Isopropyl Alcohol on a paper towel to clean the spokes. I wanted to see if the shine remained. It did indeed. After the test run, I decided to polish the entire rim. The setup was pretty basic: Two 5 gallon buckets, polishing compound, polishing ball, polishing rag, paper towels, rubbing alcohol and a drill. A 5 gallon bucket was used because it's plentiful and it fits perfectly behind the rim. It's easy enough to sit beside the rim on another bucket and bang out an entire rim in 15-20min. The procedure is also straight forward: Blow off rim with compressed air Insert buff ball into drill, apply polishing compound to the buff ball Press puff ball against the spoke for 1-2minutes. Wipe away remaining polishing residue with a cotton cloth Inspect shine. If you hit your target result, move to the next spoke. Once all the polished areas are complete, clean the residual polishing compound off with paper towels and isopropyl alcohol. Blow off rim with compressed air in preparation for paint It's hard to capture on camera how shiny the spokes were following the procedure. The end result was adequate enough for my tastes, but it may not be as shiny as the original factory machined face. Achieving ~60% of the effect for 5% of the refurbishing cost worked for me, so I duplicated this procedure on the other blasted rim. Finally, I coated the rims in two coats of Rust-Oleum 248929 Clear Wheel Spray Paint. I have my doubts that this spray paint will last more than a year, but I did not feel like $150/hour for powder coating (before material costs) was justifiable when I can get completely refinished turbines on ebay for around $160 each with little to no risk. My method is by no means the proper way to refurbish the rims. A more correct method would involve: Bead blasting the rim Machining the face and spokes of the rim. Doing this on a lathe is not fun as you have many interrupted cuts Masking the spokes of the rim Pre-heating the rim in an oven Silver Powder coating the pockets between the spokes Removing masking from the spokes Baking the rim Clear Powder coating the entire rim Baking the rim The Black spray painted set cleaned up well with acetone, but took a lot of manual labor to completely remove all traces of the paint. Some rims were painted multiple times with different colors and these rims took considerably longer. The benefit of acetone is you do not need to blast the rim. I tried Goof-Off but frankly, acetone worked just as well for less cost.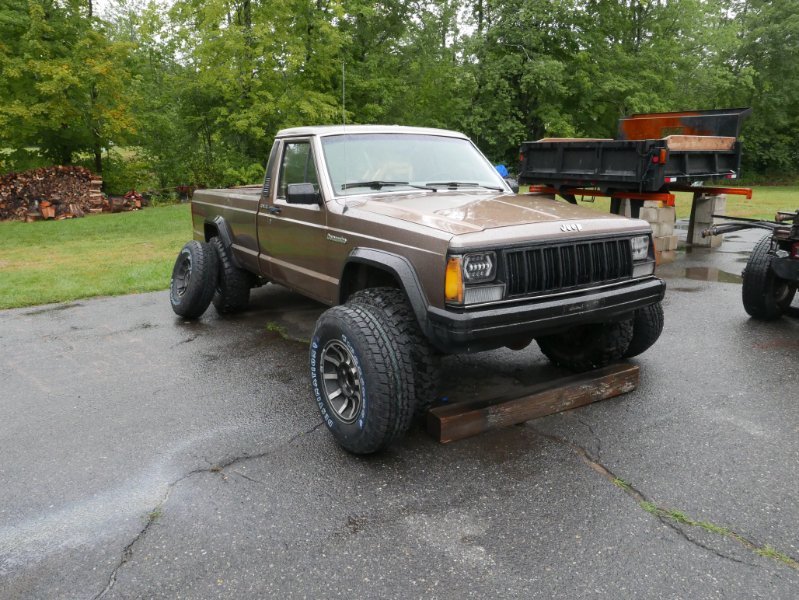


-
1988 Golden Brick
Salvagedcircuit replied to Salvagedcircuit's topic in Member Projects: Your Comanches
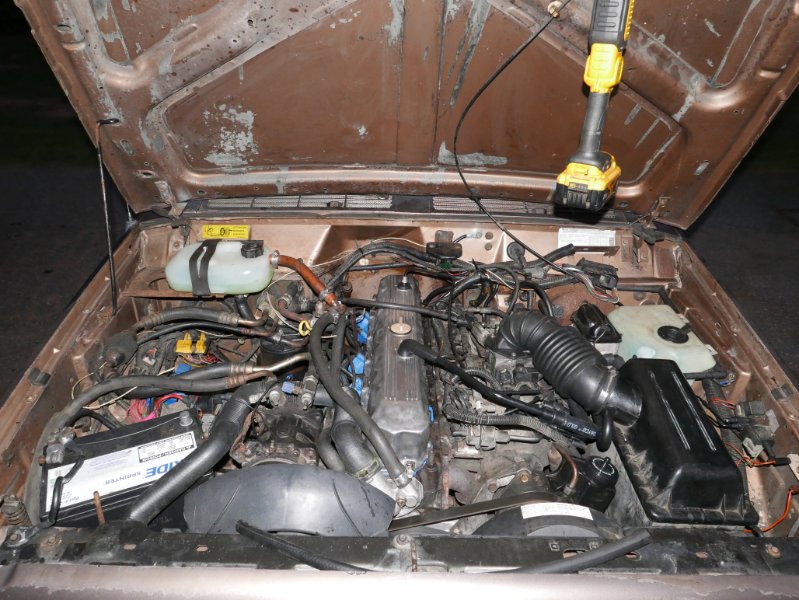
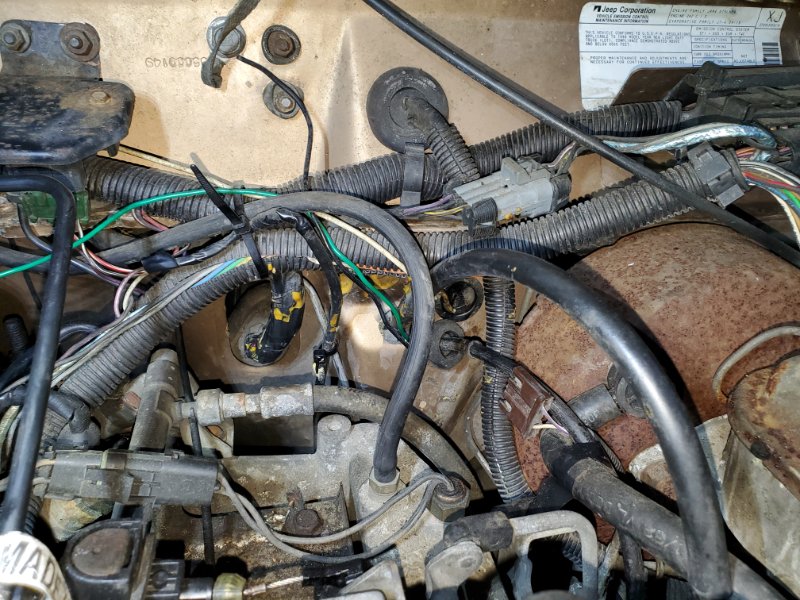
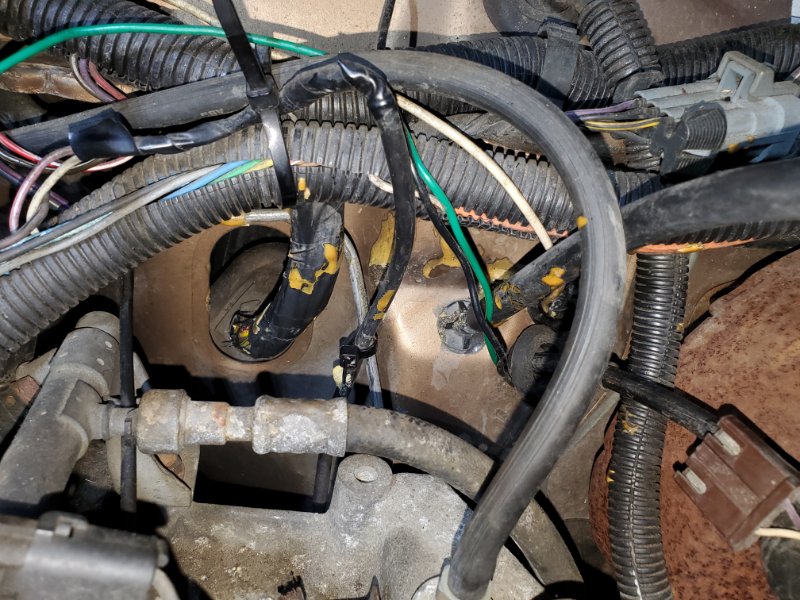
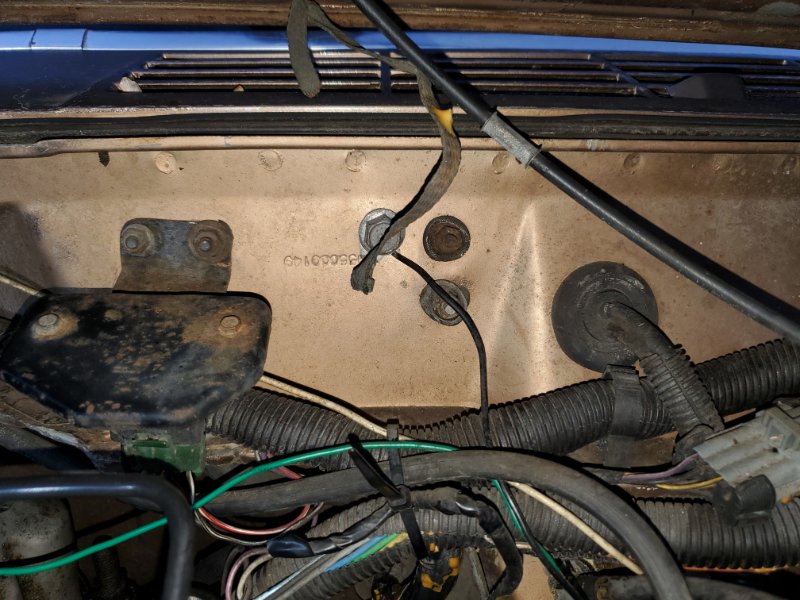
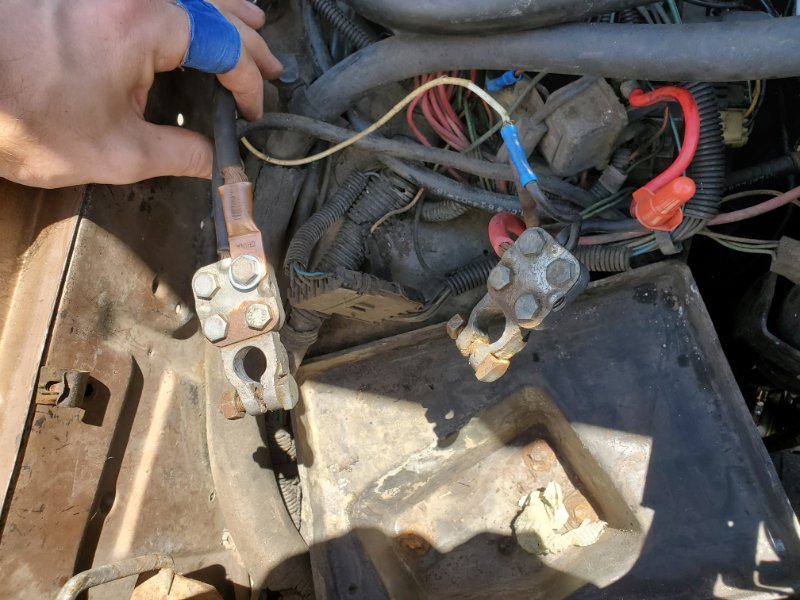
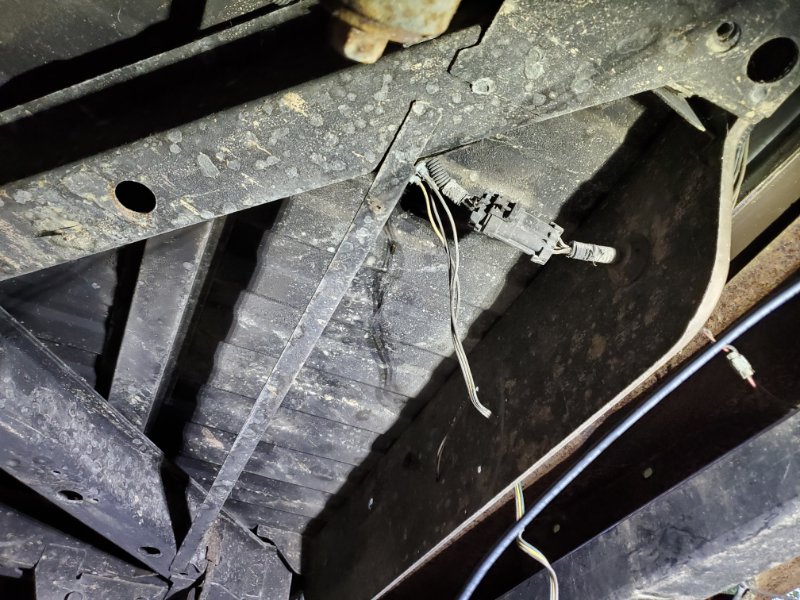
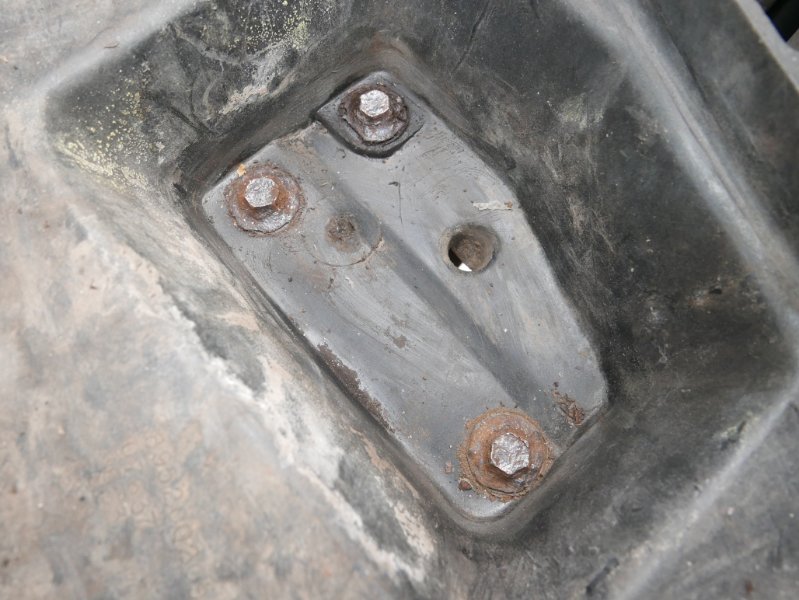
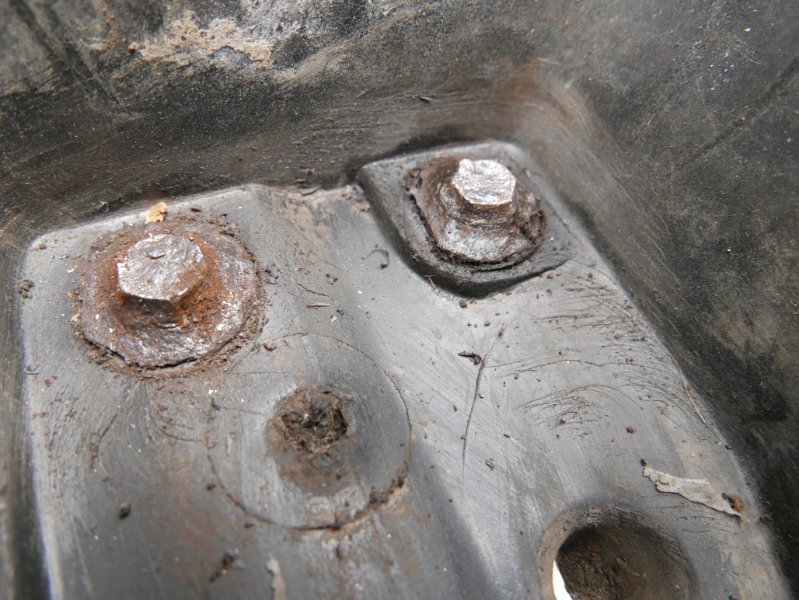
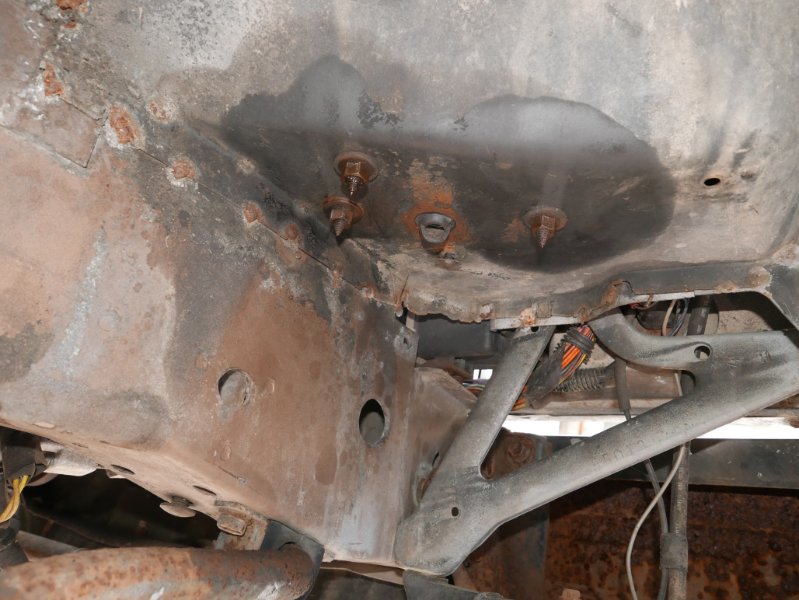
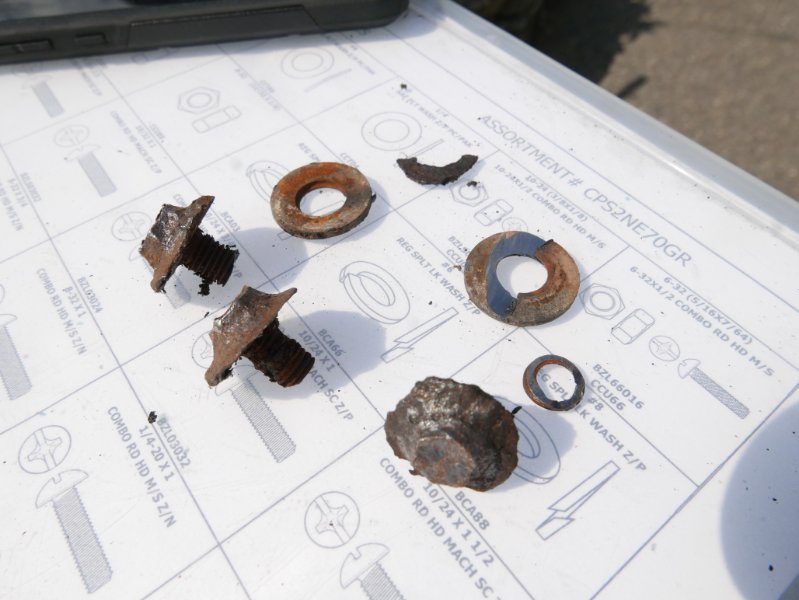
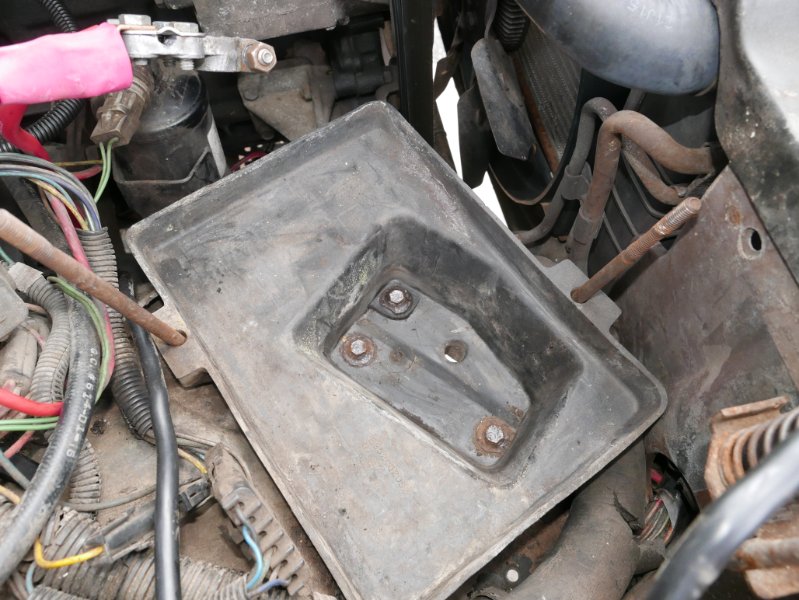
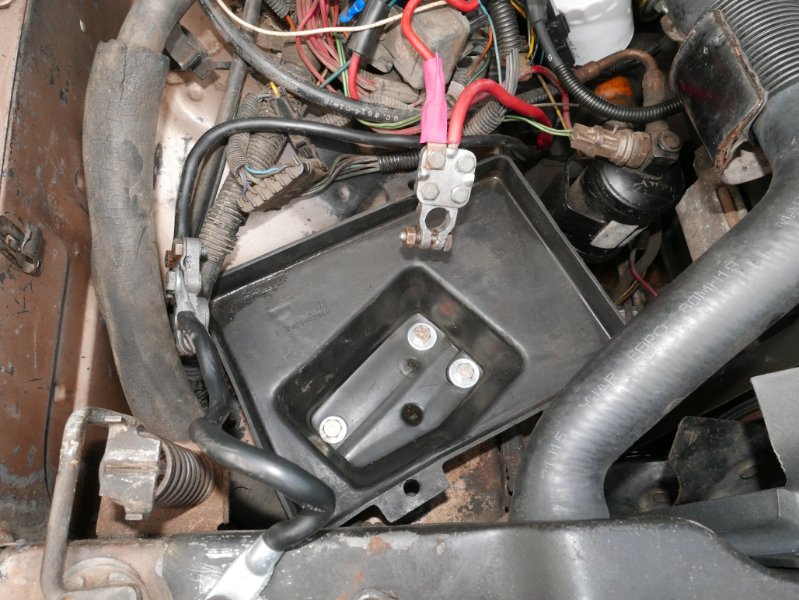
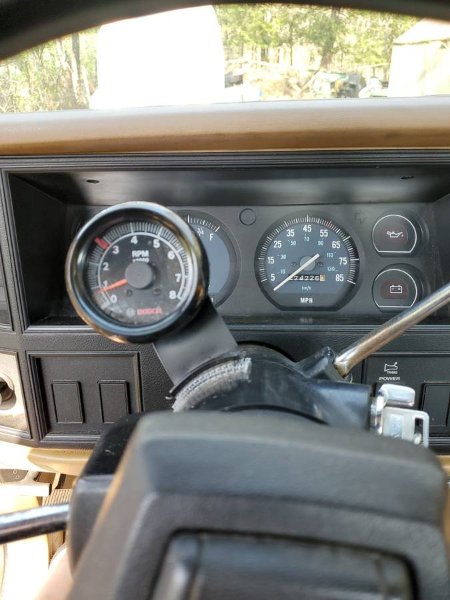
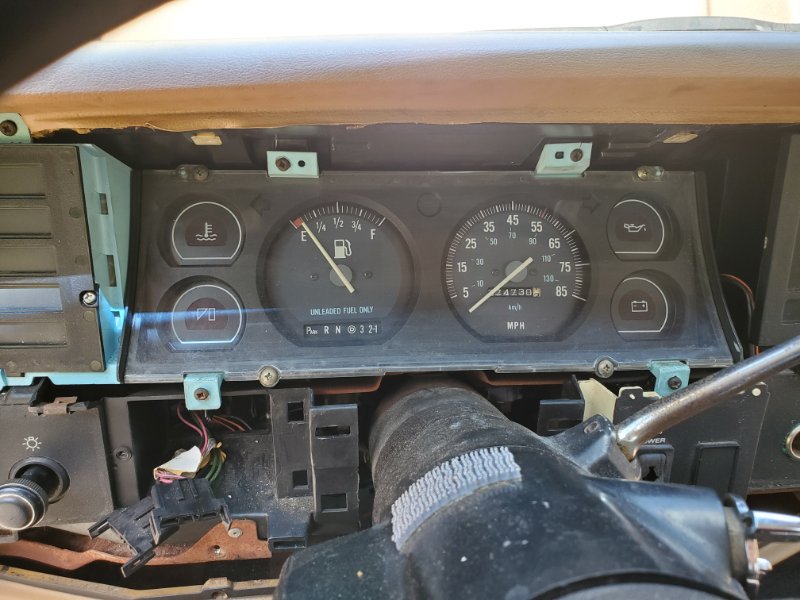
Gauge Cluster, Wiring Gremlins and a Stuck Battery Tray Being a base model comanche, I was greeted by a dummy cluster in the drivers seat. I was not a fan of the lack of information provided to the driver even though the oversized gas gauge was rather humorous. The previous owner installed an external tachometer on the steering column which I did not particularly admire either. Luckily I was able to find a mostly full gauge cluster on ebay and modified it for the AW4 column shifter. I followed some guides here on how to trim it properly and everything fit well. Wiring Gremlins One of the most off-putting sights in my engine bay were the hodge-podged electrical mods from the previous owners. There seemed to be a never ending amount of splices, ghost clips, open circuits and poor grounds wherever you looked. Ironically, the main firewall ground strap was repurposed as a wiring harness tie down and I did not know this was supposed to be the main ground until I read over the cruiser54 tips. This nonsense unfortunately extended to the rear of the comanche too. The tail light wiring harness was spliced four times too many, and even so the license plate lights simple did not work. I believe there must have been a different bumper at some point in time as there were two sets of license plate lights. A Grote 6000 light box was screwed into the sheet metal behind the bumper while two round snap-in lights adorned the rear face of the bumper. Everything was tied together with exposed wire. Excellence. Battery Tray I was trying to get access to the alternator to get better photos of the label to see what alternator was in my truck, the 60a, 90a or 105a, and I also wanted to get a vacuum in and around the battery tray to remove a bunch of dirt, debris and old acorns. This is what was waiting for me under the battery. There was no saving the bolts. The only option was as the grinder. Luckily AMC decided to go with a plastic battery tray. It survived 34 years with no sweat. The metal underneath was also smooth and rust free. My '97 astro van had a metal battery tray and it did not last anywhere near as long. I added some new standard bolts and now I at least have access to the alternator in an emergency situation. If I didn't replace those bolts, I'd be toast for sure.


-
Thanks for the info. I have an '88 and I'm planning on doing a light tint of either 25 or 30% attenuation because NY state and NY state 70% light transmittance. My glass looks almost entirely clear in comparison to my folks '12 grand cherokee!
-
Nice job filming this up!
-
Renix Vacuum Canister OEM Location
Salvagedcircuit replied to Salvagedcircuit's topic in MJ Tech: Modification and Repairs
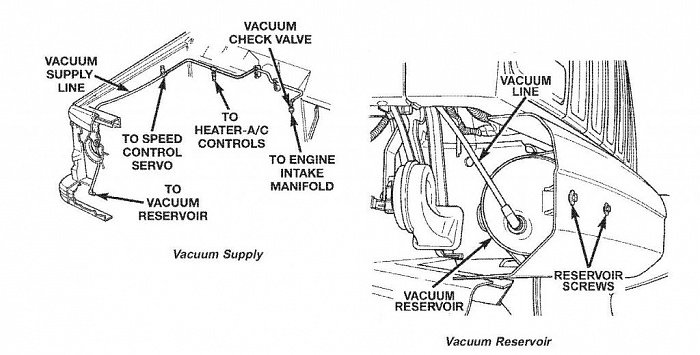
Thanks a ton for this! I repainted my bumper and assembled everything and I was wondering what the slots on the bottom were for! I thought my bumper was after market and the front holes were just missing. Thanks again! Never underestimate the power of an incorrect diagram! -
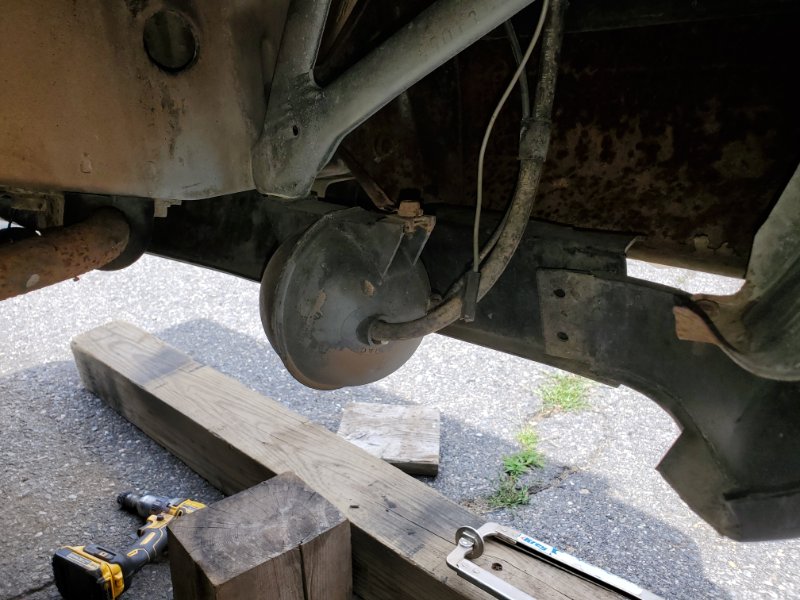
I've been looking around on ebay listings and in the jeep service manual and everywhere I could find mentions the vacuum canister is screwed to the front bumper. Mine is not. My front bumper has no holes in the front face to mount it. Instead, my vacuum canister is bolted into one of the side A-shaped fender brackets behind the bumper. It is held on with one of the two mounting bolts. That seems like a recipe for failure if I leave it mounted this way. If anyone has photos from their renix comanche vacuum canister, I'd appreciate it! Maybe I should just move it below the coolant expansion tank
-
1988 Golden Brick
Salvagedcircuit replied to Salvagedcircuit's topic in Member Projects: Your Comanches
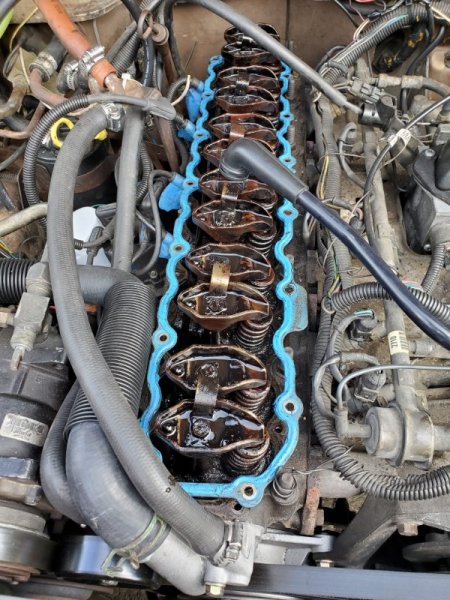
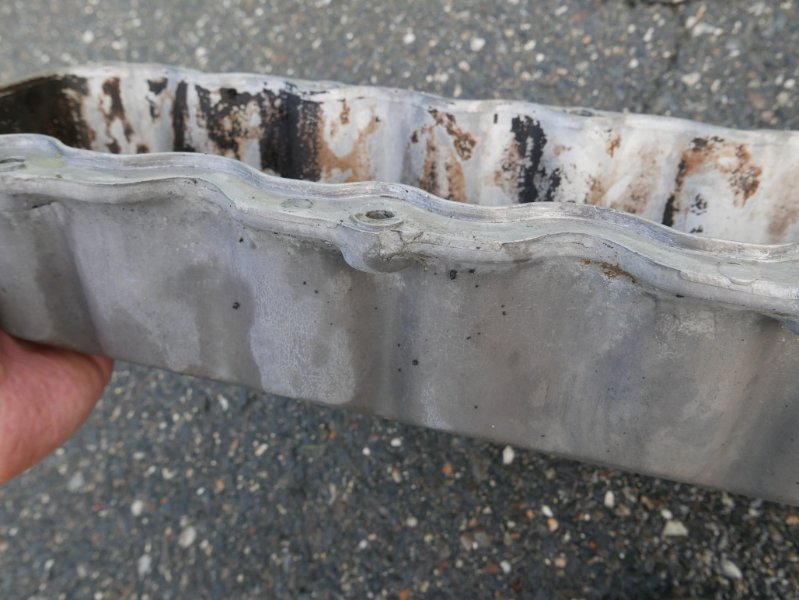
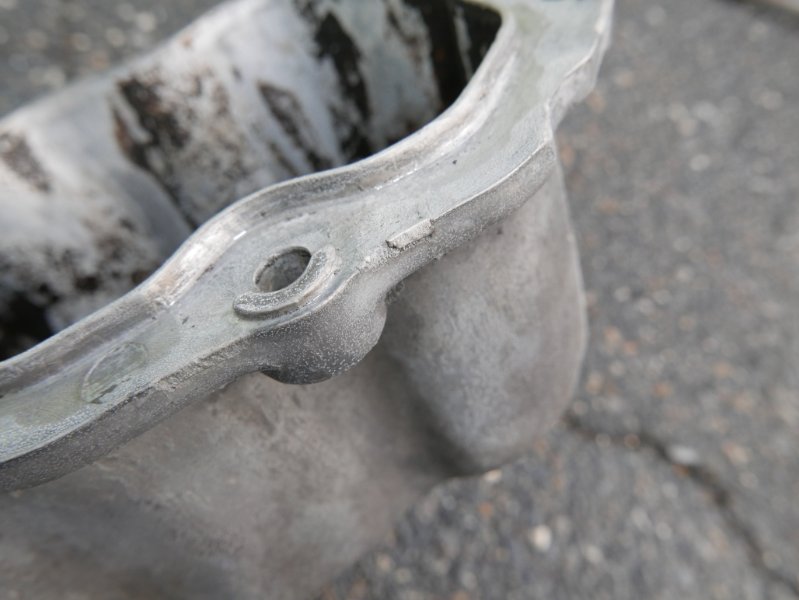
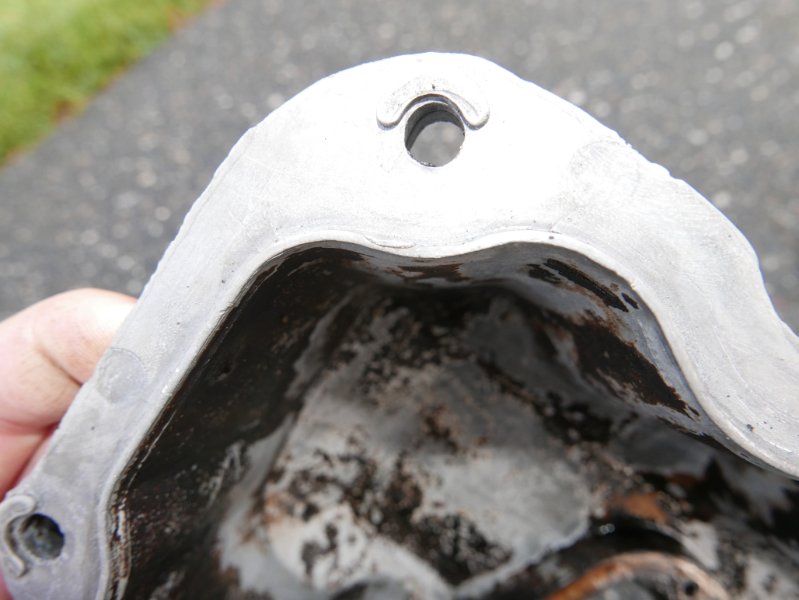
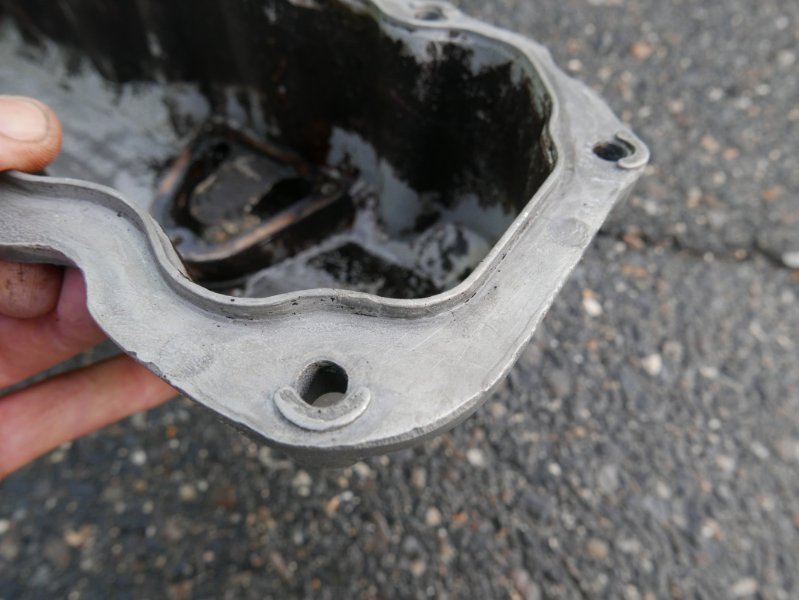
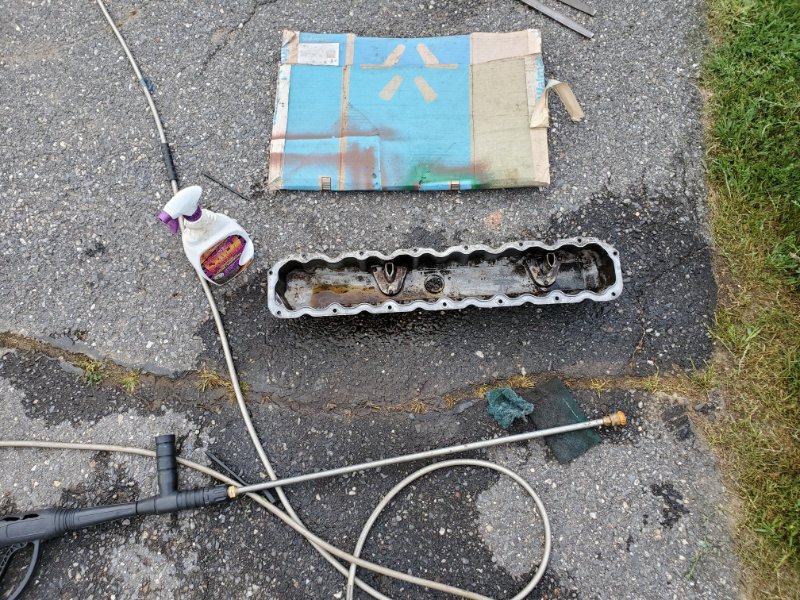
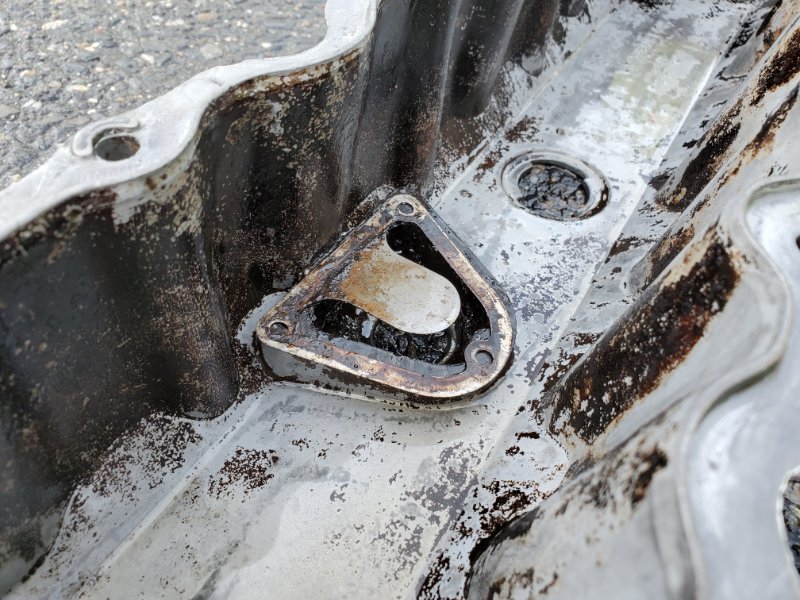
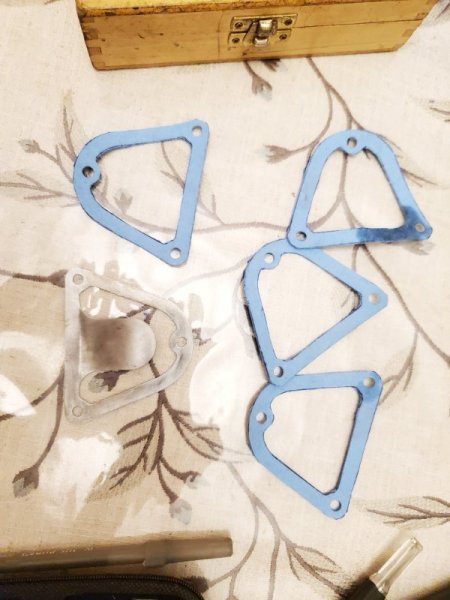
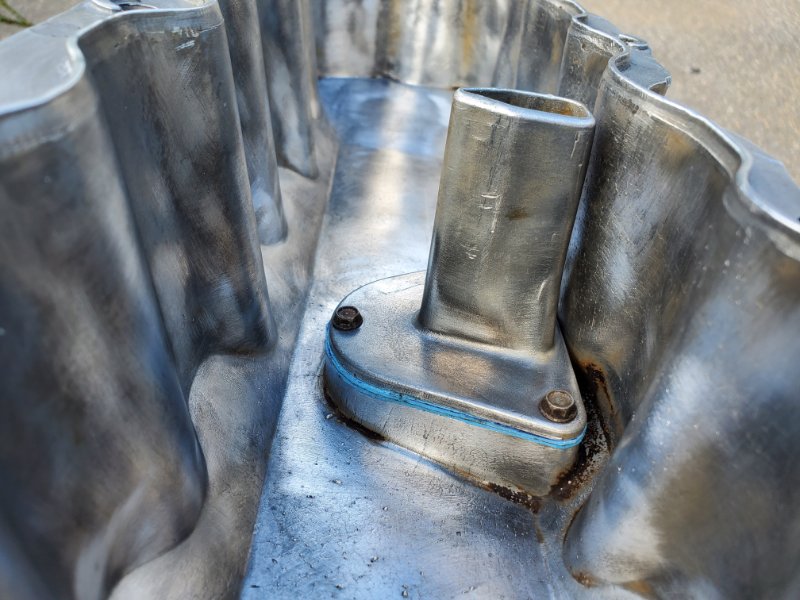
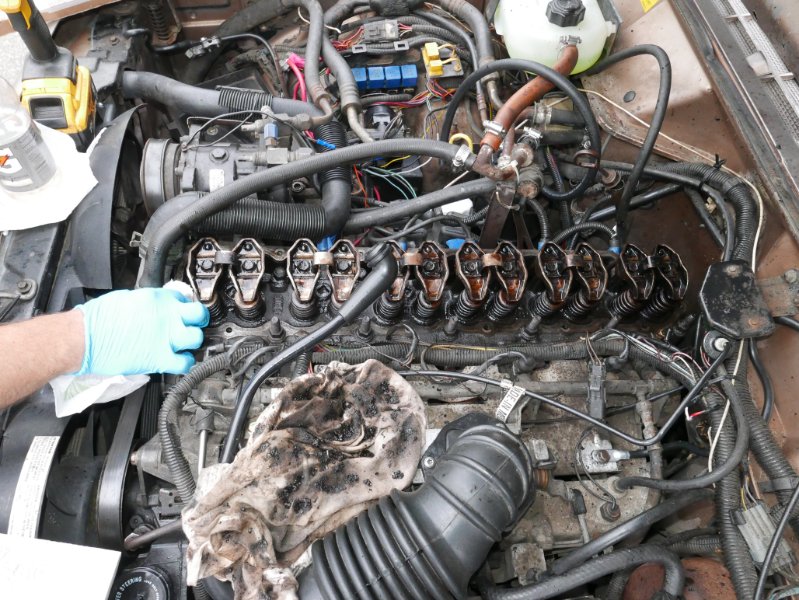
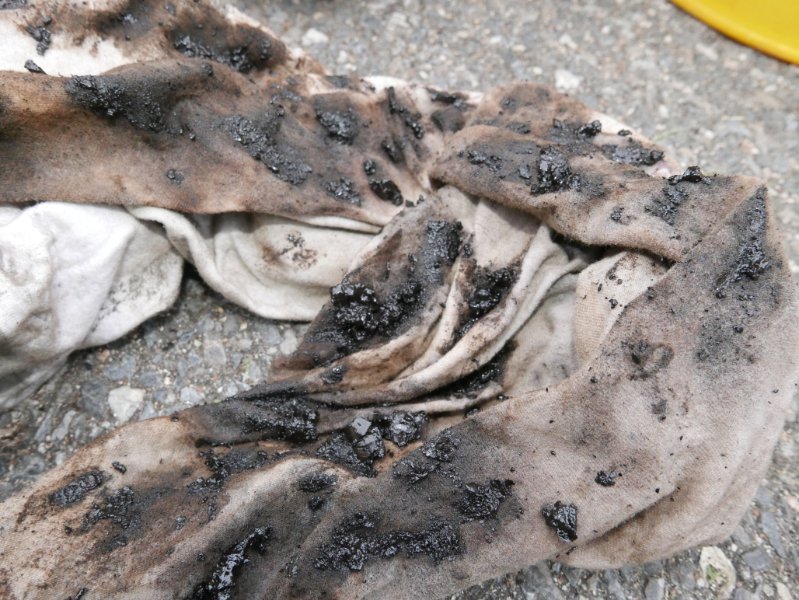
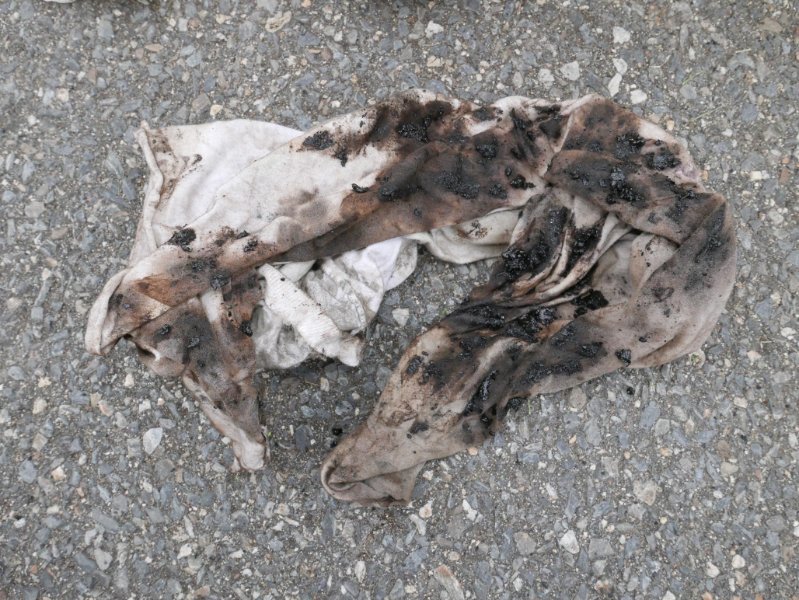
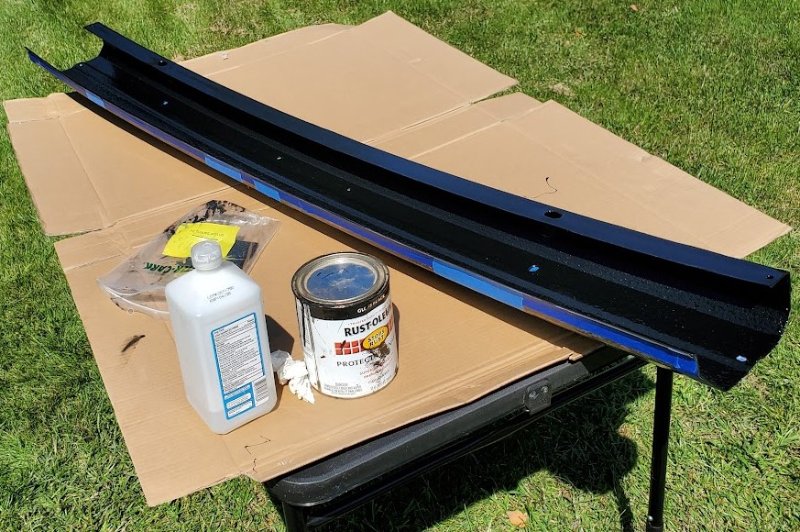
Valve Cover Inspection and Filing After taking care of all the easy to access maintenance items, I decided to remove the valve cover and get a better idea about the extent of the sludge in the top of my engine. Boy was she dirty. It was so bad that there were marble sized globs of sludge just chilling on top of my lifters. I spent some time with my brother using plastic spudgers and rags evacuating the sludge and grime from the top of the engine. If you look at the photos of the rag you can see how messy this procedure was. If you do something like this, make sure to be extra careful not to get these globs of sludge back into the engine through the valves, we did our best to pull away the debris from the valve area to where we could safely remove the material from the top of the head. One of the neat things I noticed when I first opened the engine was the distinctively blue valve cover gasket. This is a reusable higher cost gasket from fel-pro that is designed to be reused multiple times. This could only mean someone has replaced this recently and shelled out the extra $ for convenience. This is nice to see because it vaguely implies that whoever worked on the engine decided to not cut corners and use the cheapest available fiber gasket off ebay. However, I ended up chucking this gasket - such a waste! Why? Well my valve cover casting has many inclusions and cavities in it. The flanges that are supposed to seal are very pitted and even have burs on them. This is not from wear or the miles, but rather these came from factory. Casting is not always a consistent process and if a dressing and de-burring procedure is intentionally skipped, sealing issues can occur. The best way to fix sealing issues other than this lovely blue gasket is to clean up your valve cover! Since I did not have a 3ft granite reference stone on hand, I took the next best option. I used a reference 8in Norton sharpening stone and cleaned up the edges and shoulders of the casting. I attached some photos of the before carnage. Obviously, because I changed the quality of the mating surface, a new gasket was needed. There were also deep impressions into the blue felpro gasket from the poor surface quality of the valve cover. While I was here, I wire-wheeled the entire inside of the valve cover as it had a lovely patina of 270K miles of baked in sludge. Simple green, purple power and power washing was nowhere near enough to clean this residue off. I also cleaned up the valve cover port metal flaps and cut out some new seals out of fel-pro gasket material. I did not cut down the height of the vent towers as stated on the cruiser 54 pages as I did not find any traces of oil on my air filter when I picked up the engine and I did not want to damage something that was working. If I develop this issue in the future, I'll go back and trim the vent towers down.