

Salvagedcircuit
-
Posts
1381 -
Joined
-
Last visited
Content Type
Profiles
Forums
Gallery
Everything posted by Salvagedcircuit
-
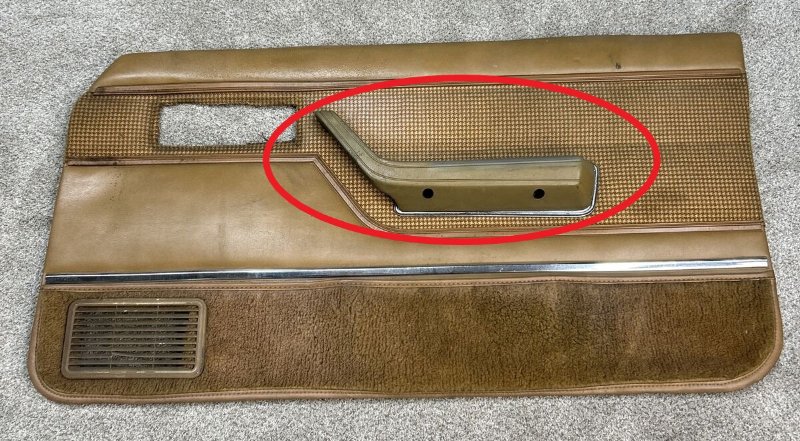
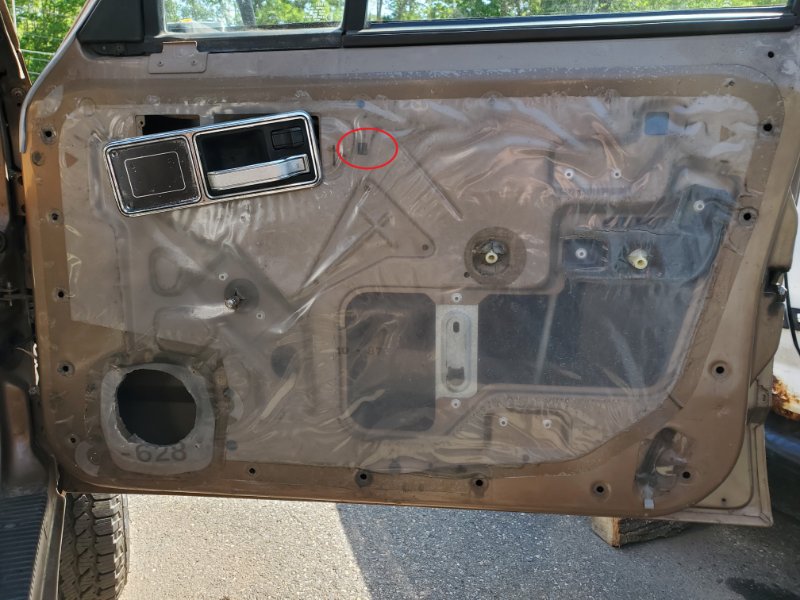
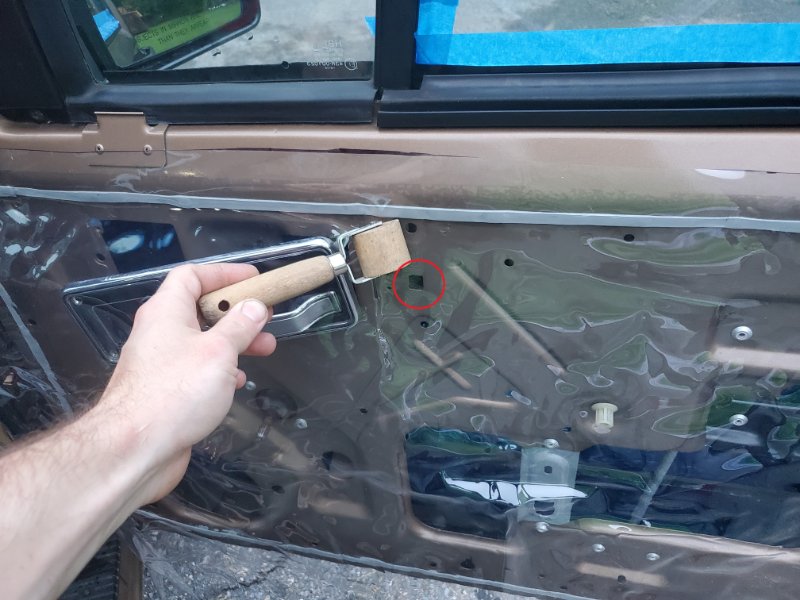
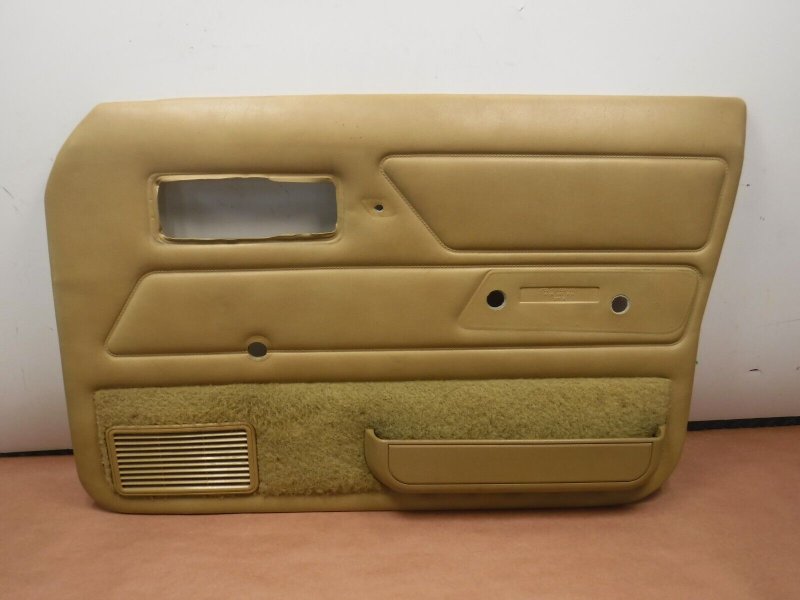
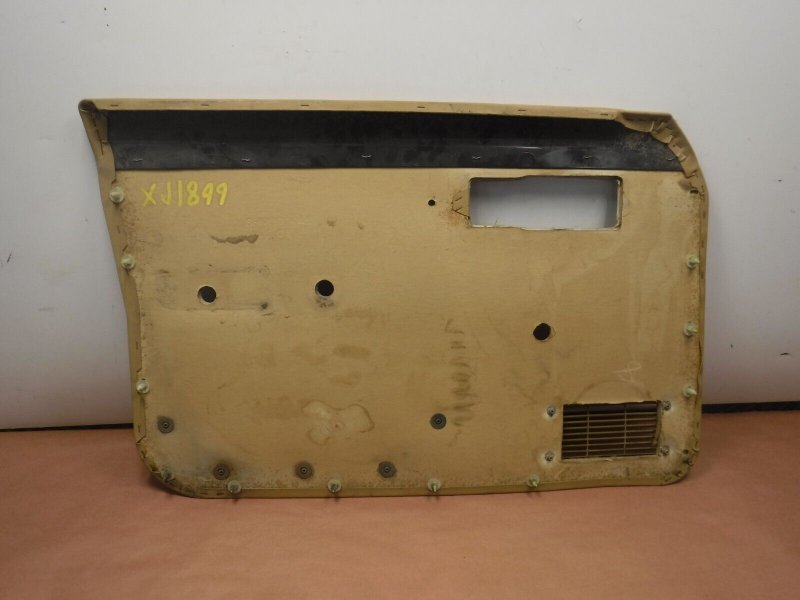
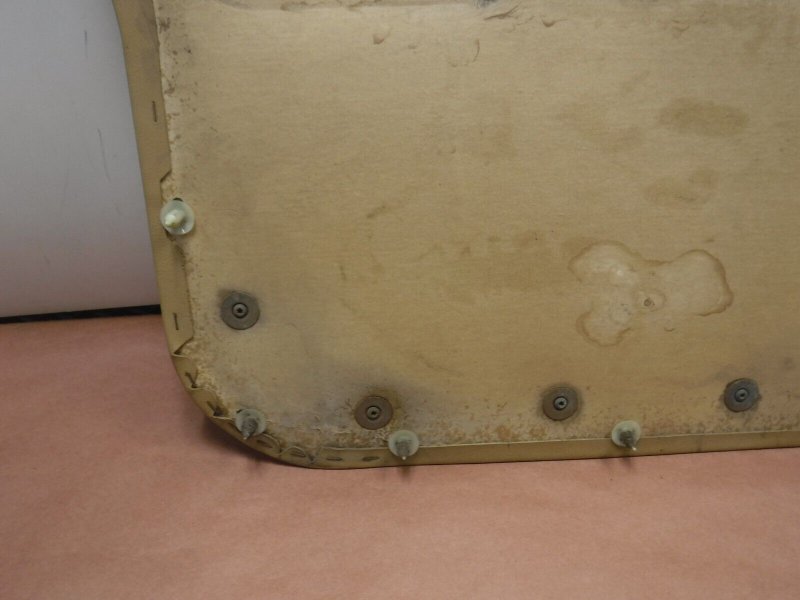
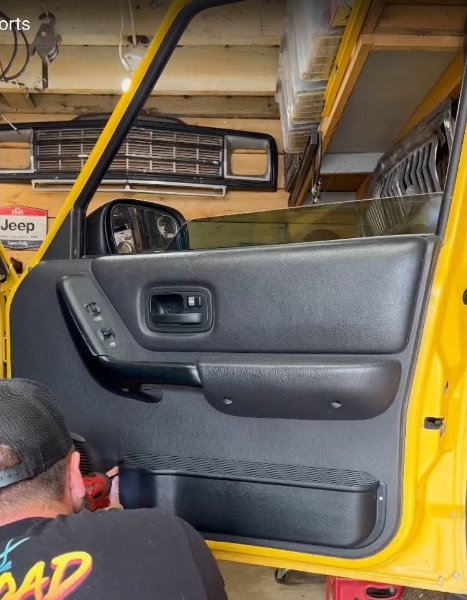
 It's safe to say mine does not have it. All I had was a hole. This is what it's supposed to look like: That's an image of a 2 door XJ, but the same thing applies. That circled item is the exact insert @schardein posted. I have an empty square there. It's safe to say there's no mount there in my door. Thanks for the investigative help guys!
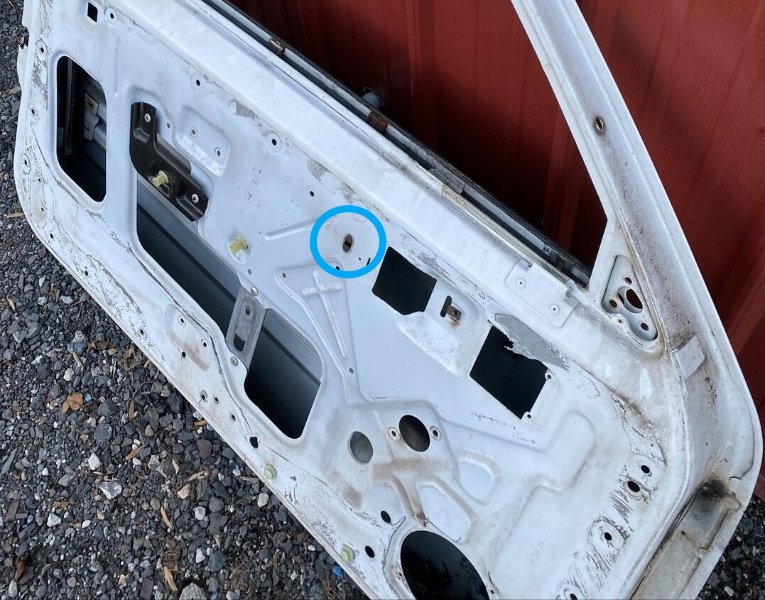
-
Thanks. I saw some videos on how it installs, but I've never seen close up the retaining hardware. Huh. I have a feeling my door does not have the hardware for the hockey stick handle. I'll have to investigate with a usb endoscope camera
-
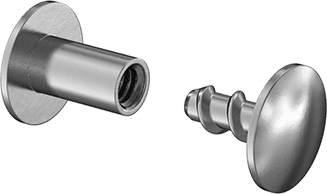
That's exactly what I was after! Woah. Those look mighty custom. Are they just pressed in from the front?
-
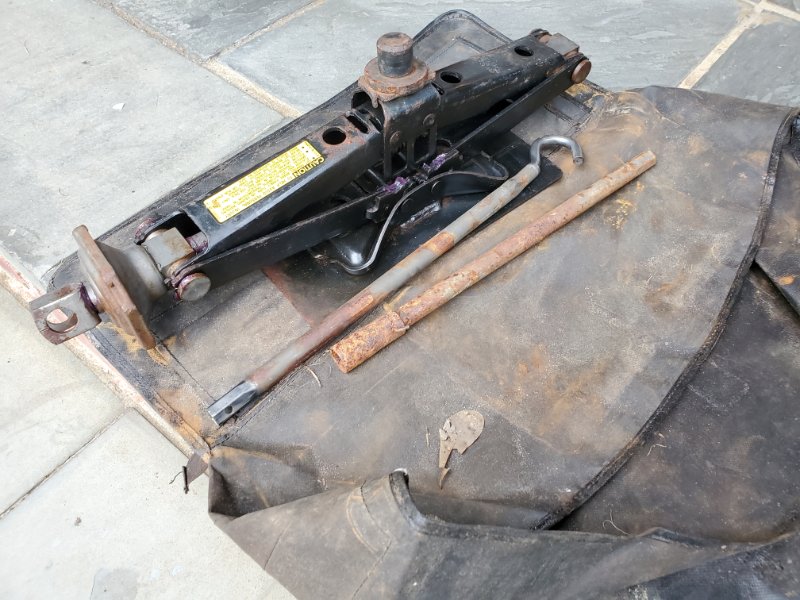
Very thorough selection. Good call on the extra coil and belt. I went ahead and grabbed this scissor jack this weekend: It's a M998 Humvee Jack. Rated for 3.5 tons and made in the states. These were included with every AM general humvee sold. They are quite stout in comparison to any consumer scissor jack and should not mind any temperature fluctuations. The "8 ton" Big Red jack I originally intended to use as an emergency jack failed on first use. Incredible. This looks like a lot better alternative. The base is a good size as well, so it should be a lot more handy in emergency situations. I just finished cleaning it up, greasing the joints, main cog and threaded blocks. I may just end up making an adapter that goes to 3/4 drive instead of using the included handles. I plan on machining a larger plate for the top and using a interference fit, this way the adapter never wiggles loose. I just have to find a source of good quality jack pads and implement them into the top design. If I can't find a good source, I may just use a good quality hockey puck from a major brand that won't vanish overnight. Edit: The military likes to use CARC paint on vehicles intended for overseas. It's possible that the jack handles were painted with it, but it is unknown. CARC is unfortunately known to cause harmful health effects when sanded. If you do try to de-rust parts like these, wear some kind of respirator while wire wheeling.
-
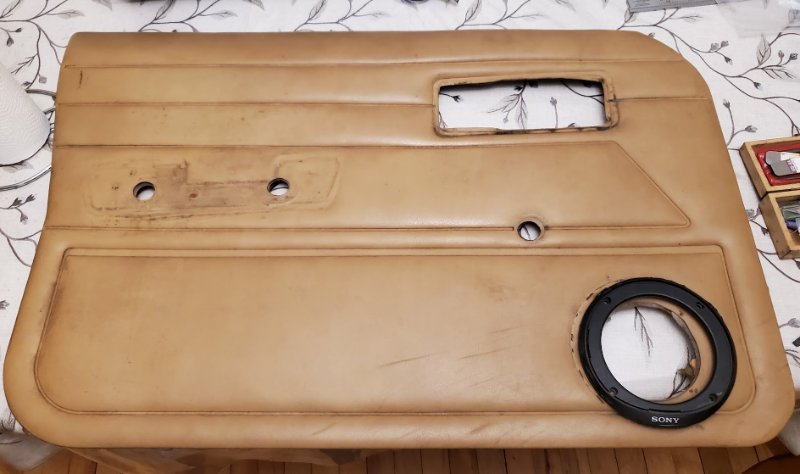
Thanks for the info. You know what, I'm going to look through the auveco catalog and see if I can find anything. They have a lot of gm original fasteners that many 60s--> now vehicles have used. I believe I found the speaker fasteners that were missing from my comanche doors: https://www.auveco.com/nylon-grille-nut-8-or-10-screw-size-1-2-head-13933 If anyone has a photo of what the door half nuts look like, that would be awesome. Thanks!
-
Wrecked 92 Comanche - Yuma AZ
Salvagedcircuit replied to damianriel's topic in Craigslist/eBay... i.e. Not Your Stuff
Wow. That's one of the worst smashed up comanche's I've seen. The rear tailgate, bumper, possibly passenger door, some engine parts and tires/rims might be salvageable. With an impact of that magnitude, I would not be surprised if at least one of the alloys are cracked. Such a sad way for a '92 to end up. Edit: Certainly, I hope the driver survived this one. -
Lol. I think I need to start looking up some hermaphroditic fasteners
-
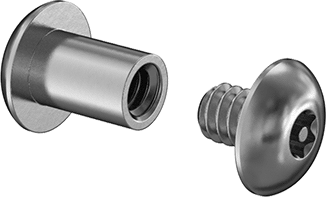
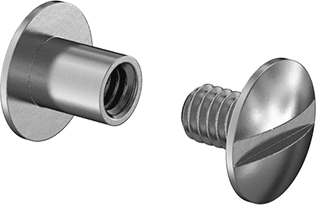
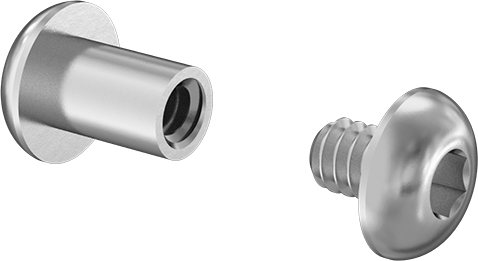
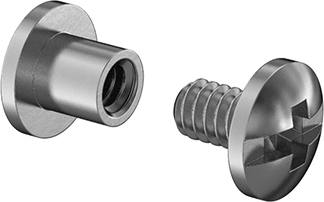
Self tapping screws are definitely a no-no for our door cards. I can't imagine they would work well at all in a cardboard / felt backing material. I don't know the dimensions of the part yet, I'm waiting back from heritage for some technical drawings, so this is purely a fastener brainstorm. My preliminary Mcmaster searches: Polished Nickel-Plated Steel button one-time press-fit fastener: https://www.mcmaster.com/99172A128/ Torx Stainless Binding Barrel and Screw: https://www.mcmaster.com/96754A101/ Philips Stainless Binding Barrel and Screw: https://www.mcmaster.com/99637A301/ Pan-Head Stainless Binding Barrel and Screw: https://www.mcmaster.com/94887A129/ Allen Key Stainless Binding Barrel and Screw: https://www.mcmaster.com/97851A306/ I can imagine any of these + a big ol washer on the back would yield some pretty satisfying results.
-
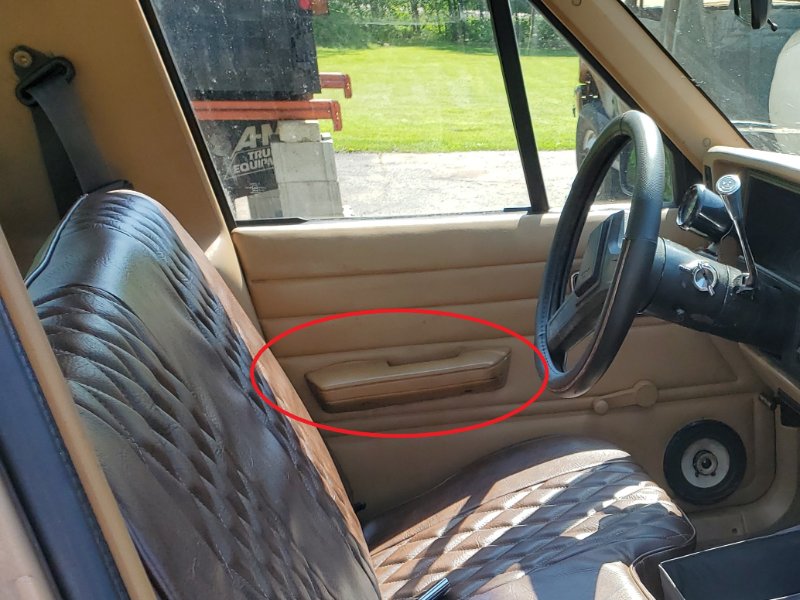
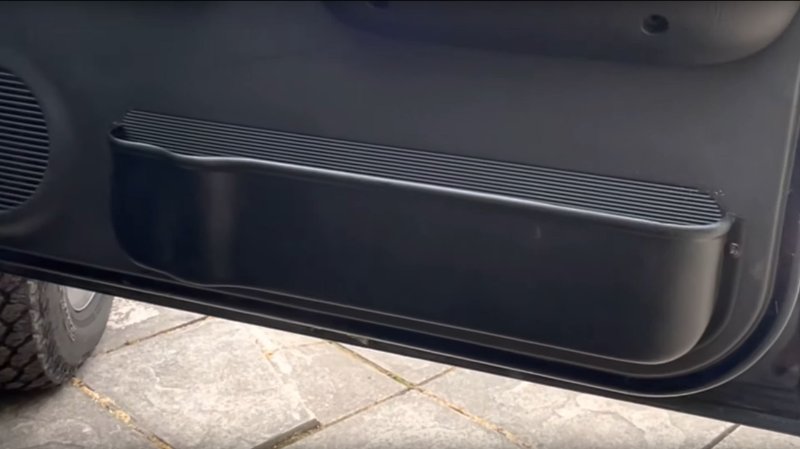
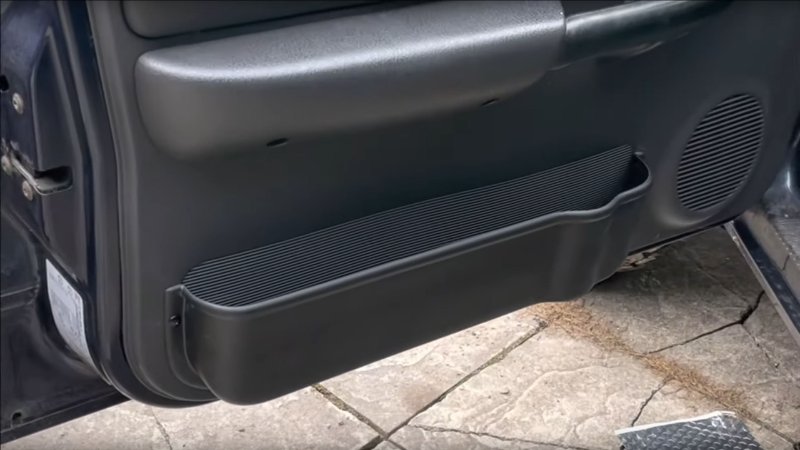
I have the base model SporTruck which has simple door pulls on either side. My driver side door pull failed and is now flopping about. The door pull looks to be made from hard foam wrapped in vinyl and backed in a black plastic plate. That plastic backing plate has cracked in half. The plastic door mounting studs are fine. I looked on ebay for replacement door pulls for the past 3 weeks and none have come up in honey / tan. There is just one in gray, but it looks just as damaged as mine. Does anyone know if its possible to swap out a door pull for a hockey stick style handle? This is the Hockey style handle I'm talking about: I just finished buttoning up my door with sound deadening and I completely forgot to check my door to see if there's a threaded half nut where the top post of the hockey handle attaches. From my photos, I can't tell if there's anything behind the square cutouts. I'm hoping there's some kind of fastener. If anyone has done this modification to their truck, I would really appreciate any input. There are 20+ hockey stick style handles in tan on ebay, but none with the straight door pull. Thanks a Metric Ton!
-
Interesting. Good call! I goofed. I didn't look close enough at the ebay images I was referencing. The pockets are indeed held in by washers and torx screws! As shown in this listing: https://www.ebay.com/itm/125996528246 With that in mind a 0-80 tap might be small enough to leave a threaded hole into the heritage part. I have no idea how thick the walled part is though. If it is too thin, a 0-80 might be too big and I'd have to resort to a different fastening method. Some variation of urethane glue might work well since there is a decent sized flange around the perimeter of the pocket. Plastic heat staking might be another option. It is a very common practice found in many plastic assemblies today. It requires a plastic spru to stick out of the part which is later heated up and pressed in place, usually in a sandwiched like configuration. It provides a very decent fastening method quickly and cheaply. However, I don't think it's going to work here as the part does not have any spru sticking out of it. Even if I created ABS nails from ABS 3D printer filament, then take the head of the ABS nail and melt it into the heritage part, it would likely deform the heritage part and make it look like trash. The obvious fail safe is to just use a nice looking fastener and tighten it from the back side of the door card. Something like tiny elevator bolts.
-
I was sifting through youtube, as one does, and I ran across these two videos about Cherokee XJ door pockets. It seems some folks have used injection molded pockets intended for vintage VW cars and attached them to their XJ door cards. It looks pretty darn OEM looking to me. Part info: Heritage Parts Centre: AC857004 Heritage parts ebay link Both of these examples show a 97+ that has a plastic door card. I'm thinking of doing something similar, since my door cards were botched by the OP and I don't feel too bad about modifying them. I'm not going to take the lazy bones install method though. I was thinking of getting a pair of these, spray painting them with the SEM honey color spray paint and adhering them to my door card with proper glue and plastic heat stakes, similar to how the OEM jeep hard plastic door pockets were attached. I don't mind the look of them and I think the additional two cup holders would be pretty fantastic.
-
Sliding window latch
Salvagedcircuit replied to fiatslug87's topic in Craigslist/eBay... i.e. Not Your Stuff
This is the way. Is there anyway we can create a thread dedicated just for 3D cad for Jeep comanche / XJ parts? I have some CAD of various parts that I'd like to upload but it sure would be great if we could have one master thread for CAD uploads. This way anyone can CNC, 3d print or laser cut them without paying the ebay hype-train tax. I have not CADed up this latch since I've never had a sliding window comanche. Yet . -
I legitimately saw an arcticat snow mobile on the side of the road around memorial day. It was indeed free since it was next to garbage and a broken wheelbarrow. I was thinking of grabbing it but I'm knee deep in projects. I'm still kinda regretting it. I grabbed the wheelbarrow though and it works great with a new wheel. It costs $$$ to throw stuff out in NH. The nearest scrap yards are usually very far away so I guess that keeps scrappers at bay.
-
Is this an mj roll bar
Salvagedcircuit replied to strictlyxjs's topic in MJ Tech: Modification and Repairs
Hahaha. That's awesome! I was thinking of offering lower, but it was a 200mi each way and I wanted the guy to be slightly motivated for the sale to go through. I only had that day to make it happen lol. -
True to my avatar name once again ...
Salvagedcircuit replied to NHMJXJ's topic in Member Projects: Other Cool Stuff
Lookin good! -
Issues after WJ Master/booster upgrade
Salvagedcircuit replied to superjay5ive's topic in MJ Tech: Modification and Repairs
I mentioned this to the last few folks who did a WJ swap. Make sure you check the booster rod length. I did a WJ booster swap this past October. My brand new WJ cadrone booster was not adjusted to the master cylinder. I purchased (2) WJ cardone boosters from amazon and 1 from napa. I believe all of them were set fully recessed from factory. I know, I know, that's a lot of boosters. The napa one went back because it wasn't painted, and I damaged one cardone booster because some brake fluid accidentally entered the opening during my first assembly attempt. The rod was fully recessed and never even pumped the master cylinder because it was so far recessed. There's an adjustment procedure in a pdf I will try and link when I get back. Grab yourself a master cylinder measuring tool or a caliper and some reference gauge blocks. -
Is this an mj roll bar
Salvagedcircuit replied to strictlyxjs's topic in MJ Tech: Modification and Repairs
Definitely. Making the end feet and curved brackets should be a lot easier than bending an entire bar. Pretty wild find. Finding an oem comanche sport bar is hard in itself. The longbed even harder. A long bed bar on a different truck? That's unicorn level probability! Huge thanks to @strictlyxjs. -
Is this an mj roll bar
Salvagedcircuit replied to strictlyxjs's topic in MJ Tech: Modification and Repairs
To be fair, the owner of the nissan pickup was super nice and said he never understood why the rollbar was even there. The previous owner bolted it into the bed. -
Is this an mj roll bar
Salvagedcircuit replied to strictlyxjs's topic in MJ Tech: Modification and Repairs
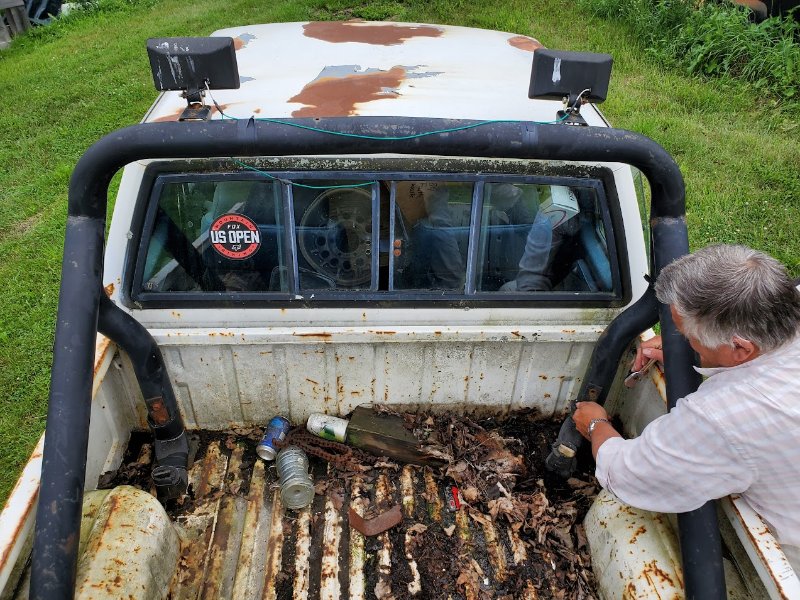
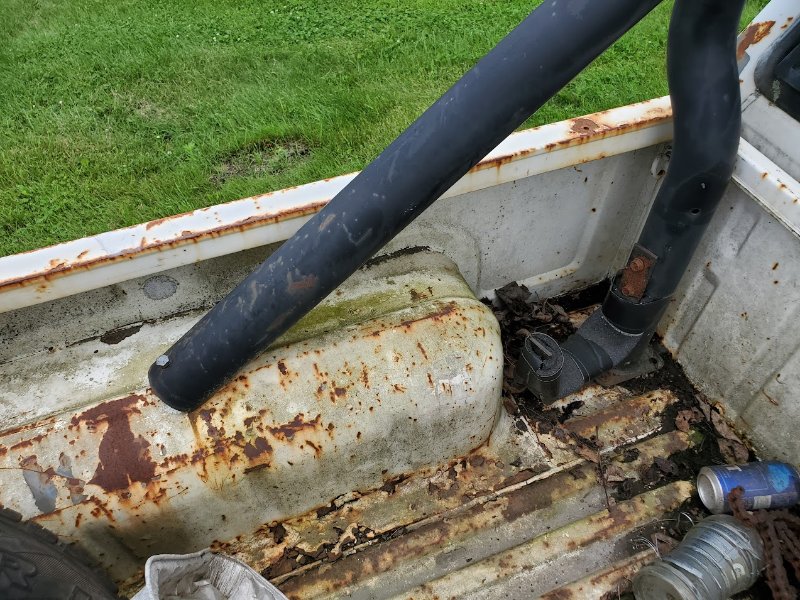
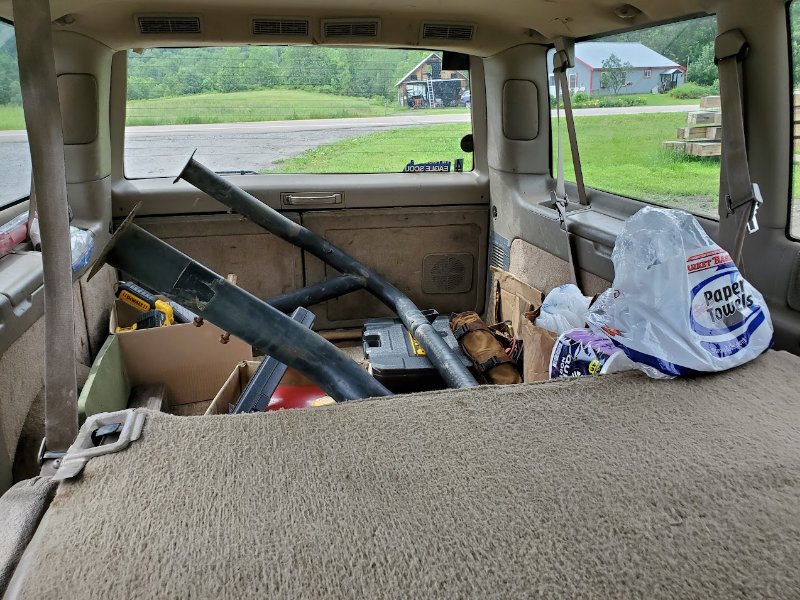
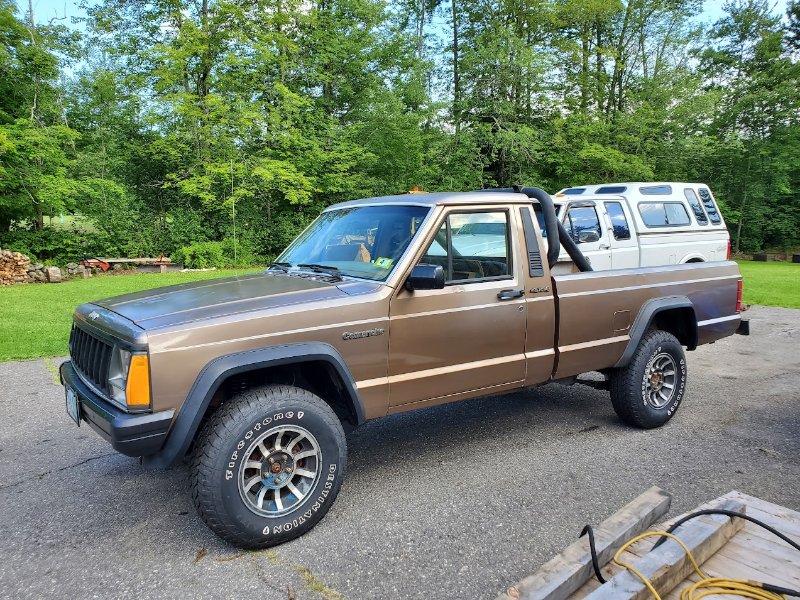
@strictlyxjs You sir are the man. . I owe you big time I picked up the roll bar today. It has been safely rescued from the bowls of a very broken nissan pickup. @eaglescout526 you were spot on! It was a long bed roll bar with the ends chopped off. It was barely held into the nissan bed. There was only one bolt on each member, which made removal a breeze. It looks like there's ~2in missing from the angled ends, but nothing that can't be fixed. It's an OEM rollbar for sure. The lights were generic boxes, not the KC lights, but for $100 smackaroos, it was the score of the century.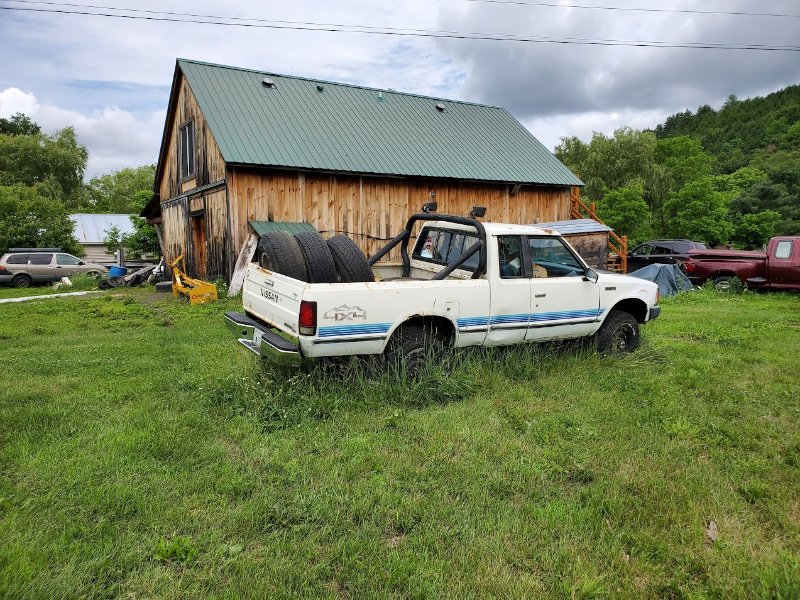


-
Hahaha. Microsoft engineers implemented photo rotation wrong in win10. In order to actually rotate a photo in windows 10, you must select the image inside a folder, go to the top toolbar select the "picture tools" tab, then select rotate left or rotate right. If you instead just right click an image and select and "rotate right" or "rotate left" from the right-click menu, it does not actually change the EXIF rotation flag. it just rotates the photo inside windows and windows only. Genius design there. This is why every time you upload a rotated image from a windows 10 machine, the image never shows up right. I wish I got paid 300k+ to be a software engineer at microsoft and mess up that badly!
-
Woha boy, this was a yahoo group? That's wild. Was there a usenet group?
-
Is this an mj roll bar
Salvagedcircuit replied to strictlyxjs's topic in MJ Tech: Modification and Repairs
Thanks for the update. I'm in the process of purchasing it now -
Is this an mj roll bar
Salvagedcircuit replied to strictlyxjs's topic in MJ Tech: Modification and Repairs
Looks close. Go for it buddy -
86-90 chrome turn signal trim pieces
Salvagedcircuit replied to Pete M's topic in Craigslist/eBay... i.e. Not Your Stuff
Interesting. Is crown actually making them? I grabbed generic gray turn signal pieces from amazon a few months ago and they were bad clones. None of the screw holes lined up. I had to drill new holes to make them fit -
Big Ton Leaf Springs Source?
Salvagedcircuit replied to robfg67's topic in MJ Tech: Modification and Repairs
You are right, It is a red flag. If I were to do it again, I would email them the spec sheets you posted above while on the phone and go from there. I bet they would have made the springs up, no problem. I only found out the place used email after I paid for the item and it was ready to ship. The place is very old school, mom and pop like. They write down every order on paper. Nothing wrong with that, just letting other folks know to be more prepared than I was. 7/14/23 Edit: It looks like St. Louis Spring updated their website. They do indeed make the springs in house in the USA. Website: https://saintlouisspring.com/ Video: I'm glad I gave them my money and not some shady importer. I paid for the springs out of my own pocket. If I were to do this all again, I'd definitely give them the leaf spring spec sheet attached above and they would probably make it to spec.