
.png.7e552d2cdda8b793a26e985c2302a054.png)

damianriel
-
Posts
100 -
Joined
-
Last visited
-
Days Won
1
Recent Profile Visitors
1486 profile views


damianriel's Achievements
")
Comanche Fan (3/11)
-
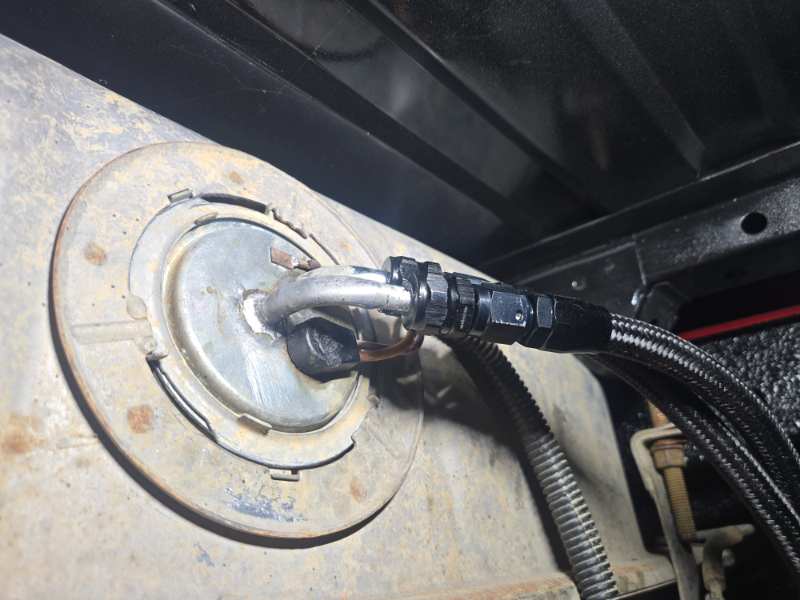
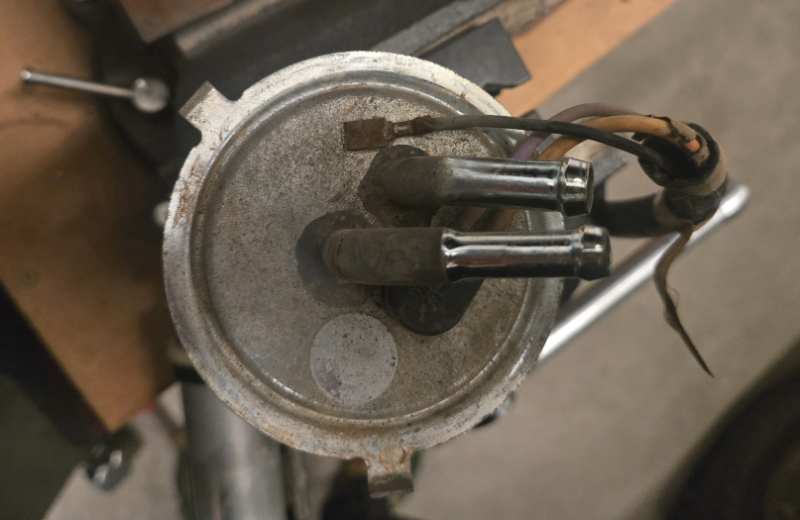
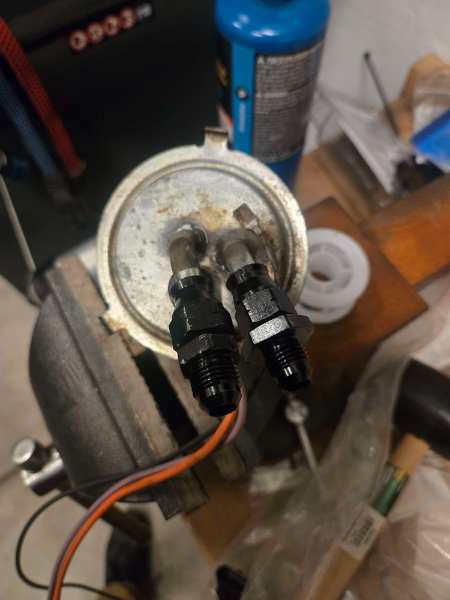
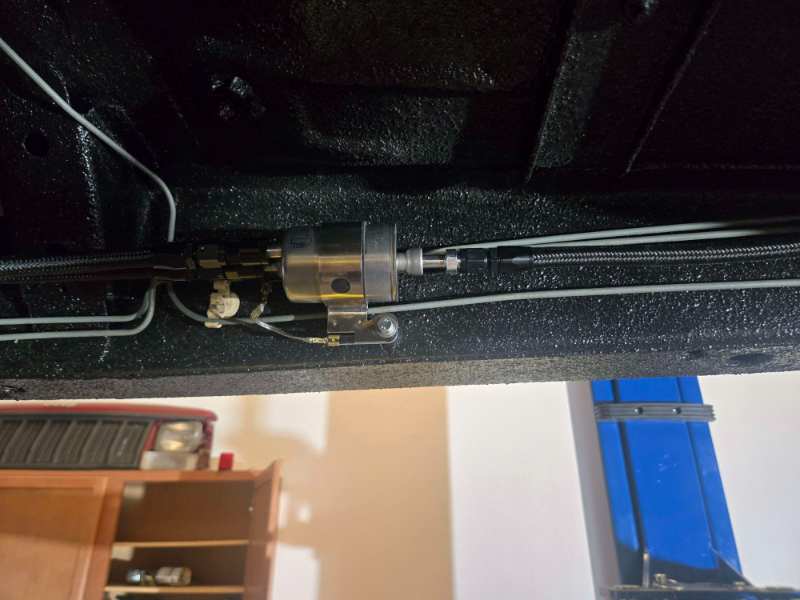
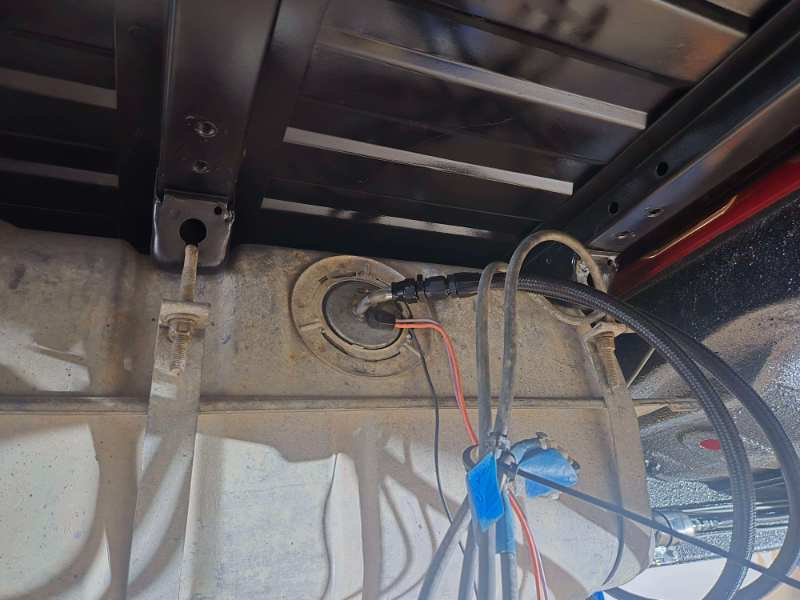
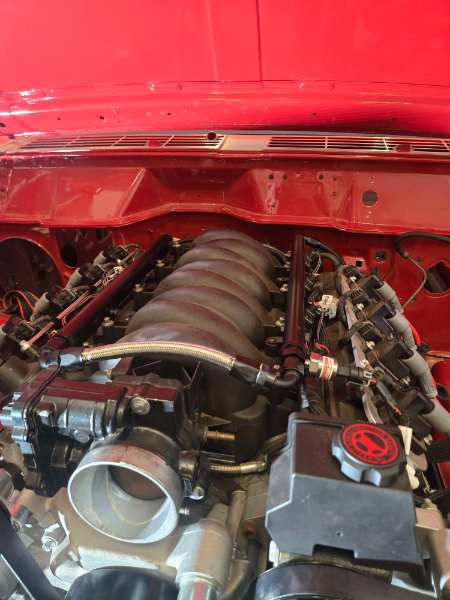
Today I did some work on my second fuel pump assembly and the racetronix fittings. They do seem to be secure however I don't currently have any wiring in my truck so I can't put them under pressure. I will say, they are a bit difficult to get on by the nature of how close the output and return lines are on the sealing plate. I did manage to bungle up the ORing on the return side, I think it will be ok but I will be looking to replace it. You can see it torn a bit in the image below. That being said, it's the return line so I'm not overly concerned with it in this immediate moment. As for installation, if the lines weren't so close together it'd be pretty easy. You can see how close my lines are in this image. The best way I've found to install these, and the same way I had to install the compression fittings, was to remove the bulkhead electrical connector, I've tried being lazy and not removing it on both hangers and I started burning up the plastic so I removed it on both and then reinstalled it. Just start by removing it. After removing that, use a hand wire brush, I used a stainless brush toothbrush sized, to clean up the solder joints on the sealing plate. After that use a small propane torch to heat up the solder on the return line, this should make it so you can use a wrench, or the fuel pump hanger to twist the lines away from each other. They may not stay away from each other, but as long as one of the lines is temporarily broken free from the solder you can fit the fittings on. The racetronix fittings are pretty simple install. Slide the back half of the fitting, and then the ORing, over the barb, and then push the ORing against the barb (I didn't take pictures of this process, I apologize) it may help to use grease or oil on the ORing. Then slide on the AN half of the fitting and tighten it up as if it were a compression fitting. You need to break the solder joint so that you'll have the room to spin these fittings to tighten them. Once tight I aligned mine so they weren't touching, then reheated the sealing plate/return line, used some solder flux, and then solder to re-wet the solder joint, then let it cool. After it's cool reinstall the electrical bulkhead connector. It's a somewhat complicated install and honestly probably not all that beneficial. If the lines weren't so close it would be an easy recommendation to do but that's just not the case. There is one more avenue I have considered and that's just removing the outside half of the hard-line, and then installing bulkhead AN fittings. This would be a pretty permanent modification but honestly is the "right" way to do it. I may consider doing this with the hanger I attempted to install the compression fittings onto. I will update this thread on long term reliability of the racetronix fittings, especially after replacing the damaged ORing, but as the truck isn't running this is all I can really report. Edit: if the MTS image below is accurate, it may be a better candidate for these fittings. If I can find one cheap I may check it out.
.jpg.a25ab3108ccbb12e08a034951dcffa54.jpg)
-
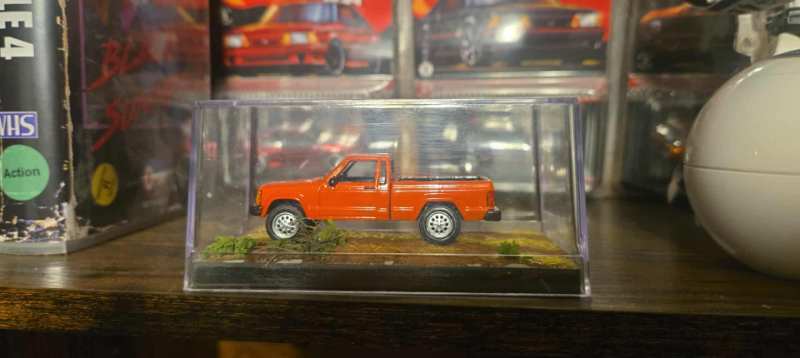
Taking a break from the regularly scheduled content to appreciate that today is my birthday, and my great friend got me a custom 1/64 scale Comanche. Also the racetronix fittings should be here Monday, so much for FedEx 2 day shipping.
-
As soon as they arrive I'll be sure to post my feedback here, in the meantime I've tried to start trimming out any unnecessary bulk from the engine bay harness I have, which is a 91 HO harness and man do they have some confusing things going on here
-
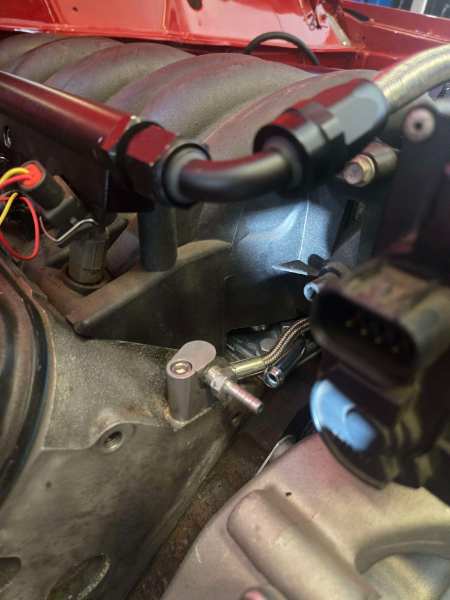
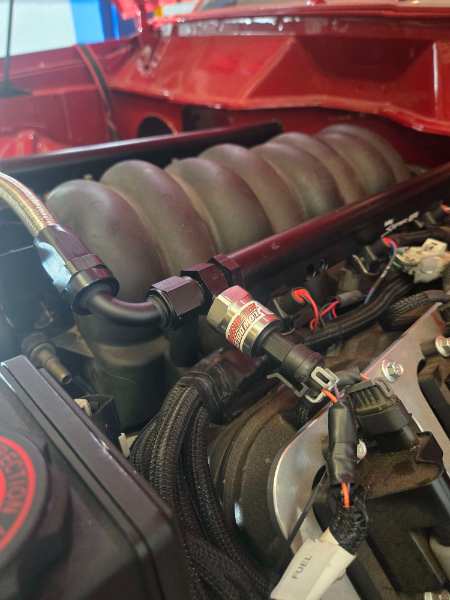
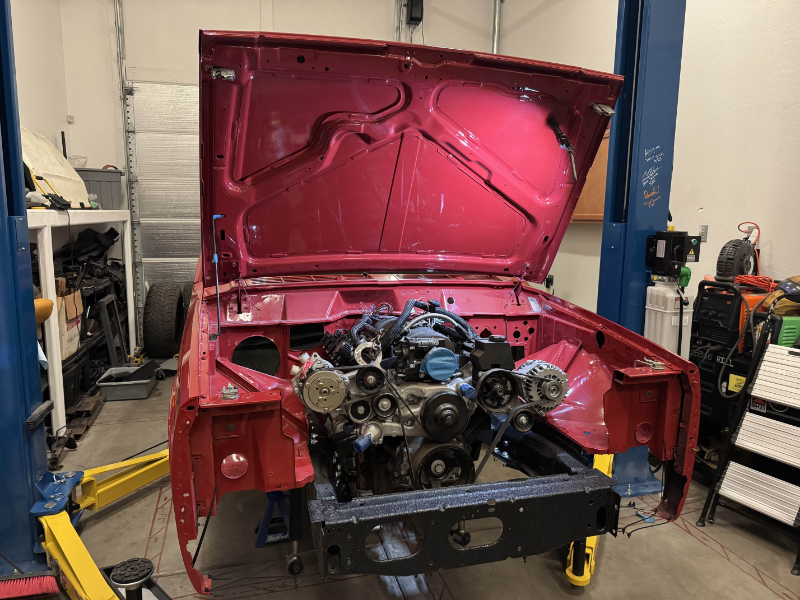
I've decided the best way to move forward with this build is to set myself minor goals/objectives to move on to the larger objective of having a running driving truck. That being said the current objective is to get the motor fired now that it's sitting in the bay. This weekend's step towards that was building an LS compatible fuel system. I'm lucky to have great stores near me that I can go to and close my eyes when I swipe on $400+ of AN fittings and line. SDHQ and Speedway motors are going to be a danger to my bank account. So I landed on a full AN fuel setup, using a corvette style filter regulator. I also decided to add a fuel pressure sensor at the fuel rail so it can be monitored by the Holley Terminator X. To start, I added Compression AN fittings to the fuel pump hanger. I have to say, I probably wouldn't recommend this method. After cutting off the barbs, there isn't enough length left before the bends for the face of the hardline to rest against the AN fitting to get a proper seal. Thus fully relying on the ferrule to seal the fitting. This may or may not hold pressure. I do have a second fuel pump hanger assembly, and found Racetronix's Barb AN adapters. I have both of the appropriate sizes on order and will report if I think it's a better solution, or if you should just hose clamp the line to the hard line. I used Speedways' LS1 AN filter regulator kit, mounted in the factory filter location with a spacer. I may need to work on this further as the single bolt holding it on doesn't seem ideal. At the engine side, I had quite the housekeeping to do. I needed to install my Amazon special LS6 PCV valley cover, swap the -8 feed fitting to a -6, add the pressure sensor housing and sensor, and shorten the Holley fuel crossover line that was obnoxiously long. Starting at the valley cover, I discovered the rear knock sensor was pretty rusty, and broke both the plugs unplugging them, so a quick trip to AutoZone and I got a Dorman replacement kit. I used the good AC Delco sensor that was in the front, and installed the new sensor and harness. I did seem to run into a clearance issue with the PCV output and the ICT Billet steam port crossover kit I'm using, so I'll have to come up with a solution for that. After getting the intake back on everything else was pretty straight forward.

-
Tore my 96 Hvac box apart tonight as I don't see a reason to not rebuild it while I have it out. Compiling a list together of parts I'll need and appear to have located copper/brass heater core replacements, likely TSM. I plan on ordering the upgraded evaporator from jeepair, they do have a Heater core listed as in stock as well so I may ring them and see what that's about. Additionally, the hardware that mounts the HVAC box to the firewall, As I have lost or misplaced one. And I'm eyeing this foam to replace the foam on the blend doors. I still need to figure out what foam I'm going to use around the heater core and around some of the vent mating surfaces. I am planning on using this Repop 97-01 kit for the firewall seals, and I suppose I'll let everyone know how that goes.

-
So, got a little bored this weekend. It's got a long way to go and I'm probably going to change a few things, but she's sitting pretty for now.
-
Honestly, I tore it apart and put it aside, seeing as I don't have a working truck to put it on, it wasn't at the forefront of my mind. Once it starts rolling a bit further I'll make a thread for it.
-
After helping my buddy do a myriad of mods on his Tacoma, including lift, wheels, tires, and wiring some of his electronics, I decided to actually make forward progress on the truck seeing as every step I've tried to make this year has somewhat just blown up, I decided to do something easy. Or something that should have been. After stripping the Novak motor mounts from my old truck I definitely mixed in the hardware with other random hardware. Instead of guessing I just decided to reach out to Novak and order a new hardware kit. Seemed pretty straightforward, however the hardware I received didn't match what was listed in their directions. It also seemed to be possibly missing some washers and 7/16 bolts. Quick run to ace and I got everything installed. I did have to run a tap through the blind holes in the frame, as they had been gunked up pretty significantly with the rhino liner that was sprayed on the chassis. The hardware Novak included was m10x1.5 so that's what I tapped them with, I don't recall if this is the original threading for these holes, but the tap definitely did tap into the steel. The bolts appeared to tighten just fine, and nothing stripped out, but I am considering drilling these holes out with a 23/64ths bit and tapping to 7/16-14. That should give me a lot more bite if I decide to go that route.


-
 damianriel changed their profile photo
 -
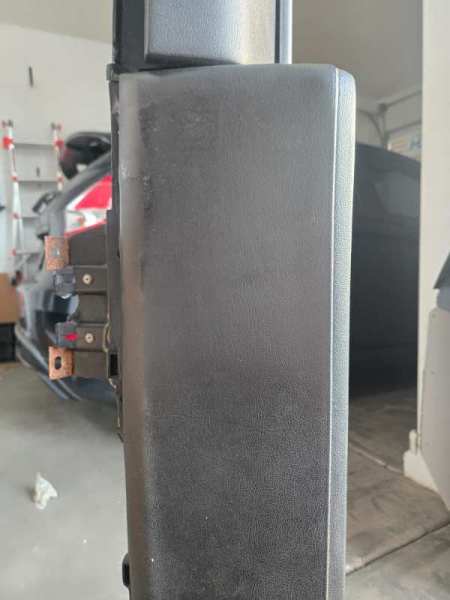
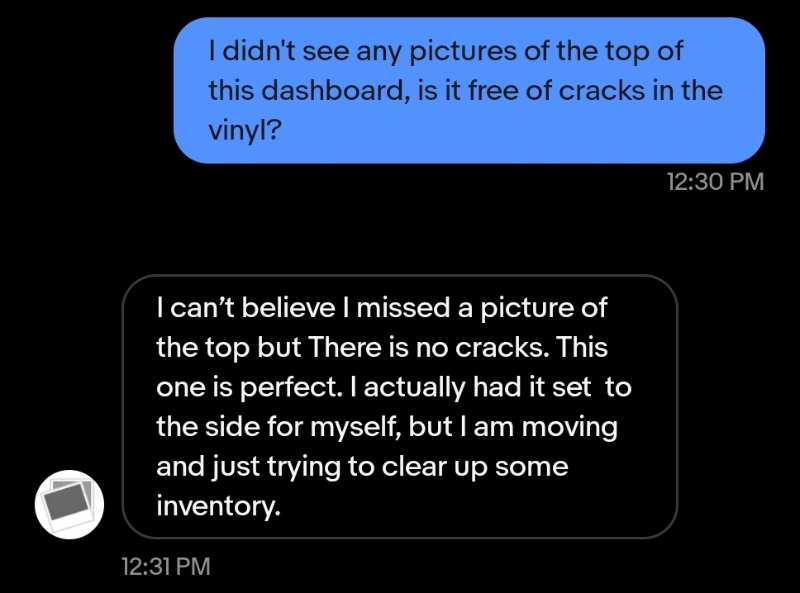
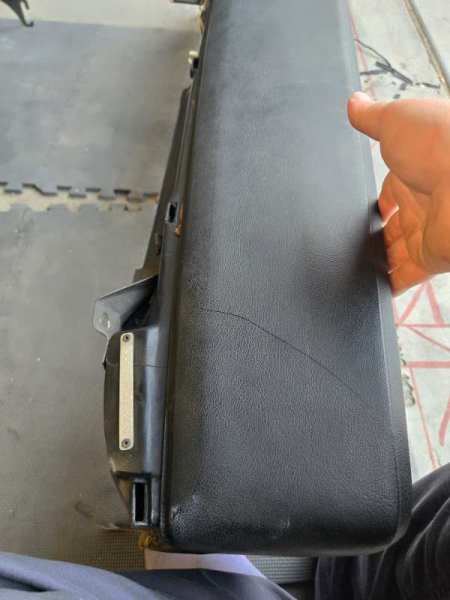
I'm beginning to believe my quest for a clean black interior is a fools errand. The dash I bought on eBay came in today and to be frank, it's less than stellar. I was under the impression it was in much better condition than it is. It's partially my fault for not seeing that half the mounting screw holes were cracked, and will need plastic weld repair. However I did notice that there wasn't a picture of the top of the dash in the listing. Upon chatting with the seller he assured me it was in good condition and free of cracks, the actual verbiage described it as "perfect" This isn't entirely incorrect however was deceptive, as there is a VERY obvious repair to the vinyl. Now, I still have the dash I bought in 2018, in which the underlying structure is in much better condition, however it appears the vinyl dried and cracked while in storage in RI and I didn't notice until I unpacked it in AZ. I'm thinking I may use the eBay dash temporarily while I look into getting the original dash refinished by either JustDashes.com or possibly a local upholstery shop like @Limeyjeeper had done. I would have liked to keep it OEM but I'm pretty sure I now have over $1200 spent on trying to get a clean dashboard for the truck and I want the next cent I have towards my fools errand to be a well spent one.

-
It appears to me the 4 door seat frames are narrower than the folding frames. I'm not in a rush to get this resolved but it's something I'll have to think about in the future.
-
If I find the time I can maybe cobble something together in CAD to be 3D printed but I haven't even pulled the trigger on the screen yet due to the price.
-
The 12.3" screen? Interested in how this turns out because I was thinking of doing the same thing.
-
Right, completely spaced on that one.
-
I'm not sure what year XJ they came out of, as I bought them off someone in a FB group in 2018. I would assume 84-85, I don't see any tags or such to confirm and I'm not sure if they came from the same truck the dash I bought from the same person did.
-
I noticed that while I was looking at my seat covers and comparing to the earlier picture you had posted. I did find some local upholstery shops that seem to be pretty highly rated so I may inquire about what they can do.