

Salvagedcircuit
-
Posts
1381 -
Joined
-
Last visited
Content Type
Profiles
Forums
Gallery
Everything posted by Salvagedcircuit
-

Project “Tomahawk”
Salvagedcircuit replied to ghetdjc320's topic in MJ Hardcore Tech: Epic Journeys to Greatness
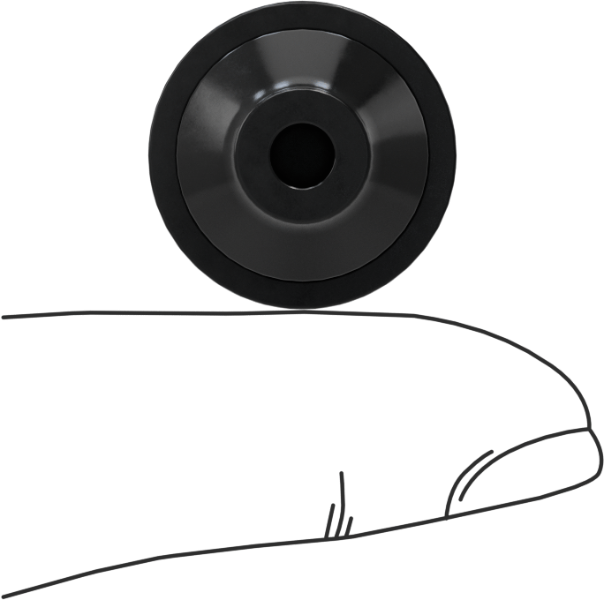
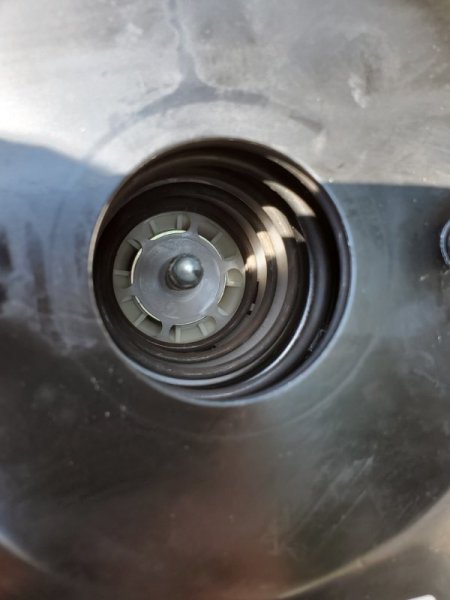
Curious, what is the filler neck near the booster in the photo below (circled in white)? Thanks!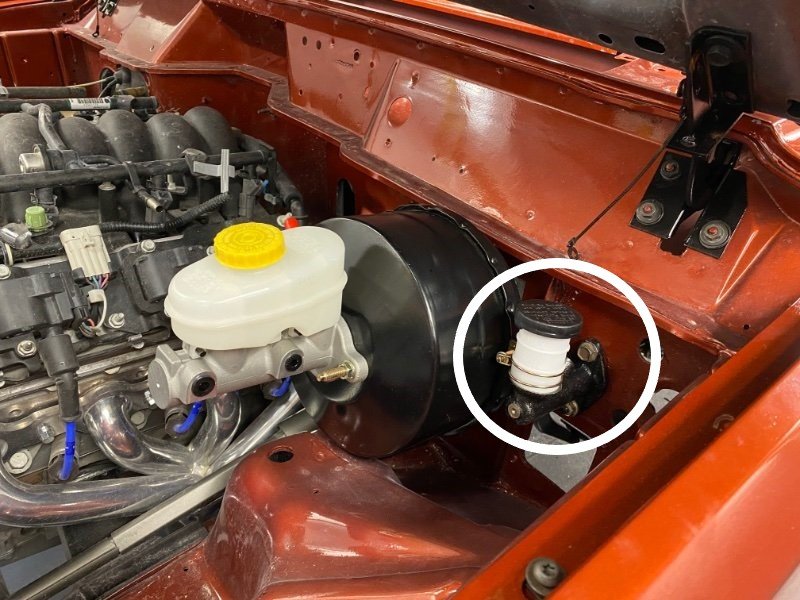
-
Pull my hair out shop
Salvagedcircuit replied to camjeep3's topic in Member Projects: Other Cool Stuff
Very nice indeed. When no one's looking, do a snow dirt angel on your new shop floor Congrats! -
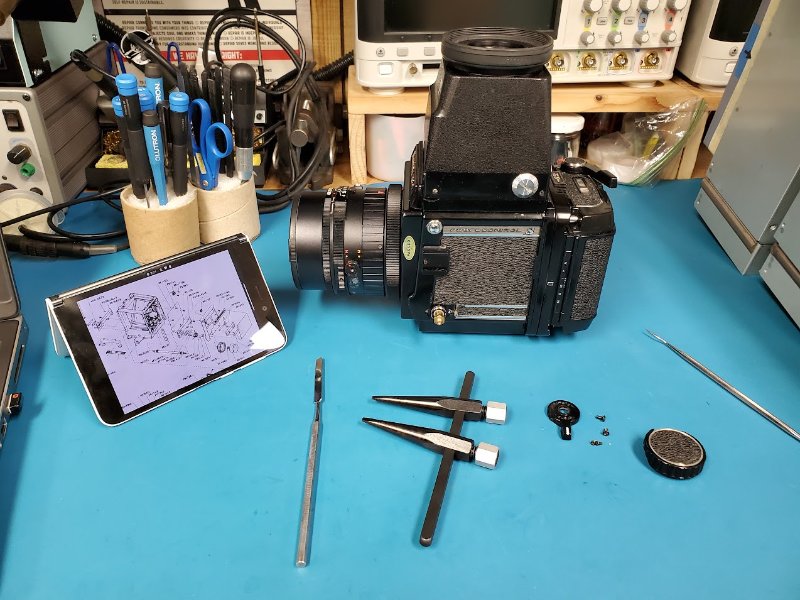
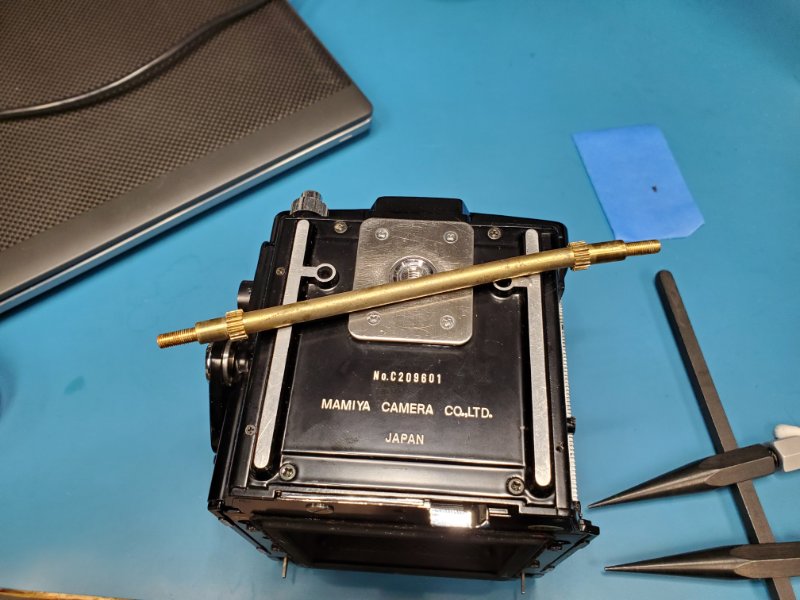
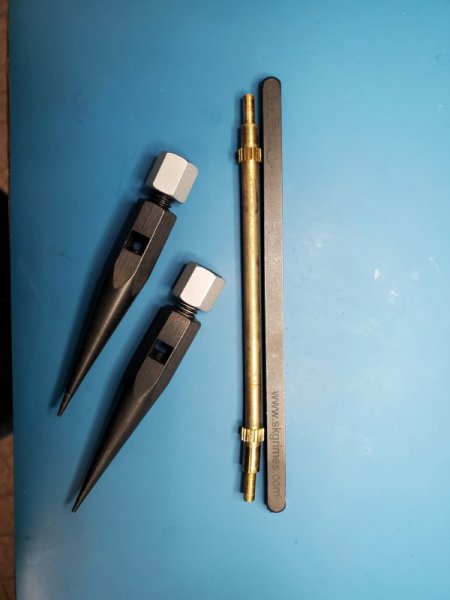
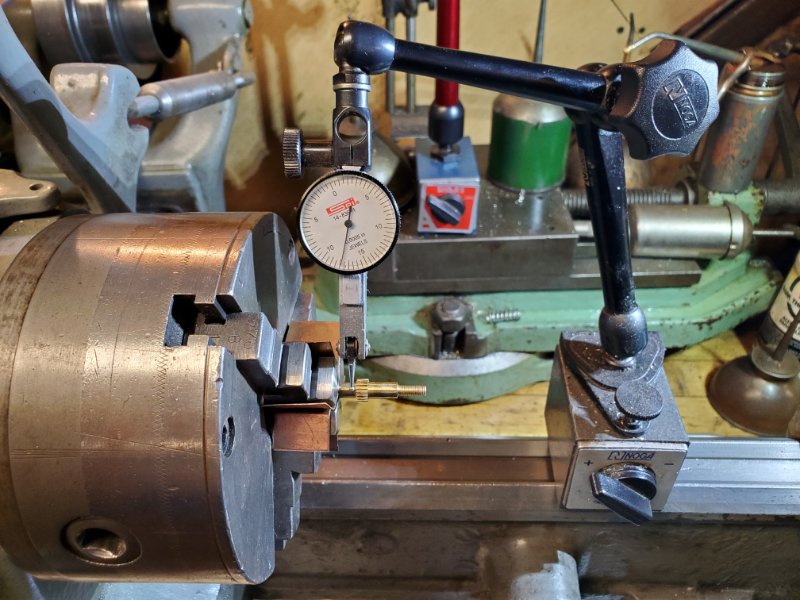
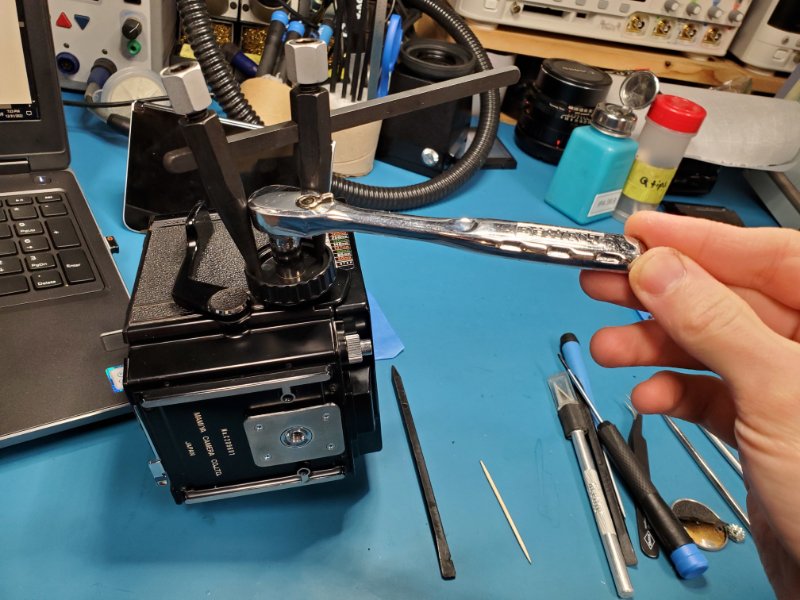
It's a Southbend 9in. Pretty close Since the mamiya shaft was solid brass, I was able to get it within 6 thou of center true by doing nothing other than lightly tapping the bent end with a piece of hickory and keeping a close eye on the indicator. Pretty dang good. Prevented me from machining a new shaft or sacrificing another rb67 to harvest a working focusing shaft.
-
That right there, that takes the cake. Nice job. I should make me one of those in the 80s reinx style.
-
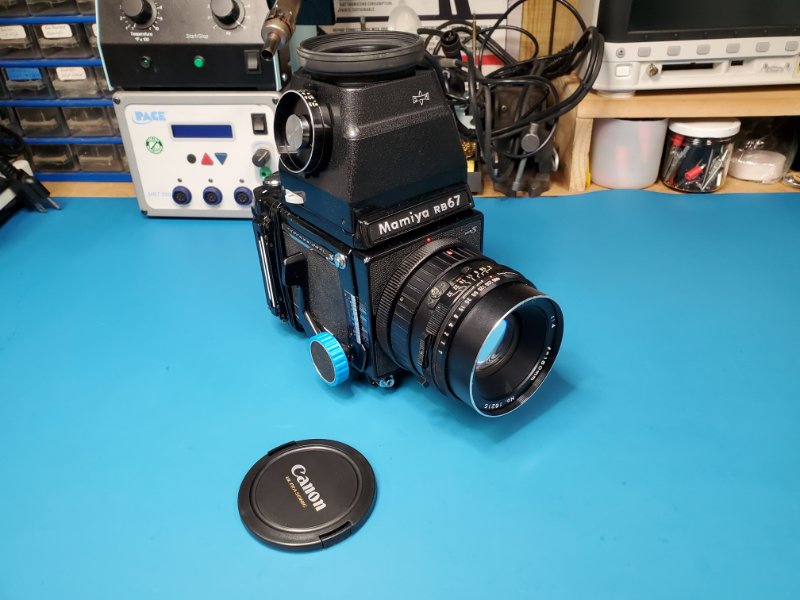
This is the way. I got a panasonic superdisk camera for christmas 2 years ago. The camera is a tank and the batteries still work. It uses 2 cell sony np style batteries. Such an absurd camera. Otherwise, I repaired a mamiya rb67 as my brother's christmas present this year.
-
previous owner wiring fun
Salvagedcircuit replied to Pete M's topic in MJ Tech: Modification and Repairs
Mine was just like this! One of the connectors was toast so I replaced it with a BWD Automotive PT300 pigtail advance# 85186 https://www.ebay.com/itm/174574459324 https://shop.advanceautoparts.com/p/dorman-conduct-tite-electrical-harness-3-wire-throttle-position-sensor-85186/22148598-P I had to make a slot in one of the plastic sheaths on the connector, but definitely a easy concession when the local parts store had it in stock and the terminals on mine were burnt and completely not reusable. -
"As rare as a farari" a web page article on the comanche
Salvagedcircuit replied to The86manche's topic in The Pub
It is incredible that MBA's and upper management can just condone free forced labor. I saw nothing, I hear nothing, I say nothing! https://www.shuforcedlabour.org/drivingforce It's all about that last penny. The top execs need their solid gold Yacht railings! -
-
Restoration - Part Deux
Salvagedcircuit replied to 87MJTIM's topic in Member Projects: Your Comanches
Looking good! I did this same process this summer! -
I have this exact same problem. My original antenna was bastardized by the PO. I replaced it with one from another 88 cherokee and the sheet steel punch out hole was a larger diameter than the rubber plug on the antenna cable. The rubber plug on my antenna cable did not slide along the cable either. I was not using excessive force, but I could not get it to move. My solution is grab a new rubber grommet from mcmaster and either shove the entire antenna cable and old rubber plug through the new grommet or slice off the old rubber plug from the cable, buy a new plug, make a slit, attach the plug to the cable and add a little bit of silicone to the slit. Either method should work. I just have to take some measurements first. Something like this: https://www.mcmaster.com/7291N45/ Or this https://www.mcmaster.com/grommets/grommets-6/ Or this: https://www.mcmaster.com/7291N19/ I'm leaning toward the last link and just making a slit.
-
You know its a quality dealership when they wax and polish the radiator hoses, fan shroud and air intake
-
Excellent documentation! I don't think I've ever used cruise control on any vehicle, but dang if I ever wanted to add it to my comanche, your guide looks pretty complete. I nuked my original '88 TCC switch and I forgot to rewire it into the 96 combo brake switch after I did the WJ booster+master swap. Really hoping it has not damaged something >.>
-
Project “Tomahawk”
Salvagedcircuit replied to ghetdjc320's topic in MJ Hardcore Tech: Epic Journeys to Greatness
Looks awesome! If you are using a new booster, make sure to check if the booster push rod is adjusted properly to the master cylinder. I blindly trusted that cardone would set the new booster rod length to Jeep spec before shipment to match a WJ Jeep master. They did not. It wasted 2+months of my time. The booster rod was set all the way to shortest most recessed length. Awesome progress as always! Thanks for all your input along the way too. I should hopefully be uploading my build log soon. -
Project “Tomahawk”
Salvagedcircuit replied to ghetdjc320's topic in MJ Hardcore Tech: Epic Journeys to Greatness
Bookmarking this for when I need to investigate my tailgate. I thought it was my tailgate rubber blocks being warn. Oh boy was it not. The tailgate just keeps shifting left, even when parked on flat ground. The tailgate is very straight too. Probably the side latch mount. -
SRT Comanche build
Salvagedcircuit replied to ghinmi's topic in MJ Hardcore Tech: Epic Journeys to Greatness
You sir, are the right kind of crazy. Nice job! -
Little Red Wagon
Salvagedcircuit replied to eaglescout526's topic in Member Projects: Your Comanches
Cool! Curious, where did you find a windshield washer tank sensor? Thanks! -
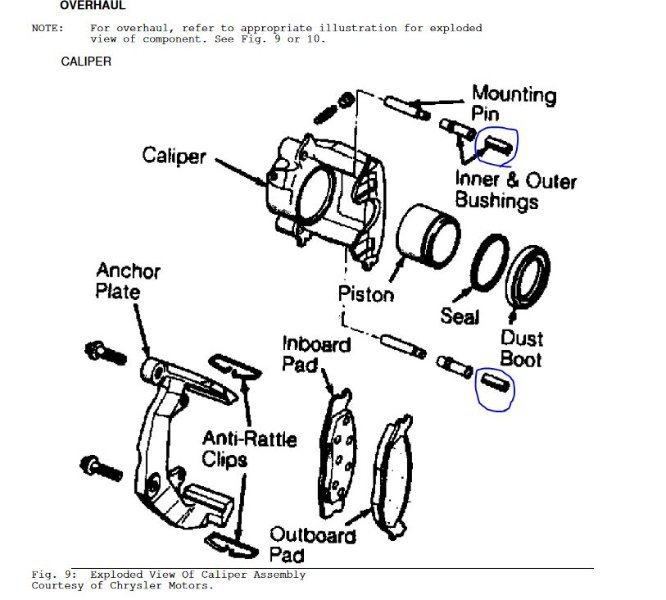
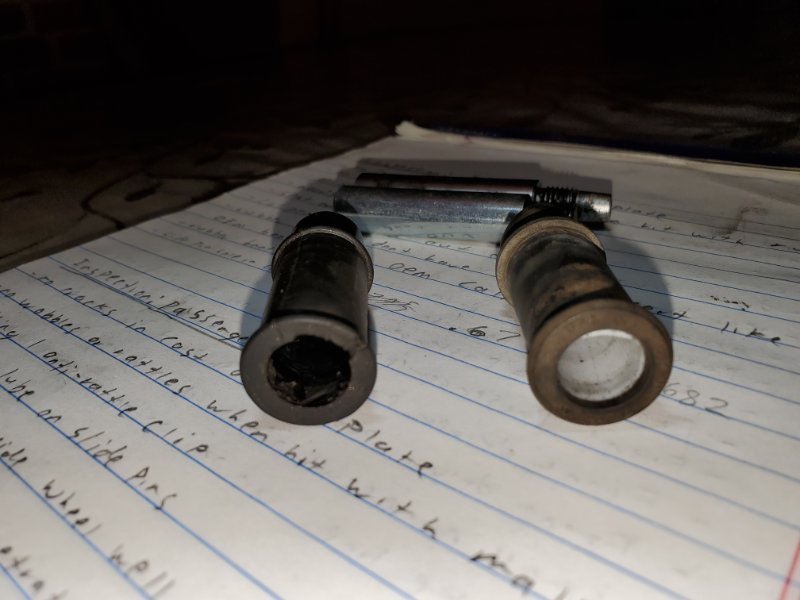
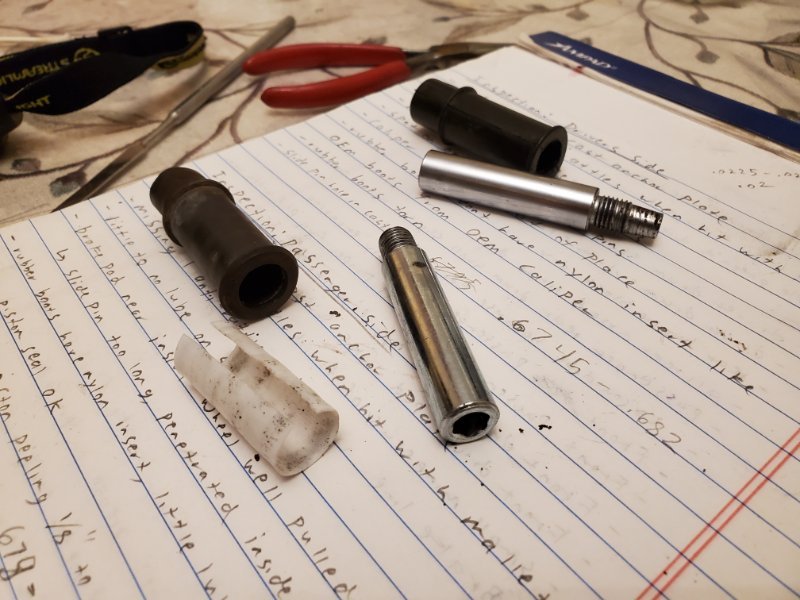
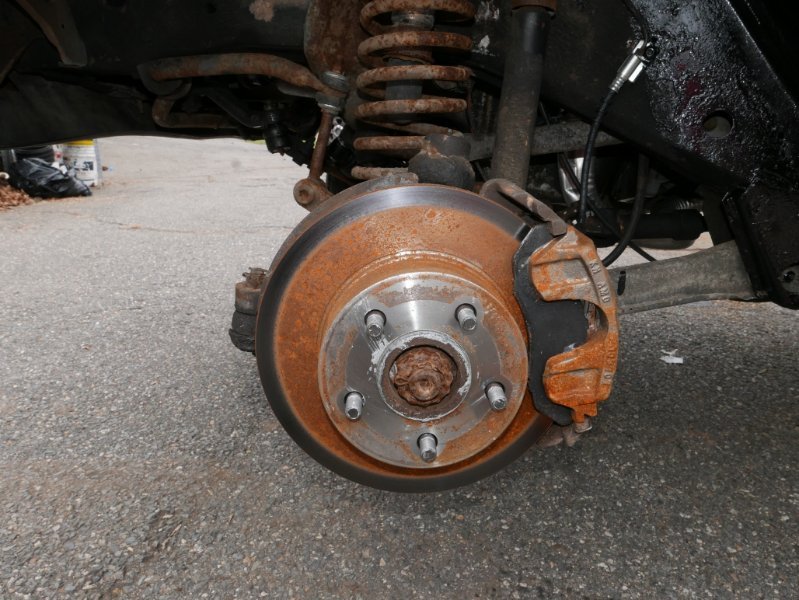
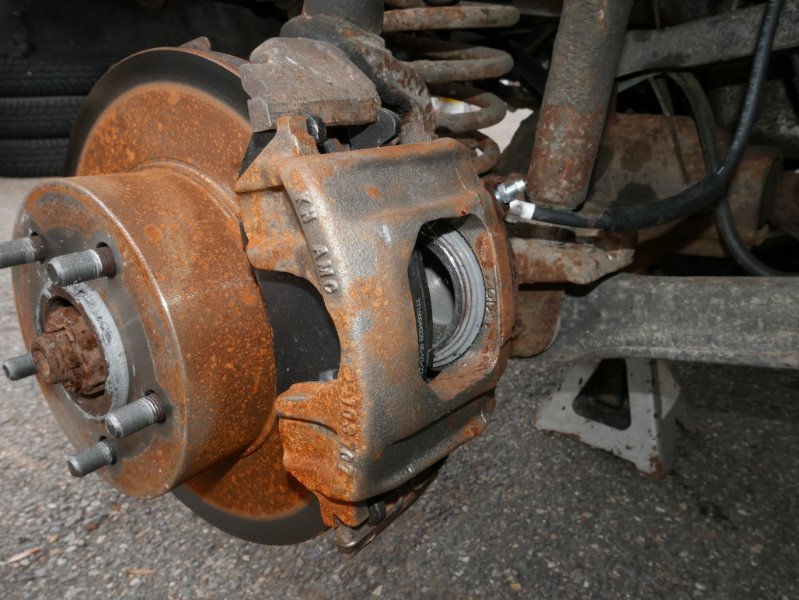
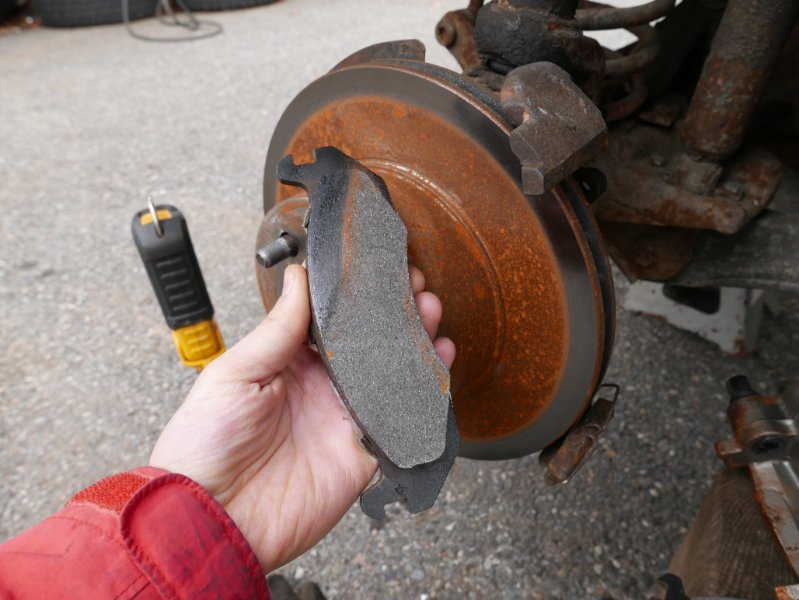
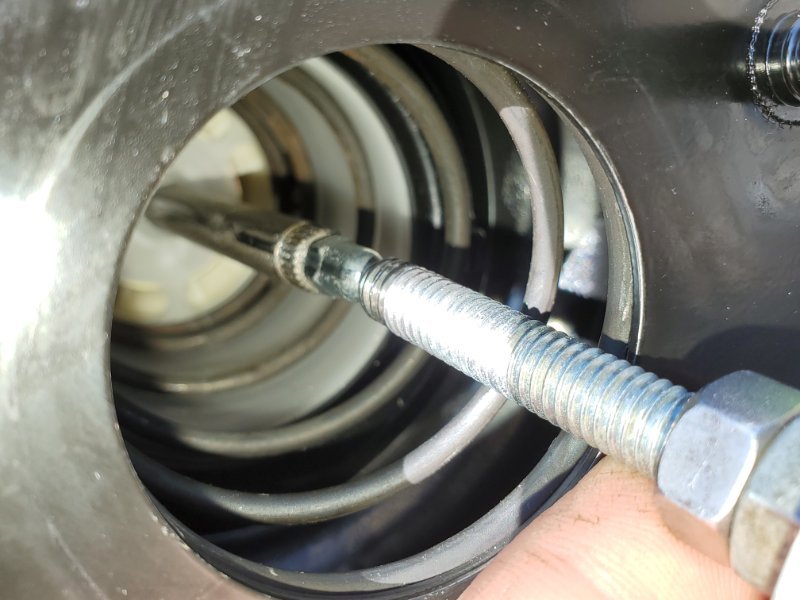
I dug around a bit. The cherokees and comanches from 1984-1989 used a Teflon sleeve between the rubber boot and the slide pin for the front calipers. I attached a photo from the service manual. I spent some time looking for this sleeve and it simply does not exist anymore. Not on rock auto, not jcwhitney, nothing from autozone, napa, advanced auto or fisher parts. I called the jeep dealer and they at least acknowledge the part existed. They of course had no calipers or caliper rebuild parts. "Discontinued." Here's some mopar part numbers: 1984-1989 Caliper bushing #52001700 sleeve #52001701 The good news is this sleeve is nothing more than a sheet of 0.02in thick teflon rolled up. I measured with 2 calipers to make sure. There is a slight wavy pattern stamped into the teflon sheet, but I don't think it's that important of geometry. The omix part doesnt look like it has such a pattern. Here is the 0.02in thick teflon sheet I have ordered: https://www.mcmaster.com/1192N17/ I plan to cut some myself and see how it goes. I am also going to order the sleeves from omix and compare them. Why am I doing all of this? The calipers that I was sold by autozone did not have the slide pin bushings in them. I installed the calipers correctly and torqued them down, but I noticed after 4mi of use, the brake pads and caliper shifted on me and misaligned. When the caliper was removed and slide pins removed, the slide pin hole diameter on the autozone caliper was 0.53in. The same slide pin hole was 0.5in on the stock caliper. I removed both rubber boots and measured the casting hole diameter. The casting hole diameter on both calipers was 0.682in. I cannot fully confirm that the omission of this sleeve caused the caliper to shift on me, but it definitely is not a good sign if rebuilt calipers are missing components. I did inspect the caliper anchor plates on both sides of the vehicle and neither were cracked, warped or damaged. The threads in both anchors looked clean and un-damaged.
-
Comanche Camper... The Comansion!!
Salvagedcircuit replied to neohic's topic in MJ Hardcore Tech: Epic Journeys to Greatness
Congrats! Glad that it found a new home. -
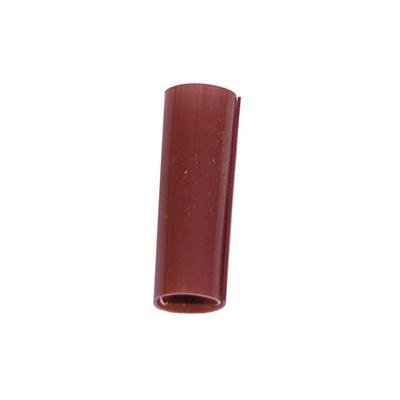
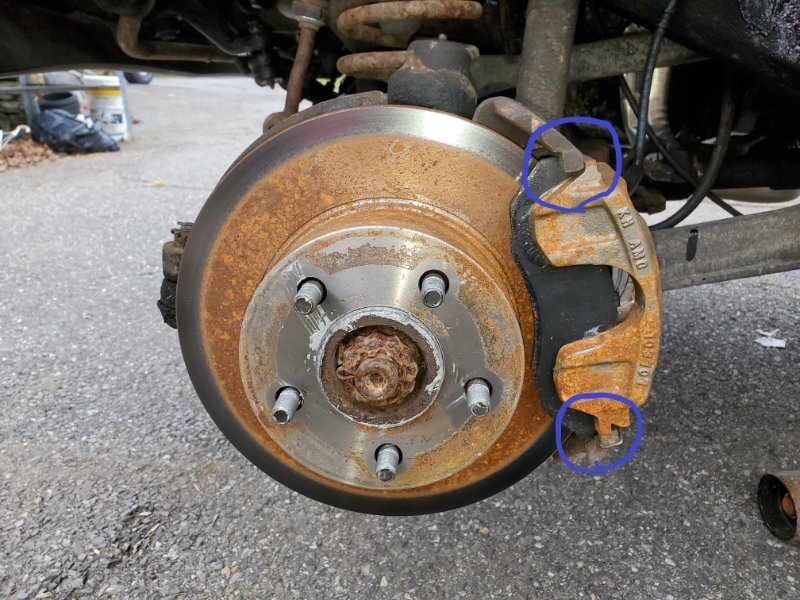
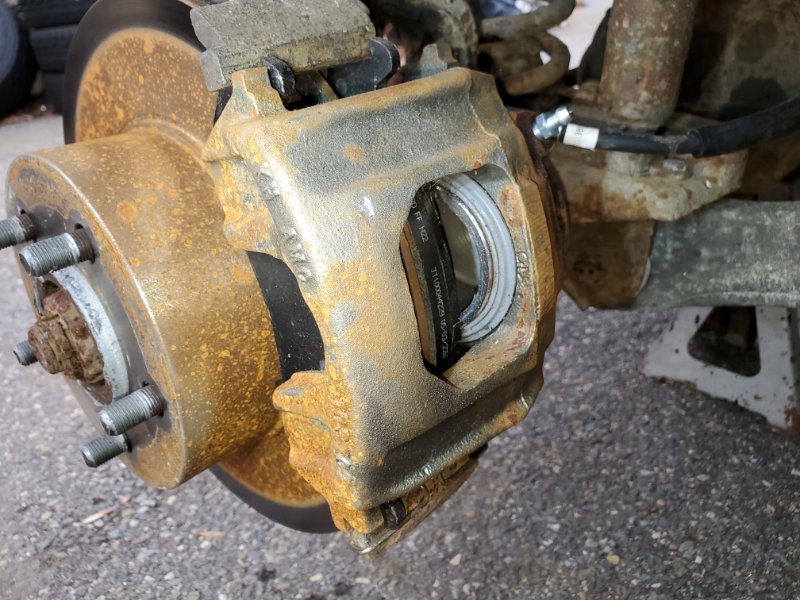
Does anyone know where I can find these teflon or nylon inserts for the slide pins? My new caliper from autozone did not come with them inside the rubber boots and the entire caliper shifted on me. Thanks.
-
I have an '88 with 2 problematic front calipers. I am investigating whether or not 1990-01 anti-rattle clip calipers are compatible with the anchor plate on the '88 front axle. Would I have to change a bunch of steering related components, or would the calipers bolt up? Thanks.
-
I am going to address my glaring issues with the driver side brakes and then inspect the booster. Worst case, I will grab some clay or mounting putty and take a measurement. Thanks again cruiser54 for the input.
-
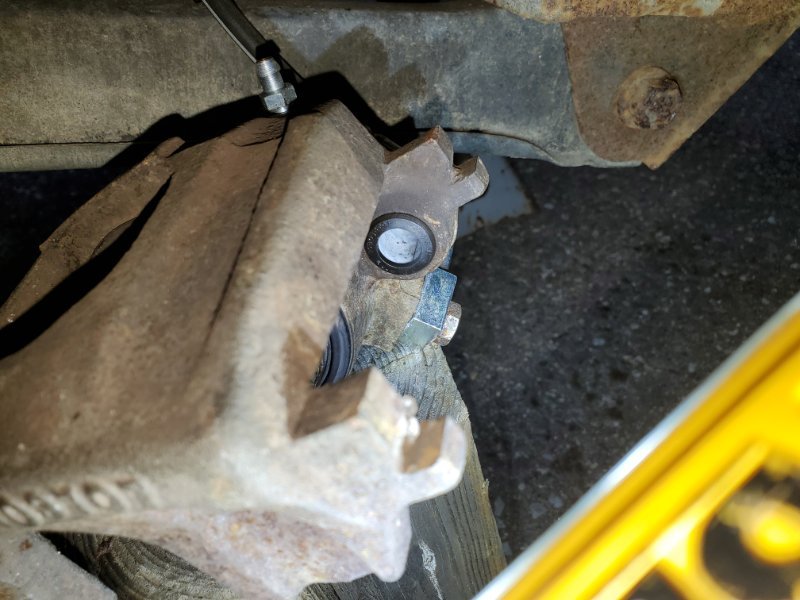
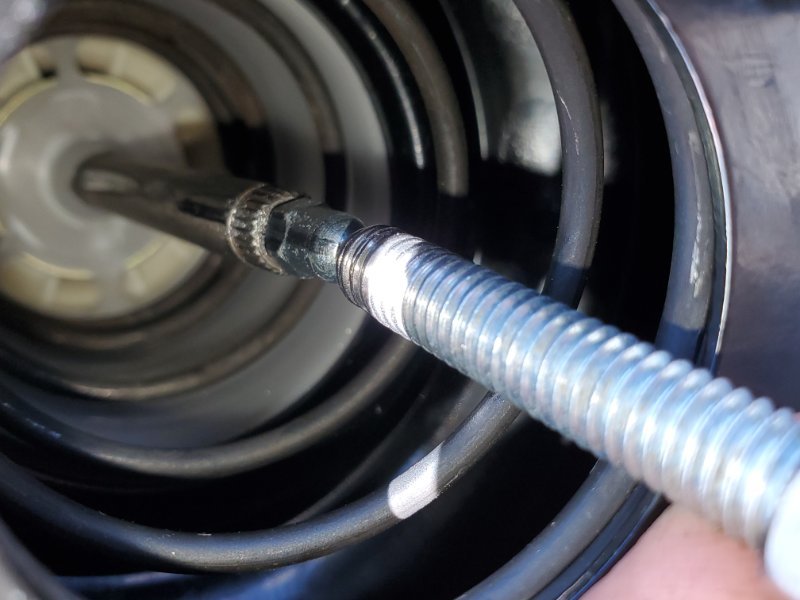
An update on this. I checked my driver front caliper and I noticed the 3 month old autozone caliper shifted on me. I do not know if either I did not torque the slide pins enough, or maybe I forgot to push the caliper in all the way. I have never had this happen to me on any vehicle I've worked on. I am also investigating the rear driver side drum cylinder to see if its leaking internally and lastly I will double check the booster push rod length. I originally decided to leave the booster rod length stock as there was no documentation from jeep on adjustment in the WJ manual and the cardone technical asce technician did not mention the process. The photos included show the booster length just before I installed it. This is the length shipped by cardone. The adjustment nut is fully seated on the push rod shaft. I did not make any adjustments. I will be calling cardone again tomorrow and re-reading the lexus booster rod length adjustment process cruiser54 mentioned. This could be the reason why I am experiencing a soft pedal for 7/8 of the throw and it then gets hard the last 1/8 of the throw.

-
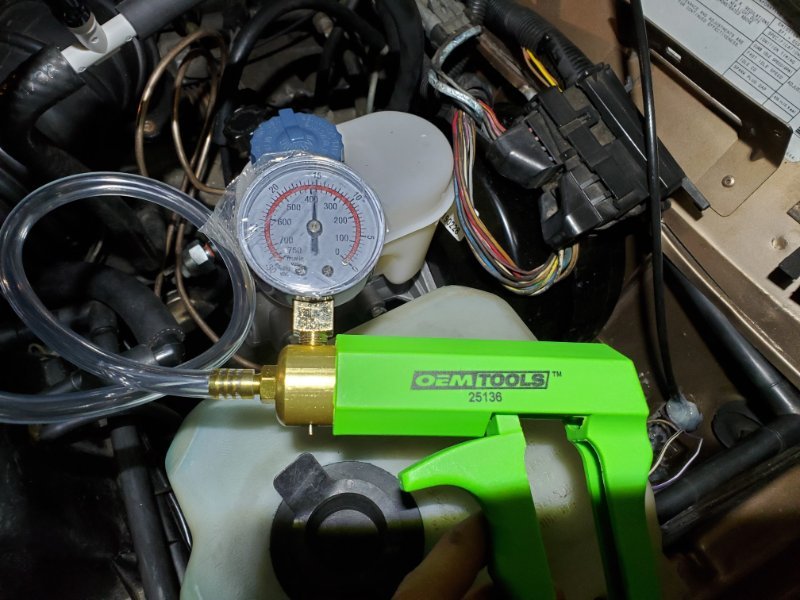
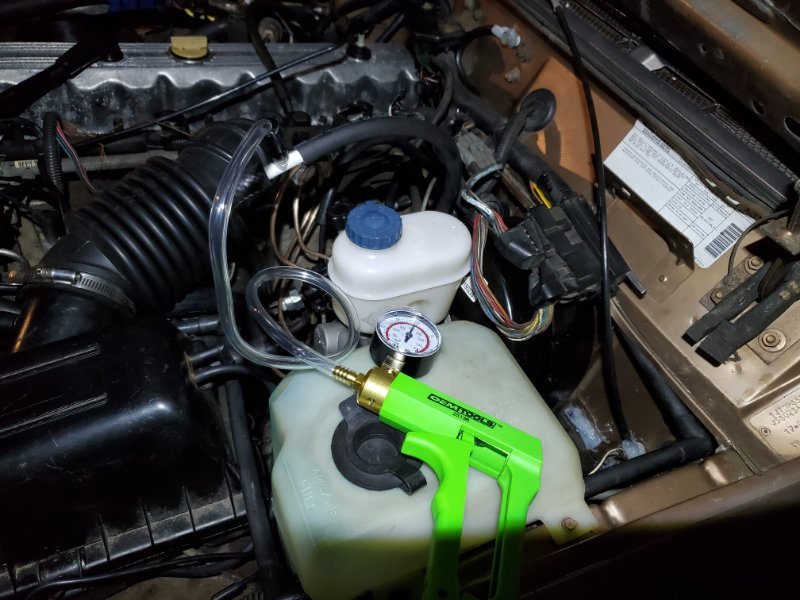
Thanks again for all of the help guys. I swapped the lines and re-bled every wheel (rear passenger, rear driver, passenger, driver). I now have brakes but the pedal seems very weak. I removed the rear drums and inspected the drum cylinders and there were no signs of brake fluid leaking anywhere on the drum backing plate assembly. I reinstalled the drums and adjusted the rear drums again, following advice on how to properly adjust the star-adjusters. The pedal still feels soft up until the last, say, 1/8 of the travel length. My wilwood proportional valve is set on 5 turns, about 50%. I have a new brake line in the back and old brake lines in the driver front and passenger front. I notice there is a large sucking sound whenever I press the brake pedal to the floor. I then disconnected the vacuum from the booster and plugged the hose. If I do not plug the hose, the engine revs pretty high. My brake pedal now feels pretty stiff. However, when I use the brakes with the vacuum disconnected from the booster, they barely work. It takes a while to stop from accelerating to 5mph. It does indeed stop and it is not just rolling resistance. I plugged the vacuum line back into the vacuum booster and the pedal is soft again until the last 1/8 of travel. However, the brakes work a lot better. I put my rear tires on the lawn and my two front tires on the pavement. I was able to do a burnout while the front brakes held the vehicle from going forward. I conducted another burnout test with all front and rear wheels on the pavement and the front brakes hold the vehicle in place while I spin out the rear tires. It just seems incredibly strange that 7/8 of the pedal travel feels incredibly soft. Am I not getting enough vacuum to the booster? My vacuum gauge is measuring 15in-mg when the engine is idling (~400rpm). I connected the gauge with a T as stated in the 01 WJ manual. I did my very best to baby the master cylinder during bench bleeding. I did not mishandle it in anyway. I did not push the shaft more than 3/4in when bleeding for fear of flipping seals. I triple checked the master and booster alignment so they are definitely aligned properly. I am at a loss of words to why this does not work. If anyone has any advice, I would greatly appreciate it. Thanks!

-
Jeep Turbine paint?
Salvagedcircuit replied to Salvagedcircuit's topic in MJ Tech: Modification and Repairs
Hmm. This was normal paint and not powder coated? Do you by chance remember what shade of gray you used? Thanks! -
Jeep Turbine paint?
Salvagedcircuit replied to Salvagedcircuit's topic in MJ Tech: Modification and Repairs
Thanks a ton Pete! I glass bead blasted my turbine rims and they look great, but I've been mulling about robust options for refinishing the rim, yet retain the factory look. I think the two best options are to either: -powder coat light gray (no idea the shade), tape up 10 spokes -remove tape, polish 10 spokes -powder coat clear entire rim or -anodize light gray (no idea the shade), tape up 10 spokes -remove tape, polish 10 spokes -anodize clear entire rim I believe both methods will work. I think the only differentiator is the polish on the anodized spokes will not be as shiny as the powder coat, but I believe the anodized finish should outlast the powder coat. From what I've found is that consumer / prosumer paint does not adhere to aluminum well. Factory electrolysis painting yields best results, but that's usually out of every restoration budget. I am currently leaning toward the anodization. I don't want the spokes to be a chrome level polish shiny. Folks that have powder coated feel free to chime in. Thanks a ton!