

Salvagedcircuit
-
Posts
1389 -
Joined
-
Last visited
Content Type
Profiles
Forums
Gallery
Everything posted by Salvagedcircuit
-
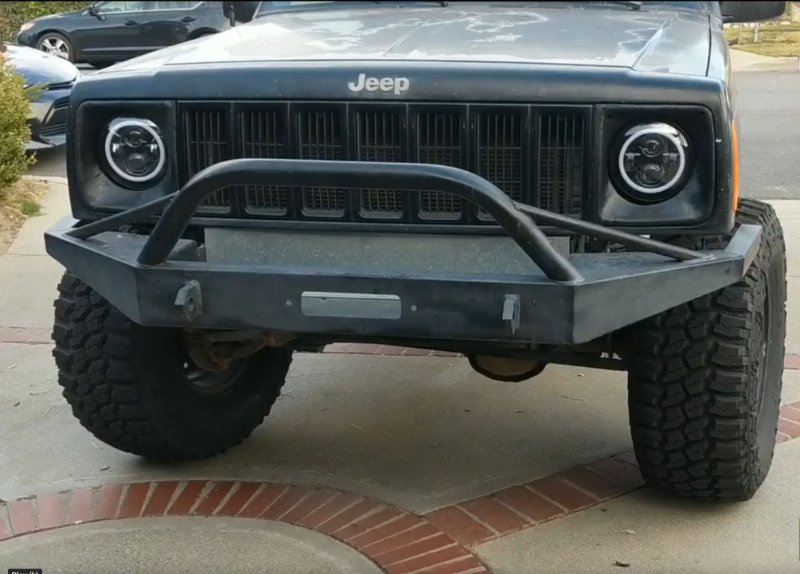
Thread Revival! Has anyone seen this guy's round light conversion: I just discovered the Jeep Casablanca concept yesterday and I think it looks the closest so far. It still looks a bit strange, but I don't know if that's because of the amazon alien-head headlights or that it makes the front look too wide. I feel like I should give this a shot using a scrap 97+ header panel from a junkyard and a Wrangler JK blinker
-
Broke down in the middle of the night
Salvagedcircuit replied to dreaminbohemian's topic in MJ Tech: Modification and Repairs
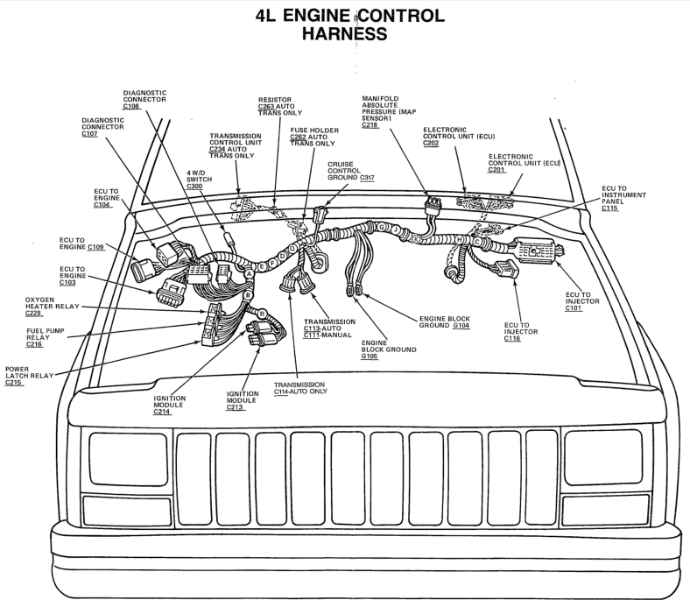
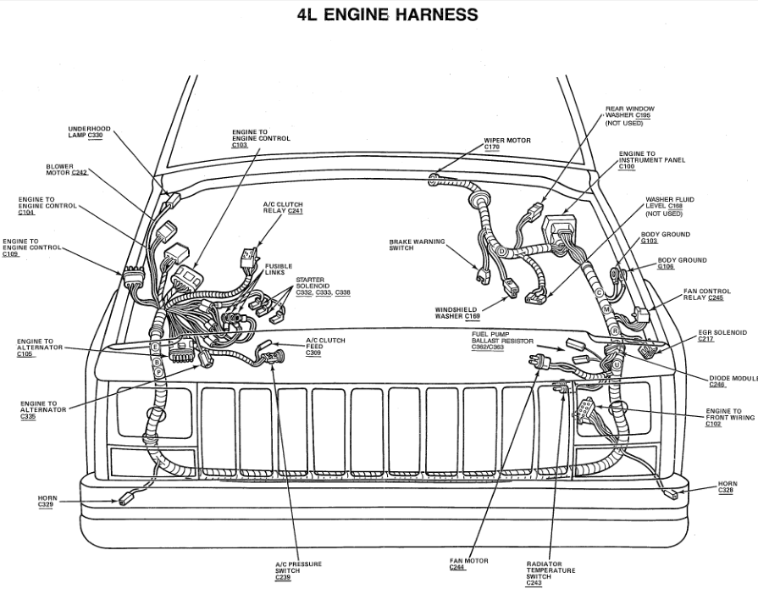
you want to check the 1988 electrical manual which is here. page 89-91 shows the information you want. On page 89 it shows the O2 sensor is on the injector harness that directly connects to the C101 engine control harness. This should not be that hard to find as every cherokee and comanche from 87-88 had this harness. 1986 did not have a 4.0L in either cherokee or comanche. page 90: Engine control harness page 91: Engine harness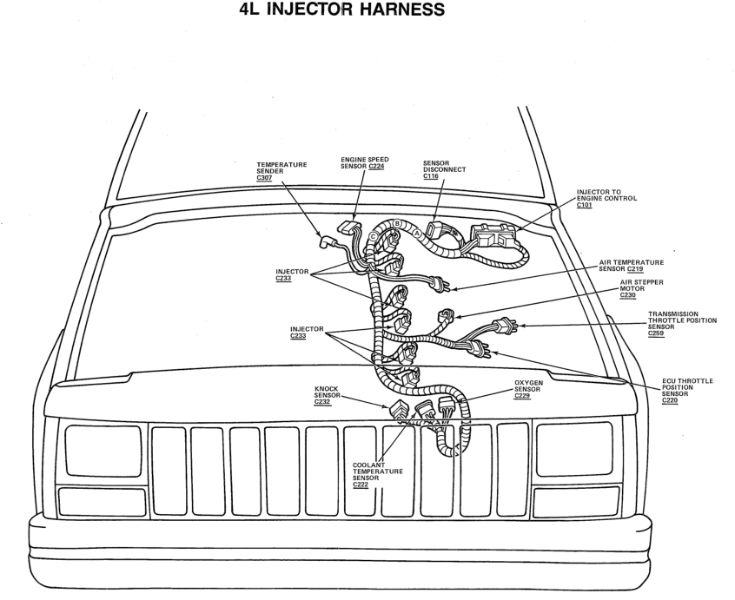
-
1990 Comanche Eliminator
Salvagedcircuit replied to pizzaman09's topic in Member Projects: Your Comanches
This is the stuff I used for my power steering fluid. Valvoline 602241. It cross referenced to the original gm fluid for the Saginaw box. You can get it at any auto parts store. It's red in color.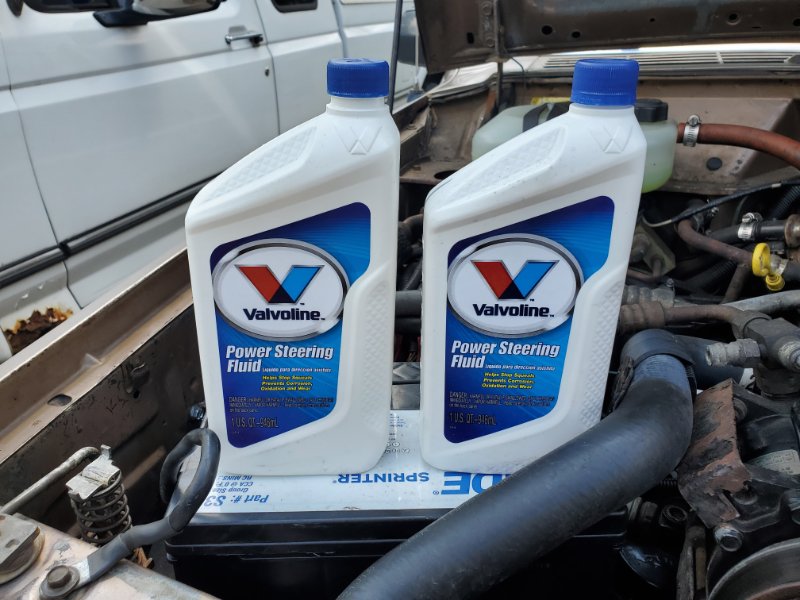
-
1975 Brutally Simple Daily Driver
Salvagedcircuit replied to neohic's topic in Member Projects: Other Cool Stuff
That looks great! I mainly use toolboxes to carry all my tools, but this year my newly acquired ratcheting open end wrench tool pouch has been worth it's weight in gold. It's definitely the little things that matter. Back in ~2007 my grandfather gifted me a small clam shell set of standard craftsman sockets and wrenches. It was toward the final years of USA production. He's since passed and I think of him every time I use that kit. -
1990 Comanche Eliminator
Salvagedcircuit replied to pizzaman09's topic in Member Projects: Your Comanches
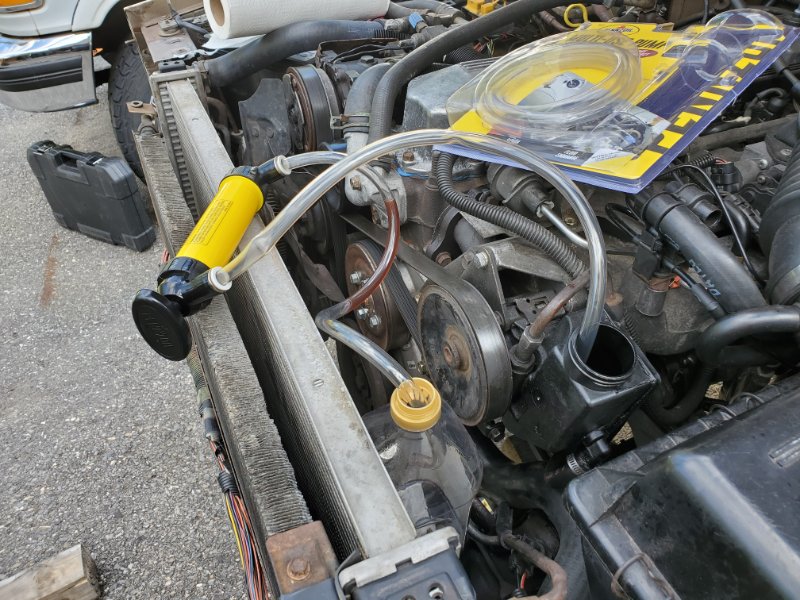
Excellent work! My PS cap was completely broken when I got my MJ. I replaced it and I noticed it was was wet every time I used the jeep. it was strange. I was thinking of rebuilding my power steering pump, but it seemed too daunting of a task so I decided to just flush it out. I used (3) bottles of power steering fluid and it has not bubbled up or left a wet cap since. Part of me still wants to rebuild it, because it can probably use it, but it's certainly nice to know that it's do-able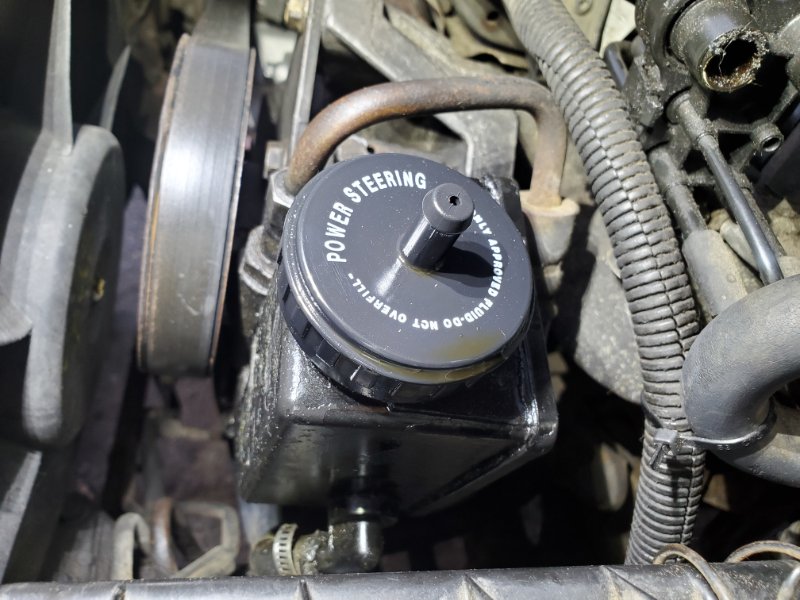
-
It is extremely likely the dorman header is identical to this and sourced from the same supplier. Something you want to check is how flat it actually is. I have a renix jeep, so I just went with a renix header (it was less work) but I had to literally take a metal file to the internal and external edges because there were burrs. I then took it to a granite surface block and some 400grit sandpaper. The renix header is really a trash design. Just look at how the pipes are welded inside. it's a complete welding disaster. The baffle style header you selected is a better design, but it would have required me to redo the entire down pipe that I *just* replaced. I bead blasted mine, blew off with an oil-free air compressor, cleaned with alcohol, blew it off again then brush painted it with VHT high temp paint. The paint flaked off in like 30 hours. VHT paint is truly garbage.
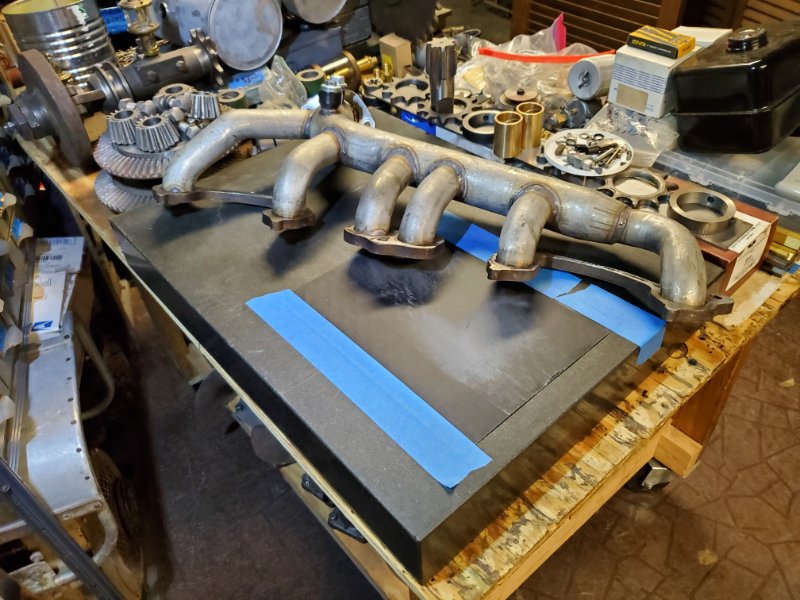
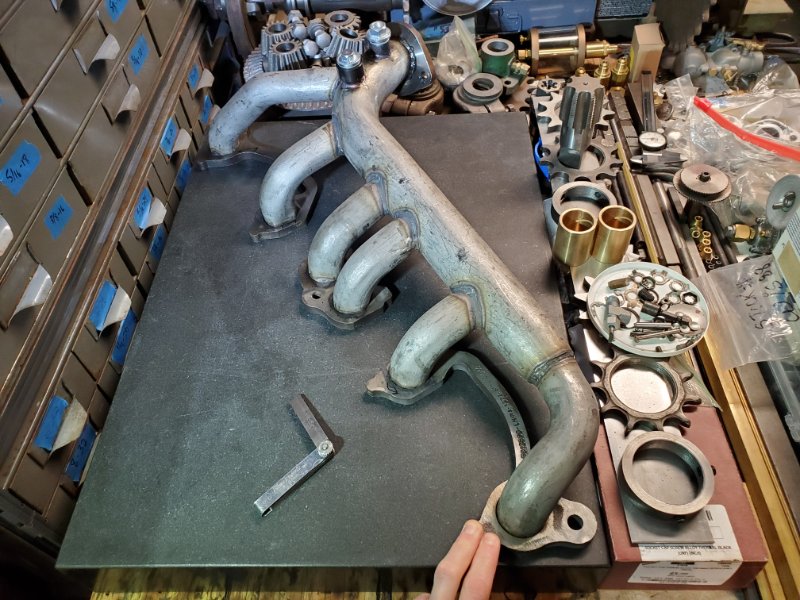
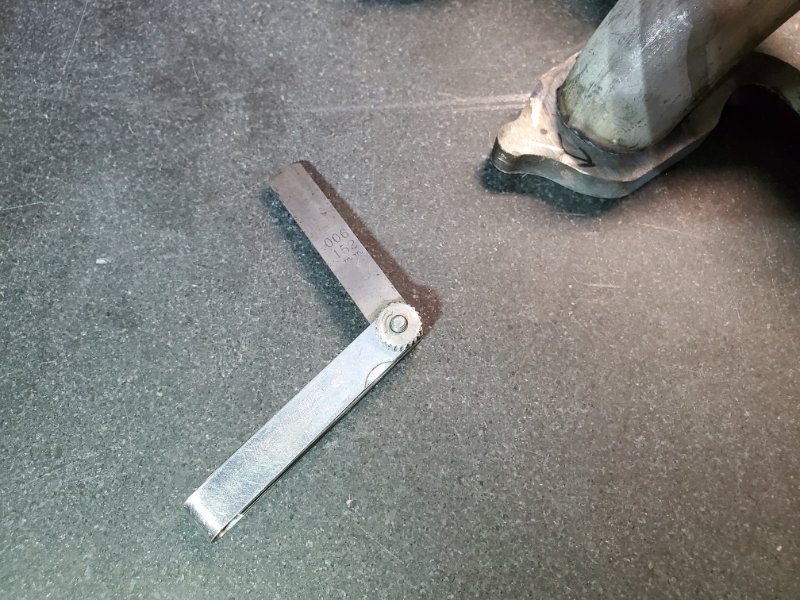
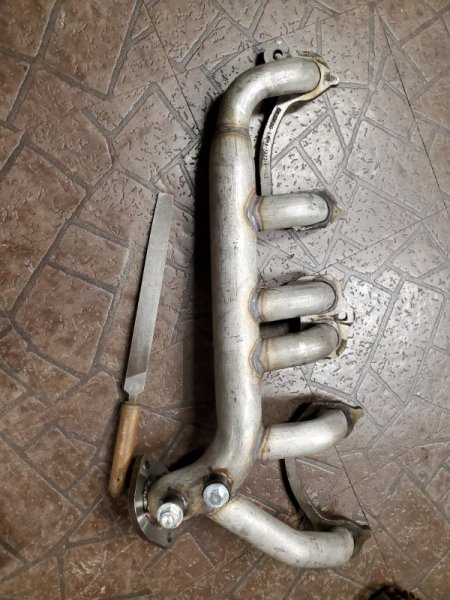
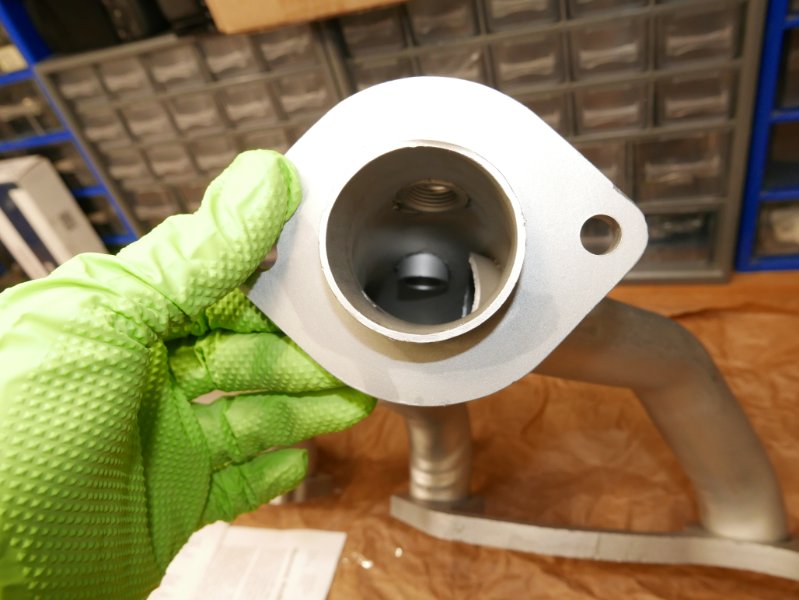
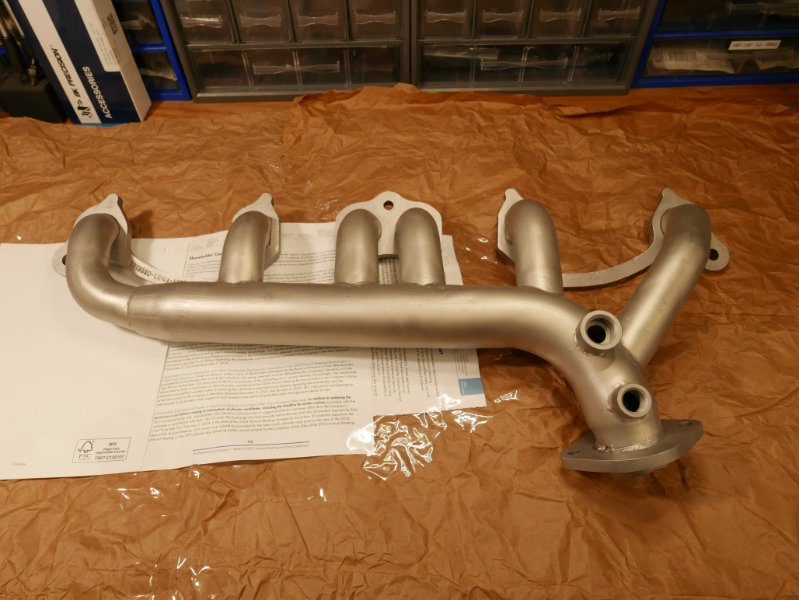
-
Broke down in the middle of the night
Salvagedcircuit replied to dreaminbohemian's topic in MJ Tech: Modification and Repairs
1) That could be part of the front CAD axle vacuum tubing (there's a grouping of 3 aluminum 1/8in tubes to the front axle on the US passenger front side) or part of the return brake lines from the rear prop valve. send photos if you have them. 2) From 87-88, the 4.0L engine wiring harness has a connector, "c101" on the US drivers side of the firewall. It may be easier to disconnect that instead of cutting a harness in a junk yard. The other wiring harness also has a connector on the drivers side firewall, further towards the bottom, that's the entire harness from the inside fuse panel. 3) Not sure. -
What is this connector and where does it go?
Salvagedcircuit replied to vfb's topic in MJ Tech: Modification and Repairs
If it's on the drivers side and you drive on the left side, it's your O2 sensor! Here's one with the same style slots on the o2 sensor.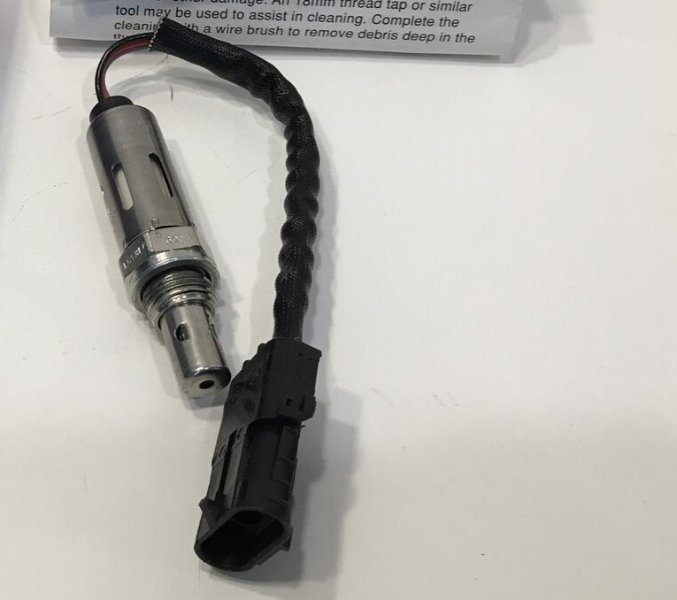
-
Wowzers thats kinda wild. Well I'm glad I did not repaint the bottom of my comanche yet lol. Will definitely save me some money over purchasing por15. His recommended choice of mastercoat + raptor liner + AG-111 might work well, but at the same time, any paint that has a prep coat + 1 base coat + 2 additional coats of paint will do better than 1 prep coat and just one coat of base paint. I do wonder what prep+rustoleum+Ag111 would yield. That might be the best bang/buck choice there.
-
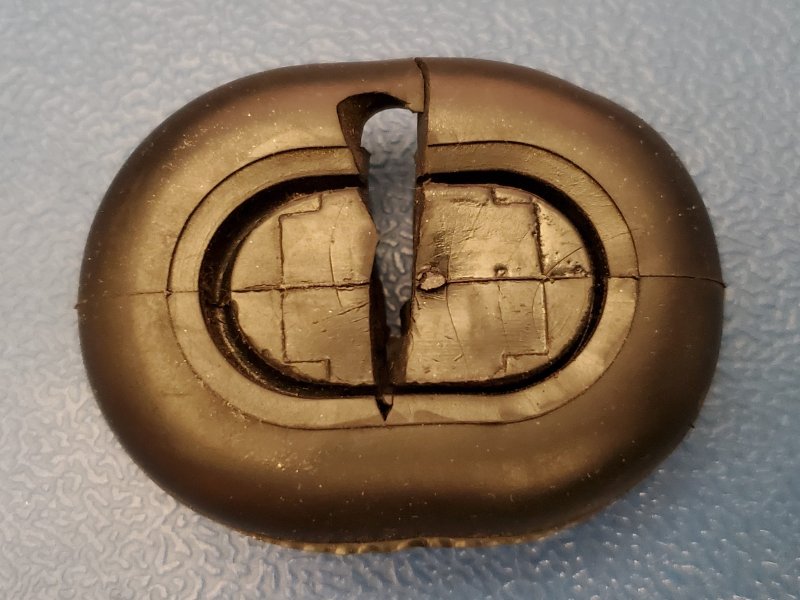
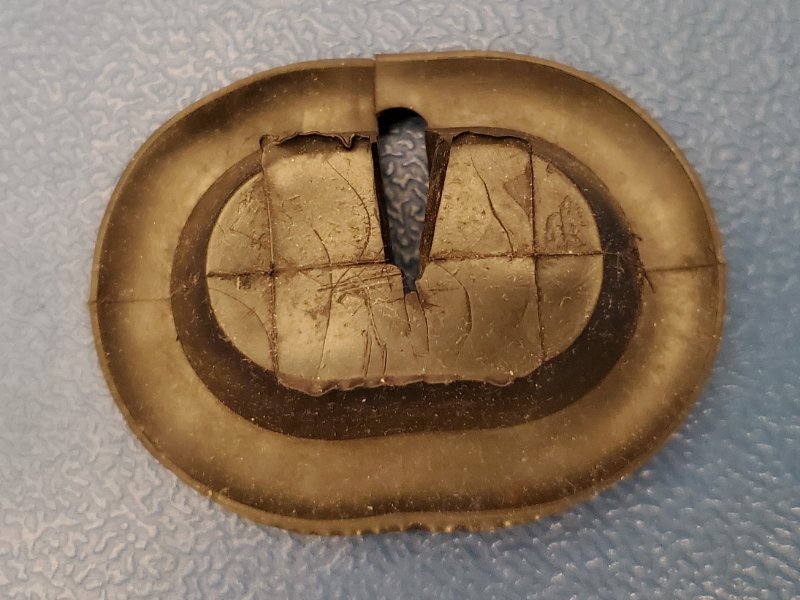
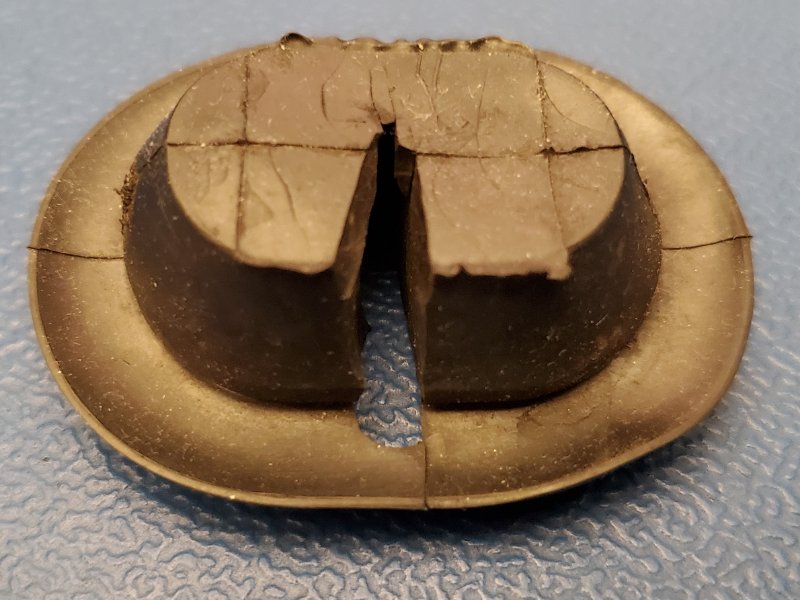
These are molded rubber firewall plugs that last a very long time. They just get bastardized by careless Previous Owners who think its cool drilling a hole or slicing in a seam to pass another wire. Here's my smaller inside door grommet made of a similar rubber. PO must have taped his eyes closed when cutting a hole for the speaker wire. Spoiler alert: This is the next grommet getting CADed up
-
Awesome! let me know how it goes.
-
Nice find!
-
CPS to ECU home run
Salvagedcircuit replied to Duncan Moody's topic in MJ Tech: Modification and Repairs
All the more reason to bypass and solder the c101. On the to-do list. Thanks. -
CPS to ECU home run
Salvagedcircuit replied to Duncan Moody's topic in MJ Tech: Modification and Repairs
Curious, was this a recommended service note for all 87-90 MJ's or just those having CPS problems? Any benefits of doing this on an MJ that does not have any CPS issues? Thanks -
Factory fog light function
Salvagedcircuit replied to schardein's topic in MJ Tech: Modification and Repairs
On a bit of a fog light tangent, does anyone know why the fog lights were changed from bring mounted on top of the bumper to a below the bumper on the cherokee XJ 97+? Was there a visibility benefit of putting the fog lights lower than the bumper? I forsee a fog light installation in the near future and I might just have to test both positions and see for myself. -
Wow, that says it all really. I sent detailed emails to all three of the seat belt shops mentioned here on comanchclub because I wanted to get some new seat belts made, and a new lap belt made. SeatBeltPlus.com reply: "The belts are made in Jupiter Florida but none of the Jeep belts have a logo on it....The Jeep kits don't come with hardware since you have to use the original hardware, the universal belts can be purchased with hardware packets but you have to opt in for it. " SafetyRestore.com reply: "I'm sorry, but we provide a service to repair your seat belts and do not stock/sell any belts. Our cutoff year is 1996 so we won't be able to work on these. For replacements, you can try LKQ.com or car-part.com. Thank you!" SeatBeltPlanet.com reply: "Thanks for all your questions. I would like for you to call me to visit about how we produce these seat belts. I'm the designer of this product. I look forward to your call. Thanks, Steve" It really says something if 2 of the 3 companies just use a supplier in Florida. SeatBeltsPlus says on their website: "We are proud to offer aftermarket seat belts made by Seatbelt Solutions. Seatbelt Solutions began manufacturing seat belts in 2005. All belts made by Seatbelt Solutions are manufactured in Jupiter, Florida. We partnered with Seatbelt Solutions because we share the same values; our commitment to the safety of drivers and passengers. " I do wonder if SeatBeltSolutions is the supplier for all of them, they are in Jupiter, FL. https://www.seatbeltsolutions.com/jeep
-
'88 Eliminator... Feb. 2009 - Sep. 2026
Salvagedcircuit replied to neohic's topic in Member Projects: Your Comanches
My comanche must have came with stock relays or really old ones. They had stamped: made in Britain. I thought to myself, holy schinikes did this sail with Columbus? All my relays worked just fine. I ended up grabbing some newly produced bosch ones that were made in Portugal, also interesting, and installed them as a matter of course. I kept the old relays though because its just cool to have. -
The 88-90 renix 4.0L ECUs are plug and play from my understanding. Folks have claimed improved performance in upgrading to the 89 / 90 ECU.
-
EGR ramblings and reach out
Salvagedcircuit replied to cruiser54's topic in MJ Tech: Modification and Repairs
Wow. That's kinda nuts. There is a simple workaround with ebay though: List in the wrong category. This is how you can still buy dental-grade toothpaste and li-ion cells through ebay. The sellers intentionally change the category the part is in and just put key words in the listing. The item will always show up in results if the buyer searches in "all categories." Ebay knows all too well about this. I think last month ebay received a fine for the mountain of scalping that occurred with 3M n95 masks and cleaning products that happened during the peak of the pandemic. The fine was so small, I don't think it was equivalent to an hour's worth of their profit. I bet they will even write off the fine on their 2023 income taxes -
He's right, it is an incredibly useful source of information! Welcome to the club!
-
Hahaha. This is the correct thing to do
-
Added some more photos and info. I have higher resolution photos of each image. I can continue to host them here and add a link to the original sizes via imgur or something so the post history is preserved, but you can still zoom in as well. let me know what you think. Also, still looking for some more 2.5L engine bay images. If anyone has one for a missing year, come on down
-
The hole size varies depending on year. I have 2 different plug diameter OEM antenna cables. Its kinda bonkers. Only one of them was correct.
-
Interior Leaking Bad - What could it be??
Salvagedcircuit replied to NEO auto's topic in MJ Tech: Modification and Repairs
Some folks on here have had success with the generic firewall grommets: https://www.amazon.com/Pack-Universal-Firewall-Boot-Accommodate/dp/B08LGNDD2G/ I used one and it fit well until I was able to hunt down the correct antenna cable that mated with my behind-the-dash radio coax cable. -
Same to you buddy!