
.jpeg.f07a13a160462b96483a23ac6c034f57.jpeg)
89 MJ
-
Posts
7473 -
Joined
-
Last visited
-
Days Won
8
Content Type
Profiles
Forums
Gallery
Everything posted by 89 MJ
-
Thanks guys! That was exactly what I was looking for. Plans changed and we won’t be needing the trailer for the band, but I still want to add a 7 pin at some point.
-
I’m aware that I need the controller, that isn’t the part I’m worried about, I was more so wondering if anyone had installed one and wondering the route they went with it and whether or not they got rid of the 4 pin connector.
-
The plan is to install the controller and all of the associated goodness. It’s not a small hill either, my truck won’t pull the hill empty in 5th. Plus at some point I would like to get a camper to have behind the MJ, and I’ll probably need one then. I did consider just getting the adapter, but the 4 pin connector has been giving me issues, so rather than fix that, we figured we might as well upgrade.
-
mini beast Project: Stock To Beast!!!
89 MJ replied to MiNi Beast's topic in MJ Hardcore Tech: Epic Journeys to Greatness
Is that trailer hooked up to the MJ? if it is! -
I am going to buy a connector this afternoon and start on it. I’ll report back and then create a write up.
-
What is the best 3 inch lift kit?
89 MJ replied to COMANCH3's topic in MJ Tech: Modification and Repairs
Get a set of new metric ton springs. That will increase ride height and increase payload capacity, but it may ride rougher. -
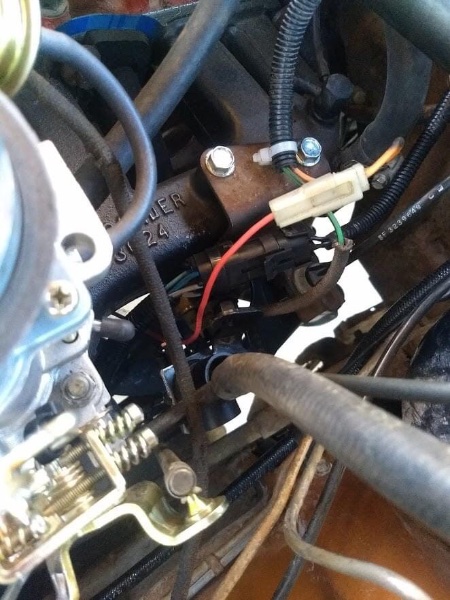
This Sunday, my band has a performance in which we will be using our car trailer as a stage. We will be playing at a car show, so I am bringing my MJ. I am thinking, it probably would make sense to use the MJ to tow the trailer and then my parents could bring whatever vehicle to the show. Our trailer has electric trailer brakes though, so it has the 7 pin connector. I know I could just use an adapter, but I think it would come in handy in the future to have the 7 pin connector, and I will have to go over a large hill to get to the show. How many of you have installed a 7 pin connector in your MJ? How did you go about doing it? Thanks in advance.
-
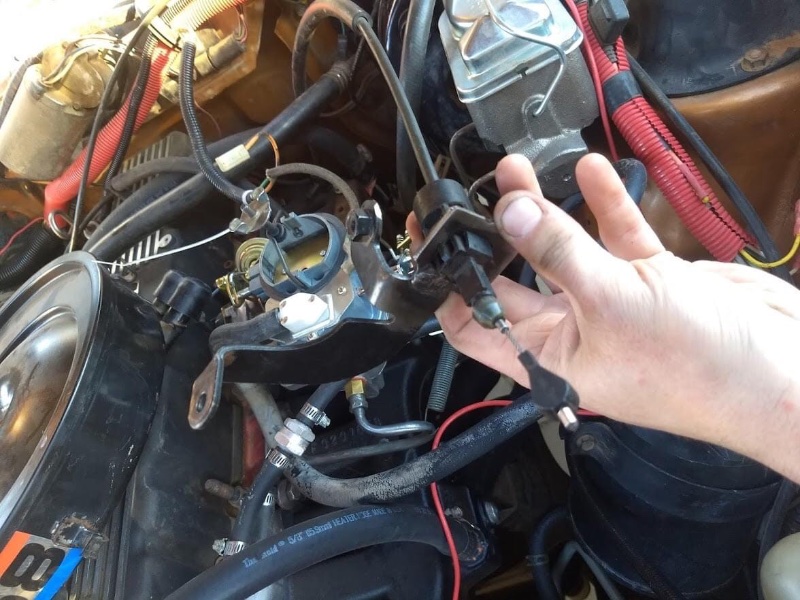
Yes, I used one like the picture.
-
^ just retired
-
I ran a stock driveshaft with my 8.8 and no lift. I’m still running a stock driveshaft and a 3” lift. FWIW
-
You could add me to the wanting cheap gas list.
-
^ works on his dad’s Charger
-
^ lives in the mountains
-
Last I filled up, we were at $2.89/gal
-
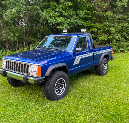
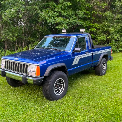
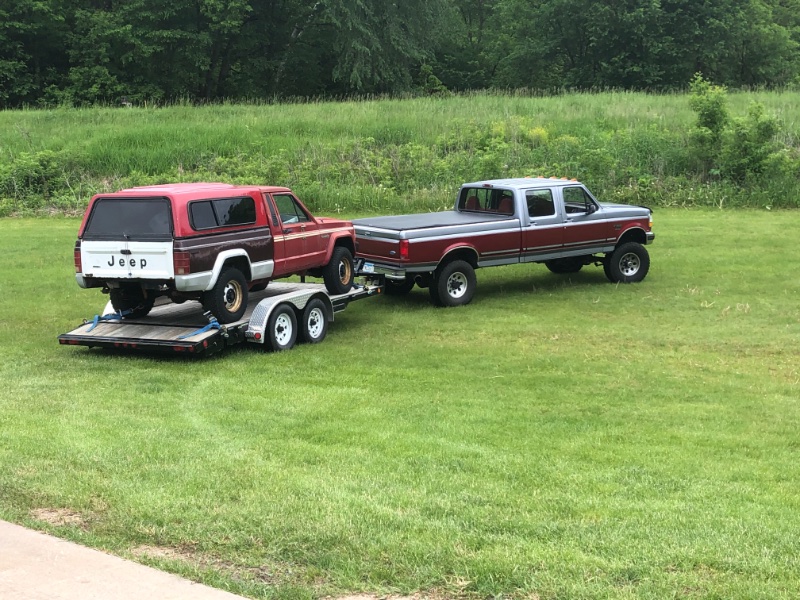
It looks tiny compared to the F150 and even that Honda thing.
-
Beautiful!
-
Go get the truck and use said truck to get fire pit building supplies.
-
Of course I did! Hopefully he will drop by!
-
For future reference in case I decide to do an AW4 swap: //THE BIG AW4 INSTALL POST - very long post incoming gonna have to break it up and caption the process with the pictures so hopefully this all makes sense. there are a couple small issues i need to work out, but overall this is a good picture of what it's going to take if you're interested. for what it's worth, i managed to perfectly maintain AMC's original power band and highway engine rpm speeds despite gearing, transmission and tire size changes. it's a drastically improved driving experience - still feels like a vehicle of its vintage, but with more modern throttle response, acceleration, and driveability. -------------------------------- So why do this? If you've ever dreamed of an automatic with overdrive, this is what you've been dreaming of. This is by far the easiest, and best, overdrive automatic to adapt and install. According to the internet, the AW4 was developed jointly by AMC, Aisin and Borg Warner - hence the Aisin-Warner name. When properly cooled and maintained, the AW4 is a very dependable and long-living unit. Its use of a standalone TCM allows it to be used behind a carbureted engine and keeps wiring as simple as possible. First things first - if you're the kind of person that is intimidated by electrical stuff, this won't really be the task for you. You'll need to be able to read and understand wiring diagrams to correctly assemble the transmission harness and integrate it into the existing wiring where needed. I work on cars professionally, so while I'm attempting to write this so that anyone with minimal knowledge will understand, I will probably overlook something that is second nature for me at some point. That said, this definitely isn't a job you can graduate to after changing your own oil a handful of times - it's relatively straightforward, but a bit tricky at points. There are a couple things I haven't totally nailed down yet. One of which is the front driveshaft. The original will be too short; the donor will be too long. I haven't bothered with the transfer case shifter since I don't have a driveshaft. I made new linkage rod for the original shifter to attach to the new transmission. It's a bit stiff getting out of park and the detents don't line up with the original shifter, so I may go with the Jeep shifter and cable at a later time. There's enough information on forums about the various differences from year to year so I'll just link to those rather than summarize. I used a 1989 TCM, 1989 TPS, and a 1991 transmission. Up thru 1997 any year TCM will run any year transmission if you're forced to mix and match like I was. https://www.naxja.org/forum/showthread.php?t=1053970 DONOR VEHICLE PARTS NEEDED (preferably all from the same vehicle) -transmission AND transfer case (231 or 242) -starter w/solenoid connector -flexplate and bellhousing tin plates (keep all bolts) -transmission control unit -as much original wiring as possible with at least connectors for the TCM, TPS (read note below), and the two transmission connectors at the firewall -both transmission and transfer case shifters with cable and linkage -cooler lines -throttle body -throttle cable bracket -crossmember NOTE ON THROTTLE POSITION SENSOR I recommend using the RENIX ERA throttle position sensor regardless of which TCM you use. All TCMs will use a 5v reference and this sensor will work with any system. The renix sensor is a dual sensor that is capable of reading 0v nominal at idle or 5v nominal at idle depending on which side of the sensor you use. The sensor has an arm pivot that makes it MUCH easier to adapt than the later style sensor. Connectors can be obtained new thru parts stores if your donor vehicle does not have what you need. If using a chrysler era TCM, you'll need a 5v regulator to provide the signal voltage. Renix TCMs provide the 5v signal. WALKER PRODUCTS 20091094 - is a complete kit with sensor and both pigtails. STANDARD MOTOR PRODUCTS TH67 - sensor only STANDARD MOTOR PRODUCTS HP4460 - 3 wire connector for use with chrysler era TCM STANDARD MOTOR PRODUCTS S555 - 4 wire connector for use with renix TCM NOTE ON DRIVESHAFTS If you use a slip yoke eliminator kit, you can use the original Eagle rear driveshaft. This worked for me both on this install, and an AX15 manual transmission in an SX/4. The overall length of the transmission and transfer case assembly is within an inch or so shorter of the original 998/129 assembly. However in this situation, the AW4 is longer and the 231/242 shorter which makes the original front shaft too short. Additionally, i do have an 8.25 rear axle installed which moves the pinion yoke about another inch forward which may affect whether the original driveshaft can be used with the original eagle model 15 rear axle - I'm not sure here. HIGHLY RECOMMENDED NEW PARTS -slip yoke eliminator kit (unless you want to have a driveline shop modify from the donor) -USA STANDARD GEAR USA41198 u joint u bolt kit if using SYE -large external transmission cooler -transmission cooler hose, clamps, etc -transmission mount -EAGLE BRAKE SWITCH W/CRUISE and connector (if you don't already have cruise control) -1000-1300 ohm resistor (transmission control resistor on diagram) -fluid/filter/gaskets/seals -misc wire/battery cable/heat shrink/eyelets -misc sheet metal for brackets as needed WHAT MUST WE ADAPT? The transmission crossmember will need to have much of the middle section removed, a new section added to the rear, and reinforced appropriately. I'll credit Paul Schexnayder here for the method I used, though my work is not nearly as nice as his. We'll need to adapt the throttle bracket to connect the transmission throttle valve (kickdown) and mount the TPS. It's discreet once complete. We'll need to adapt the donor throttle cable bracket to properly anchor the throttle valve cable. I've removed the original engine control module and associated wiring, so its location in the passenger kick panel and harness grommet were ideal to reuse for the TCM and the new wiring. If you're still using the original system, you'll have to find another home for it. THE OVERALL PROCESS Remove the original transmission, flexplate, starter with cable, kickdown and shifter linkage, transfer case vacuum lines, and cooler lines. [refer to pictures from here out]

-
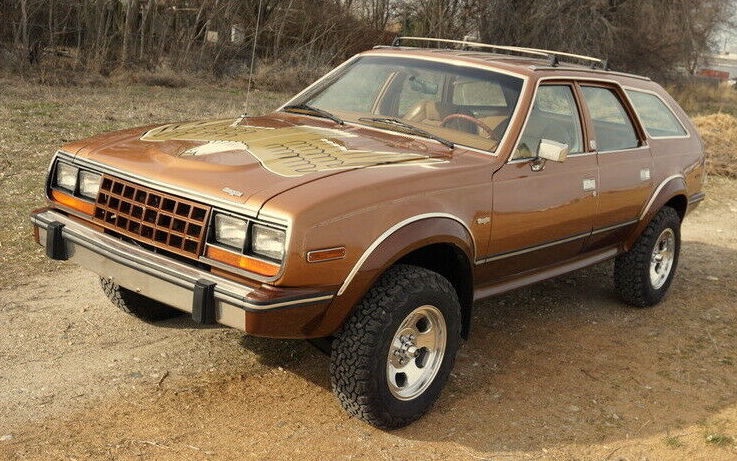
I’m kinda digging the Jeep Golden Eagle stripe. Maybe one in maroon would look sweet on this car. I'm also digging the aluminum slots.
-
The Eagle and MJ shared the same turbines. These were some aftermarket ones that we had laying around.
-
If I found a set, I’d consider it, but I honestly think I like OEM turbines the best on Eagles.
-
Well, I swapped header panels, listed it on Facebook, and it was gone in a couple of hours. I’ll miss it, but now we are on to getting the Eagle back. And we fixed the brake issue, they freed up and then the needed bleeding.
-
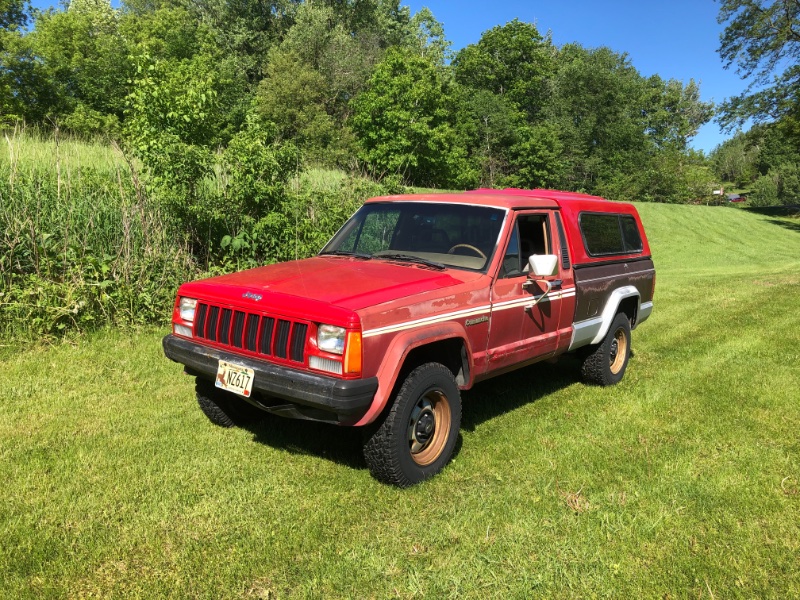
Yeah, my car does have XJ wheels and they will be going away. I might try to get some XJ turbines to replace them.
-
I might run those turbine wheels, but the rear end is sitting about an inch lower than the front end, so something needs to be done with the suspension. I do love me a set of turbines on these cars. Don’t worry about being a party pooper either. I love different ideas!