

eaglescout526
-
Posts
12178 -
Joined
-
Last visited
-
Days Won
13
Content Type
Profiles
Forums
Gallery
Everything posted by eaglescout526
-
*ZZ TRIM STYLE ZZ - PLASTIC BUCKET SEAT -ZZ BAC 75 AMP ALTERNATOR BCQ Battery - Maintenance Free CGX Head Restraints-Outboard Seating, RR CKA CARPETS - CLASS I SHORT PILE 8 - 12 OZ CLE ACCESSORY FLOOR MAT - FRONT &&&&&&&& REAR DGF H D A904 AUTO TRANS EFB ENGINE - 2.8L GM 6CYL GAC ALL WINDOWS - TINTED GLASS GFD SLIDING RR WINDOW GPB DUAL - O/S MIRR PKG - LOW MOUNT - CHROME HAA AIR CONDITIONING - FRONT HCC HEATER W/UPR LEVEL VENTIL - TYPE II JJA CIGAR LIGHTER - FRT COMP LMA HALOGEN HEADLAMPS MBJ Bumper - Front, Black MD8 Delete Front License Plate Bracket NAA ESA W/CATALYST (EXC CALIF SYSTEM) NFA TANK - 20 GAL FUEL NMB ENGINE COOLING - STANDARD DUTY RCA MONAURAL SPEAKER SYSTEM SBA POWER STEERING Build date 4/6/86 Body code JL62
-

Before and after
eaglescout526 replied to kansashogan's topic in MJ Hardcore Tech: Epic Journeys to Greatness
It’s an Apple file. He will either A need to convert it or B throw it in day OneDrive and post a link to it -
I greatly appreciate that! Gotta look out for each other.
-
Jeez Pete nightmare fuel much? Glad you’re doing ok though!
-
To be fair there’s not much chrome left on them. I mean one had more than the other but I haven’t seen anything abnormal going on. But do we even know if those lamp manufactures used chrome plating for the reflectors? I’m genuinely curious if that’s what is used.
-
Says the retiree, ironically hahaha.
-
I ran one of the ROLs reflectors through a vinegar bath and I even watered the solution down to help save it, like I said they were in bad shape at the bottom so I wasn’t expecting anything great. They came out fine aside from the massive pitting that vinegar creates. But it will without a doubt take off the chrome and it made them the perfect primer grey for any paint application. Now I will have to report back on the electrolysis when they finish up and see if that takes off the chrome or not.
-
I think it is a chrome plating. One of the reflectors for my Marchals for chunk is horribly degraded in a way where the reflective material is coming off in chunks. Currently running them through electrolysis to hope for the best on them. Fun fact, Jeeps weren’t the only ones with Marchals. Fords and GMs of the same time could also have them.
-
I think I asked this a while back when I had a set. Now I’m trying to restore some Marchals. You should be able to get away with repairing and restoring them. Someone in here recommended some sort of reflective chrome like spray paint for the reflector.
-
Nice!
-
Dana/Spicer is the way to go for axle and drive train related parts.
-
I mean when you got a few different types of people who sell things. those who just want it gone those who don’t know what they have and just want it to go to a good home and then you start getting into those who know what they have.
-
Given that the TJ is also going up in value, that’s probably a steal for some folk on your side of the country if it’s a clean rust free TJ.
-
I think that’s when everyone realized that the quality and quantity of modern crap looking Jeeps have really shown the poor imagination and style that Jeep once had.
-
‘88 Sportruck 4x4
eaglescout526 replied to Scottybbythesea's topic in Member Projects: Your Comanches
I used to have rims like that. Painted them a matte black and ran them for a bit. Till I found the 5 spokes. Looks nice. Definitely an 80’s piece. -
You’re a slacker Mcfly!
-
Hahahaha I know who the seller is of those.
-
84-86 Clock Connector Conversion
eaglescout526 posted a topic in MJ Tech: DIY Projects and Write-Ups
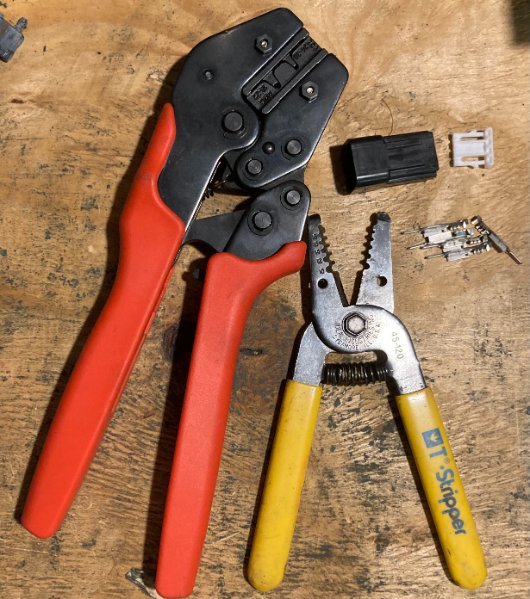
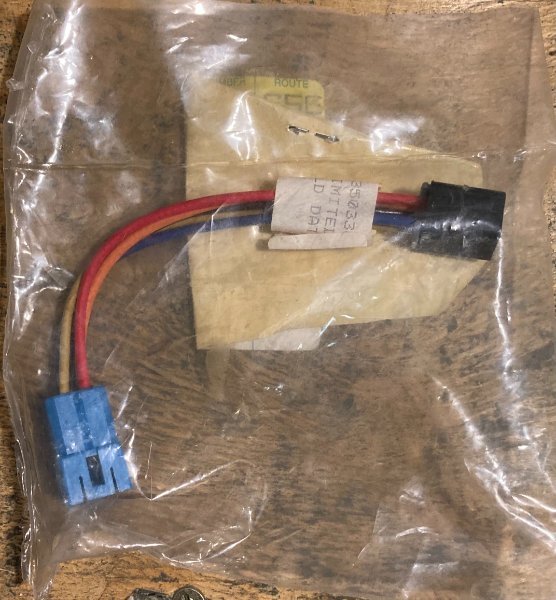
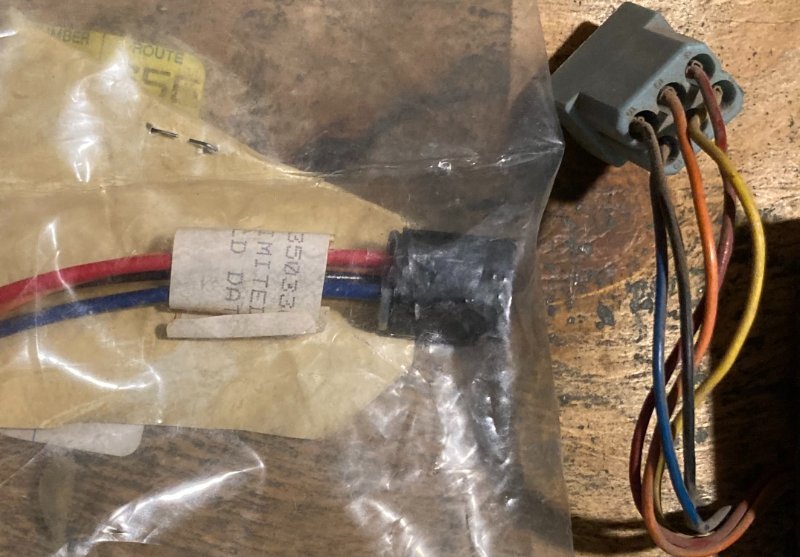
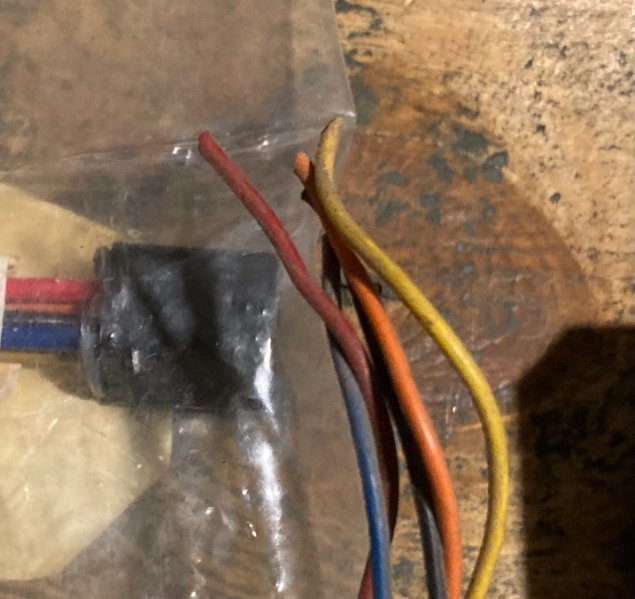
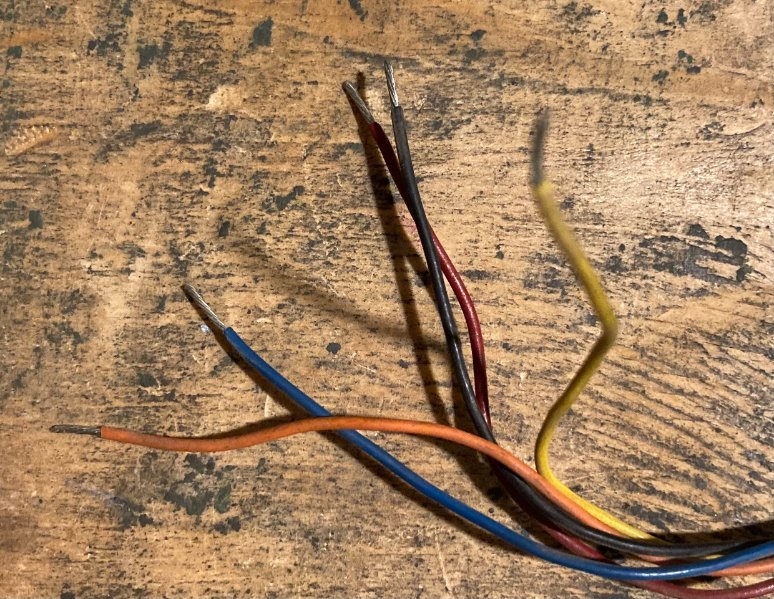
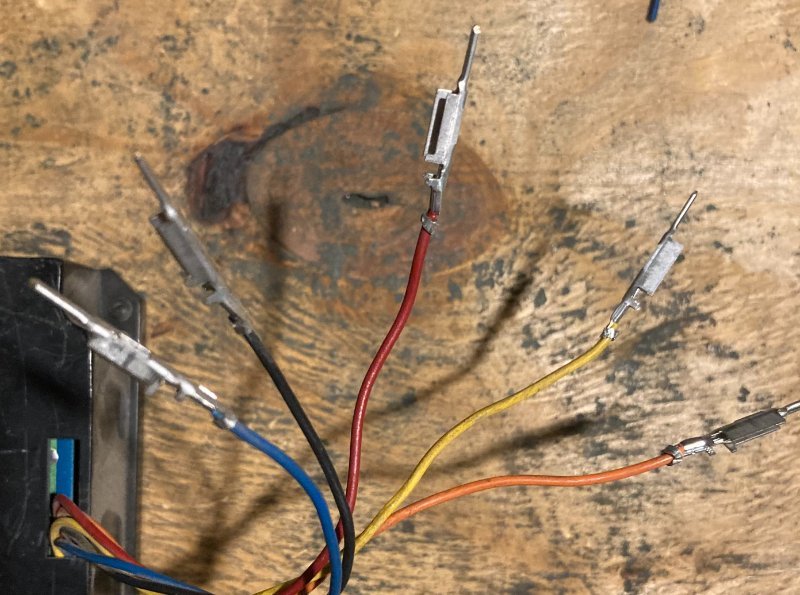
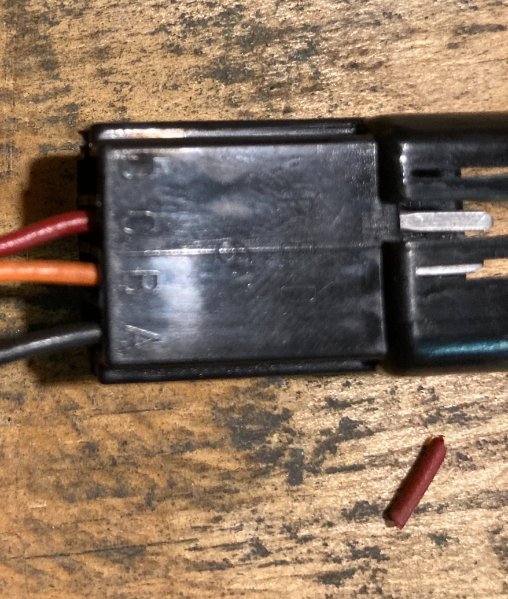
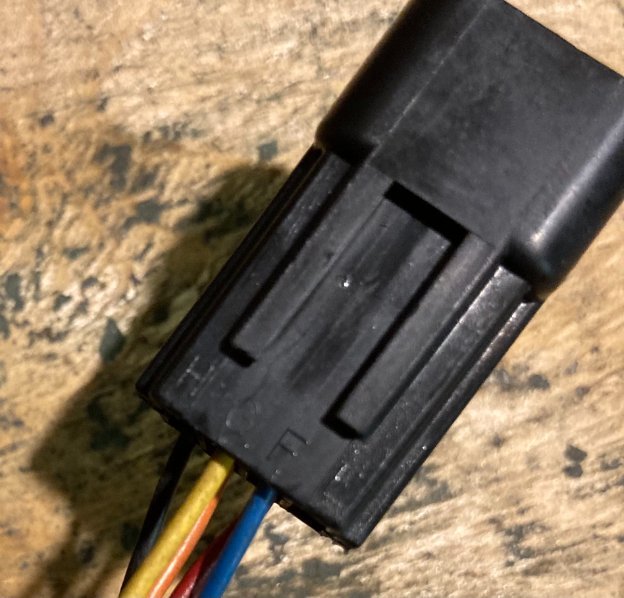
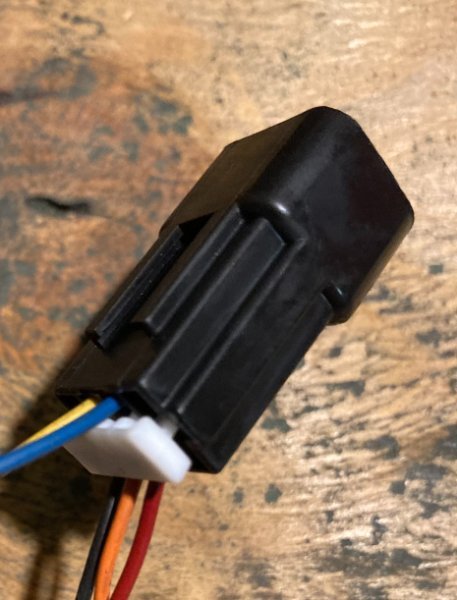
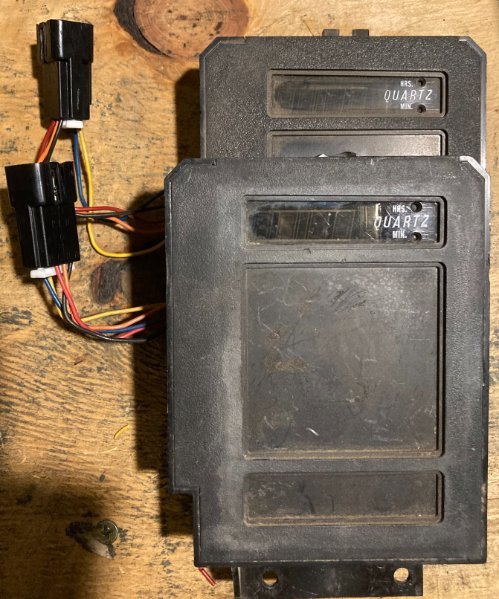
Want a 'QUARTZ' clock but can't find the one that fits in a late 87-90 but have an 84-86 blue connector clock? Well here's the quick easy solution: 1. Your clock Tools and parts needed: 1 Set of wire strippers/cutters 1 Set of ratcheting barrel crimpers 1 8 slot female 150 metri-pack connector(PN 12045688 in the delphi/mouser catalog) 1 retainer to secure wires in connector(The white thing, PN 12045690) 5 male metri-pack terminal(PN 12047581(0.80-0.50 cable range) or 12059894(0.50-0.35 cable range), which ever works just one holds smaller wires) 2. Now I was very very fortunate enough to find that Chrysler/AMC made a connector adaptor to use the newer clocks with the older harness connector. Using this harness I was able to piece together which wire goes where seeing how the newer clocks don't have the same color wires as the older ones. Old vs new 3. Go ahead and snip that blue connector off like so: 4. Using the wire strippers, strip back the wire insulation to reveal some wire for the terminals. 5. Take your ratcheting barrel crimpers using the right terminal crimper attachment(I honestly don't know the name or number for the crimper teeth, it was a cheap set that has proven very good quality, do forgive me for not knowing such). Using said attachment and the beautiful thing about the ratcheting crimper is that you can set the terminal in the teeth and squeeze the handle to where the terminal will stay snug in place for you to push the wire through the termial and then crimp the terminal and wire together. End result should be like so: 6. Now that your wires are crimped to the terminals, it is now time to put them where they need to go. Black wire needs to go to the A slot in the connector Orange in the B slot Red in the C slot Like so: 7. Once those are in, flip the connector over to install the last two wires Yellow into the G slot Blue into the F slot Like so: 8. Once all the wires have 'clicked' into place and won't come out with a little tug you are ready to install the wire plug to prevent the wires from coming out, like so: Plug is omni-directional so it will go in either way unlike the other metri-pack connectors 9. Now you should have a successfully converted clock ready to install in your truck for some absolute 80's goodness and class I had already previously converted a clock to test this so it all works as they should when you plug the clock in.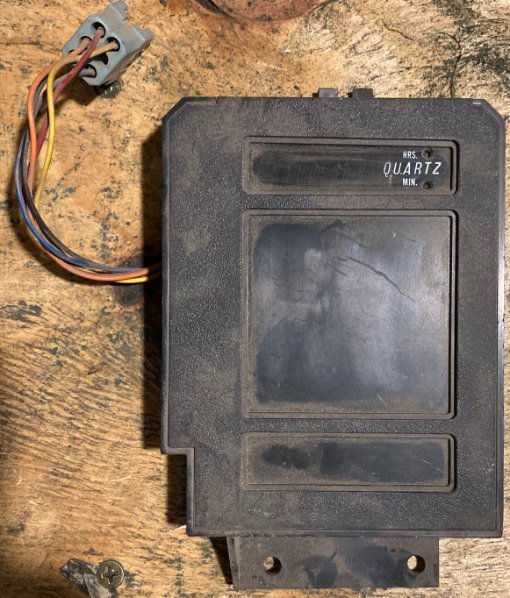
-
Clock conversion DIY?
eaglescout526 replied to eaglescout526's topic in MJ Tech: Modification and Repairs
I have one of those, not entirely sure what to do with it. -
When you say drivers side manual do you mean the one with the remote inside the door or one that just manually moves on the outside with your hand? I have an aftermarket one that you move the mirror on the outside for cheap if you want that to get you by.
-
Clock conversion DIY?
eaglescout526 replied to eaglescout526's topic in MJ Tech: Modification and Repairs
No one else? I mean I still plan to make the DIY. Thought more would chime in. Stay tuned, I should have it ready by tonight or tomorrow. -
Done. I must’ve missed that one.
-
How loud is your MJ?
eaglescout526 replied to Far McKon's topic in MJ Tech: Modification and Repairs
I recommend installing one of those hood insulators. Helps quiet it down a bit. -
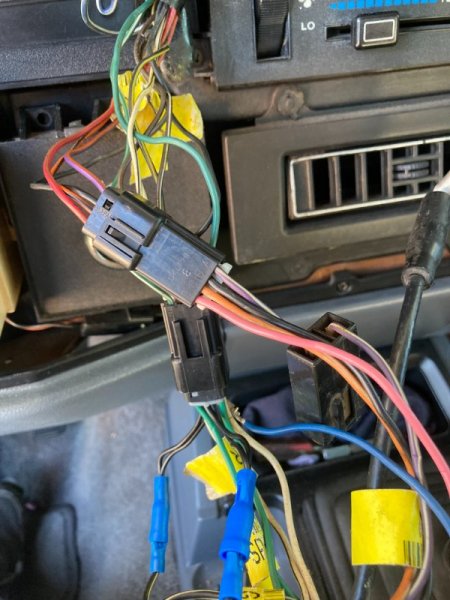
Welp got a few things done today and am happy about that. Straightened the steering wheel again after the tenth time(not really) after the steering realigned itself. Also adjusted the drivers side tire to bring it back in a little as it does seem to have been knocked out but she drives straight. Replaced the sway bar links and finally did something I wish I did the first time: As per the diagrams graciously provided by miniut I was able to put factory plugs on my radio. At first I still couldnt figure out why every speaker but the drivers side door was playing(still have that left channel issue miniut, but no biggie all speakers play). As I was messing around I found that one of the crap butt connectors released one of the wires. So I redid that with some Metri-pack connectors to make it more permanent. All in all its been a busy day.
-
Anyone want a DIY on converting the old 84-86 style plugs to the later 87-90 plugs for the clock? I have an adaptor and was able to figure out which wire goes where for the new plug since you can't really compare the two clocks cause the wire colors are different.