

eaglescout526
-
Posts
12139 -
Joined
-
Last visited
-
Days Won
13
Content Type
Profiles
Forums
Gallery
Everything posted by eaglescout526
-

‘88 Sportruck 4x4
eaglescout526 replied to Scottybbythesea's topic in Member Projects: Your Comanches
I used to have rims like that. Painted them a matte black and ran them for a bit. Till I found the 5 spokes. Looks nice. Definitely an 80’s piece. -
You’re a slacker Mcfly!
-
Hahahaha I know who the seller is of those.
-
84-86 Clock Connector Conversion
eaglescout526 posted a topic in MJ Tech: DIY Projects and Write-Ups
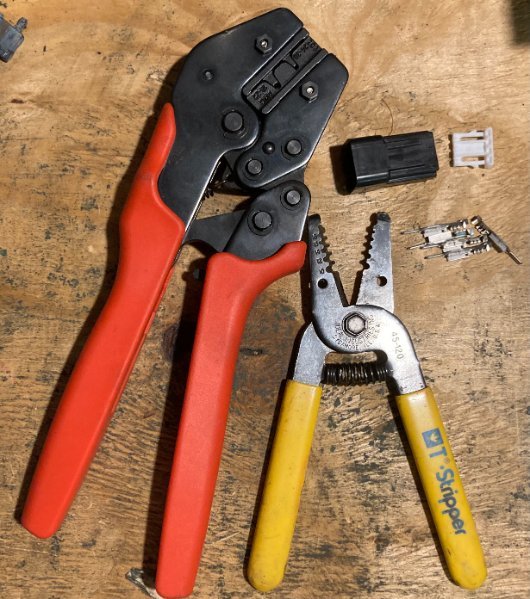
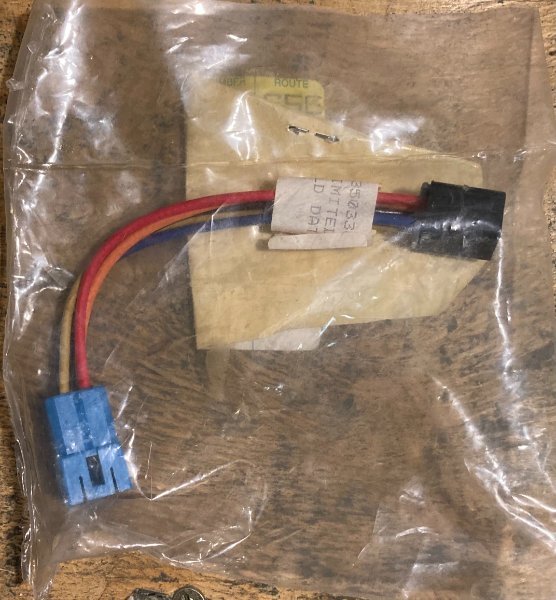
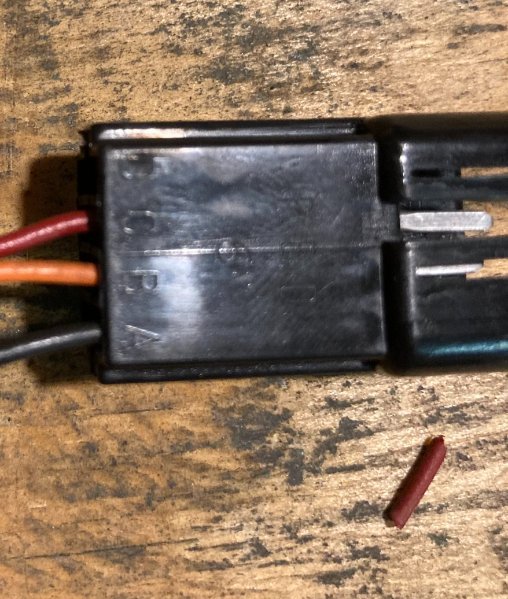
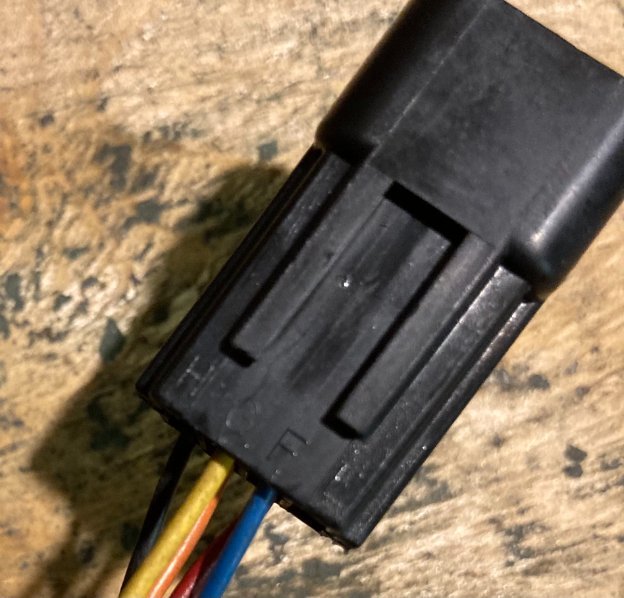
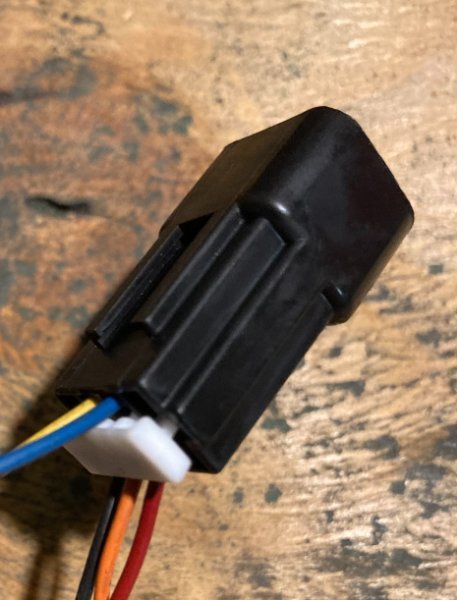
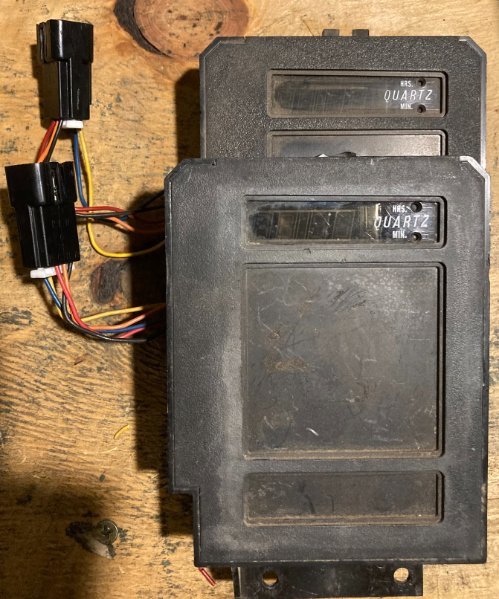
Want a 'QUARTZ' clock but can't find the one that fits in a late 87-90 but have an 84-86 blue connector clock? Well here's the quick easy solution: 1. Your clock Tools and parts needed: 1 Set of wire strippers/cutters 1 Set of ratcheting barrel crimpers 1 8 slot female 150 metri-pack connector(PN 12045688 in the delphi/mouser catalog) 1 retainer to secure wires in connector(The white thing, PN 12045690) 5 male metri-pack terminal(PN 12047581(0.80-0.50 cable range) or 12059894(0.50-0.35 cable range), which ever works just one holds smaller wires) 2. Now I was very very fortunate enough to find that Chrysler/AMC made a connector adaptor to use the newer clocks with the older harness connector. Using this harness I was able to piece together which wire goes where seeing how the newer clocks don't have the same color wires as the older ones. Old vs new 3. Go ahead and snip that blue connector off like so: 4. Using the wire strippers, strip back the wire insulation to reveal some wire for the terminals. 5. Take your ratcheting barrel crimpers using the right terminal crimper attachment(I honestly don't know the name or number for the crimper teeth, it was a cheap set that has proven very good quality, do forgive me for not knowing such). Using said attachment and the beautiful thing about the ratcheting crimper is that you can set the terminal in the teeth and squeeze the handle to where the terminal will stay snug in place for you to push the wire through the termial and then crimp the terminal and wire together. End result should be like so: 6. Now that your wires are crimped to the terminals, it is now time to put them where they need to go. Black wire needs to go to the A slot in the connector Orange in the B slot Red in the C slot Like so: 7. Once those are in, flip the connector over to install the last two wires Yellow into the G slot Blue into the F slot Like so: 8. Once all the wires have 'clicked' into place and won't come out with a little tug you are ready to install the wire plug to prevent the wires from coming out, like so: Plug is omni-directional so it will go in either way unlike the other metri-pack connectors 9. Now you should have a successfully converted clock ready to install in your truck for some absolute 80's goodness and class I had already previously converted a clock to test this so it all works as they should when you plug the clock in.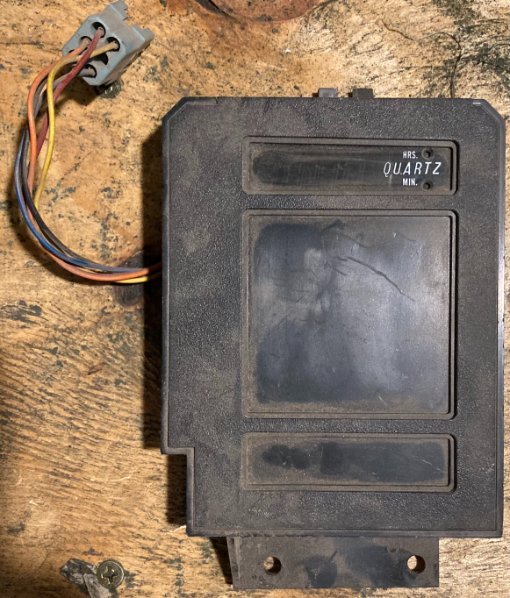
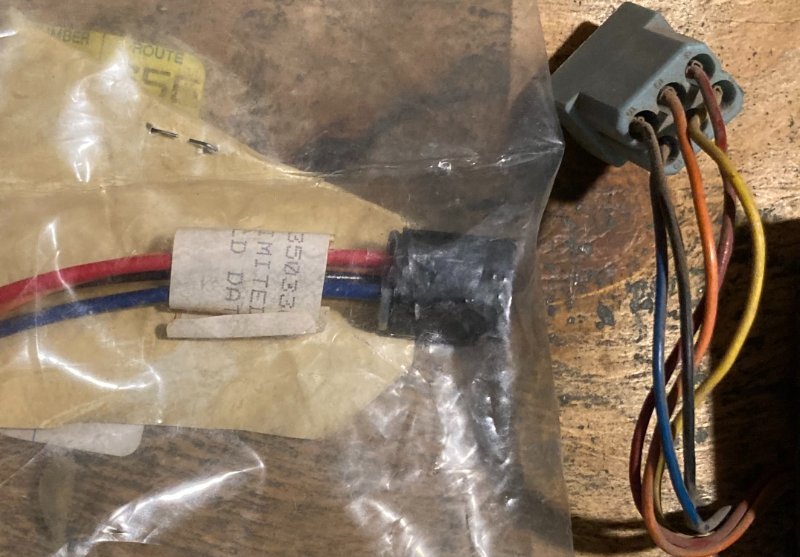
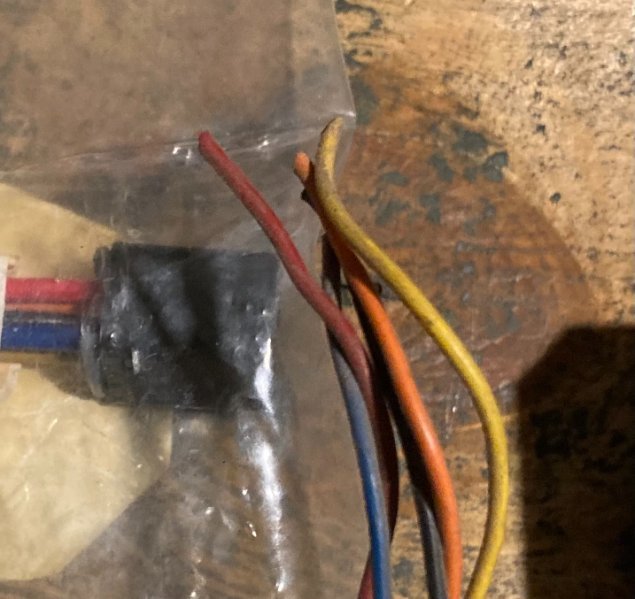
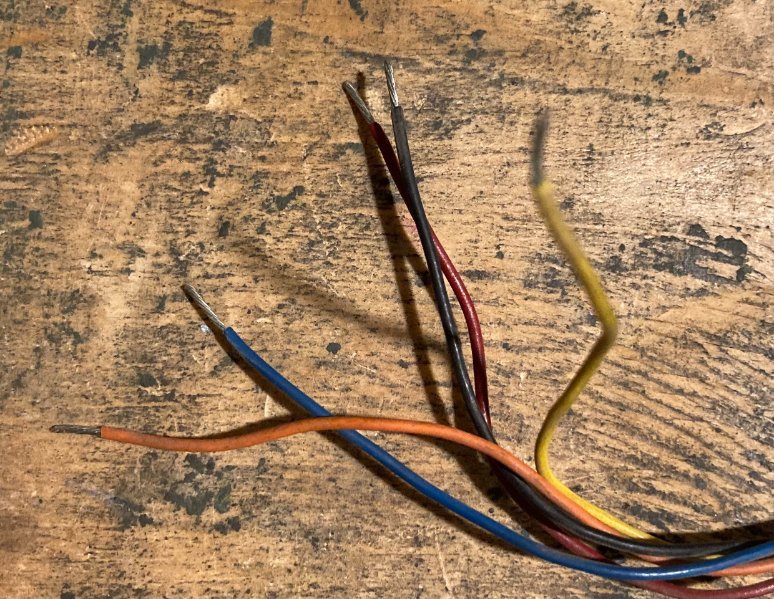
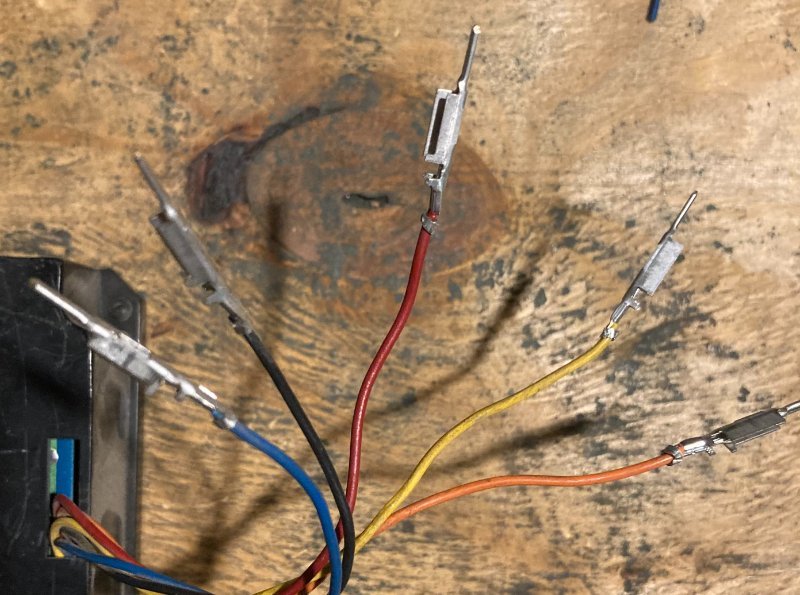
-
Clock conversion DIY?
eaglescout526 replied to eaglescout526's topic in MJ Tech: Modification and Repairs
I have one of those, not entirely sure what to do with it. -
When you say drivers side manual do you mean the one with the remote inside the door or one that just manually moves on the outside with your hand? I have an aftermarket one that you move the mirror on the outside for cheap if you want that to get you by.
-
Clock conversion DIY?
eaglescout526 replied to eaglescout526's topic in MJ Tech: Modification and Repairs
No one else? I mean I still plan to make the DIY. Thought more would chime in. Stay tuned, I should have it ready by tonight or tomorrow. -
Done. I must’ve missed that one.
-
How loud is your MJ?
eaglescout526 replied to Far McKon's topic in MJ Tech: Modification and Repairs
I recommend installing one of those hood insulators. Helps quiet it down a bit. -
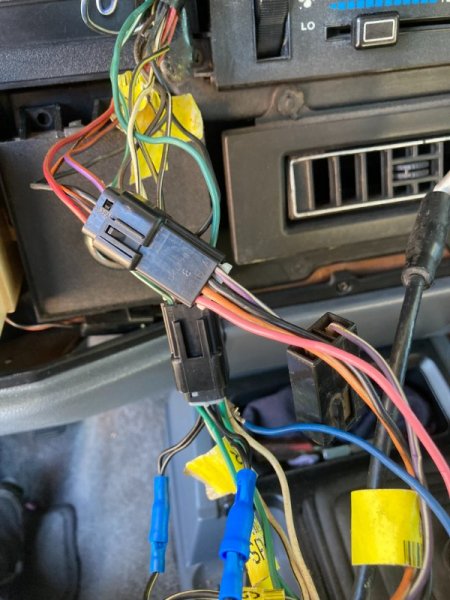
Welp got a few things done today and am happy about that. Straightened the steering wheel again after the tenth time(not really) after the steering realigned itself. Also adjusted the drivers side tire to bring it back in a little as it does seem to have been knocked out but she drives straight. Replaced the sway bar links and finally did something I wish I did the first time: As per the diagrams graciously provided by miniut I was able to put factory plugs on my radio. At first I still couldnt figure out why every speaker but the drivers side door was playing(still have that left channel issue miniut, but no biggie all speakers play). As I was messing around I found that one of the crap butt connectors released one of the wires. So I redid that with some Metri-pack connectors to make it more permanent. All in all its been a busy day.
-
Anyone want a DIY on converting the old 84-86 style plugs to the later 87-90 plugs for the clock? I have an adaptor and was able to figure out which wire goes where for the new plug since you can't really compare the two clocks cause the wire colors are different.
-
Yup! Radiator is still good. I can get it squared away and what not.
-
Ooo its got an AMC valve cover too.
-
Lever and block on rear Differential
eaglescout526 replied to Coastal NC Jeeper's topic in MJ Tech: Modification and Repairs
Its the rear proportioning valve. It articulates and proportions rear braking power for when you have the bed loaded. The more in the bed, the more power that goes to the rear brakes. Neat little device that was conceived before modern day brake controllers. Ive always wondered how they can fail. -
*C1 TRIM STYLE C1 - CLOTH &&&& VINYL BENCH SEAT -SA CHARCOAL 163 Zone 63-Dallas 1AA U.S. Dealer Retail 3V3 Customer Preferred Discount ALN APA Monotone Paint ARL BAF Alternator BCD 550 Amp Maintenance Free Battery BGA Power Front Disc/Rear Drum Brakes CBA Straight Back Bench Seat CKA Carpets - Floor and Cargo Area CUM Mini Floor Console DBB All Manual Transmissions DDQ 5-Speed Manual Transmission DMM 3.07 Rear Axle Ratio DRK Dana 44/226MM Rear Axle DSA Anti-Spin Differential Rear Axle ERH 4.0L I6 Power Tech Engine GAC Tinted Glass Windows GBB Tinted Windshield Glass GCB Front Door Tinted Glass GEH Fixed Door Vent Glass GFD Rear Sliding Window GRZ Left Remote Mirror GSZ Right Remote Control Mirror GTZ Manual Remote Mirrors HAA Air Conditioning JAY DO NOT USE - See JP, KA classes JCA 85 MPH Primary Speedometer JGB Digital Clock JHA Var Intermittent Windshield Wipers JJA Cigar Lighter K27 Do Not Use K2B STRIPE/BADGE/MOLDING/COLOR K3R STRIPE/BADGE/MOLDING/COLOR KKS STRIPE/BADGE/MOLDING/COLOR KWS STRIPE/BADGE/MOLDING/COLOR LAP Shift Indicator Warning Lamp LBC Glove Box Lamp LMA Halogen Headlamps MB1 Black Front Bumper MBJ Black Bumper MDA Front License Plate Bracket MFF Black Grille MHA Black Windshield Moldings MMC Rear Door Solid Window Insert MMG Belt Moldings MMK Lower Grille Surround-Painted Silver NAA Federal Emissions NBK EVAP Control System NF2 18.5 Gallon Fuel Tank PE4 COLORADO RED CC PRI PNT - HE4 QE4 COLORADO RED CC SEC PNT - HE4 RAA All Radio Equipped Vehicles RAF AM/FM Cassette Radio RCD 4 Speakers SBA Power Steering SCE Steering Wheel SFA Standard Duty Shock Absorbers SGA Rear Shock Absorbers SUA Tilt Steering Column TBB Full Size Spare Tire TBM Tire Carrier Winch TMW Tires TZH Michelin Brand Tires WJN 15" Aluminum Wheels WLZ All Aluminum Wheels XBS Pickup Box YAA Build To U.S. Mkt. Specifications YGE 5 Additional Gallons of Gas Z01 Rear Spring Group I Z1A GVW/Payload Rating Z58 Left Front Spring Group Viii Z78 Right Front Spring Group VIII Build date 4/24/91 Body code TL61 Sold by DON DAVIS DODGE CHRYSLER JEEP, ARLINGTON TX
-
*Q7 Seat - Cloth Low-Back Bucket -SA Charcoal 3LX ADE COLD WEATHER GROUP AGD APA MONOTONE PAINT PACKAGE BCQ Battery - Maintenance Free CAC BUCKET SEAT - LO BK CGW CKA CARPETS - CLASS I SHORT PILE 8 - 12 OZ DDJ 5SPD MANUAL TRANS ERB ENGINE - 4.0L I6 MPI GAS GAC ALL WINDOWS - TINTED GLASS GSC MIRROR - RIGHT BLACK JFH TACHOMETER - MECH JGB Clock - Digital JHA WINDSHIELD WIPERS - DELUXE JJA CIGAR LIGHTER - FRT COMP K60 BODY SIDE MOLDINGS - VINYL LAP FUEL ECONOMY SHIFT INDICATOR LIGHT LMA HALOGEN HEADLAMPS LNJ DUAL ROAD LAMPS - FRONT MBJ Bumper - Front, Black MCA FRONT BUMPER GUARDS MCB MDA FRT LICENSE PLATE ATTACH REQUIRED NAA ESA W/CATALYST (EXC CALIF SYSTEM) PE4 Colorado Red QE4 Colorado Red RAB Radio - AM/FM SBA POWER STEERING SCE STRG WHL - EURO/SPORT TYPE SUA TILT STEERING COLUMN TBB CONVENTIONAL SPARE TIRE WJH 15X7 Aluminum Wheels Build date 12/8/87 Body code TS61 Sold by BRAEGER JEEP-EAGLE, MILWAUKEE WI
-
I want the radiator lol *X1 -Q8 3LR APA MONOTONE PAINT PACKAGE CBA BENCH SEAT - STRAIGHT BK CGX Head Restraints-Outboard Seating, RR DCB Transmission - 4-Speed Manual,T3340 EPD ENGINE - 2.5L I4 TBI GAS GAC ALL WINDOWS - TINTED GLASS GSC MIRROR - RIGHT BLACK HCC HEATER W/UPR LEVEL VENTIL - TYPE II JJA CIGAR LIGHTER - FRT COMP LAP FUEL ECONOMY SHIFT INDICATOR LIGHT LMA HALOGEN HEADLAMPS MBJ Bumper - Front, Black MDA FRT LICENSE PLATE ATTACH REQUIRED NAE EMISS CONTROL TESTING &&&&&&&& LABEL PXB Olympic White QXB Olympic White RAC RADIO - AM/MTR TBG SPARE TIRE - COMPACT WMC BASE WHEEL DRESS - UP (INCLS TRIM RING) Build date 1/12/87 Body code TL61 Sold by MONTY'S JEEP-EAGLE, VICTORVILLE CA
-
Hell yeah! Stripes make the MJ look much better, regardless of the package.
-
Chunk, A 1984 XJ
eaglescout526 replied to eaglescout526's topic in Member Projects: Other Cool Stuff
Hahaha I mean I’ll be doing all the fun hard stuff like AMC/Ford duraspark to Renix so she can contribute a little bit. -
Chunk, A 1984 XJ
eaglescout526 replied to eaglescout526's topic in Member Projects: Other Cool Stuff
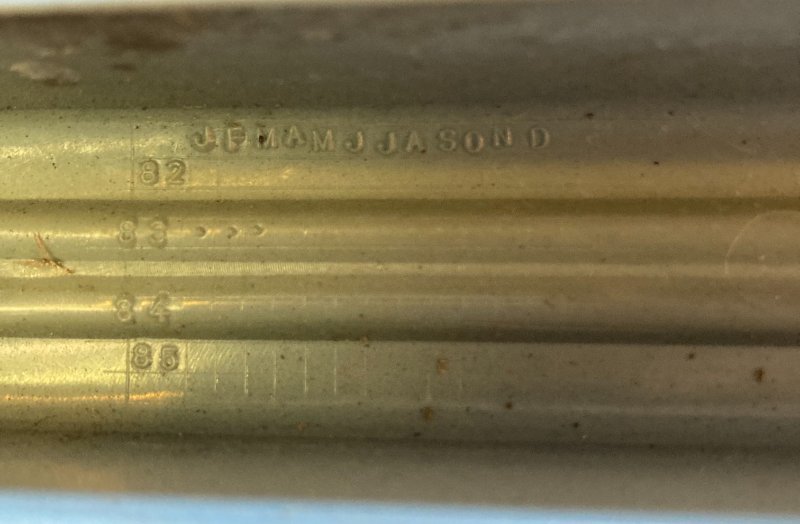
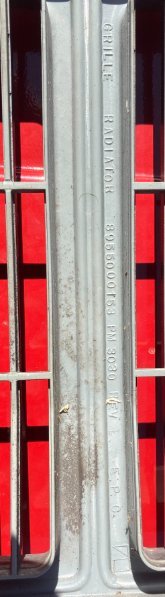
Not much new, still waiting on the garage door. Decided to address one thing though. Asked my girl which grill she wanted Chunk to roll with, 21 or the 10. She chose the 21 to match LR just like I had planned. So what did I do? Why I asked her to take off the old one! Shes been helping me with him since she claims ownership to him as well. Also found out the original 10 slot was made in 83 confirming it to be original to Chunk The 21 slot was also made around the same time so it works!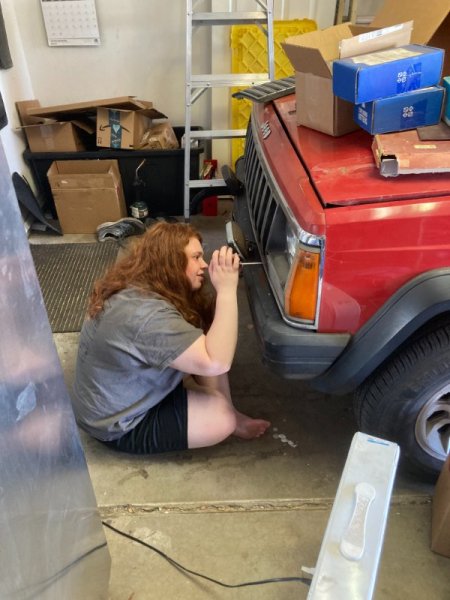
-
Remove & Reinstall Coil Spring Isolators
eaglescout526 replied to howeitsdone's topic in MJ Tech: Modification and Repairs
That looks rust infused right there. It should definitely unscrew. Make it red hot and hope for the best. -
I might do so in the future just because I don’t like those torx bolts in the front. For now they did still go in straight. And thanks Pete!
-
Remove & Reinstall Coil Spring Isolators
eaglescout526 replied to howeitsdone's topic in MJ Tech: Modification and Repairs
Yes, the metal part. The rubber will come out or rip out if you gripped it. -
Remove & Reinstall Coil Spring Isolators
eaglescout526 replied to howeitsdone's topic in MJ Tech: Modification and Repairs
I took a big set of channel locks and grabbed the bump stop tightly and gave it one hell of a twist. -
Just do some typical maintenance like Pete suggested and it will get better. I lubed up every damn joint I could find, I have pretty fast wipers now. At this point it’s either something electrical or there’s something out of spec.