thecodemonk Posted August 15, 2019 Author Posted August 15, 2019 Thanks! Tent is sold to a lovely couple who came down from Canada to pick it up. Back on topic though...I stopped by the shop and got into some good conversation with the owner and the techs there about what's going on. First...the progress updates: The gauge cluster fits great!!! Also, the shifter switches fit in a factory-like location. Huge thanks to Rory (owner of RADesigns) for prototyping and putting that together! This gives me the ability to leave it running like the stock shifter from the silverado for when my wife drives (she prefers it that way), but still do manual-like shifting for when I'm on the trails or if I just feel like it (as well as control how the torque converter behaves in manual mode...nice strong hold in any gear on downhill segments, for example). Speaking of shifters...the winters shifter needed to be raised a bit so that I didn't smash my fingers when putting it in park. The Hazzard Fabworx guys made a mount that puts it perfectly (and will keep my hand warm when I have the heater rolling haha). Now...onto the bad: This is the view from the top, for clearance to run the radiator hose and fill neck, as well as the plumbing for the air intake. Sadly, there's just not a lot of room with the truck spacing. I talked with Luke (owner of Hazzard) and his techs and what I think I will do is convert the whole accessory package to corvette spacing, buying approx 1.5" of room. Then we'll move the PS reservoir somewhere else. That has the additional consequence of switching the side that the upper coolant hose has to run from the drivers side of the engine, to the passenger side. That's great news! That should give us plenty of room to run the air intake pipe around to the drivers side of the bay (like stock, which means I may be able to hook it up to a snorkel later if I want) and there won't be any interference to the coolant fill neck. To convert to corvette spacing, I need to: - Switch out the crankshaft balancer - Swap out the water pump (thankfully, the 2001 camaro pump works for both F-body spacing and corvette spacing) - Remove the spacers on the accessory brackets and swap those to the tiny one (only for the passenger bracket) ...and I think that's it. Additionally, they mentioned it would be a lot simpler to tune if I stuck with the fuel injectors that came with the truck. Truck injectors are shorter than the car injectors, so that means getting a spacer kit for them to lengthen them out. Lastly, they mentioned a billet fuel rail would be good to grab too...didn't need to be fancy, but it would help. So I got that on the way too (oddly, the Holley "Sniper EFI" branded one is the cheapest one on Amazon that doesn't have crap reviews). Oh...one last thing. The SD508 ear looked like it was going to hit the hood. So...I got the SD7B10 mini compressor (the little compressor the Geo Metros use). It's just going to do actual A/C work for a tiny cab, so a tiny compressor should be fine. The holley diagram for the brackets show it as being lower than the alternator, and the alternator looks like it clears just fine. So, I got all of that ordered up and the parts should arrive today, and I'll drop them off at the shop tomorrow. My Amazon garage looks like I have a million cars with all the mixing and matching of parts.
thecodemonk Posted August 30, 2019 Author Posted August 30, 2019 Update time! Pulling back the accessories to corvette spacing definitely bought the room needed to plumb the radiator and the intake tube. It just clears the PS reservoir too. Whew! Also, they reworked the truck box at my request to fit the battery in the back. (It used to be at a slope, but I think it's more usable this way anyways). I measured and I should be able to fit a pair of Group 31 batteries (one on each side of the bed) in the future! I'll stick with the stock Group 24 battery for now and will upgrade later. Planning for the future!
89 MJ Posted August 30, 2019 Posted August 30, 2019 Nice. I think it’s time that this got moved over to Epic Tech.
thecodemonk Posted September 7, 2019 Author Posted September 7, 2019 On 8/30/2019 at 4:07 PM, 89 MJ said: Nice. I think it’s time that this got moved over to Epic Tech. Aw, I'm flattered. I'm not sure how epic it is as LS swaps become more commonplace, though. I'm enjoying documenting the whole process in the hopes that some of the info will help save time for others in the future. :) No big updates this past week...still working on plumbing and I didn't get a chance to chat with the techs yet. More updates next week on fuel and piping
thecodemonk Posted September 17, 2019 Author Posted September 17, 2019 Continual small bits of progress...I stopped by the shop last week and they have it outside of the shop right now, but still working on it (that shop is always super busy). ECU is wired up and mocked into the planned location Also, the fuel filter/pressure regulator with its own return line is here, by the computer...not too hard to get to, and a bit easier for plumbing to the fuel rails. This part is originally for a 99 Corvette. The rest of the work was getting wiring run into the cab...not as many sexy pictures, but it's still progress. Also, the MJ is famous! My friend sent me the video below when he spotted the MJ. It's in the background in a lot of the shop pictures, but does get a few minutes of spotlight at around 10:50 into the video.
thecodemonk Posted September 20, 2019 Author Posted September 20, 2019 Stopped by the shop after work yesterday to check status and see what's been done (and see if there's anything else I need to grab or that I missed). They got the battery wired up and in the bed, so we're getting closer! With the battery in the bed, they got some posts for jumpstarting up under the hood (and will use that to connect to the future winch). They also got a custom tube for the transmission dipstick and made a simple (but pretty) mount for it (since the OEM one didn't sit as easily with where everything ended up) Also, wiring for the dash is making progress. If the left side of the dash computer looks a bit bare, that's because it is! Most of the data will be coming in from the ODBII port and the GM ECU, which saves us a bunch of wiring and having to run dual sensors on everything (the Dakota Digital ones and the ones used by the ECU). Another week down, and another week closer to driving the truck again.
thecodemonk Posted October 4, 2019 Author Posted October 4, 2019 Stopped by the shop today and got a treat...will upload more info tomorrow, but for now...just a sound clip of it started with open headers (it's so close I can't hardly contain myself!) Sent from my Pixel 2 using Tapatalk
thecodemonk Posted October 7, 2019 Author Posted October 7, 2019 Hah, you're right! I'll probably just correct that when I get it back home. For now, here's a few more details from last week's visit: The overall engine bay is starting to clean up. The old ECU wires are all still there, but the old ECU is no longer connected to anything and it seems like everything is looking good. We'll cut them out after we are able to take it for a test drive and verify that there's no significant systems that aren't working, which will clean up the engine bay a lot more. Speaking of clean, they got the relays all mounted nicely on the passenger side of the firewall. I need to go in there and make sure it's all labelled for what each one does, but I like the setup. Lastly, it looks like we'll have to clearance the center support in the hood to clear the DBW actuator...it technically fits, but it's a bit close for comfort. Something that wouldn't be as much of an issue for the drive-by-cable guys. Also, the hood release mechanism sits on the intake tube and pushes down on it. Again, it technically works (hood closes and latches), but I think it would wear through later on, so we'll see if it's easy to move and modify. If not, I'll have to look at some hood pins. Maybe aerocatch? or the pushbutton ones like bleepinjeep sells? I'm not sure which one I like better yet. For now, it's scheduled to go in and get exhaust put together today or tomorrow (which will get the O2 sensors in and allow for running it longer to test everything). We're also waiting for the modified driveshafts to come in so it can get some test drives in (shortened front, lengthened rear).
thecodemonk Posted October 11, 2019 Author Posted October 11, 2019 Went and saw the truck again today...exhaust is on and that tamed down the sound a lot at idle. I didn't get much in the way of pics of the exhaust yet...pipes are definitely bigger than stock though. Still need to add the O2 sensors to finish it up for running. Gauges are in and working! Just need to calibrate fuel and verify all sensors are reading the full range. Dash computer is tucked away nice and clean too! Also, some of the wiring is cleaned up and it looks like there's more room than I initially thought there was... One last engine bay pic, just because... They have the drivelines but not installed yet to give the guy working on the trans wiring room (doing the extra work to get the RA design switches all hooked up). They said it could be ready for me to drive as early as next week! (Which is an engineer estimate, so probably closer to the end of the week after, realistically) Sent from my Pixel 2 using Tapatalk
thecodemonk Posted October 19, 2019 Author Posted October 19, 2019 Some more progress on the truck at the shop...TLDR: we're on the test driving phase and fixing any little bugs along the way! The hood mechanism was a lot simpler than we thought, so no hood pins required. Closes just fine (just need to push down on the driver side first, before the passenger side). The interior is buttoned up and looking more complete again... The Dakota digital controls and ODBII plug is mounted down low, but easy to get to. And this picture...is just because I like seeing the y-pipe and driveshaft under there. I should be back to driving this and working on it on my own again at the end of next week! Things encountered this past week: - one of the lines on the gas tank pump was leaking into the tank...while it wasn't really a problem on the stock engine, the new engine was struggling for fuel when a sudden demand was asked of it (it behaved fine on a slow acceleration, but if you stabbed the gas pedal, it couldn't keep up). They found this while calibrating the fuel gauge (which required pulling the pump out to set it to certain pre-determined values). - ANOTHER transmission line blew off at a fitting...this will get a new fitting to make sure that doesn't happen again. - The front squatted down an additional 1-2 inches (approx), so we're getting some longer springs put in (I had the 4.5" RE springs with the OEM spring pad (0.75") and a 0.75" spacer in there previously, totaling about 5.25" of lift over stock). So we have the RE 7.5" lift springs coming early next week to help make up for some of it and will take out the spacers (both the oem pad and the daystar pad to bring it back in line, which takes 1.5" off, bringing us to approximately 6" of lift from stock equivalent...ish...we'll figure out what works.
Limeyjeeper Posted October 22, 2019 Posted October 22, 2019 Awesome build!!. Love what you did with the dash. If I can't get mine working that looks like a great alternative.
JordanTMiller Posted October 22, 2019 Posted October 22, 2019 I cannot explain how excited I am for this. Congrats on it man!
thecodemonk Posted October 22, 2019 Author Posted October 22, 2019 1 hour ago, Limeyjeeper said: Awesome build!!. Love what you did with the dash. If I can't get mine working that looks like a great alternative. Thanks!! It came out better than I had hoped for. I'll get some video of it actually running later this week. 1 hour ago, JordanTMiller said: I cannot explain how excited I am for this. Congrats on it man! Thanks man! It's been a long road hah.
thecodemonk Posted October 26, 2019 Author Posted October 26, 2019 I still need to grab some video of some of this (as pictures aren't enough to really display it all), but I got the MJ home now and am daily driving it again! I pulled up to the shop to see the MJ all ready to go! They gave me the keys to test drive it before I paid and it was a blast to tool around on (plenty of power, but not so much that it's uncontrollable) After that, we got all the old parts on the pallet... ...and into the back of the truck. It definitely had that baja lean going on with all the weight in the back of the bed! That said, it didn't have any trouble hauling all of it around (as one would expect) A final engine pic for good measure... I got it all home and unloaded and it's back to being pretty much level. This sight makes me happy that it's all back home and ready for duty again! It's got both the springs and the pucks in it right now...I might take those pucks back out as I like a bit of rake in the stance. In the meantime, it runs great and I'll keep fixing/upgrading as I go (and I'll get some videos posted of it running, and of the dash, etc). I think I will get a sway bar for this at some point in the future...it leans a LOT more than the XJ did and I can only assume that's a result of the leaf springs having less arch in them and being longer when compared to the XJ leafs. Most immediate plans: - Get video of this thing running and of the gauges (which I'm REALLY happy with) - Continue listening for other rattles or noises that need attention and checking for anything that may be loose...I should probably still check the floorpans at some point (I worry I won't be able to get the carpet back in right...detail work escapes me) - Fix the broken mounts on the a-pillar trim - Find out why the radio won't pick up any stations. Going to check the wire behind the passenger kick panel after the baby wakes back up. - Swap out the 2-piece front axle shaft for a single one (and replace the axle seal, attach the blockout plate for the vacuum CAD mechanism, etc) - Get the parking brake reattached (I disconnected it when I did the axle work and never got around to getting it reattached as I needed some extra hands to hold a few things) - Fix the interior lights that are dangling by their harnesses out of the b-pillars - Continue disassembling the XJ and stealing any and all useful parts - Sell all the old parts from the swap to anyone interested nearby More long term future upgrade plans: - OBA - AC added and functioning - Sway bar (Anti-rock?) - Front auto-locker? - Front bumper (hidden mount winch...maybe BWE's setup for the winch mount and a JCR non-winch bumper?) - Building a rear bumper along the lines of "Wife's MJ" ( https://comancheclub.com/topic/8516-wifes-mj/?do=findComment&comment=136071 ) - Building some bed protection along the lines of H3RESQ's ( https://comancheclub.com/topic/27668-h3resqs-dream-mj-the-build-continues/page/26/ ) - Replace front fenders...maybe 97 swap the exterior? (the wife loves the 97 swapped front ends, I'm more a fan of the old style) Long-long term plans: - flip the grille so that it's not upside-down haha
thecodemonk Posted November 5, 2019 Author Posted November 5, 2019 Thanks guys! Last night, a transmission line came off at the trans cooler... I got home and got it fixed and found that the Lokar transmission tube has a TINY opening that none of my funnels fit (and none from the local parts stores either). So I ordered their special "funnel adapter". Not sure I'd go this route again, had I known this. I DID find out that my interior b-pillar lights work though! I just need to figure out how to get them to stay in their holes in the b-pillars. Anyone know if there's a special clip I need to get? or if there's some kind of trick to it? Also...no video yet. Finding dedicated time to do a video while there is daylight is a lot harder that I thought it would be. Hopefully soon though!
Wallace Krempa Posted November 8, 2019 Posted November 8, 2019 On 4/27/2017 at 1:33 PM, thecodemonk said: What ended up happening was that the hazzard lights wire to the battery had been cut and the hazzards were on (which was overriding the brake lights and turn signal lights). It must have been messing with the grounding for the dash lights as well, since they no longer blow fuses either. The comanche drives great now and I can drive it around at night without using my phone light to see my gauges! First time i have seen this thread, and looks really cool. Love the name BTW. I might have to look into this, mine does the same thing.
thecodemonk Posted November 8, 2019 Author Posted November 8, 2019 2 hours ago, Wallace Krempa said: First time i have seen this thread, and looks really cool. Love the name BTW. I might have to look into this, mine does the same thing. Thanks!! Hopefully it's just as simple for you as it was for me. :)
neohic Posted November 8, 2019 Posted November 8, 2019 Haven’t looked here in a while. Glad I did! Great build so far.
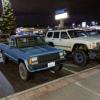
thecodemonk Posted November 30, 2019 Author Posted November 30, 2019 Mostly daily driving it right now, but this happened recently (with@Ls2xjcomanche )... Canopy time!! Sent from my Pixel 4 using Tapatalk
JordanTMiller Posted November 30, 2019 Posted November 30, 2019 13 hours ago, thecodemonk said: Mostly daily driving it right now, but this happened recently (with@Ls2xjcomanche )... Canopy time!! Sent from my Pixel 4 using Tapatalk Oh my gosh that looks amazing! I’m a sucker for a canopy. @Ls2xjcomanche’s build isn’t too shabby either!
thecodemonk Posted December 2, 2019 Author Posted December 2, 2019 On 11/30/2019 at 7:22 AM, JordanTMiller said: Oh my gosh that looks amazing! I’m a sucker for a canopy. @Ls2xjcomanche’s build isn’t too shabby either! Yeah it is! His MJ looks just as gorgeous in person as in the pictures. :) The canopy really does work well on the MJ...I'm liking it so far. It does sit a little farther back compared to how it probably should due to the rear tailgate having a bit of a bow in it (which means the rear glass won't close without the canopy sitting back a little). The canopy does cut down on wind noise on the highway too, which is a nice benefit. For people who may have wondered, heat isn't an issue so far while driving around town or on the highway...I mean, it's cold out still, but even going up hill on the highway, the max temps I saw for the engine was 200 degrees and the max temp for the trans was 135, but usually sat around 120. In town, it stays closer to 125-130 most of the time, once warmed up (warmer in town since TC lockup isn't as common and no TC lockup = more heat).

Recommended Posts
Create an account or sign in to comment
You need to be a member in order to leave a comment
Create an account
Sign up for a new account in our community. It's easy!
Register a new accountSign in
Already have an account? Sign in here.
Sign In Now