thecodemonk Posted March 23, 2020 Author Posted March 23, 2020 On 3/20/2020 at 10:51 AM, billyblankss said: Looks great. Do you notice any significant power loss from the larger wheels and everything? Any pros / cons you want to share? Oh wait...I see the confusion now. The picture with the 35's just has the tires sitting there next to the jeep. The MJ is still on 33's haha.
thecodemonk Posted April 8, 2020 Author Posted April 8, 2020 Update time! I stopped by the shop last week and they were working on cutting all the brackets off the 60 and had disassembled both axles to prep for welding/cutting. They'd gotten most of the brackets off of the Dana 60 but cutting the cast portion down was a lot of work (pictures below are before they finished on the cast side). The passenger side was nice and shiny though! I saw the work they were putting into it and I'm glad I trusted them to it, rather than try and hack at it myself without the right tools (no plasma cutter). Fast forward to today, I stopped by again to drop off a few other small parts I found while cleaning the garage (might as well finish a few small upgrades while we have things apart) and they've made a lot of progress! The 14 bolt is shaved down and the plate welded up (using all of the proper warming and slow cooling procedures, of course). Gears were checked and everything is looking good! Man, it's easy to forget how ginormous these axle tubes and housings are...all my time in the past was spent around dana 30 and dana 44 housings, so I'm just not used to the dana 60 and up stuff. Speaking of dana 60... The artec truss really made everything come together easy. If you look close, you'll notice that it's even welded to the housing (again, using the heat and slow cool down process before/after welding). This thing looks like it was made to come this way! For a size comparison, this is my fist through the hole left by the unit bearing. I've never seen so much room to work in! Lastly, and the artec weld-on high steer arms look plenty strong for anything I want to do with them later down the road, much less what they'll be doing now. Plenty of room for future hydro assist or even full hydro if things get really crazy (doubtful, but you never know...I didn't expect to be driving a LS MJ on tons anytime soon either, but here we are).
thecodemonk Posted April 15, 2020 Author Posted April 15, 2020 It's all coming together and I'm learning more as we go. First off...axles are under the jeep and the 35s from the wrecked XJ fit great! On the front axle: In the air: On the ground: 4.5" of backspacing is about perfect...I don't think I could go any more to suck the wheels in farther without hitting something (not without going to GIANT wheels anyways). On the rear axle: In the air: That's the new tailgate...it's straighter than the old one was even before I made my big mistake and doesn't look half bad. The 4.0 sticker is a lie now though...I think I need a 5.3 version of that to stick on there. Underneath: That pinion guard should help protect it on the rocks. :) Since the axles fell out of the truck, the hubs were messed up. True to the jeeper's creed, never just replace...always upgrade. So we put on some warn hubs instead of the OEM ones. I like this new style over the older ones I had on my wagoneer axle. Less turning and easier to get a gloved hand in there. Once it was on the ground and flex tested though, it jumps into the fenders real quick. So I needed more bumpstop. I had some daystar 2" extended bumpstops from previous build plans, so we got those in but even then, it still wasn't enough. I needed something to build up from the bottom and that's when I remembered that I had the JKS bumpstops on the old XJ still (just a bit dirty). So I went home and, sure enough...here they are. I grabbed them and they should help finish that up. This is what it looks like at ride height currently (waiting on driveline updates, since the u joints for the axles are a bit bigger than the old ones). It's wide, but not as wide as I worried it would be. Mudflaps are next on the upgrade list though...then maybe some flares in the future.
thecodemonk Posted April 15, 2020 Author Posted April 15, 2020 Oh yeah...forgot to get pictures, but I'm also doing the WJ booster upgrade at the same time. The poor single diaphragm booster just wasn't able to really push the brakes on the one ton axles as easily until the pedal was almost all the way to the floor. So...upgrade time. Thankfully, the parts for this are cheap and should be a huge upgrade from what everyone says. I'll report back on that once that's complete. In the meantime, here's a quick video of lowering it down onto the tires and checking the stance (also proving that the axles looking off-center in some of the above pictures is just the angle). https://www.youtube.com/watch?v=Uv7au5nLWsQ (In case anyone was wondering why I didn't get lug nuts, I figured the inexpensive stuff they would be able to grab locally would be easier and cheaper for now and I can always upgrade to something fancy later)
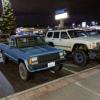
thecodemonk Posted April 28, 2020 Author Posted April 28, 2020 More build and tech info tomorrow, but for now... I got to go hang out with@JordanTMiller and my MJ is now as tall as his! There was only so much room in the driveway so that's as much Comanche as I could fit into the shot haha.Sent from my Pixel 4 using Tapatalk
JordanTMiller Posted April 28, 2020 Posted April 28, 2020 6 minutes ago, thecodemonk said: More build and tech info tomorrow, but for now... I got to go hang out with@JordanTMiller and my MJ is now as tall as his! There was only so much room in the driveway so that's as much Comanche as I could fit into the shot haha. Sent from my Pixel 4 using Tapatalk Ha! We could of parked closer but we were practicing good social distancing Thanks for stopping by man!
thecodemonk Posted May 11, 2020 Author Posted May 11, 2020 Note to self: Stop planning specific days to post because, inevitably, it will rain or work will slam you until you have no time left to go out and grab pictures. That said, this weekend was nice and I had a little bit of time, so here's some updates: Overall, it drives great! The power and the brakes work wonderfully and were very apparent when I had to move my 20ft dovetail trailer (about 2k lbs) but didn't have a brake controller. I didn't move it far, but the truck acts like it's not even there. Easy to move with plenty of torque and easy to stop with the one ton brakes. I didn't exactly move it far, but I remember it taking more throttle and feeling it push more on the XJ when I had to move it in the past. First off, a front straight on picture. It's definitely wide, but full widths aren't as bad as I thought they might be. Starting with the rear axle: I realized that I had grabbed a front axle shot but not a rear shot of it on the ground, so this is where everything lines up to at ride height. I had never gotten around to fixing and lengthening the rear parking brake cables on the Dana 44, so it's nice to have that back on the new axle. It's not as "needed" with an automatic, but it's nice to have the extra assurance. The new springs ride PERFECT. It's stiff enough not to squat under 1000lbs of playground sand, but soft enough to flex with the bumps in the road while driving. I couldn't be happier with the General Springs metric ton leafs. With those leafs and the 35's, I did put the little 0.75" rubber spacers/isolators in the front to give it a hair more lift, which evened out the ride so it didn't have TOO much rake. I like a little, but not silly amounts. :) For the front axle: With the artec truss, the front springs sit a little wider than the body, but it seems to even out when flexing, so I'm not going to worry much about it. The 3 link works great and doesn't bind. HOWEVER, it can droop a lot since it never binds up like a 4-link eventually does (or at least the one I had on the XJ did), so the driveline does eventually bind. We got the pinion angled up as high as we could without cutting and turning the C's and while making sure the jeep was still drivable, but it still binds. Eventually, I'll have to cut/turn the C's or put some limit straps on there (probably both), but for now, it drives great and will be great for some trail riding with the wife. I did notice the old bump stop locations on the inner C's of the front axle rub on the front spring. I'm not sure what to do about that for now as I don't want to cut into it yet. It doesn't make noise or seem to be causing any problems yet but something to keep an eye on. The front steering setup with the weld-on high steer works GREAT! Artec's setup hooks to the knuckle a bit inside and I think it gives me a little extra steering angle than I would otherwise get (since the steering box only turns so far). I actually get BETTER turning radius on the big axle than I did on the old dana 30, I suspect because of the superduty dana 60 being able to turn the knuckles at a sharper angle). When I did some measurements while turning in a circle, it was about 10" tighter, which makes taking a u-turn a lot easier than it used to be. In the picture below, you can see how the drag link actually comes back a little. I thought about hooking up the sway bar, but looking at it above and in the picture below, I'm not sure I actually have enough room to connect the lower link to the bracket (and what room there is, only gets worse when turning). I haven't really needed it, especially with the refreshed rear leafs, but I would like to have the option in the future. Perhaps a bracket that hooks to the existing spot and comes up and out will solve it for me. I'll have to do some thinking on that. The other upgrade we did was the boostwerks hidden winch and steering box support. I don't have a winch that fits in there right now (I had a Zeon 8S but that's too bulky to squeeze in there, so I sold it and will keep an eye out for a sale on a winch after I get a new front bumper). That whole bracket is a really cool setup, though. I feel a lot more comfortable with the added support on the steering box. My wife really likes the jeep the way it is right now too and wants our daughter to be able to ride in it more. With the new safety laws, however, that means a childseat or booster seat for many years to come while on the road, so that's going to be on the priority list. There's no way our current baby seats (the one she's about to outgrow already) will fit in the middle position and the shifter, but I suspect those seats will fit fine if I didn't have the back of the current bench there. So...we'll be converting from the bench to some bucket seats in the future and seeing if there's a way to fit a securely mounted baby-seat in the middle. I've been working on clearing the shop of old parts and the old jeep to make room to start working on things a bit more at home too. Hopefully, once I get the XJ shell out of there, there'll be a bit more simple fab going on.
thecodemonk Posted May 13, 2020 Author Posted May 13, 2020 Got it out to move the trailer out of the alley so the landscaper can get to the backyard. It doesn't squat too much with the new springs and I still have plenty of suspension travel left in the back. The one-ton brakes stop the (empty) trailer pretty easily and the LS has plenty of power to move it. Honestly, it's like it's not even back there.
thecodemonk Posted May 21, 2020 Author Posted May 21, 2020 So...not strictly a hardcore upgrade, but it's an upgrade nonetheless. I have cupholders! The graco slimfit carseat fits pretty well on the bench with all three of us and the cupholders can fold in half when not in use. While they don't look like it at first, they fit normal cups without any issues (my wife had a small hot chai, I had a large iced tea). Also, baby loves riding in the MJ.
thecodemonk Posted May 25, 2020 Author Posted May 25, 2020 Minor update today...upgraded the side mirrors to the 97+ style since they bolt right on. I was so done with them rattling around and pointing any which way they desired.I grabbed these from the local junkyard years ago and only just got to putting them on. For those who don't know, this should show the difference in how much more visibility you get with the newer mirrors.With them on, I think it looks just fine and it was an easy task.Sent from my Pixel 4 using Tapatalk
Ls2xjcomanche Posted May 25, 2020 Posted May 25, 2020 Looking good! I’ve been following your build since you picked up the canopy. I swapped mine as well because there was too much of a blind spot with the older style.
thecodemonk Posted June 1, 2020 Author Posted June 1, 2020 On 5/24/2020 at 8:02 PM, Ls2xjcomanche said: Looking good! I’ve been following your build since you picked up the canopy. I swapped mine as well because there was too much of a blind spot with the older style. Yeah, it's a huge difference between the two mirrors. I love the new ones.
thecodemonk Posted June 1, 2020 Author Posted June 1, 2020 Update on the truck...runs great, wheels great (especially considering there's no lockers yet). Had some fun working on a trail this weekend with the local club in preparation for their yearly big event. It was in the low 90 degree temperatures outside and muggy near the creek but it was great to finally get back out on the trail! It felt great to get back on some mountains again. It feels like it's been years (probably because it has). Once we got up there, we got to work. We had 4 excavators and I think we had over 20 people working to help clean up the trail, take down dead trees, as well as make some fun obstacles (ensuring there were bypasses for the BLM trucks, if they had to come up for a search-and-rescue operation or something). An example of one of the obstacles in progress. I'm glad I did the shave on the rear end...would have dragged while playing around if not for that.
thecodemonk Posted June 1, 2020 Author Posted June 1, 2020 I think my phone must take large pictures since I keep hitting the an attachment size limit. Sorry Pete! Anyways, we made sure to test out the obstacles (I stayed off the big one with no lockers and a huge rear overhang...need more armor to protect the truck before I tackle some of them). The first time through, it was a bit too easy, so they spaced out the logs a bit to make it challenging but still doable and fun for a rig locked on 35's (we have other trails that are both easier and harder). Meanwhile, I had to get some obligatory flex shots of the MJ. :) (Yes, the front tire was just barely starting to hit the fender a little) As with all jeeps, once one person flexes out a bit, the others have to join in. :) It was a great time and the trail looks so much better than before! On the truck side of things, however, I've been running into what I think is heat soak the last week or so (as outside temps have started to rise a little). Once in a while, it just won't crank if I try and try to start it up too soon after stopping...but if I let it sit for a few minutes, it starts right up just fine. It's not too bad at the grocery store, since we're usually inside for a few minutes, but at the gas station, it gets really annoying. So...I've got a time delay relay and a momentary switch on order and will see if wiring up the fans to be able to run a few minutes after I turn off the truck helps to fix the issue.
Pete M Posted June 1, 2020 Posted June 1, 2020 1 hour ago, thecodemonk said: I think my phone must take large pictures since I keep hitting the an attachment size limit. Sorry Pete! don't worry, the software will shrink them automatically before saving. but it does sometimes hiccup on big files , so you may need to load one at a time.
thecodemonk Posted June 4, 2020 Author Posted June 4, 2020 Latest mod install...Comanche Club Sticker!!!Sent from my Pixel 4 using Tapatalk
thecodemonk Posted June 17, 2020 Author Posted June 17, 2020 Finally got around to the b pillar lights.Here's how the old lights were:They dangled like that because the plastic clips had broken off and they wouldn't stay in their holes anymore. They've been dangling like that for most of the time I've had it. They worked, but looked kindof bad just dangling there.While poking around the wrecked XJ, I found these clips under the front door sill trim:I thought they'd be perfect to ease wiring up the lights. I chose black for ground, yellow for the door switch (matching the existing wires), and the black with a blue stripe for the hot power.So, I wired one side up to the euramtec lights I had ordered months ago and had sitting in the "to be installed" pile and the other side to the Jeep. Plugged it in and tested it out and it's all working! Woohoo!It looks much better too. It just took a dremel to widen the hole about 1/4 inch.Sent from my Pixel 4 using Tapatalk
89 MJ Posted June 17, 2020 Posted June 17, 2020 On 5/21/2020 at 2:43 PM, thecodemonk said: So...not strictly a hardcore upgrade, but it's an upgrade nonetheless. I have cupholders! The graco slimfit carseat fits pretty well on the bench with all three of us and the cupholders can fold in half when not in use. While they don't look like it at first, they fit normal cups without any issues (my wife had a small hot chai, I had a large iced tea). Also, baby loves riding in the MJ. Most important upgrade though. Not even debateable.
thecodemonk Posted June 17, 2020 Author Posted June 17, 2020 Oh yeah, almost forgot. My wife was the big motivator to get this done. She was tired of the lights being the way they were and bought me a Milwaukee soldering iron to motivate me to get it done. She wanted to make sure I posted up about it so that appropriate credit goes where it's due. :)Sent from my Pixel 4 using Tapatalk
thecodemonk Posted June 17, 2020 Author Posted June 17, 2020 Most important upgrade though. Not even debateable. Dude! It's been huge! Also the baby is only just turned 1 and demands a truck ride every couple of days. :)Sent from my Pixel 4 using Tapatalk
89 MJ Posted June 17, 2020 Posted June 17, 2020 11 minutes ago, thecodemonk said: Dude! It's been huge! Also the baby is only just turned 1 and demands a truck ride every couple of days. :) Sent from my Pixel 4 using Tapatalk Smart kid!
thecodemonk Posted June 28, 2020 Author Posted June 28, 2020 Had a good weekend out in the woods with the MJ. The local club, North Idaho Trail Blazers, had their annual Cabin Fever run and my wife and I went on out favorite trail. It's not the most difficult trail, but it's the one we got engaged on and offers beautiful views! At the trail head, we started with airing down (of course) and my wife grabbed a great shot of most of the rigs! Then, as we started up the creek, we hit "Wet Wedgie", which is a rock V in the creek. The fancier jeeps skipped it, but I didn't come to this trail to take bypasses. No lockers, a good spotter, and a little bit of throttle, and we were through! Here's a short video of the MJ getting through it. :) As we waited on the trail for a few other jeeps, my wife got a great shot of the MJ in the creek too. After this, we had a long fclimb up the hill and across the ridge of the mountains here. The jeep's engine and transmission got a bit warm with the long slow climb but that's the only time I had any issues. We paused about halfway up for 10 minutes and it came right back down in temperature from 250 back to 199. A little more climbing and we got to "the wall", which is a tall hump at the top (preceded with a few smaller "kelly humps"...aka "wheelbase checks" as I call them). A little momentum carried me right over. With the LWB jeep, I dragged the rear over each and every one of them, but didn't have any body damage. It seemed to always hit the rear hitch and bumper only, which took the hits just fine. My trailer plug housing is the only thing that took any damage. The wires and plug itself are fine. I'll figure out a different mounting solution for that later, so it'll be more protected in the future. A bit later, my wife took a really artsy picture of the MJ...I think it looks awesome! As we got to the peak of the trail, we lined up for a nice shot. You'll notice that one of these things is not like the others. :) As we exited the trail, we pass a few driveways for those who like to live deep out in the woods. We have a very patriotic community out in Pinehurst, as you can tell. Since we had a small group on our trail, we finished it by 1pm and thought we'd go check out one of the others. While it was a bit less friendly to the long wheel base jeeps, it was still fun to watch the short wheel base jeeps play around in the holes (we'll be updating this trail in the future to have something more fun for the JLs and MJs and such later). One of the holes DID claim some Jeep steering (not mine, thankfully). I'm pretty sure the drag link isn't supposed to be in that shape. There WAS a rock pile that I attempted part of, which got a great shot of the jeep! Shortly after that, I got stuck. Some lockers are definitely in order. Ok, one last glamour shot of the jeep on the trail. I absolutely love this jeep. It performed great, didn't break anything, and gave us a lot of adventure and memories this weekend. I can't wait to go out some more!
Pete M Posted June 28, 2020 Posted June 28, 2020 ahh, that brings back memories... looks like you guys had a blast

Recommended Posts
Create an account or sign in to comment
You need to be a member in order to leave a comment
Create an account
Sign up for a new account in our community. It's easy!
Register a new accountSign in
Already have an account? Sign in here.
Sign In Now