87Chief Posted December 3, 2019 Posted December 3, 2019 More info on the bed rack? I'm wanting to mount a RTT on a bed rack also. How was the bed rack mounted/installed? Love the build
thecodemonk Posted December 3, 2019 Author Posted December 3, 2019 31 minutes ago, 87Chief said: More info on the bed rack? I'm wanting to mount a RTT on a bed rack also. How was the bed rack mounted/installed? Love the build The bed rack is actually really simple, but were I to do it again, I'd use something thinner as, while strong, it was stupid heavy (all 0.25" 2x4 square tube cut and welded together and then attached to 0.125" angle iron). I ended up drilling holes into the inside of the bed and just bolting it on with some grade 8 bolts and washers. I built it by making the hoops to match the roofline (one at each end...at this point I found out that the bed is a different width in the back compared to the front, but was too far into it to change it). Then I just put a long beam front to back with a couple of cross beams in between. This was my main tool for cutting and how I got everything lined up to be even...it's sketchy but it worked (this was back when we just got the shop built, so it's nice and empty) It was level enough to support the heavy beam without moving, so it worked. I would definitely recommend one of these band saws...it makes nice clean cuts really easily and really helped in getting everything on the correct angles. After the first few cuts, I went and measured again... and again and again until I had a mini mockup to make sure I was on the right path. From there, I knew I had the angles right and made my first hoop...then test fit it on the MJ to make sure it matched the roofline (I had some help holding it up while I stepped back to eyeball it) I tacked the first hoop onto angle iron that I cut to length for the bed rails. Then, I made another identical hoop for the back. The back of the bed is narrower than the front of the bed but it was close enough that I just went with it (and was short on time before a trip that needed this done for). After that, it was simple. I measured and cut some north/south beams to connect the hoops: Then measured and cut some east/west beams to add to the structure: I welded it all up as best as I could and jumped on it a while to make sure it wouldn't fall apart. Then set out on the trip...I ran out of time to paint it so it gathered a bit of surface rust as I went but it worked. Since I built it all on the truck, I didn't realize how heavy it was until I had to take it off. It takes three strong adults all of their strength to get it on and off the truck and easily weighs 400+ lbs. Definitely overkill, but it looked great. I do want to make it again, but use thinner steel next time (and correct the rear hoop width). From my notes when I built it: (I may have had to invert some of the numbers when I went to the saw (180-x)...I can't remember now, but when you do it, it'll be obvious to you) Each leg I cut: - Bottom of leg at ~17 degrees - Top of leg at ~36 degrees - Outside length of the leg was 21" long (top to bottom) For the angle iron: - Bed Ledge is approx 1" wide - Length of ledge is 89-90" - Length of inside bed is 87.5 (got to cut some room on the inner side of the angle iron so it fits around the front of the bed and the tailgate stop at the back) Top beam for the hoop is - 48.5" / 45.5" lengths (top/bottom) - Cut top at angle of ~37 degrees
87Chief Posted December 3, 2019 Posted December 3, 2019 Awesome, thank you so much for the detailed reply. I will definitely try and make this rack, but use thinner metal. I thought about using 1x2 120 wall square tubing, thoughts on that?
thecodemonk Posted December 3, 2019 Author Posted December 3, 2019 1 minute ago, 87Chief said: Awesome, thank you so much for the detailed reply. I will definitely try and make this rack, but use thinner metal. I thought about using 1x2 120 wall square tubing, thoughts on that? Honestly, that should be perfect and more than enough for any RTT. 120 wall is what I'll be trying when I get around to building a rack again so if it works great for you, let me know so I know for sure!
derf Posted December 3, 2019 Posted December 3, 2019 I'm looking at doing something very similar with mine. I agree that .120 wall would be a lot better than .25. That has to be a heavy mother of a rack.
87Chief Posted December 10, 2019 Posted December 10, 2019 Just got some quotes on steel.. For a bed rack, with potentially putting a roof top tent on it, is the .083 1x1 good? Might go something like this.. 1 x 1 x .083 x 20ft = $ 19.33 1 x 2 x .125 x 20ft = $ 39.42 1½ x 1½ x .125 x 20ft = $20.96
derf Posted December 10, 2019 Posted December 10, 2019 That's a little smaller than I would feel comfortable with. Maybe something like 1.5 square tubing or thicker wall. Or both. Or maybe putting in more tubes. Like 6" on center vs 12" on center.
thecodemonk Posted December 18, 2019 Author Posted December 18, 2019 Man, I'm bad about updating this thing...more details to come, but this is a thing that happened recently.
thecodemonk Posted January 31, 2020 Author Posted January 31, 2020 1 hour ago, Pete M said: no video of it on the dyno? Sadly, no video of it on the dyno. I dropped it off on the way out to my wedding anniversary vacation, and just picked it up after they tuned it. I need to get back to documenting this thing...just been daily driving it and had to replace all the TREs in the steering recently. The downside of ruff stuff's one-ton kit is one of the TREs is a specialized part (which means I can't easily replace it with something locally and I have to wait for shipment). I'm not a fan of specialized parts like that for anything that's a wear item, so I'm looking at heims (since I can grab those easily and carry spares a bit more easily/cheaply) for the future. My wife did say yes to throwing some upgrades in the axles too, so that'll all happen at once...pending tax return. Once I get that going, this thread will pick back up again. :)
thecodemonk Posted March 7, 2020 Author Posted March 7, 2020 (edited) It's tax return season...which means parts season and thread update season. Woohoo! As I mentioned before, the steering in the jeep is super loose. "The Cure" seems to help but not enough for me to really be ok staying with the inverted-y or inverted T or whatever it's called...non crossover steering. I fought it trying to get it right on the XJ and I'm still fighting it on the MJ. Well NO MORE! It's time to upgrade and as the jeep motto says...never replace parts without upgrading. Well...one thing led to another, and I ordered a bunch of parts with the tax return. The first batch of stuff came in today! I started unpacking some boxes and everything's looking so great! First up, the obvious parts from the picture...fresh metric ton springs from general spring. I'm looking forward to them being a little stiffer than what is in there now (even a little weight seems to sag out the rear right now). Next up...a front differential cover (probably making it obvious what is going on the front). I set it here next to a dana 30 cover from ruff stuff that I never got around to putting on. Hey @Airborne Janitor or @JordanTMiller...either of you guys in Spokane need a dana 30 cover from ruff stuff and a matching lube locker? I'll sell it to one of you guys for cheap. Next up, I got a little something that should tell you what's going in the back. Last, but definitely not least, a cute bundle that's been taking most of my time is enjoying the wheel adapters to make the front and rear axles match bolt patterns. Whew! It's going to be busy in the next month or two! Edited March 19, 2020 by thecodemonk Fix picture formatting
JordanTMiller Posted March 7, 2020 Posted March 7, 2020 Man I’m so exited for you and it’s not even my rig! You sure know how to do things right and I applaud that👏🏼 I passed you today by whitworth towing home the new long bed Pioneer! I was going to stop and ask if you wanted to trade ha.
thecodemonk Posted March 7, 2020 Author Posted March 7, 2020 Man I’m so exited for you and it’s not even my rig! You sure know how to do things right and I applaud that I passed you today by whitworth towing home the new long bed Pioneer! I was going to stop and ask if you wanted to trade ha. Hahaha, that was actually my parents borrowing the truck for a dump run. Excited for your new rig! Sent from my Pixel 4 using Tapatalk
thecodemonk Posted March 8, 2020 Author Posted March 8, 2020 Welp. It's been an eventful day. The good: Got the axles. 4.10 gears, superduty 05+ Dana 60 and a GM 10.5 from 2006...14 bolt! It squatted the truck a bit on the old springs. The bad: On the way home, though, I hit a bad timed yellow light and they slid into the front of the truck bed, leaving a mark. Thinking I would let them move back a bit, I gave it a little throttle when the light turned green. They shifted back...then didn't stop and settle like I thought they would. Instead, the punched through my tailgate and landed on the road. Nobody was hurt, thankfully, but it was still really frustrsting. I'm the process of falling out, one of the bounced and left a cut on the bed. A few helpful and strong guys helped me load the axles back up and I strapped them down properly, alongside my damaged tailgate. Once I got home, I noticed that my bed floor is bowed down too. Oi. Sadly, I don't think I'll be able to salvage the tailgate, so it'll live in my shop, mounted on the wall as a constant reminder to always ALWAYS strap down my load. The axles themselves came away with only minor damage to a few studs and one of the front hubs. In the meantime, I'll be keeping an eye out for a new tailgate.
Pete M Posted March 11, 2020 Posted March 11, 2020 always secure your stuff. always. I've been known to throw a chain or cable over super heavy objects because I don't trust the 10 ratchet straps I just put on.
thecodemonk Posted March 11, 2020 Author Posted March 11, 2020 3 minutes ago, Pete M said: always secure your stuff. always. I've been known to throw a chain or cable over super heavy objects because I don't trust the 10 ratchet straps I just put on. Yeah...lesson learned here. Nothing stays loose in the bed anymore, no matter what.
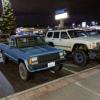
thecodemonk Posted March 19, 2020 Author Posted March 19, 2020 Welp...another update. I've been home a lot more but somehow have less time than before to work on things >.< With my old wheels being 15" diameter and the new axles needing 16+ to clear the brakes, I figured it's time to upgrade the wheels (which also means different tires). It's a bit sad, because these tires are still new enough that they have the little rubber fingers on the side. Hopefully I'll find a good local buyer for them. However...in the interest of saving money, I remembered that my old XJ's tires are on 17" rims already! So...I got the tires off of those. ...well, more accurately, I spent a few hours getting the first ring off (those old nuts and bolts have been on there too long) and decided it was worth the money to let a tire shop handle the rest. Next up, I ordered in a set of steel wheels in the correct 8-lug pattern (8x170mm) I went with the metric bolt pattern of the ford axle rather than the 8x6.5 bolt pattern of the chevy axle for three reasons: - Adapter hubs for the front axle are freaking expensive ($400+) - I'm sick of dealing with custom parts on wear items. Remember my issues with the steering TREs? yeah...OEM parts or easily obtainable parts (like heims) for things that wear from now on. - The rear axle is a bit narrower than the front anyways, so a bolt pattern adapter-spacer on the back won't be hugely noticeable. Also, a few other parts came in. I didn't get pictures of the artec boxes, but it's the weld-on high steer kit for the front and the truss for the TJ/XJ mounts for the superduty axle. I don't feel confident in welding to cast, so those items are going straight to the shop to install. That "Heavy" sticker is no joke either. I got the "no ring gear shave" kit from TMR to trim down the 14 bolt. 35's are not huge tires compared to how low the 14 bolt hangs down, so I figure any clearance help I can get, I should take. Cover alongside the dana 30 cover for comparison... \ Of course, I couldn't help myself and, after I got the 35's mounted on the correct rims, I had to see how it looked on the jeep. Not too bad. Jeep will be a little higher with the bigger axle tubes, new rear springs, and the tires being bigger so the fender clearance should be better than it looks in the picture.
JordanTMiller Posted March 19, 2020 Posted March 19, 2020 Man, I should of just parked my new project in the field across from you and started buying all these old parts off of you! Those 35s look so good in front of your rig. Can’t wait to see it come together!
thecodemonk Posted March 19, 2020 Author Posted March 19, 2020 13 minutes ago, JordanTMiller said: Man, I should of just parked my new project in the field across from you and started buying all these old parts off of you! Those 35s look so good in front of your rig. Can’t wait to see it come together! In a few weeks, I'll have a set of 33's for sale. ;) Alternatively: The old XJ is on jackstands now. Now that I have a better look at it, the wagoneer front axle doesn't look damaged afterall, so that'll probably be for sale too. You could end up with a pair of dana 44's...the rear from the MJ and the front waggy axle from the XJ. I have the 5 lug to 6 lug adapters on the 8.8 on the XJ now too (to match the beadlocks). Front Dana 44 has an e-locker as well...a quick way to some wheeling upgrades. ;)
billyblankss Posted March 20, 2020 Posted March 20, 2020 Looks great. Do you notice any significant power loss from the larger wheels and everything? Any pros / cons you want to share?
thecodemonk Posted March 20, 2020 Author Posted March 20, 2020 51 minutes ago, billyblankss said: Looks great. Do you notice any significant power loss from the larger wheels and everything? Any pros / cons you want to share? Not really any significant power loss from stock to 33's (running 3.54 gears...I was on the 4.0L during the swich). I didn't notice a huge power loss on my XJ when I did the same jump from stock to 33's on that, years ago (3.73 gears). I feel like XJs are perfect on 33's. It's the move to 35's that I started to feel it on the XJ, even after I moved to 4.88s. It gets me up to speed, but I could have used one more gear (or more power and less gearing). I'm hoping I'll feel it less with the V8 and 4.10s, but I'll let you know when I get that going.

Recommended Posts
Create an account or sign in to comment
You need to be a member in order to leave a comment
Create an account
Sign up for a new account in our community. It's easy!
Register a new accountSign in
Already have an account? Sign in here.
Sign In Now