

1989 Eliminator
-
Posts
428 -
Joined
-
Last visited
Content Type
Profiles
Forums
Gallery
Everything posted by 1989 Eliminator
-
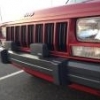
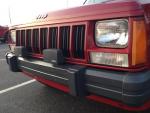
Front Door Trim Panel for Eliminator Edition - MI
1989 Eliminator replied to 1989 Eliminator's topic in Wanted
The long door trim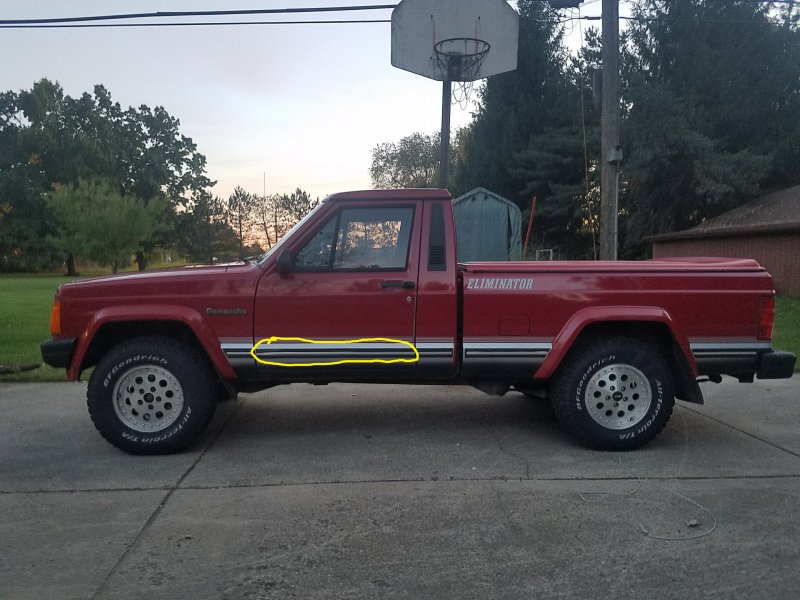
-
Front Door Trim Panel for Eliminator Edition - MI
1989 Eliminator replied to 1989 Eliminator's topic in Wanted
Bump. Still looking! -
I lost one of my front door trim panels/strips from the glue peeling back and the wind caught it one day. Please let me know if you have one you are willing to sell. I've had trouble finding one online.
-
Closed to Open Cooling System
1989 Eliminator replied to 1989 Eliminator's topic in MJ Tech: DIY Projects and Write-Ups
Agreed. Two of the outer mounting brackets do not line up but the mounts using the rubber grommet lines up just fine which is enough support for the radiator. My Jeep hasnt had any issues with this setup. -
Closed to Open Cooling System
1989 Eliminator replied to 1989 Eliminator's topic in MJ Tech: DIY Projects and Write-Ups
The electric fan is stock wiring. The fan +12V wire comes from the secondary fan relay. The ground wire from the fan goes to ground. The coolant temperature switch located on the radiator is what switches the relay on/off. To re-purpose the coolant bottle, the 5/16" line coming from the radiator overflow line by the radiator cap was routed into the bottom of the bottle. I managed to find a rubber grommet that fit in the bottom of the bottle and was about the same outside diameter as the hose. So, I inserted the 5/16" hose into the grommet with some Seal-All and then pressed all of that into the bottom of the bottle. -
Krustyballer Fabrications
1989 Eliminator replied to shelbyluvv's topic in Vendors- members making products for MJs
Review on Krusty's Hitches. I must say this man does an awesome welding job. The fabrication and shipping was very fast. No damage to the hitch when I received it. The hitch also came with new bolts. I painted the hitch with POR-15 rust proofing when I got it. That is some great stuff by the way. All the dimensions were within spec and everything went on good. Thanks Krusty! -
Hey all, Here is the model and information you need to know about my Jeep. 1989 Jeep Comanche Eliminator, 4.0L Straight 6, Automatic Transmission, 2x4, I have A/C and cruise control. I have managed to complete my closed to open cooling system conversion. I did not spend a lot of money and I also did not go the cheapest route. I shouldnt have to replace any more water pumps or worry about cooling ever again. Here is a list of components that I bought: //////////////////////////////////////////////////////////////////////////////////////////////////// 2-Row Radiator - $100 https://www.amazon.com/gp/product/B01EVWTXLY/ref=oh_aui_detailpage_o09_s00?ie=UTF8&psc=1 Quality: 8/10 Functionality: 10/10 Comes with elbow and straight radiator cooling line fittings. Radiator Cap - $35 https://www.amazon.com/gp/product/B01F93S3E2/ref=oh_aui_detailpage_o00_s00?ie=UTF8&psc=1 Quality: 9/10 Functionality: 7/10 It is very hard to turn on and off the radiator. 4' of 5/8" Black Heater Hose - ~$15 total Autoparts store 4' of 3/4" Black Heater Hose - ~$15 total Autoparts store (2) 5/8" to 3/4" Hose Adapters - ~$15 total Autoparts store One Gallon of Concentrate Coolant - $15 Autoparts store One Gallon of Distilled Water - $3 High Flow Thermostat Housing - $33 http://www.hesco.us/products/7882/cooling-system/133247/hi-flow-thermostat-housing-hfth2#.WRuBvWjyuwU High Flow 180deg Thermostat - $19 http://www.hesco.us/products/7969/thermostats-and-housings/43013/hp--gmfordamcjeep-thermostat-180-degree-4364#.WRuIYGjyuwU Thermostat Housing Spacer - $37 http://www.hesco.us/products/7969/thermostats-and-housings/43017/thermostat-housing-spacer-hesths#.WRuIiWjyuwU High Temp Blue Silicone Gasket Maker - $12 Autoparts Store Hi-Flow Water Pump w/ Gasket - $87 https://www.4wd.com/p/flowkooler-high-flow-water-pump-natural-1747/_/R-GNLS-1747 Hose Clamps - ~$10 Autoparts Store 6' of 5/16" Hose for Radiator Vent - ~$10 Autoparts Store (1) 5/16-18 by ~2" long (1) 5/16-18 by ~1-1/4" long *Not exactly sure on length because I gave up on using the housing spacer (I will explain later) *The housing spacer and thermostat housing comes with gaskets. Total: ~$396 Well worth it, will never have a cooling issue. Works like a charm. My Jeep is preventing global warming from happening. //////////////////////////////////////////////////////////////////////////////////////////////////// A few pictures of stuff I bought... Start taking off parts... I had to take off the supports on top of the radiator, loosen the belt, and accessory fan. See photo below. NOTE: See the square rubber supports on top of the radiator? You need to reuse those. Take them off and put them on the new radiator so you do not forget... :doh: At this point I drained the coolant and took off all the hoses and transmission cooling lines. There is no pressure in the transmission lines so no fluid should leak out! Here is my old radiator taken out of the truck. This also shows the fitting types for the transmission lines. See the bottom elbow transmission fitting? My new radiator came with a replacement. The stock one is one piece and not a swivel fitting like the new fittings. You MAY have to grind, file, sand, etc. the diameter of the new elbow fitting so the plastic quick disconnect fitting will slide on the new fitting. Either that or you can file the plastic piece like I did. See below. ^^ That plastic piece goes on the elbow fitting ^^ I found that there was two holes that did not line up to support the radiator...Both sides. So I zip tied them on. Not too important since there are other brackets supporting the radiator on the top. First issue I found with the housing spacer... The belt comes pretty close the to lower housing bolt. See below. Also you can see two brass inserts. That is a 1/4" plug on the right (wrapped in teflon tape) and 3/16" plug on the left. Normally sensors go there on the newer jeeps. The Renix older jeeps have the sensors elsewhere. Second issue because of stupidity (Halfway my fault). Hardware store worker said the housing bolts were M8-1.25. They are not... They are 5/16-18. So I stripped out the holes and the bolts. I said screw the spacer and used original bolts. Bad luck for trusting the hardware store kid. :fs1: A little fabrication was needed for the radiator cap on the support bracket. It comes pretty close. Also, the vent hose is a 5/16" hose. I re-purposed my coolant reservoir bottle for my overflow tank. I forgot to take a picture but the two heater hoses go straight into the heater core. This shouldn't affect the A/C as the heater valve is open when the A/C turns on. This info is straight from the Jeep service manual I have. Heat comes out of the vents when the blower fan isnt on which is the only case which could be bad... Heat could build up without the blower fan on and melt/overheat things in the HVAC. Other helpful things to note: Make sure to put fan belt shroud/cover on before the new radiator is in. Make sure to put the rubber supports from the old radiator onto the new radiator. !!!!!!!! LET THE SILICONE CURE BEFORE FILLING THE SYSTEM WITH COOLANT !!!!!!!! Feel free to message me for any questions about my experience with this upgrade. :cheers: :rock on: :clapping: :waving: . :MJ 2: .
-
http://comancheclub.com/topic/50435-how-to-change-your-harmonic-balancer/
-
Questions on 96 booster mc swap
1989 Eliminator replied to 1989 comanche mj's topic in MJ Tech: Modification and Repairs
Check out my DIY booster swap in my signature. It outlines which ends are bubble and standard flared. -
If you haven't already... click on the link in my signature for the dual diaphragm brake booster upgrade.
-
http://comancheclub.com/topic/50435-how-to-change-your-harmonic-balancer/
-
Closed to Open Cooling DIY
1989 Eliminator replied to Blue88Comanche's topic in MJ Tech: DIY Projects and Write-Ups
what was your way of purging the air out of the system? I usually start the engine and let it warm up close to operating temp, shut off the engine, let it cool a bit till the radiator is 'warm". then open the radiator cap. Repeat maybe one or two more times. -
Upgrade your ground cables!!! Recommend doing the WJ/XJ brake booster conversion. It makes your stopping power so much more. Replace the hard vacuum lines with rubber hoses of the same inside diameter. Use POR15 rust proofing on the rear of your frame, bumpers, and rocker panels. Expensive stuff but works amazing. Duck tape your spare set of keys on the connector for the rear lights! I do this because it looks like a terrible electrical job with all the tape but if you ever lock your keys in your jeep all you have to do is go underneath the back to the connector, rip off the tape, and you have your spare set with you!
-
tire size / speedometer gear question
1989 Eliminator replied to Blue88Comanche's topic in MJ Tech: Modification and Repairs
This^ Tires deform due to the weight they hold. To more accurately find out your vehicle speed you need to measure your dynamic rolling radius. Then find out your current RPM, the gear you are currently in (if you are in OD then use that...), and the differential gear ratio. MULTIPLY... (RPM * 2 * 3.14 * 60 * [measured tire RADIUS in inches]) to get your inches per hour. Then DIVIDE that answer by the transmission gear ratio, the differential gear ratio and 63360 to convert inches to miles. (RPM * 2 * 3.14 * 60 * [measured tire RADIUS in inches]) / (Transmission Gear Ratio * Differential Gear Ratio * 63360) = MPH The final answer is your actual vehicle speed in miles per hour. I found that my GPS was pretty accurate to my actual vehicle speed since I also have bigger tires on my truck. -
Rough idle driving me nuts!
1989 Eliminator replied to jm88j's topic in MJ Tech: Modification and Repairs
When warming up it is common for rough idling since the O2 sensor is not warmed up yet. The O2 sensor is in open loop mode. When the sensor is warm enough the ECU then goes into closed loop mode fluctuating the air to fuel ratio. The renix does not do a great job at this so the engine will kind of "hunt" for a stable idle no matter what... But I also did about everything in my power to get rid of this. If you click on the link in my signature youll find my solutions, tips, and see what helped me. -
Yeah I went about it by buying bubble flare lines then double flaring on the other end. Gotta be real careful bending the lines.
-
Go for it @cruiser54!
-
1, can I pull a automatic pedal assembly and brake switch from a newer XJ so that I do not have to modify the booster arm? Yes you can. 2, being that it is a WJ booster, that means I DON'T need to space it from the firewall. Correct? The one I got doesn't have a spacer even though I pulled it myself. Correct 3, proportioning valve. I can't use the MJ one without upgrading the internals, correct? You CAN use the MJ proportioning valve 4, rear height sensing valve. Do I need to bypass this before I do this mod or can I run with it the way it is? You do not Click on the link in my signature about the WJ booster upgrade
-
updated pictures!
-
Hello everyone! I am a graduate from Kettering University (AKA...General Motors Institute) and I took a vehicle dynamics course while I was there. Apart of the class was to create a portfolio for one vehicle within each group and of course I chose my 1989 Jeep Comanche (Eliminator package) to do my portfolio on. The calculations within the files below were calculated using both CarSim (simulation software), in lab measurements (in garage, using weights and measurement tools), and vehicle dynamic equations. Below I have the power point presentation and excel document Google Drive links that have the raw data for my 1989 Jeep Comanche. The excel document is read only. ***FOR BOTH the power point and the excel document, click on the links below and you should be sent to each file in google drive. If you cannot click on the links, copy and paste these links into your web address bar at the top of your web browser. After that, download the files by clicking the downward facing icon near the top right of the screen. You need to do this so they look and function better since the files are Microsoft office files. Google drive doesn't like to view these files sometimes so it is best to download and open these files with Microsoft office.*** https://drive.google.com/file/d/0B52R0MdRNDTlYml2Nm1LMUo2NTg/view?usp=sharing - PowerPoint Presentation https://drive.google.com/file/d/0B52R0MdRNDTlMFp5VDNfbGVlZTVBUTRqQU5tcHRZQUIxVUJZ/view?usp=sharing - Excel Document There are a lot of parameters that are laid out but most of them have a description to explain what each parameter means. This goes a lot more in depth than your typical specifications you would normally find. All the values you see are estimated but most were proven after being calculated by doing test runs and measurements. If you have any questions please ask! Interesting parameters: spring rates center of gravity corner weights on each wheel max braking acceleration max driving (WOT) acceleration time to 60 mph estimated minimum stopping distance curb-to-curb steering radius NOTE: I have a fiberglass bed cap on my truck and some stuff in the back so this added about 150-175 lbs to the total weight of my truck. I am running 31" BFG tires which change ride dynamics and weight. I also have 2" coil spacers and 2" lift drop shackles. Not too much different than stock so all the values you see are pretty close to stock. ENJOY :thumbsup: Here are some links for other Comanche info: http://comancheclub.com/topic/7477-a-list-of-links-for-info/ - from "Rokhound" http://comancheclub.com/topic/19732-random-informative-picture-thread/ - from "maddzz1" http://comancheclub.com/topic/48710-diy-projects-writeups-master-search-index/ - from "minuit" http://comancheclub.com/topic/39751-comanche-specs/?hl=1996&do=findComment&comment=400145 - from "yxmj"
-
Does anyone have an extra NSS that they are willing to sell? I have chased my backup light issue to the NSS so that is why I am in need of one. Please PM if you can sell one to me. Thanks.
-
Looking for a neutral safety switch for the AW4 trans. I have a 1989 MJ but most (if not all) years use the same switch. PM me if you have one willing to sell!
-
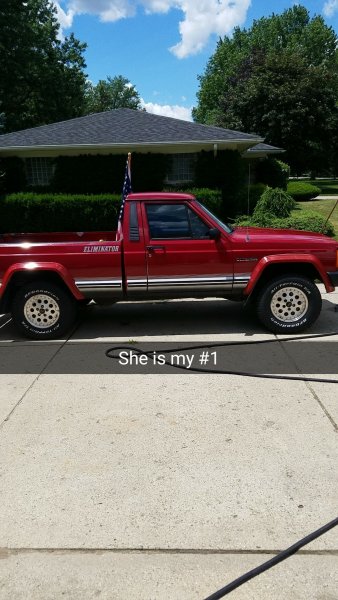
I put the 3 inch coil spacer blocks on the front and longer rear shackles on the back for a higher look. This also gave me the ability to run 31" tires on my 2wd.
-
I would do what hornbrod said but also clean all the drum brake components very good. Also put anti-seize on the adjuster screw so that can move easily. Those often get rusted together and will not turn; making your rear brakes not adjust.
-
I actually kind of had this same issue with my Dorman balancer. I put it on as far as it could go and the sub was not quite flush with the crankshaft.