

Salvagedcircuit
-
Posts
1389 -
Joined
-
Last visited
Content Type
Profiles
Forums
Gallery
Everything posted by Salvagedcircuit
-
Door Card Hole Measurement Needed
Salvagedcircuit replied to Salvagedcircuit's topic in MJ Tech: Modification and Repairs
Unfortunately, there was no designation on the back of my door cards. I covered the back of my door cards in neoprene, similar to how newer XJ's had the neoprene moisture barrier.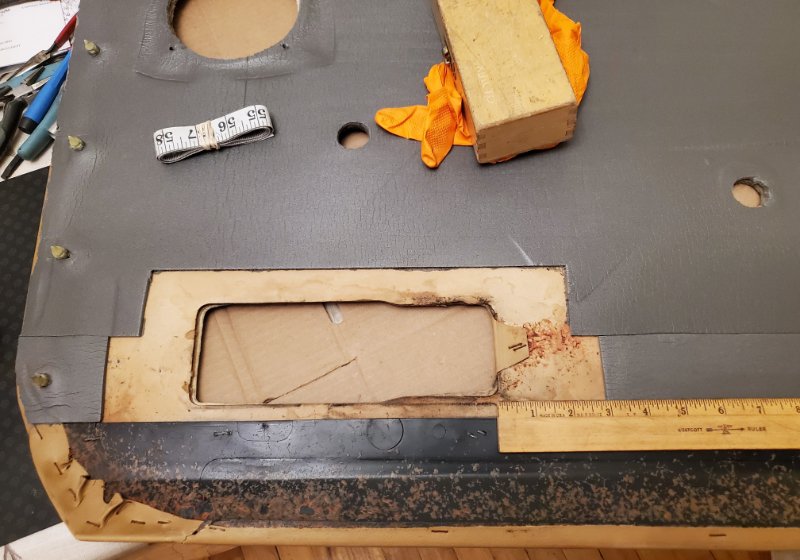
-
Door Card Hole Measurement Needed
Salvagedcircuit replied to Salvagedcircuit's topic in MJ Tech: Modification and Repairs
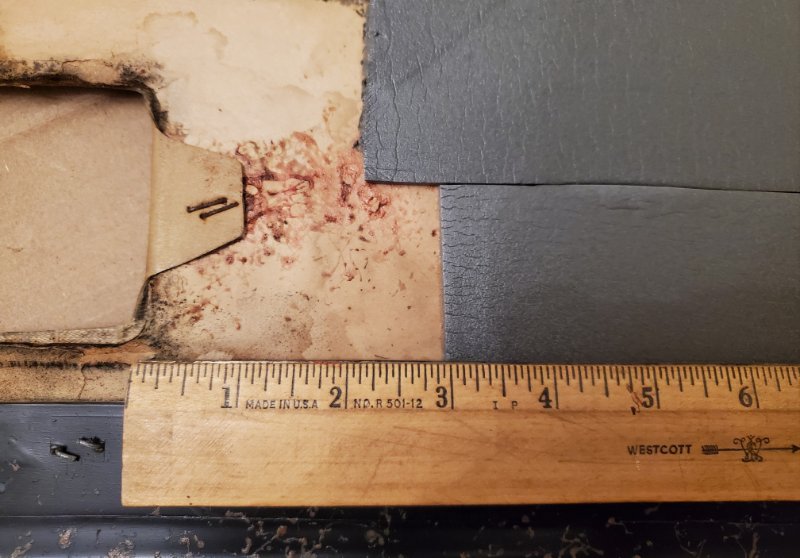
Do you know the height? It looks like the hole is directly on the centerline of the door handle pocket Thanks! -
I'm adding hockey stick handles to a base model comanche with a door pull door. I was able to find the door insert for the handle, but now comes the dreaded hole cut. If anyone has a door card with a punch out for the hockey stick handle nearby, can you send me measurements where that 3rd hole is? I am interested in two lengths, shown in black and white. Thanks a ton!

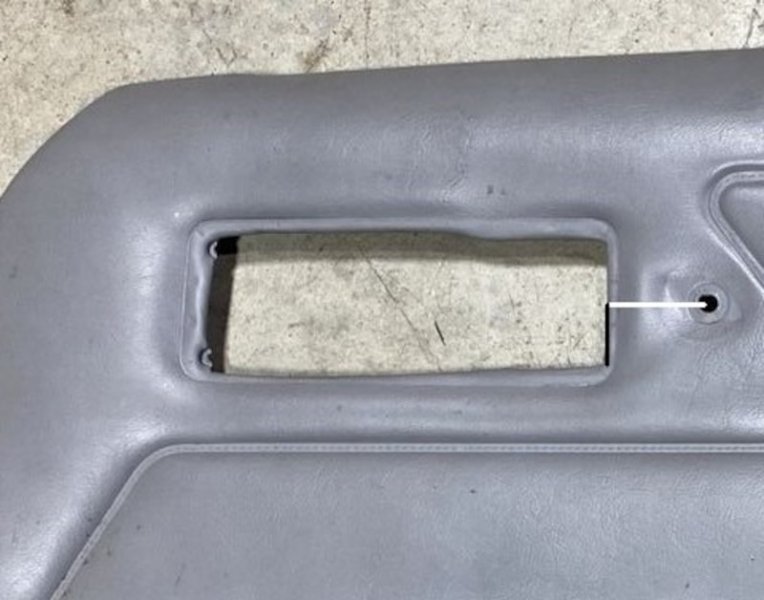
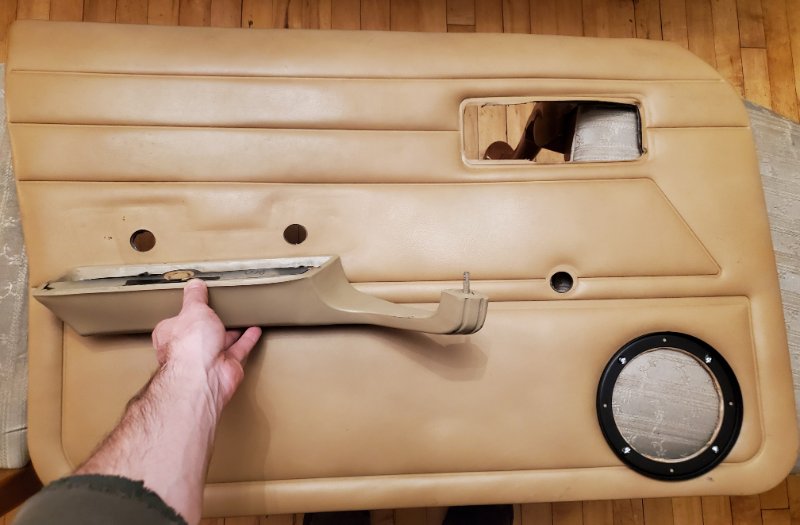
-
Keep it Stock Stupid
Salvagedcircuit replied to GonzoTheGreat's topic in Member Projects: Your Comanches
Find one on the east coast with little rust is like winning the lotto! I luckily found a low rust one that was just moved to Massachusetts, but even so, I still had to replace the driver and passenger floor boards. Good luck with your restoration! -
I don't think these have bee duplicated by phoenix graphics or @boxyjeep yet. I hope these landed in good hands
-
Seat Belt Mounting Hardware
Salvagedcircuit replied to Salvagedcircuit's topic in MJ Tech: Modification and Repairs
You have a message good sir -
Seat Belt Mounting Hardware
Salvagedcircuit replied to Salvagedcircuit's topic in MJ Tech: Modification and Repairs
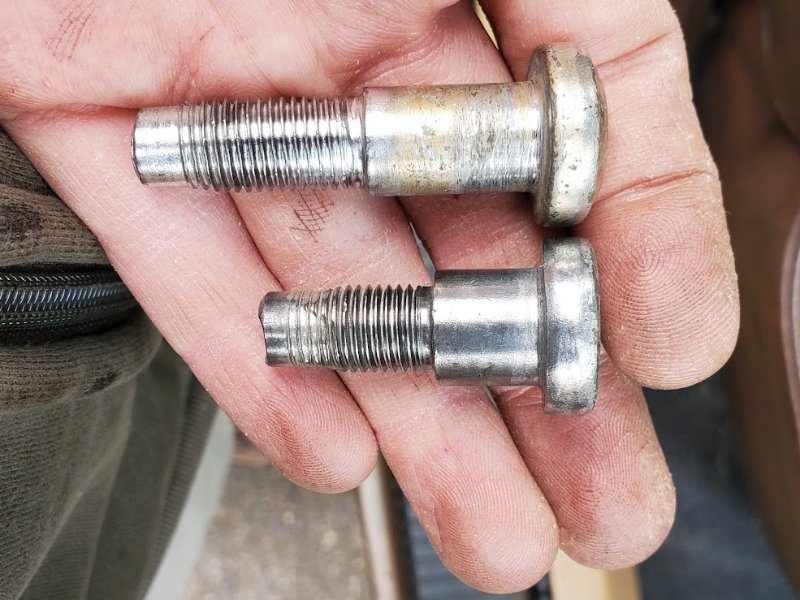
That's very possible. I somehow had (3) long torx t50 bolts and 3 shorter ones. I need to find a longer t50 from a junkyard or ebay now. Thanks Edit: In case anyone was wondering, the seatbelt bolt torque is likely 32 ft-lbs. Page 675 of the 97XJ "Lubrication and Maintenance" service manual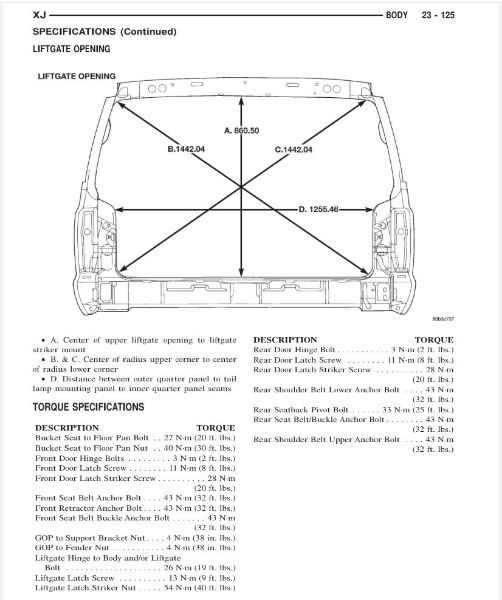
-
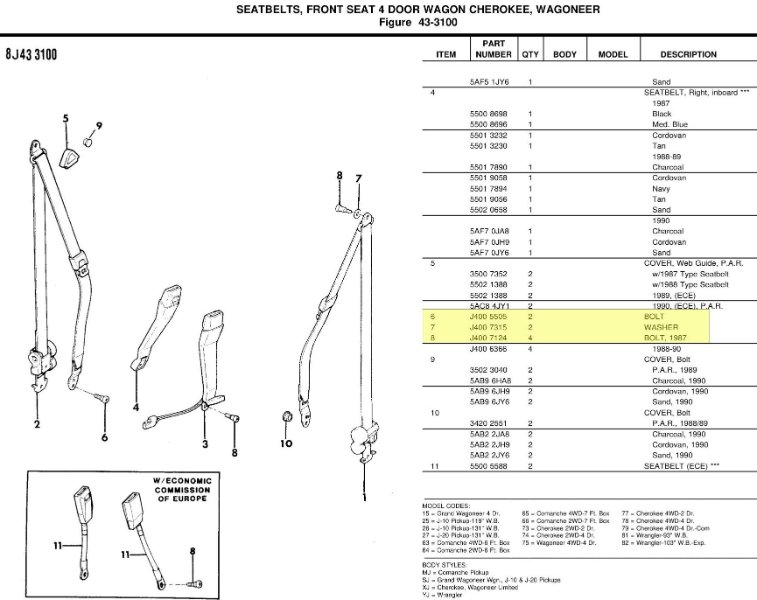
On another picturesque night of wrenching, I found beside me torx bolts of every shape and size. Does anyone know which size bolt is correct for the comanche seat belts? I attached a photo of the 88-90 parts diagram. There's supposed to be a washer (J400 7315) and a #10 bolt (J400 5507) on the top seat belt mount point and a #10 bolt (J400 5507) on the bottom most mount point. I believe the previous owner used a spare bolt from a cherokee or another amc or gm product at the time In my hand I have two torx T50 bolts, one shorter with a wider diameter shoulder and one longer with a smaller diameter shoulder. I believe the longer one is the correct bolt. The longer one is labeled as "1.87in Long" in the parts diagram which checks out with the measurements from my hand. The previous owner mixed and matched seat belt mechanisms and the shorter bolts simply will not grab enough into the bottom seat belt mount point. Thanks! These part diagrams are pulled from page 1192 of the 1988-to-1990-parts-catalog pdf: https://cdn.xjjeeps.com/pdf/en-us/1988-to-1990-parts-catalog.pdf
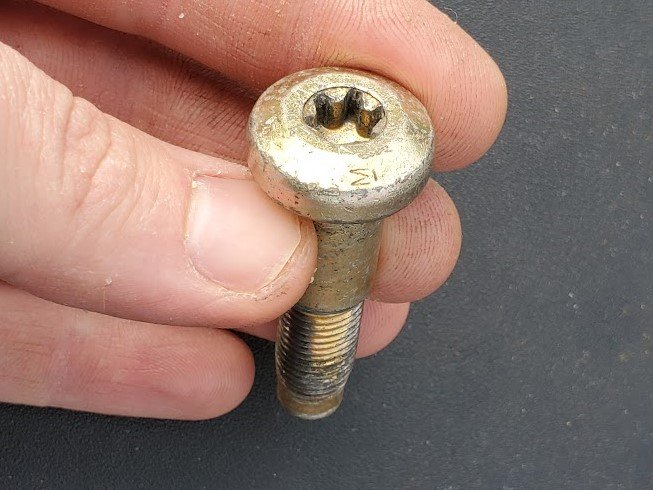

-
1989 MJ Turn Signal Sound Volume
Salvagedcircuit replied to AMCyaLater's topic in MJ Tech: Modification and Repairs
My turn signal sound has recently become quieter too. I have never discovered why. I purchased a new flasher from littelfuse and it flashes quicker but just as quiet. Mine flasher also causes the radio LCD backlight to slightly dim when flashing. -
Lookin good!
-
Pin holes in floor
Salvagedcircuit replied to acfortier's topic in MJ Tech: Modification and Repairs
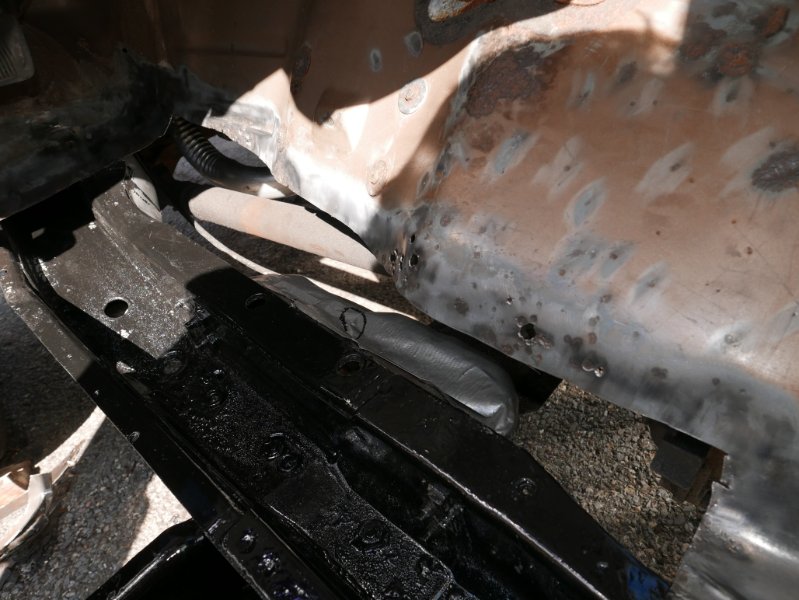
I'd definitely remove as much of the original seam sealer on the bottom of the cab as you can. On mine, it seemed like they seam sealed before painting and there was rot hiding underneath. A cup wire wheel on a grinder makes removal a breeze. wear goggles and a mask. protect your glass with cardboard or newspaper so wire wheel strands don't scratch / embed into your glass. A flat 1.5in razor scraper also works well. It is slower but makes a more controlled mess. -
Awesome job! That is the correct solution
-
That's an awesome truck. Excellent score!
-
Congrats on the score!
-
Definitely a maaco paint job. Painted right over the trim and handles. Looks like the seller did little maintenance to sell it. At 59k miles though, dang it's a keeper.
-
Pin holes in floor
Salvagedcircuit replied to acfortier's topic in MJ Tech: Modification and Repairs
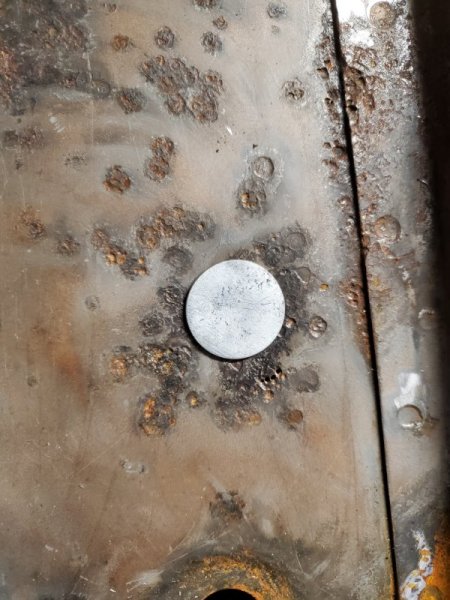
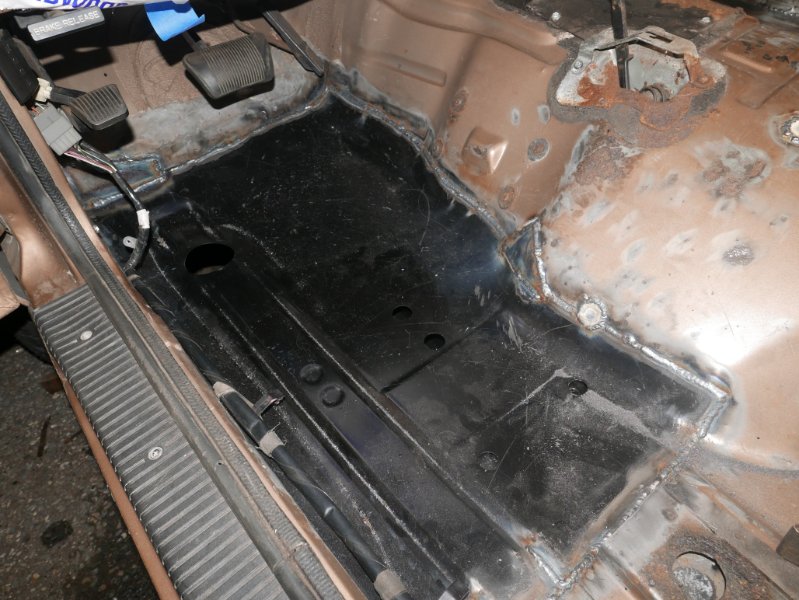
With a grouping of small holes, I would either cut it out and patch it with new metal or widen the hole with a punch and use a elevator bolt as a plug, then weld it on up. For very tiny holes I wire wheeled, cleaned the spot with alcohol, applied the por15 prep, applied por15 then covered in 1k seam sealer.
-
Something to note, every copart listing shows the full VIN in one photo. They just obfuscate the vin number in text.
-
1990 Comanche Eliminator
Salvagedcircuit replied to pizzaman09's topic in Member Projects: Your Comanches
Neat! Thinking about doing the same. Any reason why you chose red over clear? Red should be more optimized but hey who knows maybe the clear one has more lumen output. -
Chiming in here on behalf of all past and present HO owners: I've been eyeing a bored throttle body and doing the IAT relocation, but I need to grab a spare throttle body first before having it bored. I don't want to have my vehicle down for a bit. I'd also love to record some data from my renix monitor before and after the swap to see if I can quantify the difference. If I can push 200hp 200 ft-lbs and 25mpg, that's goals right there!
-
Fastenal used to provide cheap and relatively easy freight shipping (if you had experienced fastenal workers). Then fastenal decided to split their service in half in one of the stupidest moves of the century, and now they no longer deliver coast to coast. Greyhound also used to transport goods, but I don't know if they still do.
-
Hehehe. Reminds me of what happened to all those twenty Comanche's given away in the pennzoil contest ~30 years ago. I wonder if they ever gave them all out lol. That would be funny if Shell is sitting on a pile of comanche's in storage somewhere. One can dream right
-
I see the Great Pumpkin and I raise a painted photo of Linus and Sally just before a certain someone's called a blockhead One of my mom's excellent creations in ~2021

-
Absolutely! I was able to source the tubing I needed to fix my hacked up rollbar. It's 3in OD seamless driveshaft tube. it's 0.95in thick. I got the tube in and it matched the OD of the rollbar exactly. I should be welding it up soon when I get my welding tank refilled.
-
Good on you! They will definitely remember you as crazy uncle Pete
-
Replacement jute/carpet padding
Salvagedcircuit replied to acfortier's topic in MJ Tech: Modification and Repairs
I might have my new juke pad left over. I just have to find it. I installed a vinyl floor from ACC carpets and they include juke padding with every kind of flooring they sell regardless if you want it or not. I never installed it. I went with a closed cell foam instead.