


ghetdjc320
-
Posts
5079 -
Joined
-
Last visited
-
Days Won
1
Content Type
Profiles
Forums
Gallery
Everything posted by ghetdjc320
-

AX-15 upgrades/other transmissions
ghetdjc320 replied to speeding_infraction's topic in MJ Tech: Modification and Repairs
From my research and some first hand experience: The stock gearset is plenty strong. If you need more torque handling the 2 main upgrades are the thrust washer and bearing retainer plate. 500ish HP an TQ have been run fairly reliably with those mods. If you need to speed shift and are mashing gears, then some upgraded shift forks are in order. There was a revision to the 5th gear synchro hub in later years. Main shafts have been broken occasionally and cryo treating may help but only under severe and repeated abuse. Keep in mind that most of the “upgrades” are made for the Toyota R series and are compatible with the AX15. -
It shouldn’t make much of a difference. Sequential injection is a bit smoother at idle but untimed batch injection works just fine on many engines. Not likely to be the root cause IMO but would be good to get that fixed at some point.
-
Project “Tomahawk”
ghetdjc320 replied to ghetdjc320's topic in MJ Hardcore Tech: Epic Journeys to Greatness
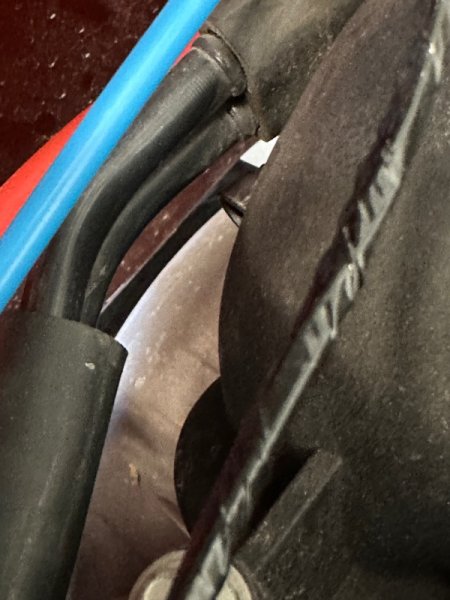
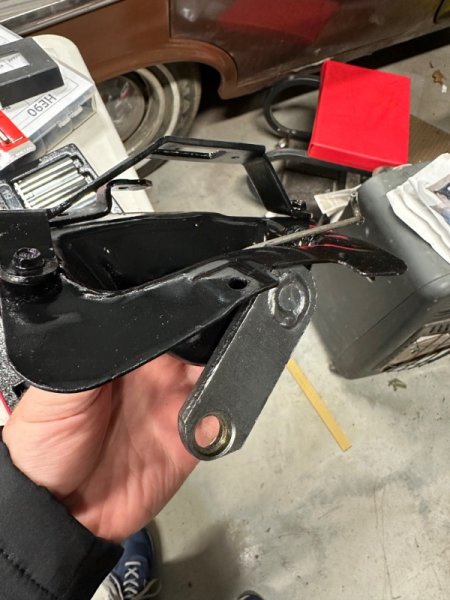
Latest updates: was able to move the engine forward about 1/2” to get adequate firewall clearance which was a big win. Started work on the tcase linkage. I’m running the Novak cable linkage on the np242. Disassembled the original transfer case shifter to clean and restore it. Works very smoothly now. Also unpacked my 97 front grill. 97+ fenders in the way as well.

-
I think it’s the best setup on the market for the ax15. Really nice that you can use all stock Jeep parts up to the pressure plate.
-
If you happen to have an oscilating tool, grab a stiff caulk cutting blade for it. It works great to remove the factory seam sealer so you can get down to clean metal and find any hidden rust on that toe-floor panel seam.
-
BORA will make them in steel or aluminum. They are highly regarded. The link above is for the BORA adapters https://www.motorsport-tech.com/bora.html
-
Most definitely. I'd personally recommend a 140A-180A mig welder that can run .025 or .023 mig wire as that will work better for thin sheet metal. That being said, ive used plenty of 100a flux core welder for projects (including floor pans) when I didn't have access to my welding setup. Here is a link to dash removal:
-
Project “Tomahawk”
ghetdjc320 replied to ghetdjc320's topic in MJ Hardcore Tech: Epic Journeys to Greatness
In regards to sound dampening and insulation: I've been quite averse to laying Dynamat or any other similar butyl-based material on the actual floor pans due to a bad experiences in my last MJ. In retrospect, most of the negativity actually came from having the "mass backing" on my carpet. That junk crumbled into crumb rubber in every nook and cranny. For this build I lined the firewall with dynamat followed by 1/2 dynaliner. The roof and back of the cab is getting dynamat followed by 1/4" dynaliner. I used medium bodied 3m pillar foam in strategic areas between the structure and sheet metal skin. The doors are geting dynamatted inside along with a 12x12" 1/2" dynaliner behind the speaker to help reduce resonance. Instead of the factory water shield, I'm using 1/8 dynaliner to further insulate the doors and deaden the sound. The trans tunnel and possibly the floor will get dynamat followed by 3/8 dynapad which is a very heavy sound absorber and and thermal insulator. I'm still debating using some rubberized undercoating on top of the hard raptor liner as the rubberized stuff does much better at preventing chips from road debris. -
Project “Tomahawk”
ghetdjc320 replied to ghetdjc320's topic in MJ Hardcore Tech: Epic Journeys to Greatness
Found a company online that repairs and refurbishes the old overhead console electronics. Just sent them my 1991 XJ sunroof console to get worked on and found a clean factory harness for it as well. More interior/electrical updates coming soon. -
I'd also suggest taking out your dash and firewall padding. You'll likely find a ton of rust hiding under the seam sealer in the toe pans. Get yourself a spot weld cutter bit along with a sharp thin and sturdy chisel/scraper. Makes things a lot easier
-
Turbine Wheel Manufacture Differences
ghetdjc320 replied to H3ADBANG4L1F3's topic in MJ Tech: Modification and Repairs
Do we know if the finishes varied by manufacturing area? I’ve always seen machined spokes with a medium grey background but I know there were some that were all painted -
Project “Tomahawk”
ghetdjc320 replied to ghetdjc320's topic in MJ Hardcore Tech: Epic Journeys to Greatness
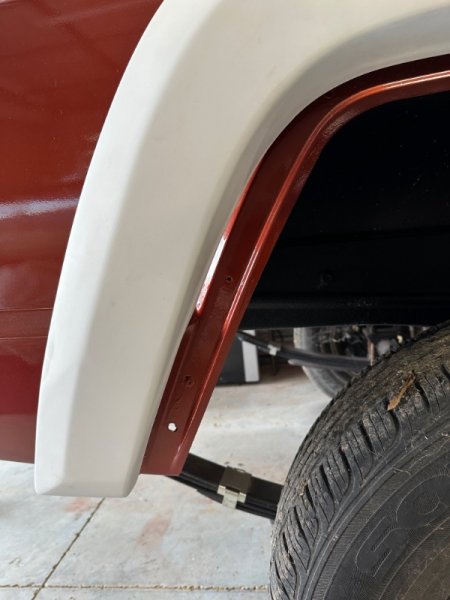
Got a chance to meet up with a fellow Comanche builder today @Comanche SS First time I met anyone from the club. Great guy . We got a bit of a game plan for getting this project finished up though it will still take probably about another year. Will be nice to get this one completed though. here are some build updates: notch flares came in. Planning to focus on electrical and interior during the time I have left. The painless harness is great but requires a good bit of customizing and of course planning ahead for any extra accessories. I measured out for tire size and am planning on running metric 34’s (285/75/17) which have actual dimensions of 33.9” and 11.2 width on a 8” wheel. The notch flares really open up the leading and trailing edges of the rear wheel well in an MJ but don’t raise the opening by more than about an inch. Shouldn’t be necessary to separate the pinch weld/seam for the bed wheel wells.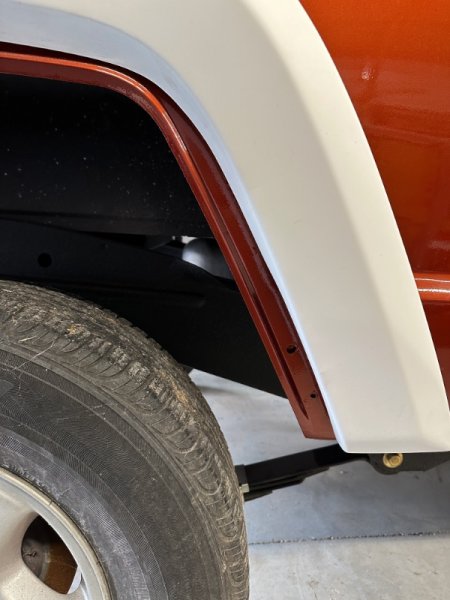

-
couple of the MJ coins on ebay
ghetdjc320 replied to Pete M's topic in Craigslist/eBay... i.e. Not Your Stuff
The descriptions are consistent with the one I got also. That does appear to be the original packaging. Was kind of a crinkly thin plastic wrapper -
Turbine Wheel Manufacture Differences
ghetdjc320 replied to H3ADBANG4L1F3's topic in MJ Tech: Modification and Repairs
I’ve never seen an Italian one either. All the ones I’ve ever seen were made in usa -
87 Chief - West Chester, PA - $8500
ghetdjc320 replied to NHMJXJ's topic in Craigslist/eBay... i.e. Not Your Stuff
Now that's a good restoration candidate! Power doors, D44, full skid package, manual, sports bar, cargo lamp etc. -
No-weld floor pan replacement
ghetdjc320 replied to Elwiscon's topic in MJ Tech: Modification and Repairs
The combination of both is perfection. The factory left those seems exposed on the bottom trapping water in the butt joint. The panel bond works perfect along with welding to get the sheer strength plus the sealing needed for that area. I’ve used the technique mentioned by @89MJ with great success. Using a copper backing (I use copper tubing hammered into a flat plate) to act as a heat sink and a backer to fill plug welds. -
No-weld floor pan replacement
ghetdjc320 replied to Elwiscon's topic in MJ Tech: Modification and Repairs
Most body shops i've seen wouldn't touch something structural. They'd probably cut out patches. -
No-weld floor pan replacement
ghetdjc320 replied to Elwiscon's topic in MJ Tech: Modification and Repairs
The actual spot welder doesn't cost much, though I don't know where you could find those big electrodes to fit all the joints. Anyone have a source? -
No-weld floor pan replacement
ghetdjc320 replied to Elwiscon's topic in MJ Tech: Modification and Repairs
It sure is great stuff. If jeep had used it back when they were building these Comanches and Cherokees we would have far fewer rust areas and leaks. It may be a good idea to run some sort of fastener all the way from the upper frame cap through the floor pan and into the lower frame support in the same area that the spot welds were done by the factory. I'm thinking rivets with a good rivet gun would work then maybe seam seal the back side with brushable seam sealer. -
No-weld floor pan replacement
ghetdjc320 replied to Elwiscon's topic in MJ Tech: Modification and Repairs
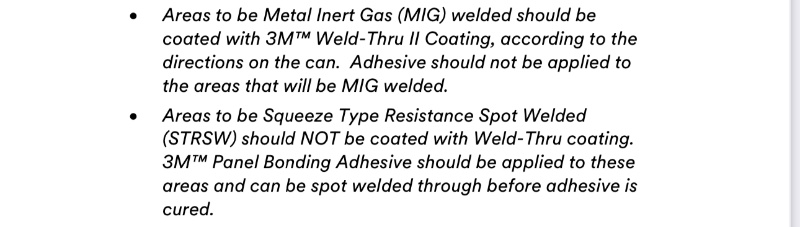
Your install looks great. Nice prep work . I would point out though, that panel bond is no substitute for spot welding. It’s meant to be used in conjunction with spot welding on structural areas. The Comanche cab essentially has 4 structural horizontal areas, the two rocker panel areas and the two floor braces which also support the bed frame. Using panel bond in conjunction with welding is an excellent technique which essentially seals the joint and prevents moisture from entering. As you pointed out, the original spot welds are very difficult to separate even 30 years later. Fused metal will be much stronger than a chemical bond in an accident. You don't want a "crumple" zone under your seating area . As per TDS below, spot welding through the uncured adhesive is a great technique that provides an awesome sealed bond. TDS: https://multimedia.3m.com/mws/media/738334O/3m-panel-bonding-adhesive-tds-08116.pdf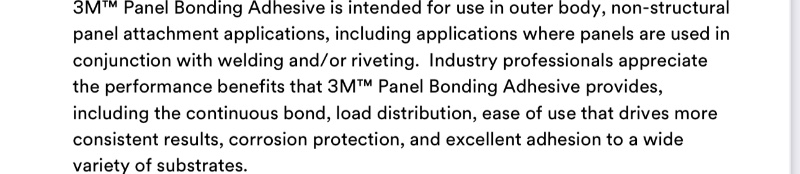


-
Project “Tomahawk”
ghetdjc320 replied to ghetdjc320's topic in MJ Hardcore Tech: Epic Journeys to Greatness
Thanks! I may end up keeping it here in long term storage, tightly sealed up for a later date. Just far too busy to get back to this and build it at the moment. Now I understand the whole “barn find” thing -
Project “Tomahawk”
ghetdjc320 replied to ghetdjc320's topic in MJ Hardcore Tech: Epic Journeys to Greatness
Trust me, I don’t want to -
Project “Tomahawk”
ghetdjc320 replied to ghetdjc320's topic in MJ Hardcore Tech: Epic Journeys to Greatness
Well, I’ve considered it thoroughly and my schedule is just not going to give me the time to finish this project. Regretfully, I’m considering passing the torch on to someone else who can finish it off. You guys have known me here for years so if someone in the club is interested just let me know. Headed back overseas in mid April. If you go through this thread you’ll see the level of work and quality of components that are on this thing. No expense was spared. -
Project “Tomahawk”
ghetdjc320 replied to ghetdjc320's topic in MJ Hardcore Tech: Epic Journeys to Greatness
Engine is about ready to come back out. Hopefully tomorrow -
Project “Tomahawk”
ghetdjc320 replied to ghetdjc320's topic in MJ Hardcore Tech: Epic Journeys to Greatness
Good to know, and I was wondering if he could build them without the logo. I’ll reach out to him today about that. Thanks