

drcomanche
-
Posts
445 -
Joined
-
Last visited
drcomanche's Achievements
")
Comanche Aficionado (4/11)
-
DrComanches Project "Frankenstein"
drcomanche replied to drcomanche's topic in MJ Hardcore Tech: Epic Journeys to Greatness
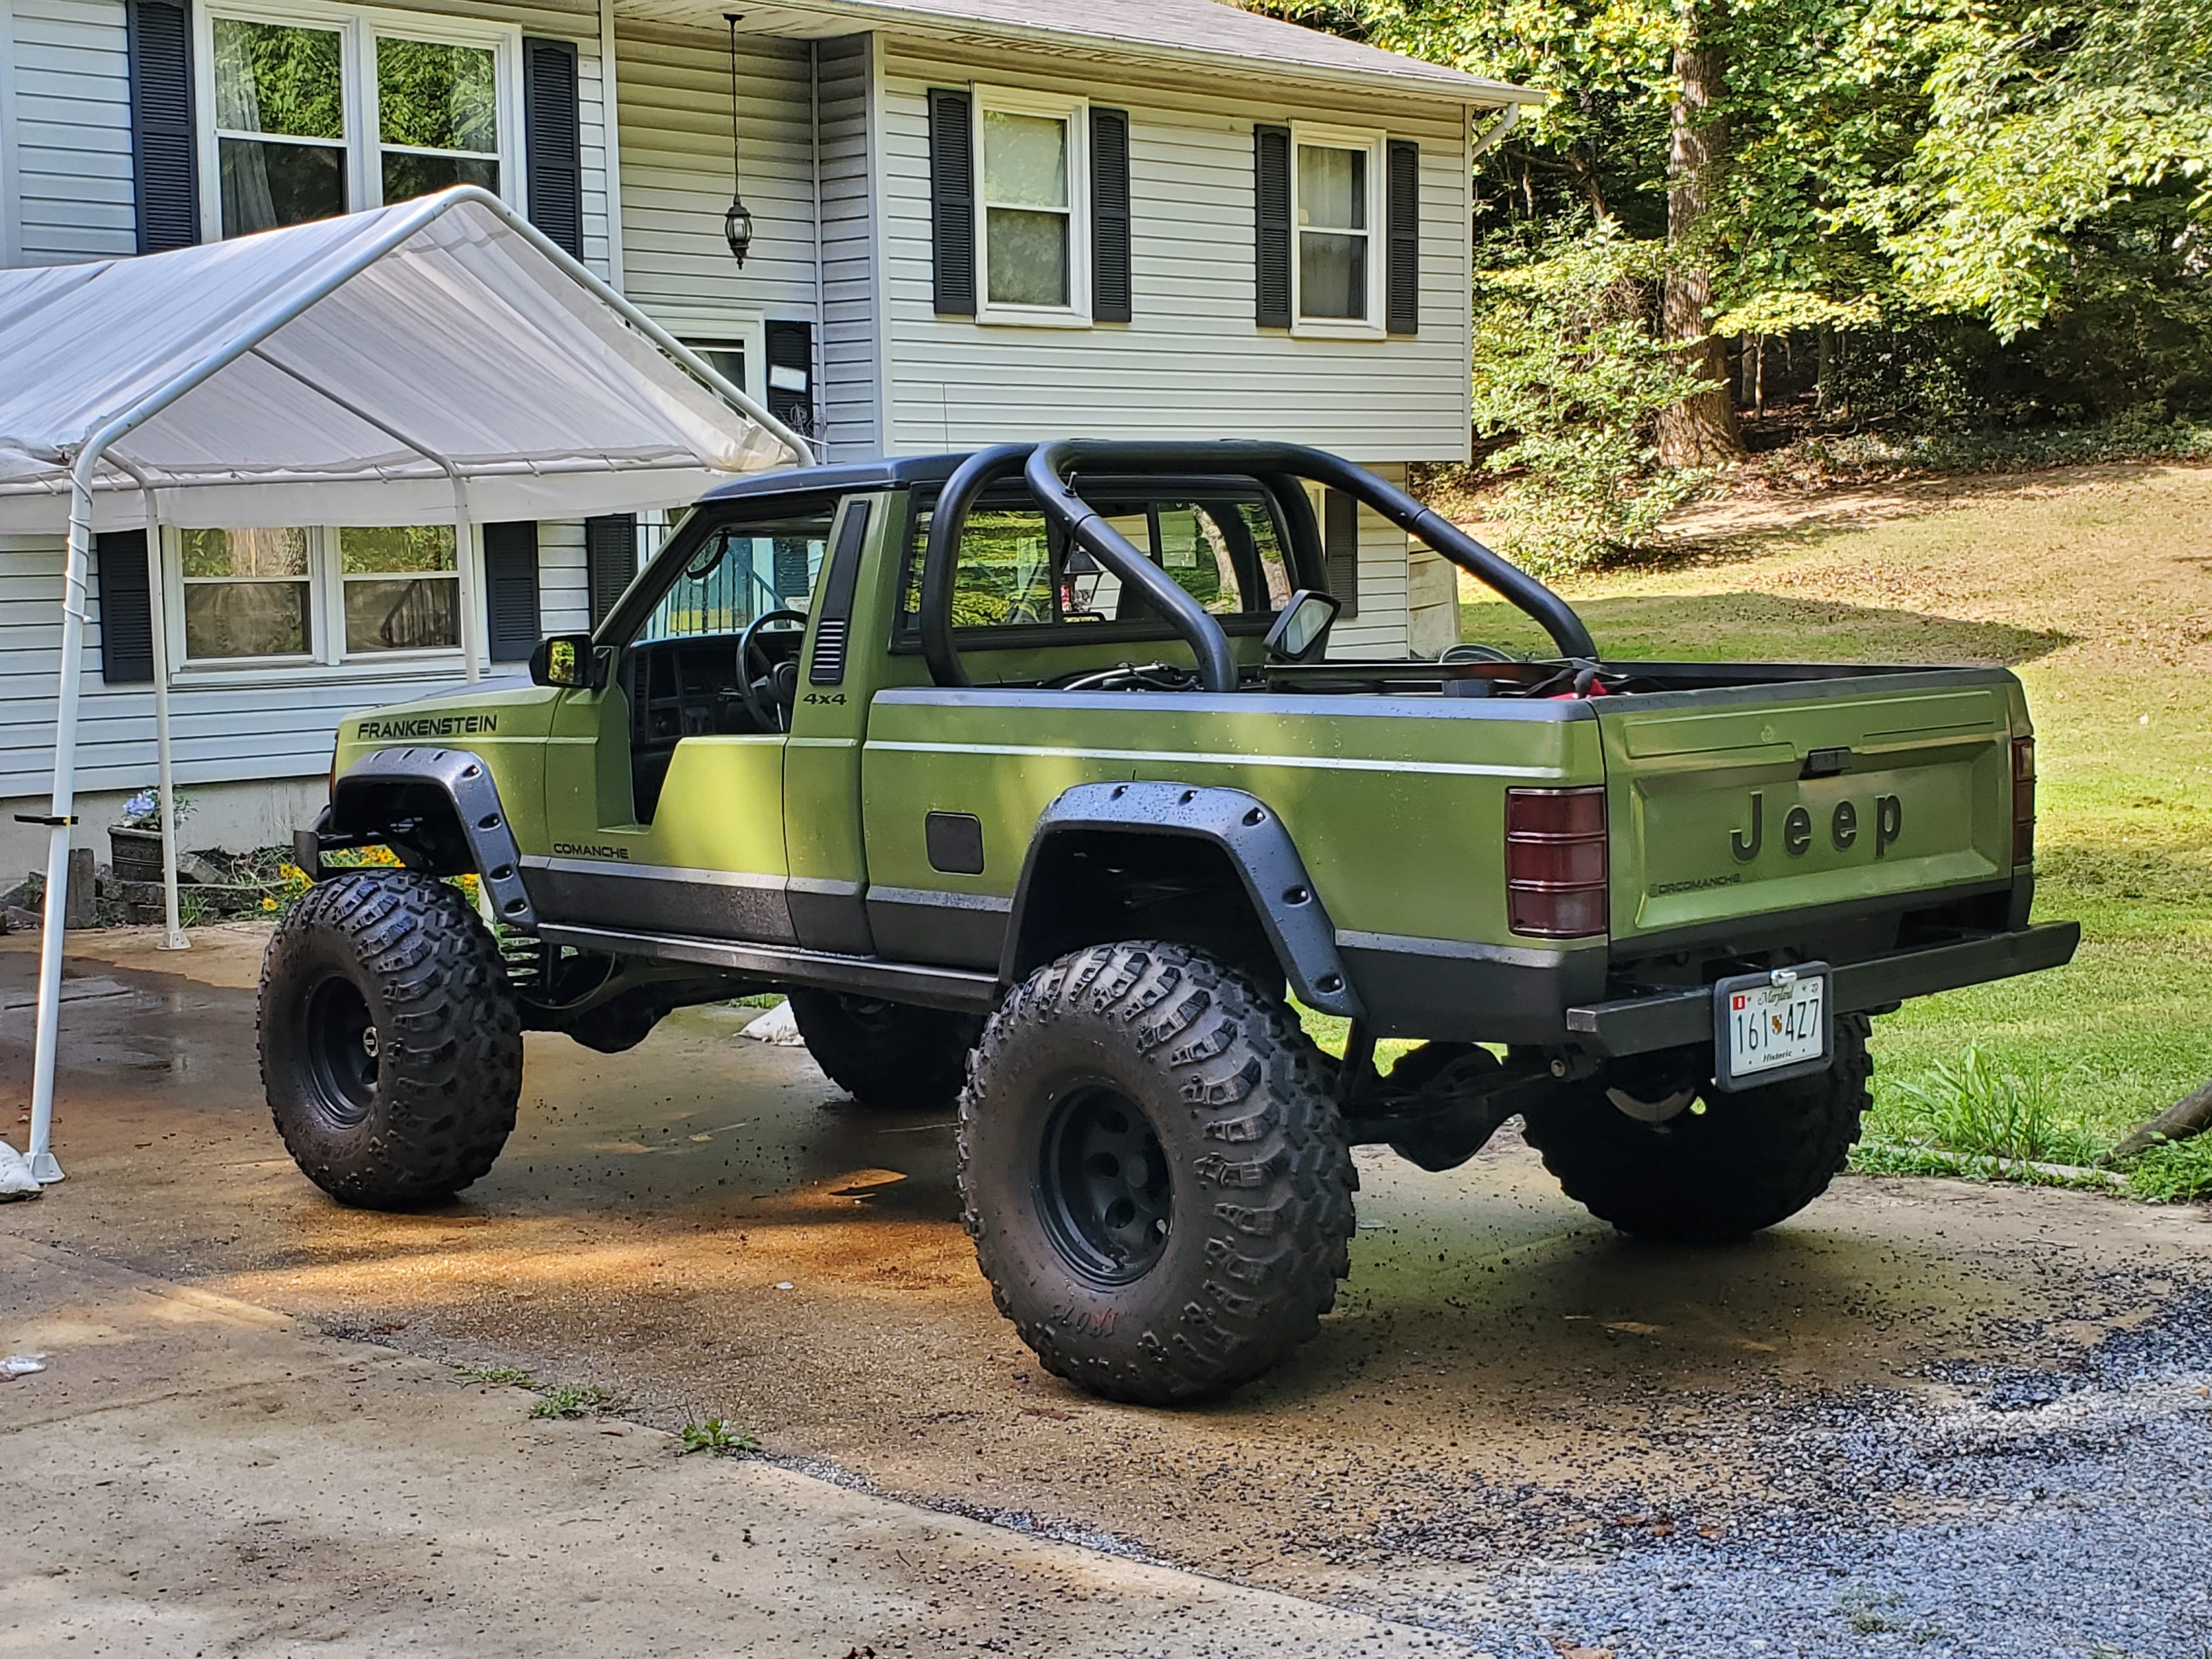
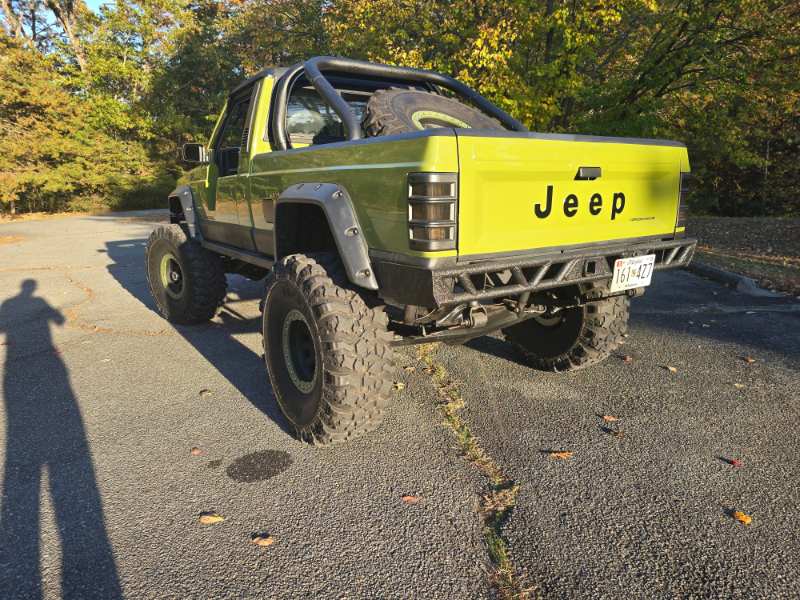
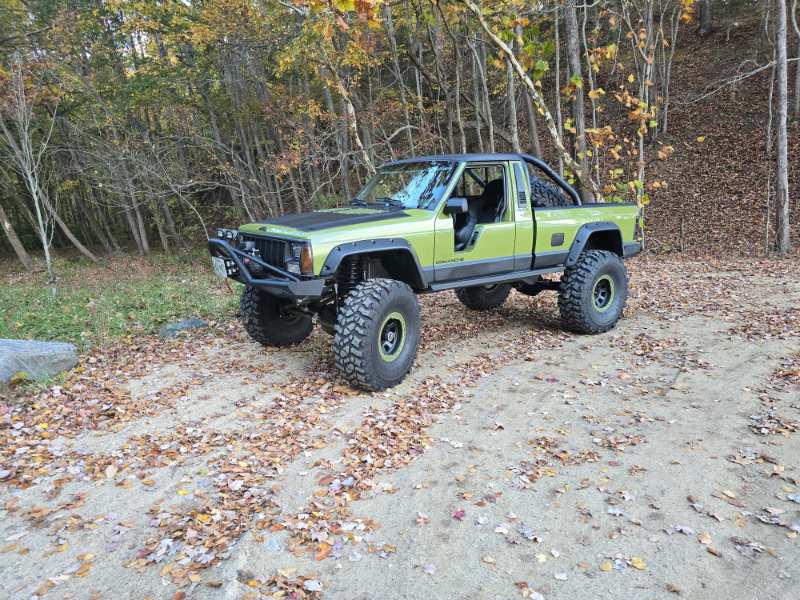
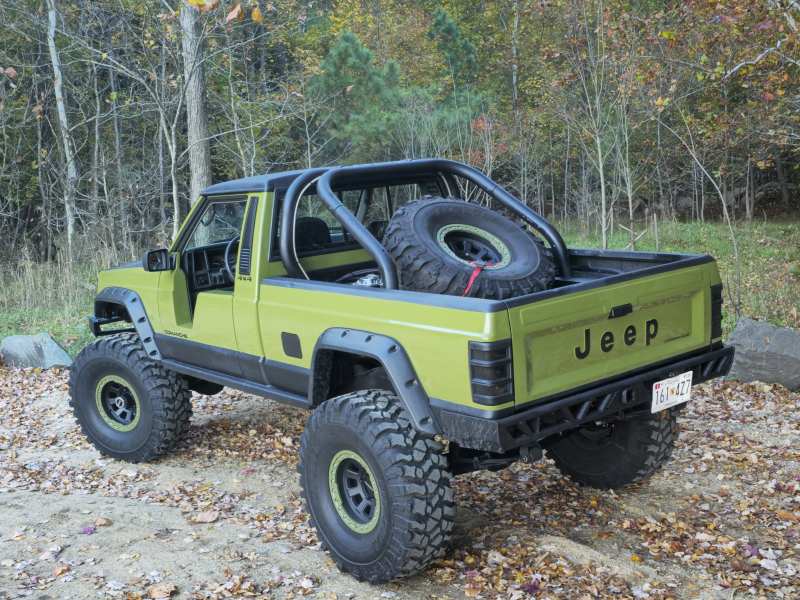
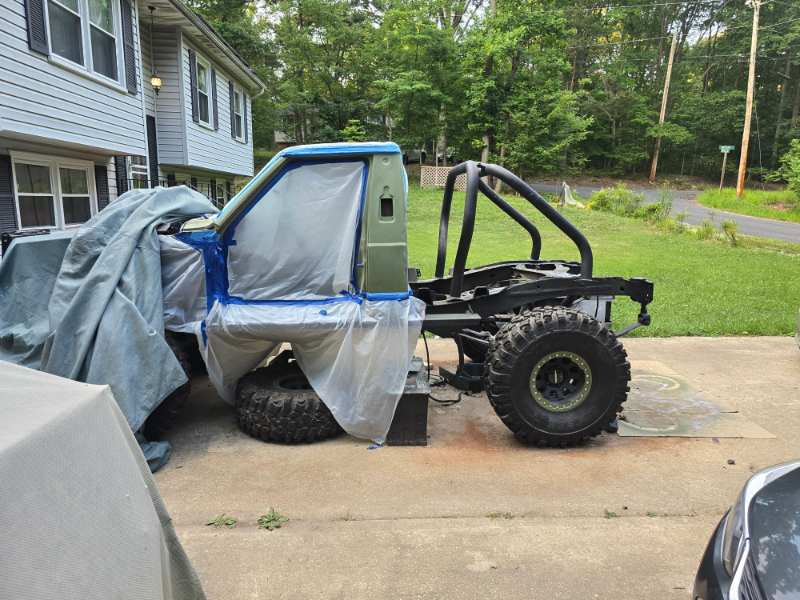
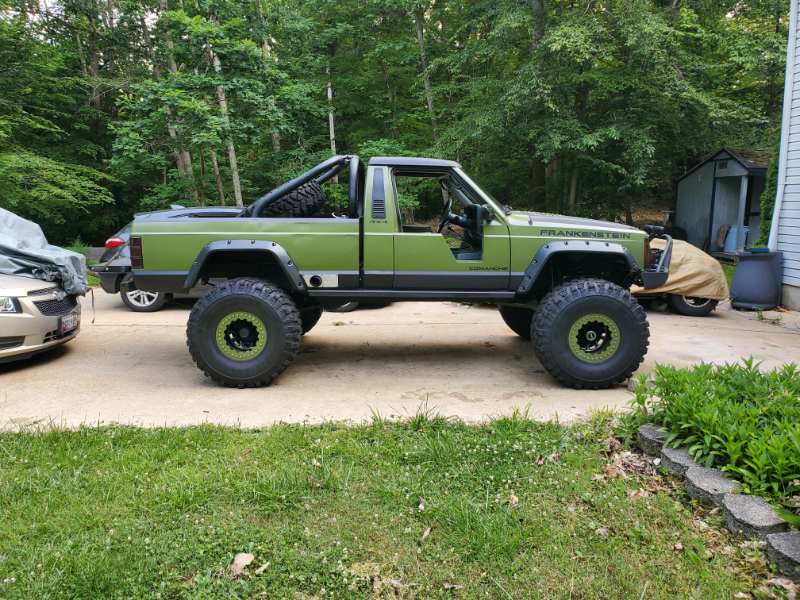
Sorry for the photo dump, but so much has happened.
-
DrComanches Project "Frankenstein"
drcomanche replied to drcomanche's topic in MJ Hardcore Tech: Epic Journeys to Greatness

-
DrComanches Project "Frankenstein"
drcomanche replied to drcomanche's topic in MJ Hardcore Tech: Epic Journeys to Greatness
-
DrComanches Project "Frankenstein"
drcomanche replied to drcomanche's topic in MJ Hardcore Tech: Epic Journeys to Greatness

-
DrComanches Project "Frankenstein"
drcomanche replied to drcomanche's topic in MJ Hardcore Tech: Epic Journeys to Greatness
-
DrComanches Project "Frankenstein"
drcomanche replied to drcomanche's topic in MJ Hardcore Tech: Epic Journeys to Greatness


-
DrComanches Project "Frankenstein"
drcomanche replied to drcomanche's topic in MJ Hardcore Tech: Epic Journeys to Greatness
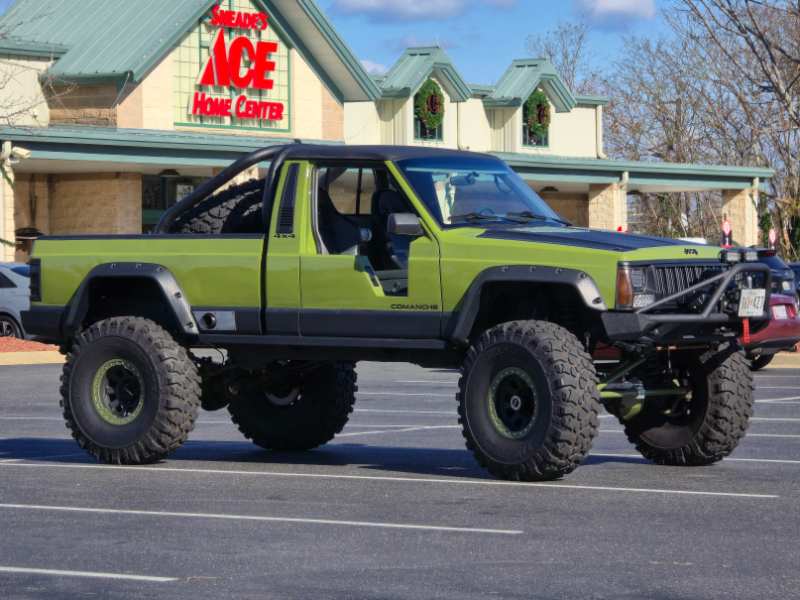
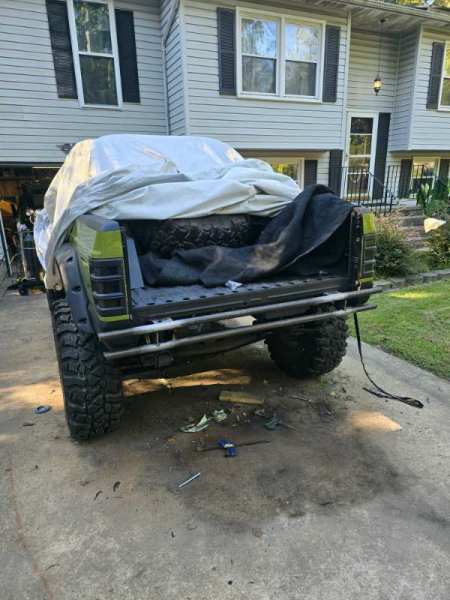
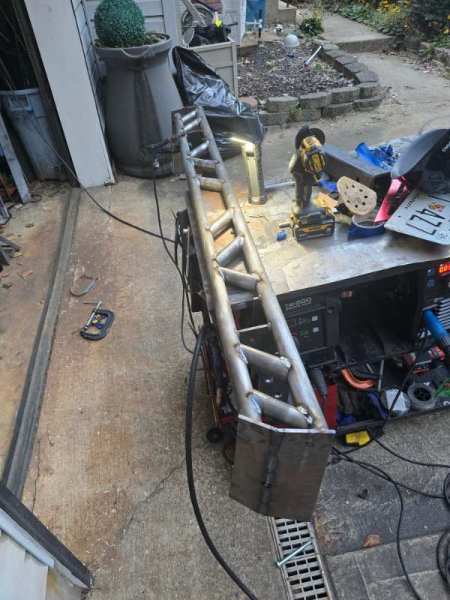
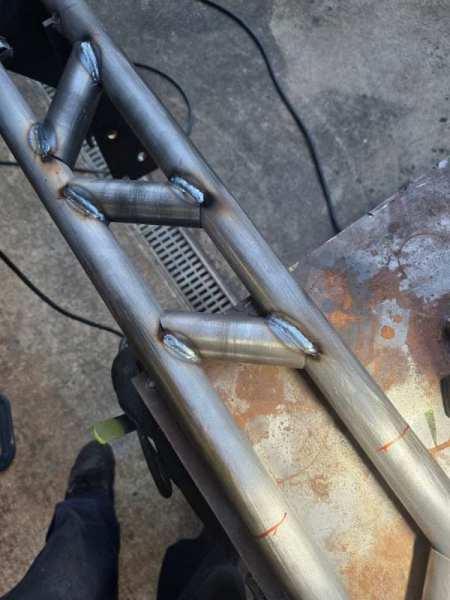
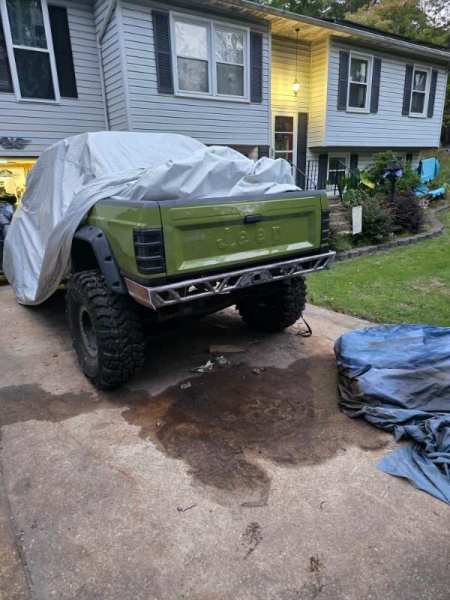
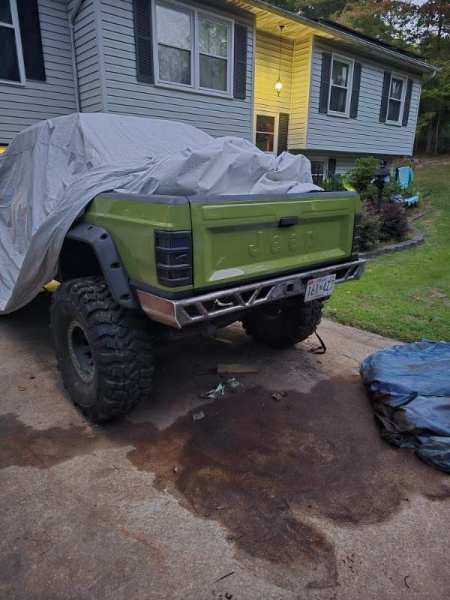
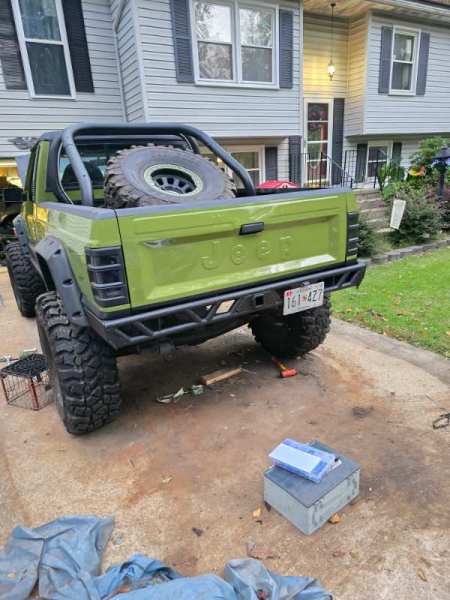
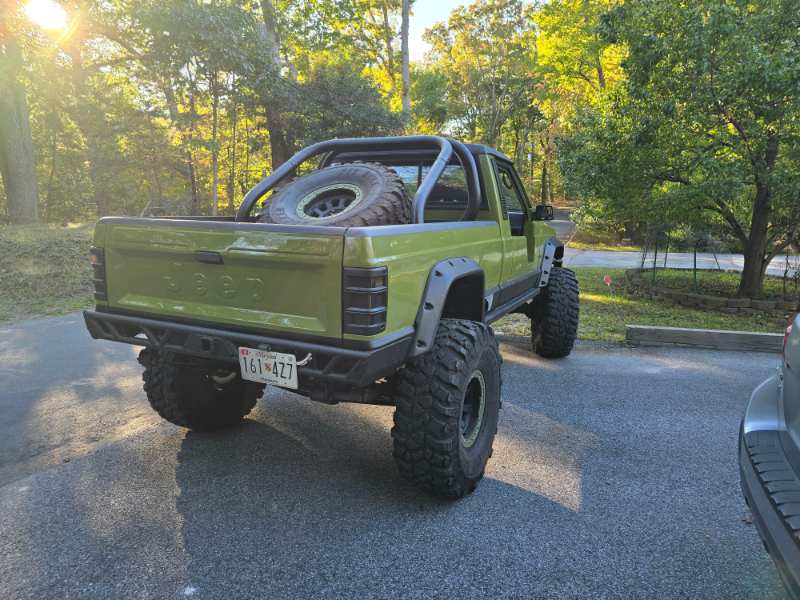
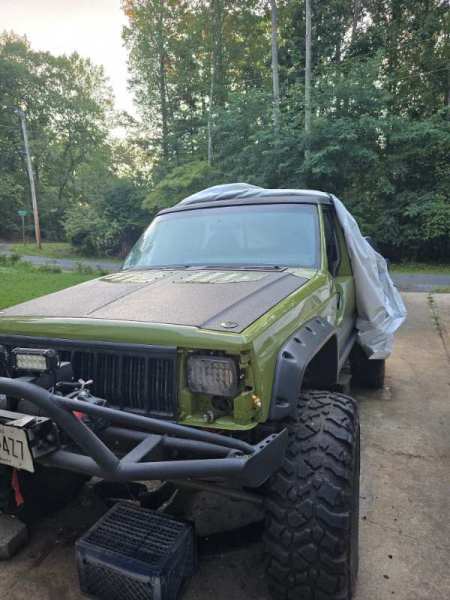
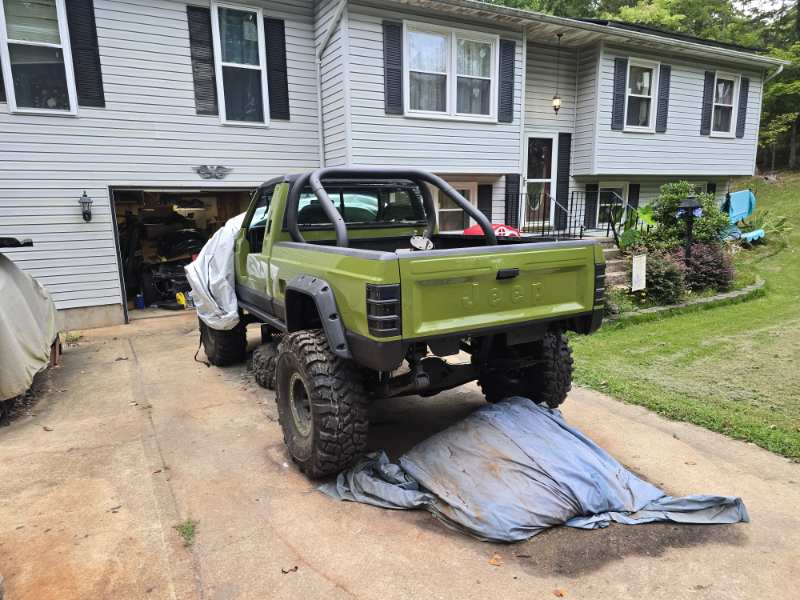
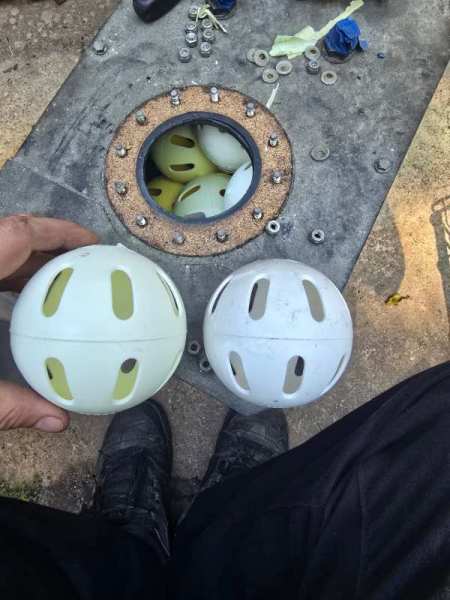
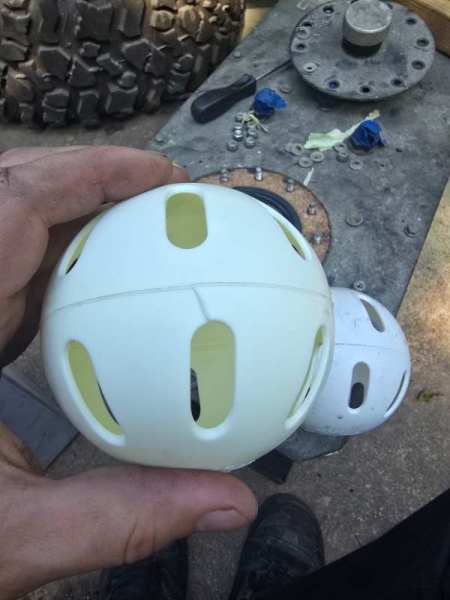
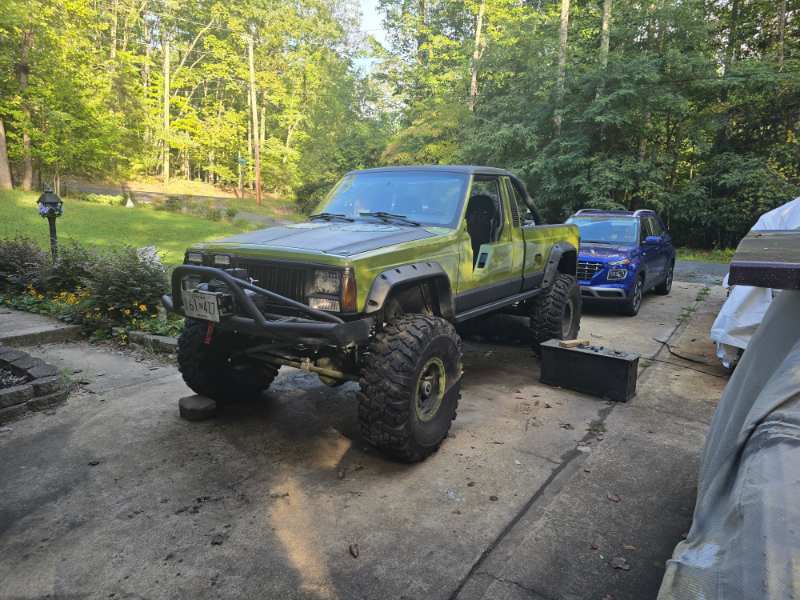
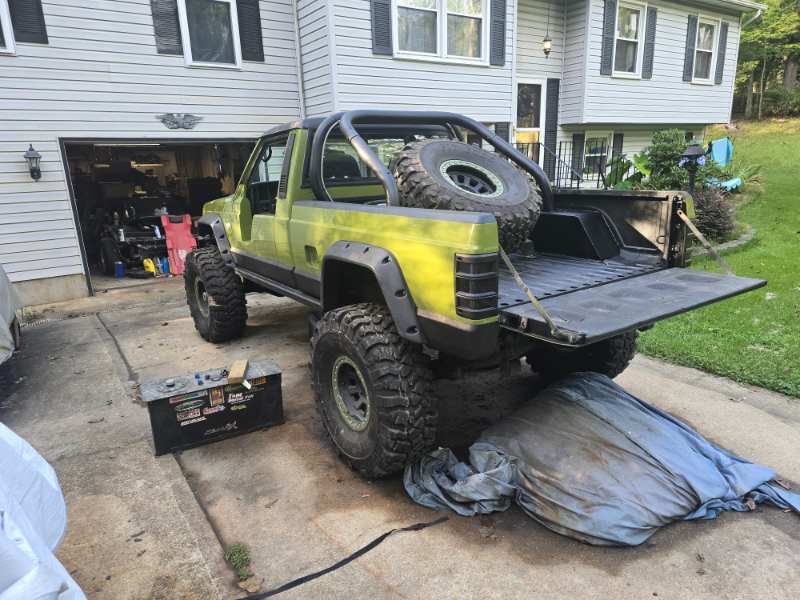
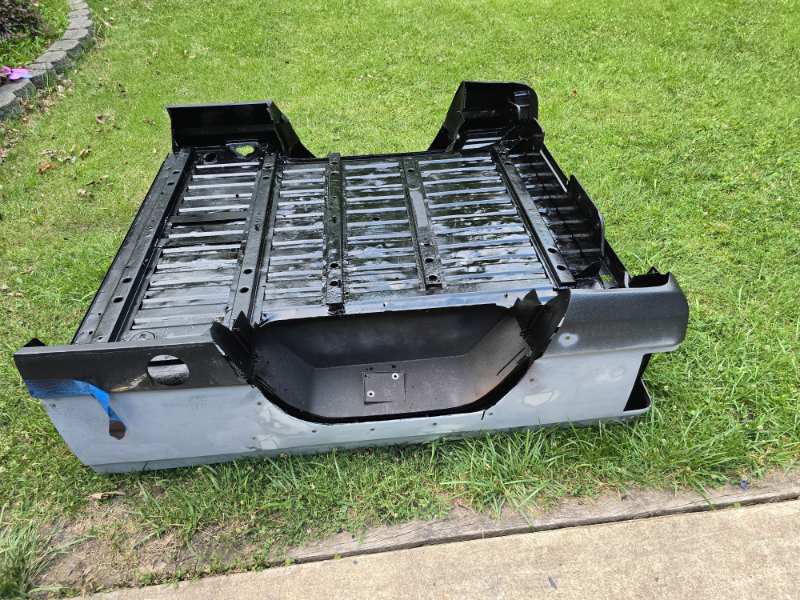
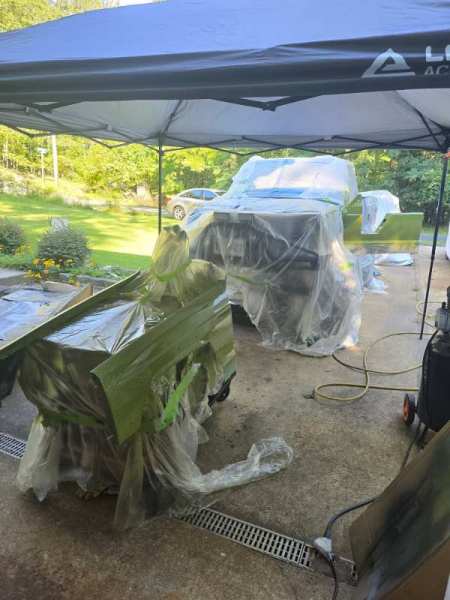
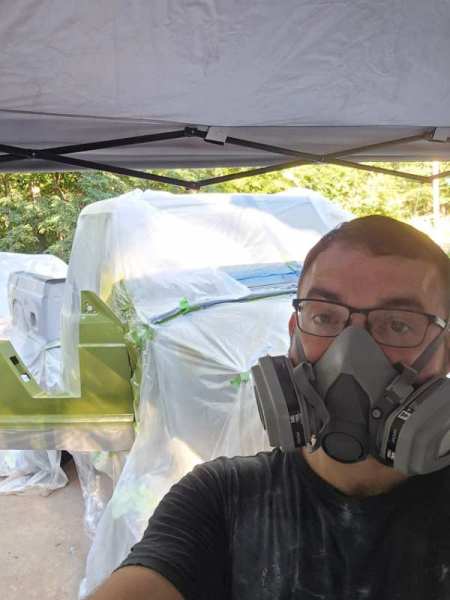
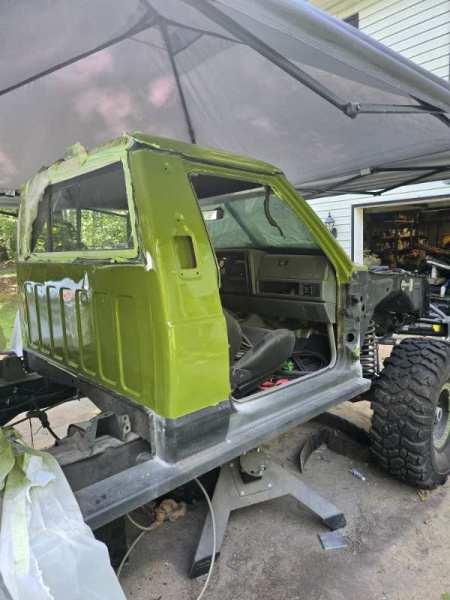
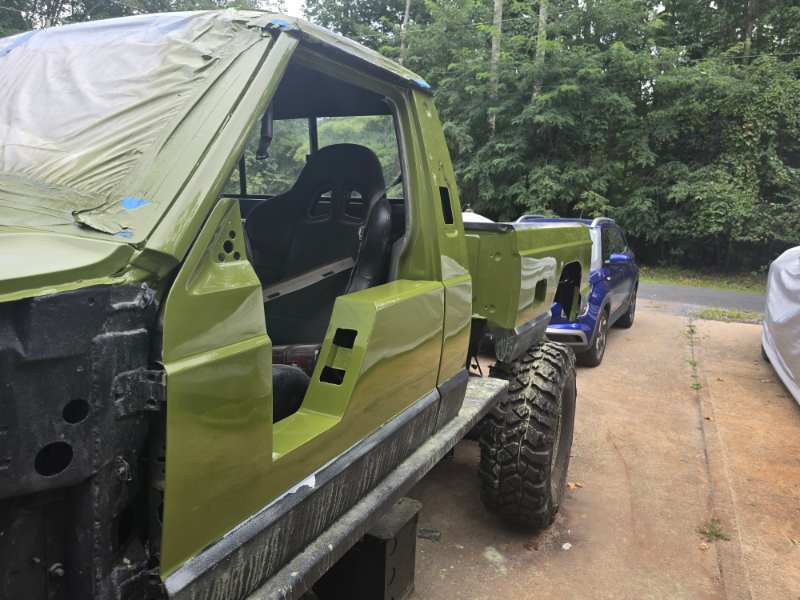
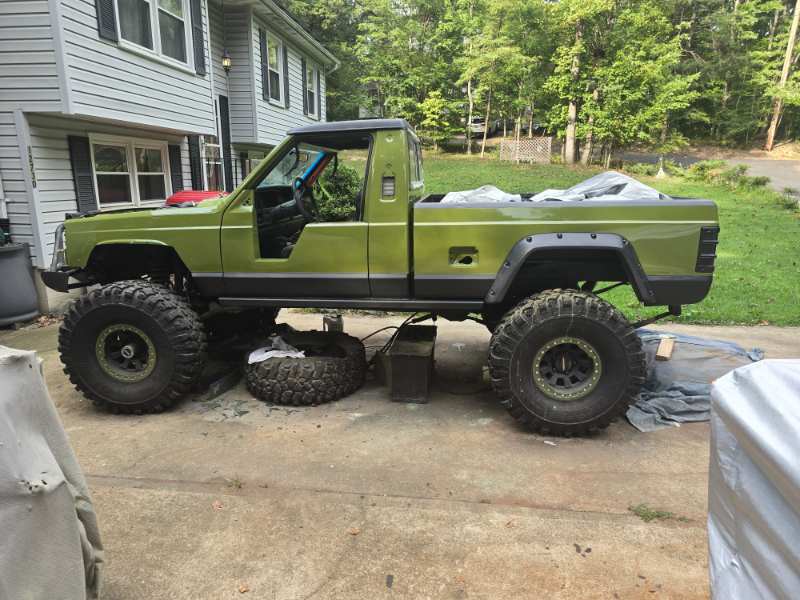
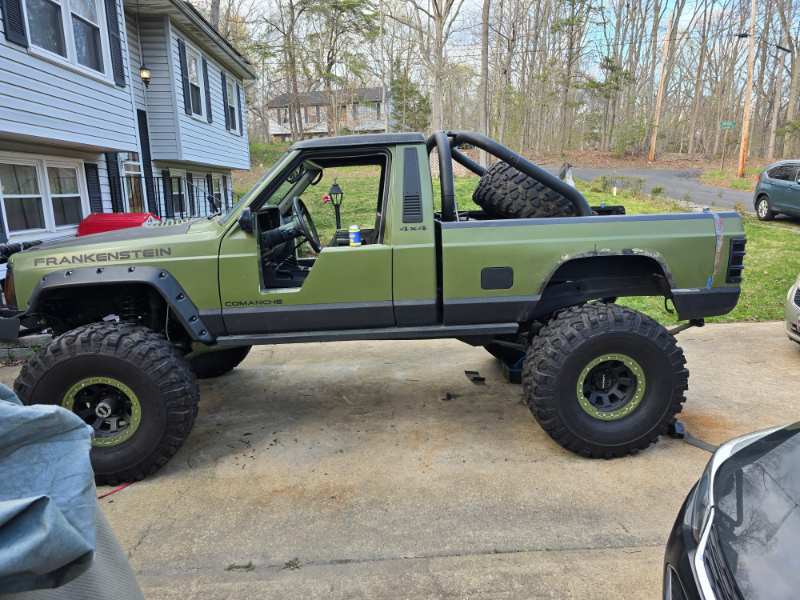
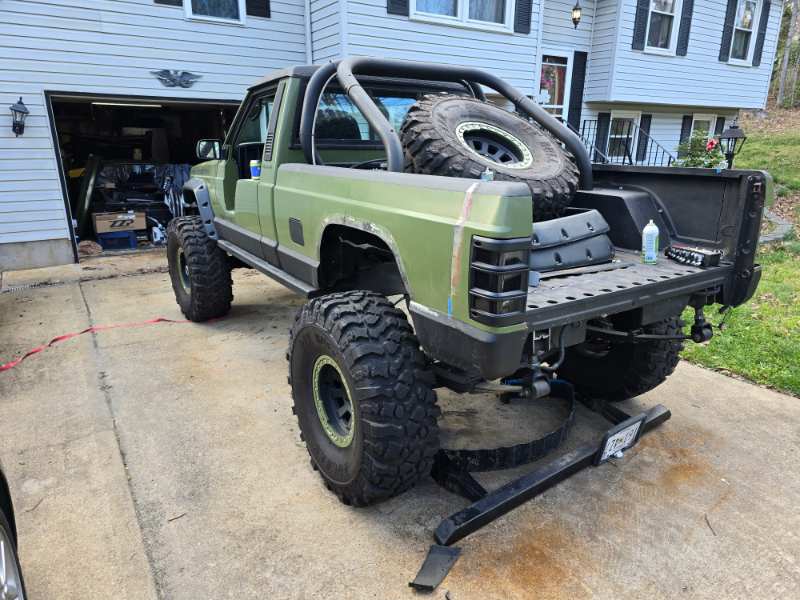
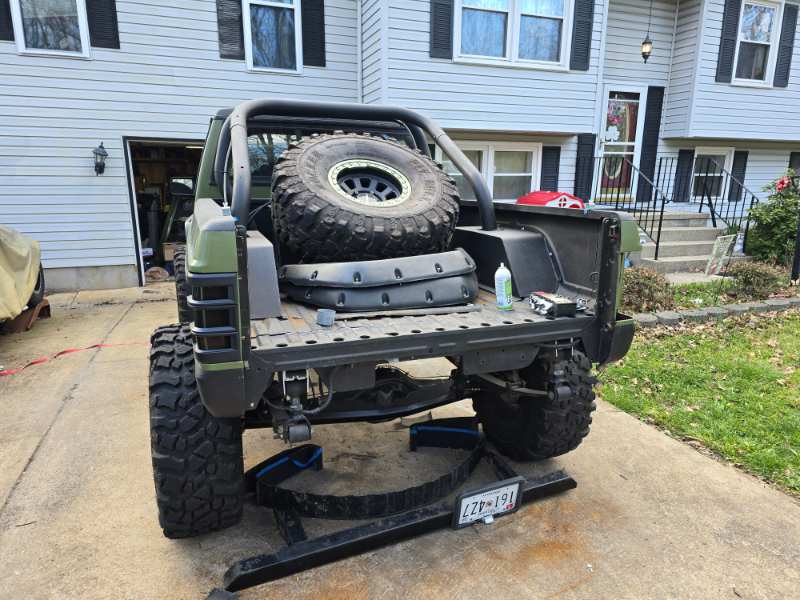
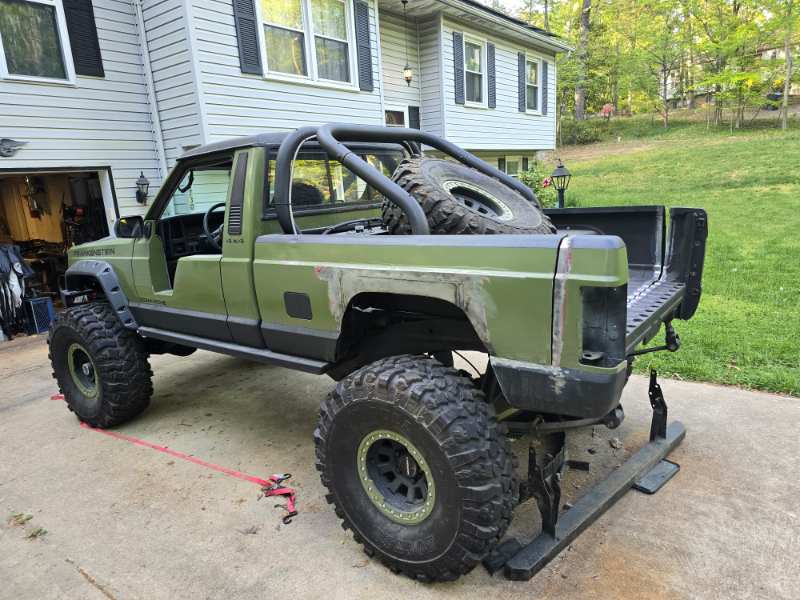
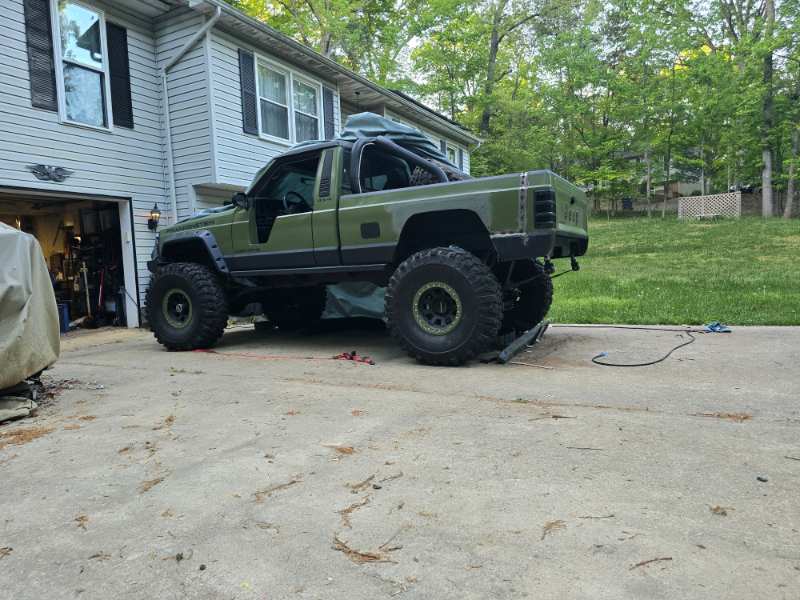
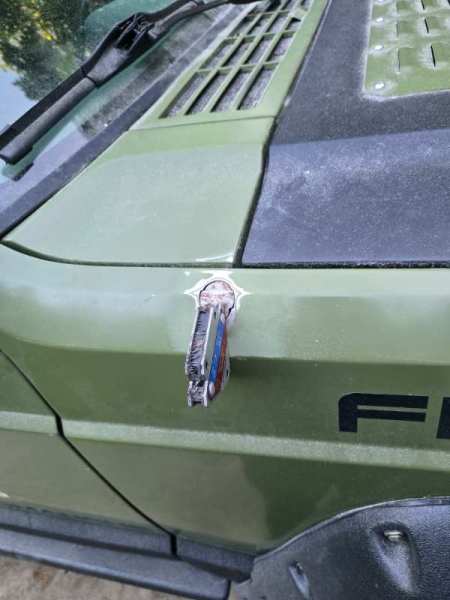
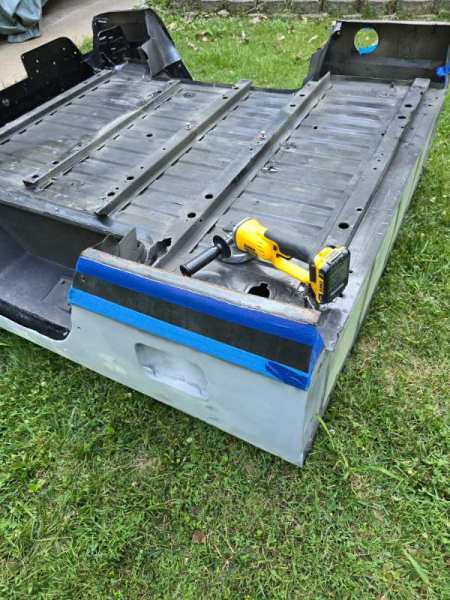
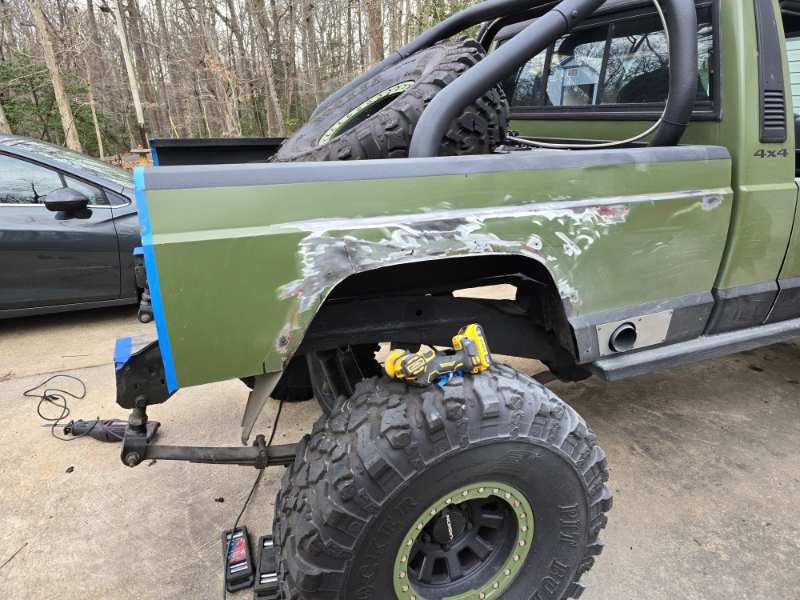
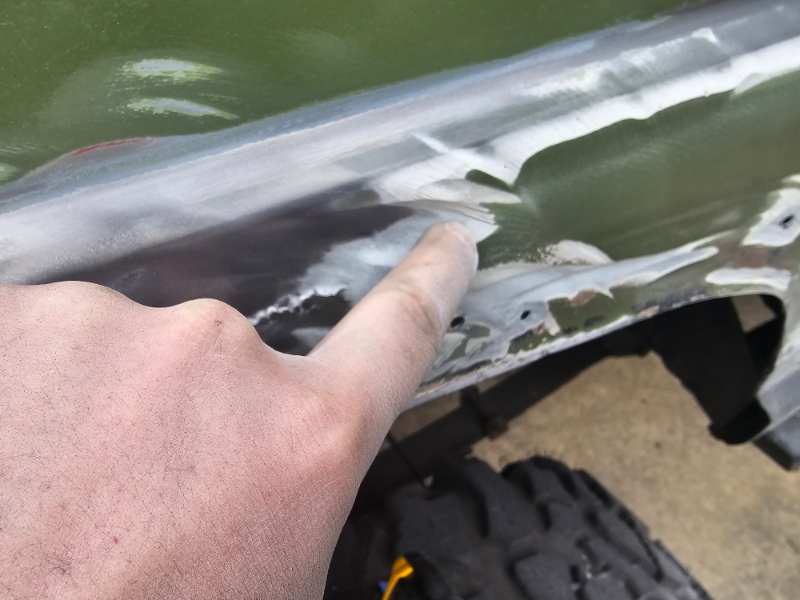
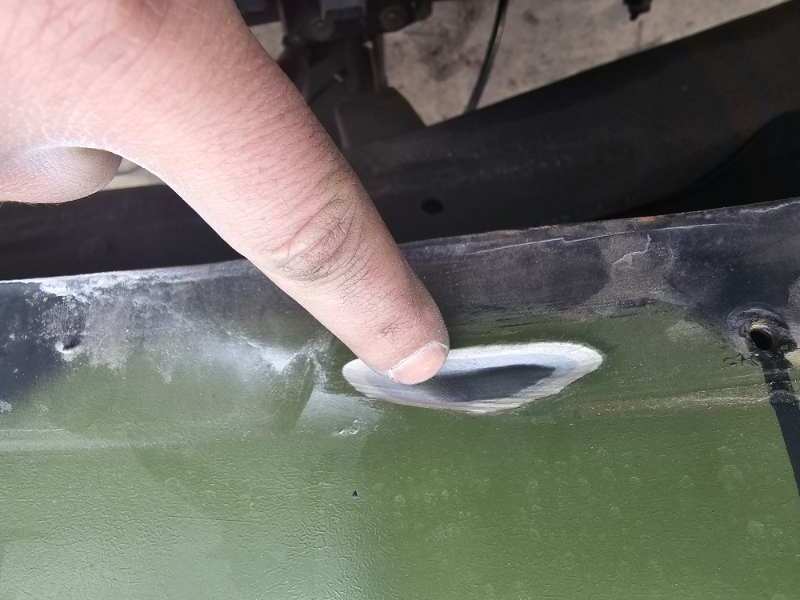
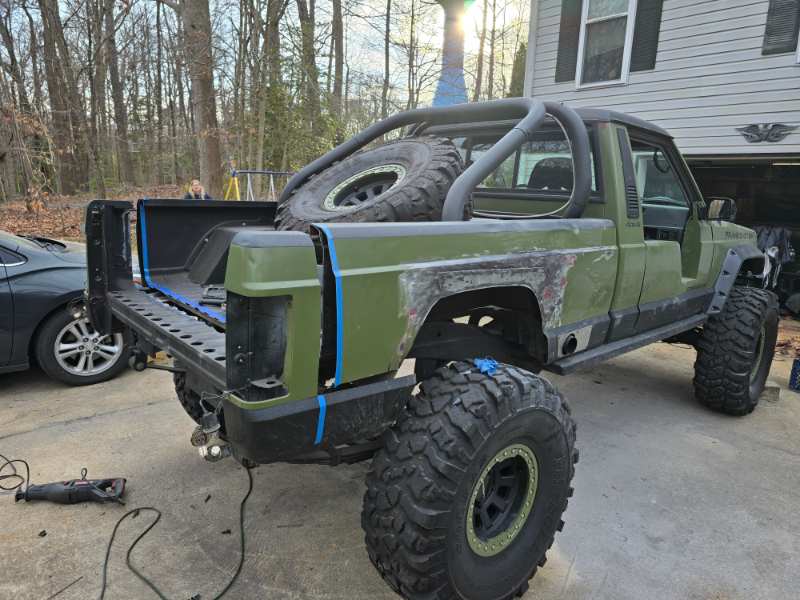
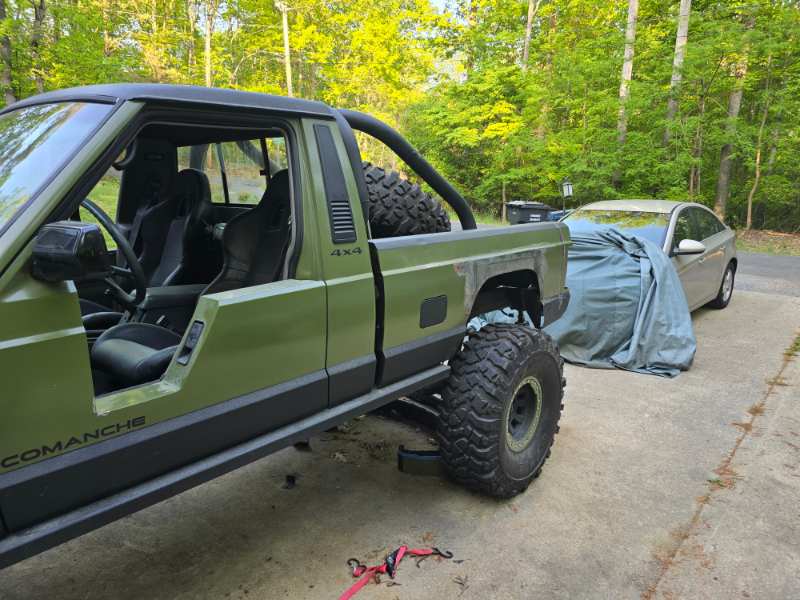
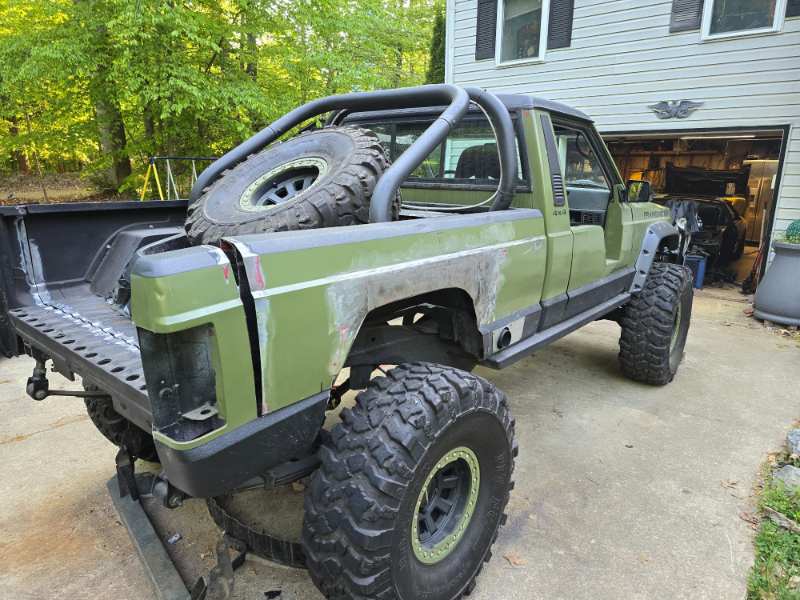
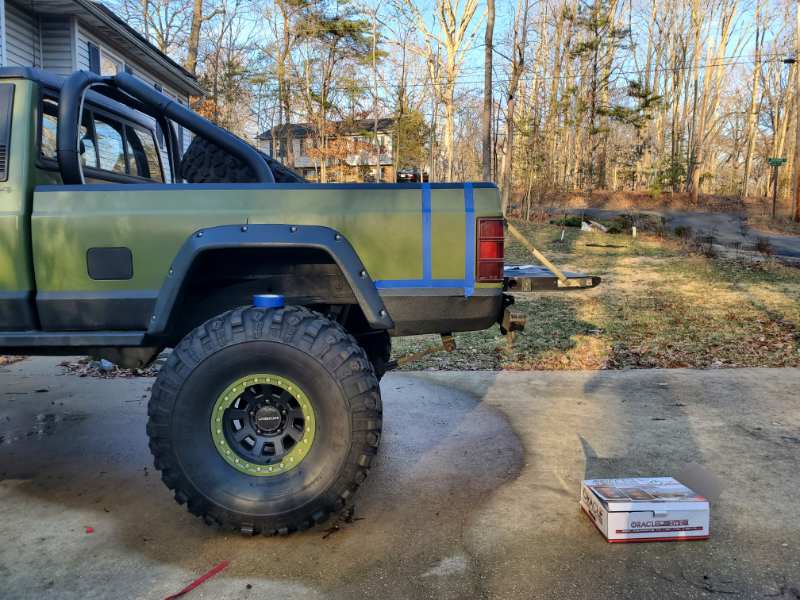
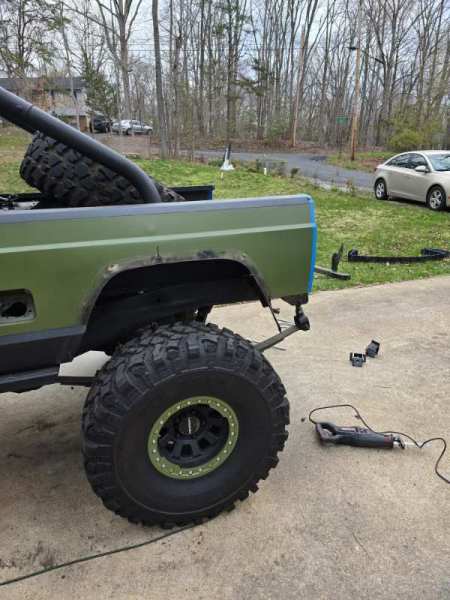
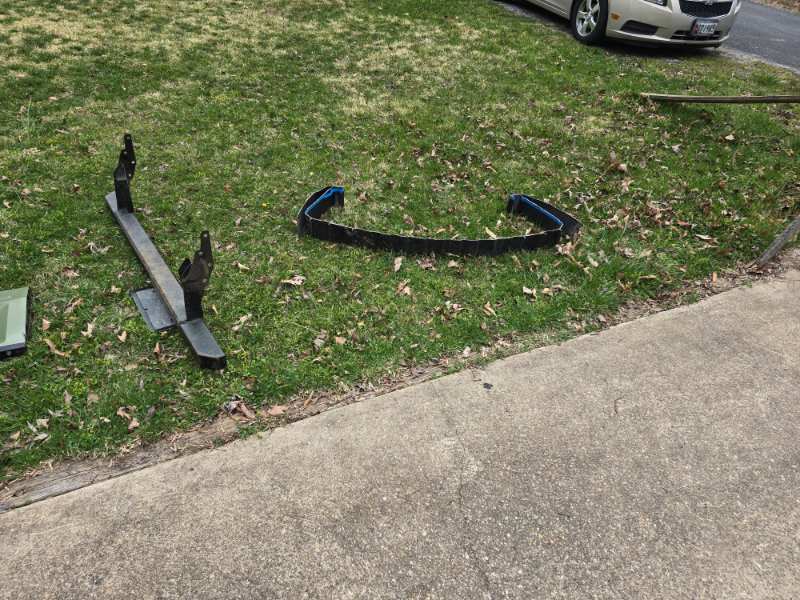
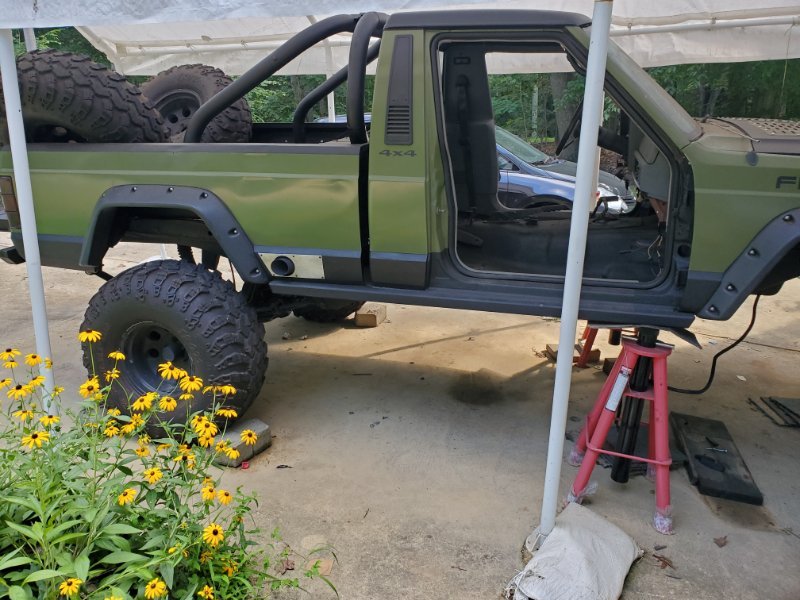
I feel bad that it's been so long since I've posted here, but as is usual, I always work on the Comanche(and a couple of other non Jeep projects). I honestly am not sure where I left off with the last posts versus now, but in short, I did another big rebuild. I always wanted to shorten the bed out a bit, and in doing so, I wanted to adjust/repair some things along the way. The reality of bobbing the bed was much more challenging than just cut and weld. I had fit issues, cut issues, weld issues, heat/warp issues, basically everything that could come with thin metal welding/fab. While I was at it, I found some problems to fix and also more mods to pursue. The bob itself was fine. I removed 8 inches from the overall length and wanted to keep the look natural, so rather than cut straight down or remove the lower quarters of the rear of the bed, I cut along the quarter edge and trimmed it there. It looks far more natural in my opinion, and gets rid of the extra length that I didn't think looked very good. The process of rewelding it was another story. I took meticulous measurements and marked consistently, but still ended up with a disparity in general distance. It's hard to be completely accurate, but even a quarter of an inch is a significant gap for welding. In the end, I managed, but did overheat the metal in a couple of spots. I had to do a lot of stretch and heat treating to get them to be out enough so that I didn't have to layer it with a crazy amount of bondo(which I didn't want to do). End result speaks for itself. While there, I knew that the bedsides had been patched before I bought it. I dug in to potentially thin out the bondo or see the overall state of it and found a much worse situation. They weren't butt welded like I expected, but lap welded with not treatment. They were done haphazardly, and then just layered with bondo. I couldn't leave it as is, so I made some patch panels myself and cut the old out. I didn't quite get the contour match, but got close enough. I had to modify the lower forward quarters because they were done poorly before. I just cut them higher and welding in 1/8th plate patches on the bottom. It's far more rigid and easier to treat for rust. I knew in this process that I would need to address my rattle can paint job which was cracking, had crows feet, and in general, compromised the underlying metal. One big part of this project was repainting it. Which I decided(a very poor decision)to try to do myself. This was the biggest drag on this project. Trying to do a proper 2k paint with a compressor was very time consuming. I can't even count the hours I spent priming and sanding(multiple times because the paint gun or compressor didn't do to well with heavy primer). It was, kind of, a personal nightmare. Eventually, I just did it and painted the truck part by part. Honestly, it did work pretty well. It did, unfortunately, require tons of post paint correction to fix. I did the full spectrum, from 600 grit to 5000. The end result wasn't bad. I definitely had runs and solvent pop(probably due to colder temps delaying offgas time), but it is a much stronger paint job than before and should last a lot longer. While I had the bed off, I took care of some of the structural issues I had since I was already there. I replaced the fuel cell with one that wasn't rusted. The RCI rockcrawler was a good cell, but the powder coat was paper thin and weak, causing it to fracture and allow moisture in. That caused some rust, and I didn't want to deal with it, so I went with a motobilt fuel cell and bracket instead. I relocated some of the wiffle baffle balls from the old tank to the new and used whatever new leftovers I had. For anyone wondering, original wiffle balls do hold up very well. they swelled a bit and the small edges cracked, but no debris and I couldn't cause them to flake or shatter by hand. They are a very good baffle at 5+ years in a tank. The last big part of this was the rear bumper. It's been a sticking point for me for a while, and with the shortening of the frame, I needed a custom approach as the mounting holes were no longer the same. I hand fabricated it, from mounts to bumper, to try to match the front bumper a bit. It took a good bit of fab work and design to get it right. Going into it, I had only ideas of design and worked through piece by piece. I think it turned out pretty well. In the end, I did a few extra things before the paint. I shaved the antenna hole in the fender, since it never worked anyways, I rewelded the doors, since the started to crack due to my old amateur welds(as well as reworked the interior door panels to add cup holders). I replaced the front clip since the old was cracked and had rust welded screws stuck in it. I bedlined(properly) all the parts that weren't done before. I completely dismantled the fuel door(pulled the skin off to treat the rust). I rebedlined so many other parts. I refined tons of the mounting points on the bed(nutserts and welded nuts on) to keep it better mounted. And lastly,(relatively, there was a ton of other inbetween stuff done too) I replaced the taillights with some oracle lighting tinted rear tail lights. I figured they matched what I was going for with the truck and I've been sitting on them for a while. Now, here's the part I'm sure everyone is waiting for, the pictures.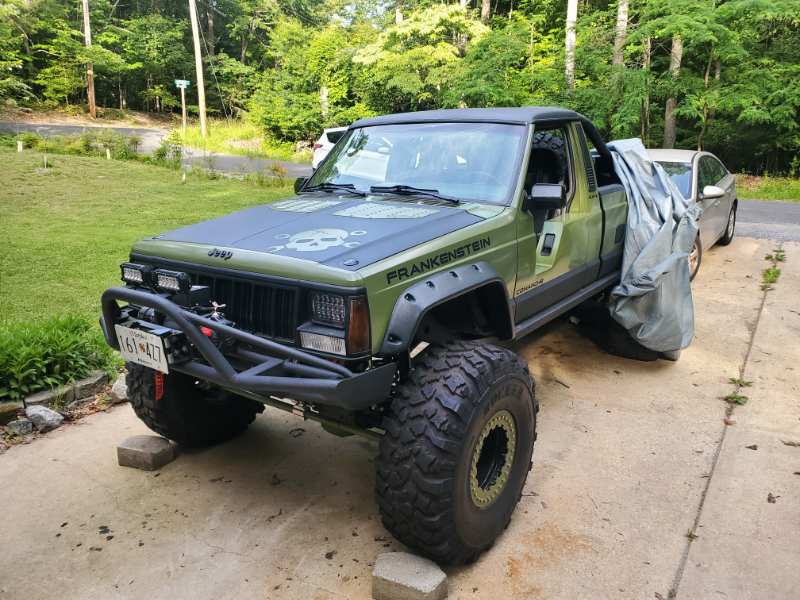


-
Those wheels look great!
-
Vibrations at highway speeds
drcomanche replied to VorTekX's topic in MJ Tech: Modification and Repairs
Did the used tires come with the wheels? And if so, were they balanced? Take it from experience, unbalanced tires can wobble in a very large variety of ways depending on their mounting and how out they are. Going for a balance and alignment can't hurt. If you're seeing it in the shifter and cab, go for some new bushings, as eagle said. I lost a lot of driveline vibration with a new trans mount. Another easy thing to look for is if the driveshaft is out of alignment or bent. Set the rear up on jack stands and put it in gear and see if it has an uneven movement. There are a lot of options for what it could be, but fortunately, most are easily debunked and a lot are relatively cheap, too. -
Project "Eliminator"
drcomanche replied to 89eliminator's topic in MJ Hardcore Tech: Epic Journeys to Greatness
Seems like you've got a good bit of time on that MSD, how do you like it vs the stock style of ignition coil? Any difference or is it all for the rev limit? -
DrComanches Project "Frankenstein"
drcomanche replied to drcomanche's topic in MJ Hardcore Tech: Epic Journeys to Greatness
I'll probably go back to the 195 later. I'm at 180 now, but it does get VERY hot and humid here, so by the time I go to drive it, it's already over the 195. But in general, not much use for it as is. -
DrComanches Project "Frankenstein"
drcomanche replied to drcomanche's topic in MJ Hardcore Tech: Epic Journeys to Greatness
-
DrComanches Project "Frankenstein"
drcomanche replied to drcomanche's topic in MJ Hardcore Tech: Epic Journeys to Greatness
-
DrComanches Project "Frankenstein"
drcomanche replied to drcomanche's topic in MJ Hardcore Tech: Epic Journeys to Greatness
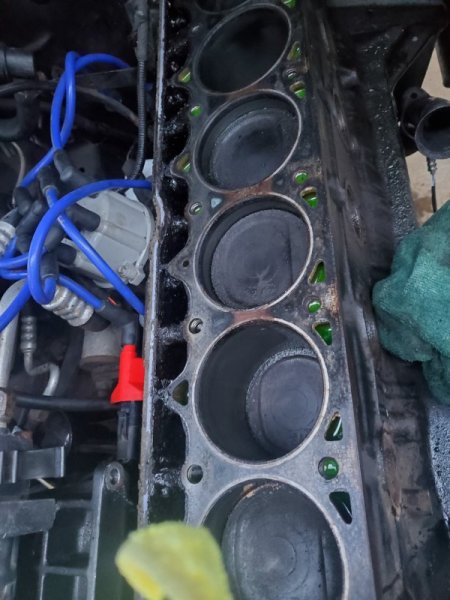
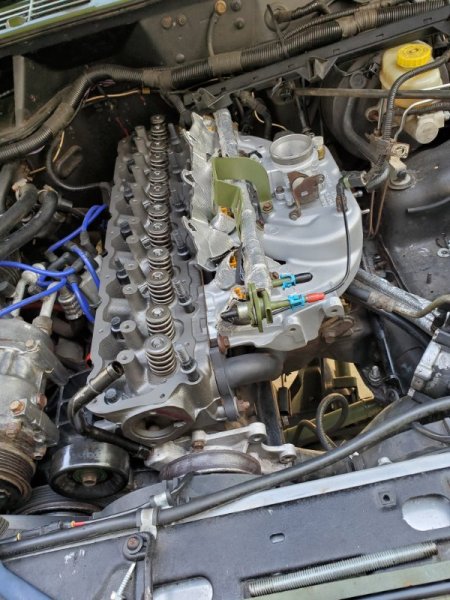
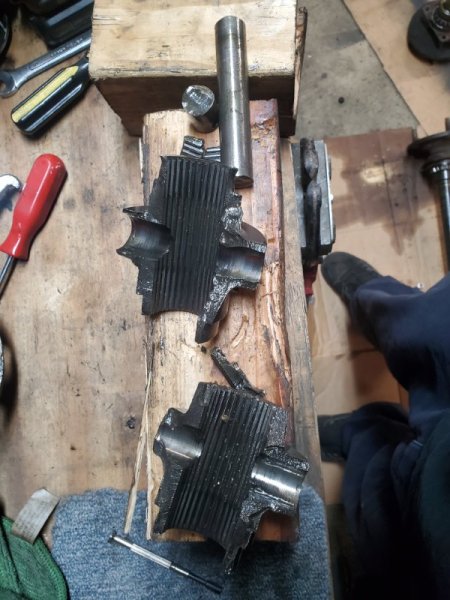
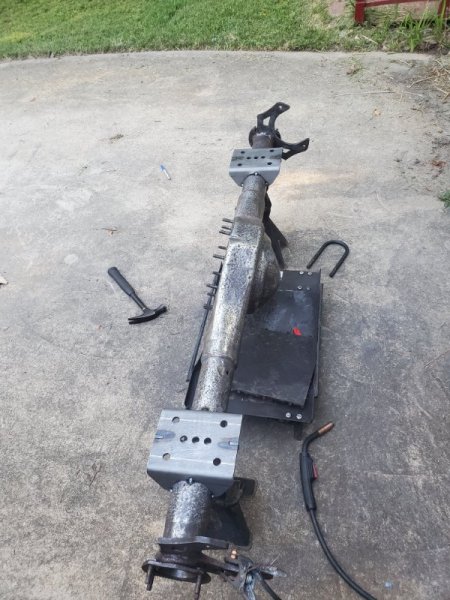
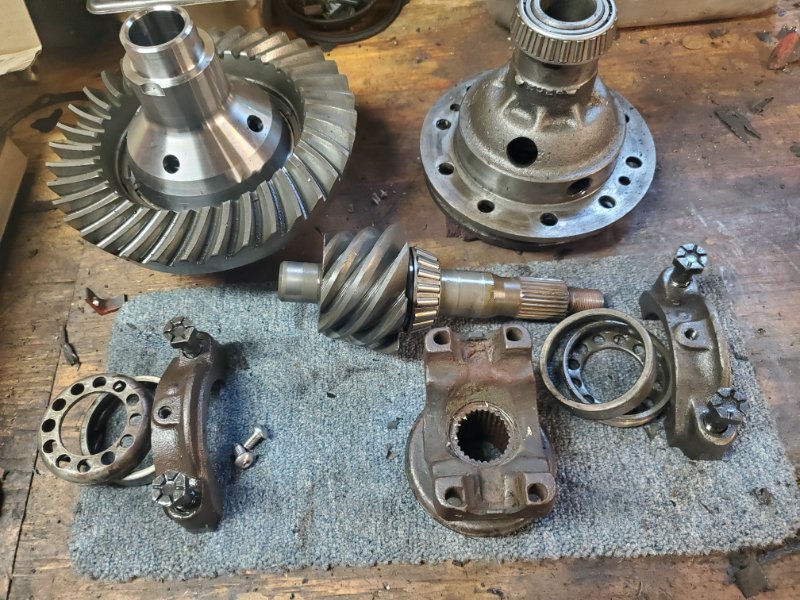
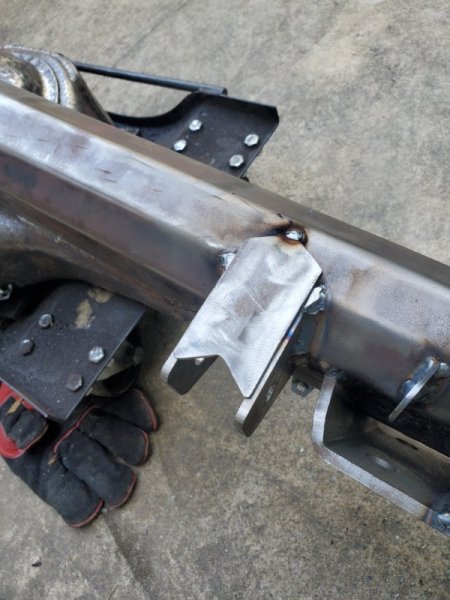
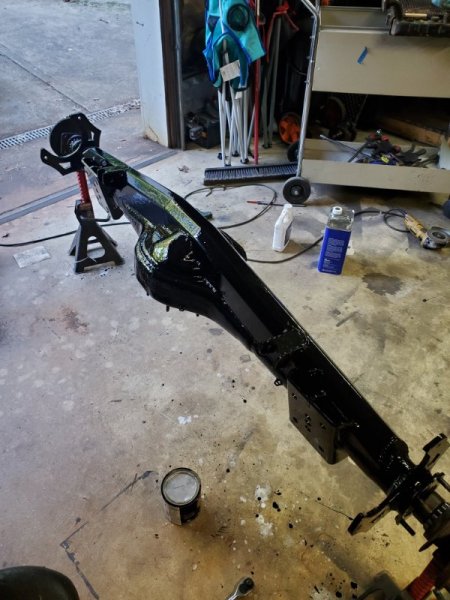
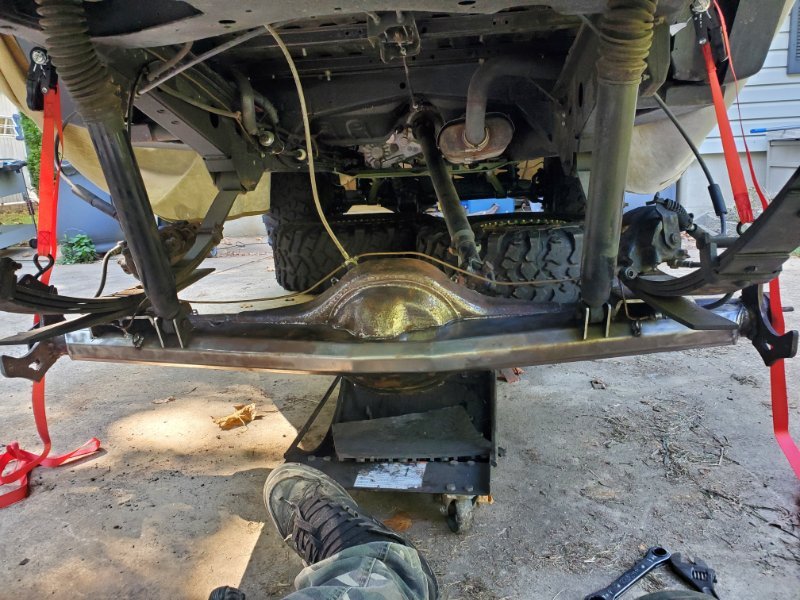
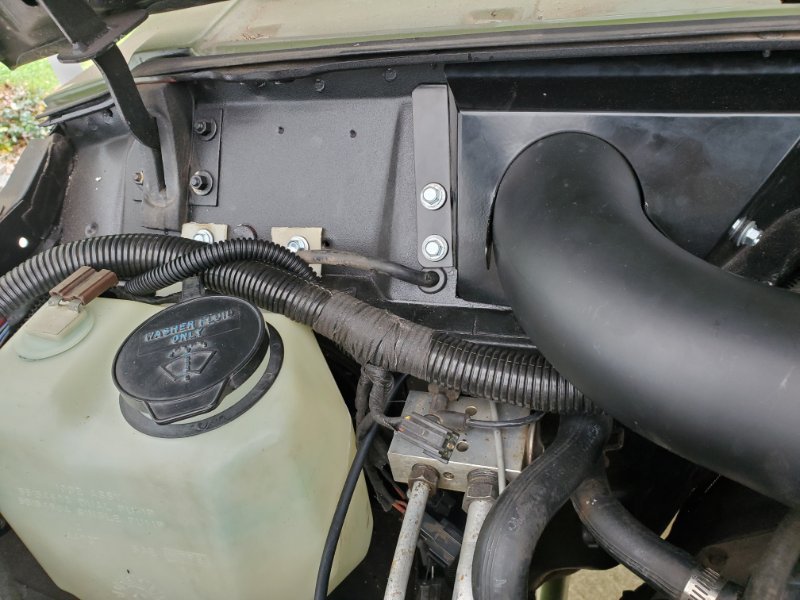
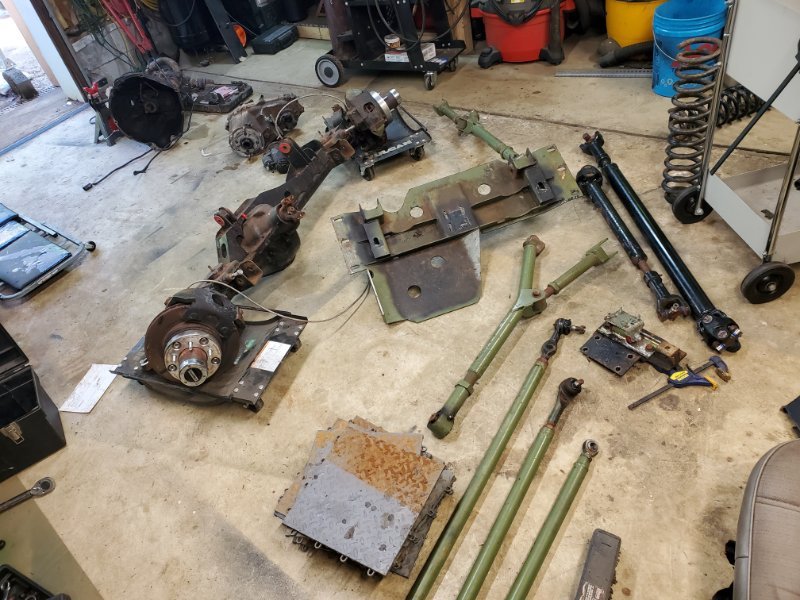
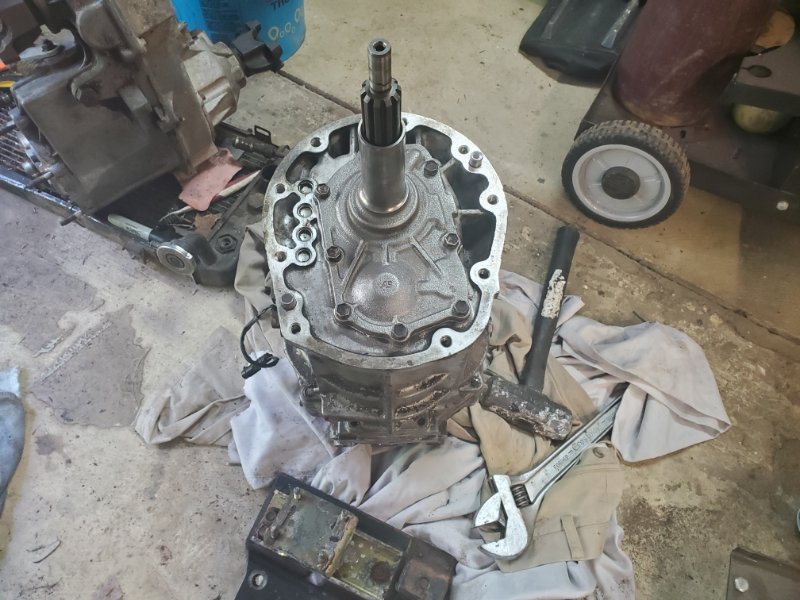
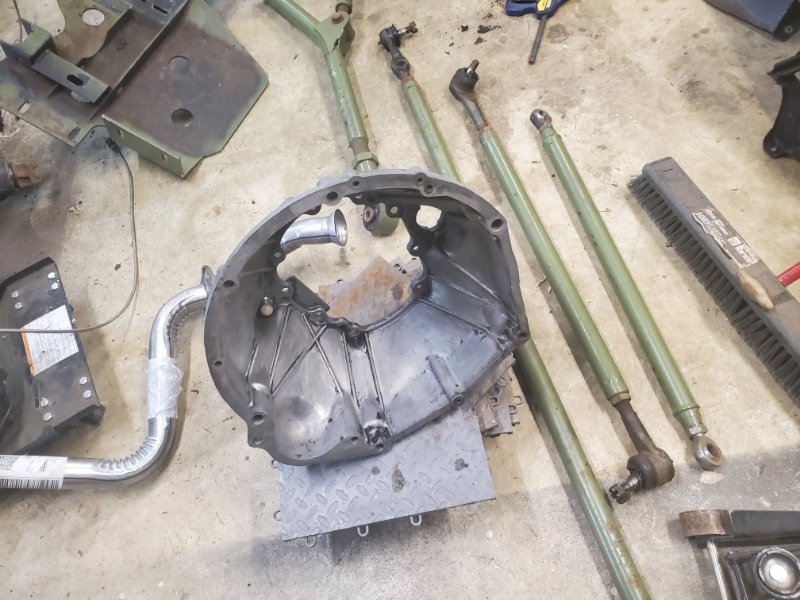
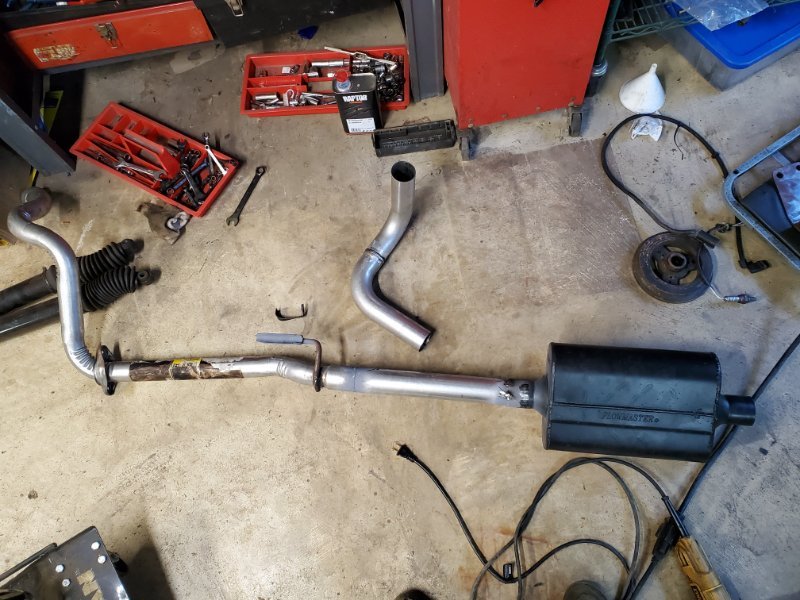
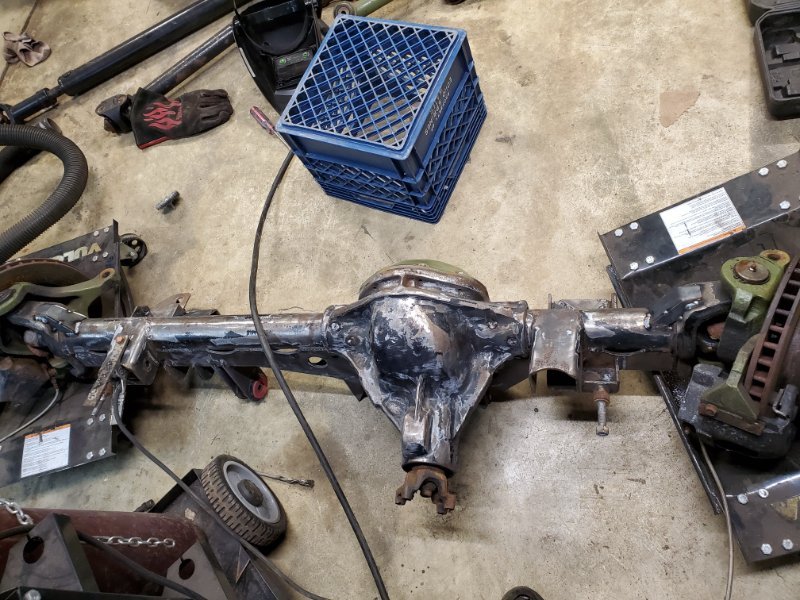
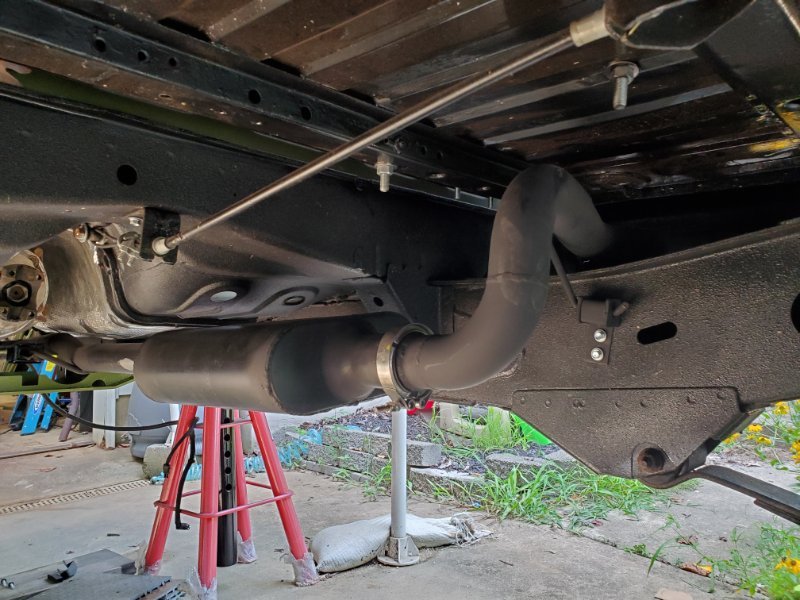
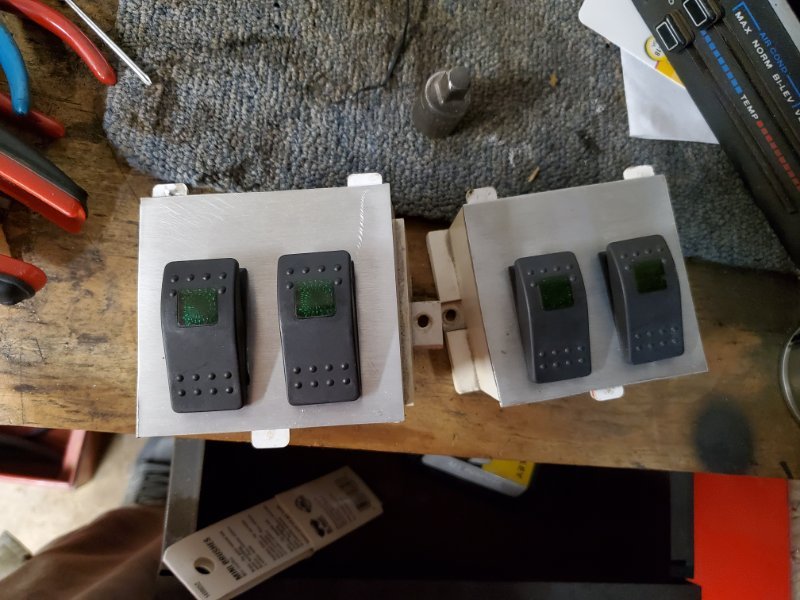
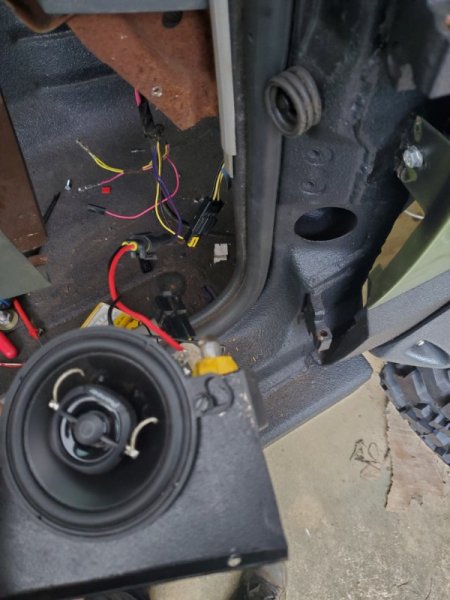
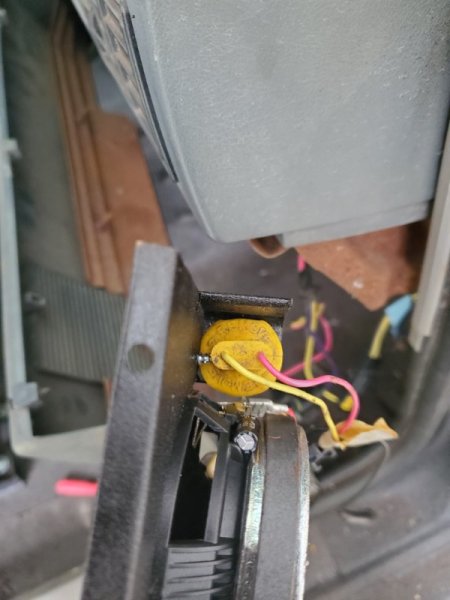
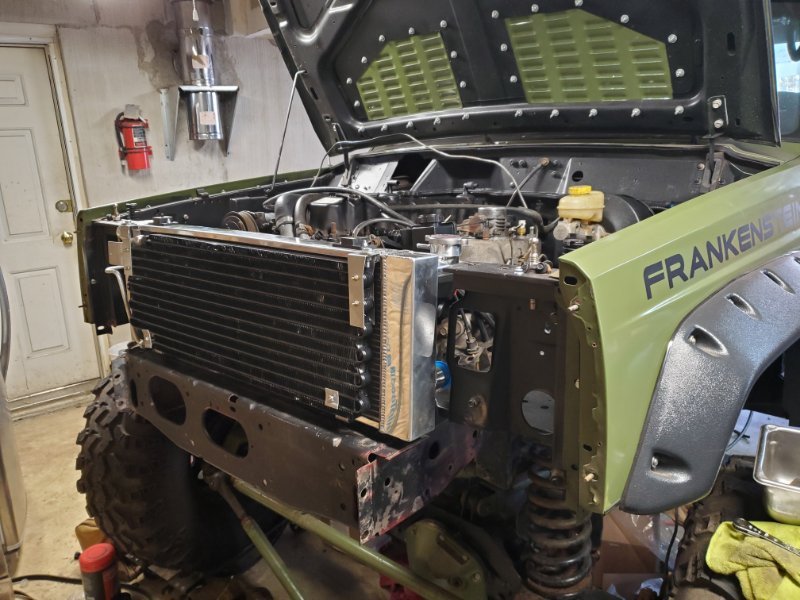
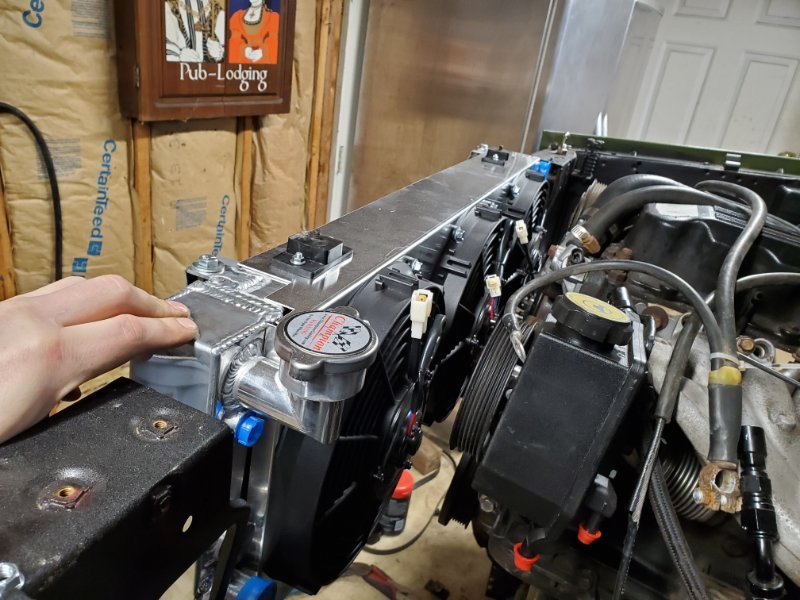
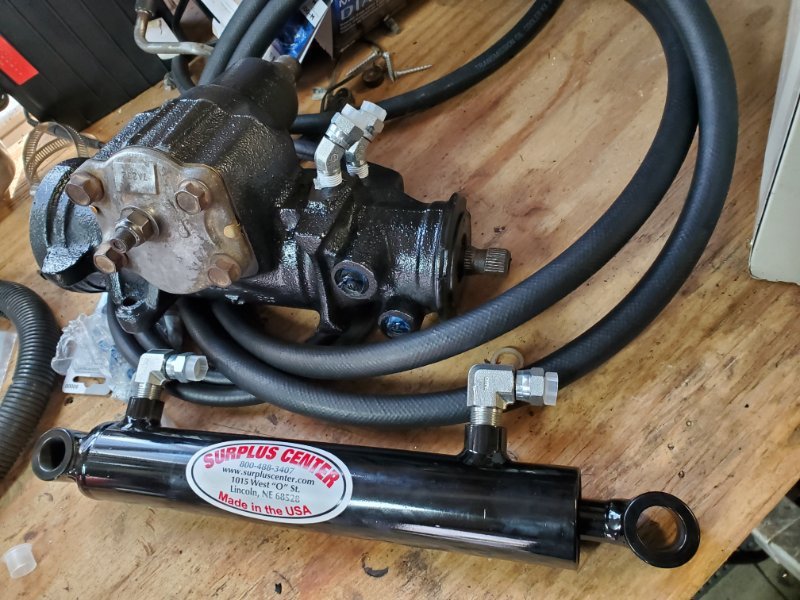
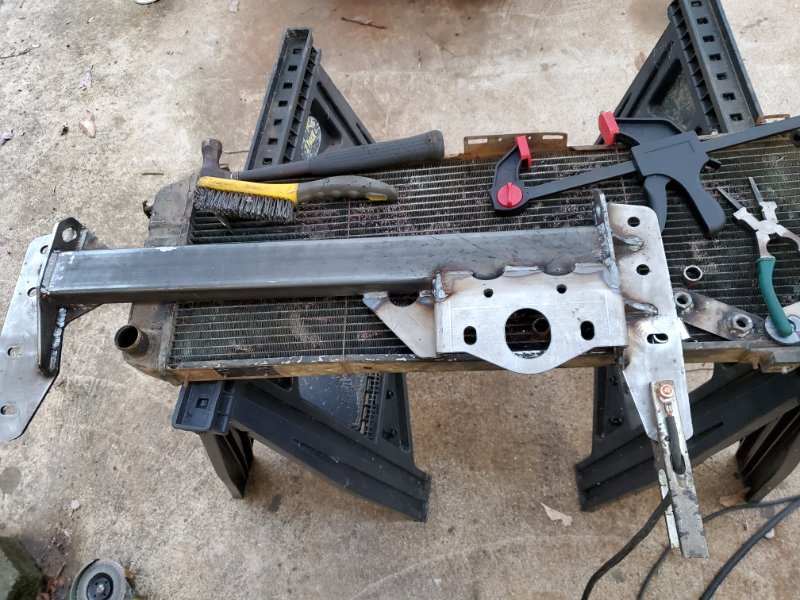
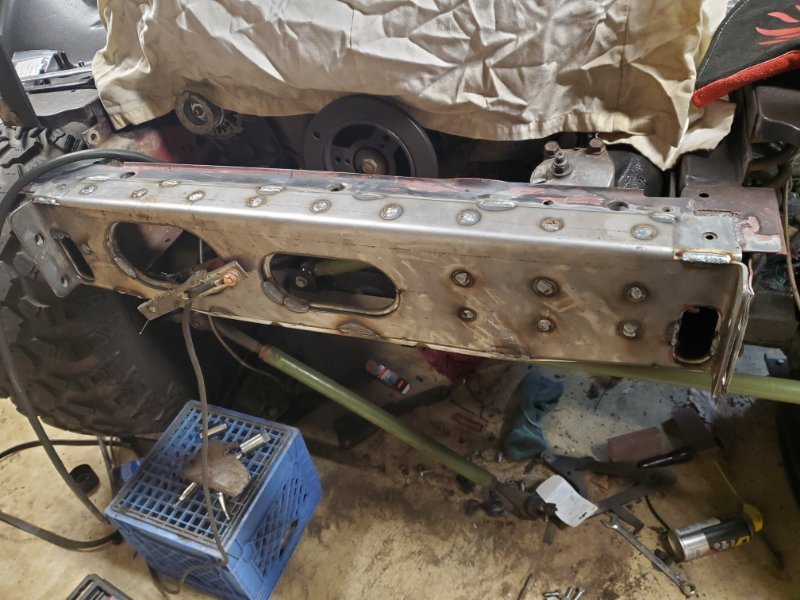
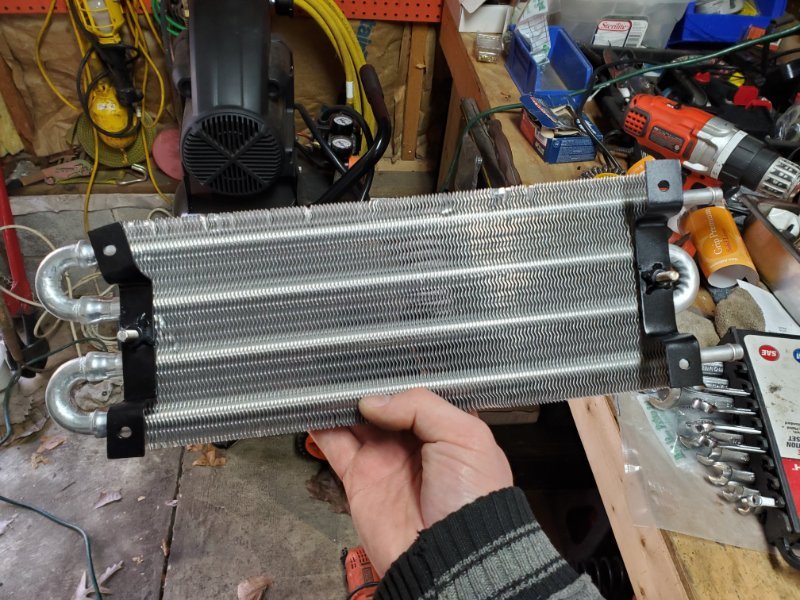
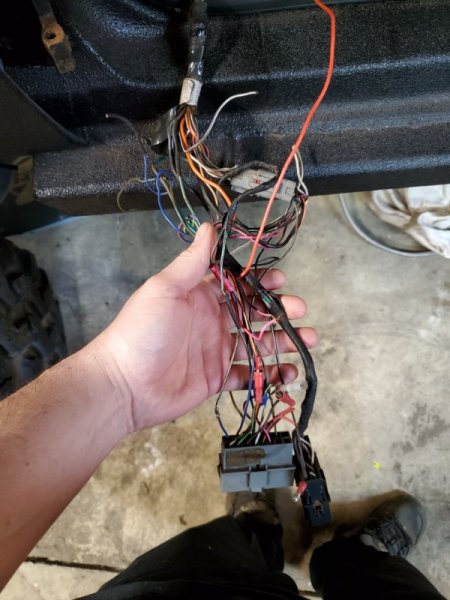
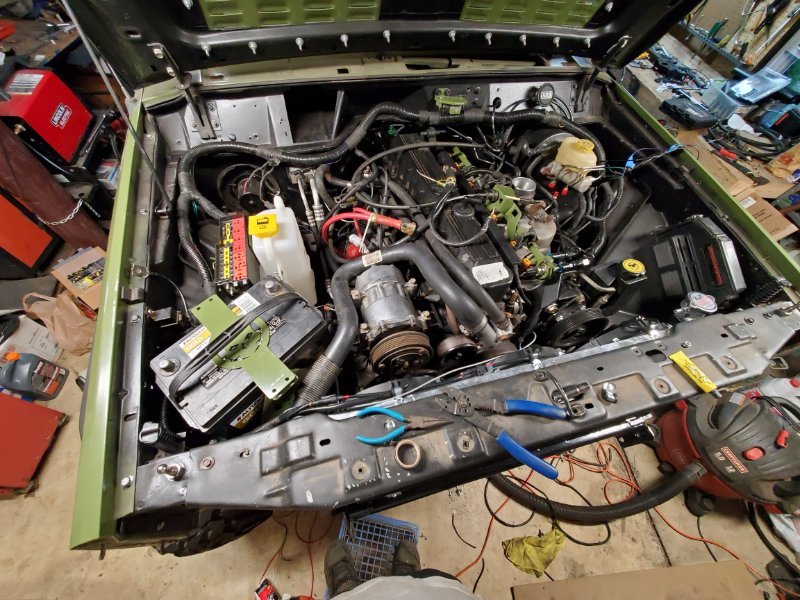
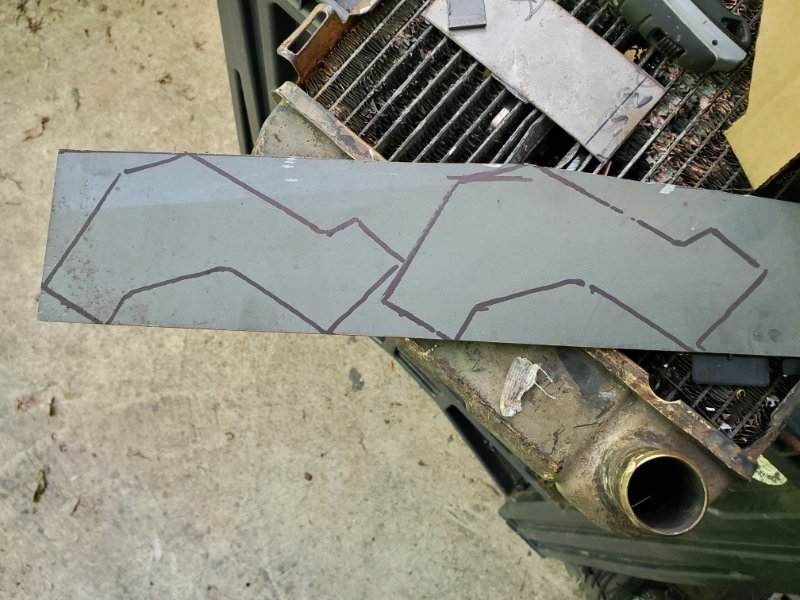
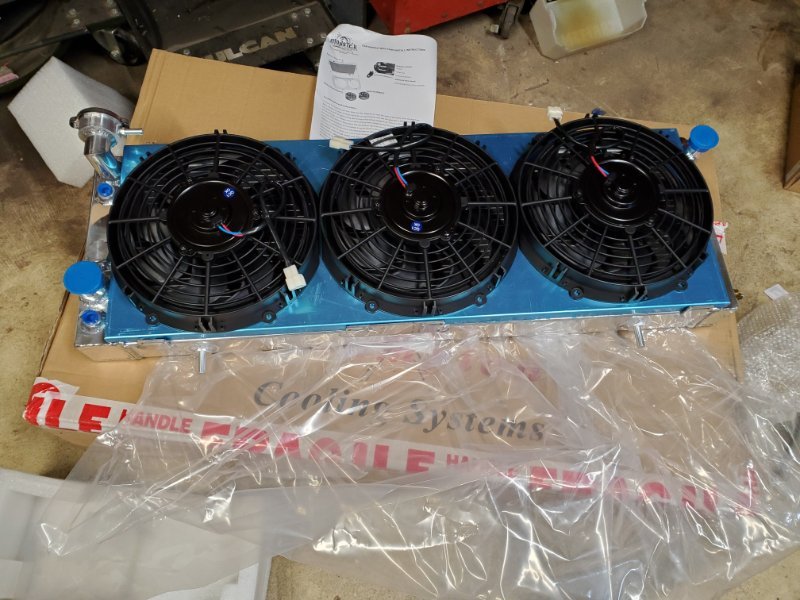
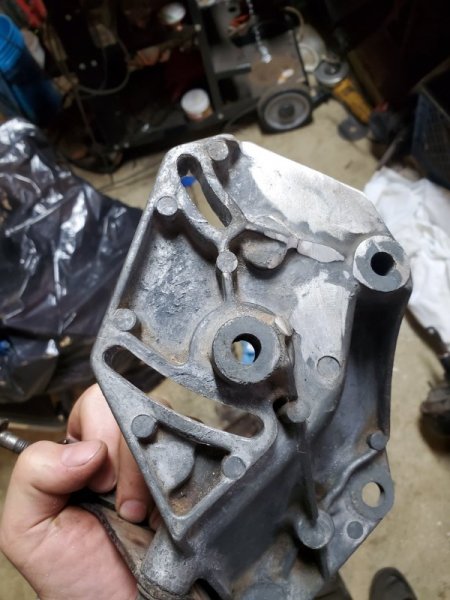
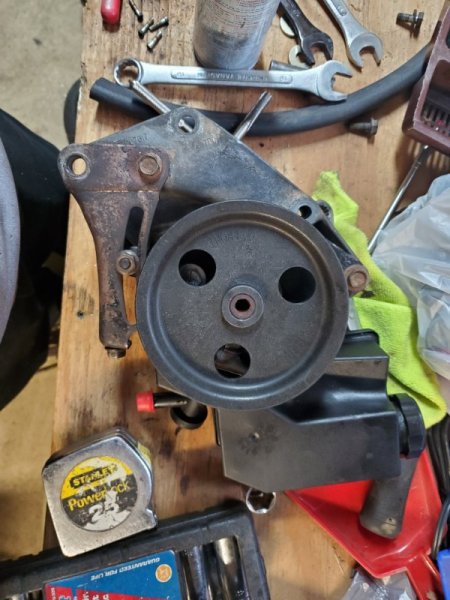
Back again with another way too long since update. To be honest, I'm not quite sure where I left off with explaining the mods I've been performing, so I'll be rehashing a bit of some I may have already said while adding more info around their installation. For starters, I'll elaborate on some of the current upgrades. I basically replaced or rebuilt every system in the truck. For the cooling system, I changed the thermostat to a lower temp one to cycle coolant sooner. I replaced it with a 2 core radiator from champion, and went full electric for the fan system. Two of the fans are run by a temp sensor that I had to install mid tube from the top of the radiator. I couldn't replace the existing one since it communicates with the ECU. The last fan is run by a switch on the dash. I cleaned the whole system out, especially since I replaced the heater core when I had the dash apart. For steering, I went with the power assisted steering I wanted from the beginning. I had read all kinds of topics in the past about steering pumps that could work and I found the one for the 5.2(I think?) that was said to fit but the input nozzle needed boring to not cavitate. I basically played it by ear and settled with a size in the middle. I ported the steering box myself and replaced the seals while I was there. After purchasing some extra parts(ram, mount, hoses, fittings, etc.)I put it together. It took a lot of trial and error to get the placement right where it wouldn't hit the tie rod or steering linkage. I also added a cooler for the lines in case it got too hot moving the big tires. I ended on a psc ram rather than retrofitting a hydraulic one as it was just easier. I wanted to keep the old belt tensioning system, so I customized the bracket a bit to fit this pump. Since I also installed the late model intake manifold, I had to cut it up to fit and made a custom bracket from it to the tensioner bracket. The size and fact that it had to be fabricated meant it didn't fit quite right and would eventually start causing belt squeal due to misalignment. After doing some measurements(and after a lot of belts) I propped it out about a quarter of an inch and now, no more belt squeal. I also added a steering box brace As I said before, I installed a late model intake and customized it, and with that, I added a THOR cowl intake. I repainted the manifold in ceramic coat high temp when I did the head work. For exhaust, I went all new. New manifold and new downpipe. Since I wanted a bed exit exhaust, I had to cut the new pipe partway, and then installed a flowmaster super 44 on the end. To keep it removeable, I did a v band after it and then welded up a pipe to go over the rail and out the bedside. I increased the size to 3 inch at the exit and cut a piece of aluminum to help spread the heat. I did a ton of custom wiring and incorporated the lights, AC, and fans into the pcm in the engine bay. I had purchased a complete harness from someone and before installing it, I redid all the taped joints to freshen them up. For the body and frame, the entirety of it is now plated and bedlined after doing a ton of prep and paint work. The entire trans tunnel is insulated with aluminum sheet and fiberglass backing to keep some of the heat off the floor. Inside the truck, I custom made some brackets for under dash speakers and courtesy lights. I also made dash switch bezels out of aluminum and got everything working. I purchased some generic bucket seats from jegs to install and had to basically make a bracket from scratch for them. I also added a fire extinguisher, just in case, and replaced some of the insulation and gaskets. I finally switched to the bigger brake booster and remade my brake lines all the way around the truck. I also snagged a zj brake prop valve for the rear discs, but I may change it out with an adjustable rear one, since I'm not getting very good rear brake actuation. The engine itself has one of the more recent issues. It had been giving me a ton of warm start issues and poor performance. I went to town on sensors but eventually just settled on pulling the head and looking at it. Turns out the head was warped by about a quarter of an inch and the head gasket was starting to fail and let blow by happen. I replaced it with a rebuilt unit from Clearwater, which was good for me, because the valves were pretty bad as well. Took a lot of effort and strain(and next time I'll probably take the whole hood off) but I managed. I made some beadlocks with the Total metal innovations kit and slapped some pitbull rocker radial 37s on it. I may try to switch the wheels out for some aluminum ones(if I can find them in 15) to lose some of the rotating mass I have. Also put together and installed a rough country spare tire mount that I customized to fit my 5x5.5 pattern. The most recent repair/upgrade I've had was when, a month ago, my rear end blew out. I pulled it out and found that the mini spool and carrier pin had split in half. I think the carrier pin had already been broken and that caused the excess stress on the spool. So while I was in it, I decided to do the whole axle. The prior work that someone had done to it resulted in some questionable damage to the axle including low cut, bad welds, and preexisting damage. The old spring perches had one welded in about a quarter inch too far, which caused by leaf spring to pull out of the busing in the bracket. I cut them off and replaced them with a set of motobuilt u bolt eliminator ones, as I'll also be adding a truss to it. I got the truss from ruff stuff specialties and it took a lot of adjustment to get it working. I also had to cut it in around the new perches. I added some brake line brackets too. I had to do some touch up inside the case since some prior damage had left some sizeable dents in the rear of the case. I custom made a skid plate for the bottom as well as some shock mounts. Then, I repainted it all. I'm currently in the process of adding coats to it. For the carrier, I'm replacing all the bearing and refitting everything. I thought about it for a while, and decided I would not be putting in a spool again to give it better road manners and went with a grizzly locker. Fortunately, the gears were fine, but the axle shaft splines were pretty damaged, so I'll be replacing them too.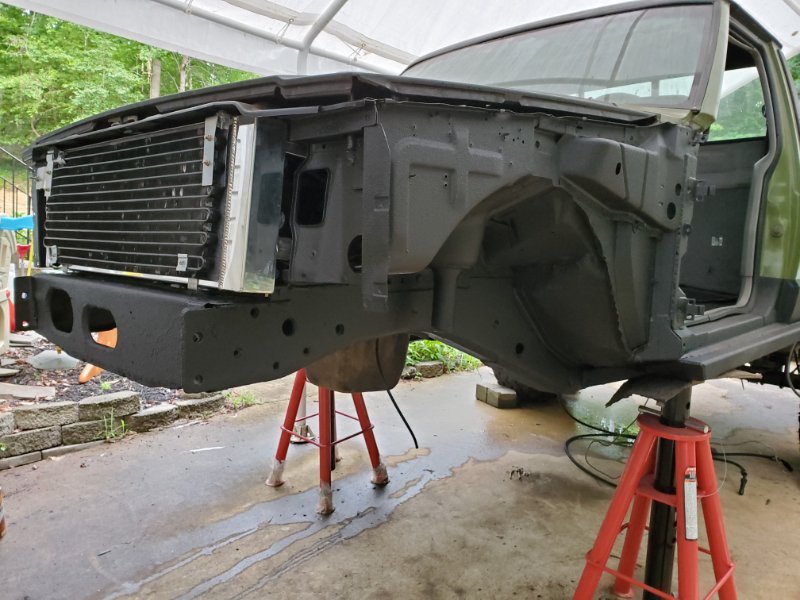
-
Issues with Clearwater Cylinder Heads
drcomanche replied to drcomanche's topic in MJ Tech: Modification and Repairs
Got an email back today. It was very short and frank but basically said the head is interchangeable, the warranty sticks, painted mating surfaces is normal, blemishes are to be expected because it's not new, and the head is ready to be mounted, but if I'm worried, just blow it off with air. I guess I'll try it out and see what happens. Can't run any worse than my old one.