cruiser54
-
Posts
9413 -
Joined
-
Last visited
-
Days Won
14
Content Type
Profiles
Forums
Gallery
Everything posted by cruiser54
-
Yep. It's in our medicine chest. Not in the kitchen!!!
-
A little trick for bug bites I learned from my doctor buddy. First chance you get, wet a paper towel, shake some plain Adolf's meat tenderizer on the towel and apply to the affected area. Rub it around a bit.
-
They build nice ones right here in my town. They sell them around the world. http://adventuretrailers.com/
-

Headlight grounding issue?
cruiser54 replied to dustyinthedirt's topic in MJ Tech: Modification and Repairs
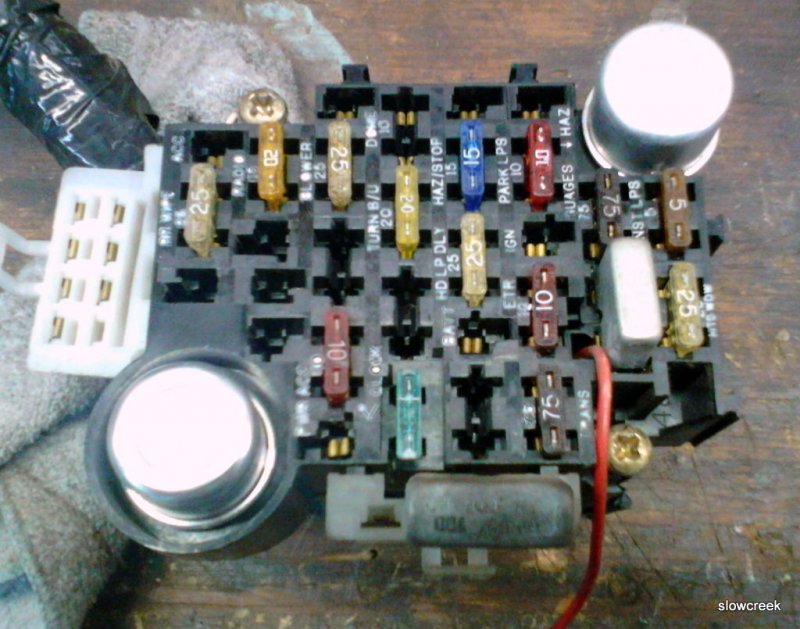
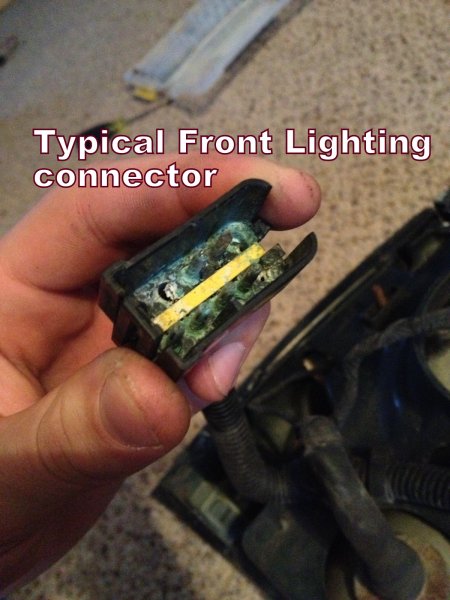
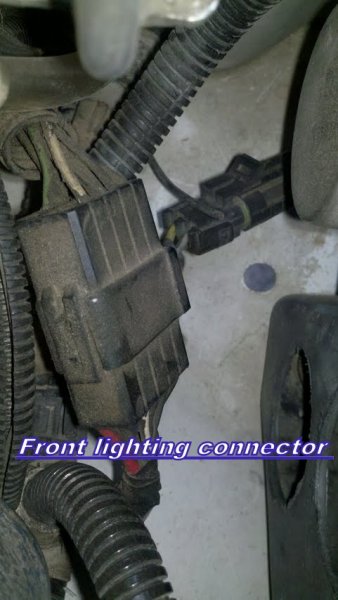
I suggest unplugging EVERY electrical connection in the engine bay you can find, whether engine related or not, and spraying it out with a good electronics cleaner, visually inspecting the terminals making sure they haven’t retracted into the plastic holder, and then plugging it back together. There’s a critical 10-pin connector for the front lighting system located in front of the air cleaner and behind the left headlight assembly. Don’t miss that one. Also be sure that the connectors to the ballast resistor mounted near the air cleaner housing are clean and tight. ALL of the relays should be removed, the terminals wire-brushed until shiny, and the receptacles sprayed out with contact cleaner. Then plug them back in. I do this on every Renix Jeep I purchase or work on for someone else.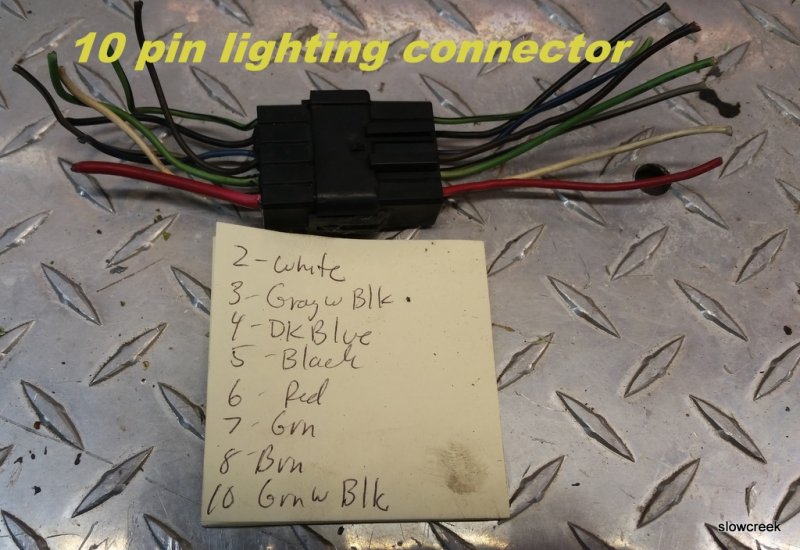
-
running rich/low mpg
cruiser54 replied to a bum with money's topic in MJ Tech: Modification and Repairs
O2 sensor should be switching rapidly from .1 to 4.98. Never still after it warms up. -
running rich/low mpg
cruiser54 replied to a bum with money's topic in MJ Tech: Modification and Repairs
AND, share the same GROUND!!!! The sensor ground circuit affects the CTS, TPS, IAT, MAP, ECU and diagnostic connector grounds. It’s very important and not something to overlook in diagnosing your Renix Jeep as it is common for the harnesses to have poor crimps causing poor grounds. If any or all of the sensors do not have a good ground, the signal the ECU receives from these sensors is inaccurate. Set your meter to measure Ohms. Be sure the ignition is in the OFF position. Using the positive (red) lead of your ohmmeter, probe the B terminal of the flat 3 wire connector of the TPS . The letters are embossed on the connector itself. Touch the black lead of your meter to the negative battery post. Wiggle the wiring harness where it runs parallel to the valve cover and also near the MAP sensor mounted on the firewall. If you have an 87 or 88 with the C101 connector mounted on the firewall above the brake booster, wiggle it, too. You want to see as close to 0 ohms of resistance as possible. And when wiggling the harnesses/connectors the resistance value should stay low. If there is a variance in the values when wiggling the wires, you have a poor crimp/connection in the wiring harness or a poor ground at the engine dipstick tube stud. Refreshing of the dipstick tube connection is covered in Renix Ground Refreshing, and the sensor ground upgrade is covered in Tip #6 – Sensor Ground Upgrade. On 87 and 88 models, you could have a poor connection at the C101 connector as well. See Tip #2 – C101 Refreshing and Tip #27 – C101 Elimination. -
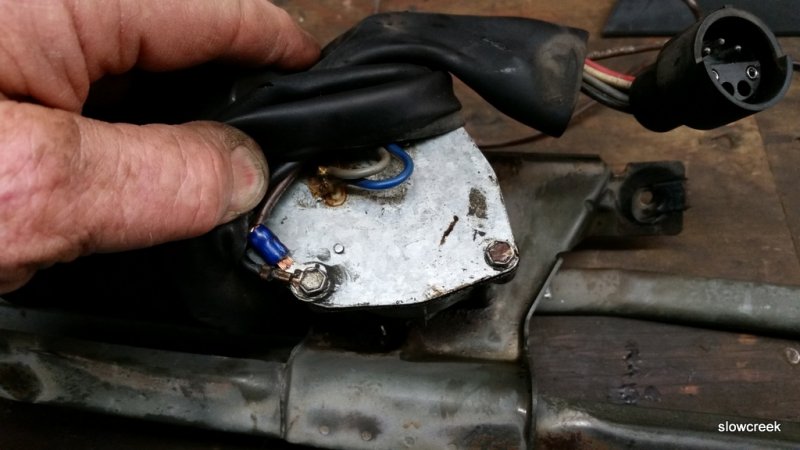
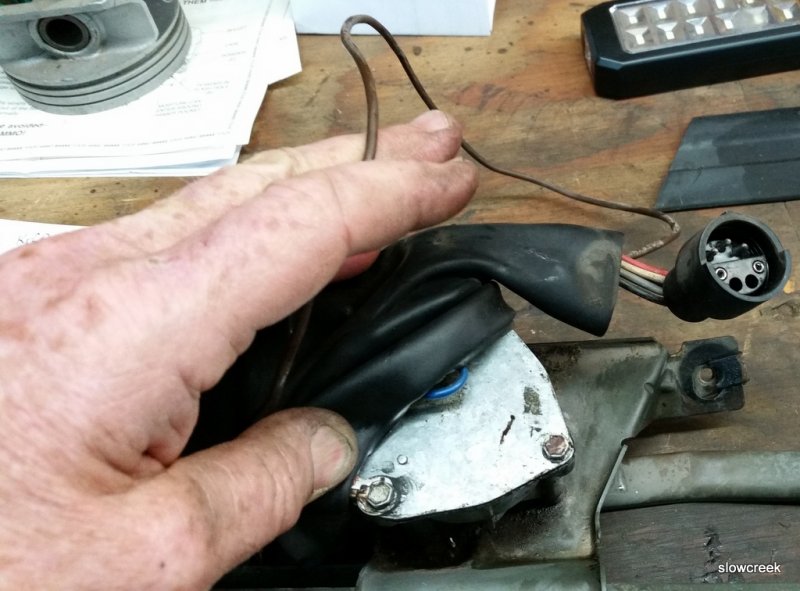
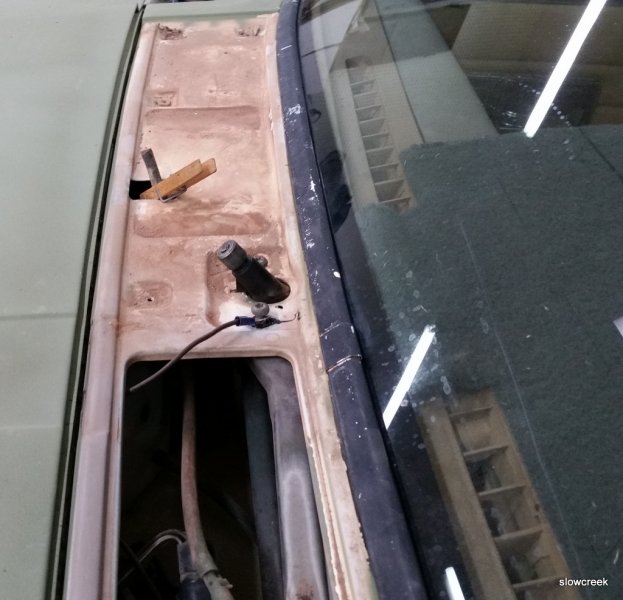
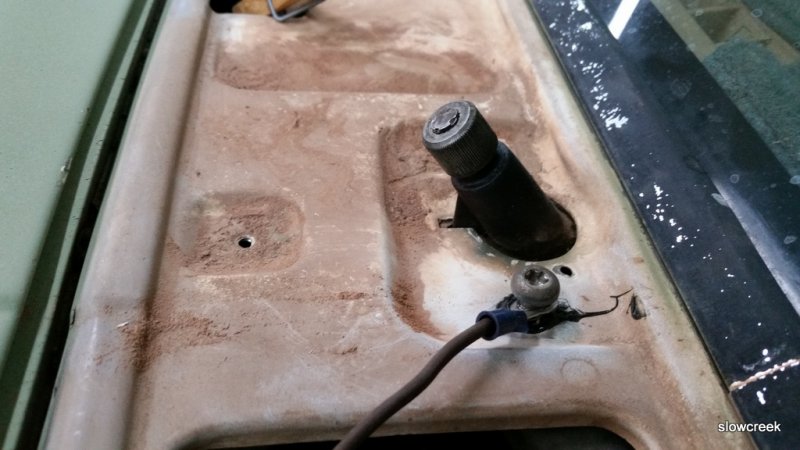
At the motor you will have a ground wire. That one runs across the firewall to the right inner fender, across the radiator support, along the driver's inner fender to ground there. Long run with small wire. I run one from the ground wire at the motor to one of the wiper pivot bolts.
-
See if the blades move back and forth by hand. It's common to have the little bolts holding the motor on to the linkage assembly to work loose also. This causes a bind. If it's an 84 to 90, I have a ground upgrade that helps.
-
TRANS fuse keeps blowing.
cruiser54 replied to Knucklehead97's topic in MJ Tech: Modification and Repairs
Yup. 7.5 amp just to the left of that red wire. It's the reverse lamp circuit. The one under the dash on the passenger side is TCU power wire.
-
TRANS fuse keeps blowing.
cruiser54 replied to Knucklehead97's topic in MJ Tech: Modification and Repairs
TRANS fuse is for the NSS and reverse light circuit. The fuse under the passenger dash is main power feed to TCU. 2 different animals.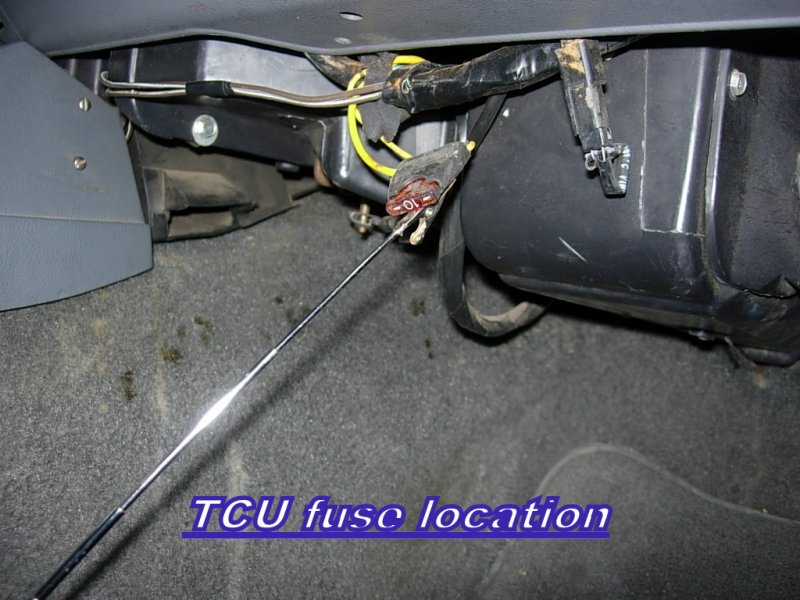
-
I have never replaced a u bolt except when I needed longer ones. Been reusing them for 50 years with no issue. But, they were never rusty, and I liberally sprayed the threads with some kind of penetrating oil before removing the nuts.
-
HVAC Vacuum Line Routing
cruiser54 replied to kryptronic's topic in MJ Tech: Modification and Repairs
Yours is a 90 and there is a different procedure for that. do you have a radiator with a cap on it or only the pressure bottle with a cap? -
Shift points for XJ auto? Too low rpm
cruiser54 replied to rynoshark's topic in MJ Tech: Modification and Repairs
Good. What about the TV cable? Also verify your TRANS fuse in the fusebox is good. That's the 12v feed for the Power mode. -
Agree on CRC. Have you tried their Freeze-Off penetrating spray?
-
Shift points for XJ auto? Too low rpm
cruiser54 replied to rynoshark's topic in MJ Tech: Modification and Repairs
If you don't do Tips 1 and 10, you're just pissing in the wind here. Those 2 tips should take about 23 minutes to do...... Yes, change the TCU also at some point. -
Test fuel pressure.
-
Shift points for XJ auto? Too low rpm
cruiser54 replied to rynoshark's topic in MJ Tech: Modification and Repairs
Yep. 88 and later TCU plugs right in. Get those tips done!!! -
If it's an 87 to 90, the TPS is probably going bad. But, before firing the parts cannon at it, check the sensor grounds. The sensor ground circuit affects the CTS, TPS, IAT, MAP, ECU and diagnostic connector grounds. It’s very important and not something to overlook in diagnosing your Renix Jeep as it is common for the harnesses to have poor crimps causing poor grounds. If any or all of the sensors do not have a good ground, the signal the ECU receives from these sensors is inaccurate. Set your meter to measure Ohms. Be sure the ignition is in the OFF position. Using the positive (red) lead of your ohmmeter, probe the B terminal of the flat 3 wire connector of the TPS . The letters are embossed on the connector itself. Touch the black lead of your meter to the negative battery post. Wiggle the wiring harness where it runs parallel to the valve cover and also near the MAP sensor mounted on the firewall. If you have an 87 or 88 with the C101 connector mounted on the firewall above the brake booster, wiggle it, too. You want to see as close to 0 ohms of resistance as possible. And when wiggling the harnesses/connectors the resistance value should stay low. If there is a variance in the values when wiggling the wires, you have a poor crimp/connection in the wiring harness or a poor ground at the engine dipstick tube stud. Refreshing of the dipstick tube connection is covered in Renix Ground Refreshing, and the sensor ground upgrade is covered in Tip #6 – Sensor Ground Upgrade. On 87 and 88 models, you could have a poor connection at the C101 connector as well. See Tip #2 – C101 Refreshing and Tip #27 – C101 Elimination.
-
Check the fluid level and condition.
-
Alfa Romeo project progress
cruiser54 replied to cruiser54's topic in Member Projects: Other Cool Stuff
Yes, but not the finished product. after the paint dried, i slid it back in. -
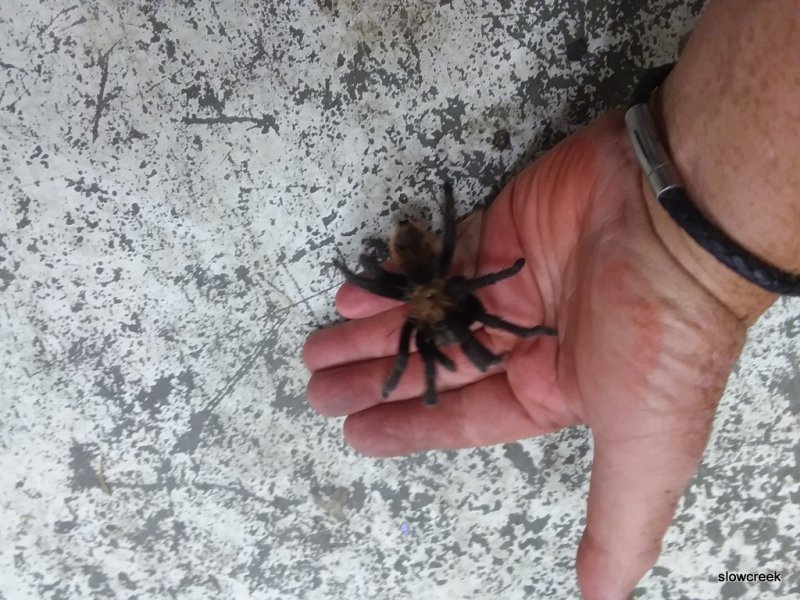
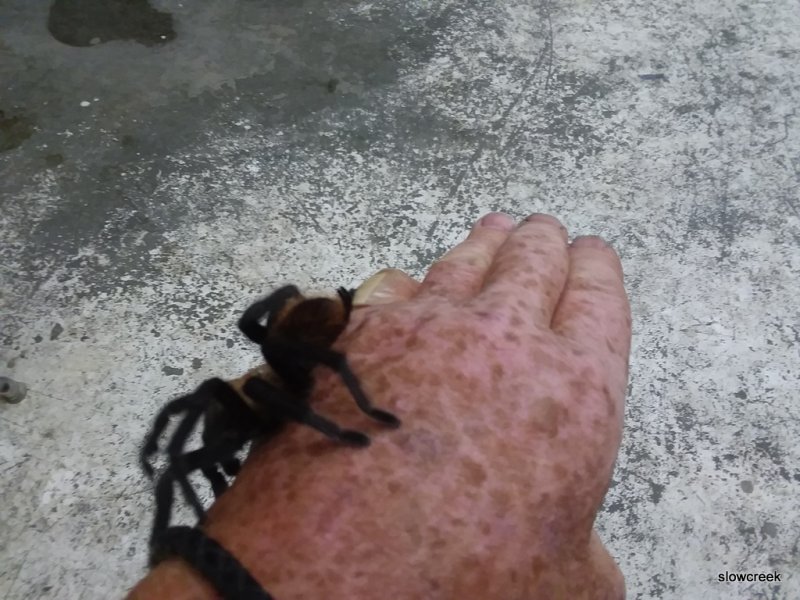
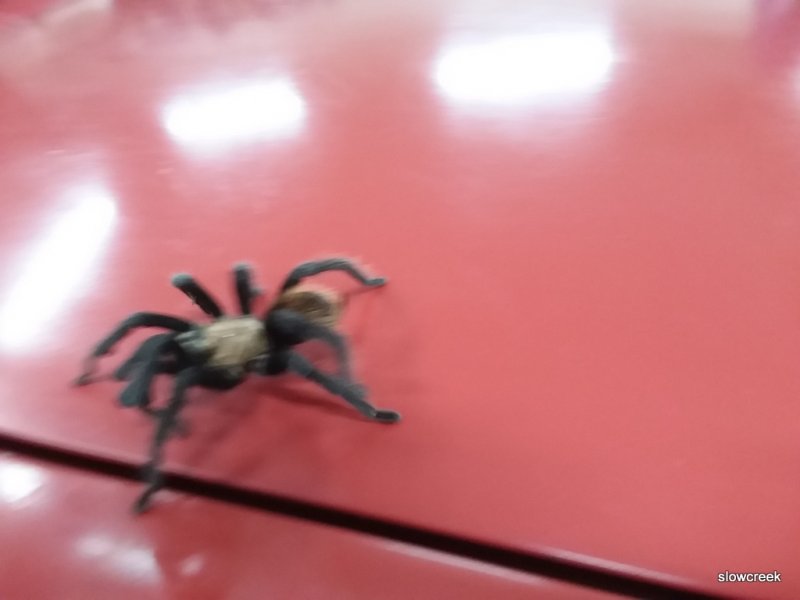
Let's see some pics of shop visitors. I went to turn out the light last night and this little guy was on the switch plate!!
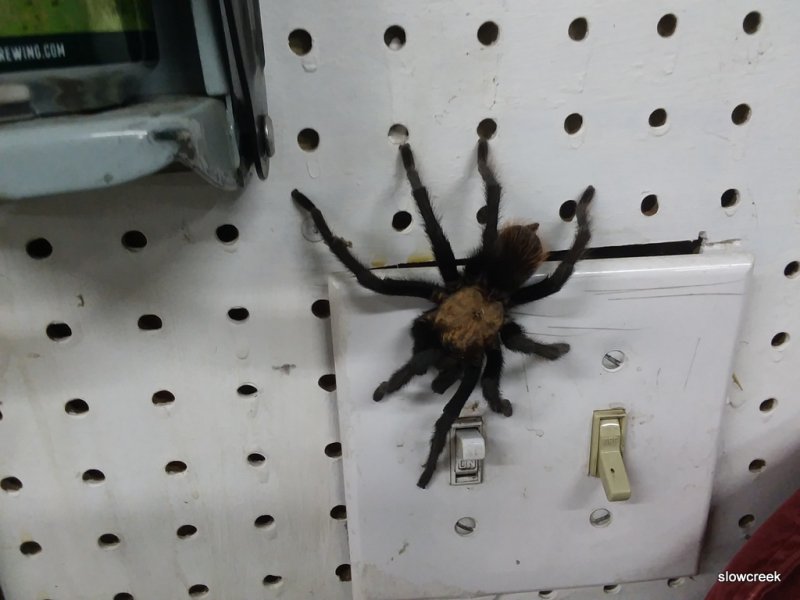
.jpg.1f37902d4dd96f55cc13e23d41149662.jpg)
-
Alfa Romeo project progress
cruiser54 replied to cruiser54's topic in Member Projects: Other Cool Stuff
Was working on jetting the dual Weber carbs yesterday. The AFR gauge is an incredible tool. New gasoline is crappola. Boils at a low temp. Using an IR thermometer I found #1 carb barrel at 142* and the rest around 125*. I used an existing cold air intake tube and ran a hose up into it to the carb. I jury rigged up an intake to put way more into the engine bay than the 2" hole. Hot dogging road test and the #1 barrel was at 125*..jpg.dd115ccaff0de3497357a6f5a4161237.jpg)
.jpg.6b992309676904f54c553e8a7d302fec.jpg)
.jpg.6cbf03d2e890f9bb60ad55dc55aa9b91.jpg)
.jpg.f67370cbc791de869854bd23965d38d1.jpg)
-
Alfa Romeo project progress
cruiser54 replied to cruiser54's topic in Member Projects: Other Cool Stuff
On to grill design. It will be some kind of expanded or perforated metal. Here is a scrap I painted and stuck in for color selection..jpg.58f1b27580881ffb1059384890dea7bd.jpg)
.jpg.e70b01d22abd1d2cd909cf892cf0e487.jpg)
-
Shift points for XJ auto? Too low rpm
cruiser54 replied to rynoshark's topic in MJ Tech: Modification and Repairs
87 TCU was different from the 88 to 90 and had early shifting issues. But, the TCU grounds at the engine dipstick tube stud as does it's "logic" circuit. Hint hint! Tip 10 makes sure there isn't too much resistance in the connectors from the TPS to TCU and solenoid activation. Another hint..... Have you done the TV cable adjustment Hornbrod suggested? Get all this^^ done and we'll revisit this. -
87 Comanche 2.5l using 2000 2.5l Engine
cruiser54 replied to ComancheCrusher9800's topic in MJ Tech: Modification and Repairs
They're 2 completely different fuel injection systems. Just use your stuff.