


cruiser54
-
Posts
9413 -
Joined
-
Last visited
-
Days Won
14
Content Type
Profiles
Forums
Gallery
Everything posted by cruiser54
-
This^^ and refresh the grounds at the engine dipstick tube. that's where multiple circuits for the transmission control unit ground. also do Tip 10 on my website.
-
-
-
-
-
-
-
-
-

-
You can always have someone move the steering wheel back and forth while you observe the steering components. You will see what's moving. are you sure you need a RMS? I’d be looking up ABOVE first, and VERIFYING the source of the oil leak YOURSELF. Everybody, who doesn’t own or have to pay for or perform your vehicle repairs, loves to poke their noggin UNDER the Jeep and come out bearing the false bad news that your RMS is leaking. Many mechanics, friends, and good old Uncle Bob seem to enjoy telling you it’s the rear main seal. Has a catastrophic ring to it, doesn’t it? A simple leak at the back of the valve cover or other source could produce the same symptoms. You don’t need to be a mechanic to figure this out. If you have good eyesight and a dim flashlight, you’re good to go on your own. Don’t jump on the RMS/oil pan gasket bandwagon right off the bat. Almost any oil leak on your 4.0 is gonna drip from the RMS area for two simple reasons: First off, the engine sits nose-up and any oil will run back to the RMS area. Secondly, the RMS area is also the lowest point on the engine. Simple physics and the old plumber’s adage apply here: “Crap flows downhill”. Valve cover gasket, oil pressure sending unit, oil filter adapter seals and distributor gasket, in that order, have to be eliminated as possibilities first.
-

Alfa Romeo project progress
cruiser54 replied to cruiser54's topic in Member Projects: Other Cool Stuff
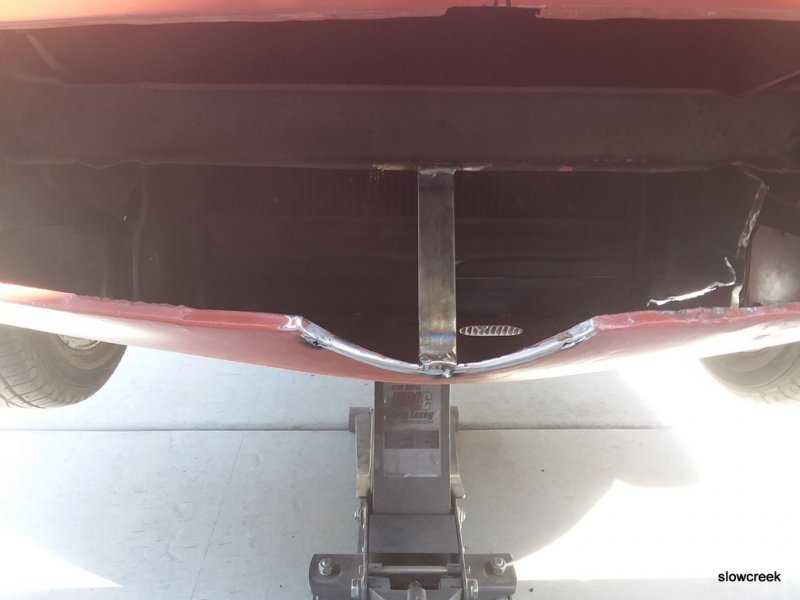
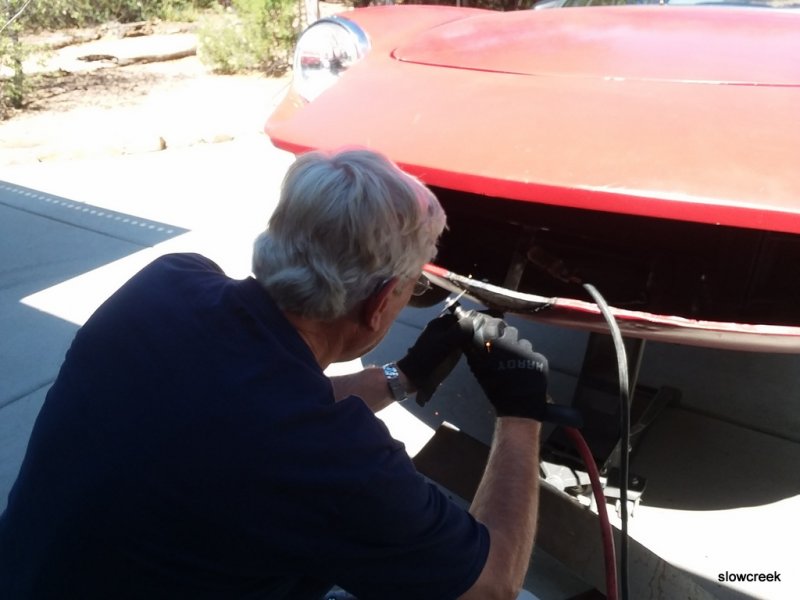
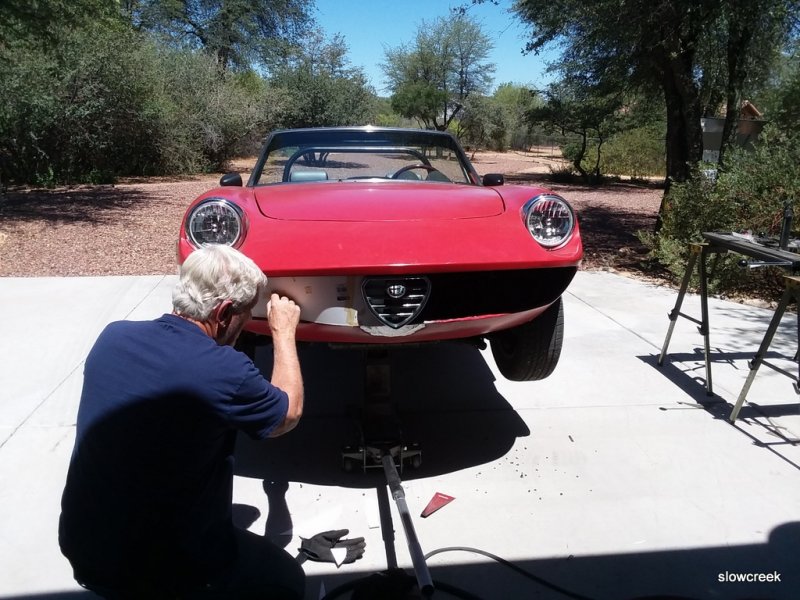
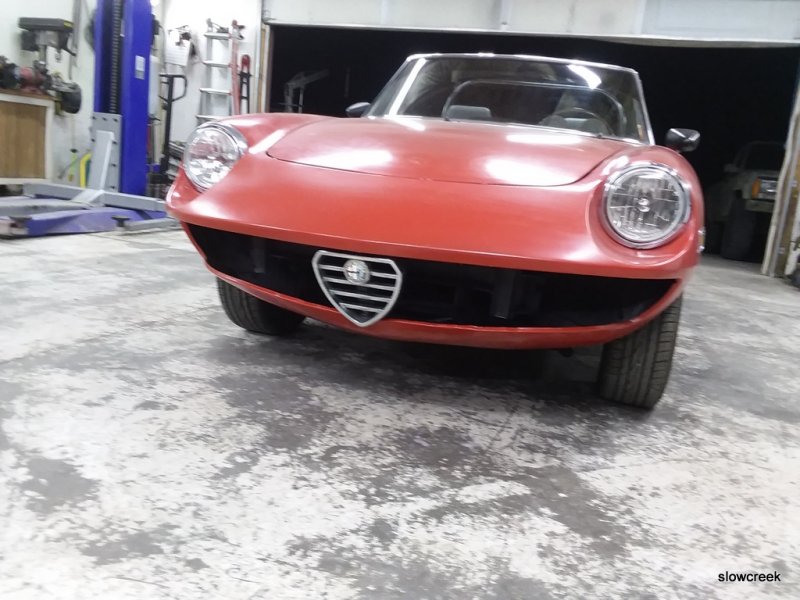
Good progress on the front grille project yesterday. That is NOT ME in the photos. That's my good friend Steve working his metal magic on my car. You may notice there are no park/turn signal lamps. And, there won't be. They are built into the headlamp bulbs!! A strip of 2 different brightness amber LEDS along the bottom of the bulb. The headlamp bulbs are H4s.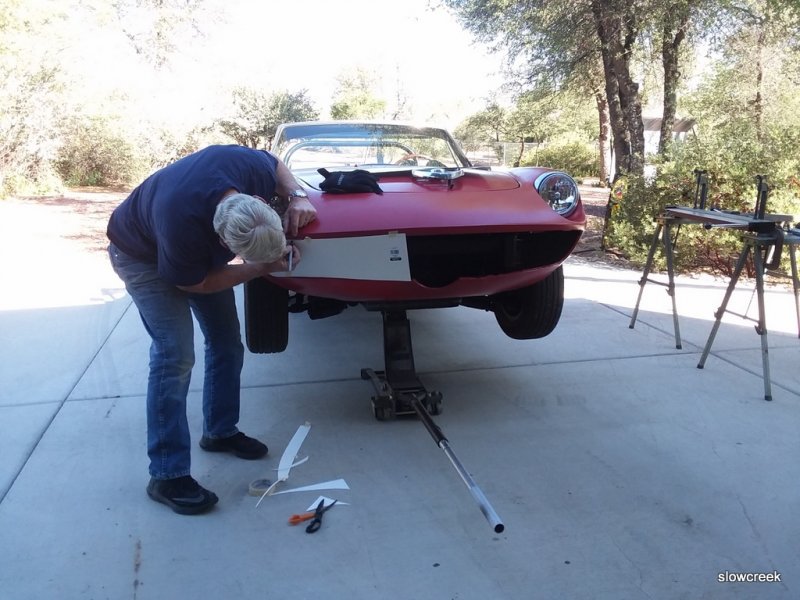
-
Alfa Romeo project progress
cruiser54 replied to cruiser54's topic in Member Projects: Other Cool Stuff
been dialing in the pair of Weber carbs. This makes it quick and accurate for jetting. https://www.wide-band.com/product-p/apsx_d2n.htm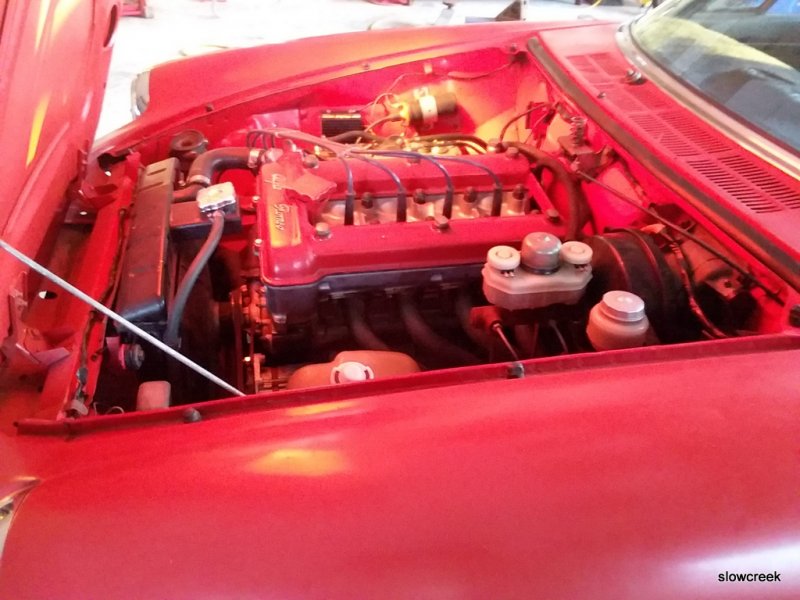

-
Don't they blink the side markers alternately? How are the marker bulbs?
-
Sporadic delayed starting
cruiser54 replied to coolwind57's topic in MJ Tech: Modification and Repairs
You 100% sure the throttle body to MAP sensor hose isn't compromised somehow? CRUISER'S MOSTLY RENIX TIPS THROTTLE BODY TO MAP SENSOR HOSE FIX JANUARY 23, 2016 CRUISER54 27 COMMENTS The Renix throttle bodies have a strange and failure prone connector on the side where the MAP supply originates and then runs up to the MAP sensor located on the firewall. This hose/pipe assembly is no longer available for purchase. The real kicker here is how critical this line is in supplying the correct vacuum signal to the MAP, the most relied upon sensor for the ECU to read regarding air/fuel ratio. Any cracks, melted spots, or loose rubber connectors can cause major starting and driveability issues. There’s a simple fix though. All that’s required is a 1/8” NPT tap, a new throttle body gasket ( Napa FPG 60742 ), a vacuum fitting (Napa 05703-B102), two vacuum elbows (Napa2-670), and a length of new plastic piping (Napa 2-672). Remove the throttle body and take it to the workbench. Using an oiled tap along with a driver, carefully thread the lower of the 2 holes of the throttle body where the old fitting was plugged in. Don’t go too deep. These are pipe threads. Flush the hole with carb cleaner and inspect for any left over cuttings. This is an excellent time to do a complete throttle body and IAC cleaning. See Tip 11. Take the vacuum fitting (05703-B102 ) and apply a LITTLE bit of thread sealer on the threads only. I prefer Permatex #2 but almost anything is fine. . Carefully screw the fitting in until snug. Install one of the vacuum elbows on the MAP sensor so it points toward the throttle body, and the other vacuum elbow on your new throttle body fitting so it points up to the MAP sensor. Cut a length of the new plastic tubing (approximately 13 inches) to fit between the vacuum elbows and install it making sure there is enough slack for some engine movement. Route it according to the photo. We don’t want any rubbing or chafing with engine movement. Not a bad idea to use some contact cement or Gasga-Cinch sparingly on the tubing to elbow connectors. Revised 2-06-2016 -
Adjustable Proportioning Valve
cruiser54 replied to Sylar's topic in MJ Tech: Modification and Repairs
There's a thread on here about it. Do you have experience flaring brake tubing? -
Sporadic delayed starting
cruiser54 replied to coolwind57's topic in MJ Tech: Modification and Repairs
They were wrong from the factory...... We worked hand in hand with JeepTech figuring this out at our dealership. This is an important procedure. -
Sporadic delayed starting
cruiser54 replied to coolwind57's topic in MJ Tech: Modification and Repairs
Distributor indexing explained For clarification though, that’s not a cam sensor inside the Renix dizzy. It’s there to fire the injectors sequentially with the firing order. You’ll never notice if it went bad because the ECU will try to “guess” where it is and does a heck of a job at it. As for the “timing”, it is controlled by the ECU. Ever notice how wide the tip of the rotor is? Try and wrap your head around this: When the ECU yells “Fire” to the ignition control module, where is the rotor in relationship to the dizzy terminal? Not to the terminal yet? Past the terminal too far? What happens to the spark/secondary ignition strength when it has to jump the Grand Canyon in comparison to shooting from a rotor tip? Use Tip 12 first to guarantee you’re on #1 TDC. Now, if you read my Tip 13, you would see the importance of indexing a Renix dizzy...... -
Back in those days, you weren't so limited by "packages". You could mix and match a lot. I ordered at least 10 Comanches myself to be my demos at the dealership.
-
Alfa Romeo project progress
cruiser54 replied to cruiser54's topic in Member Projects: Other Cool Stuff
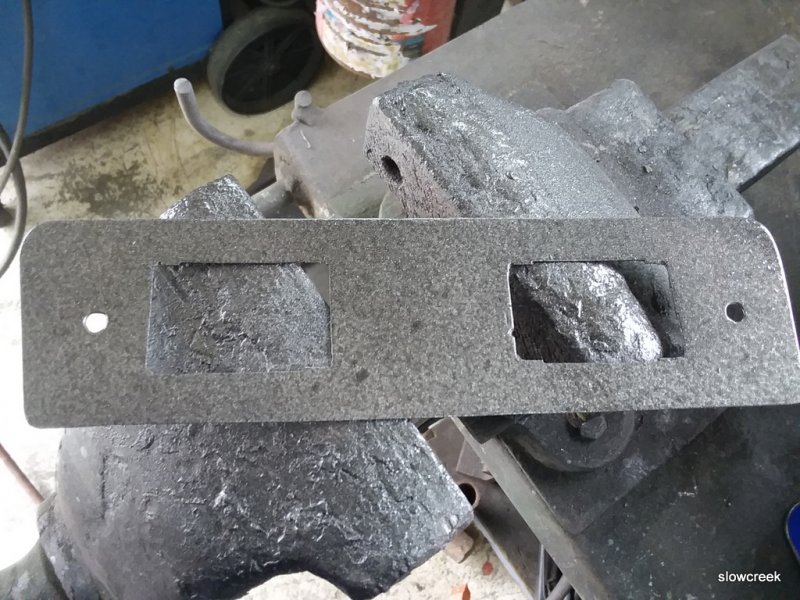
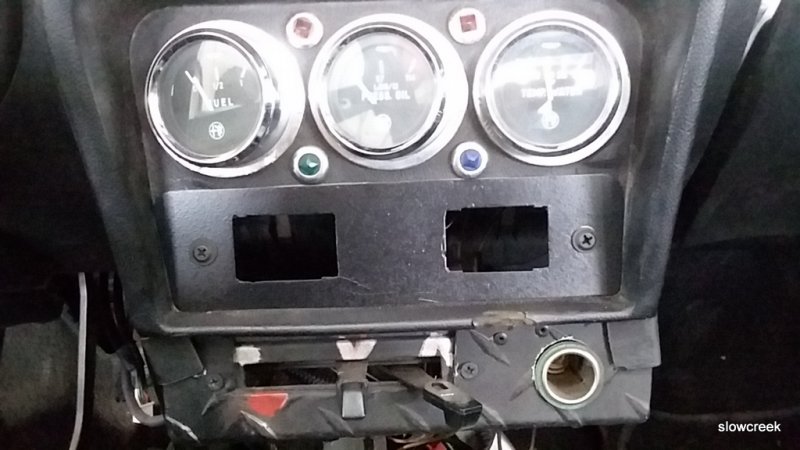
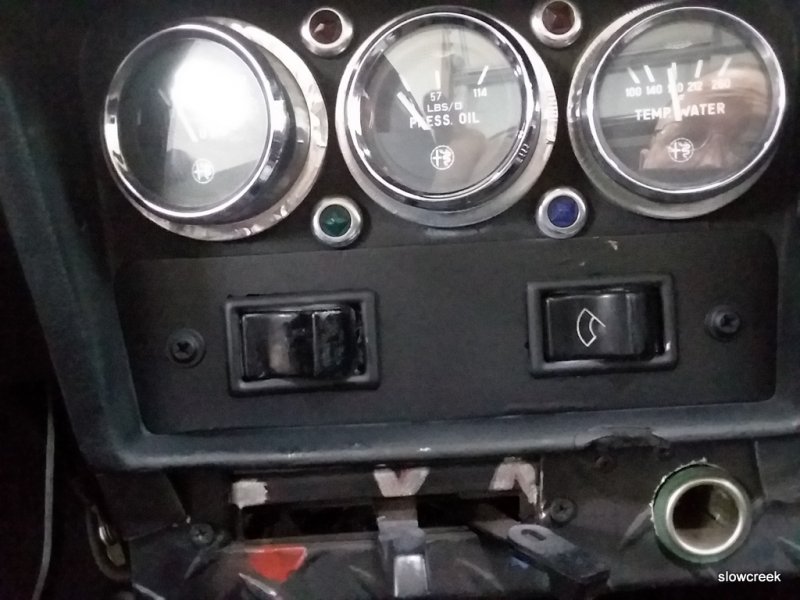
Had a catastrophic coolant loss a while back. Blew the head gasket. I consider it a blessing because I got to see what a crappy job the guy did on my head. Went with 1mm oversize intake valves and milled .030" off of it. runs great. So, I got it dialed in on Friday night and we had rain off and on Saturday. Been hotter than hell here and I couldn't go drive it, so I addressed stuff on my punch list. One of those things was using the spot where the radio used to go as a spot for my blower and wiper switches since I ditched the very ratty console long ago. I got the wiring harness installed for the wideband air/fuel ratio gauge which will be installed later.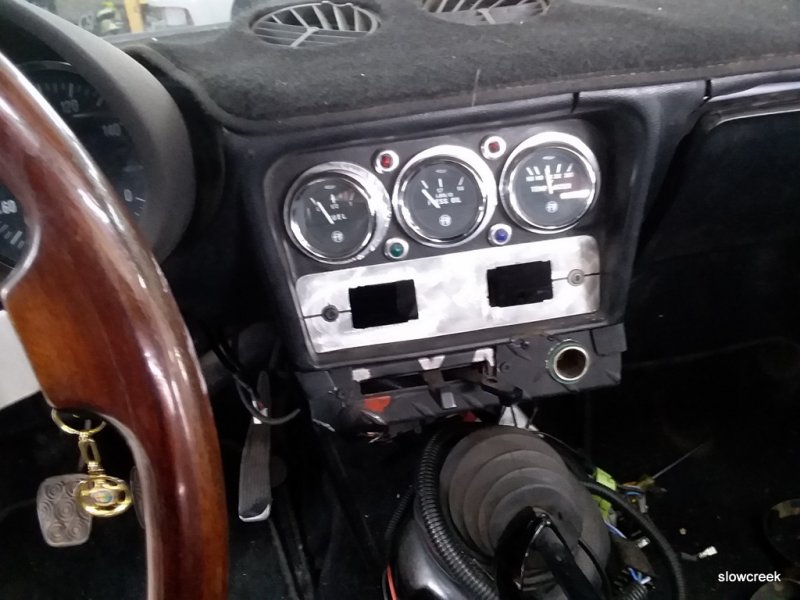
-
Sporadic delayed starting
cruiser54 replied to coolwind57's topic in MJ Tech: Modification and Repairs
Good idea. -
Sporadic delayed starting
cruiser54 replied to coolwind57's topic in MJ Tech: Modification and Repairs
I'll bet the injectors aren't staying closed when the engine is off. Try this. Key On and let the pump run. Key off. Key On again and let pump prime again. Now key to Start and see what the result is. -
Do this: The ground point for the complete instrument cluster on your XJ or MJ is located up under the driver’s side dash. If you lay on your back and look up under there with a flashlight, without wearing a hat, you will see a black wire attached to a shiny piece of metal almost directly above the hood release knob. The screw will have either a ¼” or 5/16″ head on it. This ground point is responsible for handling the ground circuit for the following items: Dome lamps, seat belt and key warnings, transmission power/comfort switch, wiper switch, headlamp switch and delay module, fog lamp switch, cargo lamp switch, all instrument panel grounds and illumination, power windows and door locks, cruise control dump valve, and a few more things. The problem is that where the ground point is located does not share good contact with the chassis where the ground should be. The solution is simple: Make up a jumper wire with #10 gauge wire about 10″ long. On one end, crimp on a ¼” round wire terminal. On the other end, crimp on a 3/8″ round wire terminal. Remove the screw from the existing ground wire and attach the small terminal of your jumper so that the original wire and your new jumper share the same attaching point, one over the other. Look above the driver’s side plastic kick panel just forward of the top of the hood release knob. You will see an 8mm stud there. Attach the large terminal end there with a washer and nut over it tightened securely. Use a coating of OxGard at all ground contact surfaces when attaching the screw and nut. **Special note for Comanche owners: Make your jumper wire 12″ long and attach it on the driver’s side kick panel close to the fusebox on the 8mm stud.**
-
No power to o2 sensor heater from relay.
cruiser54 replied to chopper35nj's topic in MJ Tech: Modification and Repairs
Terminal 30 gets it's power from the ignition switch. -
Here are the links for 90 Cherokee and 87 Comanche. Those happen to be my saved vehicles. http://www.rockauto.com/RSS/vehiclefeeds.php?carcode=1179996&m=wc&l=en&html=true http://www.rockauto.com/RSS/vehiclefeeds.php?carcode=1181483&m=wc&l=en&html=true