


Gjeep
-
Posts
1221 -
Joined
-
Last visited
-
Days Won
3
Content Type
Profiles
Forums
Gallery
Everything posted by Gjeep
-
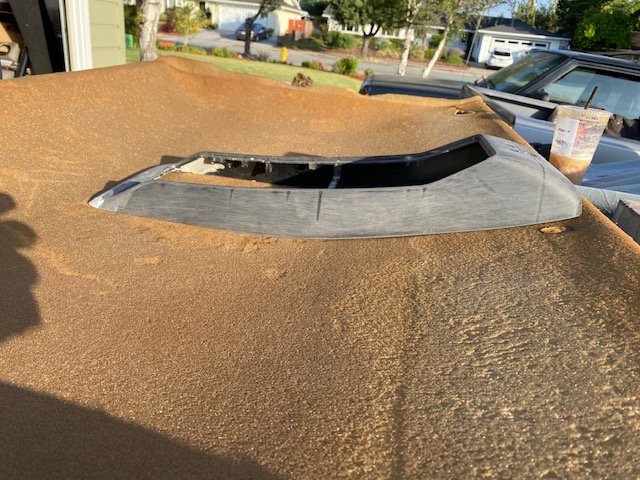
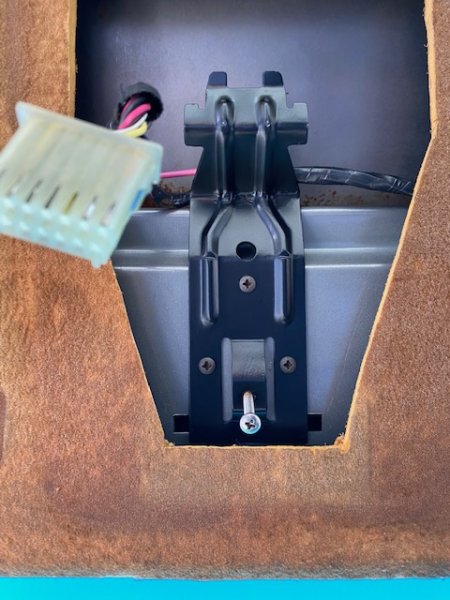
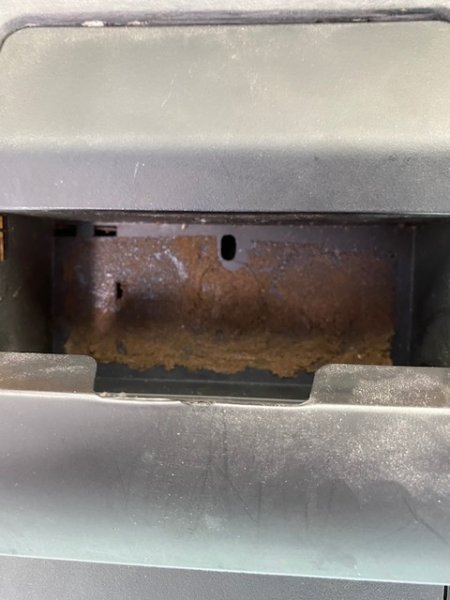
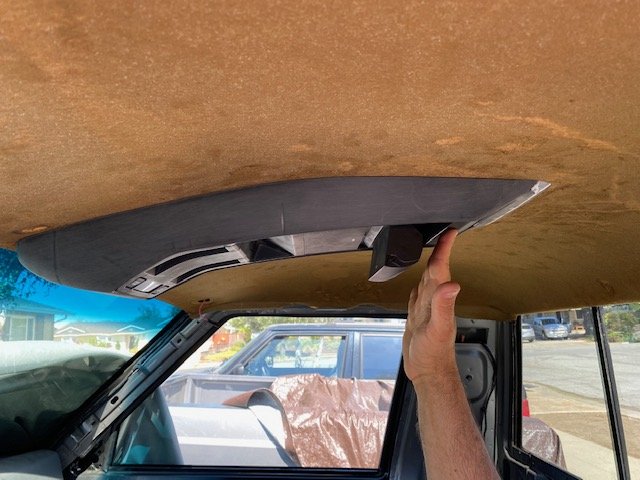
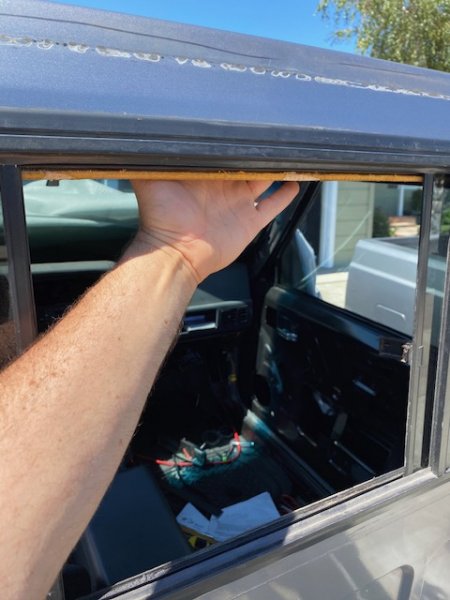
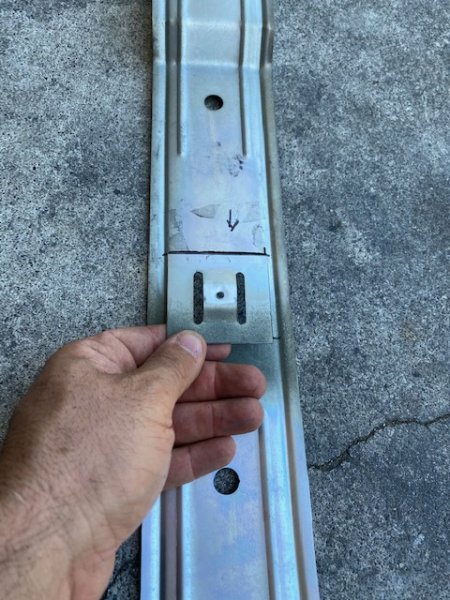
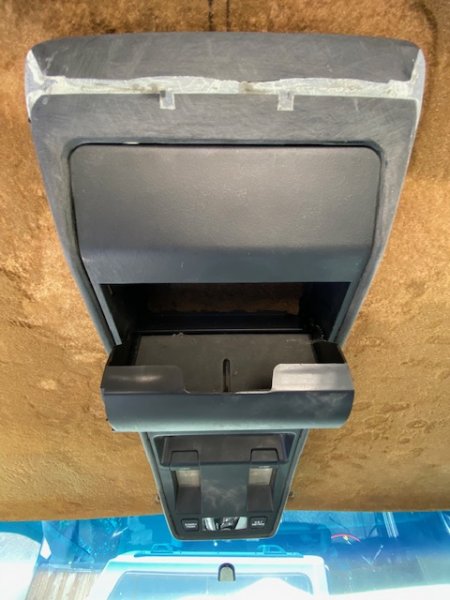
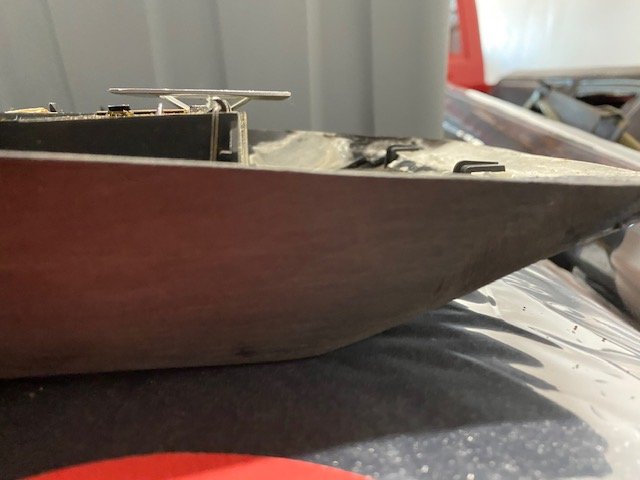
Started the morning with a heat gun gently pulling back the original gray headliner material…Success. Next I did some minor sanding on the bottom side of my MJ overhead console creation to get it dialed to the headliner I’ll be using. This headliner was installed NOS when I got this MJ back in 2012, so it’s still in good shape…and the cut-out towards the front was done to accommodate an interim mini overhead console I quickly cobbled together back then. Another hole needed to be cut in the headliner for the storage compartment area to ‘sink in’. I should note, this console is a heavily modified/sanded down XJ unit to accommodate the MJ’s arching roof. The tail end of the console is from a diced-up Chryco minivan console – and lots of plastic bonding compound with endless sanding. And sanding. And sanding. Then I put the headliner in place and test fit the console for front mounting bracket adjustment. This mounting bracket is a modified XJ bracket. If you look close at the raised ridges of this bracket, you’ll see where I did a straight cut of those ridges so the bracket could be easily adjusted while in place to fit the overhead console. A couple of tests/ bends and I was in business. First pass I hung the console and fastened it front side with the mounting screw to see how the rear of the console would hang. A small gap was present…knew that was coming due to the consoles weight. Long ago I grabbed as many Grand Waggy SJ overhead console mounting brackets as I came across because I had a feeling I’d need that backside tab for getting things to work in the MJ. At first, I considered using the full stretch of the SJ bracket, but I saw it would take more work than just a few bends to work…so despite running the risk of SJ-er’s hating me forever cutting up this hard to find bracket, I fired up the Dremel. This tab was the exact ¼” rise I needed to get the back of the console pinned to the headliner. Know that the higher side of the brackets tab needs to go towards the front of the MJ, whereas it was facing the opposite direction in the SJ. (Newer XJ consoles are easier to mount back side of the overhead console as it has a tab that simply fits behind the headliner and wedges itself in place. Perfect for MJ-er's who do the '97+ XJ swap, but for my build I wanted to keep things era pure.) Since this console was derived from the first-gen Dodge minivan and adapted to the XJ when Chrysler acquired Jeep, I learned that in a handful of applications this console was attached to the vehicles roof via a hole in the sunglass bin. The SJ was an example of where this was done. Another test fit with the bracket in place (and mounting screw cut to the proper length so not to go through the roofs sheetmetal)… Perfect… I could hear the SJ bracket contact the roof, so it will be good to tack into place after several more test-fits. Final photo is for those considering installing CRL sliders… not a big deal, but FYI, the headliner and a small (less than an 1/8” gap) shows when the window is open. This slider was installed on the truck when I purchased it. My fix for this gap is a sideways mounted ’97 XJ rear passenger doors gap seal mounted on the MJ horizontally. Fits and looks well with minor trimming. I haven’t decided if I’m going with a new CRL deep tinted slider (same style), solid or factory glass, or back in 2016 I worked with a local custom automotive builder to create a deep tinted solid glass exact size and fit as the factory glass. Due to the cost involved, I ended up getting 3 rear solid glass pieces to possibly use on both MJ’s. Need to figure out what I’m going with.


-
https://sfbay.craigslist.org/scz/tro/d/aptos-custom-jeep-comanche-trailer/7145042234.html
-
Lookin' good!
-
Yep -- I couldn't find any fuel line small enough here in the States, so I ordered from a UK site: http://www.volksbolts.com/FuelHose/index.htm For the MJ, I purchased 5.6mm ID hose 5m continuous length (as I have 2 truck I'll need this for). FYI - 5m is approx 16'.
-
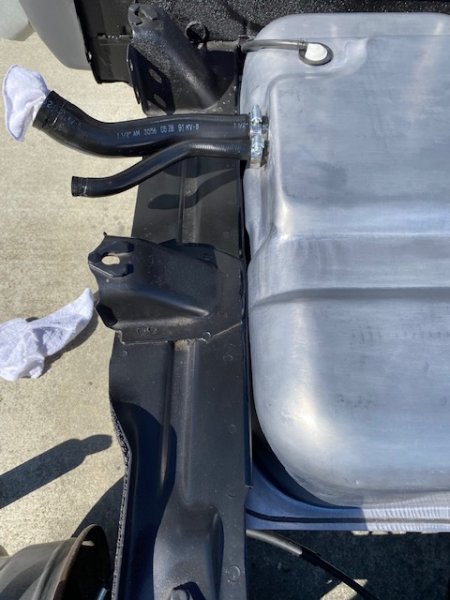
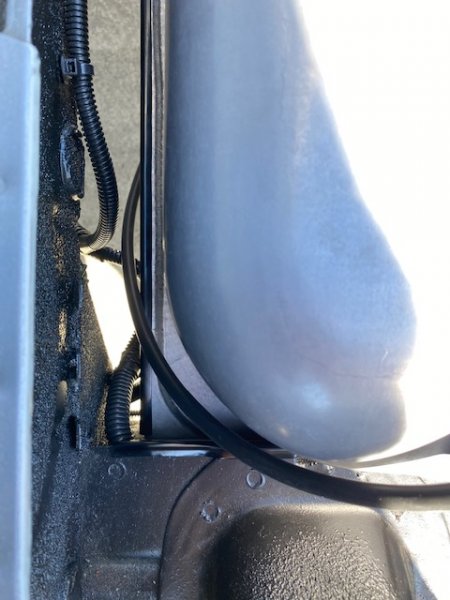
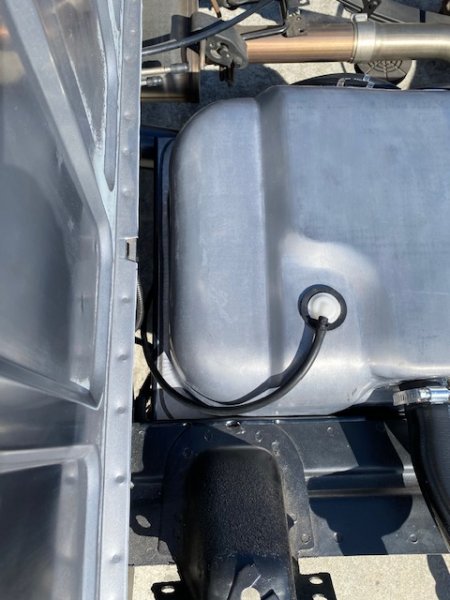
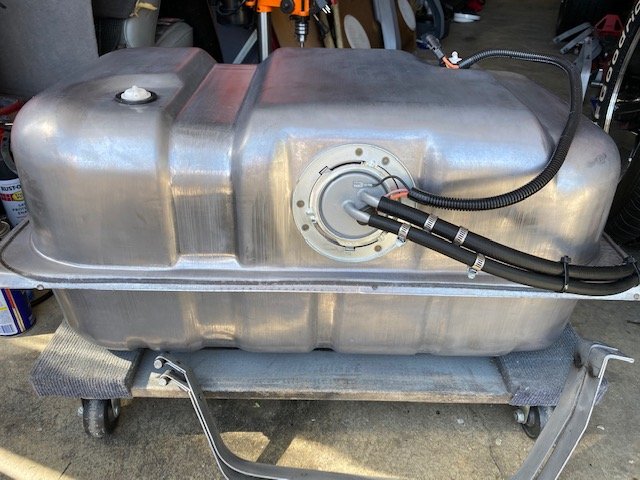
Got the tank in place...I routed the factory taillight wiring under and against the lip of the frame rail. The way the factory it came from the factory is a pain to deal with when removing the bed, as it is attached to the bed in two different places. It's not out of the way of everything. Just to be extra cautious, I added a rubber trim across the front edge of the fuel tank. I also added another rubber strip on the edge of the frame rail that the fuel tank rests against. New fuel and vent hoses throughout. (The fuel tank vent lines will be attached to the parking brake equalizer mounting bracket at final assembly). Underside shot. The 'other' 3-pin weatherpack connector attached at the cab is for the camper shells 3rd brake light (when/if running the shell). And the 2-pin weatherpack connector is for 12V power should I decide to run it to the bed.)

-
This is the power window set up he's running...https://www.quadratec.com/products/73003_801.htm?gclid=EAIaIQobChMI7pylxvSN6gIVXx-tBh2z7QZHEAQYASABEgL72PD_BwE
-
Repair or Replace Dash Help
Gjeep replied to Comanchakazie's topic in MJ Tech: Modification and Repairs
I guess it a matter of how you want your truck to look...My neighbor tried the dash patch on his car. It looked worse than the cracked dash. If aesthetics is important to you, swap out the dash from a wrecking yard. It's not too difficult. Just remember to remove your original VIN plate on drivers windshield corner of dash and transplant it to the "new" dash. -
I'll be building a MJ specific 'factory looking' sub box in the next couple weeks. It will be subtle and only running 2 Rockford 6.5" mid-woofers to compliment the 4 Rockford speakers I'm running with Punch amps. If you take a peek at my 'Son of Stink' build you'll see what I'm up to. My goal is to keep the interior stock looking.
-
88 SporTruck - 58K Miles, Needham, MA - $12,000
Gjeep replied to NHMJXJ's topic in Craigslist/eBay... i.e. Not Your Stuff
That seat pattern mismatch is something else... -
Clean truck and looks like a good quality repaint.
-
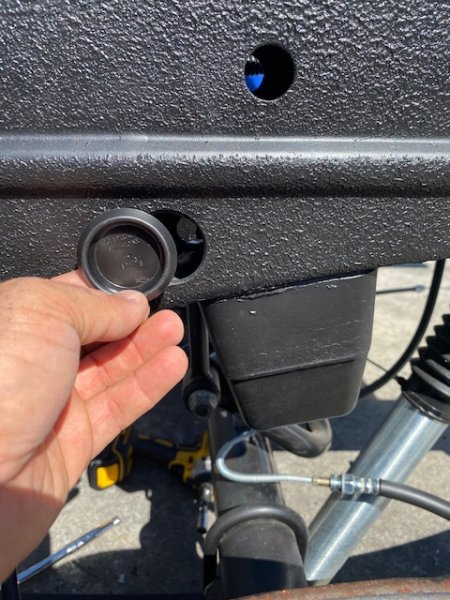
I don't see the difference between the 'no go' and 'proper clip'.
-
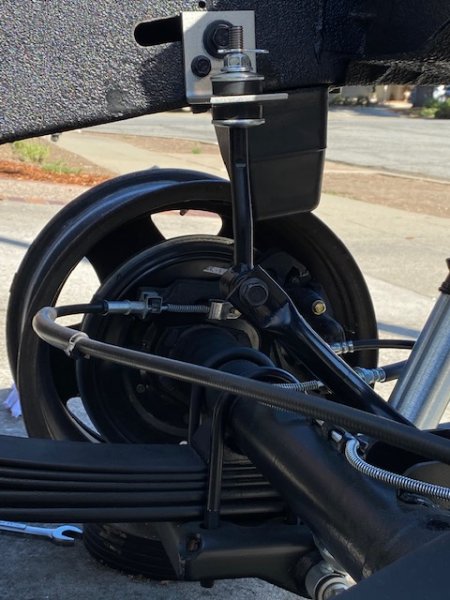
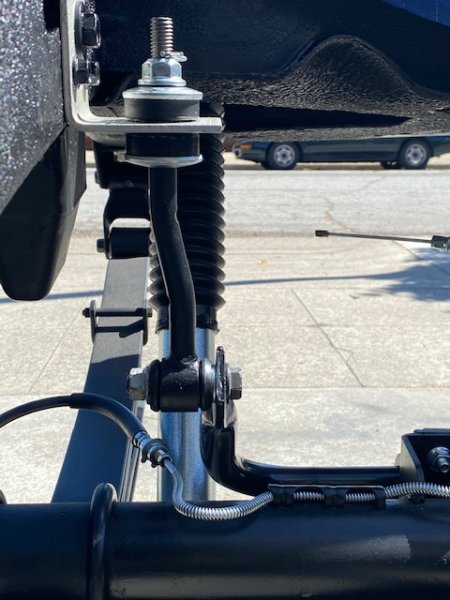
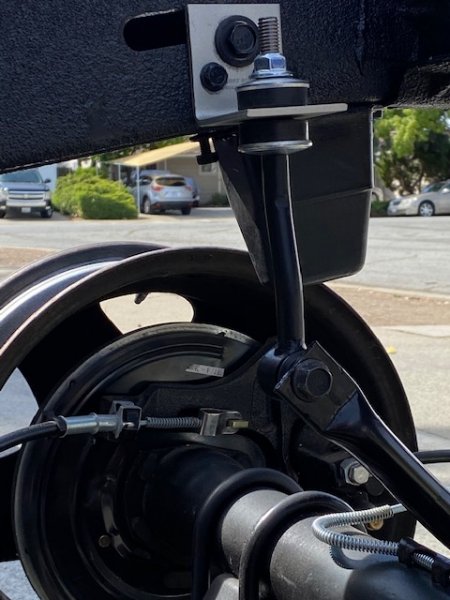
Final rear sway bar install pics -- All bushings well greased with Energy Suspension goop and access holes capped.

-
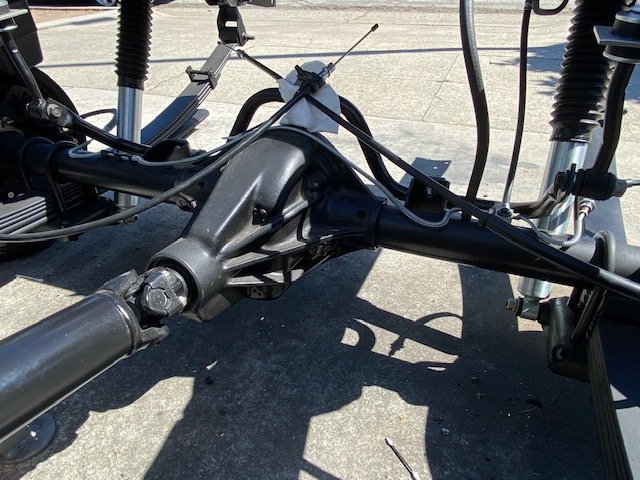
Nine 50lbs bags of river rocks are on my frame cross member in lieu of the bed & camper shell so I could mount the sway bar endlink brackets. Here's a shot of the passenger side. Managed to drop a nut into the frame rail and need to fish that out, but otherwise the install went well. (I take the rear tires off when removing/ installing the bed as it shaves about 4" of lift height. And yes, I already tightened that bumpstop bolt.) Fuel tank soon to be reinstalled...
-
That’s some pretty rare Mopar accessory body side molding. Only available in 1989/90. I’ve never seen it on any Jeep on the road/ junkyard. Nice find. They had the same available for short and long bed MJs.
-
NOS 2 door power window switches
Gjeep replied to scguy's topic in Craigslist/eBay... i.e. Not Your Stuff
General FYI for those looking at buying these — Know that the Renix and HO years are slightly different with how the wiring works, so on the back side of these switches there is a thin metal connector plate that chains certain pins together. If you’re Renix you’ll need to swap these thin plates. -
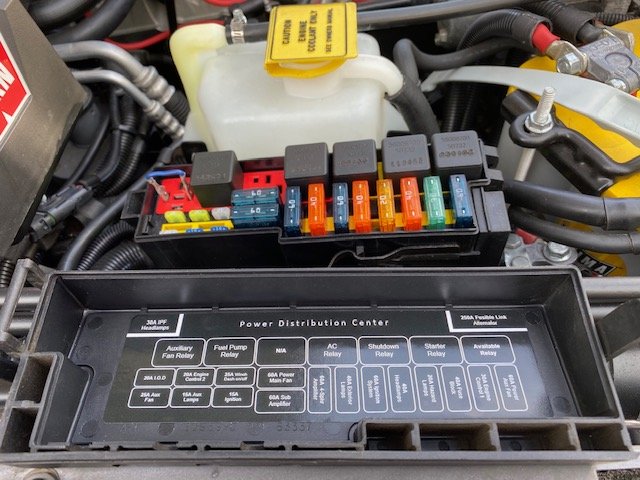
Over-stretched my back a bit so I need to take it easy for a couple days... Found a stainless steel thumb screw that works perfectly along the hood prop rod (and doesn't get in the way). Also, took delivery of my new modified PDC map and stuck it to the inner lid. Back to doing nothing I go...
-
Yep, shoulder belts officially came in 1991 though Mopar had a black belt only retrofit kit available for both the older XJ's and Grand Wagoneers.
-
Clean XJ. I never noticed that the '84's did not have rear 'oh $#!&' handles. Possibly this lack of them was a base trim thing?
-
91 Eliminator 83K miles refresh with NOS parts
Gjeep replied to Red Mistress's topic in Member Projects: Your Comanches
Correct-o. Guilty as charged. -
That’s a common clip that can be found similar in auto parts stores. In fact a non push in clip would be best. A pal nut the proper size for the threaded bolt.
-
As for car covers — Grand Cherokee ZJ specific covers fit my short bed MJ with camper well. Got it from Quadratec.
-
Dealers can still get them. Or at least they could as of about a year ago. I purchased a couple for a project. If I remember correctly they were $125 a piece.
-
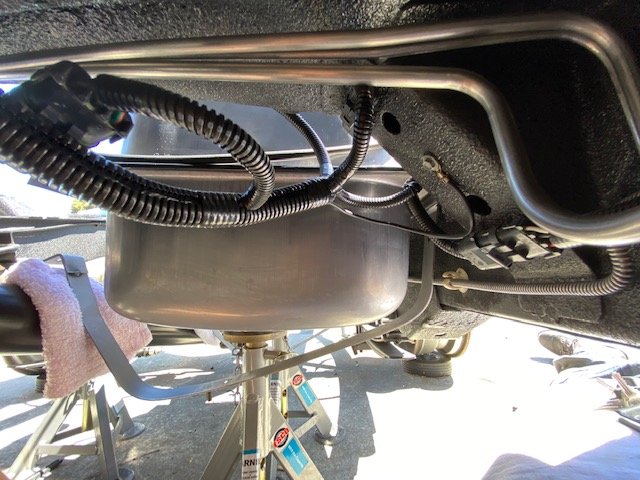
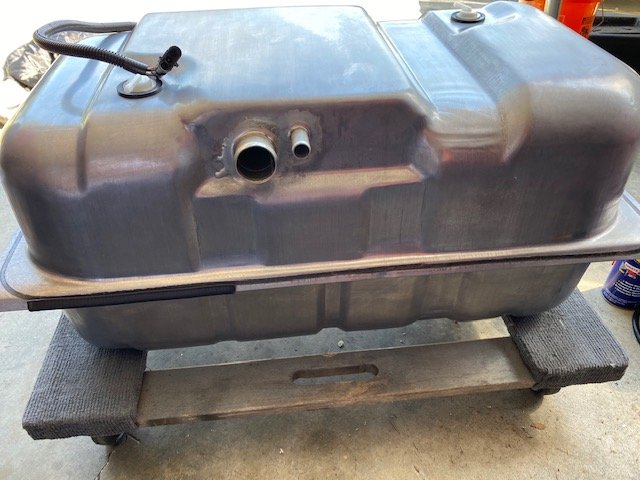
Minimal day, but got the fuel tank assembled and ready to install. New hoses, clamps, pump, filter, breather vents, wire loom, and connector.

-
Decided I’m going to see how the Laredo silver dash overlay works on the MJ with a black interior. My gauge cluster surround is already painted black. It should contrast nicely with the exterior paint and charcoal ‘jeep’ logo’d wrangler denim bucket seat inserts. Will see. Interestingly — and thankfully — to note there is no chrome outline around all the sections of this overlay as it came on Laredo models. I was going to sand off that chrome and paint it black, but as it turns out don’t have to…
.jpg.6917fcd96e02259aae6baf2fefbc11f7.jpg)
-
I reached out to SnugTop via email Tuesday of this week. I wasn't able to reach anyone live possibly due to Covid-craziness. My ask was if they could produce 2 identical shortbed hard fiberglass tonneau covers for the MJ. Also for a shortbed camper shell. No idea on the price they'd charge or what you would be interested in paying for one. I believe Hornbrod reached out to them about 10 years ago to produce a brand new shell and they did. Not sure of what it cost... When I get in touch with them on both the tonneau and the shell possibility/ cost I'll post back on CC. If anyone else has interest, let me know. Thanks