


Gjeep
-
Posts
1247 -
Joined
-
Last visited
-
Days Won
3
Content Type
Profiles
Forums
Gallery
Everything posted by Gjeep
-
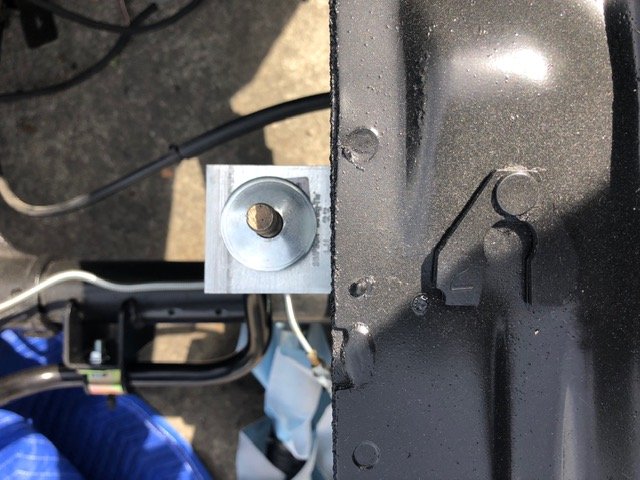
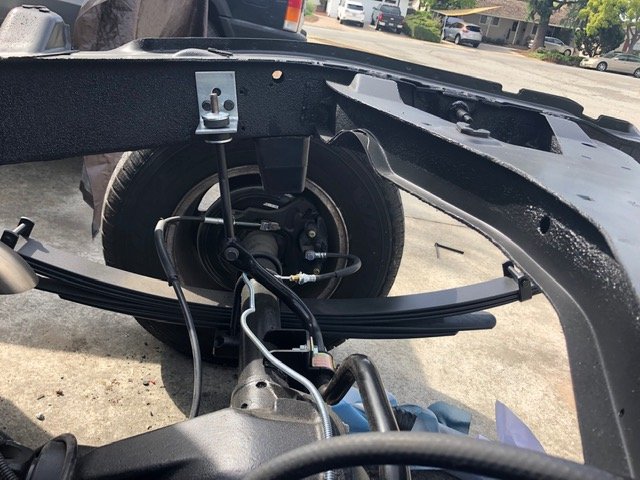
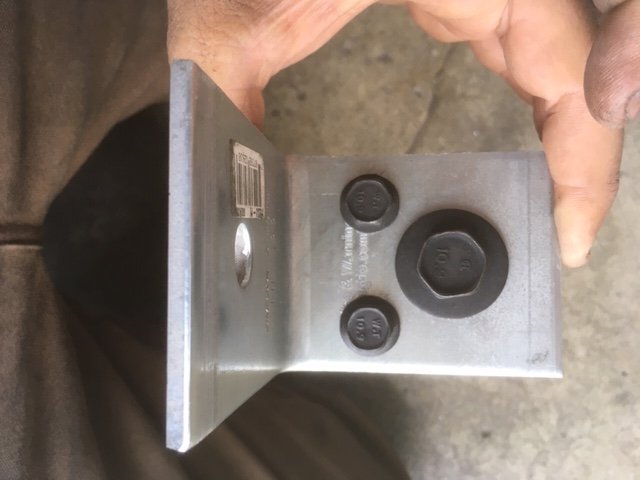
Been cleaning up and painting the underside of the MJ for the past little while. If I were smart, I would have done this when the engine/ trans was out… And after I don’t know how many ‘options’ shipped to my house or pulled from a salvage yard for rear sway bar end link and mount considerations…I stumbled on the perfect bracket at Home Depot while shopping for a house project – Simpson Strong Ties heavy-duty 90* brackets. Brakes lines, shocks, and other rear-end components are loose – and no holes have been drilled into the MJ frame yet, as the bed needs to be in place for final weight/ height adjustments…but if I’ve measured correctly, the top most part of the 90* bracket will be touching the top most part of the MJ frame overhang. Only modifications I made to the brackets themselves was 2 additional lower holes for triangular grade 10.9 attachment to the frame itself. The endlinks I went with are the same I’m running on the front sway bar of the MJ – Tomken 2” XJ/MJ lift endlinks (TMT-4013-X2). I like these because they are beefy and come with over-sized rubber bushings.
-
I did a search and found a CC member installed brackets across this frame to hang a non-factory aluminum tank versus where it hangs off the bed. Has anyone done this with the factory tank. It is a pain to remove when pulling the bed...especially when painting. Getting it to the booth then dropping the tank and removing the bed...blah blah. Let me know if anyone has done this as a long term solution.
-
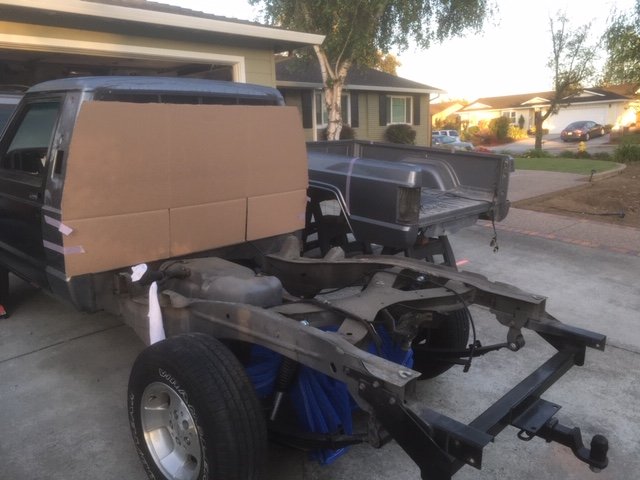
Busy morning with the MJ…Had help lifting the bed off at the crack of dawn, removed the fuel tank -- and then went to town brushing, vacuuming, scrubbing, degreasing, scuffing and then painting the frame satin black. Got about half-way done, but still need to tackle the cab unibody underside and inner front fenders. I’ll need to spend plenty of detail time taping/ covering so I don’t over-spray on the installed suspension goodies. I like how it looks though. These photos show some of what I got done today... Once I ran out of paint for the day, I took a dry scrub brush to the underside of the bed and repeated the steps to prepping the uni-frame above. That too will get hit with satin black coverage.
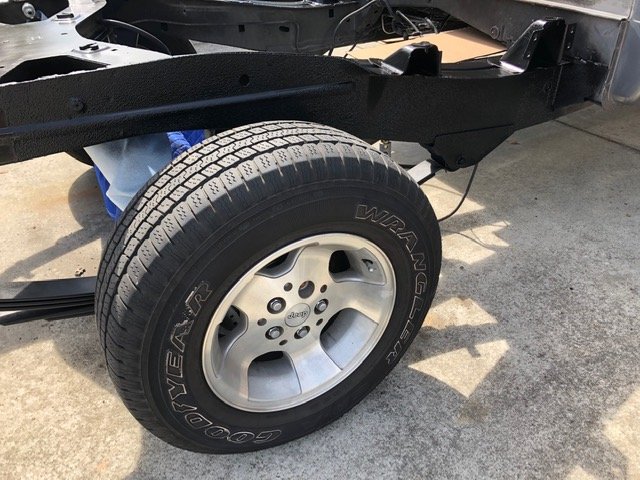
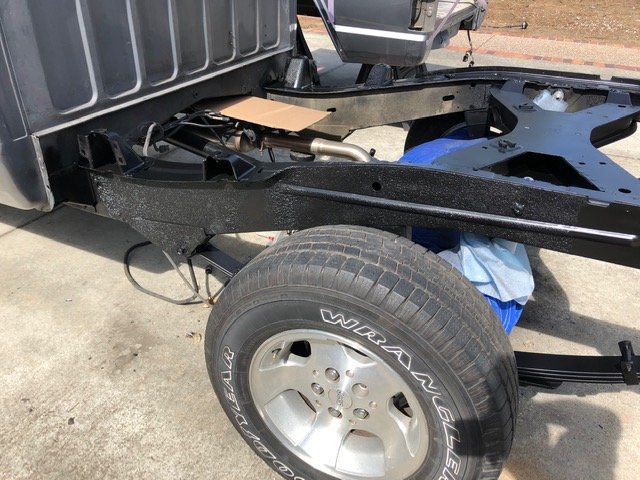
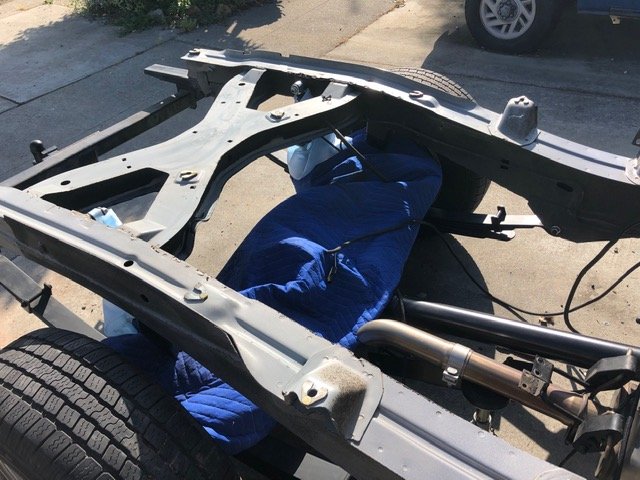
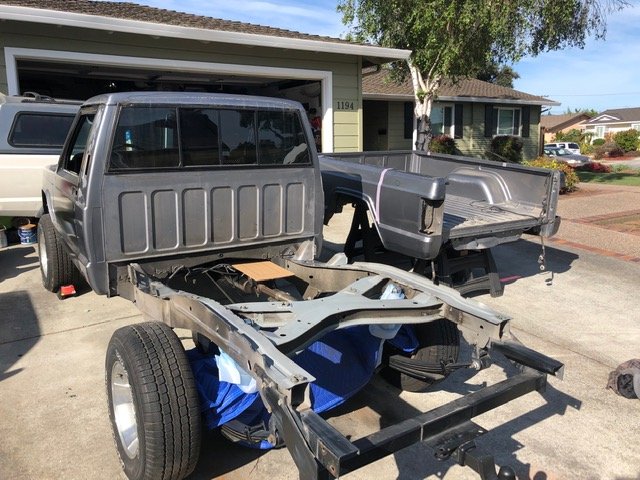
-
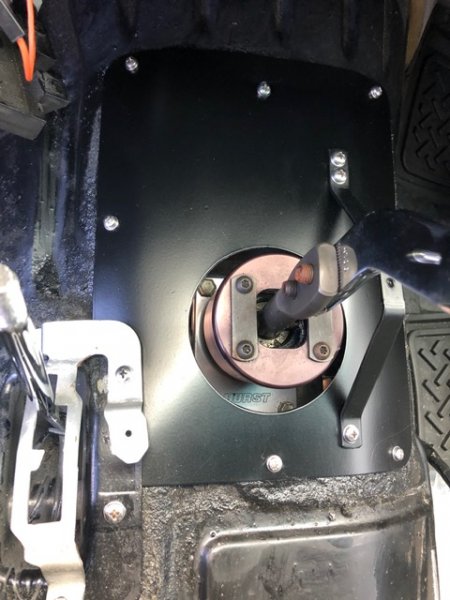
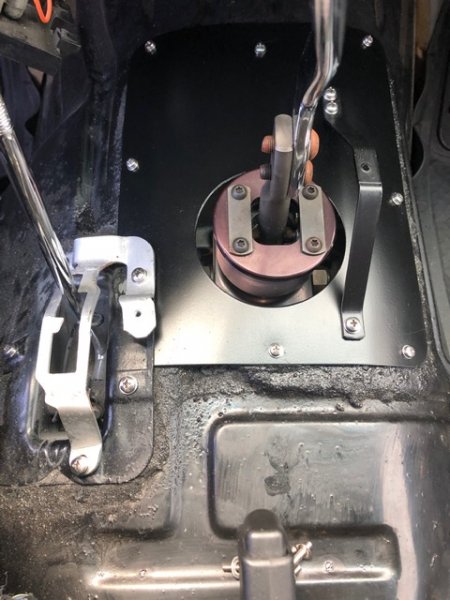
Wasn't a fan of the oversized oval hole in the transmission cover-plate for AX-15's. Got a scrap MJ column shift AW-4 with an XJ AW4 trans cover-plate and made the below...Centered hole with the full console support bracket. All stainless M4 & M5 hardware sits in nutserts.
-
90-96 footwell light connector
Gjeep replied to BeaterComanche86's topic in MJ Tech: Modification and Repairs
To answer the original question -- they don't exist (female side). I've looked high and low. But, if you were working on the male side of the terminal there is a Ford terminal that is an exact fit to those. It's in a small 8 pin set at O'Reilly's Auto. It comes in a mix of Ford and Chryco terminals male/ female. The matching female terminal in this kit is nothing like what you need unfortunately. -
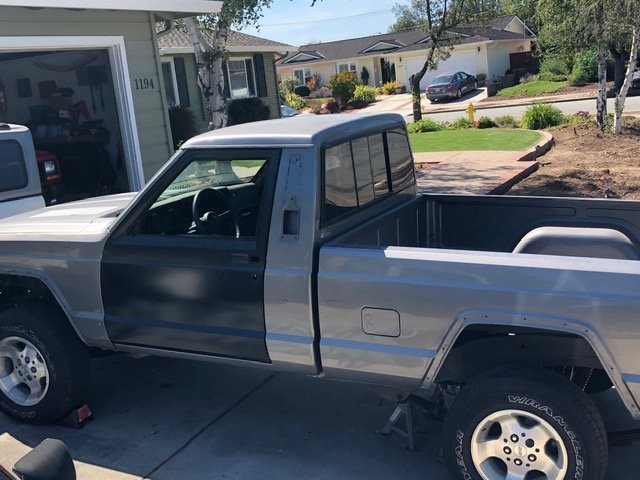
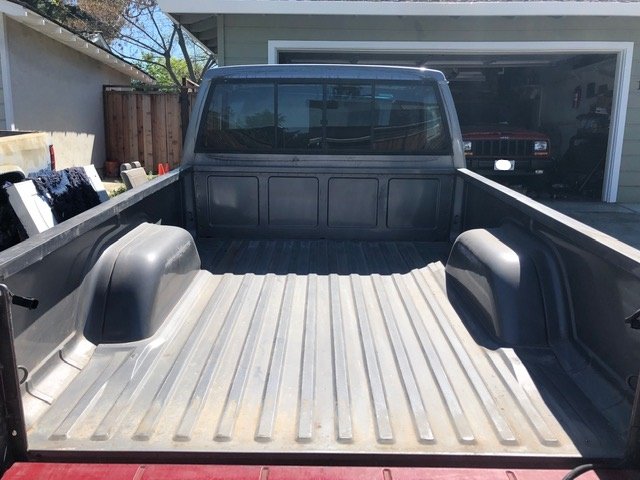
Spent a while under the MJ removing anything that was hanging off the bed of the truck -- fuel tank, exhaust, etc -- and spent quality time with a level. Seems the odd-- spot on the MJ are passenger from corner needs less shim and the driver side rear corner needs more shim. The bed was under tension/ popped when I was removing the nuts that held it to the frame. When I removed the bed on my '89 MJ it was level and quiet. Balance of my time was spent aligning door and fender panels; in addition to marking any dings/ dents that I need to deal with prior to painting it in late summer or early fall. Some of the weekend will be spent with the bed off shimming...and cleaning up the frame.
-
Devil is in the details...My MJ bed is almost a 1/2” higher on the passenger side center rear section starting at about the fender well. Shimmed less than perfect from the factory (hard to imagine)! I learned this as I was readying to attach sway bar end links. Took all sorts of measurements and level points. And yes, ground the MJ was on was level...I get to pull the bed and re-shim this weekend! Also, removed the camper shell and bedliner...Aside from a 2" dent on the front end panel, the inside of the bed is straight.
-
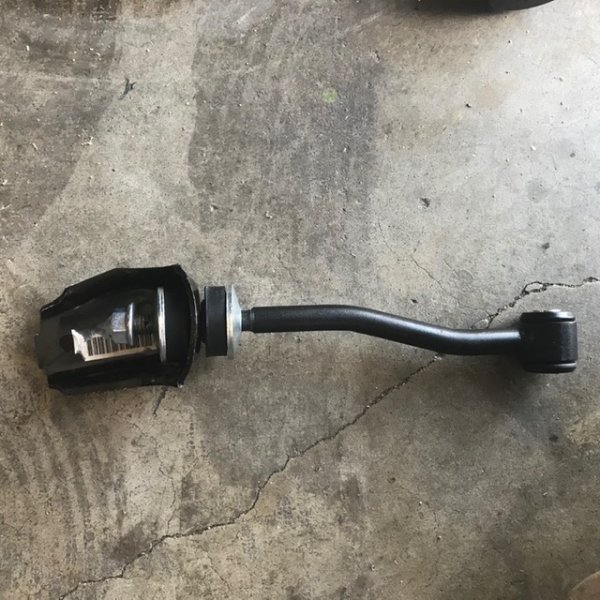
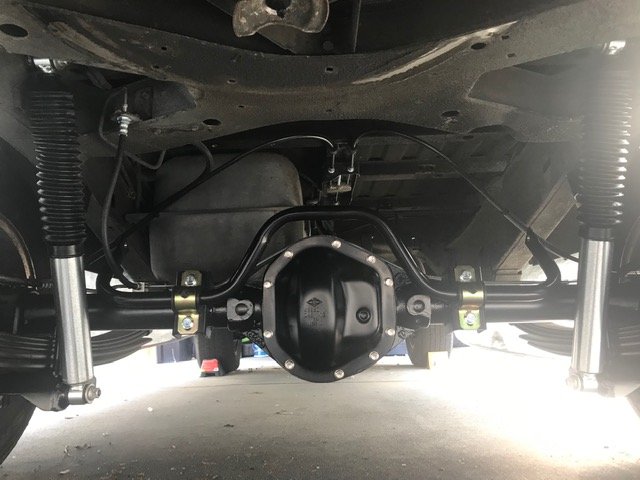
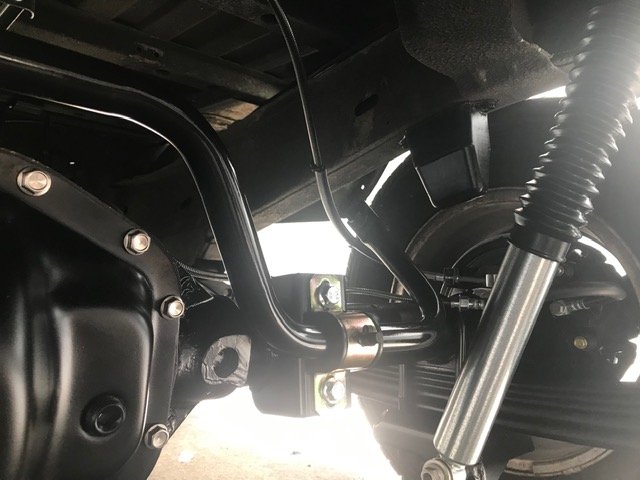
Got to putting together my rear sway bar set up this afternoon and realized…there WAS a reason I was originally going to have the sway bar arms pointing forward…to clear the shocks! Needed to go with the alternate endlink set up I was considering before the Dodge 2500/ Ford Explorer set up – Using a 90’s Camaro/Trans-Am endlink ‘bucket’ mounted to the MJ’s frame side, XJ front sway bar end link, and grade 10.9 bolts through the frame (possibly sleeved or just damn careful not to crush the frame when tightening). The new brake lines on the passenger side of the axle are good, but the short driver side brake line need to be revised. This set up though different will work just as well. And because the endlink mount is attaching to the side of the frame I can position it straight down when attaching to the sway bar. It won’t be at an angle as the other set up was. Here’s some pics of the work I got done today.
-
I haven't decided...but most likely not. Going to carve out the behind the scenes plastic support to make room to hide the subwoofer amp. I'll have 2 overhead lights already from the overhead console I've made, footwell lights, and B-pillar lights. If I do keep the light on that sound bar, I'll end up putting the subwoofer amp under the passenger seat or under the passenger side B-pillar plastic. Need to figure it out. A work in progress.
-
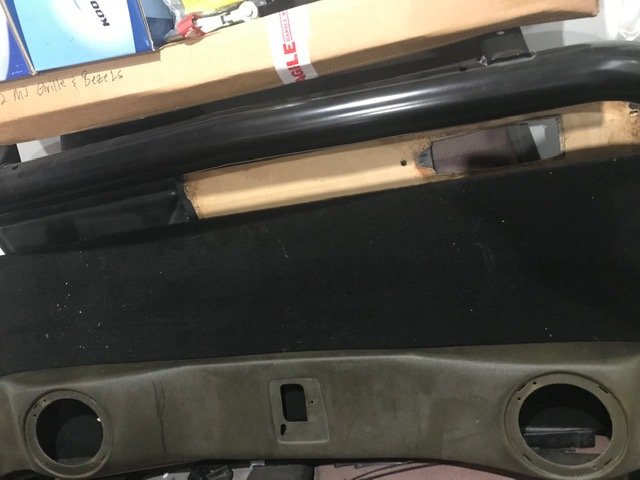
Was going through my garage and found the sound bar I removed from my '97 XJ (in favor of the more integrated headliner design the late '99+ XJ's had)... Thought it would be neat to add a couple more speakers to the MJ cabin. Then found the spare '99+ XJ sound bar support I had and thought maybe I could use that and integrate it better to the cab back wall. Got lucky at the local yard this morning and found a soon to be scrap 99+ XJ -- and scavenged what I needed for the MJ. Rockford makes 6.5” slim mid-woofers that'll fit once I carve out the plastic of the former XJ overhead set up. Should be plenty of decent bass once I adjust the dedicated subwoofer amp. Lots of trimming will need to happen to get the former headliner to fit the MJ back wall, but it'll happen...Want it to fit right and overlap front side of the back of cab wrap b-pillar panels just as the factory carpet board did.
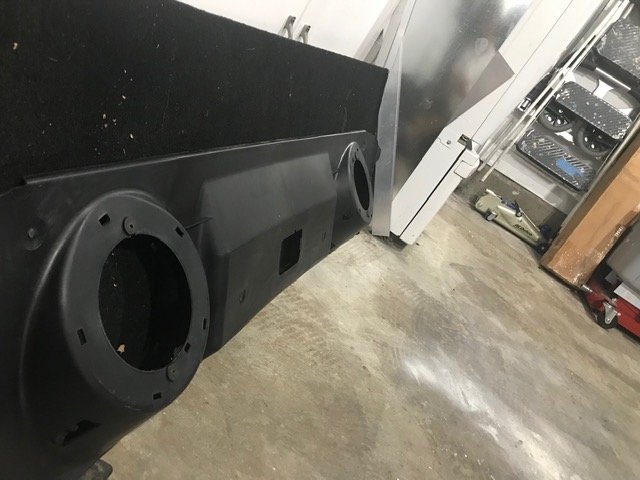
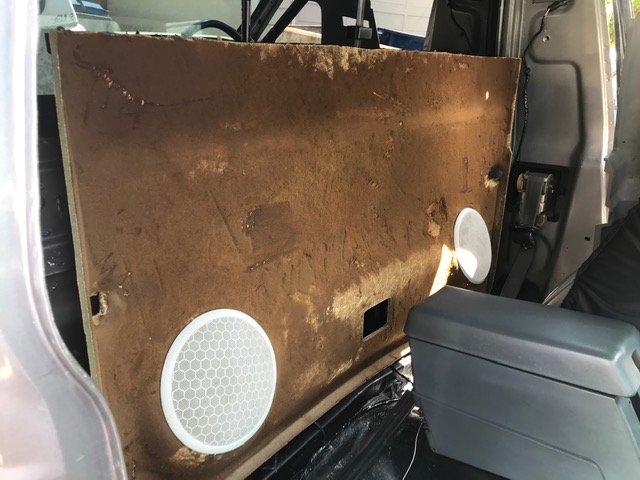
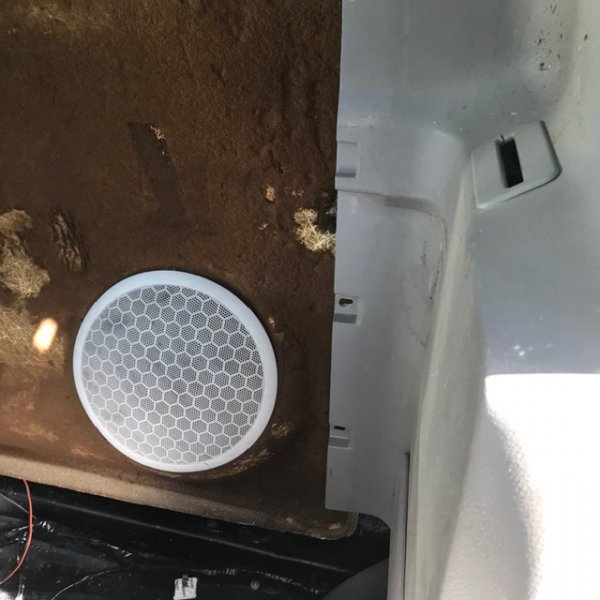
-
Got the sway bar axle brackets welded up, brake lines up and out of the way, and paint is drying. Next step is mounting the end link brackets to the 'X' member under the bed. I know the easy way to go is to use a nut and bolt on each bracket, but I'd like to us the plate/studs that belongs to that end link bracket setup if possible. Need to see how much metal cutting I would need do to make that happen. Will see. Also welded new driver and passenger side upper axle studs up. Driver's side below.
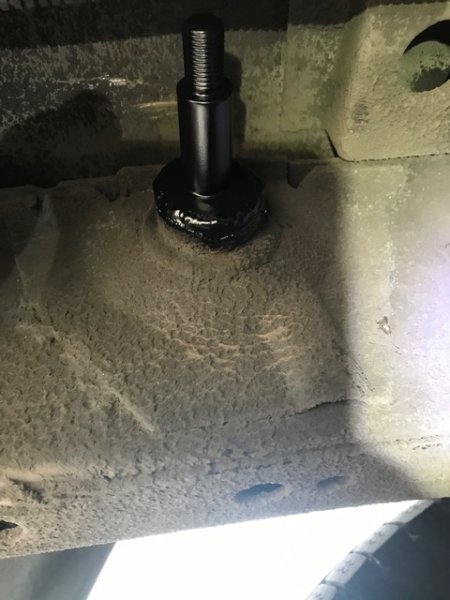
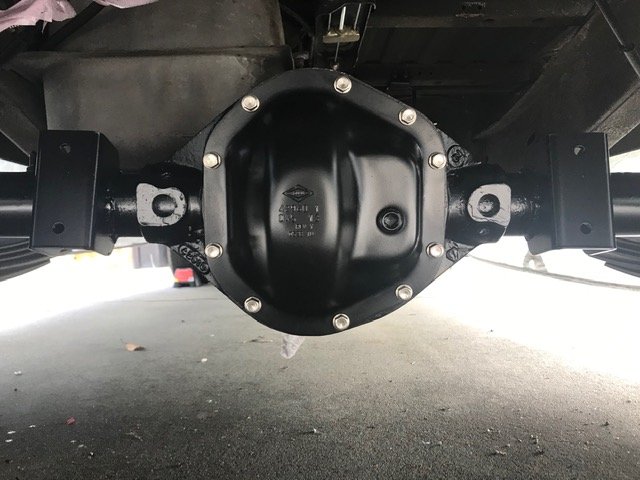
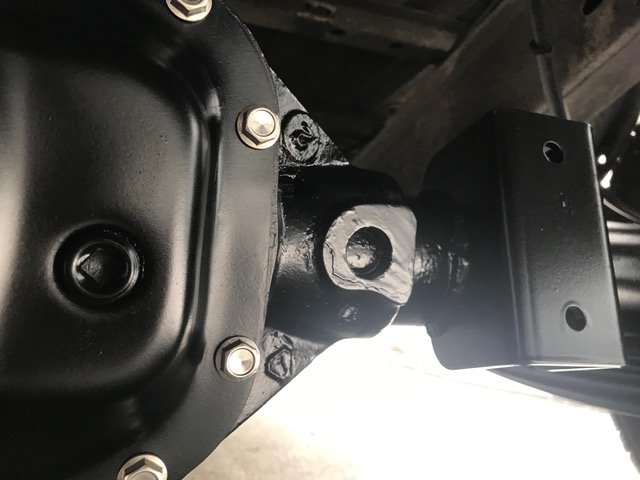
-
https://www.rubitrux.com/pre-owned-1991-jeep-comanche-pioneer-colorado-red.html Not much would need to be done to this. Dual diaphragm brake booster, add lights to the front bumper and roll bar. Done. Pricey yes, but knock $5K off and I think it's worth it.
-
what year did the bench seat get headrests?
Gjeep replied to Pete M's topic in MJ Tech: Modification and Repairs
1990 -
Does your rear brakes lockup with the ZJ prop valve for rear discs with hard stops?
-
Got the TJ rear sway bar mock/mounted up. Looks good and centered around the offset D44 pumpkin. I ended up mounting it with the arms behind the axle. Next, I needed to bend up new brake lines/ bleed the system, so I went ahead and got that done. Going to tack it to the axle tomorrow once I do some final measurements, and then remove all sway bar components and do a proper weld. Follow-up will be cutting/ drilling/ mounting the end link brackets in the ‘X’ crossmember. I’ll also be welding new upper shock mounts up as the PO snapped one of the studs and replaced it with an M8 stud wrapped with a ton of electrical tape instead of the proper M12. I want both sides matching so I cut flush and will weld a modified aftermarket upper shock mount in place.
.JPG.4c8c807ca137890b43e6797ab7cc9885.JPG)
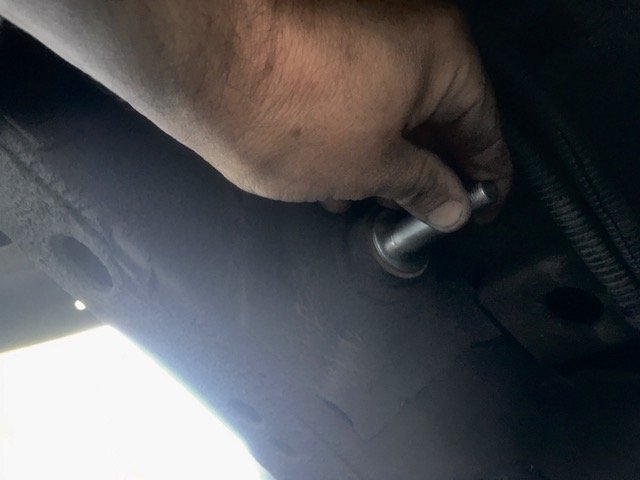
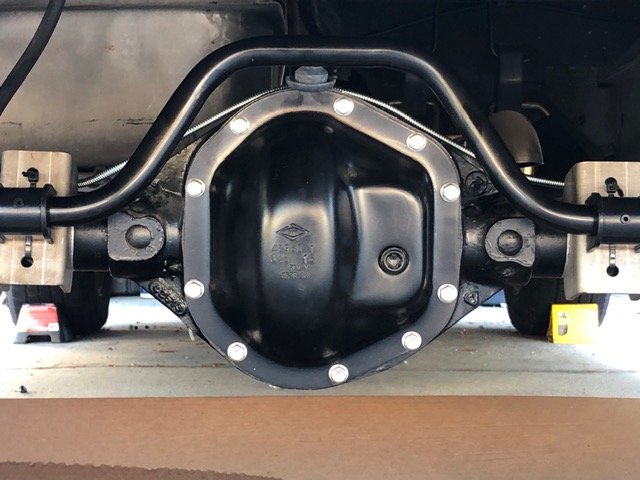
-
Experience with 180* thermostat with 4.0L
Gjeep replied to Gjeep's topic in MJ Tech: Modification and Repairs
Thanks all -- confident my current set up should be fine. I was only idling for maybe 5 mins in the driveway. The fans I believe would have brought the temp down if I let it idle for longer. If that's not the case once I'm driving the MJ, then I'll be going to Hesco high-flow t-stat with 1/8" NPT port in front for my Fan controller temp sensor.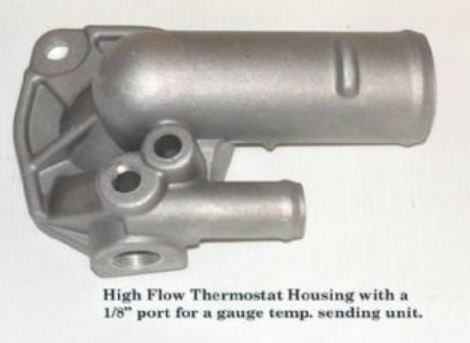
-
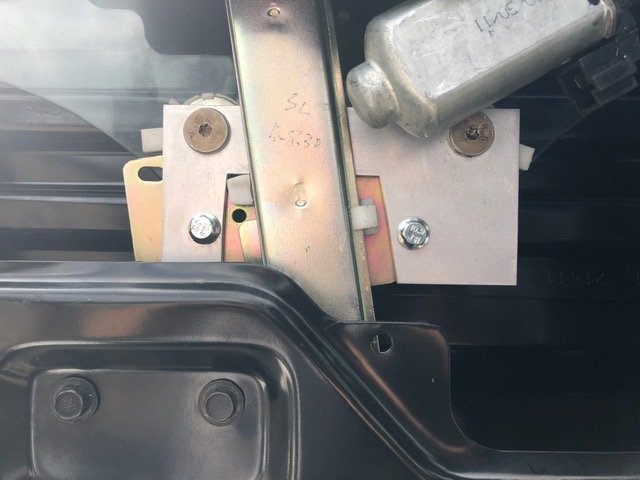
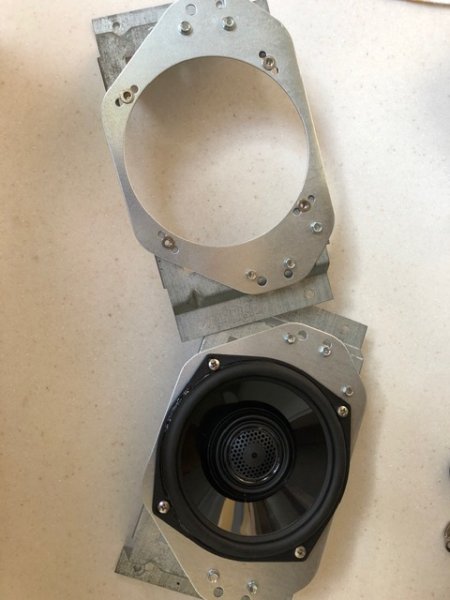
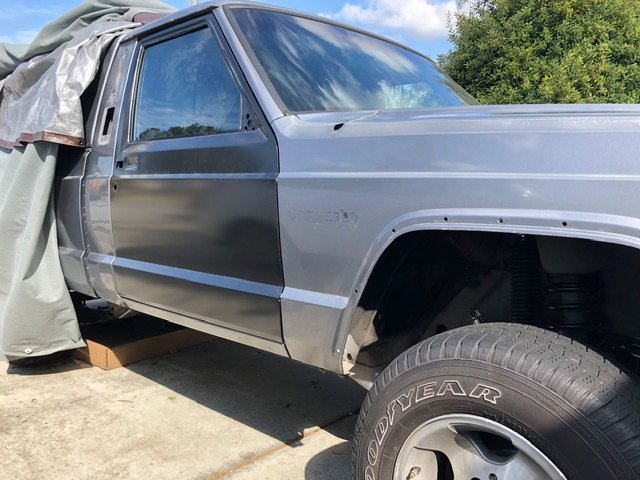
Though it feels I haven't gotten much done, I've been buttoning up some on-going projects. Full window conversion is 100% done on both doors. The adapter bracket took some time to get right...But, it works great and looks just about factory from the outside. Makes you almost ask -- Was full glass a factory option in 1992...? Inside I'll be using the first gen vinyl door panels. They just look better to me than the '97 XJ+ panels. Also modified the MJ 4x6 speaker brackets to accept the same Rockford speakers I'll be using for the front doors as well. The 5.25" conversion bracket is actually meant for a TJ. Speakers are mounted to the modified bracket using M4 nutserts and stainless steel screws.
-
Experience with 180* thermostat with 4.0L
Gjeep replied to Gjeep's topic in MJ Tech: Modification and Repairs
Yep moving the temp sender would be the quickest fix but my stubborn self wants to use the renix port. Thinking that a 180* t-stat would keep the coolant cooler and actually take the temp sensor longer to kick on. Think I'm going to stay with the 195* and see how it goes. Should be fine I think. Thanks all. -
Experience with 180* thermostat with 4.0L
Gjeep replied to Gjeep's topic in MJ Tech: Modification and Repairs
I don’t see how. Since the fans would come on sooner. Right? -
I got my Digital Dakota fan controller installed and it works great though it was a real pain to program at first. I'm currently running a 195* stock Mopar t-stat in my 4.6L stroker. My dual electric fan set up comes on about 5* too hot/ late on the low setting. And I can't program the Dakota Digital controller any lower than 150*. My MJ is a '92 H.O, but my H.O radiator is set up with the Renix port so I'm putting it to use...The reason the fans are coming on 5* late is because where the temp sensor is in the Renix-era port of the radiator doesn't get hot coolant until the 195* t-stat opens then it kicks on once temp setting is reached. This won't be a problem when driving I know, but when idling I'm at 215*. Not terrible, but I want it idling at 210*. That's why I'm considering trying a 180* thermostat and then I can raise the fan controller temp turn-on a bit... Just curious if anyone has run a 180* t-stat in their 4.0L and any feedback. Thanks.
-
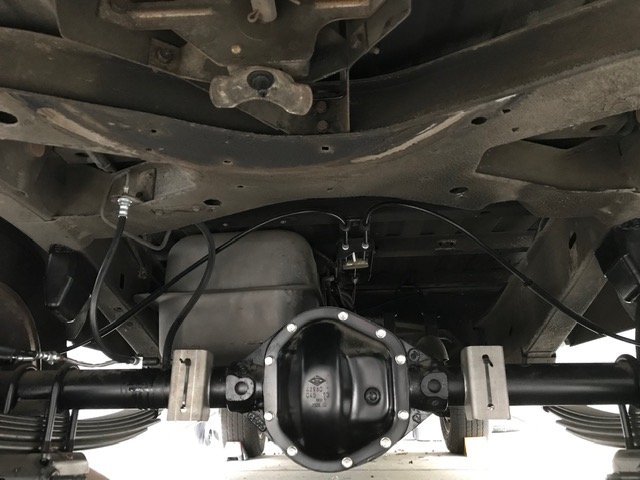
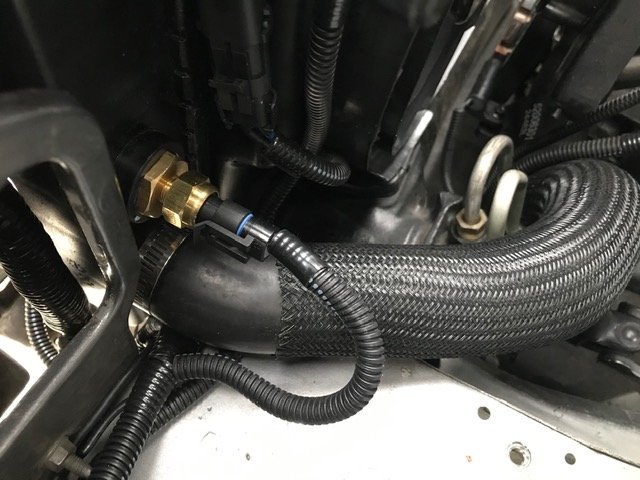
Dakota Digital sensor arrived for the fan controller, and with the help of an M22 adapter, the 1/8" sensor fit right in the Renix radiator port. Time to program the set up -- 4 pages of 11 point font. Also, got my D44 weld-on swap back axle brackets arrived. Originally I had ordered the TeraFlex TJ kit thinking they would be spot on...far from it. They were manufactured at an angle for some reason. I remembered the IROC-era Camaro and Firebird had a D44 outback so I did a google search and found HawkMotorsports.com had weld on brackets that fit perfect. Here they are help on with a ziptie...Need to weld them on once I confirm a few things. Also I get to bend up a new across the axle brake line to accommodate the brackets. Work in progress.
-
Yep. Renix years only, type 1 and type 2 for laredo only.
-
Nice and rare truck -- you even have the 'type 2' as it was called Laredo factory pin-stripping which encircles the upper window/ cab. Though I've seen this pin-stripping on an XJ, never an MJ.
-
Lookin good. Nice work.
-
https://sfbay.craigslist.org/nby/cto/d/santa-rosa-1992-jeep-comanche-4x4-5/7100428325.html Good price and it's fairly clean @ 109K. Already has a D44...