


Gjeep
-
Posts
1247 -
Joined
-
Last visited
-
Days Won
3
Content Type
Profiles
Forums
Gallery
Everything posted by Gjeep
-
I reached out to SnugTop via email Tuesday of this week. I wasn't able to reach anyone live possibly due to Covid-craziness. My ask was if they could produce 2 identical shortbed hard fiberglass tonneau covers for the MJ. Also for a shortbed camper shell. No idea on the price they'd charge or what you would be interested in paying for one. I believe Hornbrod reached out to them about 10 years ago to produce a brand new shell and they did. Not sure of what it cost... When I get in touch with them on both the tonneau and the shell possibility/ cost I'll post back on CC. If anyone else has interest, let me know. Thanks
-
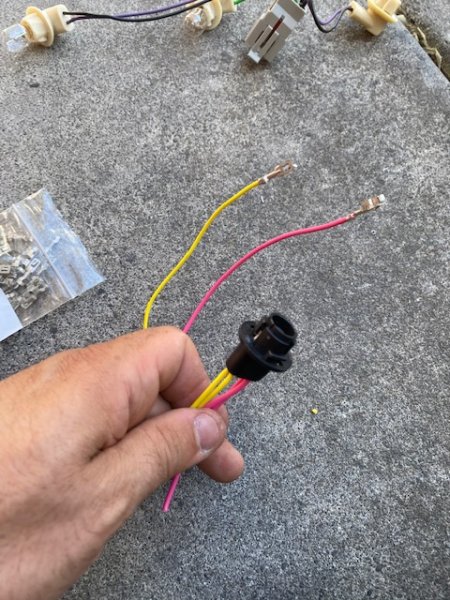
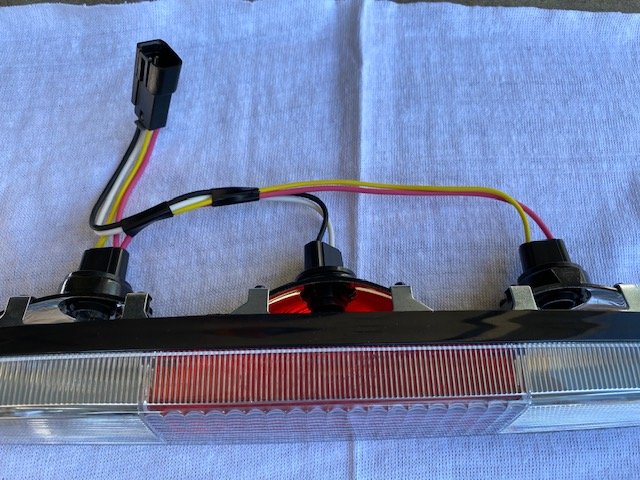
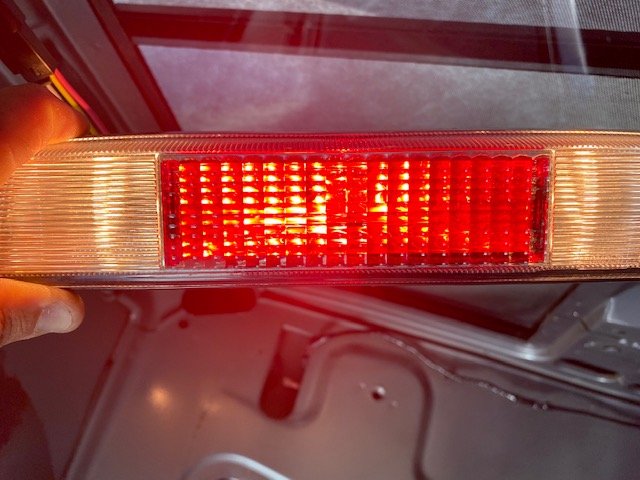
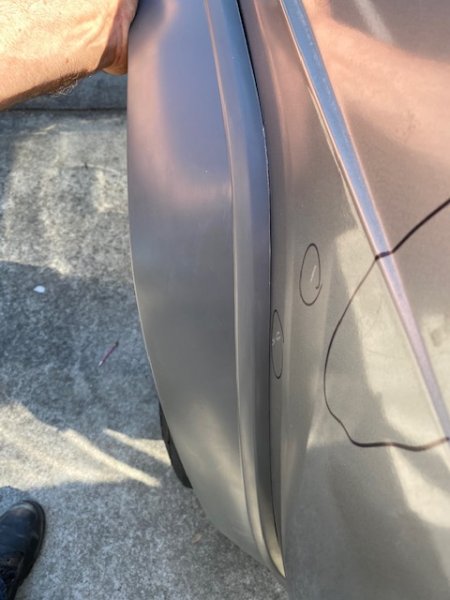
My OCD got the best of me and I wanted to get the tire iron under the hood also. Drilled a hole through the Ford bracket, and a threaded hole through the factory lug wrench on the side and got it in. Due to the location of it in relation to the hood prop rod I needed to use a 1/4" stainless screw versus a wing nut. I'm going to keep an eye out in the wrecking yards as there's got to be a wing nut that fits the bill. Also got a delivery from my recent favorite internet supplier -- connectorexperts.com. By finding OEM female Dodge terminals I was able to build my own 3rd brake/cargo light harness for the Ford lens that could have the proper factory wire colors off the footwell light and brake light switch. I used era correct 150 series terminals/connector on the cab-to-light side harness. The 4-pin connector I used can be found on the '89-'96 XJ overhead console wiring harness at the passenger kick panel (part of it is in the dashboard wiring harness and the other part is on the overhead wiring when equipped). And finally I tracked down the long lost passenger to my driver side NOS '95 XJ front fender flare. In '95 the front of the front flare was widened so the entire flare covered the tire. It's just a cosmetic difference, but I like how it looks over the earlier model front flares. ('96 XJ's were the same except they had slightly grainy texture different from what was available on the MJ rear flare.) All flares on this build will be painted satin black.


-
Help needed to find A/C Hose
Gjeep replied to Richard 91's topic in MJ Tech: Modification and Repairs
Jeepair.com made them for me back when I was in MJ Renix land. Good quality stuff. I'd suggest giving them a call. -
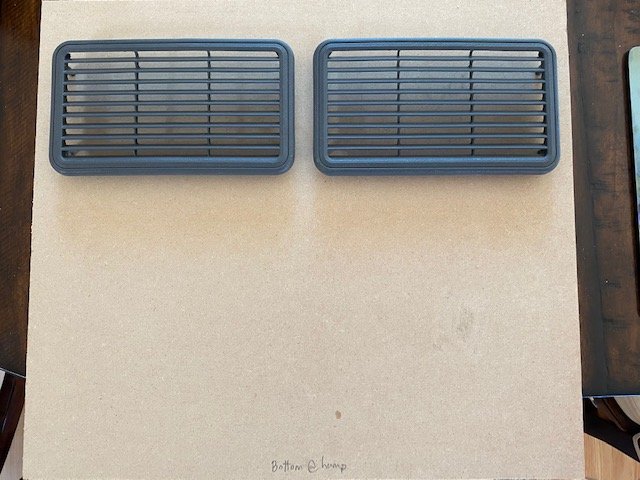
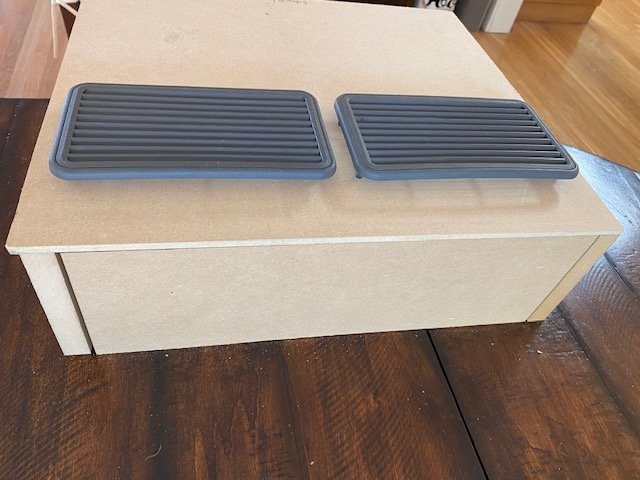
The wife loves when I use the dining room table as a place of MJ assembly…so I was up early cutting/mocking the rear cab box. Again, my aim is to create an XJ/MJ era looking sub box as Jeep may have done back in the day that doesn't eat up useful back of cab space. So…2 separate 6.5” boxes are built inside the shroud. The assembly is 5” deep and roughly 15.25” wide. About 2” of it will rest on the back of cab ledge. The final product may not be as high as this design. I need to adjust as to where the speakers will fall, height of the floor ‘hump’, center console, etc. I need to get it dialed to ‘look’ right. The overhang on the front side is so to neatly trim around the cab floor and hump as I want it not to look like an after-thought. (The gaps in photos won’t be there at final assembly…this is just cut pieces stacked together.) Inside there is enough space for the subs to be attached to their individual boxes/enclosures and a small gap so to install the factory speaker grilles. (That piece of wood is at an angle so to show the gap inside the enclosure. It'll be vertical in final assembly.) I think I’m going to wrap this in the padded seat black vinyl upholstery so to contrast with the black carpet of the floor and back of cab wall.


-
Thanks -- appreciate the kudos. My first re-do of my '89 MJ (different/dormant build thread on CC) I was so excited to get it finished I missed so many details. Many "wish I did's". This Son of Stink '92 MJ build is my get it right for both itself and for my go-back-to/ next project...the '89 MJ that I will revisit, but build better this round.
-
super "low" miles 88
Gjeep replied to Pete M's topic in Craigslist/Marketplace/eBay... i.e. Not Your Stuff
It's a nice enough truck for the price. Has had a full repaint on the exterior sheet metal by the looks of the door jamb. ZJ rims. There's a 125K original '89 SporTruck in my neck of the woods $5600 with camper shell, so the price seems fair for what you're getting. -
You will need to drill the holes. I was doubtful and thought I could do without the screws, but I would have been in a heap of trouble if I wasn't able to quickly mount them as the urethane was drying on my '89 MJ's CRL rear window. These screws pull the aluminum window frame in so it sits as close and evenly to the body as possible. Before I put them in I was going to have a very uneven gap around the window. Would have looked horrible. Like I said -- suggest you pre-drill all the holes for the screws. BTW - that window you pulled out was a first gen CRL window with separate gasket. They updated the design to LimeyJeep's pic.
-
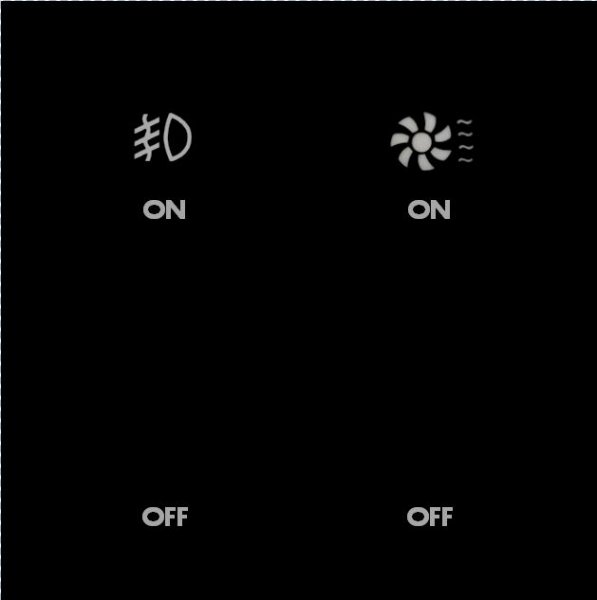
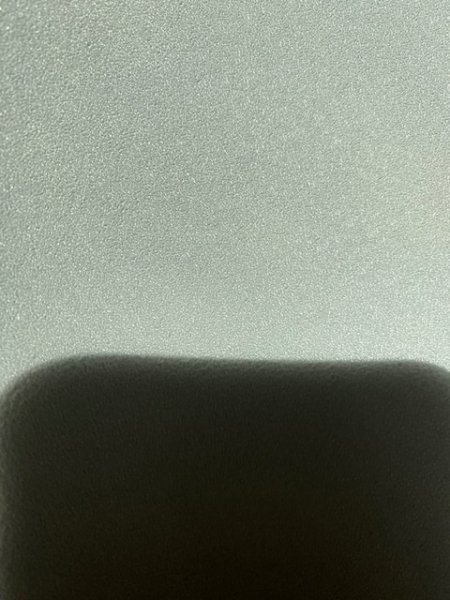
Bouncing between projects as it is hot as hell here...I just took delivery of a clear finely textured tape that I will use as an overlay of my custom switch pod labels. The photo doesn't do the texture justice -- it's an exact match to the MJ/ XJ switch pod texture. Believe me, I went through quite a few to find the exact match. I found this product online at www.noskidding.com. The item# is NS4006C -- which is a 6"x60" roll of tape. For the lighting, I have purchased a light blue semi-transparent tape I can place over the backside white of my label or I have purchased blue light bulb covers for the small bulbs that illuminate the icon of the switch (similar to the XJ/ MJ gauge cluster bulbs). I think this should work best, with the blue tape as a fall-back.

-
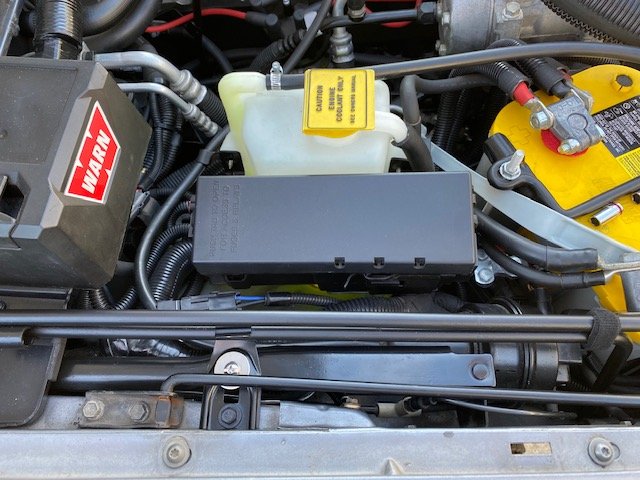
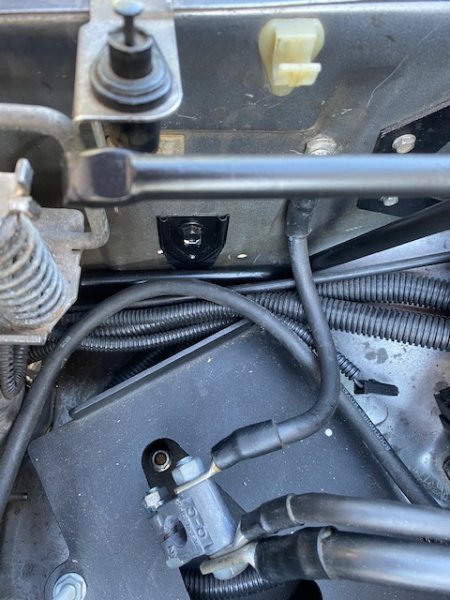
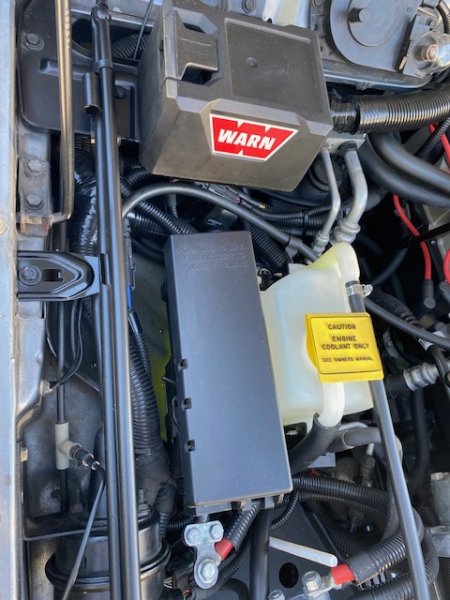
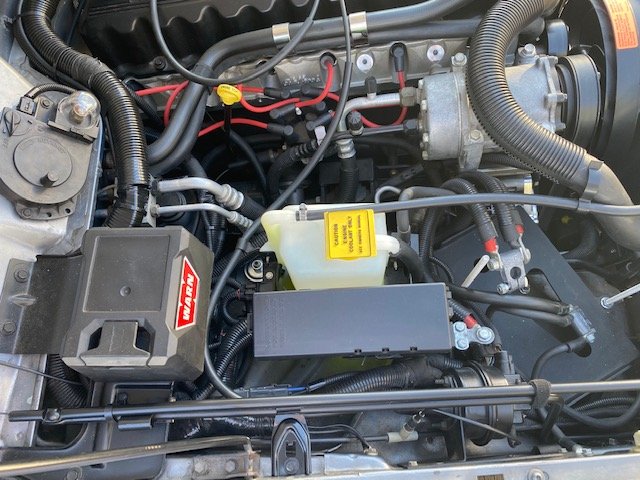
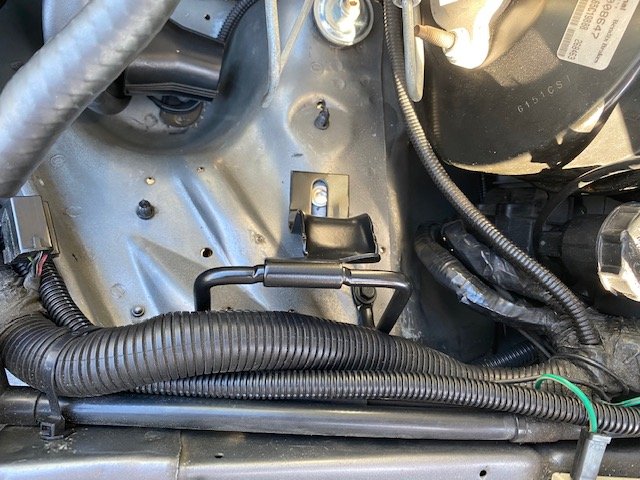
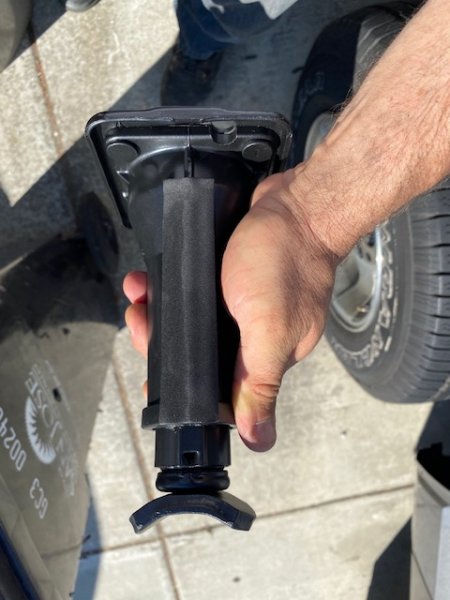
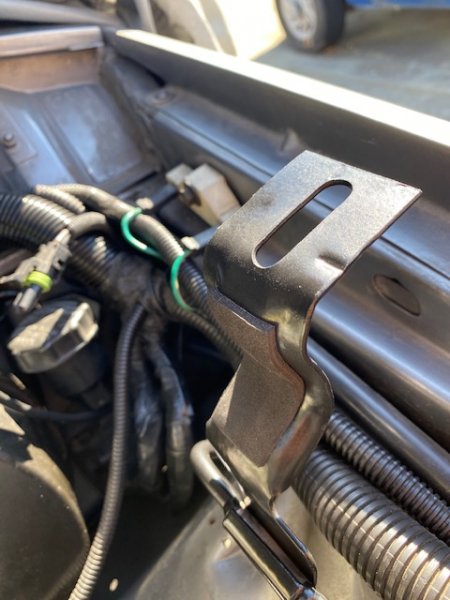
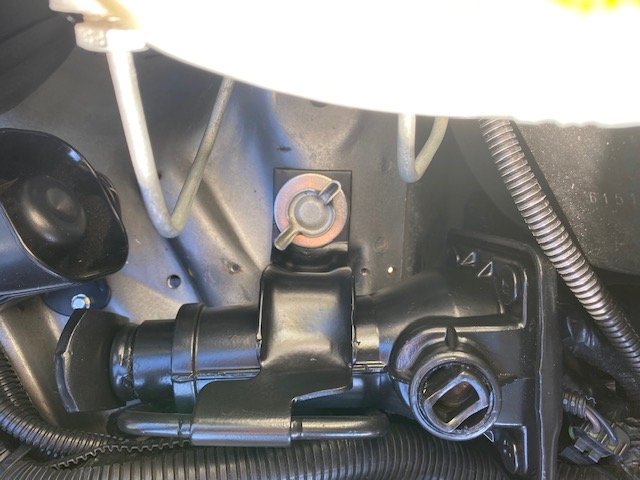
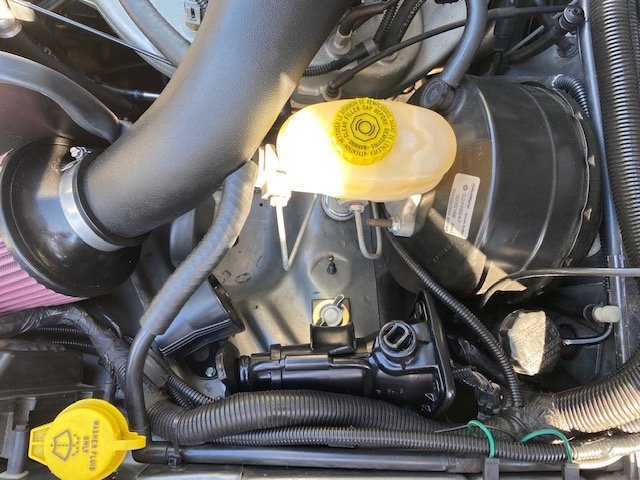
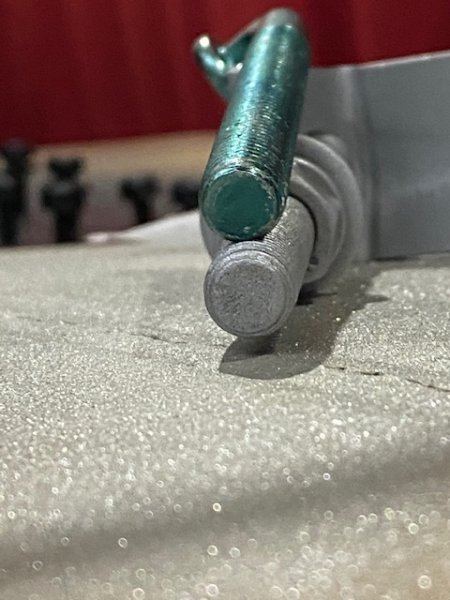
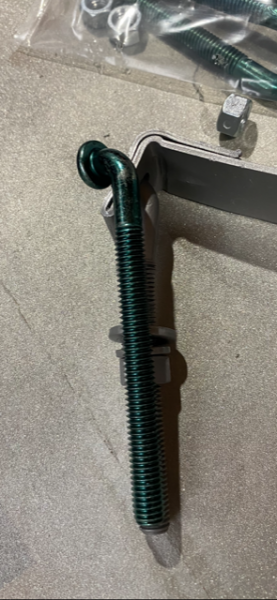
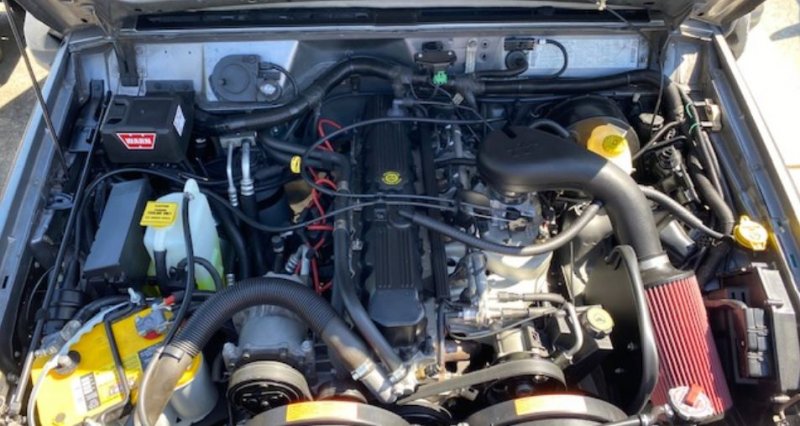
Some pics of the installed under the hood MJ spare tire tools...Remember there's a few modifications to my MJ's engine compartment that make this set up a little easier. I have relocated the washer bottle tank under the front fender ('97+ XJ), master cylinder brake lines were redone by me, and I added a '91 XJ ABS controller tray passenger side to mount the Warn winch solenoid. This setup can be done without some of these mods but I think they contributed to the ease of installation. And again my reason moved these items under the hood is for a clean back of cab area so I can set up a simple sub enclosure somewhat true to the MJ era interior. The passenger side crank stays in place thanks to two Ford first-gen Expedition retaining clips -- one mounted mid-inner fender and the other to the side of the battery tray (note: I'm running a Dirt Bound battery tray). I padded the Warn solenoid tray where it comes in contact with the crank so there is no vibrations/sounds coming from it. Driver's side has the slightly modified Bronco/F-150 bottle jack bracket...It's positioned so the retaining arm clears the master cylinder brake lines. Padding was also applied to both the back of the jack and the retainer so it would not vibrate/make sounds as the truck rides along. Finally on my quest of installing a new fuel tank, straps, etc...I was looking for new Comanche J-bolts which are not an easy find. I had read on this site that Freightliner battery tray hold-downs worked, so I ordered them. Not sure how they worked for that MJ owner because there was way to long a stretch of this bolt that was un-threaded. Just wouldn't work. The Spectra fuel tank straps came with new J-bolts but they were way to long and I'd be wrenching forever on that nut before it seated. They were Cherokee J-bolts...Close, but not quite right. Many an internet search finally brought me to Mopar 60's-70's muscle car era J-bolts -- the proper length, though a pinch smaller in diameter (standard versus MJ metric). Here's how they line up to my factory MJ J-bolts. Both of my original bolts are bent...the one not shown bent the worst. (Non-Mopar bolts are also available and are not green in color, but these are the one's I got...J-bolts).
-
The latest project is aimed at clearing the back wall of the cab...I've never been a fan of the MJ's spare tire junk up against the back wall -- plus I'm adding a couple small woofers and I want tat back cab wall area to look clean -- so I spent some quality time at the local wrecking yard trying to see what OEM options were out there from any manufacturer. I settled on Ford's inner fender mount bottle jack bracket. I removed it from a 1994 full-size Bronco, but as you can imagine that bracket can also be found on the F-series of that same generation. A few cuts, bends, and grinds got me to the final product below. I'm mounting it on the driver's side inner fender up high. My truck's a '92 and in that year the wash/wipe reservoir is on the passenger side above the blower motor. For those interested in this set up just use the '97+ XJ inner fender reservoir to get that item out of the way. As for the jack 'crank' arm, that's going on the passenger side with the 'Y' portion tucking near the inner fender side of the battery tray and the other end inner fender towards the firewall.. Again, I scoured the wrecking yard I was at to find some thing to clip that 'crank' to...and found that the '97 Ford F-150/ Expedition has 2 clips to either side of the radiator that worked near perfectly. I had to trim one and open up the clip portion to accept the MJ's crank as it was a slightly wider diameter over the Ford's. One clip I'm positioning near the battery tray and the other mid-inner fender up high. (Note: these clips are upside down in this pic.) Currently paint is drying but once I have everything mounted up I'll post a few pics...Also, the lug wrench I'll be using will be a telescoping Gorilla wrench that will reside under the passenger seat.
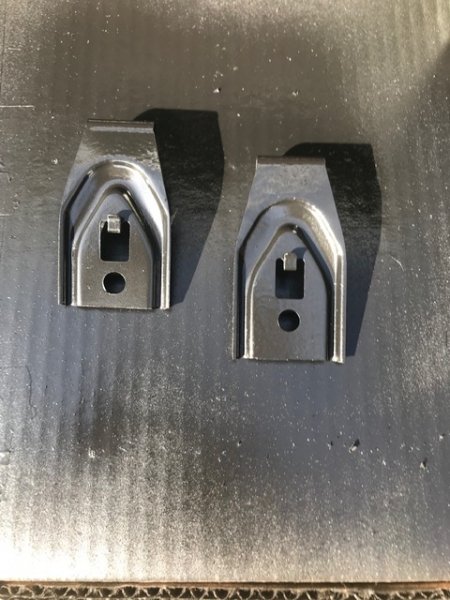

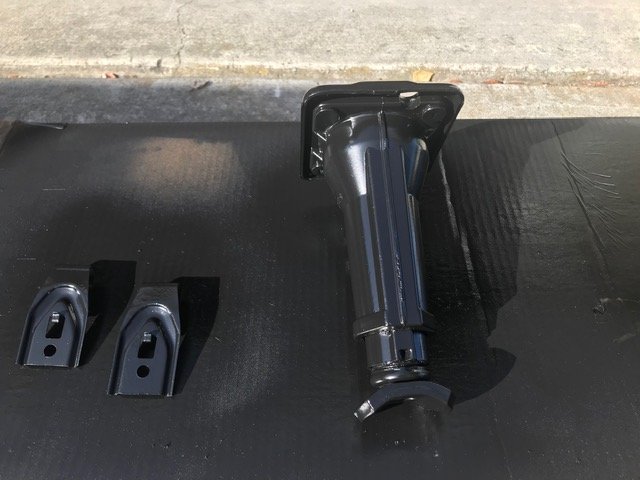
-
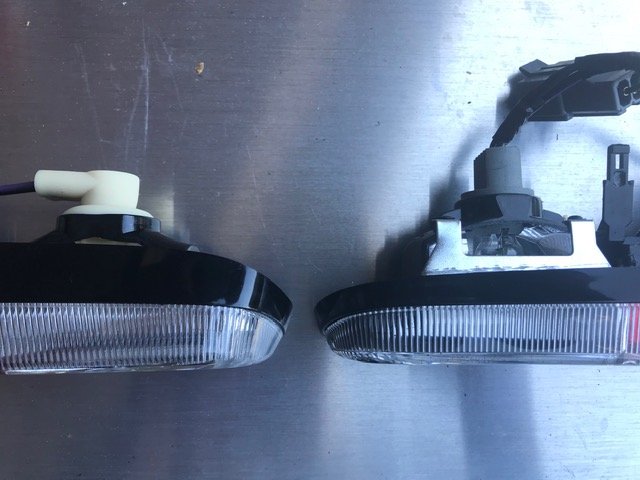
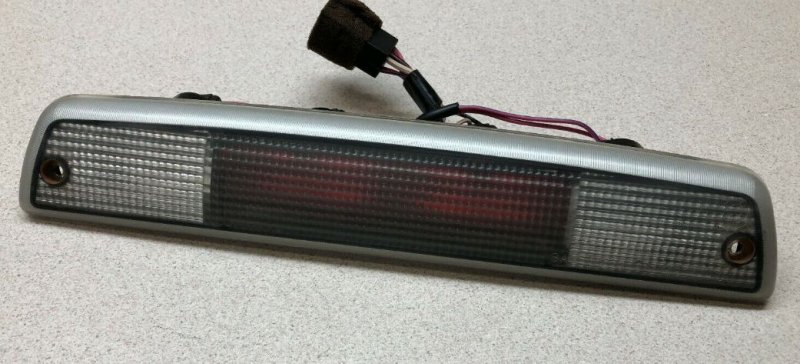
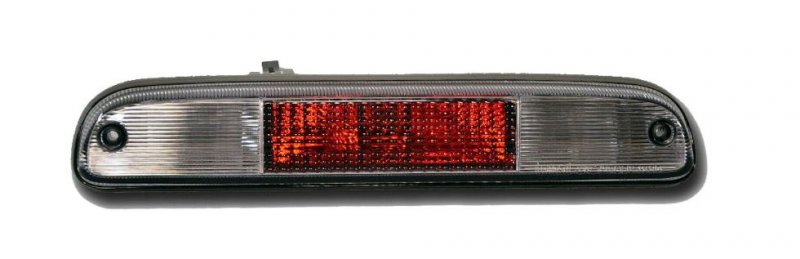
As far as the third brake/ cargo light goes -- it's going to have to be the Ford Ranger set up. I unfortunately can't trim the '95 Dodge Ram set up far enough back topside to make it work on the MJ. The Ranger light looks good though. I bought two of them...one a Dorman I was going to practice on and then a NOS Ford unit to perfect. I decided to start cutting on the Ford light and I'm glad I did. 3 hours of some dremel-ing and a whole lot of measuring and hand filing got me to the final product below. When I first looked at the Ford unit, the internet photo must have been an aftermarket -- you can see the difference. The Dorman looks like something off of the Dukes of Hazzard sheriff's car (they must be double-dipping with the old Ranger and Super Duty on this light), while the Ford light is clear across the front with the backside red plastic not being in your face. Similar to the Ram light. I'm going to change the huge electrical connector to something that MJ parts-bin.
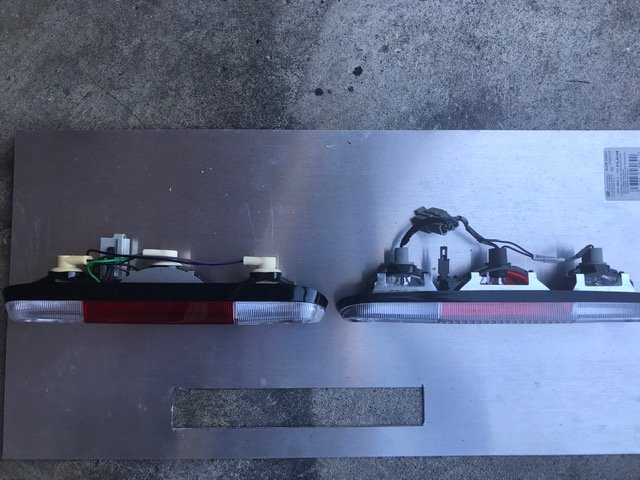
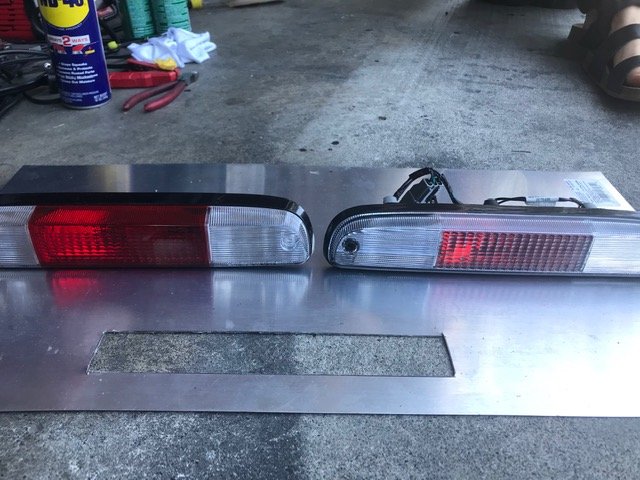
-
That’s an add on mopar kit fog relay.
-
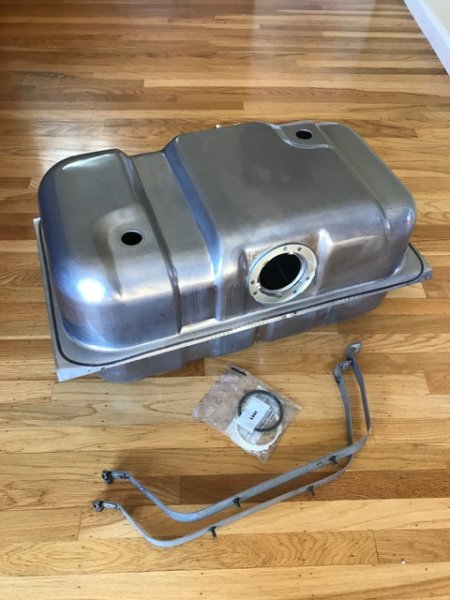
Been cleaning, prepping, painting, and sorting parts... Also took delivery of a well packaged Spectra fuel tank. Finally! These are made in Canada and are quality reproduction units -- but I will say their shipping box was paper thin with no protection/ padding around the tank whatsoever. I had taken delivery and shipped back 3 tanks prior because they had been bent and dented in transit. I contacted Spectra directly, explained I was restoring a couple Comanche's, and they sent me 5 well packaged tanks to choose from. I ended up keeping 2. Way to go Customer Service -- really appreciated it! Here's one of them cleaned up...
-
Only difference on the MJ seats is on the backside top of seat below headrest is about 3” of carpet material then turns to vinyl. Xj seats look better.
-
Beautiful work.
-
If you look on the back side of an XJ driver's side kick panel '86-'93 there is a curved line for the exact cut for the MJ foot brake pedal sweep.
-
Lunds fastback spoiler
Gjeep replied to Mossmj13's topic in Craigslist/Marketplace/eBay... i.e. Not Your Stuff
Nice -- someone can go after that Thunder Chief look. I just hate to drill holes in the top of my bed-rail. -
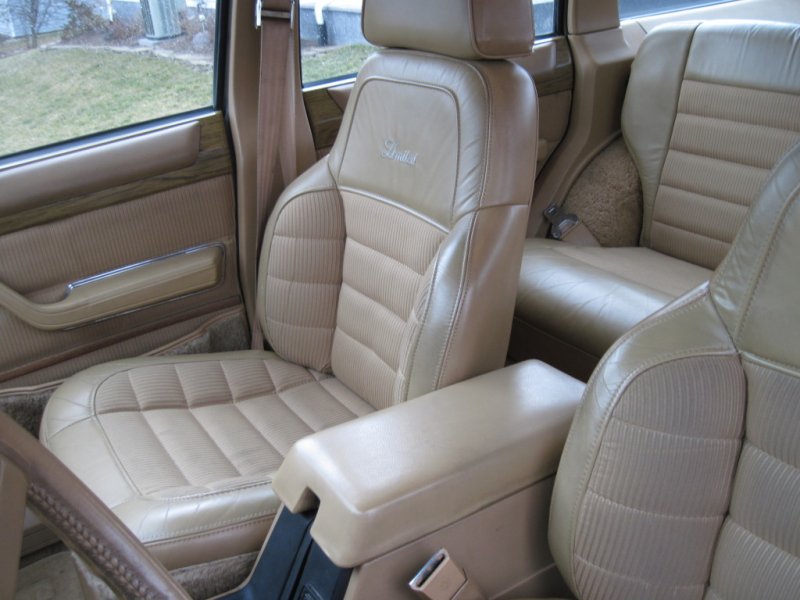
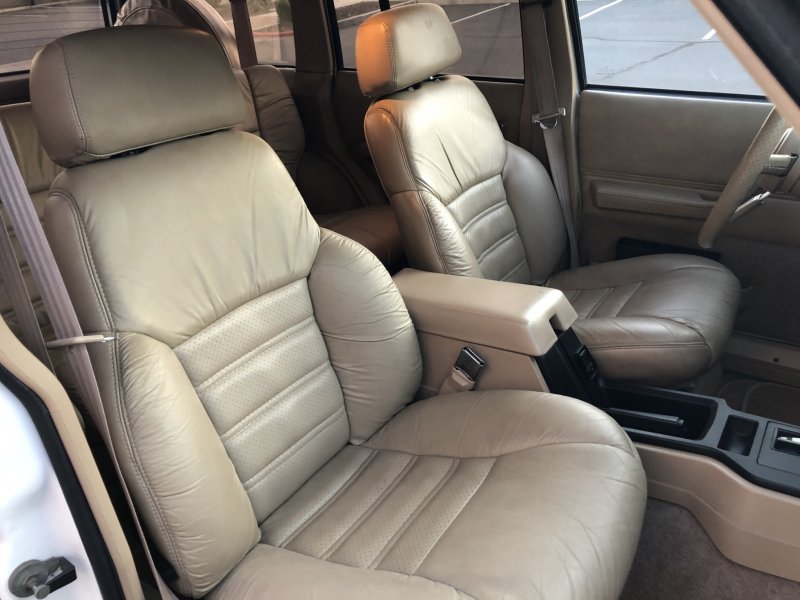
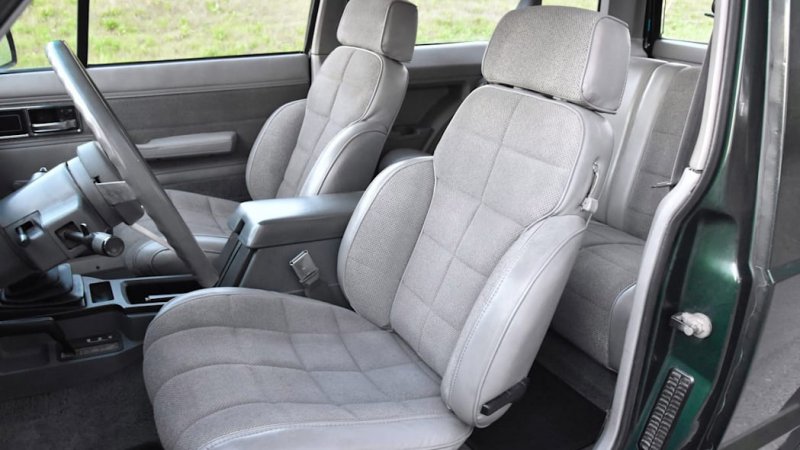
Long ago I had wired back to the camper shell interior lighting that goes on with the trucks interior lights; additionally, I fit a first gen Dodge Dakota 3rd brake light just above the rear glass of the SnugTop's shell. Worked great. This round, just in case I go camper-shell-less, I've wired cargo light and 3rd brake light wiring to the back top of the shell. Since my factory rocker switch locations are all occupied with fog light, auxiliary fan override, and winch on/off & in/out controls -- I wired the cargo light with the interior lights also. I though about using a 70's GM foot actuated hi-beam switch, but decided against it. As for the actual cargo/3rd brake light I'm using...I've poured through all years/ manufacturers that existed. Settled on 2 that look MJ appropriate. First gen Dodge Ram full size (top photo) and second gen Ford Ranger (bottom photo). Since I'm waiting on them to arrive, I'll need to hold them up to the MJ to see which looks best. I'm leaning towards the Dodge as it is Chryco. I also dug up some NOS upholstery I got 15+ years ago...1987 YJ black "Jeep" logo's denim vinyl and XJ black vinyl. I had also purchased a few years back some aftermarket non-logo'd (because they can't logo it without Jeep's permission) black denim vinyl. The aftermarket denim vinyl is a blue black color (top right color) versus a brown black color as the NOS denim and denim vinyl is...so I'll be going with the logo'd upholstery. Now to decide on the stitch pattern of the winged bucket seats I'm going to use. I think I'm going to go with a stitch blend between the Laredo and the old Wagoneer XJ Limited. When I have some time I'll play with Photoshop.
.jpg.40a467bc3a4d38856a27df8734893cbb.jpg)
-
I can tell you between my 2 trucks — the 89 had Phillips screws and my 92 torx.
-
Yep, actually crossed my mind too...but I think will keep as is. For now.
-
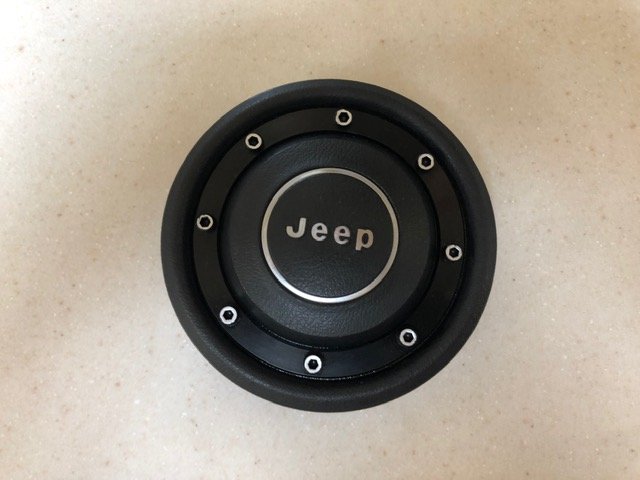
Lots of cleaning today -- everything from fuel tank hoses, breather lines to an '87 XJ black horn hub. 25+ Q-tip to get it done. I'll be touching up the plastic torx of the hub also. Also painting a ton of nuts and bolts for re-assembly when the time comes...
-
eBay...I have rolls and rolls of it. This is the guy I buy it from -- located in Santa Ana, CA https://www.ebay.com/itm/1936-1958-Pontiac-thick-masticated-rubber-sheet-1-8-C70064545/333580344687?fits=Year%3A1946|Make%3APontiac&hash=item4daaf01d6f:g:qjkAAOSwTglYmXFB
-
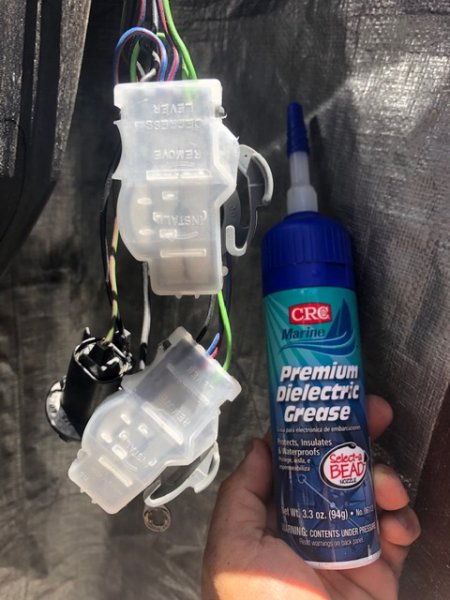
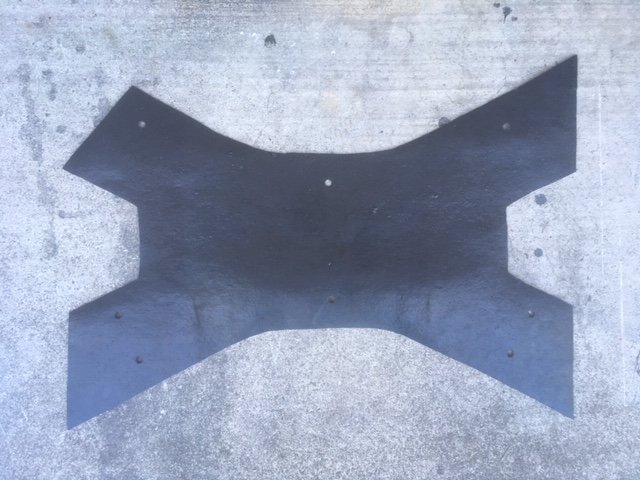
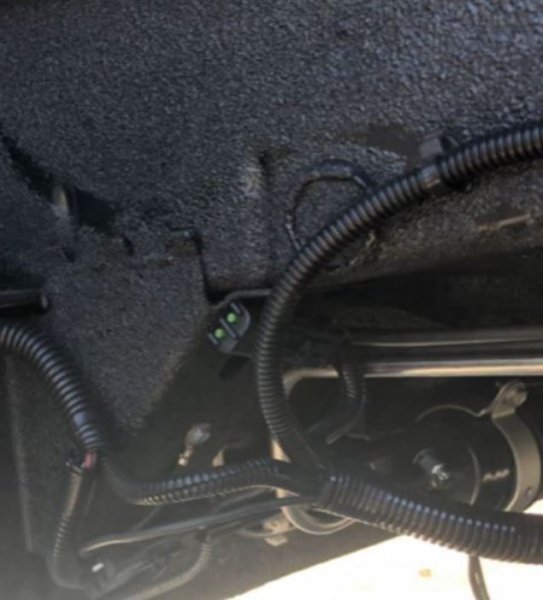
Finishing up wires to the back of the MJ – 3rd brake light and interior light for camper shell. Also running optional 12V ignition-on cigarette lighter power for the bed. Did a masticated rubber cut-out for underside of the ‘X’ cross member for the tire contact. Cut, punched and push-pinned it into place. And finally, filled the taillight sockets with marine grade dielectric grease and snapped on the new backsides.
-
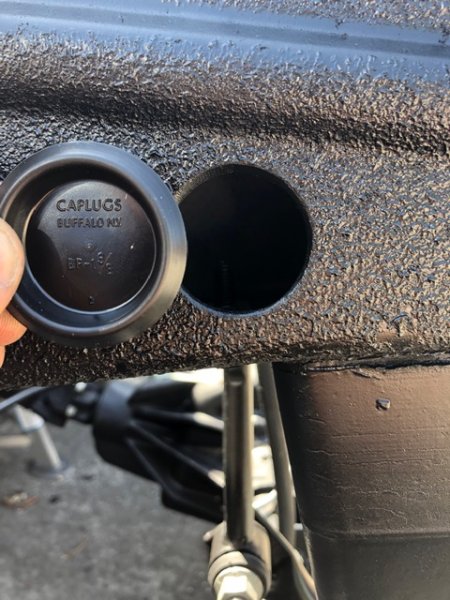
Plugging along finishing lots of details to the MJ's underside...Drilled a 1 3/8" access hole on either side of the frame so I can put a nut on all the bolts for the sway bar end link mounting bracket. Took my time measuring and all came out well. Once the brackets are mounted/ nuts in place I'll use these 'caplugs' to fill the holes. Mounted all hardware since chassis paint -- front and rear shocks, attached brake lines, bled system, etc.
-
55002368 Know that what Team Cherokee sells as this is not correct. Don't think this part is available any more, so wrecking yards it is.