


Gjeep
-
Posts
1247 -
Joined
-
Last visited
-
Days Won
3
Content Type
Profiles
Forums
Gallery
Everything posted by Gjeep
-
Not mine, but wouldn't take much to make it right. Goooooood price. https://www.facebook.com/marketplace/item/1007848919002237/?ref=browse_tab&referral_code=marketplace_general&referral_story_type=general_listing&tracking={"qid"%3A"-5951731756578499147"%2C"mf_story_key"%3A"2622993641531117808"%2C"top_level_post_id"%3A"2622993641531117808"%2C"commerce_rank_obj"%3A"{\"target_id\"%3A2622993641531117808%2C\"target_type\"%3A6%2C\"primary_position\"%3A0%2C\"ranking_signature\"%3A483702397322163149%2C\"ranking_region\"%3A\"prn\"%2C\"ranking_request_id\"%3A8099069526039728062%2C\"commerce_channel\"%3A501%2C\"value\"%3A0.00067267797809715%2C\"upsell_type\"%3A129%2C\"candidate_retrieval_source_map\"%3A{\"39331649263145555\"%3A701%2C\"29213398494921448\"%3A3009%2C\"28605625919118317\"%3A686%2C\"24437240369228549\"%3A3565%2C\"28344696615212587\"%3A8025%2C\"31831559963155146\"%3A686}%2C\"candidate_write_path_source_map\"%3A[]%2C\"candidate_seller_rerank_version_id_map\"%3A{\"29213398494921448\"%3A0%2C\"28605625919118317\"%3A0%2C\"24437240369228549\"%3A0%2C\"28344696615212587\"%3A432%2C\"31831559963155146\"%3A0}%2C\"delivery_flow_path\"%3Anull%2C\"grouping_info\"%3Anull%2C\"is_prefetch\"%3Afalse%2C\"request_fetch_reason\"%3Anull}"}
-
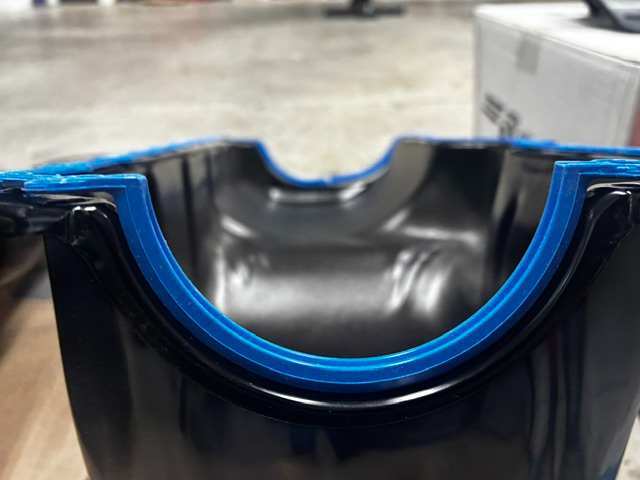
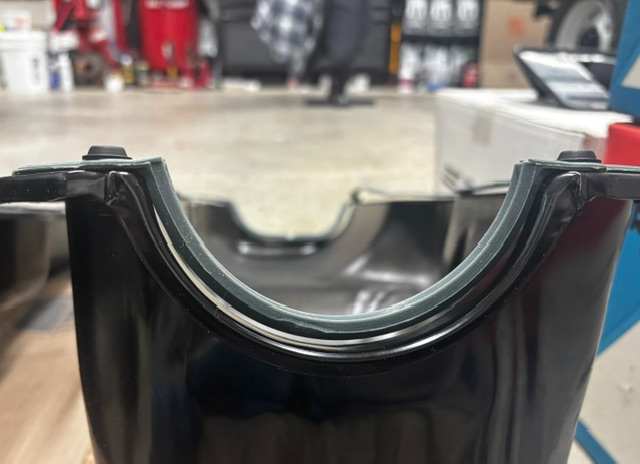
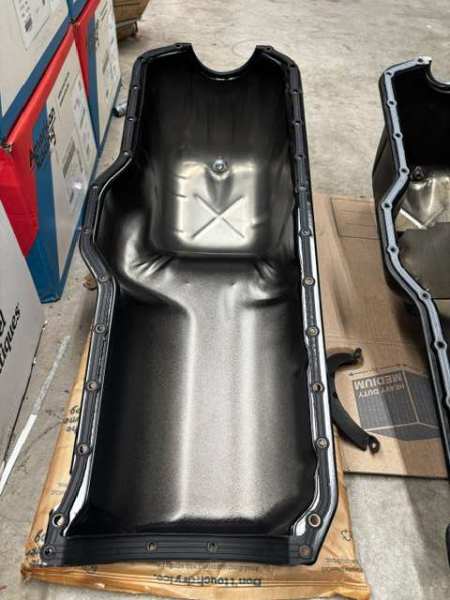
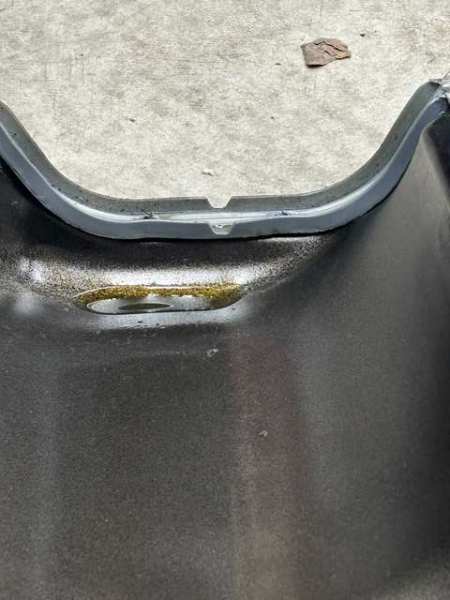
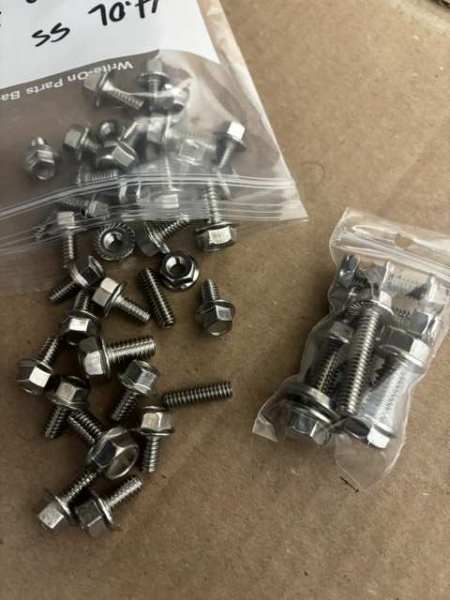
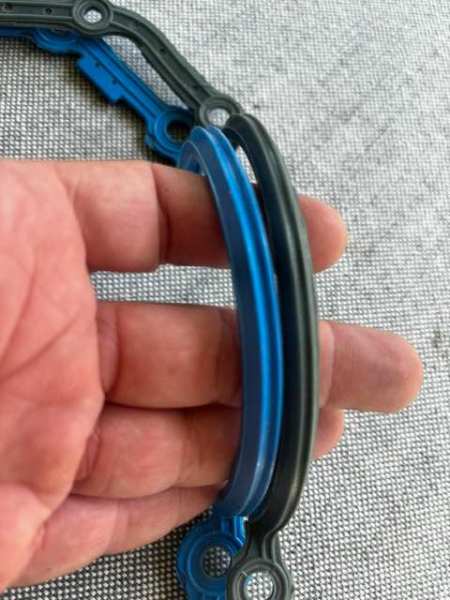
Circling back on my oil pan gasket post from last week… Placing the two gaskets on the oil pan itself told a different story. The Mopar (held in place with plastic license plate fasteners) will need to stretch to get to the pans flange. The Fel-Pro blue just fits. And as mentioned I’ve never had a leak using this gasket on any of the other Jeeps. But it is blue. And that nagged at me, so I did more digging and found a company called AJ USA that makes a black composite oil pan gasket. It arrived this afternoon and I threw it on the new pan. Fits like the Fel-Pro. Only difference I see between both the Fel-Pro and Mopar gasket is that the AJ USA gasket does not have the notch at the front/ center of it. AJ USA for the win. High hopes it will be as leak-free as the Fel-Pro. Lastly, I decided to go with stainless steel hardware to add some bling. The small bag of fasteners is for the fail-over Hesco CPS bracket setup that signals from the harmonic balancer versus flywheel.
-
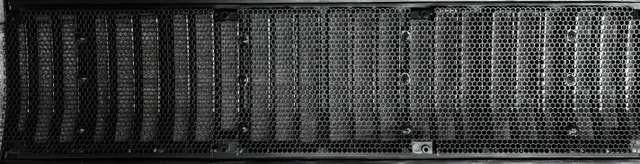
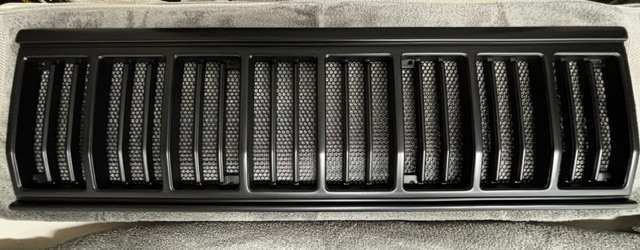
Took a little over an hour and a half this morning to get this mesh grille into place centered as it should be. Didn’t matter how slowly and carefully I screwed it into place, it kept shifting ever so slightly because of the screw/ mesh interference at the fastening point. The solution was sniping the mesh entirely at the screw grommets. That total clearance made the difference, but it still took all sorts of patience fastening it into place without any shift in position. If you look closely, the thinnest factory inserts were removed from this grille. (Page 22 of this build thread goes into more detail on that.) Still need to decide between and the aluminum mesh grille where the factory grille slats were opened up entirely. I’m thinking the aluminum may be too bright for this build with all the black trim. Will see.
-
Beautiful work.
-
Looks good/ quality on your FJ but the design doesn’t work for my vision on the MJ. Tower hinge setup is distracting. I know. I’m crazy…
-
Oregon doesn’t mess around with their front license plate requirement. I had ordered every available aftermarket winch flip-up option available and all of it turned out to be crappy made in China rusting under the paint stuff. Then looked into factory options across manufacturers new/ used that I could modify, flip up or down and unfortunately nothing was right. Circled back to Jeeps XJ factory plate holder, measured out the distance I’d need between the on-center from the bumper attaching holes to putting the plate just in front of my winch hook — 2” eye to eye. Decided that a black textured 1/4” plastic sheet cut-down would match bumper end caps perfectly. Below is what I ended up with. Nice and simple. (Nothing is painted: hardware or the plate itself yet. All will be satin black for consistency.) Nutserts will be in the factory underside bumper holes for ease of install/ removal of retaining bolts.
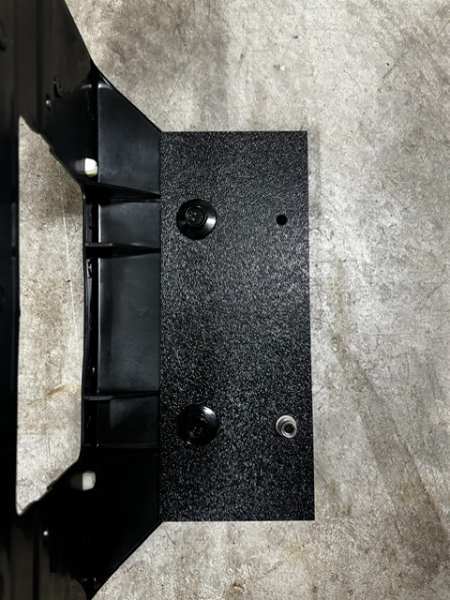
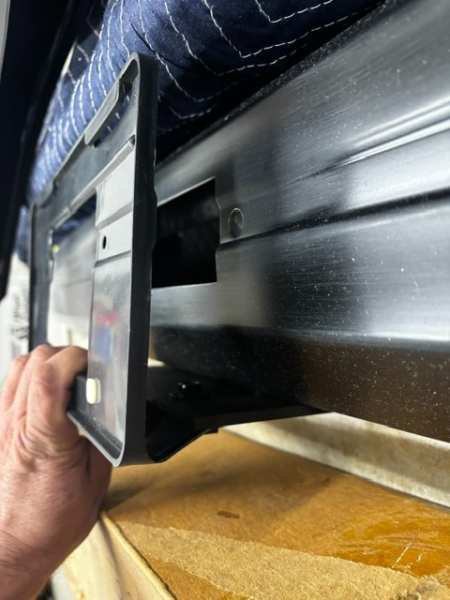
-
Kally's 1990 Comanche Pioneer revival
Gjeep replied to MJKally's topic in Member Projects: Your Comanches
Good looking MJ! -
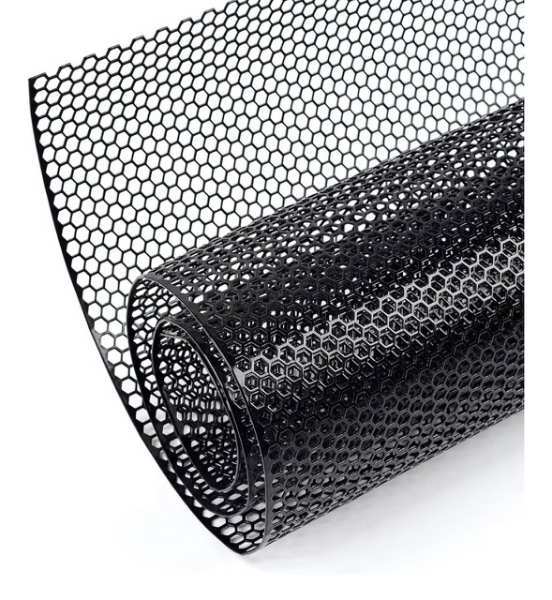
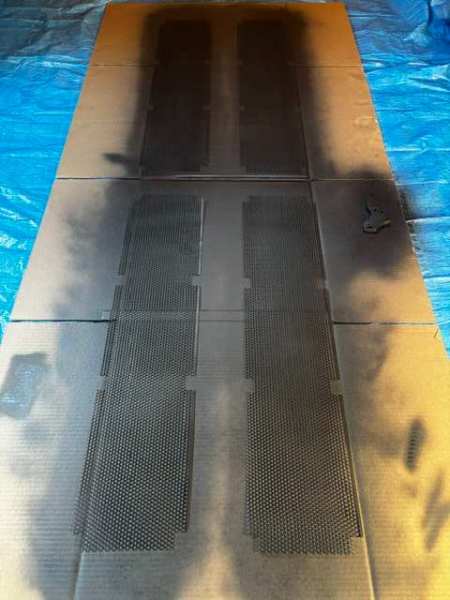
Long live the she-shed! A little over two years ago when we moved to Oregon I commandeered the shed on the property. Nice 300 sq ft structure with loft area and additional side overhang we can park a car under. My wife rightly felt wronged that she didn’t have an enclosed area for things and said she wanted a she-shed. 100% identical structure. My first question was – what are you going to put in there? Things. Done. It’s been vacant for 2 years except for 2 bicycles and 6 small Rubbermaid totes I tucked away. I’ve been inching my way in there with irrigation pipes, fittings, yard tools, etc. Time for the take-over. It’s going to serve as my parts paint booth and overall tinkering workshop (house related things mostly), but a solid dry area to paint Jeep stuff in. Come January when she heads to Florida to visit family for a week the Ditch Witch and I will run power to it. This morning the she-shed was where I painted several cut-to-size 6mm honeycomb mesh grilles for the MJ. After searching high and low, ordering far too many ‘wrong’ grille inserts I finally found a mesh design that fits evenly across all the openings of the modified factory grille. Fun part was that this mesh insert came rolled up. So, my wife’s heavy duty rolling pin was cleaned off and put to use. Worked great. Since they arrived gloss black, after I cut these proper, I sanded/ prepped them for paint. Now they’re satin black front and backside like the grille itself. Typically, with custom-ish projects I make at least one spare (this time three) as it makes a future need simple.
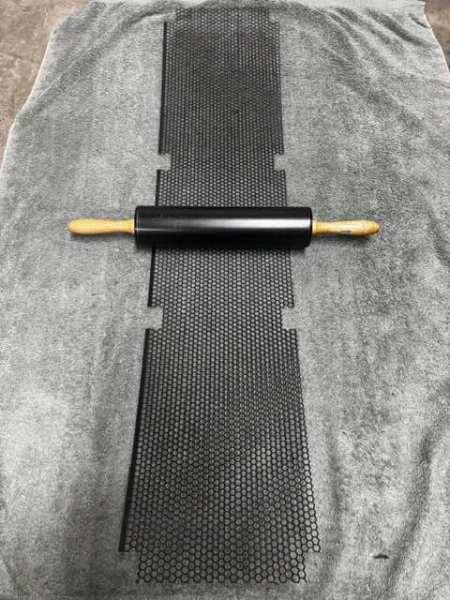
-
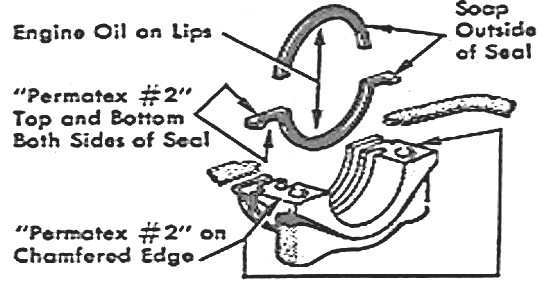
Correcto. Also between the RMS halves gets Permatex#2. Here's reference pic for the RMS:
-
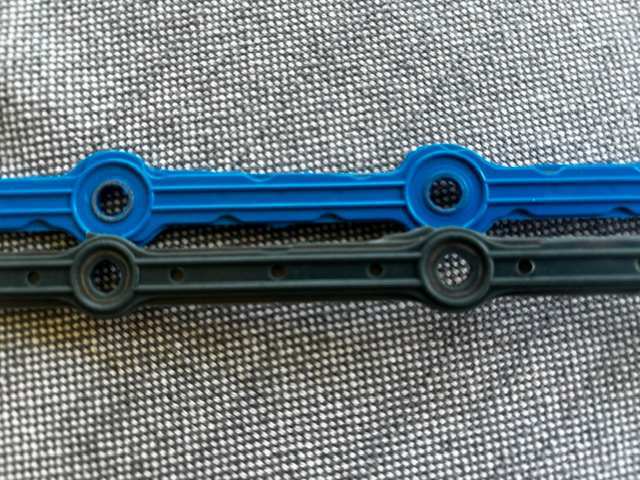
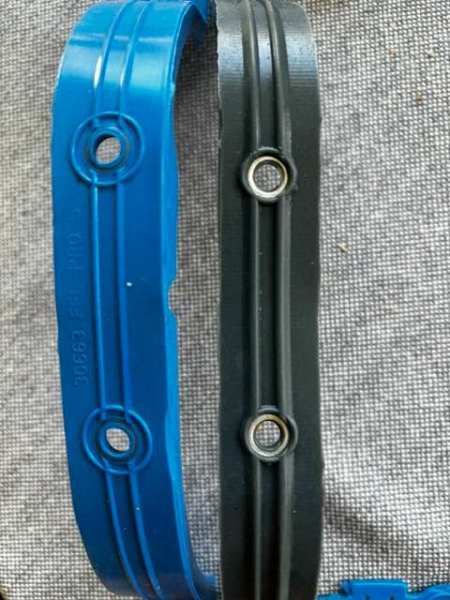
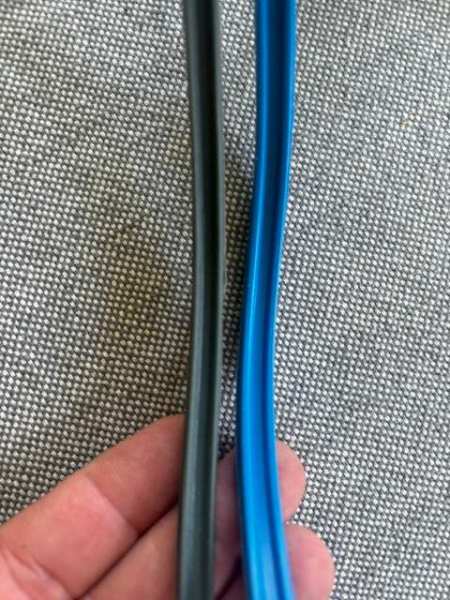
Since Hesco used a factory Mopar one-piece oil pan gasket on the stroker, I was thinking that would be the direction I’d go for the replacement. Especially since the blue Fel-Pro was, well, blue. I got curious as to the differences between the two and decided to do a side by side comparison. Mopar’s final gen was a one-piece unit is very similar to the Fel-Pro. In absolutely every other RMS/ oil pan gasket job done, I’ve always gone with the Fel-Pro. Never an issue. Fel-Pro is wider as you can see in pics but both sides of the Mopar ‘tracks’ are deeper than Fel-Pro all around. Mopar has slightly smaller bolt holes with gasket material ‘inside’ the hole – except the two holes as very front of the engine. (I put gasket maker on pan bolt threads always.) Which is the better gasket? Who knows. My purchased new XJ’s (1995 & 2001) each reached 150K before any leaks at the RMS, with the oil pan gasket showing no signs of leakage. Closest comparison using the Fel-Pro would be this very MJ pre-rebuild. Around 125K I replaced the RMS and used Fel-Pro blue on the oil pan…it got me to the vehicle refresh of 250K with no leaks either.
-
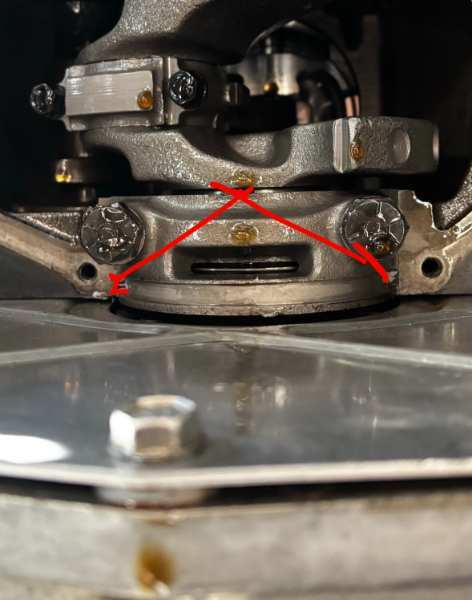
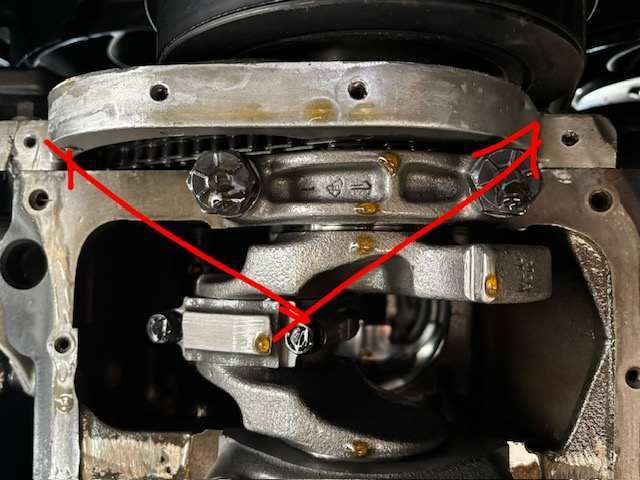
Should have listened to the little voice in my head (8 years ago)… Before I installed this motor. That voice of wisdom that echoed repeatedly in my head for a couple months – ‘just redo the oil pan gasket and rear main seal before you drop the motor in’. 3D me said, no no, it’ll be alright after all it’s a brand-new build. They know what they’re doing. In the stroker goes with all the leak-free confidence in the world. After a week of running it, a drip appears on the garage floor. Knew it. Just knew it. I remember Hornbrod’s advice, ‘Just run it. Fix it later’. Dear Don, ‘later’ has now arrived. I spy at least one possible reason the RMS was leaking. They secured gasket to the pan but there NEEDS to be anaerobic gasket maker on block where arrows are pointing. And my guess is, once I pull off the rear main bearing cap, there will be a lack of gasket maker between the two seal halves. Life will go on once I button up – sanity for the most part restored. Also took a moment to replace the plastic FPR vacuum line with a stainless steel version. Better.
.jpeg.096472147d30ffa523acc6c58716e2b9.jpeg)
-
https://regionoffroadparts.com/products/ax5-ax15-nv3550-bellhousing-inspection-cover-screws-bolts-for-jeep-wrangler-yj-tj-cherokee-xj-grand-cherokee-zj-1?variant=50505291366713&country=US¤cy=USD&utm_medium=product_sync&utm_source=google&utm_content=sag_organic&utm_campaign=sag_organic&gad_source=1&gad_campaignid=23464041987&gbraid=0AAAAA-8WpajyHe56azIlyeb0XIpJcpC5c&gclid=EAIaIQobChMI4Pr_2YimlwMVxyutBh1p5jKcEAQYASABEgIelfD_BwE
-
Project: Slippery Slope – a ’91 MJ runner
Gjeep replied to Gjeep's topic in Member Projects: Your Comanches
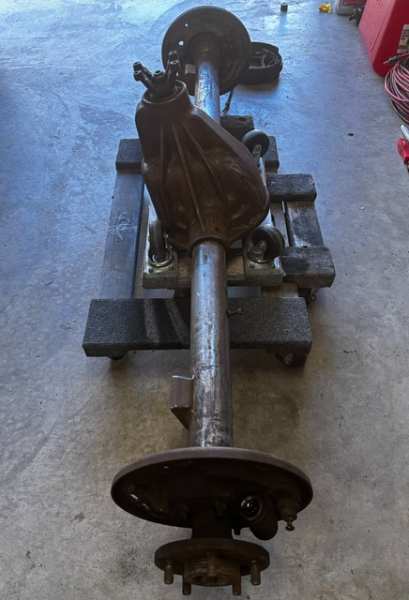
This D44 project will be a slow build, probably ready Spring of ’27… Cleaned the surface crusties off and found a couple cuts spots on the passenger side thanks to the PO. Thankfully not quite a quarter of the way through the tube. Going to make it right, weld/ grind it smooth. It’ll be getting 4.10’s and an Eaton locker (currently 3.07’s). I removed all the original brake hardware and the parts that need to be reused will sit in a bath of Evapo-Rust until they’re like new. It will retain its drum brake setup. Since I’m still fairly new to the Southern Oregon area and learning my resources – I found a single driveline shop about 45mins from me with good reviews. That’ll be the place. I want to have them make sure first all is true with this axle before they get into it. The MJ this was a flat bed, possible truggy work in progress that thankfully kept the rear leafs with no mods to the D44 axle.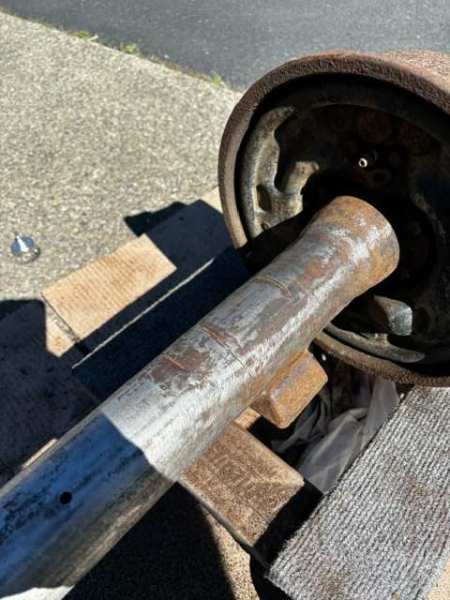
-
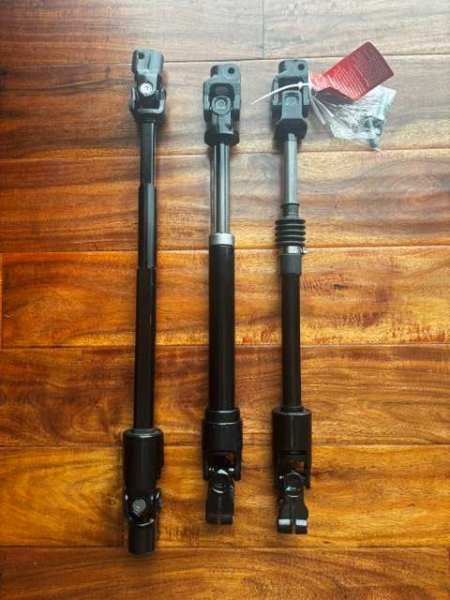
The NOS ZJ steering box I installed on this build had a slow leak front side that eventually revealed itself, so I replaced it with another. Installing a steering box in an MJ/XJ with the factory solid shaft is absolutely no fun. It's even more challenging in this truck as I have my hidden winch setup blocking about half of the access area. I began searching for a telescoping shaft. I had purchased the Borgeson unit years back, but decided to not go with it as it isn't a straight drop-in replacement. I forget what needed to be modified, but knew that wasn't the route I wanted to go. I learned both Dorman and A-Premium offered a telescoping shaft for the first gen XJ (GM column) and decided to order both for comparison. Both looked well made, but the A-Premium's telescoping shaft is what I decided to install. It's slightly beefier then the Dorman telescoping unit and the rubber seal on the shaft itself seals entirely. Dorman is just a boot having slight gaps. Onward...
-
Found fender flare hardware, inner fenders
Gjeep replied to mjenk72's topic in MJ Tech: Modification and Repairs
This build -- Middle-ish of page 5 -
Project: Slippery Slope – a ’91 MJ runner
Gjeep replied to Gjeep's topic in Member Projects: Your Comanches
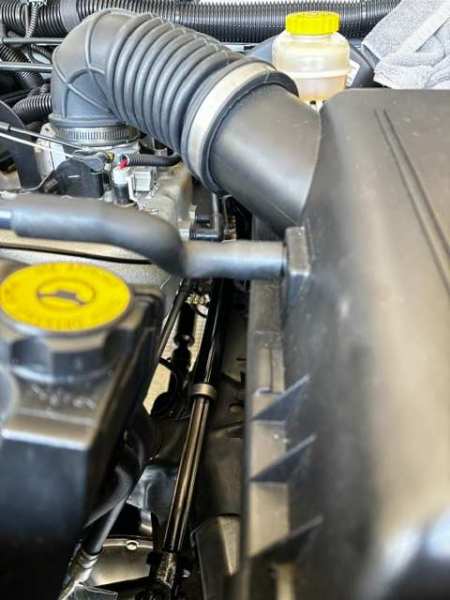
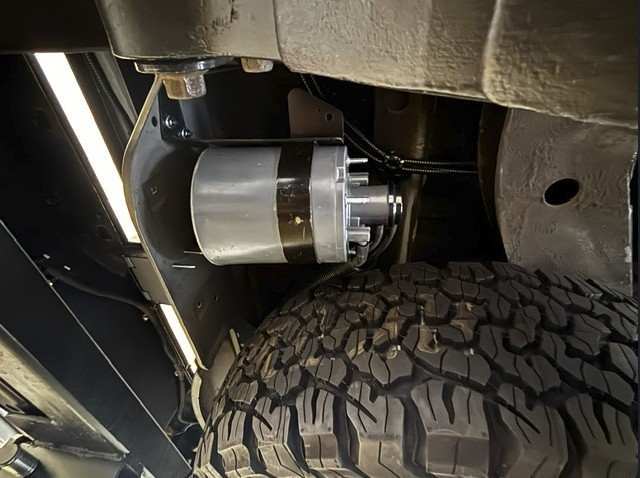
Well, the above worked until the OBD1 PCM was driven enough for it to ‘learn’… It developed an obnoxious stumble at idle every 6 seconds though ran/ drove flawlessly. (My guess is the late model canister required a purge solenoid, and I didn’t want to deal with it as the PCM triggers a ground that turns it on and off.) Couldn’t live with the stumble so back to the drawing board. I used the original charcoal canister mounted to the rear valance panel with vacuum lines up to the engine bay, and a cut-up front inner fender liner as a splash shield around it. Perfect fit and runs right.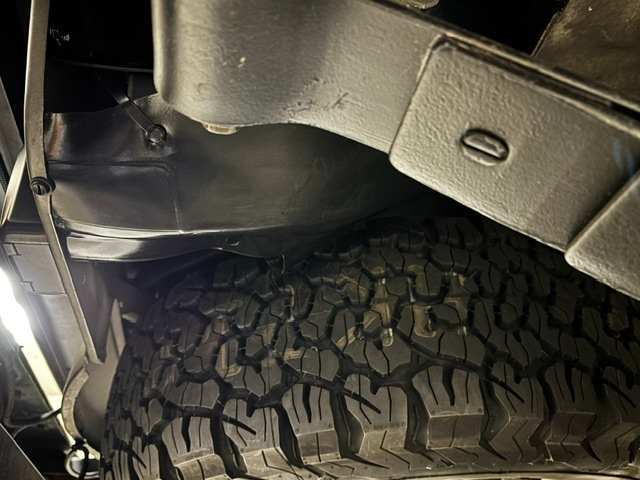
-
Telescoping steering shafts are available for 84-94 GM columned MJ/XJ’s. It is absolutely no fun installing a new box in these early XJs with the non-telescoping factory shafts. Left to right is a non-telescoping Crown beside an A-Premium (middle) and Dorman (right). The two telescoping shafts have their own unique design. They feel about the same weight and look to be quality parts. Dorman stayed more true to the OE shaft design while the A-Premium sliding shaft is shaped like a +. Would almost think that’s the stronger design. Dorman has good reviews on Amazon and I need to see if there are any on A-Premium. About time the first gen MJs/XJs see some love here.
-
Project: Slippery Slope – a ’91 MJ runner
Gjeep replied to Gjeep's topic in Member Projects: Your Comanches
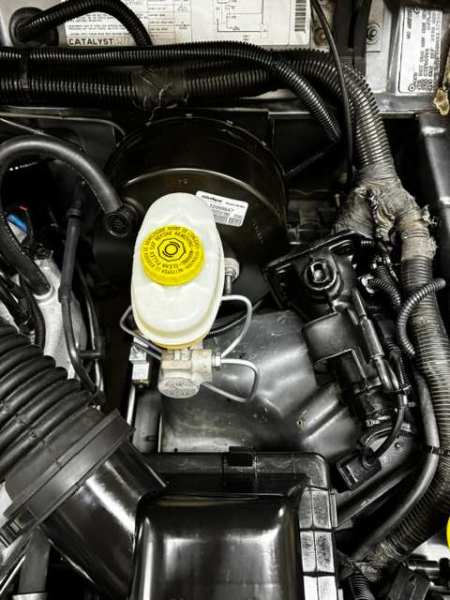
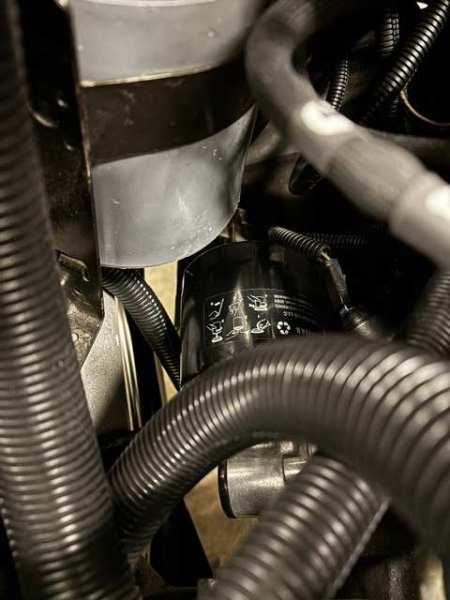
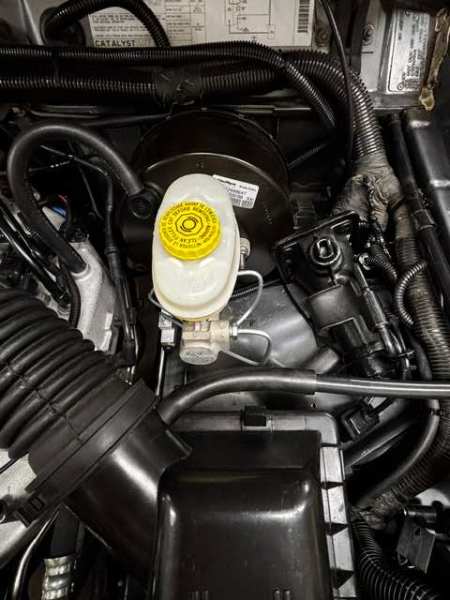
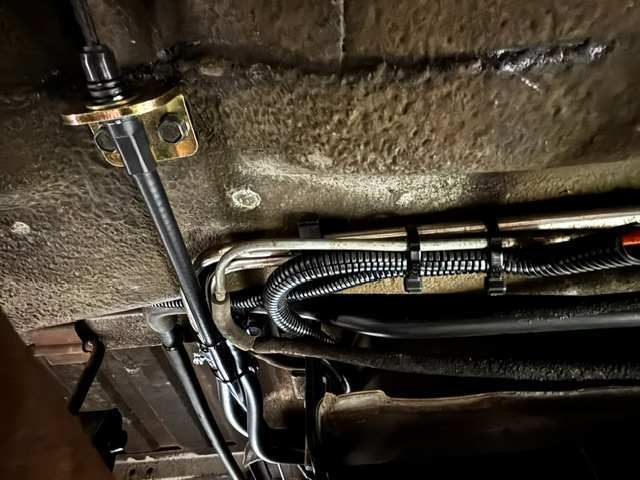
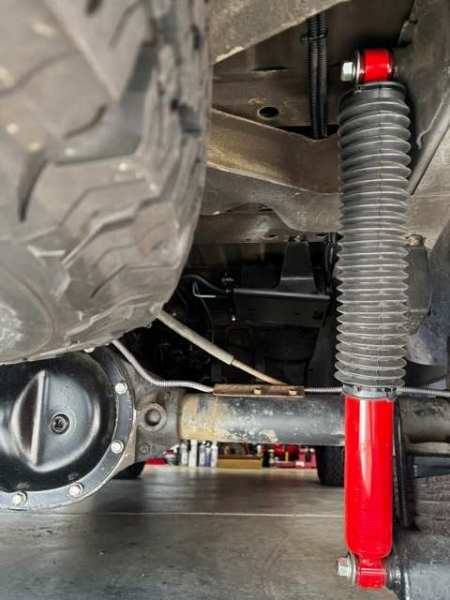
It was time to free up some workspace around the old 4.0L… oil changes were unnecessarily difficult. Time to relocate the charcoal canister. In mid-1998 Jeep decided to move the XJ’s charcoal canister from the inner engine bay ‘frame rail’ (where our MJ’s is located) to just in front of the rear axle on the exterior floorboard driver side. Pure genius. All ‘98-‘01 XJ’s had this set up. From the early Renix 4.0L days through 1997 the cylindrical charcoal canister was located way too close to the engine oil filter. As equipped from the factory Renix and early HO years weren’t too much of an issue as the oil filter was more or less vertical (spectacularly dumping oil out at every oil change). I’ve always converted early era MJ/XJ’s to the later horizonal oil filter setup for a somewhat less messy oil change. MJ/XJ AW4’s have the trans cooler lines running just below the oil filter in addition to AC lines (R134a ‘94.5-‘96 XJ setup as I’m running have lines wound in a bell shape for flow making the oil filter extremely difficult to loosen with a wrench/ eventually remove), spark plug wires, and heater core hoses (yes, I’m running ‘97+ XJ hoses) cluttering up the entirety of that area. I have barely 3/8” to maneuver the slip-around filter wrench into place. The original setup... And below is the revised setup comprised of an ‘00 XJ canister bracket (installed with a new Standard Motors charcoal box), a cobbled/cut up hard vacuum line from the same wrecked XJ that runs along the frame rail to the firewall, two Renix era engine vacuum harness’ large rubber elbows (Crown Automotive new), the original ’91 MJ horizontal HVAC vacuum line cut and now running vertical from the bottom firewall up to the intake manifold rear-most port, and a ‘97+ XJ air box/ lid (at right in pic below). Other doo-dad’s include a new freshly bent 1/4” brake line taking whatever vapors that exit the two roll-over valves at the top of the MJ fuel tank into the charcoal canister and a ‘98-early ‘99 TJ canister breather ‘top hat’. (The TJ had an almost identical rectangular canister to the later era XJ with a different bracket. The difference TJ to XJ is that the ‘98 XJ instead of the ‘top hat’ ran this breather line up the frame rail up to the lower center area of the firewall where it just stopped and connected to absolutely nothing. ‘99+ XJ’s saw that breather line connected to an even more convoluted emissions venting system.) An alternative to this TJ cap would be a simple breather line into the MJ frame rail. The end result is a ton of space around the oil filter. I can actually get a whole hand and arm in there. Perfecto. (Worth mentioning in this writeup, both my MJ’s are running an exhaust turn-down pipe just after the muffler. The exhaust doesn't go all the way back. But based on the trajectory of the muffler it looks like running this setup with the stock MJ exhaust wouldn’t be an issue.)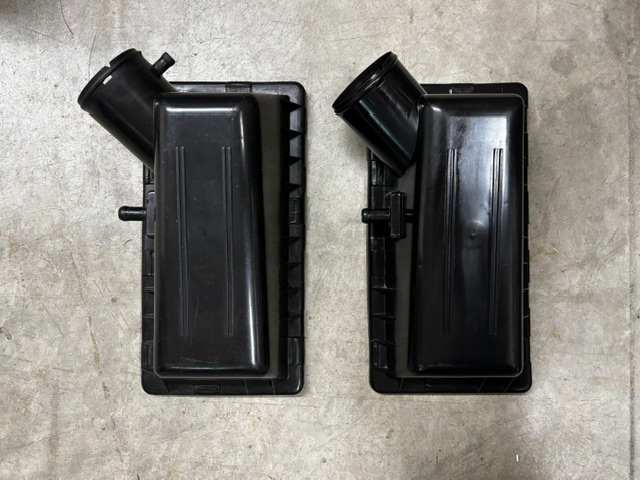
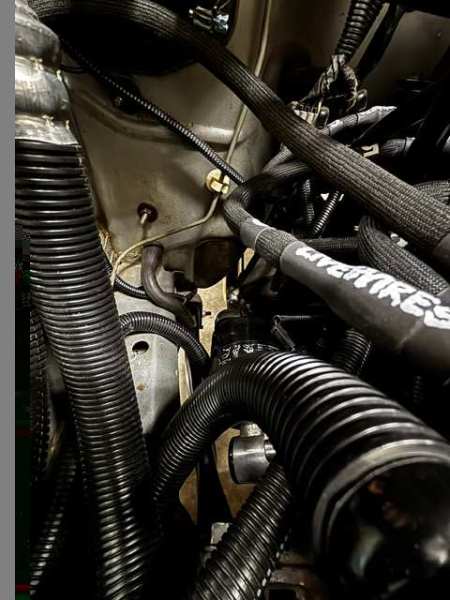
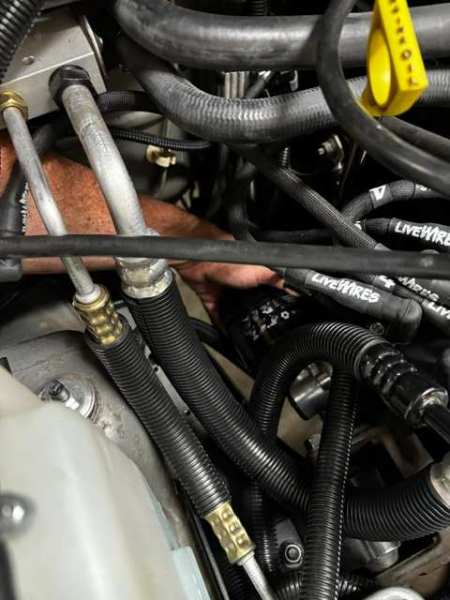
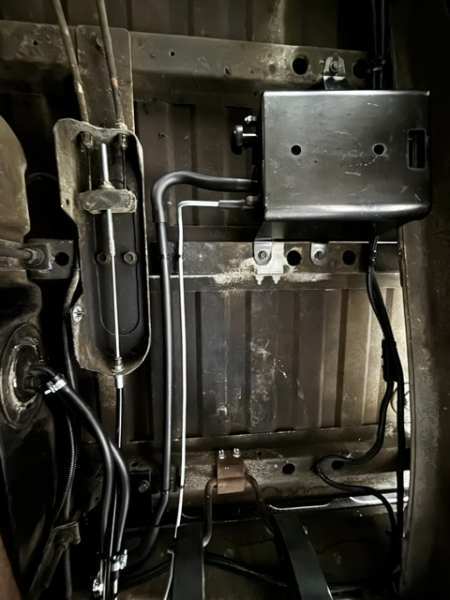
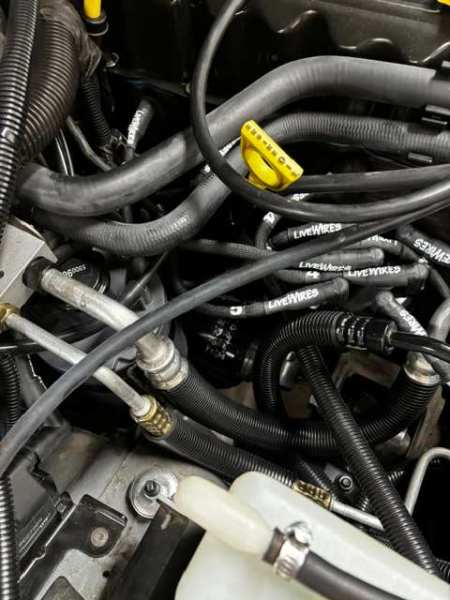
-
In addition to what you have noticed, you'll also want to POR15 the entire floorboard. The seams aren't fully sealed. Rainy season water can also come up from between the floor panels and seat track mounting studs. When you POR15 it, you'll get to see all the less than sealed spots. Worth doing before putting the interior back in.
-
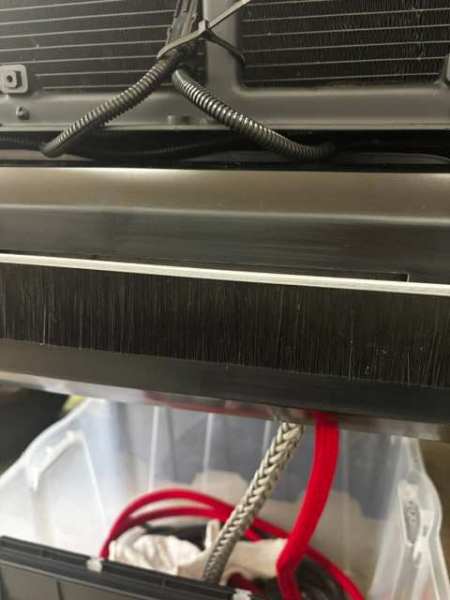
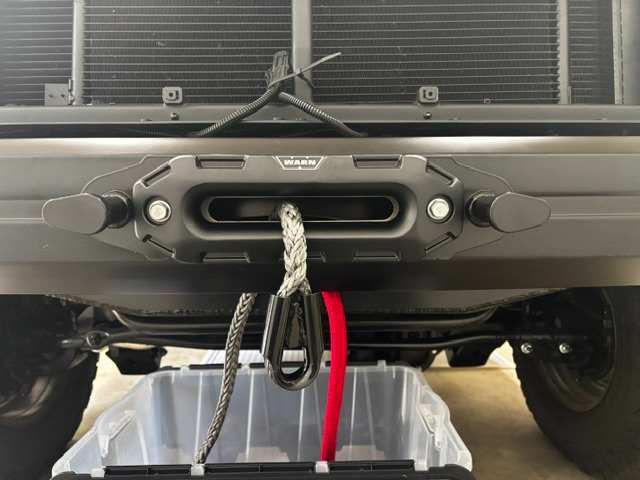
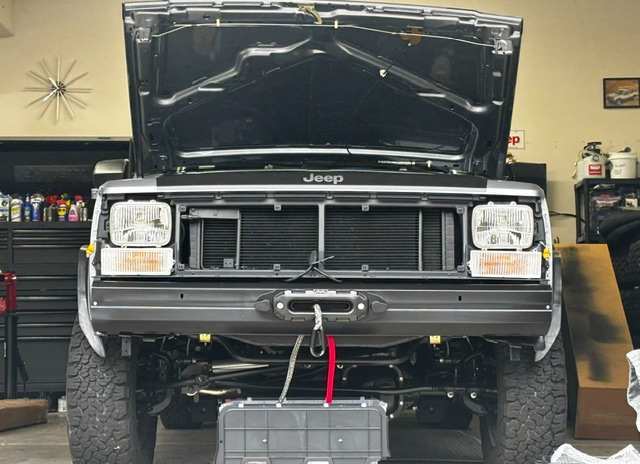
I’ve been holding my breath for the past 5 years hoping the measurements and work I did on the support bracket between the front crossmember and bumper was spot on for my hidden winch setup. And thankfully it was – just bolted it all together. My youngest helped me with this whole hidden winch setup back when she was in 4th grade (and she starts her freshman year of college in a few weeks). Crazy how time flies – and how long sometimes these projects take to get done! The go-between support bracket itself has weld nuts just behind the front bumper for the fairlead and Maximus winch line hanger bolts to thread into. Nothing is bolted down tight but wanted to do a test fit before taking everything to get powder-coated. Mounting hardware for the fairlead will be the same stainless steel bolts I used on for the factory sport bar. There will also be a ‘dust brush’ (shown below) just behind front bumper to keep the winch line clean and bug-free. Warn Epic fairlead and hook both blacked out will adorn the front. Getting back to it!
-
Project: Slippery Slope – a ’91 MJ runner
Gjeep replied to Gjeep's topic in Member Projects: Your Comanches
She's my daily. 88K on the clock now. Bought it at 85K. -
Project: Slippery Slope – a ’91 MJ runner
Gjeep replied to Gjeep's topic in Member Projects: Your Comanches
Got around to cleaning up and painting the MJ-specific SnugTop I found a while back. Decided satin black was the way to go to keep the Chief graphics poppin'. Next up... rebuilding and gearing the D44.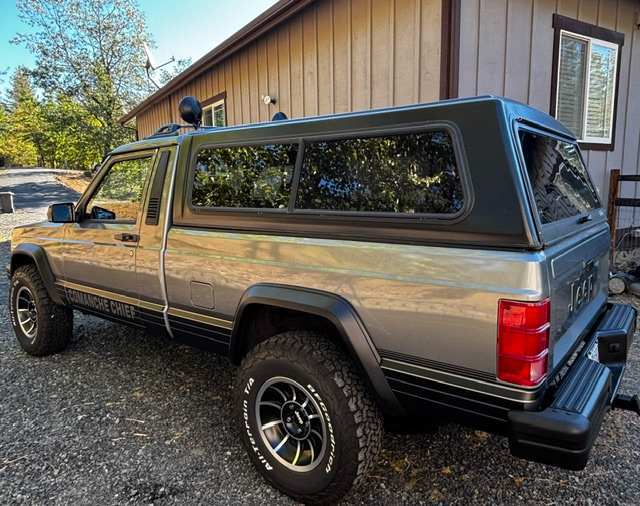
-
Adding 94-96 XJ A/C to 87-90 MJ - Slow Thread
Gjeep replied to Gojira94's topic in MJ Tech: DIY Projects and Write-Ups
Looks like the aftermarket is modifying 97+ XJ style evaporators to work with the slightly older setup with threaded nuts. There was no difference in the AC HVAC box HO years r12 to r134. I see though why you need to modify. -
Adding 94-96 XJ A/C to 87-90 MJ - Slow Thread
Gjeep replied to Gojira94's topic in MJ Tech: DIY Projects and Write-Ups
Seems like you're on the right track... Just know you're going to want to keep it to the renix years (87-90) as this is where you started from a pulling parts perspective. 91 was a different set up; '94.5 year-'96 got r134. -
New carpet in as I redo the interior.
Gjeep replied to OzarkGuy's topic in MJ Tech: Modification and Repairs
Looks sharp. Like the rims also. Era appropriate.