


Gjeep
-
Posts
1221 -
Joined
-
Last visited
-
Days Won
3
Content Type
Profiles
Forums
Gallery
Everything posted by Gjeep
-
Project: Slippery Slope – a ’91 MJ runner
Gjeep replied to Gjeep's topic in Member Projects: Your Comanches
Wrapped in black. Will be trimming out the openings soon enough.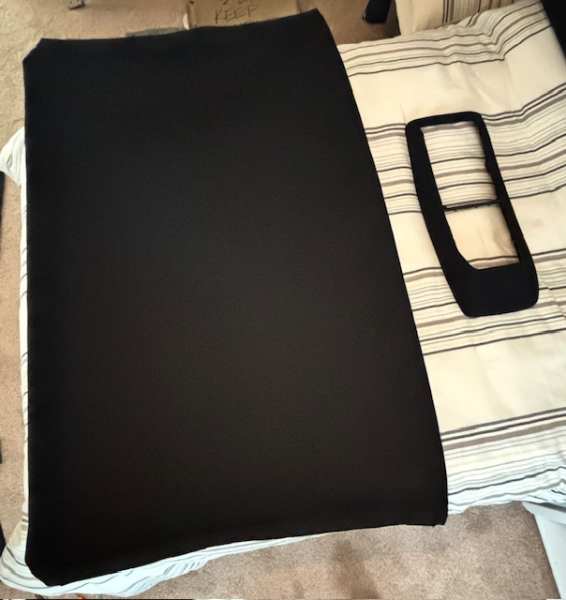
-
Satin black to match bumpers/ flares. These are 'scab' flares used for placement and are plenty faded.
-
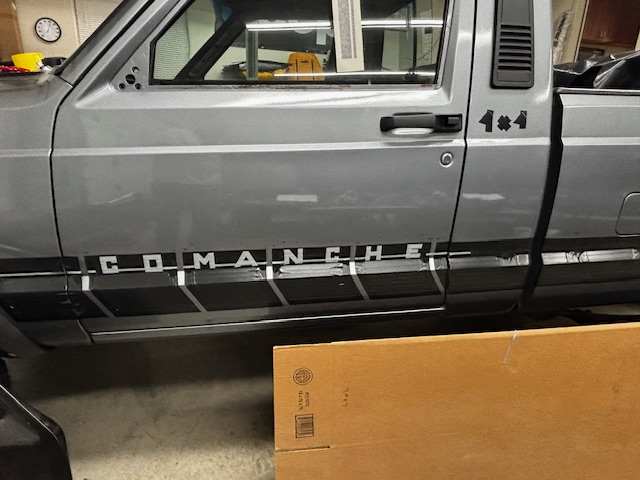
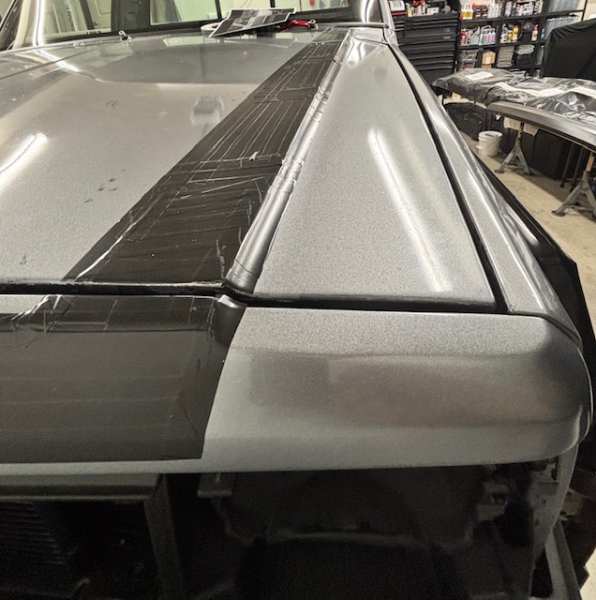
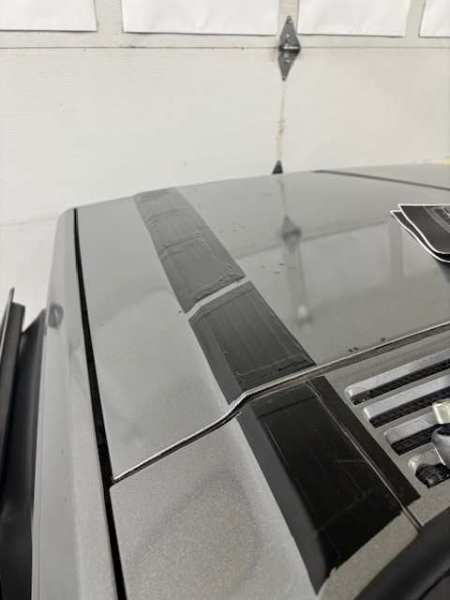
This is how my graphics lay-out started a little over a month ago, using my ’91 MJ as the guinea pig. Had to see how it would look in person. Seeing things on-screen just isn’t the same. So, I bought I don’t know how many rolls of electric tape and 1/4” pinstripe tape to represent the cut-out where body color would be shown. Many, many, many, many visions and revisions got me to here: These graphics are 99.9% final. Aiming to have files off to the graphics guy for mid-Nov tweaking/production. This is a photo of my MJ with graphics laid on via Adobe Illustrator but during the day while working I dabble using MS Word, updating master file later. You can see the sloppy blocks. The graphic will start/stop 1/2” from the flare following the contour. Hood will have a Comanche Chief-ish stripe but simpler. The tailgate center-most area will be blacked out with ‘Jeep’ letters cut out (like the ‘Comanche’ on the side) so the silver paint is exposed. The header panel Jeep logo will be a cut-out as well with solid black ‘4x4’ decal on the cab in the usual spot. I cut the wheels/tires off so I can see in my mind a couple different wheel options.
.JPG.da3eba7ec614cd2d51657fc48d893307.JPG)
-
Project: Slippery Slope – a ’91 MJ runner
Gjeep replied to Gjeep's topic in Member Projects: Your Comanches
One thing that’s not fun moving to a new area is finding trusted specialty shops – for upholstery, powder coating, etc. Being only a year into our place, I set out a few weeks back to find a local upholstery shop. I talked to several large shops that didn’t quite feel right. Then I found a one-man 30 year shop that listened to what I was asking for and was clear on attention to detail. Perfect. My black Mesa seats were near flawless; except for the vinyl flap bottom side of the seat that takes a beating from the tumble latch, chrome trim bezel screws, and no longer existing seat ‘bumpers’ that are long worn off, leaving an exposed bolt head to tear things up. I’ve always liked the look and resilience of the MJ backwall carpet material. It’s perfect for this spot – provides cushion and does not tear. I'll cut the needed holes once the seat bottom is in-place on the seat frame so no mistakes. Just dropped off my headliner and overhead console today to get recovered in black by the same shop. I’ll handle the visors as I’m retrofitting black Ford vanity mirrors in as I did for my ‘Son of Stink’ MJ project. These were one year only visors used when Jeep reduced the size of the MJ/XJ sun visors in 1990. 1991+ saw another style vanity mirror. The 1990 year is the only year offered in black – by Ford, but on a 2003 full size Crown Vic, Mercury and Lincoln auto – and it’s identical to what Jeep had used in ’90. Crazy I know, got to have a molded black vanity mirror… Next up is finishing my steering column, as I just got the NOS horn cam I needed for the 3-spoke wheel complete with plunger. Then I’ll install the column and get to the AC and other interior project tuning prior to complete installation.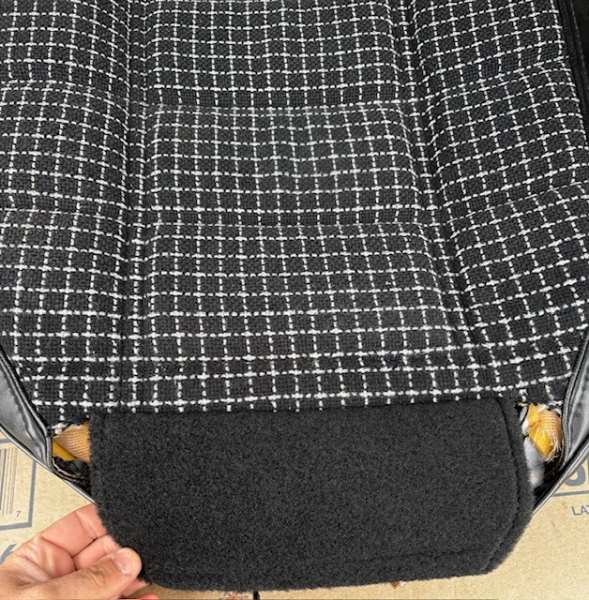
-
Another Rear Bumper Question
Gjeep replied to JimiGibbs's topic in MJ Tech: Modification and Repairs
No, very different. I have seen complete XJ rear bumpers used on MJs and it doesn't look bad. You would need to fab up the proper mounting brackets to make it work and end caps need to be trimmed a bit. Here's a link with detail on CC member that did this -- -
Project: Slippery Slope – a ’91 MJ runner
Gjeep replied to Gjeep's topic in Member Projects: Your Comanches
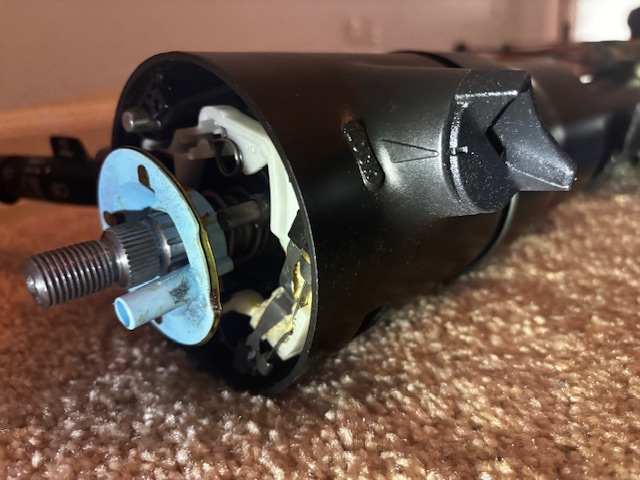
Got the vents cleaned up and clipped into place. Also, dug into the NOS AW4 steering column to swap out the ignition cylinder (for single key setup) and add cruise control stalk. I’ve taken many XJ/MJ columns apart and this was the first to have a slotted ignition cylinder retained by a torx bolt. Had me stumped for a bit, as was trying to figure out where the retaining clip went. Column had a manufacture date of 2/89. Found a NOS horn cam that is on its way, complete with the spring and horn plunger.
-
Project: Slippery Slope – a ’91 MJ runner
Gjeep replied to Gjeep's topic in Member Projects: Your Comanches
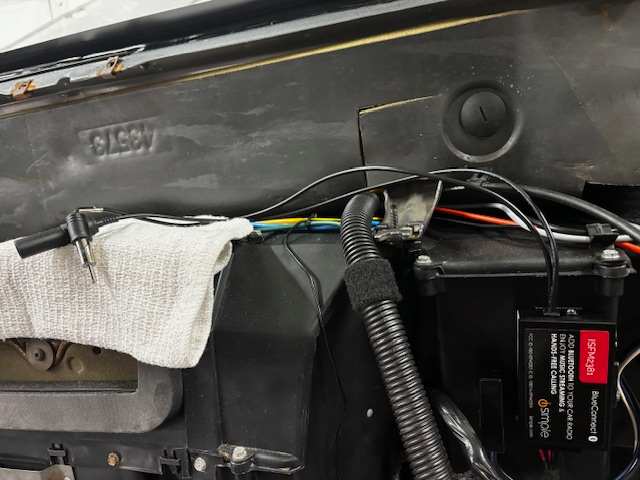
As with my other MJ, I’m using a factory NOS ’87 AM/FM radio with add-on BlueTooth. The BT vendor I went with prior (Redi-Rad) that tailored his business to classic car owners has since retired, so using a new solution – iSimple. It has phone capability included if the head unit had an aux port but mine does not, so I removed the extra wires. Now it’s just antenna coaxial connections, power, and ground.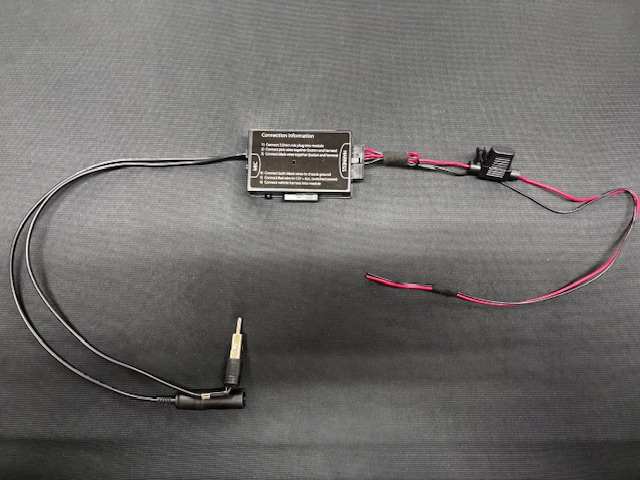
-
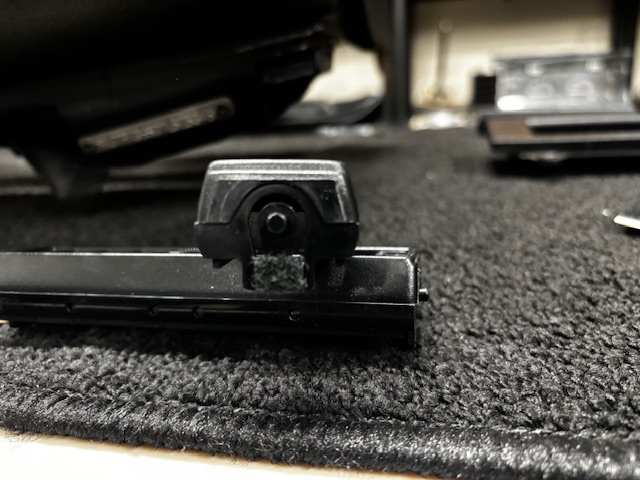
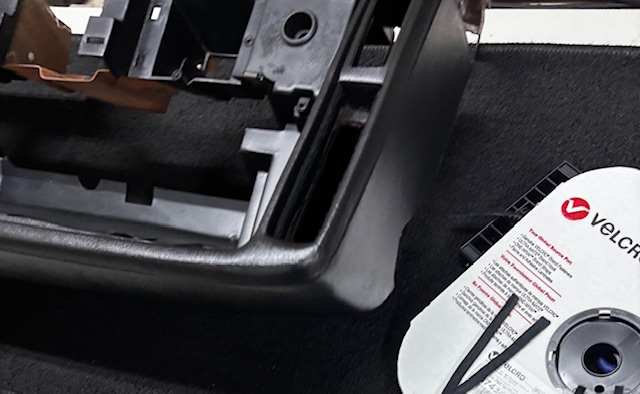
Project: Slippery Slope – a ’91 MJ runner
Gjeep replied to Gjeep's topic in Member Projects: Your Comanches
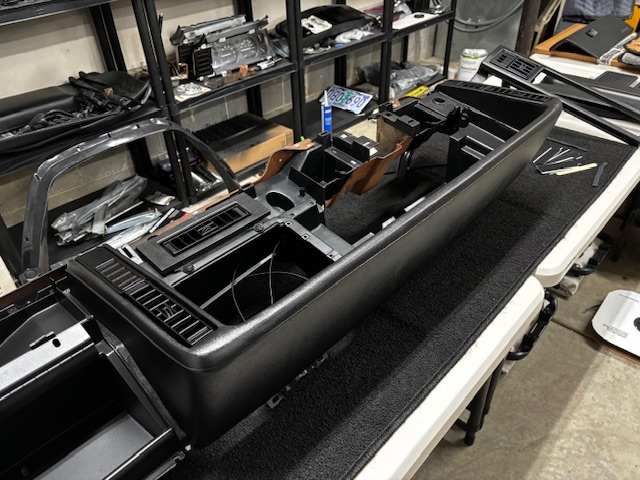
Details… I replaced the old felt surrounding the rectangular HVAC vents dashboard side with adhesive-backed Velcro 1/4” strips. Also replaced the small bit of felt bottom side of those rectangular HVAC grille/vent inserts, and top and bottom on the passenger side square grille/vent just below the glove box. Last important detail for the “new” dashboard is the old ’91 VIN plate. Can’t exist without that.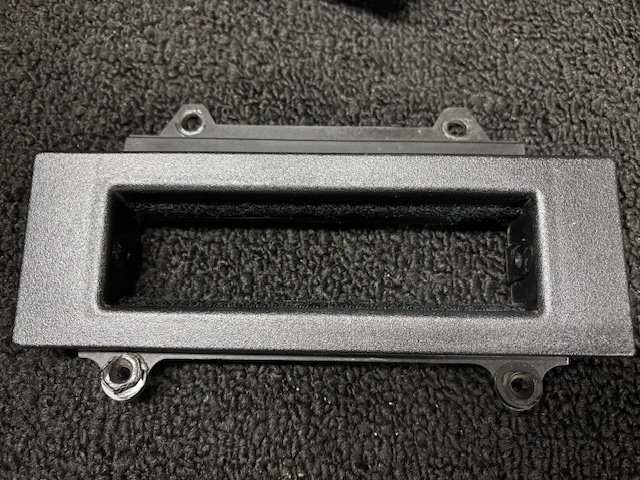
-
Having had all years, I'd recommend 91-95. Rock solid. Renix can be tough with finding parts; 97+ finicky OBD2, cheap wiring, and HVAC.
-
Project: Slippery Slope – a ’91 MJ runner
Gjeep replied to Gjeep's topic in Member Projects: Your Comanches
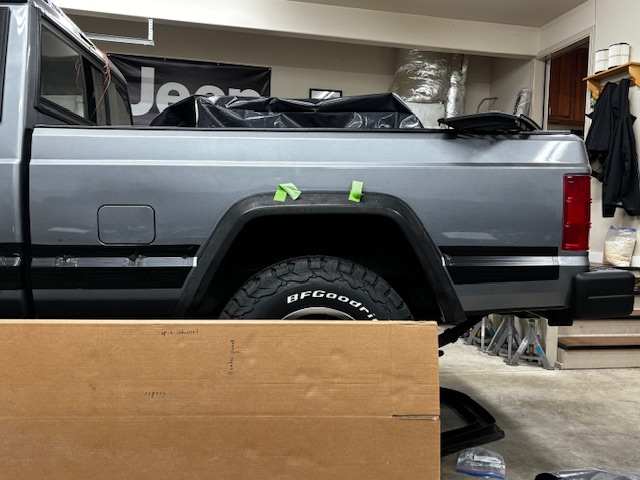
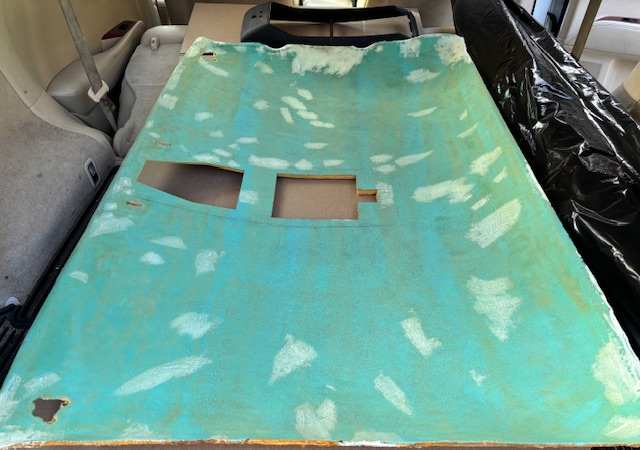
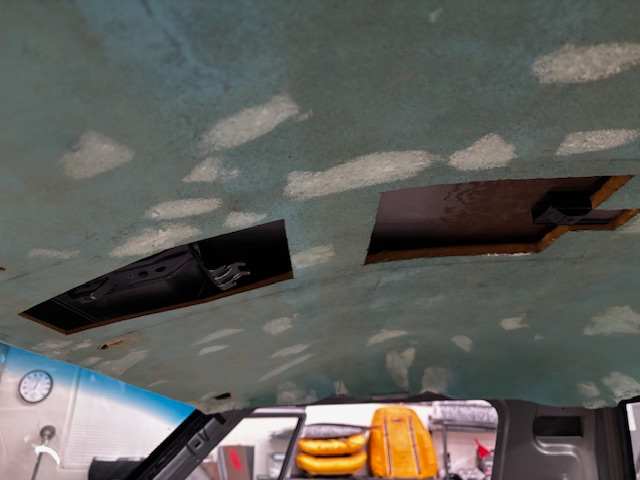
Taking a break clearing the property of dead trees and clutter (it’s endless). I'm going to let fall and winter do its thing. Going to get back to inside the housework painting walls and finishing at least one MJ before Spring. That’s the goal. Step 1 is getting this MJ’s interior tested and back together, which includes audio/ BT installation, charging the AC, and then reinstalling the dashboard, etc. Some early morning progress attaching the overhead console rear-most mounting bracket to the MJ’s roof, and test fitting with the headliner board in place. Success.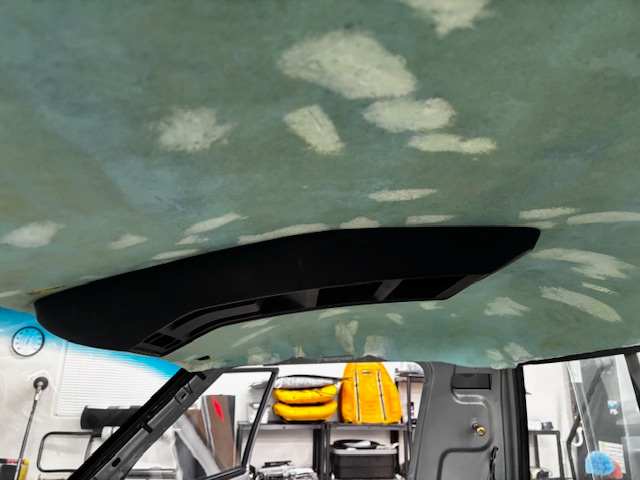
-
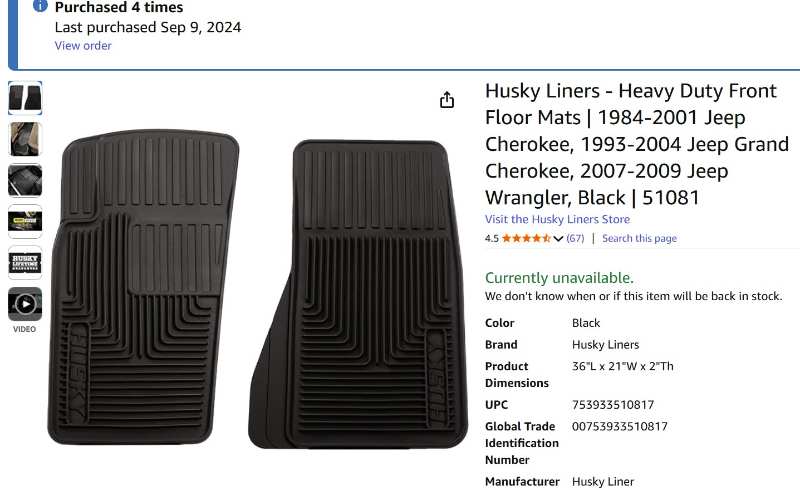
Husky was who manufactured those for Jeep. I run them in some of my XJs and fit great (passenger side flap needs to be trimmed). Sold on Amazon. Not sure if you considered these... Edit: I now see these are no longer available on Amazon. They are available from the husky website $89.
-
Seems like a nice little MJ for $5K https://www.facebook.com/marketplace/item/1484892432653721?ref=search&referral_code=null&referral_story_type=post&tracking=browse_serp%3A797ae219-ba59-4702-8c25-e141bb7dcc75
-
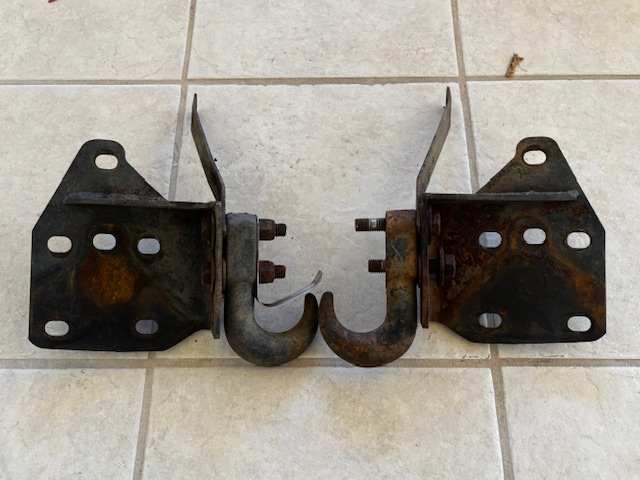
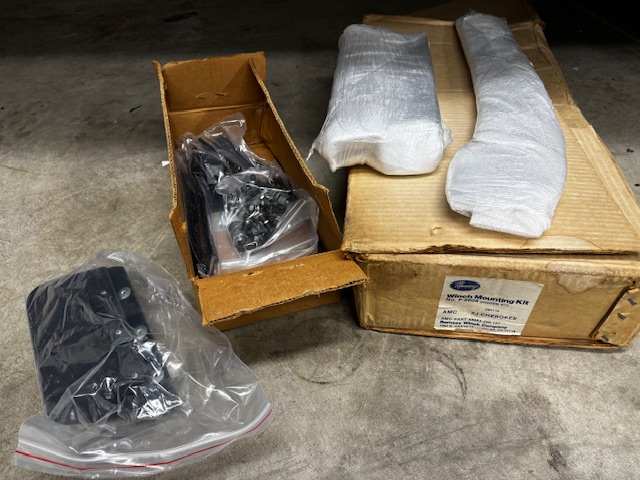
I recently purchased/ picked up (this week) a NOS XJ Ramsey kit in So Cal. No winch. Bracket kit only. Also this morning I stripped an 86 XJ Chief that also had the factory Ramsey hidden winch setup (also no winch) and interestingly enough the tie-in tow hook brackets were stubby, first gen style. Didn't grab the crossmember brackets as completely different 2.8L to 4.0L years. '86 XJ tow hook brackets used with hidden winch. Actually has 6 bolts per side where as 'newer' set up had only 3 per side, but had the through-the-frame bolt each side further back. NOS 'second' gen Ramsey mounting kit for 4.0L years.
-
nice complete AC heater core
Gjeep replied to Pete M's topic in Craigslist/eBay... i.e. Not Your Stuff
Agreed. Meant to post here.. This is a good seller and I reached out to him weeks back. The guy that posted was a new hire and like you said, had no idea what NOS meant. It is out of a 67K XJ which is a good thing though. -
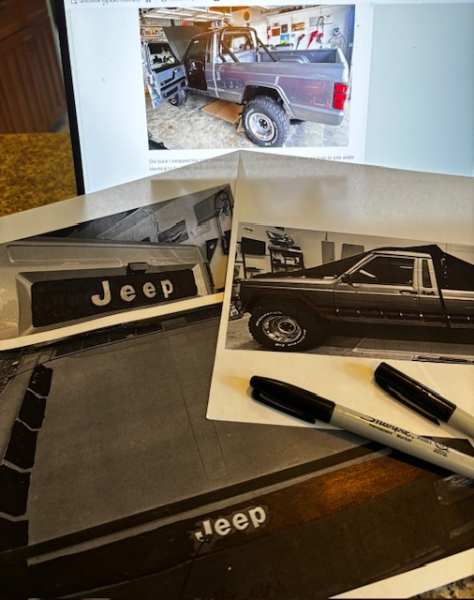
Long time no update! Don’t get me wrong, I was mostly excited to apply ‘Chief’ graphics to my stroker build – but something kept nagging in the back of my mind that it just wasn’t right for the build. I went all out on the interior. Something familiar but different and I needed to do the same on the exterior. Plus, my ’91 MJ will be a Chief and will look right especially with those vector wheels echoing the Chief stripes. Gotta be. Settling into 5.5 overgrown Oregon acres takes a bit. Ton of work. But, every week I faithfully start the little beast looking forward to getting back to it some day. (Once my ’91 MJ runner gets done that is – also sitting in the garage waiting on me.) This week was the week though to figure out the graphics – forced my inspiration by reaching out to several online vendors, but deciding that a local guy would be best. Just easier to work person to person. It pushed me to finally put sharpie to paper and doodle, over and over and over again. A good pile of not good enough paper was scattered on the kitchen floor. I kept narrowing down the graphic design ideas until I got here – 98% sure this the final design. The sketch is rough but you get the idea… Lots of knocked out lettering that’s era appropriate. ‘4.6L STROKER’ will be on the last stripe closest to windshield towards the outer lower edge of the hood. ‘COMANCHE’ will be in knocked out letters on the doors. Neither letterset will be ginormous, opting instead for subtle yet visible. Both the nose and tailgate ‘Jeep’ lettering will be knocked out, with the center area of the gate blacked out. Onward...
-
Great find! Looking forward to the build.
-
Jumping in to this late -- curious if the builder has an MJ or member near by so that he can test fit before producing the first run. It can make a difference..
-
Sharp MJ -- black with the cordovan interior looks good.
-
yep, confirmed good guy. Bought a couple things off him couple months back.
-
Chunk of steel in front of steering gear
Gjeep replied to Anthi4078's topic in MJ Tech: Modification and Repairs
Interesting -- possibly it only left the MJ not the XJ? My '89 MJ did had it when box was removed. -
Chunk of steel in front of steering gear
Gjeep replied to Anthi4078's topic in MJ Tech: Modification and Repairs
A guaranteed nope. Neither my 91 or 92 MJ had it and I just replaced the 91’s steering box a couple months ago. -
Chunk of steel in front of steering gear
Gjeep replied to Anthi4078's topic in MJ Tech: Modification and Repairs
Stopped in HO era.. that's a piece of Renix history. -
I’m running that switch and bracket on all my MJs and XJs and have tied it into my alarm. Hood opens, alarm goes off and if your hood is up, the alarm knows not to set when working on the Jeep. Mopar# 5252559; airtex 1S1049. The bracket itself is a fun one to find as 1991 XJ specific, factory alarm, typically Limited trim only if optioned (occasionally a very high end Laredo).
-
Project: Slippery Slope – a ’91 MJ runner
Gjeep replied to Gjeep's topic in Member Projects: Your Comanches
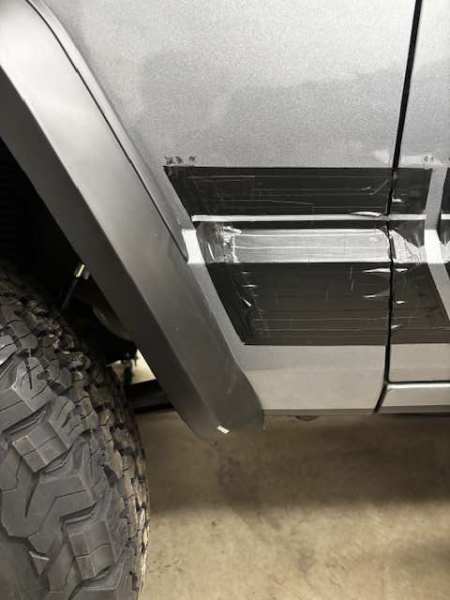
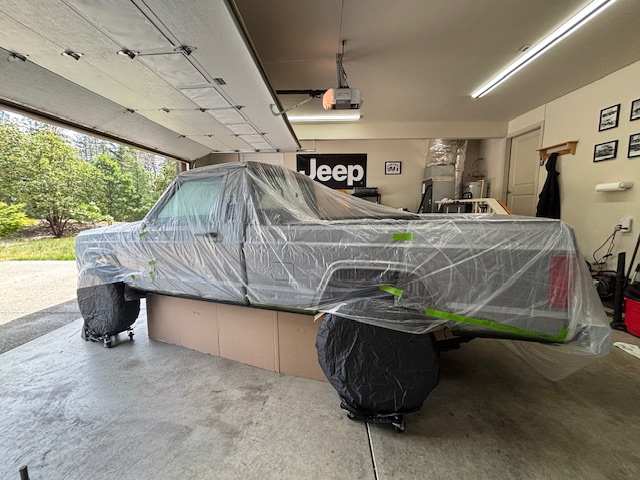
MJ was wrapped like a burrito before I matte black sprayed the rocker areas cab and bed sides. And… done. Will see if I can get to laying the graphics on Sunday. Should be an adventure.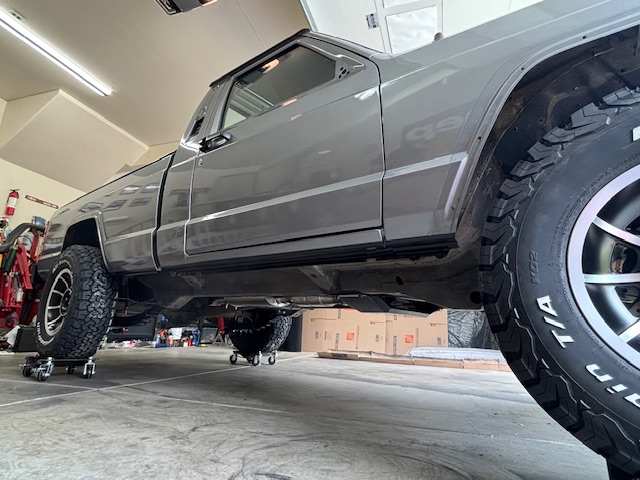
-
94.5-96 XJ's ran 134 refrigerant from the factory. I'm currently running that exact set up in my '92 MJ and just installed it in my current '91 build. I like having things factory when I can.