Gjeep
-
Posts
1221 -
Joined
-
Last visited
-
Days Won
3
Content Type
Profiles
Forums
Gallery
Everything posted by Gjeep
-
Truck of the year poster
Gjeep replied to fiatslug87's topic in Craigslist/eBay... i.e. Not Your Stuff
Yep, never seen that one. -
Project: Slippery Slope – a ’91 MJ runner
Gjeep replied to Gjeep's topic in Member Projects: Your Comanches
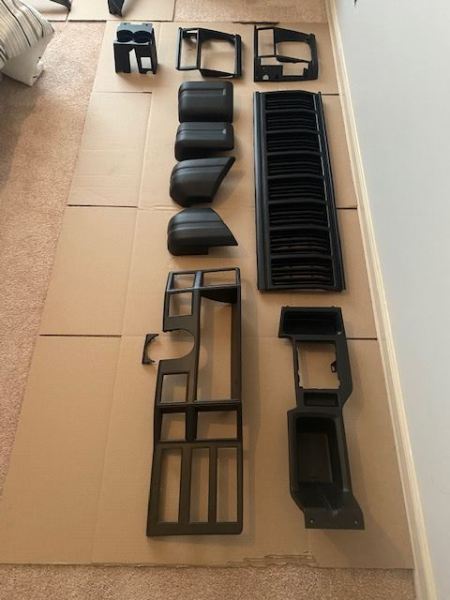
It’s in the 40’s here in Oregon, up from the 30’s last week – and that temperature is no friend to paint. So, the wife mentioned she wanted to visit a friend in California and I was all over it. Spa, flight out… I have the house inside just about 70 degrees and painting a few panels and trim that need freshening. It's a mix a NOS and used, so I want to make sure all is uniform in color. I still need to notch the air dam for tow hooks and will refinish that once it is done, but that’s couple weeks away. Black interior panels will get a good scrub though I’m not going to refinish them as this is a runner. A work truck…
-
Project: Slippery Slope – a ’91 MJ runner
Gjeep replied to Gjeep's topic in Member Projects: Your Comanches
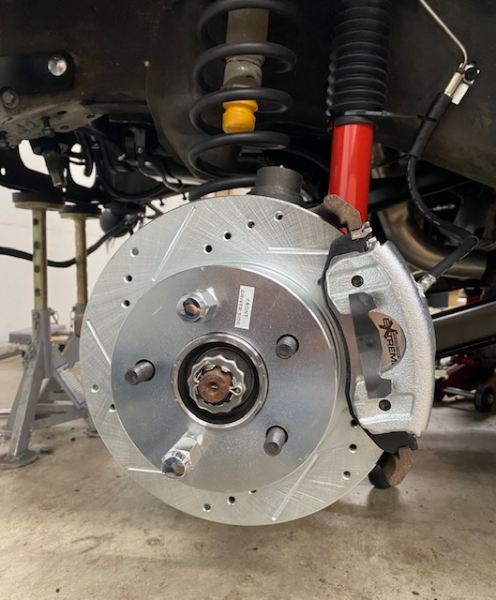
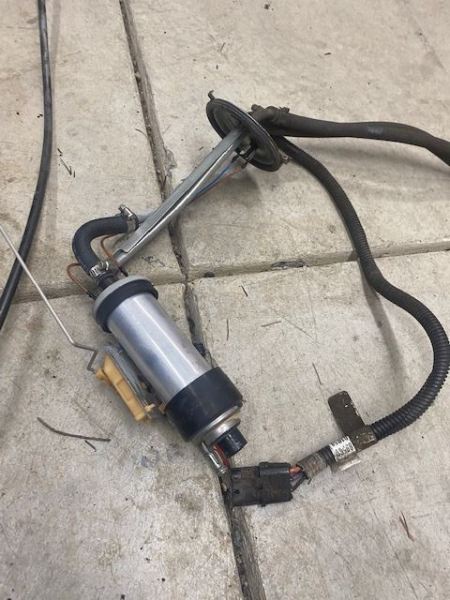
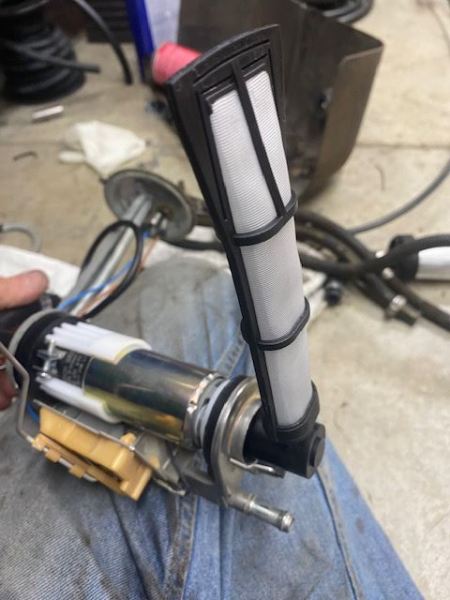
New ball joints, hubs, rotors, calipers, pads, brake lines, springs, shocks, and sway bar endlinks installed. Removed the old fuel pump and installed a new Bosch unit, running a new fuel filter and line. Nutserts in place and shortly the skid plate will be in place.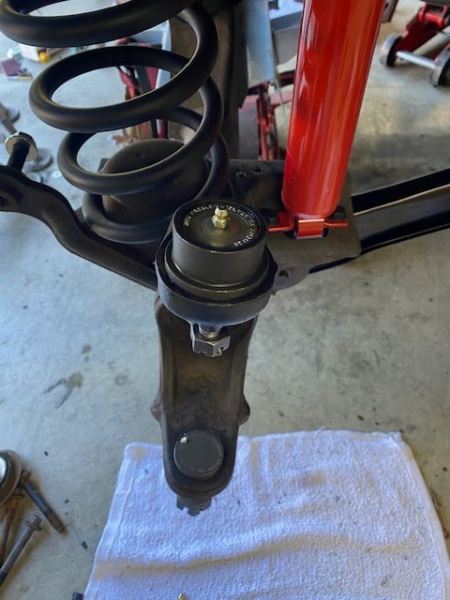
-
Emergency Brake Release With Quitar String
Gjeep replied to jamba's topic in MJ Tech: DIY Projects and Write-Ups
Yep, I installed the XJ eBrake. I cut-out that tunnel area of a scrap Jeep and traced the size/shape hole I needed to cut. You'll also need to drill 2 holes where the mounting bolts go through the floorboard. The XJ also has a reinforcement plate underside of trans tunnel spot welded to the floorpan for support. You'll want to grab that as it has the nuts the XJ hand brake bolts into. Or you can fab something up. I used ControlCables.com to make a proper length cable that extents from the hand brake to the MJ splitter. I also purchased a small mounting bracket for that cable as support. Here's a recent build with the XJ brake, go to page 3 about quarter of the way down... -
Project: Slippery Slope – a ’91 MJ runner
Gjeep replied to Gjeep's topic in Member Projects: Your Comanches
Progress – getting that oil pan up made a world of difference being able to move forward. I was able to get the front axle placed and ends torn apart. It's getting all new everything. Peace of mind. And again, for those of you with a 2WD MJ’s, the ‘93+ XJ’s use the same unit bearings as the 4WD’s, meaning you’ll have easy to source replacement brake parts, thanks to this dummy shaft insert. Service time for the AW4 – the previous owner had a shop service the transmission a year back, but I had absolutely no faith. I dropped the pan and cleaned inside/ out and found no cause for alarm around the drain magnet. A new Mopar filter and FelPro pan gasket have been installed and transmission filled with Motul Dexron III ATF.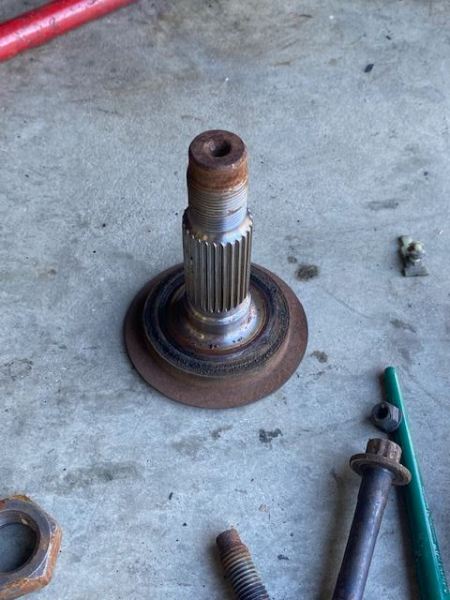
-
No difference. In fact, '97 year also used the first gen hinges. '98 hinges changed.
-
Fairchild isn't good from my perspective. I bought them few years back when I was going to do a budget build on my '92 MJ. Thin. Very thin and soft. Couldn't do it. Don used 'used' 97+ door seals on his LB MJ with no issues as they were already broken in. I'm running NOS '97+ seals on my '92 build and it's a firm close and needs break in. But I've maybe opened those doors all of 25 times. Crown '97+ XJ door seals are very nice quality and I run them on all my kids XJ builds. They take a good 6 months to close "normally" -- read, not a firm shut. I really like these. They drop off on availability on/off but seem to be in steady production. Two thumbs up.
-
skim coat of rtv both sides with Mopar gasket.
-
Project: Slippery Slope – a ’91 MJ runner
Gjeep replied to Gjeep's topic in Member Projects: Your Comanches
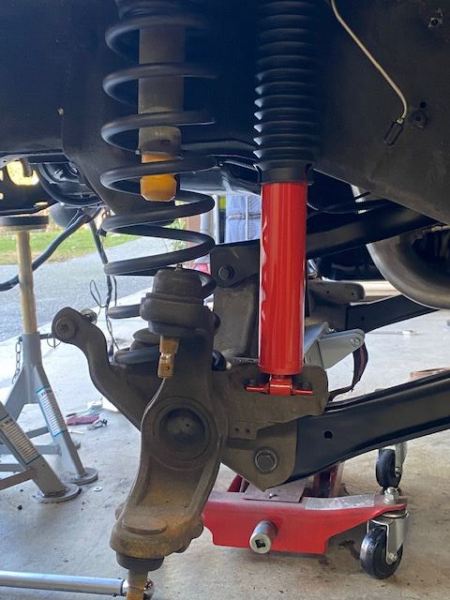
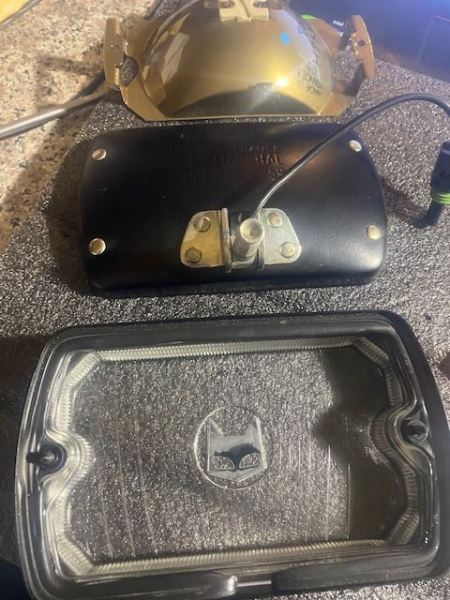
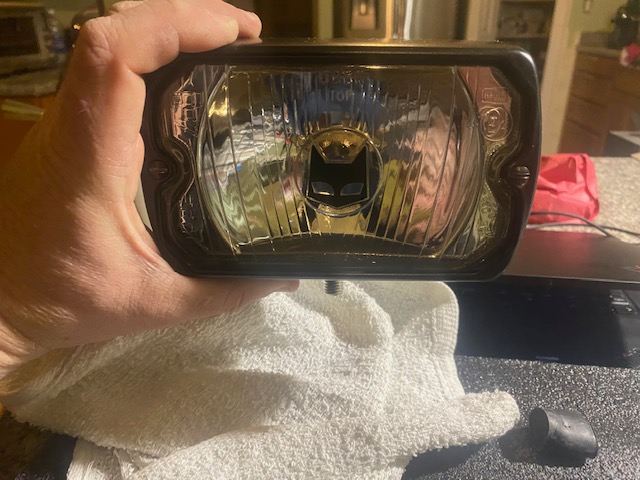
Pressed out the old, torn front axle LCA bushings and pressed in new Mopar units. Soon to get the axle up and will install new springs, the usual cross drilled rotors, calipers and HD ZJ front end tie rods and sway bar. New Denso starter in place; and like all the other Jeep’s in the family, this MJ was converted to the newer style/ connector starter (battery cable not connected yet). Finally, NOS Marchal driving lights were taken apart and cleaned up (there’s always a haze on the inside of the glass). I’ll be running those on the front end of this MJ because the road to our house from town has zero lights and plenty of deer and wild turkey.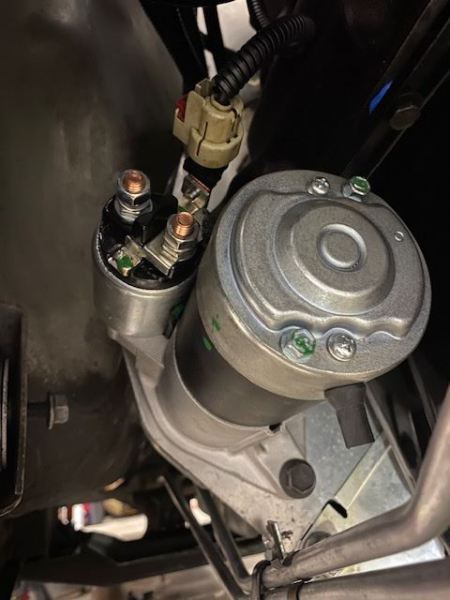

-
Project: Slippery Slope – a ’91 MJ runner
Gjeep replied to Gjeep's topic in Member Projects: Your Comanches
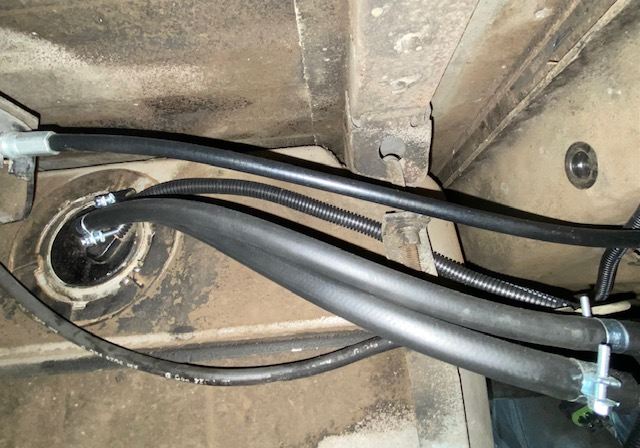
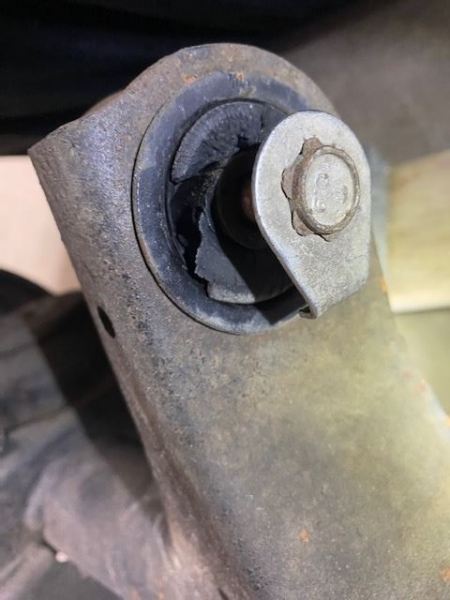
After replacing the rear main seal, and new to me AW4 cover plate (original was bent), a new FelPro oil pan gasket and Mopar oil pan were installed. The AW4 transmission cooler lines were run/ connected and a NOS electric fan was installed. This truck didn’t have an efan originally as it was a non-AC truck. Engine almost buttoned up... need to finish up HVAC install/ charge the system and done. I was hoping to line up the ’98 XJ axle and get it bolted up, but somehow missed the torn clear to the other side rubber bushing. Must have looked at one side but not the other – on order, 2 new bushings. In the meantime, I went ahead and installed the Moog replacement UCA and LCA’s. Next up is dropping/ cleaning out the fuel tank and replacing the pump with a new Bosch unit. While in there, a new filter will be installed pump side, along with new hoses and proper fuel clamps up to the hard lines. The inline filter under the cab I replaced a few weeks back. Once that’s done, a factory short bed skid plate will be installed.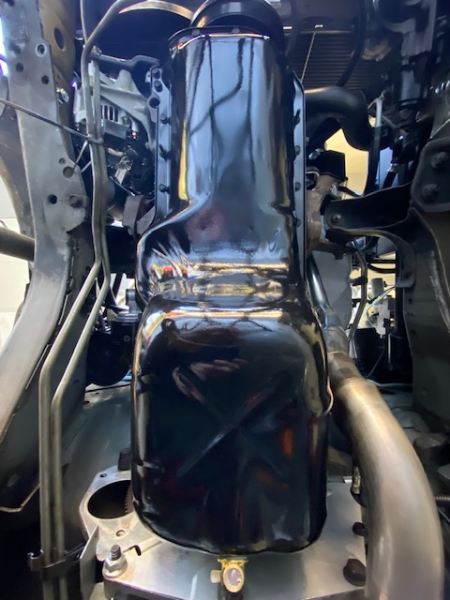

-
Project: Slippery Slope – a ’91 MJ runner
Gjeep replied to Gjeep's topic in Member Projects: Your Comanches
True. Burning the truck would have been the only option. ;) -
Project: Slippery Slope – a ’91 MJ runner
Gjeep replied to Gjeep's topic in Member Projects: Your Comanches
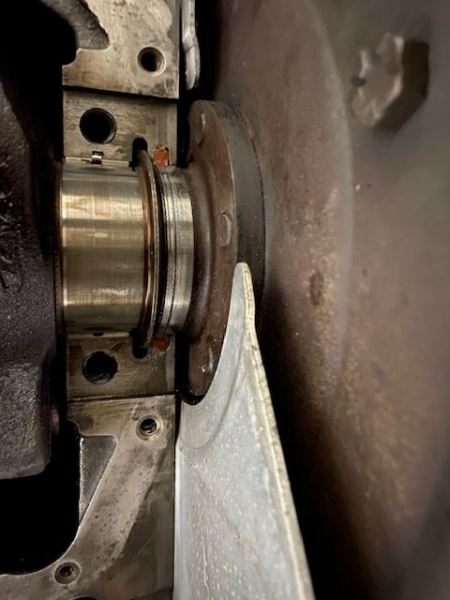
I haven’t been this happy since my kids were born. Endless days/ hours to get this rms out. It was ridiculous. And the old one that came out was hard as a rock. To be honest, I thought about throwing in the towel and gasket-maker-ing the hell out of this area. Insane. Insane, and finally done. New rms in place and time torque retaining bolts and get the oil pan back on – using a gasket. Surprised I don’t need therapy dealing with all this bottom end of the engine crazy. Thank you to my friends over the past many days who made this possible.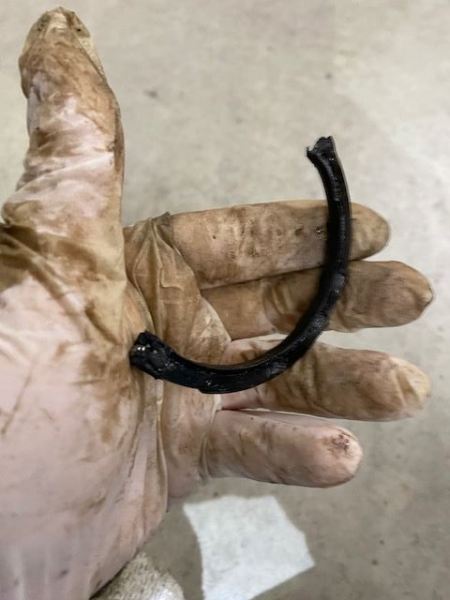

-
Project: Slippery Slope – a ’91 MJ runner
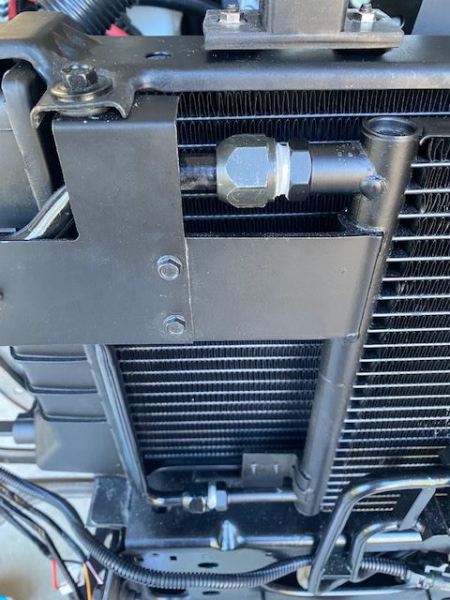
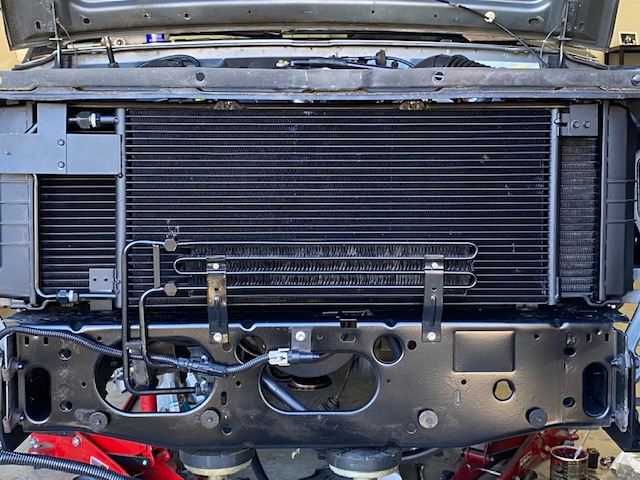
Gjeep replied to Gjeep's topic in Member Projects: Your Comanches
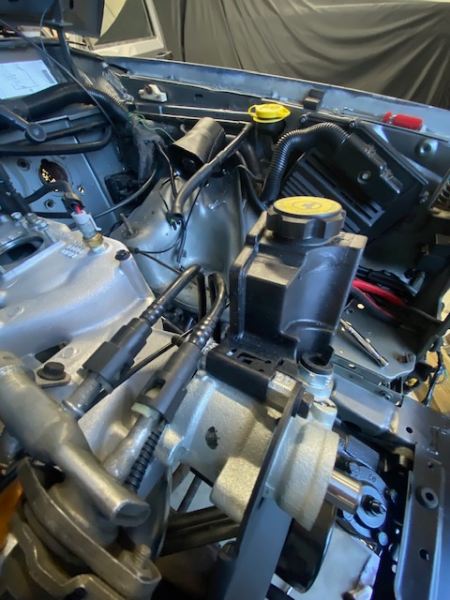
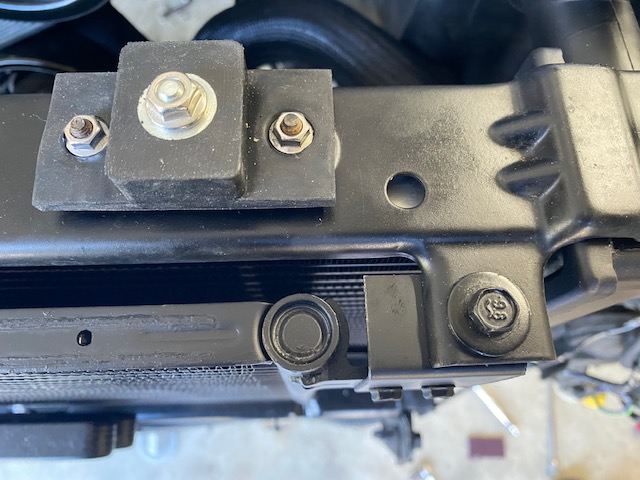
Having a heck of a time getting the upper portion of the rear main seal out. It’s stuck. Tried what feels like endless approaches – too much fun. Needed to walk away from it, so I don’t set fire to the Comanche. Will circle back on this fun… Decided it was time to have a look at the NOS automatic steering column that’s been tucked away for a bit. Was happy to find it’s a tilt column and all I need to fish through is the cruise control wiring as part of the stalk install. Only other thing to do is swap out the ignition cylinder. This is a later Renix era column so the ignition switch is oriented in one direction as compared to the HO years which is flipped the other way. I also found a NOS parking brake interlock kit that will be added to the mix. Next, I tackled the AC install engine bay side. Again, I’m going with the factory ‘94.5-‘96 R134 XJ set up. Got the drier and condenser into place and attached the related lines. Once I brought the radiator into the mix, I realized I’d have to use the old upper radiator horizontal support on the new radiator as it had integrated AC condenser bracketry tied into it. A cleaner install. No where near ready to charge as I still have the HVAC box out.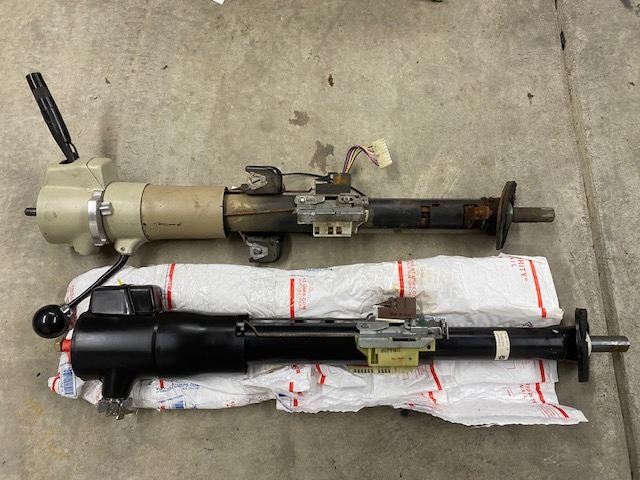
-
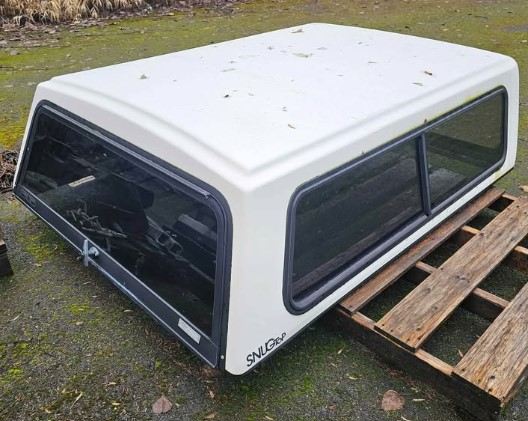
Project: Slippery Slope – a ’91 MJ runner
Gjeep replied to Gjeep's topic in Member Projects: Your Comanches
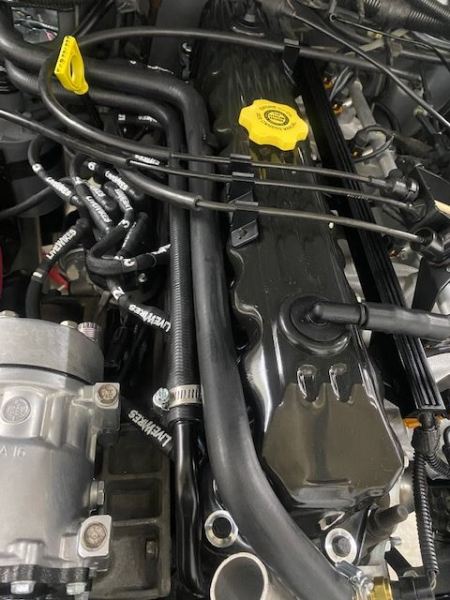
The journey was good and the SnugTop made it home. On the way back, I stopped at a handful of wrecking yard to get various hardware for this build. Long live New Comer Racing – those billet grommets for the 96+ valve cover are beautiful. Going to get them for all the XJ’s. With those in-hand, I was able to get the new valve cover on, cables crossed over to the TB, breather lines, and heater core hoses in place. For the heater core/ hose setup, I eliminated the plastic valve of this 4.0L generation. Just straight hoses to the heater core.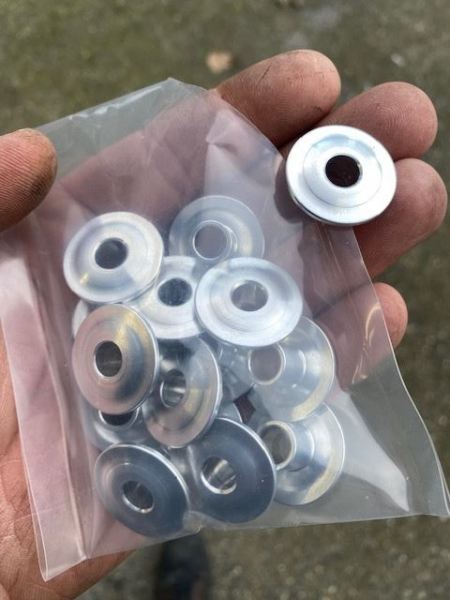
-
Project: Slippery Slope – a ’91 MJ runner
Gjeep replied to Gjeep's topic in Member Projects: Your Comanches
Always fun waiting on parts to move forward, but I’ve been chipping away at little things engine bay – got the jack set up cleaned up and installed under the hood, distributor wires in, bored TB and NOS Mopar related sensors, various broken connectors replaced, and I forget what else. Landed a SB MJ camper shell that was removed a year after the truck was purchased new. Thankfully, its been stored inside for past 30+ years. Original owner and he still has the truck. Will introduce him to CC and see if he joins. It’s a 20 hour round trip but anything MJ worth it. I won’t be running the shell full-time, only as needed.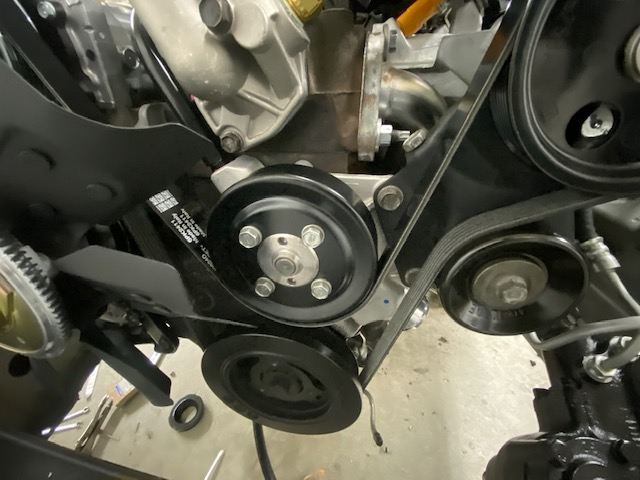
-
Sorry for the losses Adam -- I lost my mom also back in 2005 just before my oldest daughter was born. Was sad to see her go, but I know she is always with me. Keep that with you. All the best, and I believe things always have a way of working out.
-
Great article!
-
Project: Slippery Slope – a ’91 MJ runner
Gjeep replied to Gjeep's topic in Member Projects: Your Comanches
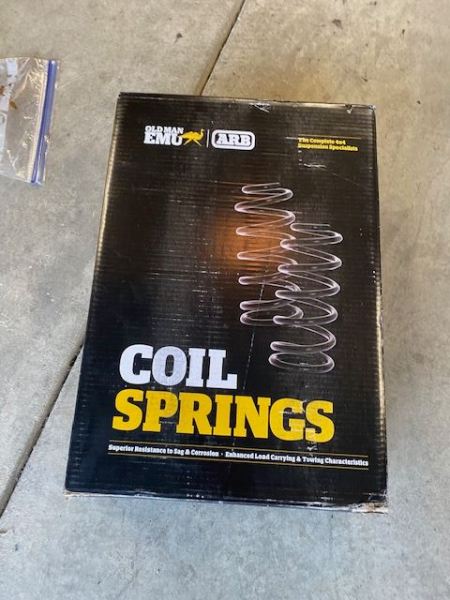
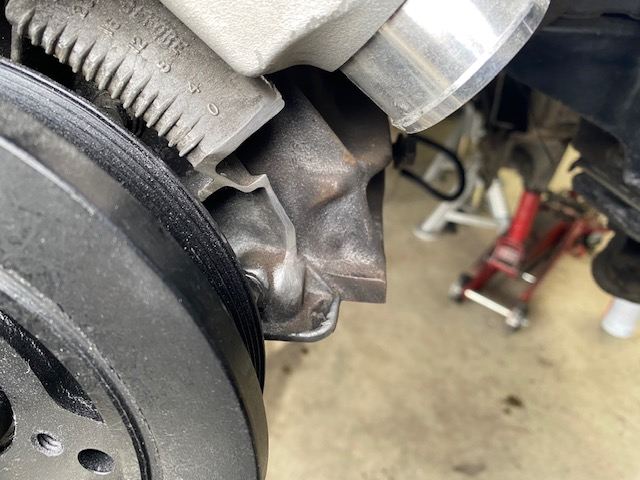
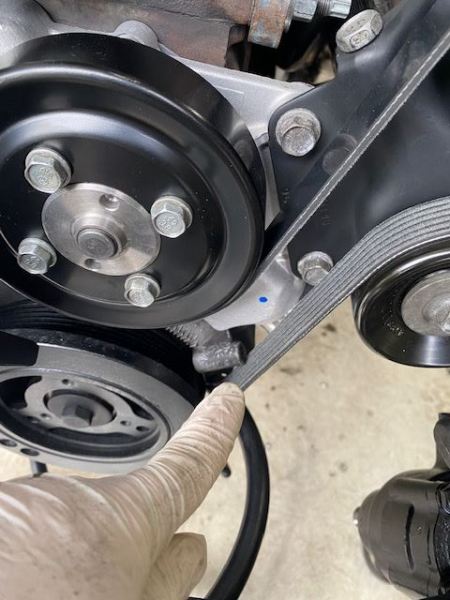
Cutting, bending, shaping is what I’ve been up to – Forgot that changing over to the newer style belt tensioner means cutting off the boss that was once used with a probe to read timing back in the day. (Could have used the newer timing chain cover, but the harmonic balancer is already on…) Also, the under the hood jack bracket was shaped into something that works for the MJ. Needed to redo one of the master to combo brake lines to accommodate the location. This build I’ll be using the MJ versus XJ jack ‘crank’ (as done on my other build for fitment). MJ crank is obviously longer. All will be cleaned up and painted, but same idea applied this round with the Ford jack related clips. Clears the hood prop rod when in the lowered position, so all is good. Good times disconnecting the front side brake line – I soaked them, heated them, and still couldn’t get the passenger side off with out absolute destruction. Fortunately, Jeep provided enough line that I was able to put another nut on a flare. And front axle is out. This MJ will remain 2WD, but I’m upgrading to the axle/ends that accept hubs versus the greaseable bearings. Again, just keeping components consistent with the other Jeeps in the herd. New ZJ steering linkage/ V8 sway bar, Mopar hubs, cross-drilled rotors, calipers, coils, brake lines, etc will be installed as it goes back together. I want the front end to be brand spankin new. I went with OME heavy-duty coils that will raise the nose ever so slightly. KYB MonoMax shocks will be installed all around.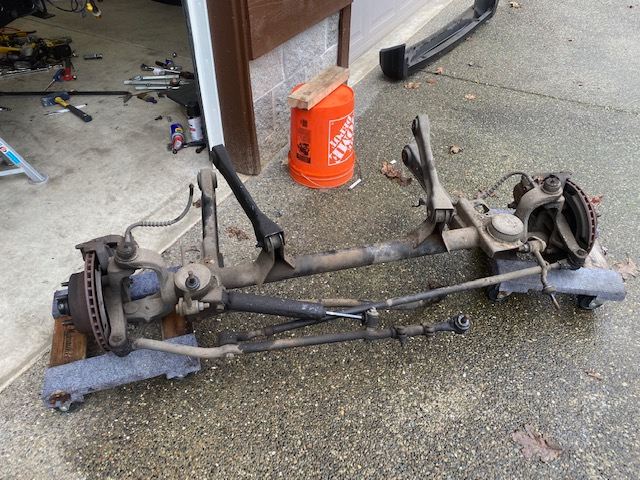
-
Project: Slippery Slope – a ’91 MJ runner
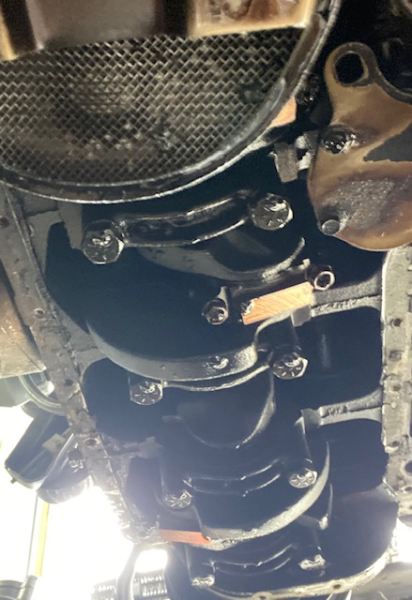
Gjeep replied to Gjeep's topic in Member Projects: Your Comanches
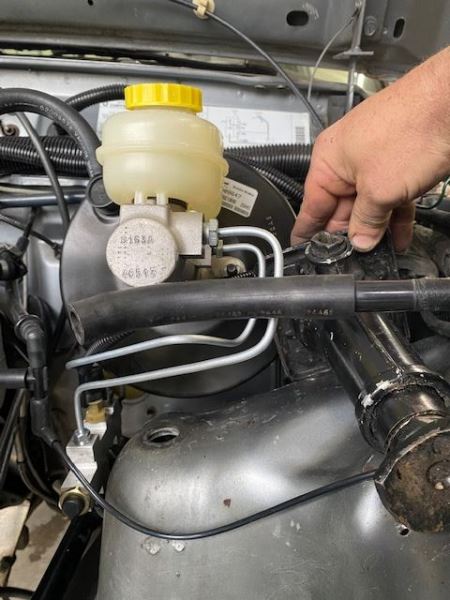
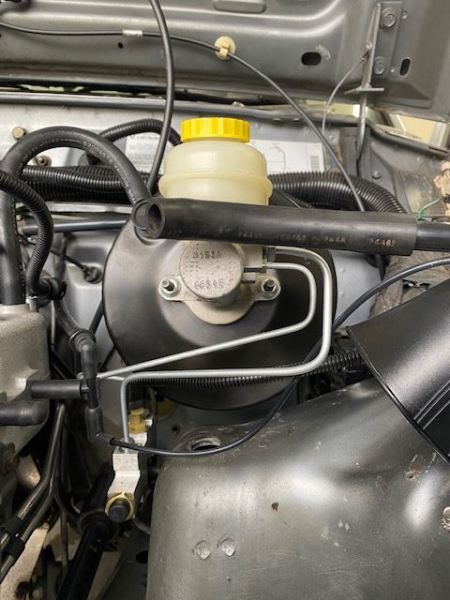
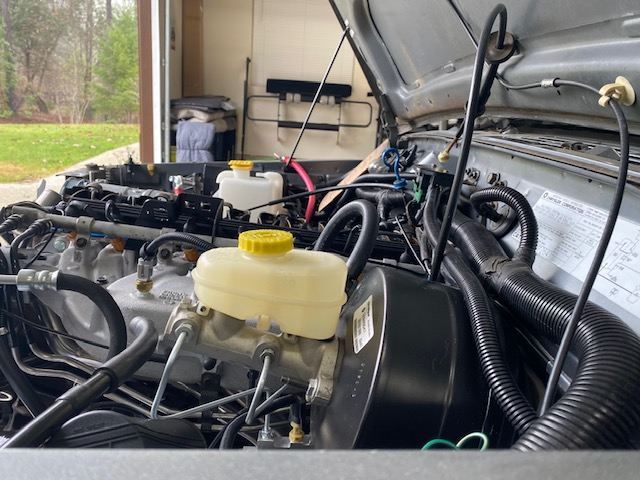
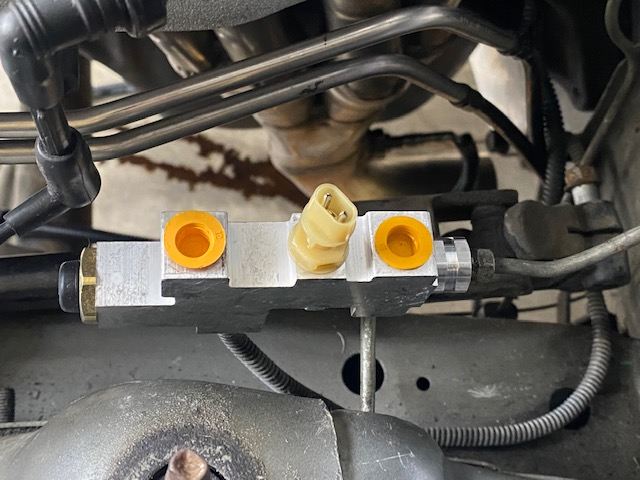
Always an adventure. What I though was going to be a reasonably quick change of gasket turned into a trying of patience. PO (or I’d guess PO’s mechanic) RTV’d the oil pan to the block almost 1/4” thick and it was on there. On there good. Lost count how many times I walked away from it. I ended up bending up the oil pan lip so much that I ordered a new one from Mopar. Front side of the pan had a thin gasket strip that I’ve never seen and no RTV. Oil was coming out regularly in this spot – mainly because the RTV was on so thick. Front side had this thin gasket or old gasket scrap that was 1/8” thinner than the rest of the junk. Crazy. On to changing rear main seal; then FelPro gasket on the pan. Been a while since I’ve looked under a 4.0L and saw it withOUT girdle. A stamped steel 4.0L valve cover is going on with a new FelPro gasket and New Comer Racing billet bolt grommet retainers. I had good luck having swapped this cover onto my other MJ long ago. No more oil-soaked air filer. This cover has new CCV and PCV elbows and grommets also. Lastly, I installed the ’95 XJ dual diaphragm booster and bent up lines to the new XJ combo valve. This calls for a mix of standard flare and bubble flaring at the master cylinder. I’ll be placing the bottle jack and related tools under the hood like my other MJ.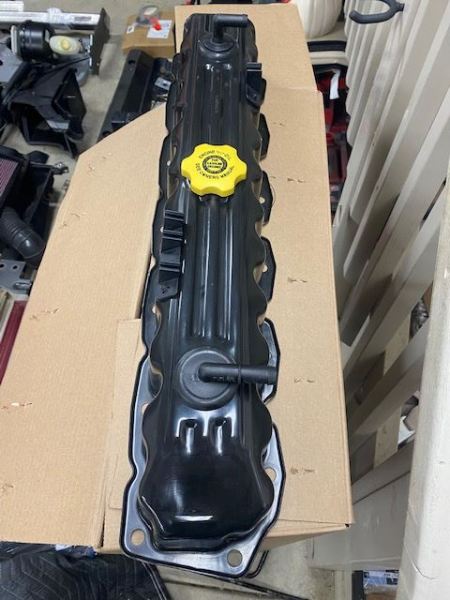
-
Project: Slippery Slope – a ’91 MJ runner
Gjeep replied to Gjeep's topic in Member Projects: Your Comanches
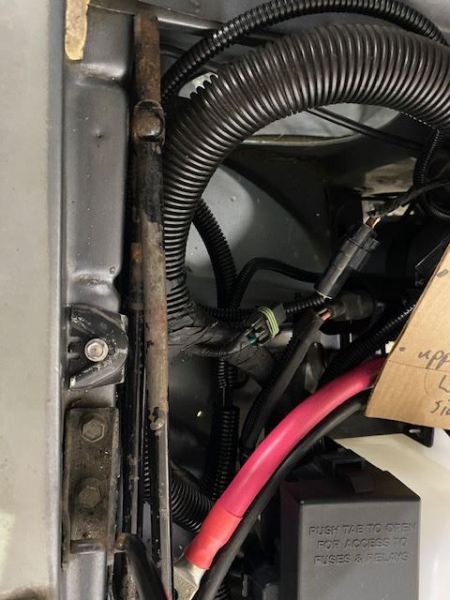
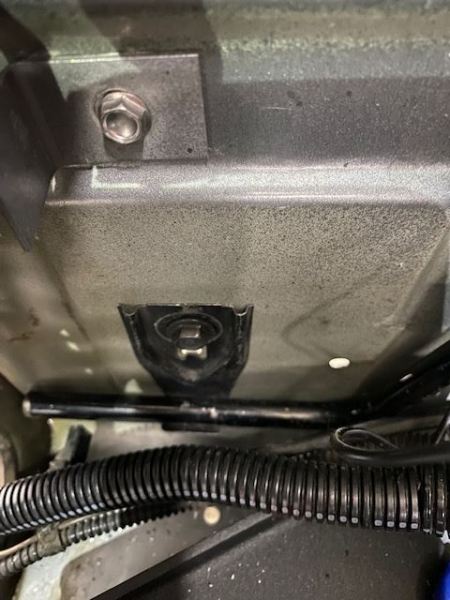
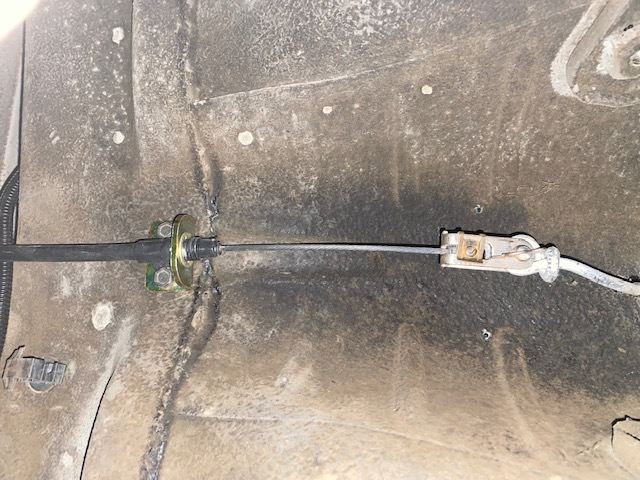
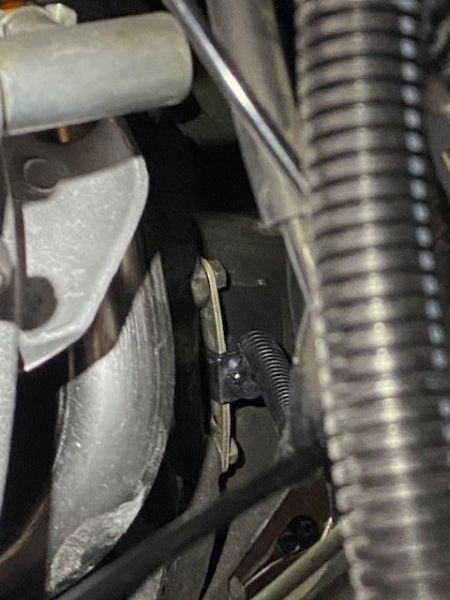
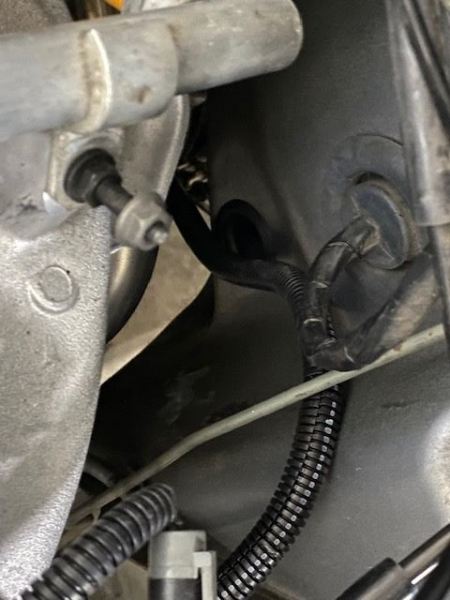
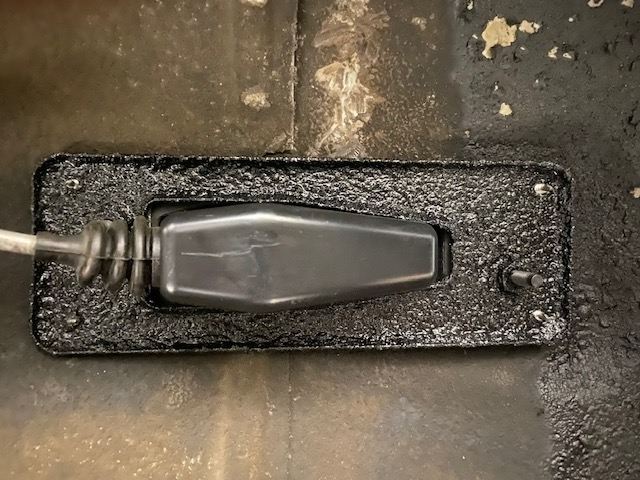
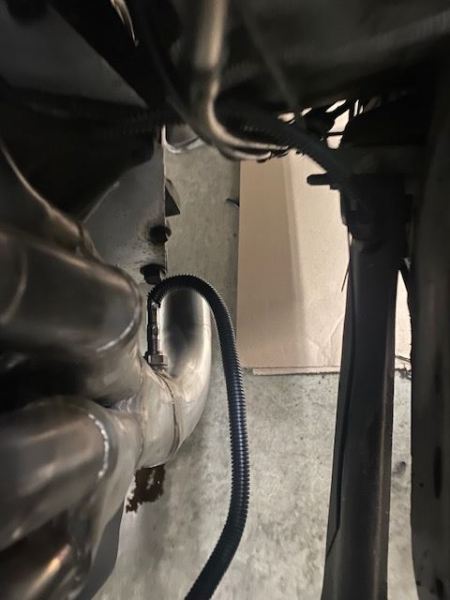
Although not completely done, I got the XJ hand brake cable/ bracket in place and connected it to the MJ parking brake splitter. To support the hand brake under the MJ floor pan I drilled out an XJ backside bracket. It stiffens the floor up well. I also installed the newer style CPS (’93-’95) and couldn’t be happier with the amount of distance it provided to keep that wiring away from the header. I needed to swap the connector as the pins are inline versus triangular as in the ‘91/’92 CPS. The wiring itself is now pressed up against the firewall, behind a brake line to keep it from moving. This era CPS with its longer connector provides an extra 1.5” of length. When removing the old CPS, which was original no doubt as bolts were unscathed, I was surprised to see there was no grommet in the bell housing for it to reside in.
-
Project: Slippery Slope – a ’91 MJ runner
Gjeep replied to Gjeep's topic in Member Projects: Your Comanches
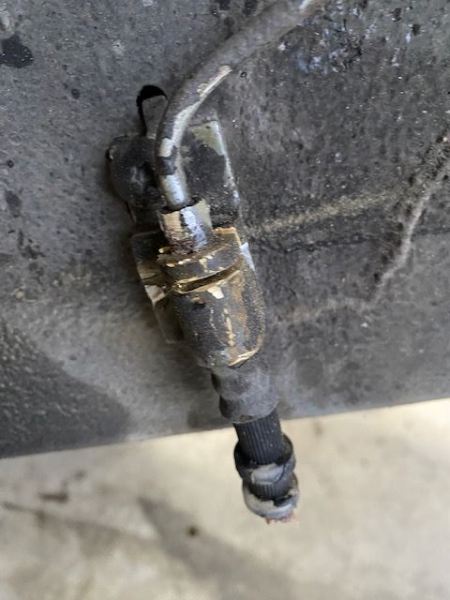
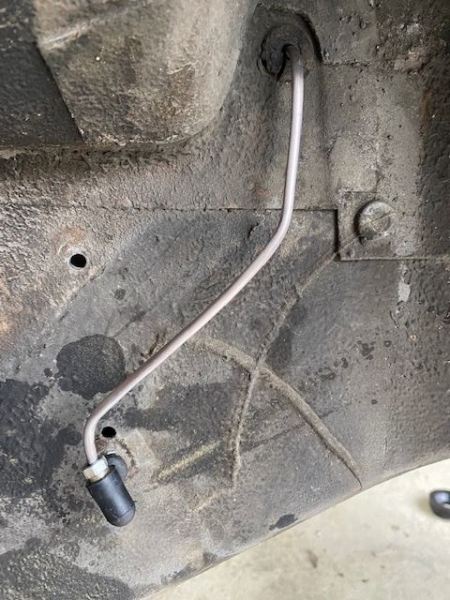
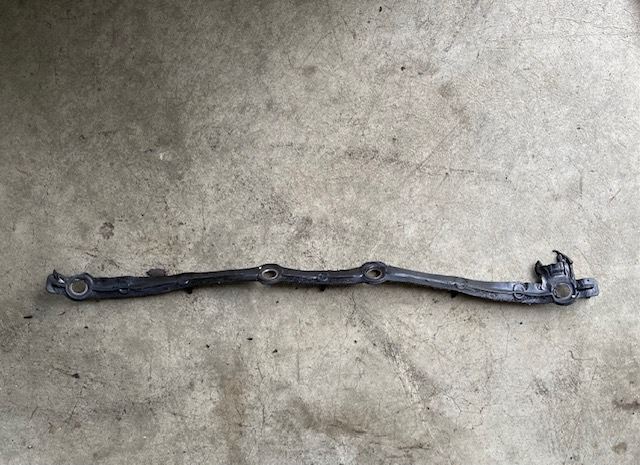
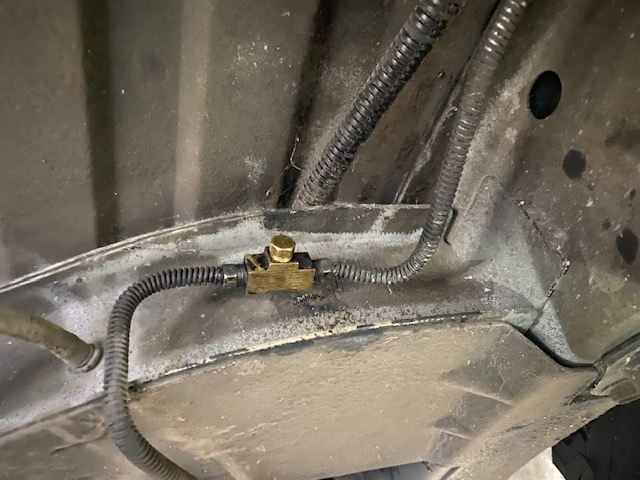
Goodbye load sensing valve setup – this MJ gets an XJ combination valve and loses the hardline that manages the rear axle valve. I’ve never liked the balance in braking that the factory MJ setup had. I swapped over to this set up on my other MJ and ran it 150K without issue/ lockup around the crazy roads and drivers of California for years. World of difference and confidence. Once I swap the front axle swap, cross drilled rotors and new braking components will complete this stopping power metamorphosis.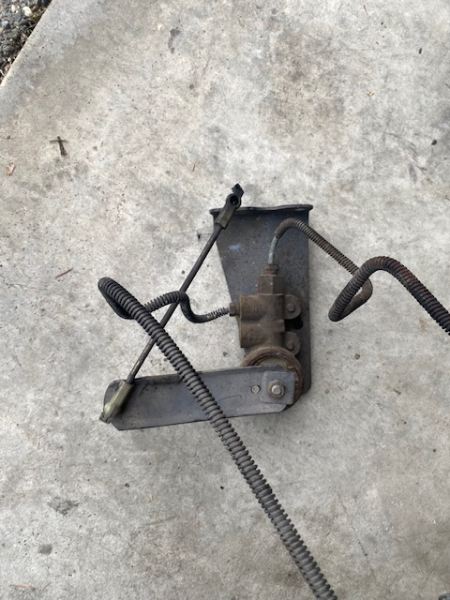
-
Project: Slippery Slope – a ’91 MJ runner
Gjeep replied to Gjeep's topic in Member Projects: Your Comanches
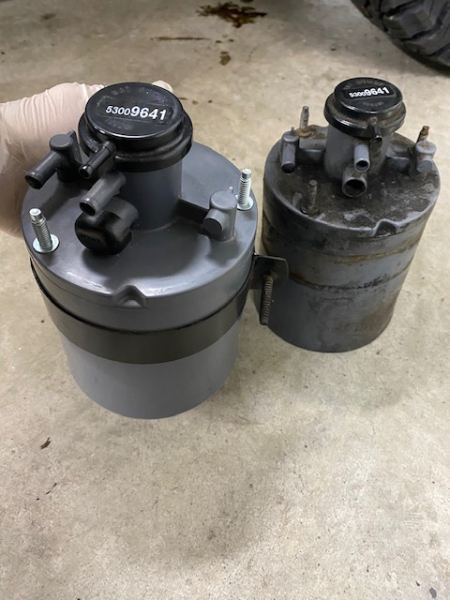
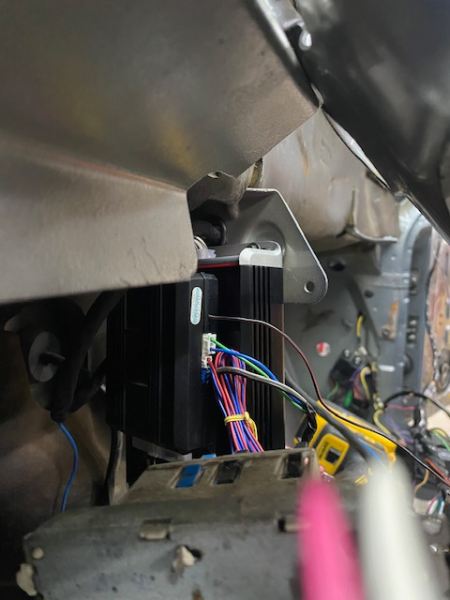
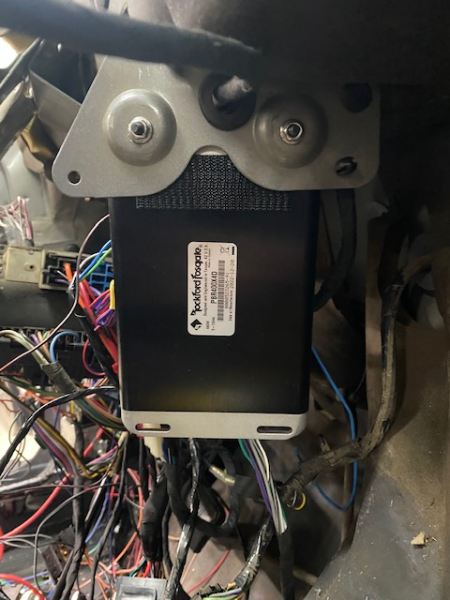
This is the amp — https://rockfordfosgate.com/products/details/pbr400x4d/ The wire loom I sourced online. Has to have the white line and then you know it’s heat resistant. The charcoal canister is different between Renix and HO years, but I got it 10 years ago from a dealership in Germany. -
Project: Slippery Slope – a ’91 MJ runner
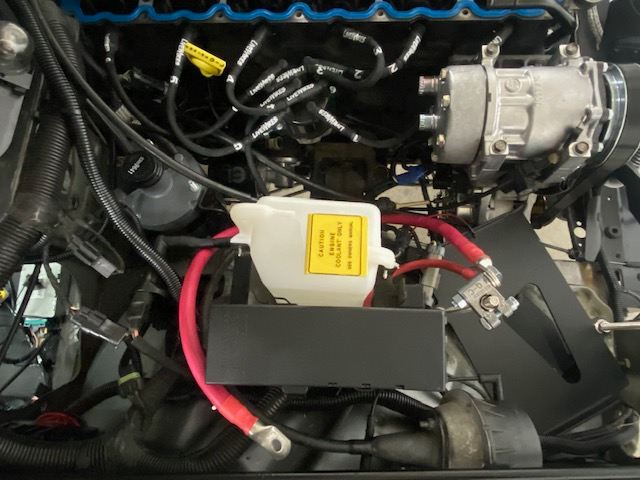
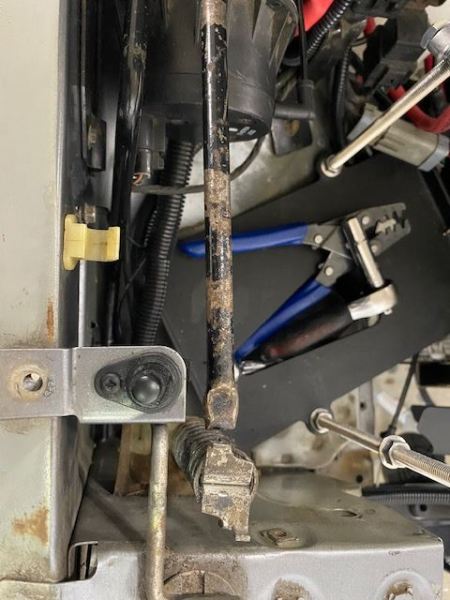
Gjeep replied to Gjeep's topic in Member Projects: Your Comanches
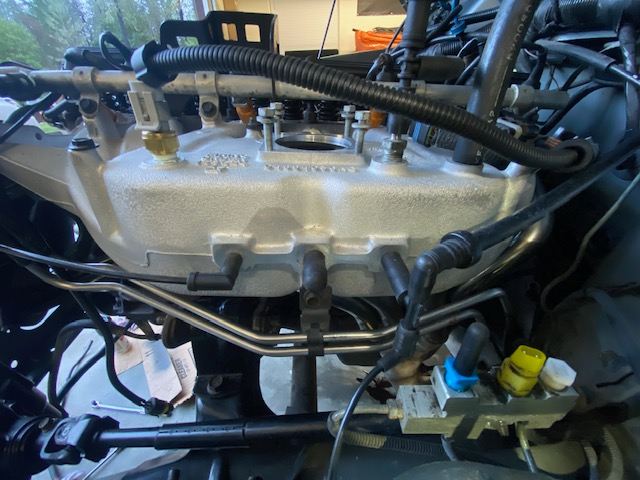
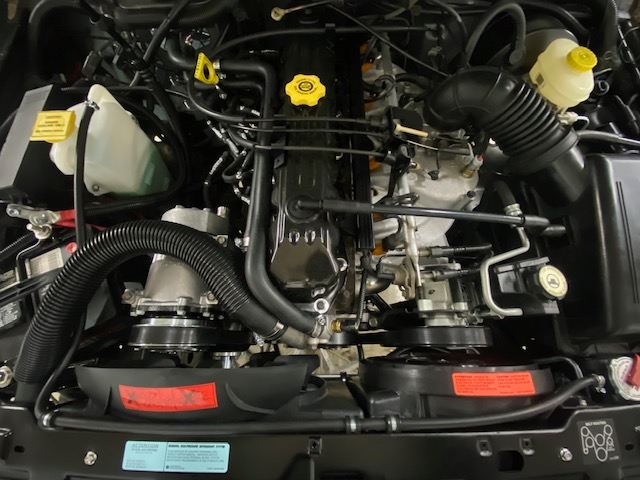
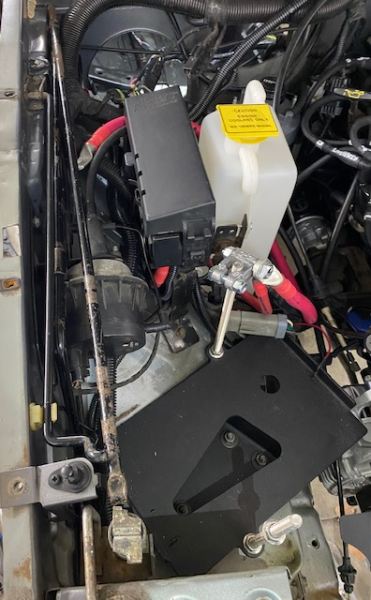
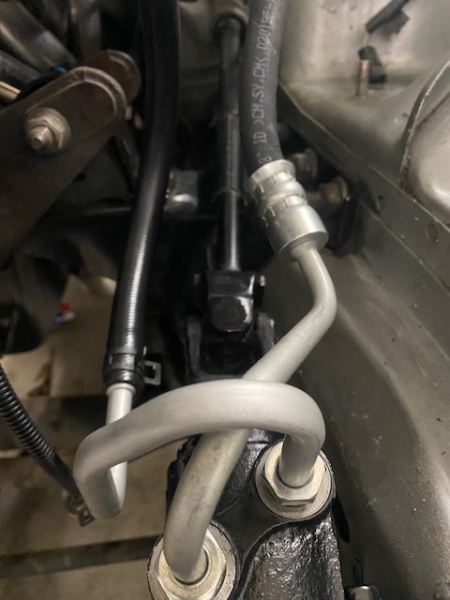
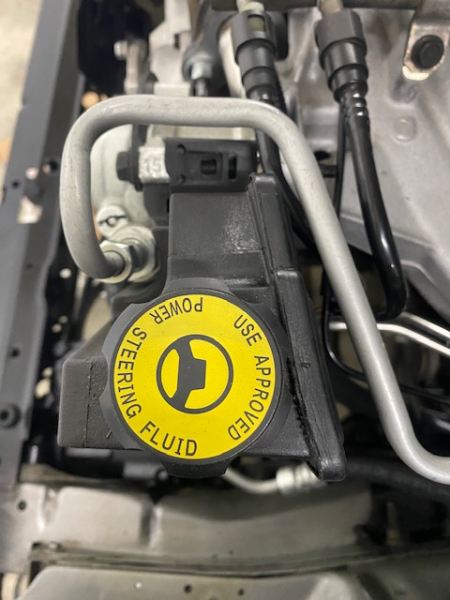
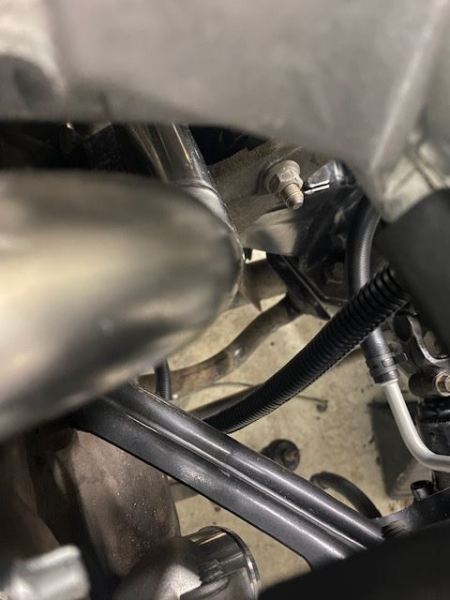
Since I’m using the later intake manifold (from Jeeps that didn’t have a return line on the fuel rail), I needed to bend for clearance both lines of the MJ fuel rail and top side of the steering pump pressure line. After a bit of trial and error, all have plenty of clearance with no rub. New steering box was also dropped in. Keeping wiring and sensors away from the crazy heat coming from the exhaust side of the engine is critical. This MJ’s CPS and oxygen sensor wire loom was cooked clear through – having only about ½’ space between header and wire run. I have no desire to be left stranded anywhere… so I doubled up on the heat-resistant wire loom and bent what ever brackets needed to move these critical parts away from the hot stuff. Below are pics of the new oxygen sensor/ wiring. Back inside the cab for a quick install… As mentioned prior, the Renix ECM was mounted behind the dash on a bracket that was carried over to the HO years. This made for the perfect spot to install my Rockford 4-channel amp. All holes lined up perfectly for the mounting. The top center hole I drilled out to 1” and added a rubber grommet and ran the audio wiring harness I made connecting the radio to the amplifier’s input wires. I also cut a 3”x2” area of the firewall matting so the wires could connect unobstructed. (They probably would have been fine keeping the matting in place, I just didn’t want anything pressing against them.) Then, front side of the amp I attached the DEI security module. All of this is tucked up high enough to not be seen once the dashboard is installed. Beautiful.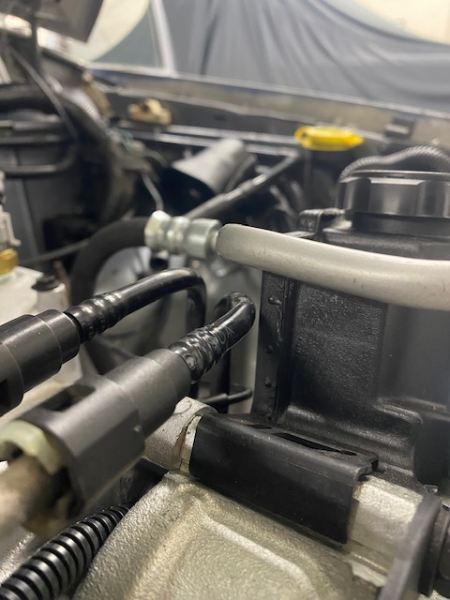

-
Shock mounts on one of mine is bent. Thanks
-
Project: Slippery Slope – a ’91 MJ runner
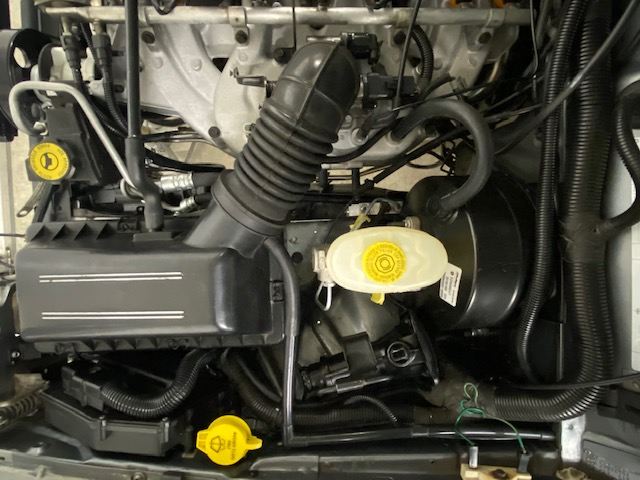
Gjeep replied to Gjeep's topic in Member Projects: Your Comanches
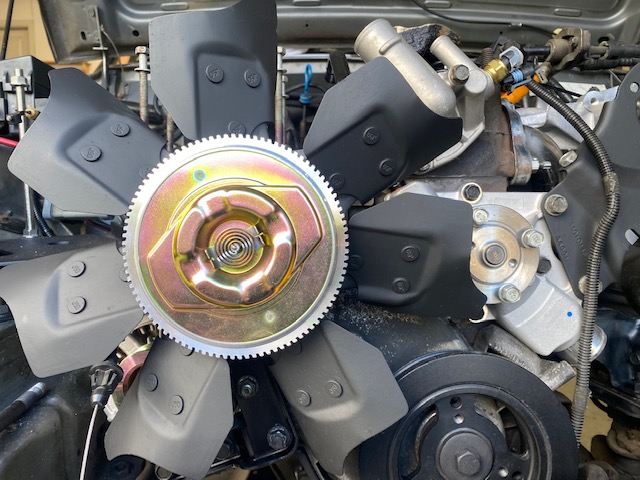
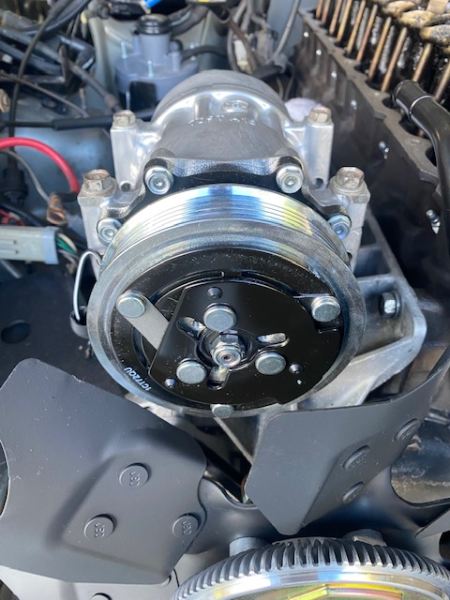
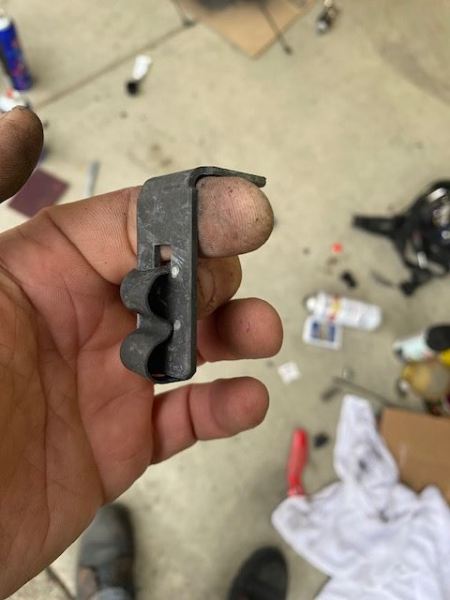
Many thanks! New fan clutch, emissions charcoal canister, R134a compressor, and power steering pump… The power steering pump and factory fuel lines weren’t playing well together. There was a little over ¼” I needed to get ‘adjust’ so the pump could attach where it belonged. The solution was bending the supply and return lines for clearance. I wanted to make sure there was gap enough so nothing was rubbing together. Finally, as I did with the other Comanche, I used a 65/66 Mustang fuel line bracket to attach the fuel lines to the side of the manifold. Just need to bend that little bracket straight and works perfectly.