Gjeep
-
Posts
1221 -
Joined
-
Last visited
-
Days Won
3
Content Type
Profiles
Forums
Gallery
Everything posted by Gjeep
-
Project: Slippery Slope – a ’91 MJ runner
Gjeep replied to Gjeep's topic in Member Projects: Your Comanches
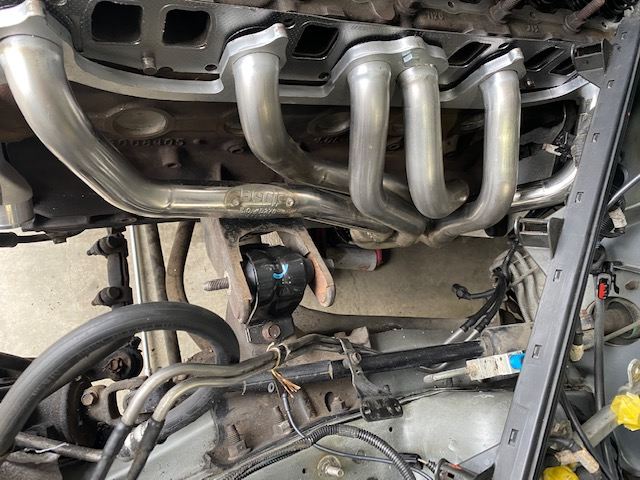
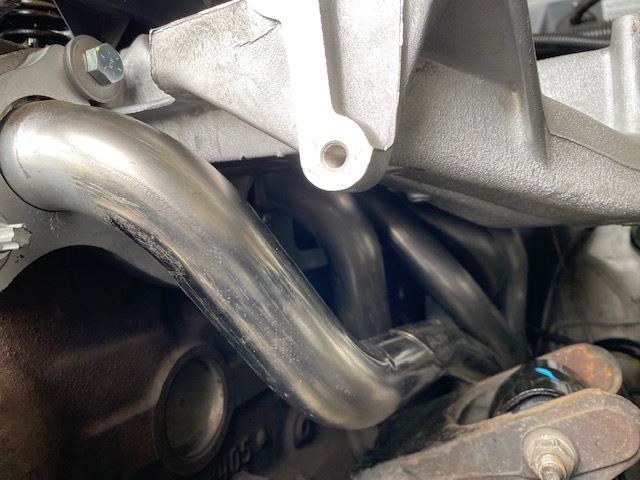
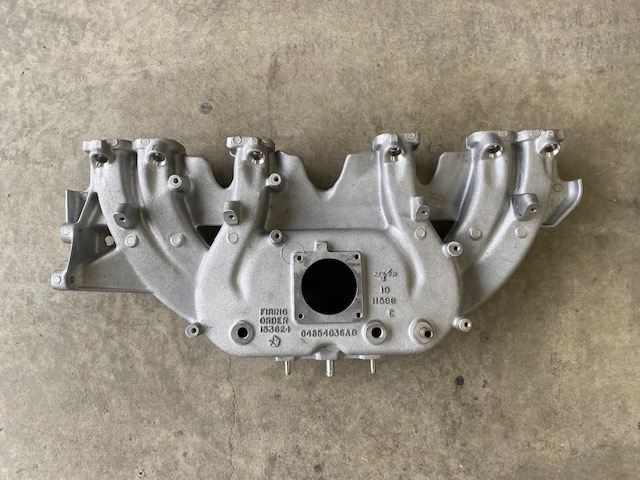
Chipping away at it… Got the new motor mounts installed, Borla header, intake manifold, fuel rail with Bosch 4-hole injectors, IAT sensor with extension, and various vacuum lines cobbled together from the Renix era parts bin all in place. A good day.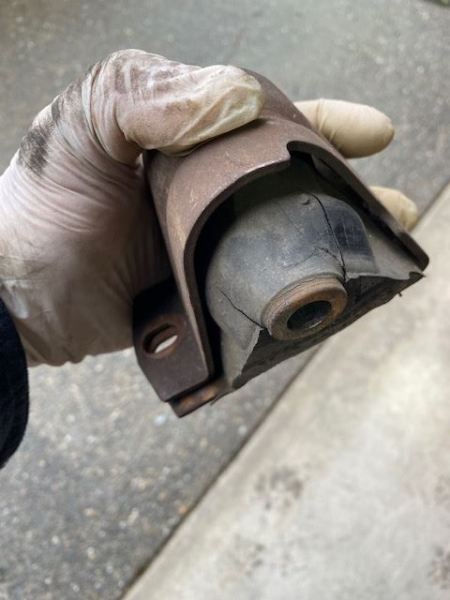
-
Project: Slippery Slope – a ’91 MJ runner
Gjeep replied to Gjeep's topic in Member Projects: Your Comanches
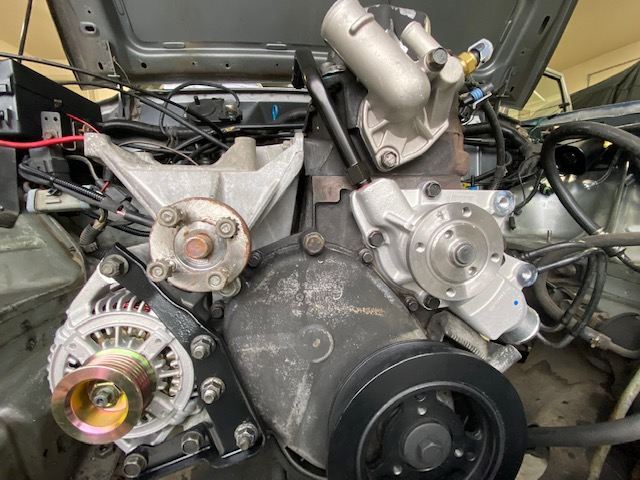
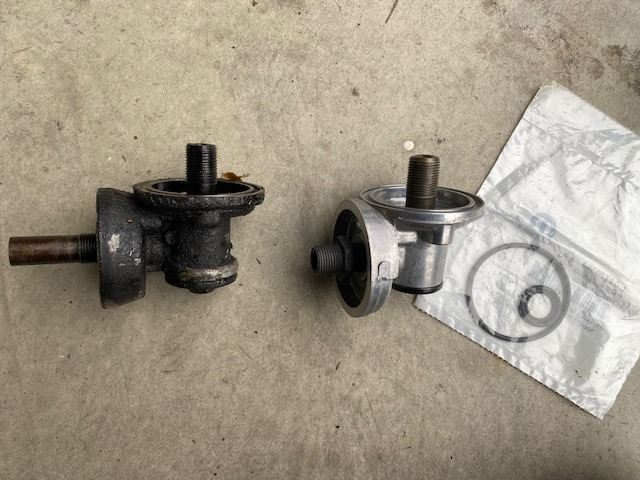
Ringing in the new year with tinker time – Build up engine side begins. As with my other MJ, I relocated the ignition coil off the block and onto the passenger inner fender just behind the PDC. Much easier access should I need to replace it and no chance of temperature replated issues. Easy enough to extend the wires and use an aftermarket coil bracket that works perfectly on the Jeep. 4.0L ZJ’s had this TSB/ relocation as several were experiencing coil damage from temperature. I never had this issue with any of the 4.0L XJs I’ve had, but easy enough to move. Dressed the front of the block with a new harmonic balancer, water pump, thermostat/ housing/ temp sensor, 200 amp alternator with notched mount and front bracket to accommodate the alternators size, and have the AC compressor bracket in place. I went with the newer style bracket without the additional pulley. By doing this and swapping the power steering bracket with later style, I can run the same serpentine belt as all the other XJs in the family. Besides that, first gen belt tensioning set up is just plain crazy. Also, saying goodbye the original downward facing oil filter adapter in favor of the later horizontal mount.
-
Project: Slippery Slope – a ’91 MJ runner
Gjeep replied to Gjeep's topic in Member Projects: Your Comanches
95/ 96 XJs were notched and had the spacer. I owned a 95, am sure of it. -
Project: Slippery Slope – a ’91 MJ runner
Gjeep replied to Gjeep's topic in Member Projects: Your Comanches
You’re saying you’d add a second aluminum spacer? As the donor booster should have already had one. I know the factory had the notch for the booster. -
Project: Slippery Slope – a ’91 MJ runner
Gjeep replied to Gjeep's topic in Member Projects: Your Comanches
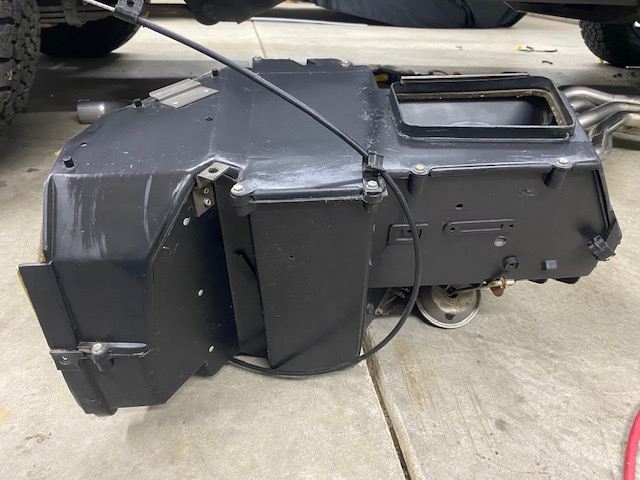
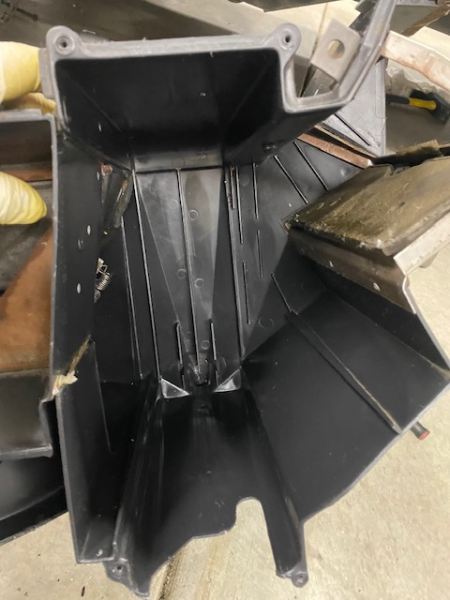
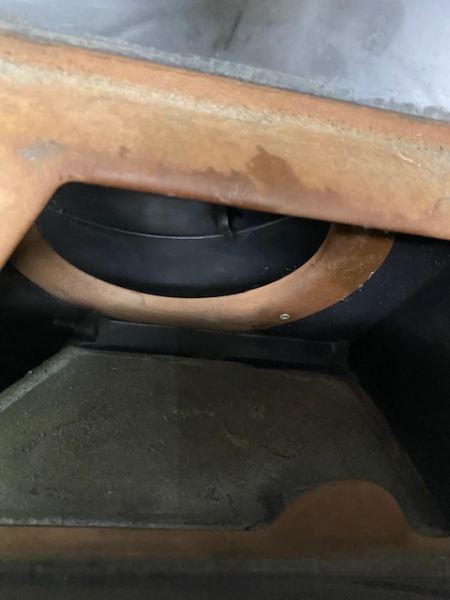
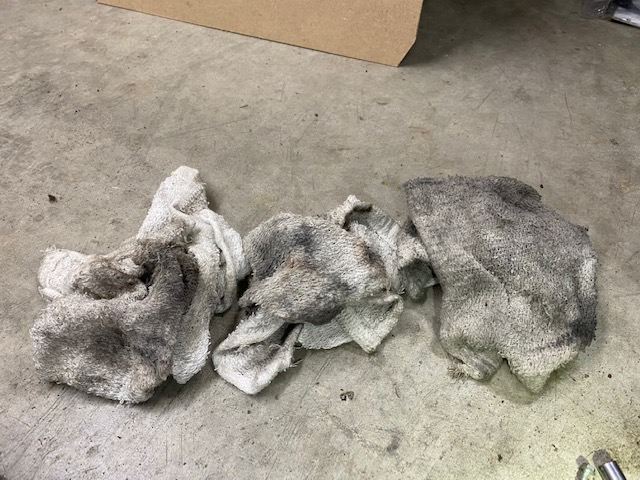
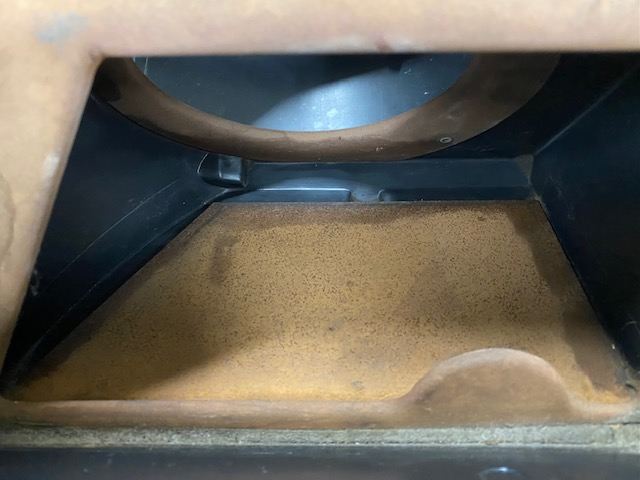
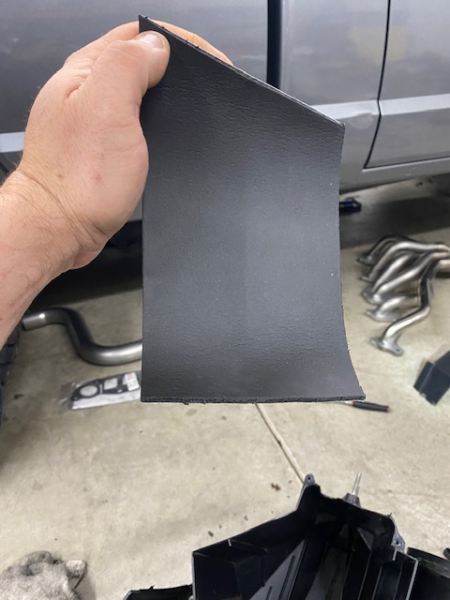
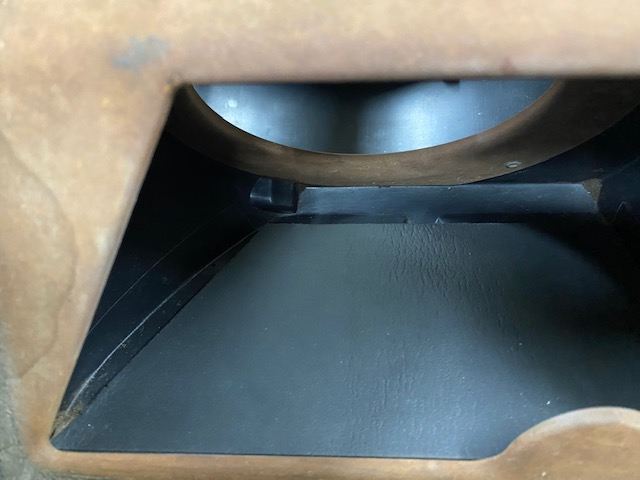
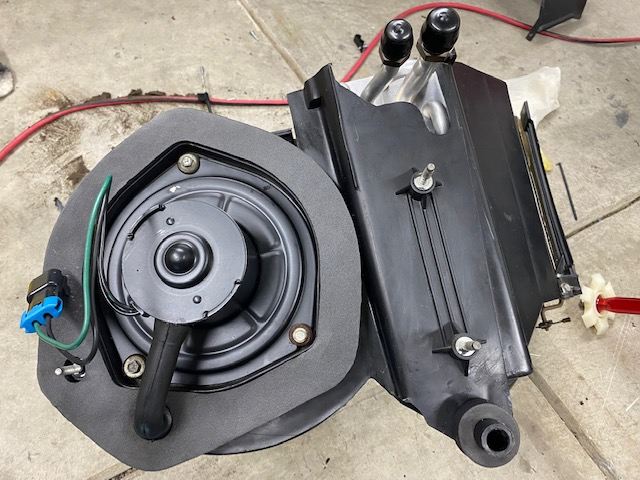
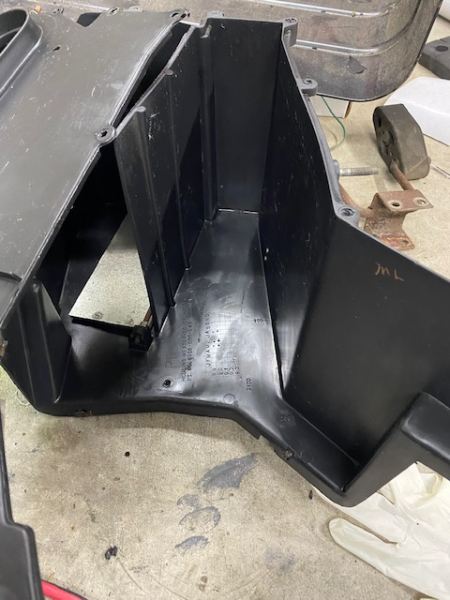
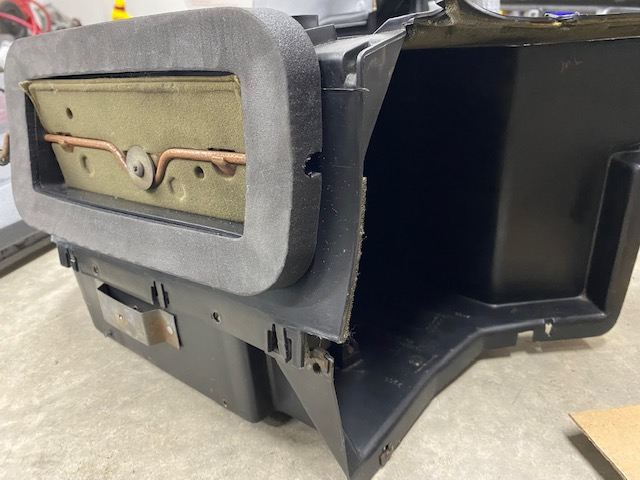
Notched the firewall pinch weld to fit the larger brake booster… though I won’t be installing it until I replace the steering column (converting to AW4 floor shift versus column) and get all the old transmission cables out and floor shift related ones in. Unearthed an AC box I pulled back during “Cash for Clunkers’ days in California, circa 2009. The AC box is slightly different than the non-AC HVAC box that my MJ came with. Basically, there’s not enough room to fit the evaporator core in the non-AC unit. As always, I took the extra time to clean everything out and replace all of the necessary seals. 3 filthy rags were the result of the cleaning inside/ out. It’s worth it. NOS evaporator is in place and ready to cool. Important note -- For those of you restoring your Jeep or have upcoming MJ and XJ first gen restorations, @H3ADBANG4L1F3 is finalizing production of these HVAC box seals for Renix and HO era. He'll also be producing brake booster, steering column, and several other very very very well done reproductions seals. These are top notch and meticulously done. Can't stress that enough. Glad I'm able to build with them and help with fitment. The foam on the lower HVAC door facing the passenger’s feet is always in rough shape as it dries out over the years and falls apart. I used very thin, adhesive backed closed foam to replace this mess. Now the HVAC door will close quietly as it was meant to. Before: Old foam removed: After: AC side finished... The heater core side of the vertically split first gen HVAC box also received a thorough scrubbing and refresh.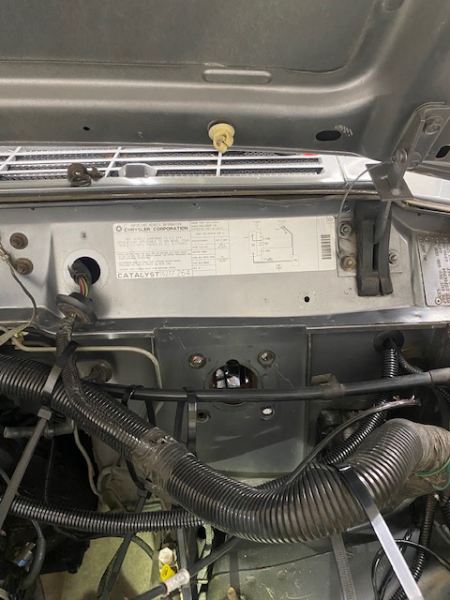
-
Project: Slippery Slope – a ’91 MJ runner
Gjeep replied to Gjeep's topic in Member Projects: Your Comanches
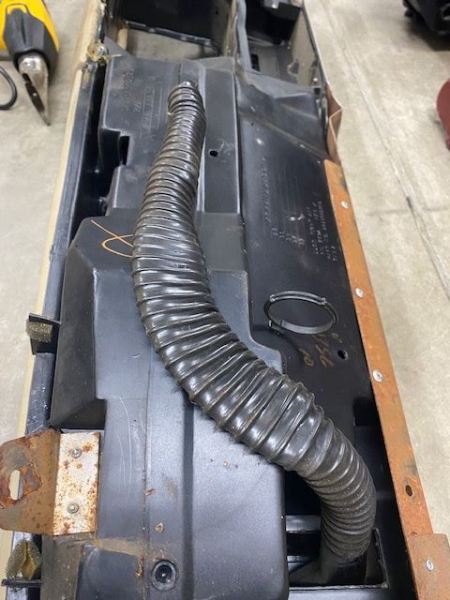
And it is out… non AC dash box is out and apart. I forgot what a pain these first gen boxes are as compared to the 97+ XJ HVAC box. Endless screws to remove and a glued in heater core seal and heater core melted to it. I’ll tackle its clean-up and reassembly soon… With the dash removed (and VIN tag), I learned why no air was blowing out of the passenger side duct. Someone at the factory wasn’t paying attention on the assembly line and didn’t put the tubing in the retainer. It has been smushed back side of the glove box flat as a pancake since September 1990. The shocks, exhaust, sway bar, and several other items on the underside are gone as of today too.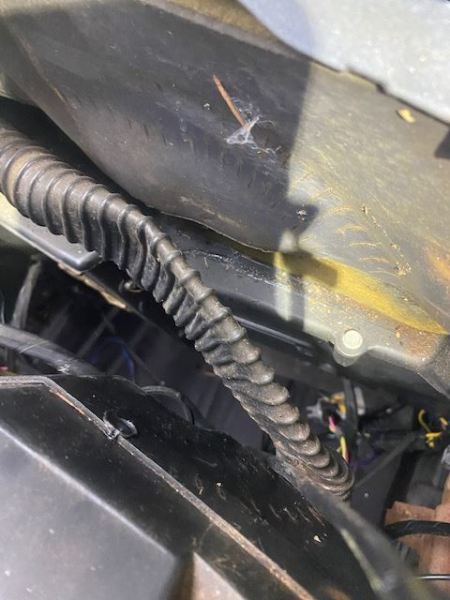
-
Project: Slippery Slope – a ’91 MJ runner
Gjeep replied to Gjeep's topic in Member Projects: Your Comanches
Engine accessory replacement begins – with tear-down. Oil pan, rear main and valve cover gaskets will be done (and installing ‘96+ stamped steel valve cover); all cooling related items will be completely replaced; harmonic balancer; power steering pump & gear box; 200 amp alternator going in; upgrading the oil filter housing the later side mounted set-up; spark plugs, injectors, intake, sensors, etc… Also will be installing factory R134a AC with this ‘rebuild’. Also pulled and tossed the single diaphragm brake booster of pure terror. Stopping within a football field at anything over 30mph is an absolute miracle. Going with tried and true for me ’95 XJ dual diagram brake booster. Undecided at this point if keeping the load sensing valve on this MJ. I eliminated on my other and no lock-up out back; whereas when I had load valve on my ’92 MJ it did lock up when empty and that was with it having a camper shell. Maybe had an issue, don’t think so…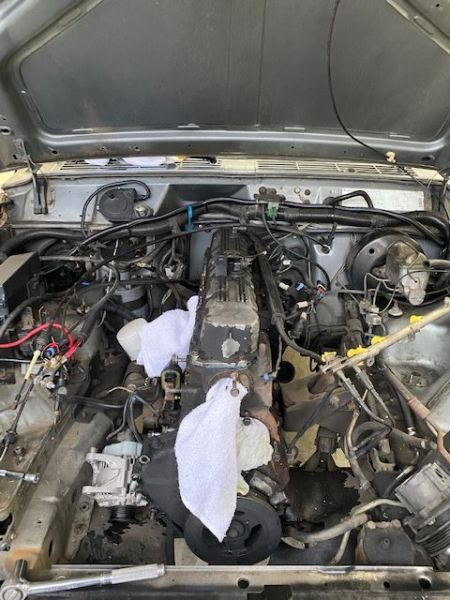
-
Project: Slippery Slope – a ’91 MJ runner
Gjeep replied to Gjeep's topic in Member Projects: Your Comanches
Your MJ is Renix era and had different lock cylinders than mine -- the notches in the door sheet metal had large at the top and smaller notches to keep cylinder in place rest of the way around. Meaning, you can likely use GM era 2-key gaskets from whenever they started I'd guess 70s through early 90s. These would work -- https://www.usa1industries.com/1973-87-square-body-chevy-gmc-truck-door-lock-cylinder-gaskets-each/ -
Project: Slippery Slope – a ’91 MJ runner
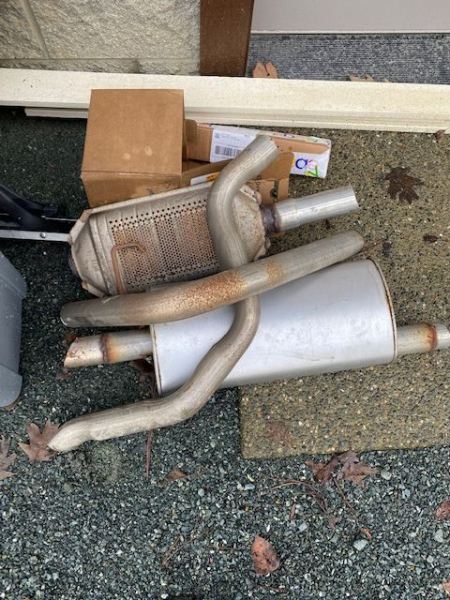
Gjeep replied to Gjeep's topic in Member Projects: Your Comanches
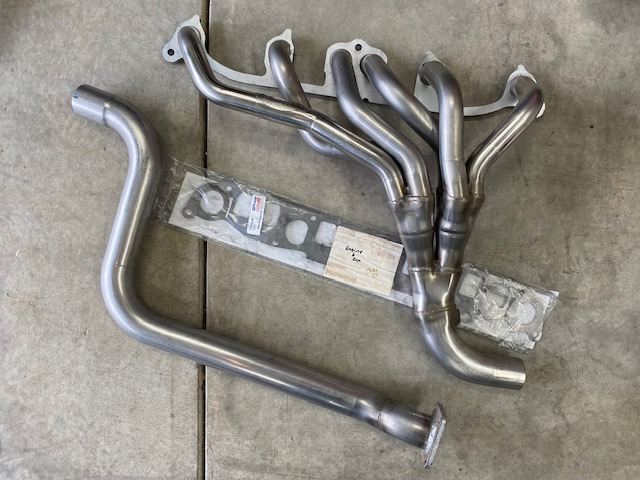
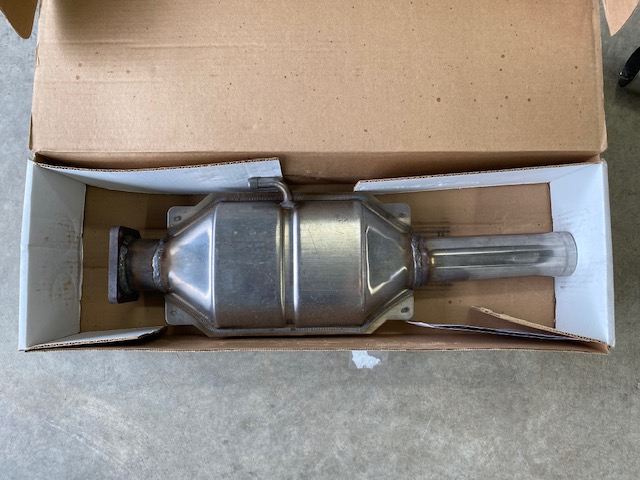
Pulling parts out of storage – ’91 MJ will get the same Borla/Magnaflow (cat) set up as in my other MJ. I’ve had numerous header/muffler set ups over the years on MJ's and XJ's and Borla hands-down sounds the best on the 4.0L. (Banks a close second; they swapped the muffler they use recently on the XJ kits and it sounds better than their first gen.) The MJ will also get the newer intake manifold at install. Speaker wires from the amp were tied in to the existing factory speakers into the doors for a clean install. And the world of repop is finally making the ‘95/’96 F-series combo cargo and brake light. I had been looking for this year’s back, but nothing was available outside of old and used – selling for a ridiculous amount on eBay. But finally… it’s being reproduced withOUT the Ford logo on it. I’ve always though this light would look best on an MJ as the shape matches the cab corners. Will need to see what/ if it needs to be reshaped a bit to fit the Comanche.
-
Project: Slippery Slope – a ’91 MJ runner
Gjeep replied to Gjeep's topic in Member Projects: Your Comanches
Chrome is available aftermarket for the 97+ XJ door handles -- never from factory though. -
Project: Slippery Slope – a ’91 MJ runner
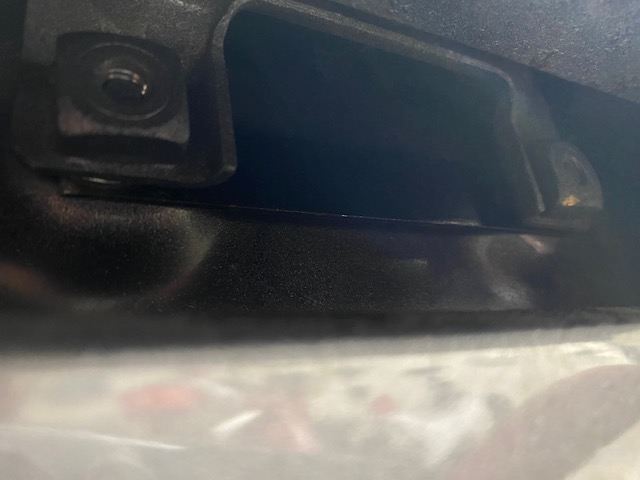
Gjeep replied to Gjeep's topic in Member Projects: Your Comanches
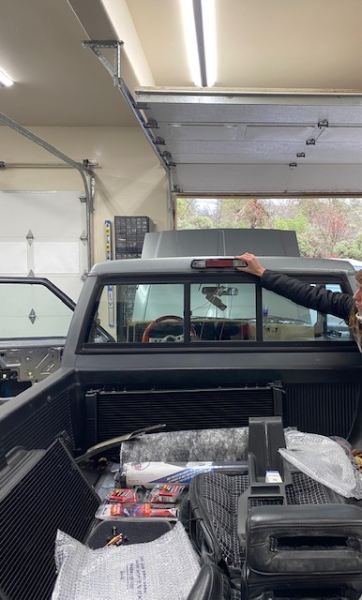
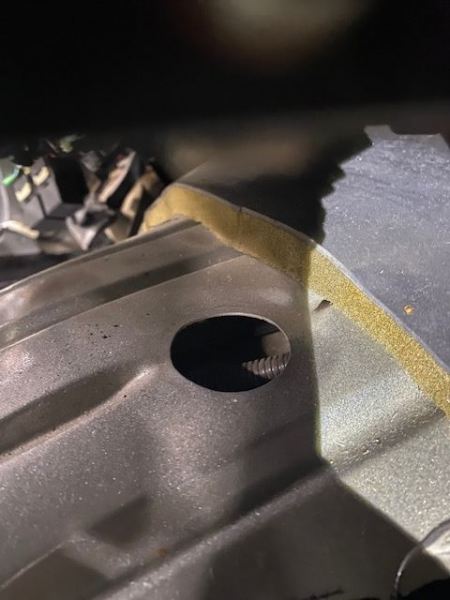
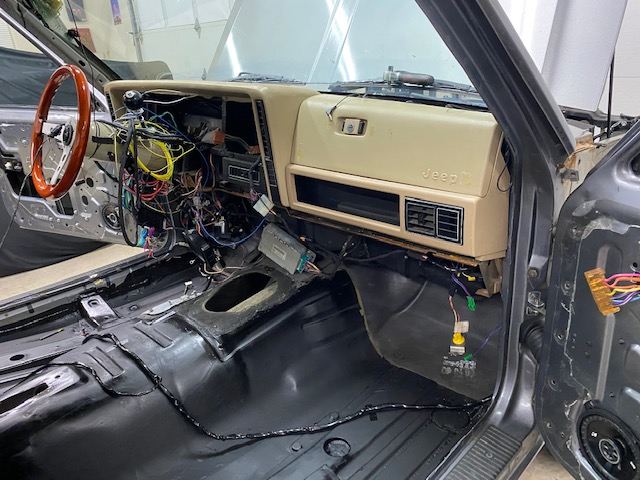
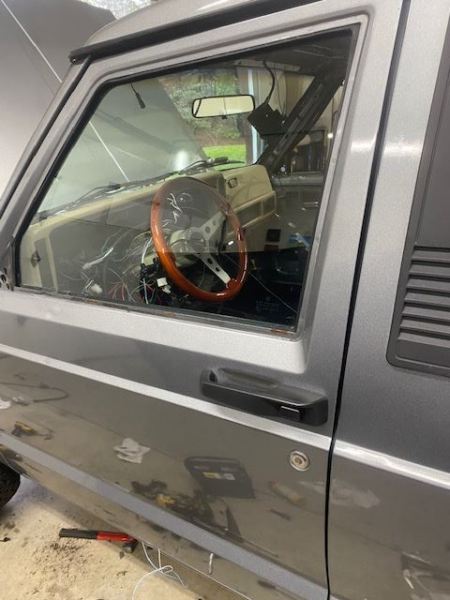
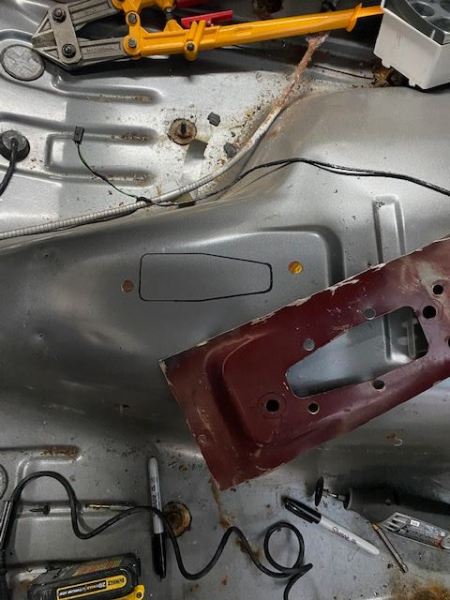
Tailgate lock in place and virtually unseen. It's always a good time getting the bracket and actuator through the opening, followed by the handle itself… But in and working, and tied in to the recently added power window, door lock, and mirror wiring. The original door stop checks were swapped out for the latest Mopar rev that includes the rubber bushing on the inside to ease the rebound of the door when opened. I’m always on the lookout for areas of possible unwanted water entry when rebuilding an MJ/XJ. This Jeep wins out of all I’ve had… the firewall had the open 1.25” passage right of center, and then inside the cab on the upper transmission tunnel another uncapped 1.5” hole (used for the early CAD front axle vacuum lines). Both holes now successfully plugged with OEM Caplugs brand insert. Lastly, I replaced the brittle and broken door lock cylinder gaskets. Next up is installing the cab harness (hanging around the steering column in this pic). I made from the amplifier to the speakers, and various other add-in’s and changes (cargo light, XJ ebrake, and power tailgate).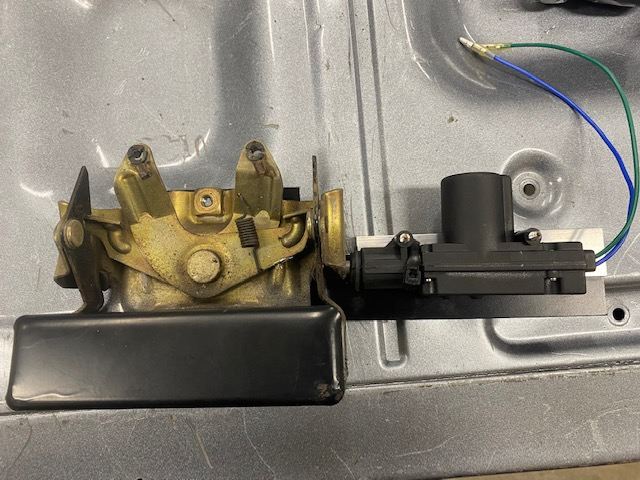
-
Project: Slippery Slope – a ’91 MJ runner
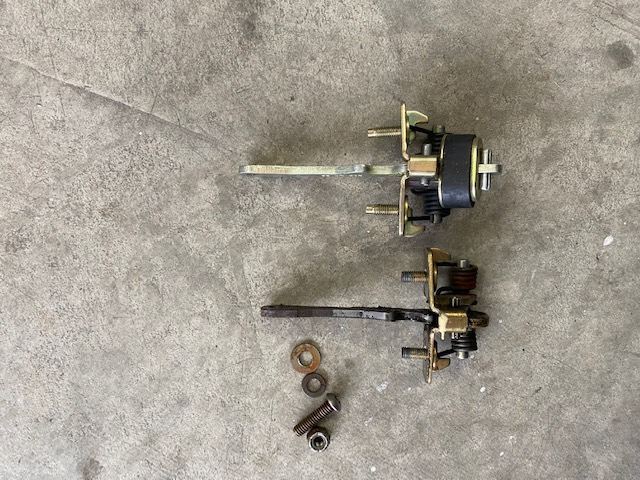
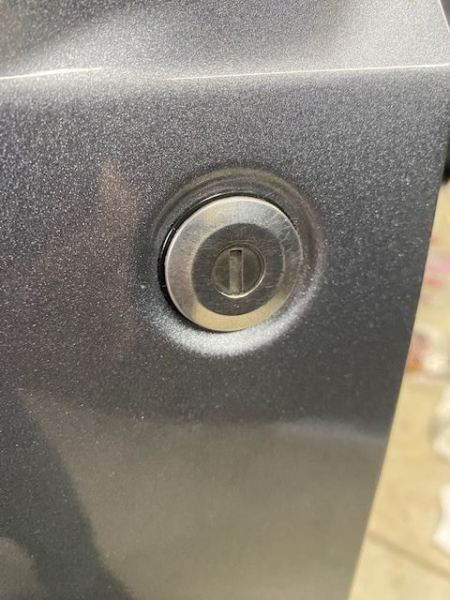
Gjeep replied to Gjeep's topic in Member Projects: Your Comanches
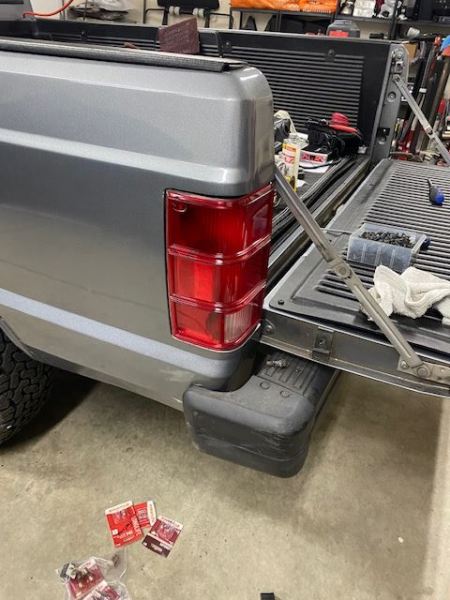
Key Parts parts installed – new set of repop taillights and linkage bumper set. As always, I try to avoid installing with rivets, so a stainless steel truss screw was used instead. This MJ will also get a power actuated tailgate lock similar to my other MJ tied into the power door lock wiring. The wiring isn’t as pretty as in my other MJ as I am constantly reminding myself to keep the focus of this build as a runner – an MJ to be used. Full window upgrade installed and working. 97+ XJ door handles were installed as I like the look of them over the original. New door to body bumpers and various plugs installed, in addition to fresh door lock cylinders to replace the brittle factory installs. And finally, the floorboard was POR15'd for a long and rust free life.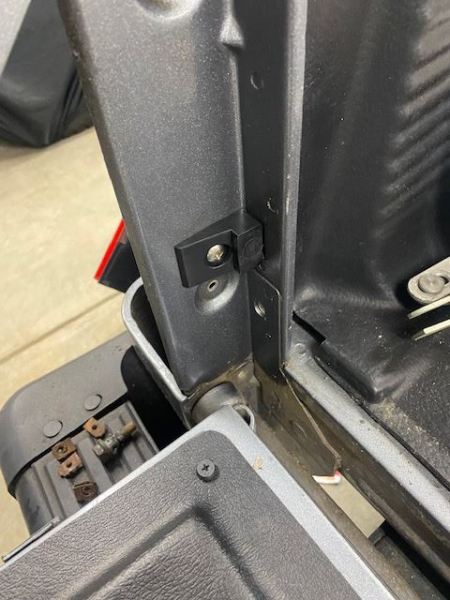
-
Project: Slippery Slope – a ’91 MJ runner
Gjeep replied to Gjeep's topic in Member Projects: Your Comanches
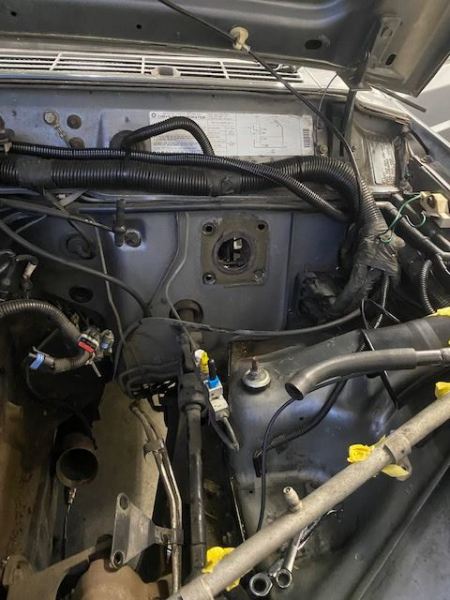
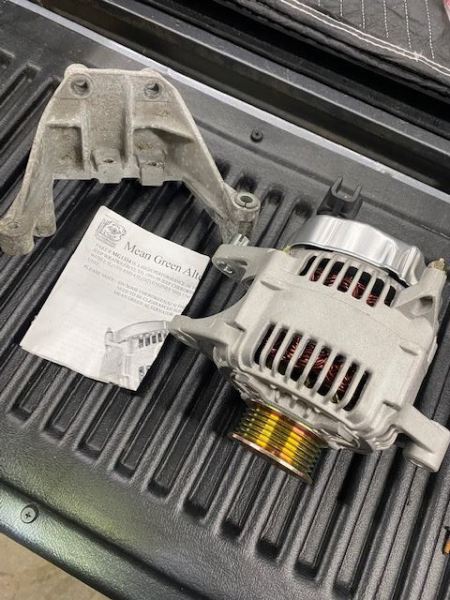
I decided to go with a 200 amp Mean Green alternator to keep things charged up, and with that, needed to notch the factory bracket for clearance. Also, I continued my search for damaged electrical connectors (and found) the fan high-low switch connector was cooked – and replaced that. Lastly, I replaced the R12 cut-off connector under the hood in preparation for AC install with the later ’94.5-’96 XJ connector. Instead of installing this vehicle year HVAC set up, I upgrade to the later years r134 specific set up. Have had good luck with this set up in the past.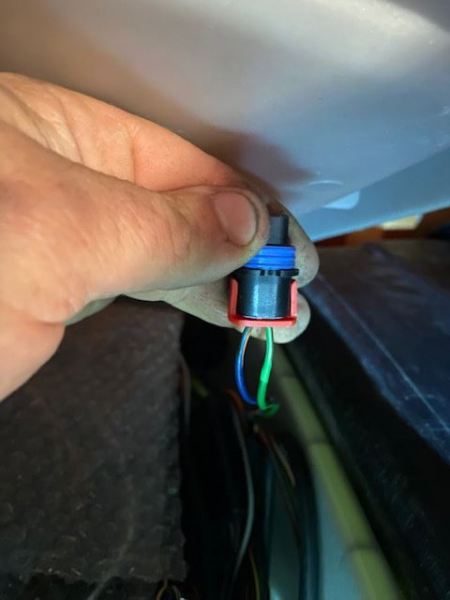
-
Project: Slippery Slope – a ’91 MJ runner
Gjeep replied to Gjeep's topic in Member Projects: Your Comanches
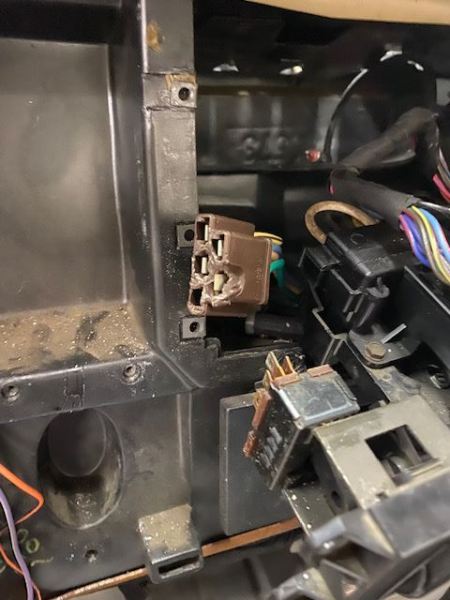
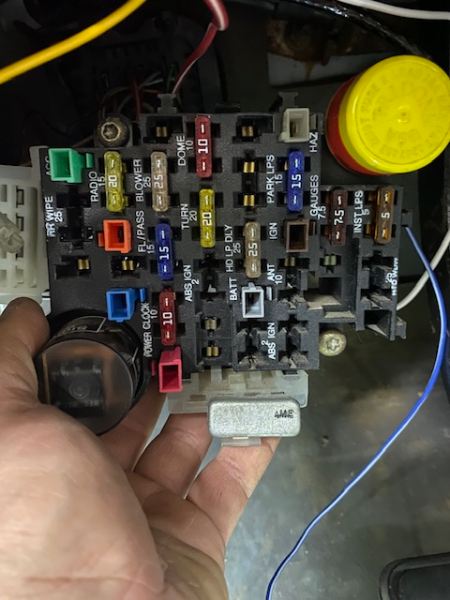
Wiring adventures – added the IPF headlight harness upgrade, overhead console, and several other battery/ accessory taps within the fuse panel. Terminals for both the tap and fuse panel/ connectors are available online and keep the appearance of things factory. As for getting the overhead console wiring in, it always takes a little bit as I strip out the XJ keyless related wires and use an era appropriate connector when assembling across the dash wiring. Also, while I’m in there playing with wires and connectors, I make sure to go through the high draw components to see if any of the housings are melted or melting.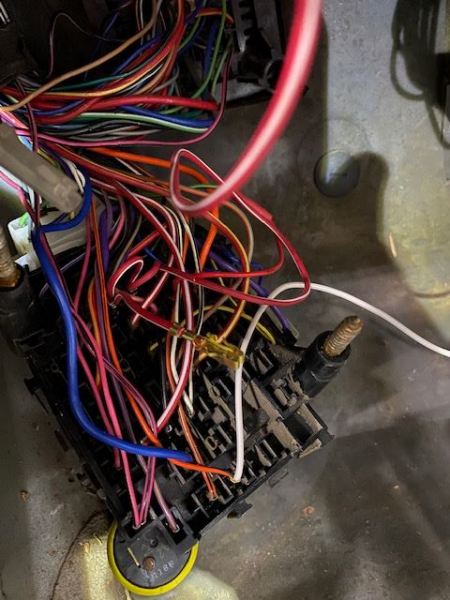
-
Nice work. Looking good.
-
Project: Slippery Slope – a ’91 MJ runner
Gjeep replied to Gjeep's topic in Member Projects: Your Comanches
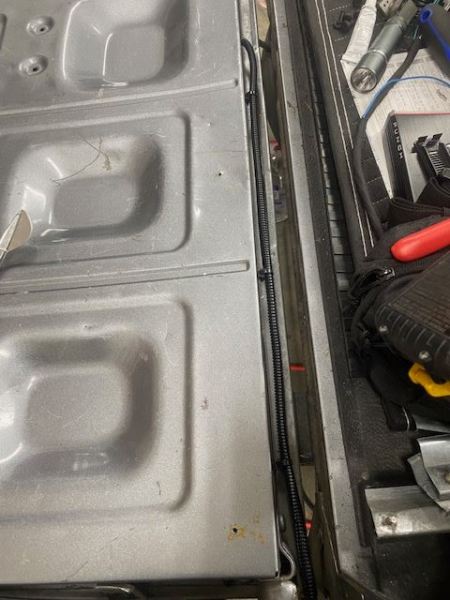
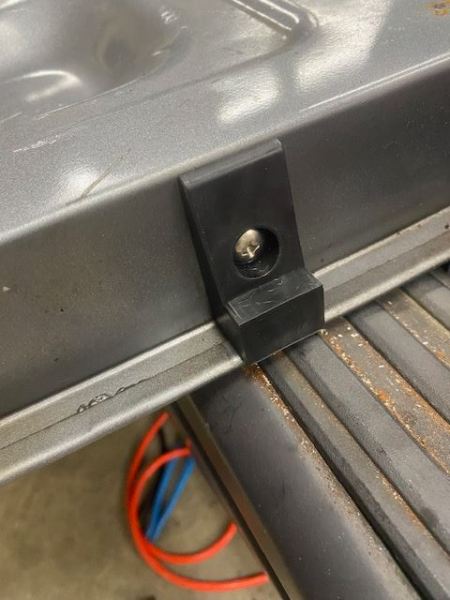
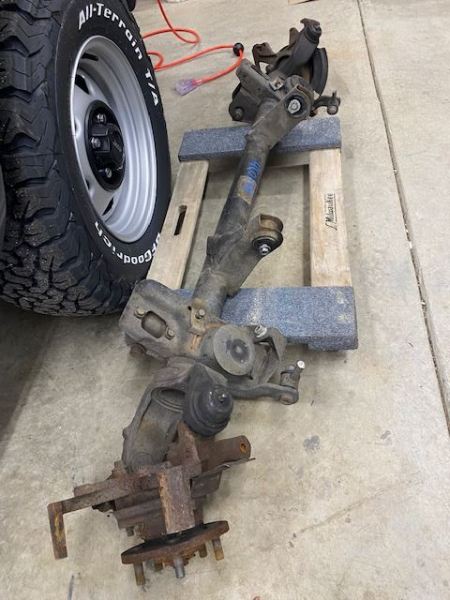
Removed everything hanging off the doors inside and out readying for the full window install. All sorts of fun drilling out the rivets that hold on window regulators and other things attached to the inner door. Also found a local, low mileage front axle off a 98 XJ that met an early demise. I prefer the unit bearings on the 2wd, makes things easier for me in the world of maintenance and service as now the same as all the others. Onward…
-
Project: Slippery Slope – a ’91 MJ runner
Gjeep replied to Gjeep's topic in Member Projects: Your Comanches
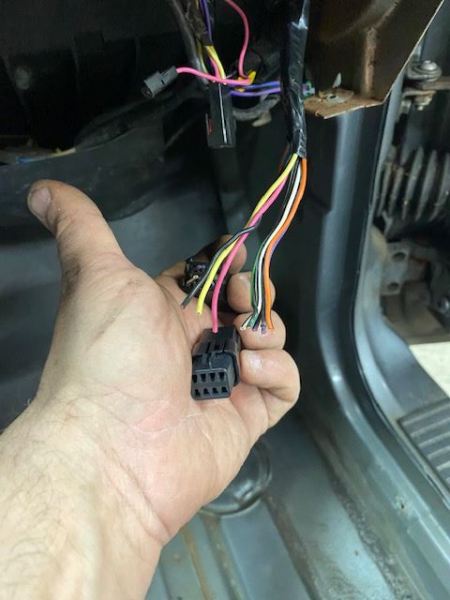
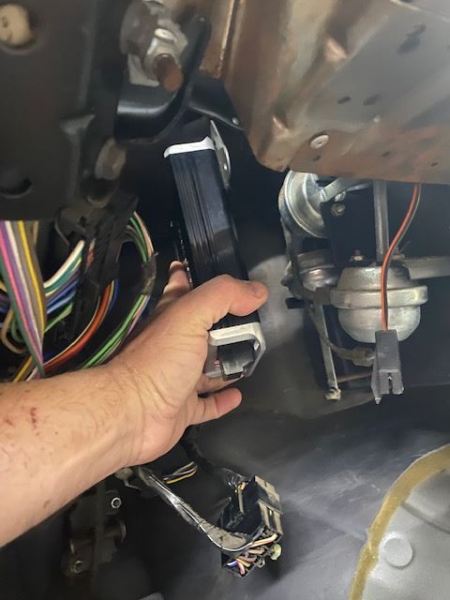
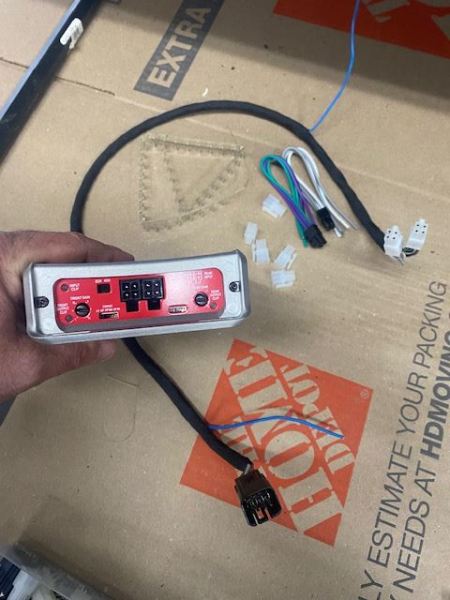
I run the Rockford Punch 4 channel amp in all my Jeeps…it’s compact/ fits anywhere and sounds just right when you dial it in. This MJ gets one too, and I’m mounting it in the carry-over Renix ECU under dash bracket that is unused in the High Output years. I chose to bend that bracket just under an inch to make it straight. Both the DEI alarm and this amp will be mounted to this location back to back. One of the benefits of this amp from my perspective is they use off the shelf Molex connectors, so I can easily make an OEM Jeep radio connector harness from the back of the radio right into this amp; and another on the output side to the new speaker wires. (They do include connectors with this amp that are universal but similar.) And since I’ve created this cab harness, I’m sure to include all the other accessory wiring I’ll need in for my add-in’s... cargo light, tailgate electric lock, and ebrake warning light tab.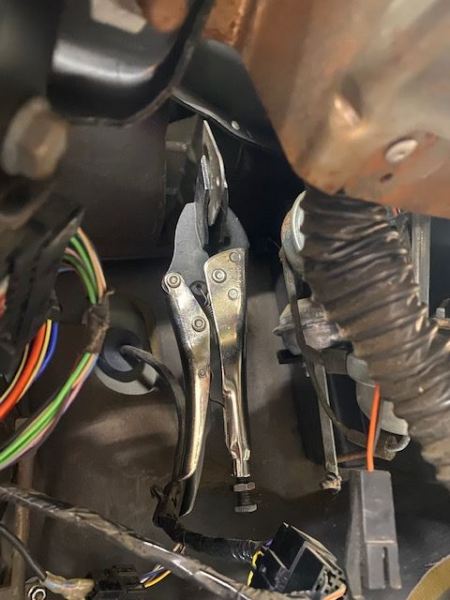

-
Project: Slippery Slope – a ’91 MJ runner
Gjeep replied to Gjeep's topic in Member Projects: Your Comanches
Way back when I had my '89 Comanche in final stage of primer, block sanding in the long down hill driveway behind the condo lived in, when all of a sudden the parking brake released itself. Truck wasn't in gear (5-spd), and I was on the passenger side sanding away. Fortunately the drivers door was open as the truck began to haul down hill towards a cinderblock wall. I managed to catch up/ jump in the cab and kick the ebrake down. It was one of the moments where you knew things were either going to go well or will end in a spectacular fail with lots of damage. Since then, I dislike the Comanche ebrake -- NOS or otherwise, just don't trust it. So all my trucks get the XJ hand brake. Cut away at the floorboard yesterday after I marked things off with an XJ template I've had forever. I'm guessing the dent on the transmission hump happened back at the Toledo factory at time of production, at install of awkward/ heavy bench seat. I needed to get things back to straight there so ebrake gasket would seal properly, but here is the before shot...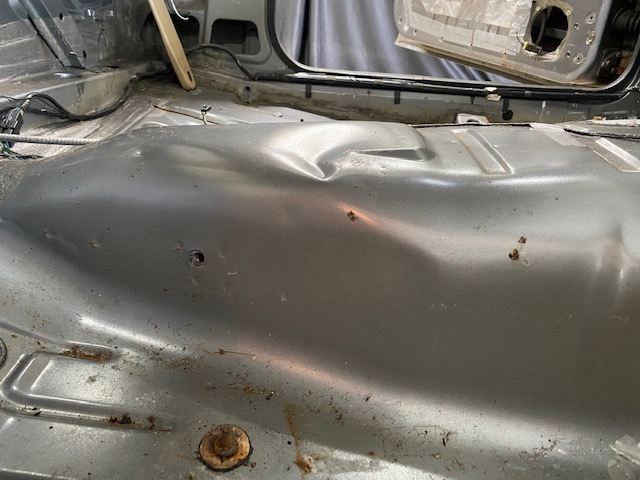
-
Project: Slippery Slope – a ’91 MJ runner
Gjeep replied to Gjeep's topic in Member Projects: Your Comanches
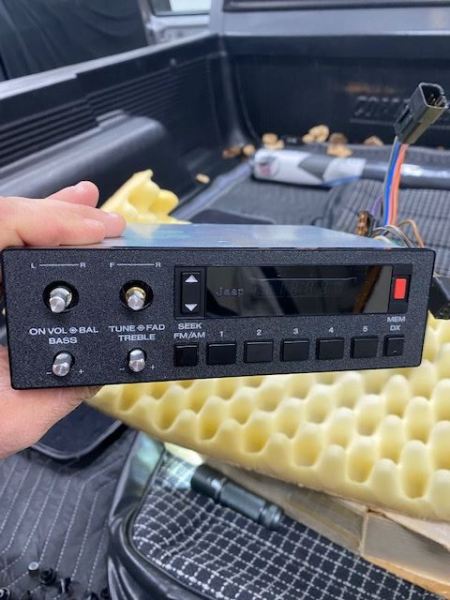
I pulled from storage the '87 XJ black Mesa fabric seats I picked up on one of my many parts runs across the US for this project. They need a good cleaning, but are in great shape. Also in the audio realm, I'll be running the same (amplified) factory radio as in my other Comanche project. Polished off the AMC logo and added 'Jeep'.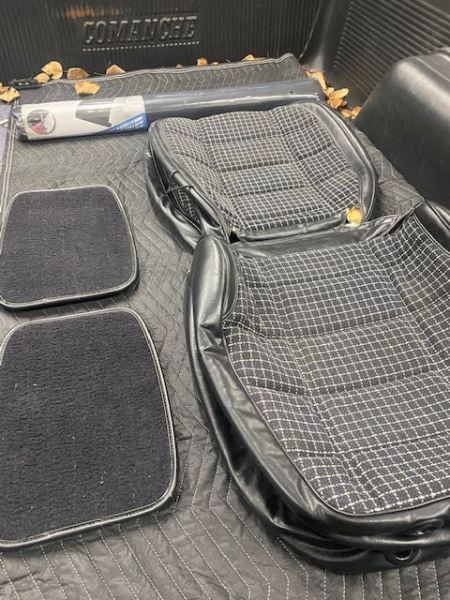
-
Project: Slippery Slope – a ’91 MJ runner
Gjeep replied to Gjeep's topic in Member Projects: Your Comanches
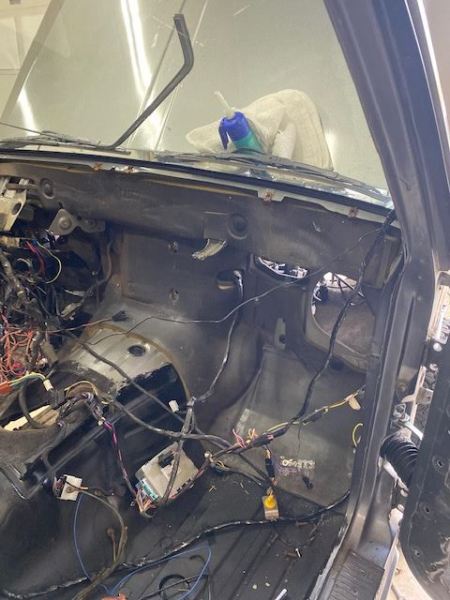
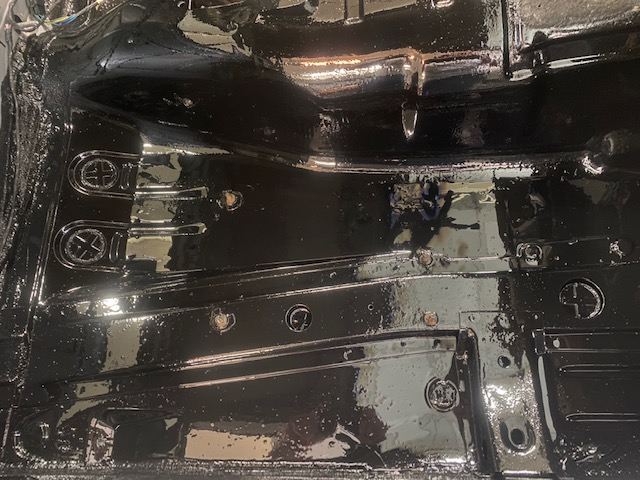
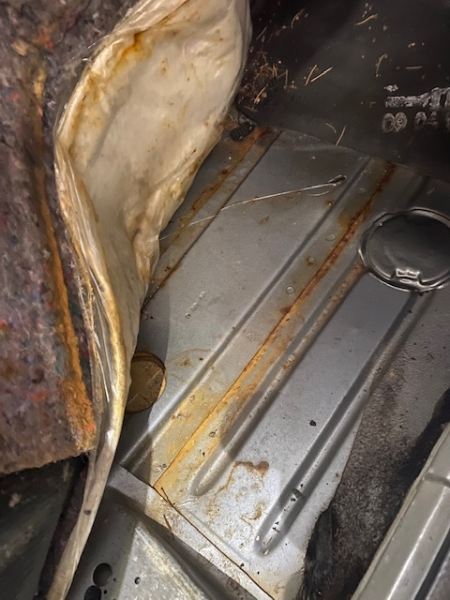
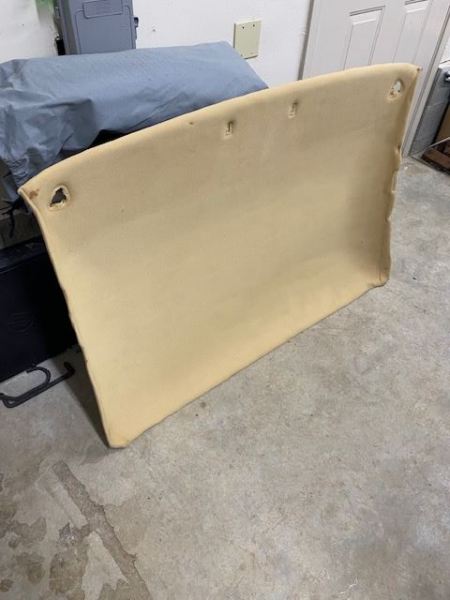
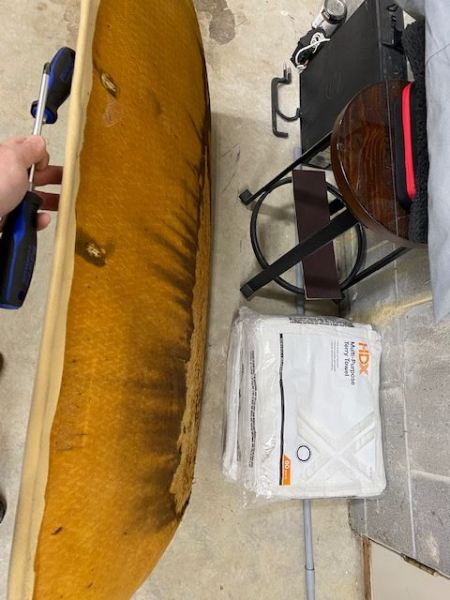
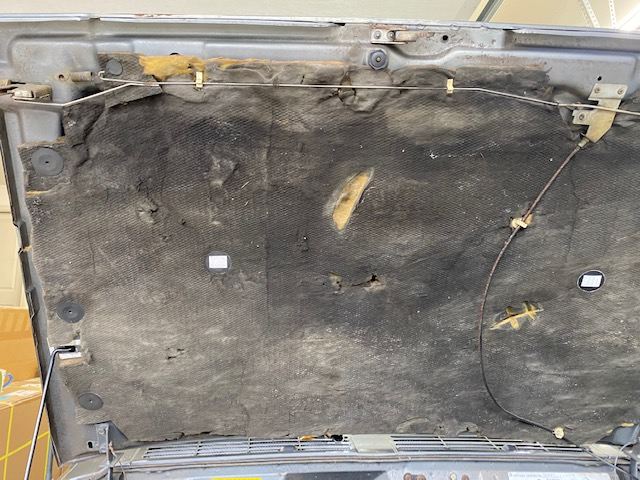
I wanted to see how the floor pans of this MJ were as I smelled a bit of musty. Removed majority of the interior panel and lifted the carpet both sides, and fortunately they're solid...but the insulation under the carpet was soaked. Either the windshield (which is the original Safeguard) is leaking and/or the HVAC box seal at the cowl has given up. Will see. Also removed the aftermarket under hood insulation and added 3 power lines to the PDC and ran them into the cab for later installs. Finally, pulled down the headliner which has been recovered but zero damage to the fiberboard. Lucky day.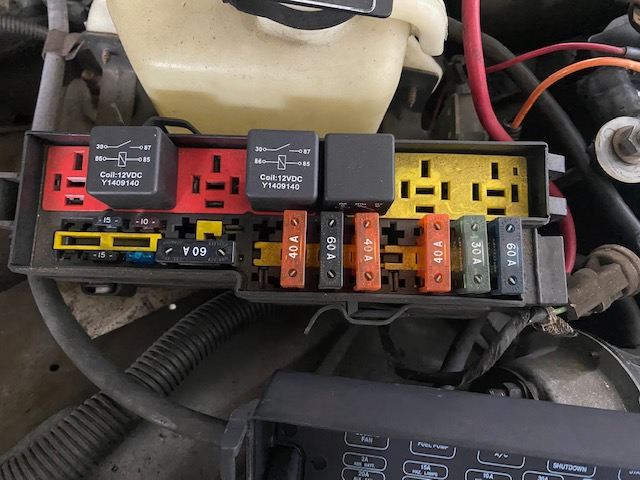
-
Hi- I will have 91 MJ send seat and shoulder belts available (for free) Spring time. Probably early March if interested. thanks
-
Project: Slippery Slope – a ’91 MJ runner
Gjeep replied to Gjeep's topic in Member Projects: Your Comanches
Well, my intention was to run this MJ for the most part as it was – aside from rims/tires, thermostat replacement and dual diaphragm brake booster upgrade (coming)… but I spend the weekend digging through my part shed because I just can’t leave things alone. Doing the usual parts replacements/ upgrades and then saying goodbye to the tan interior for black (from bench to buckets). Probably won’t get started on the big stuff until Spring, but the little things I’ll get done as I can. Slippery slope.
-
Nice find on those seats and door panels -- that's a one year at best Jeep offering. Late '87 Laredo with black interior/ 'luggage' fabric. Only seen these once before in life. Will look good. Congrats
-
1986 Jeep XJ Pioneer, 1989 Jeep XJ Pioneer, 1995 Jeep XJ Sport, 1989 Jeep MJ SporTruck, 2001 Jeep XJ Sport, 1992 Jeep MJ Eliminator, 1987 Jeep XJ Chief (for interior parts), 1986 Jeep MJ XLS (for interior parts), 1987 Jeep MJ Chief (for interior parts), 1997 Jeep XJ Sport (red), 1998 Jeep XJ Classic, 1997 Jeep XJ SE (white), 1999 Jeep XJ Sport, 1991 Jeep MJ Pioneer.
-
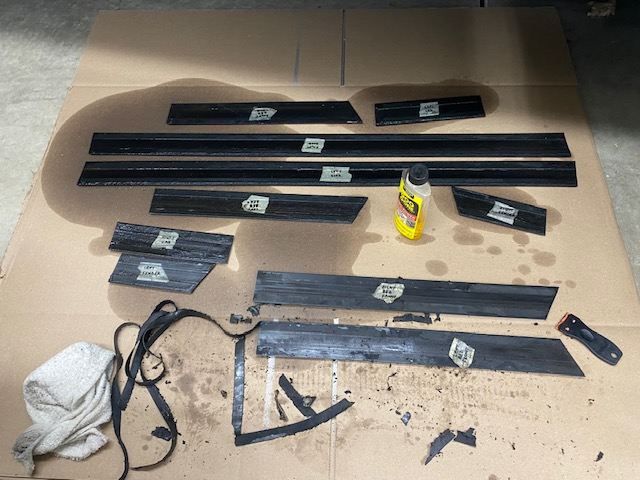
Project: Slippery Slope – a ’91 MJ runner
Gjeep replied to Gjeep's topic in Member Projects: Your Comanches
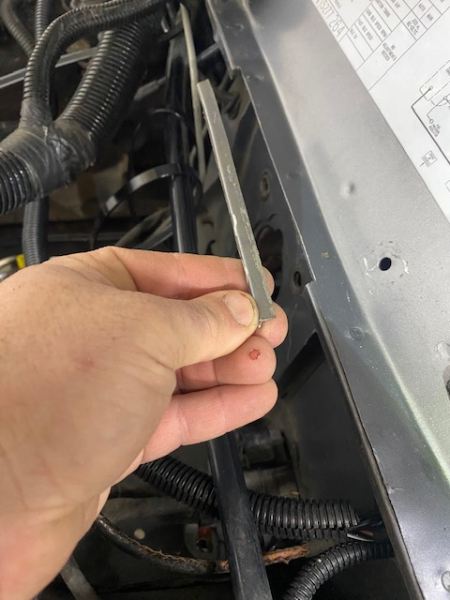
Many thanks Mike (FiatSlug) for the short bed bodyside molding. After 2 days of soaking the dried out mounting tape with GooGone, the fun of scraping it off with a plastic blade begins. Once all is off, I'll thoroughly scrub and reapply the new VHB tape.