


Gjeep
-
Posts
1221 -
Joined
-
Last visited
-
Days Won
3
Content Type
Profiles
Forums
Gallery
Everything posted by Gjeep
-
Dual OEM Aux Fan Installation, Part 2...An alternative.
Gjeep replied to Gjeep's topic in MJ Tech: DIY Projects and Write-Ups
Between all the add-ons the Nations 13341-270XP was the one best suited for my build. It’s massive and not only required carving out the factory alternator bracket, it needed extended bracketry, and a slight notch the frame. If I remember correctly it was around $800 -
Coming along great! Where did you guys camp? Don't recognize it
-
I'm a-ok... Got derailed (again) building an XJ for my youngest soon to be driver. Aiming to be done with that around November then back to the MJ.
-
91 HO Shut Off While Driving
Gjeep replied to kryptronic's topic in MJ Tech: Modification and Repairs
Try replacing the fuel pump relay in PDC. When they get old/ overheat/ die they can cause issue. -
Originally 93/94 ZJ Limited wheels, they appeared on the XJ Country model in 97-98.
-
XJ’s lookin good.
-
Project “Tomahawk”
Gjeep replied to ghetdjc320's topic in MJ Hardcore Tech: Epic Journeys to Greatness
Looking good, and not sure if you're done aligning doors... Passenger side for my MJ lined up perfectly using factory shims but the driver side was another story. Need to to create proper shim widths to get all lined up. Took forever to get just right. Nothing fun about aligning doors. -
What comes in the Team Cherokee kit hasn't been right for years.
-
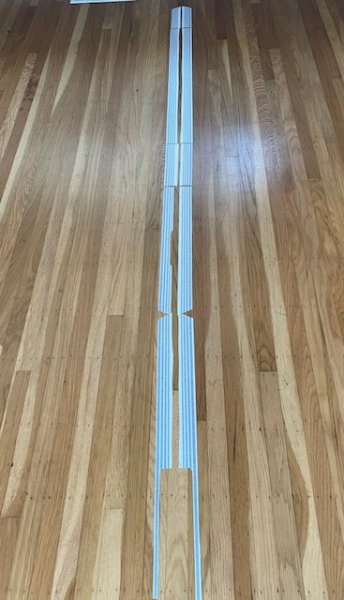
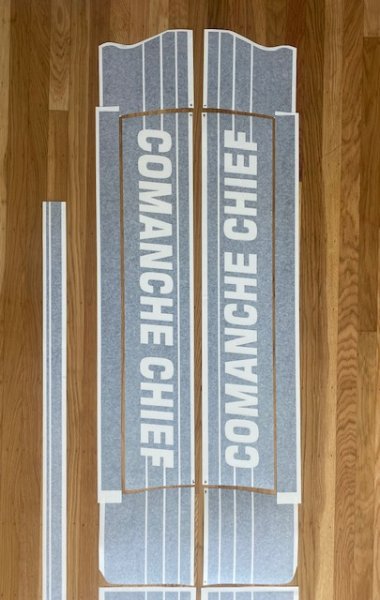
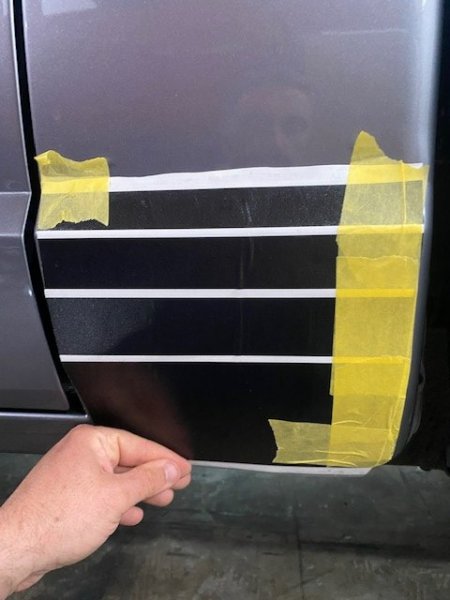
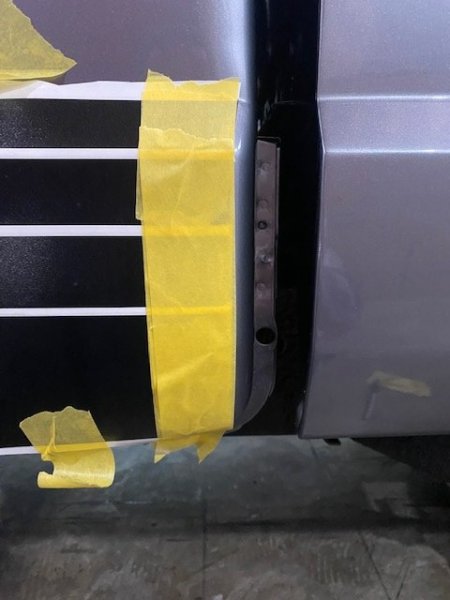
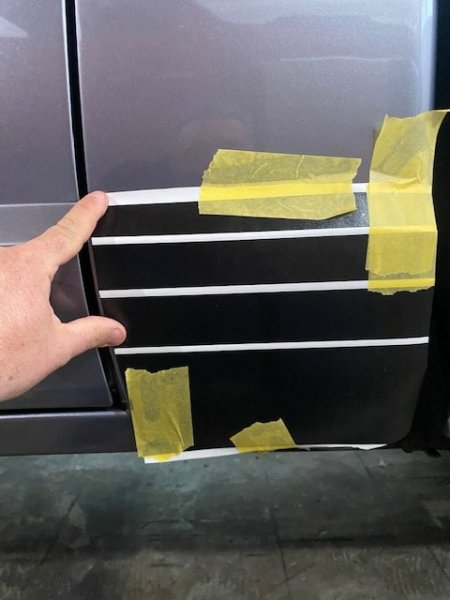
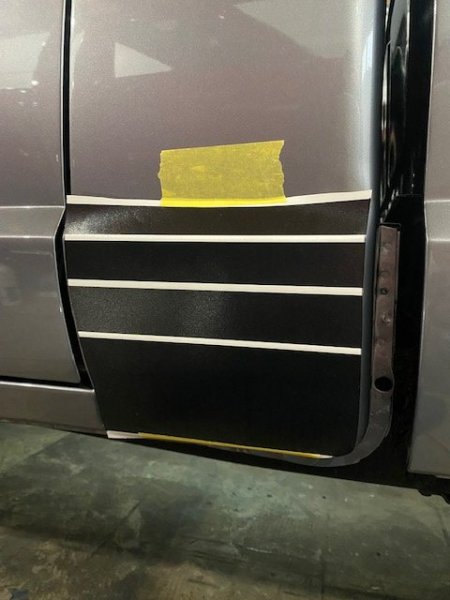
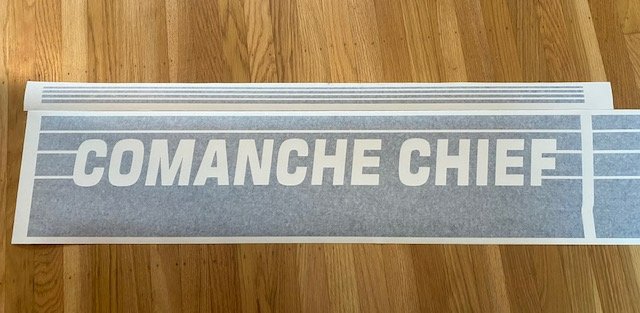
I decided it would be best to trim to size the upper set of stripes for the Chief graphics. Glad I did, as it took some time and was a bit more challenging than expected. Based on photos/ research, this graphics stack is slightly less tall than the what the factory offered. The taillight ‘stop’ is how I learned this. Not a bit deal as I just round-cut the third from bottom stripe versus a straight cut at the taillight.
-
Cut. Wasn’t near as bad as I thought it would be – had a good night rest, 5 hours with scissors/ blade and the graphic trimming is done. Sure, I see spots, am somewhat cross-eyed now and have a mild headache, but worth it. I only mis-cut the passenger cab corner (yes, I re-did it), and I’m ashamed to admit I botched a straight cut for the tailgate cross stripe (no idea how, it’s just measurement and straight cut. Re-cut a new). Finally, for peace of mind, I cut a second set of door ‘Chief’ graphics just in case I have issue when installing.
-
My aim is to drive it Sunday’s at least twice a month. Would love to take it to a show, but there just isn’t anything Jeep or 4wd related out here in the Bay Area. We have Good Guys shows and local meet ups — but mainly classics, muscle cars, and imports. For the most part in CA, an old Jeep is an old Jeep. The end.
-
No way -- Jeep ain't that particular. I have a couple spare wood grain and silver grain column inserts that aren't wonky and fit perfect. Just ordered a couple black ones off eBay that look to be straight in pics, but will see. I know I have at least one NOS black, but need to track it down.
-
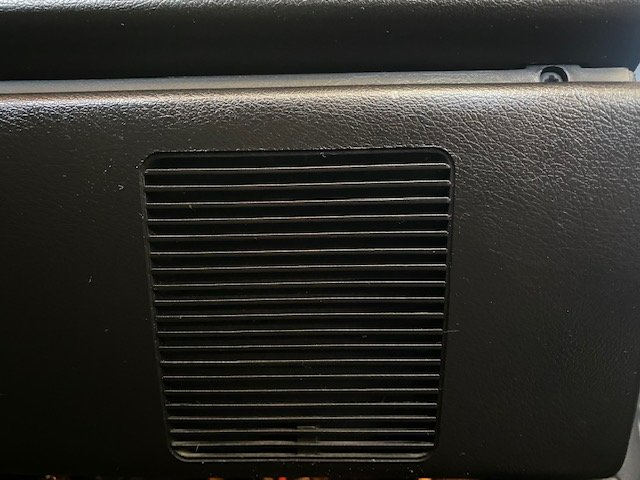
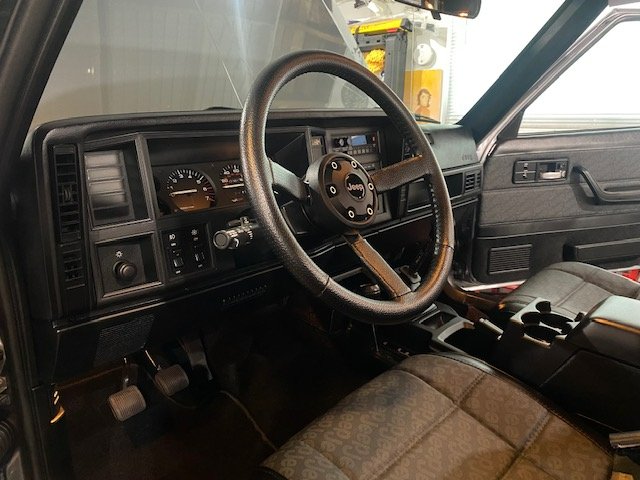
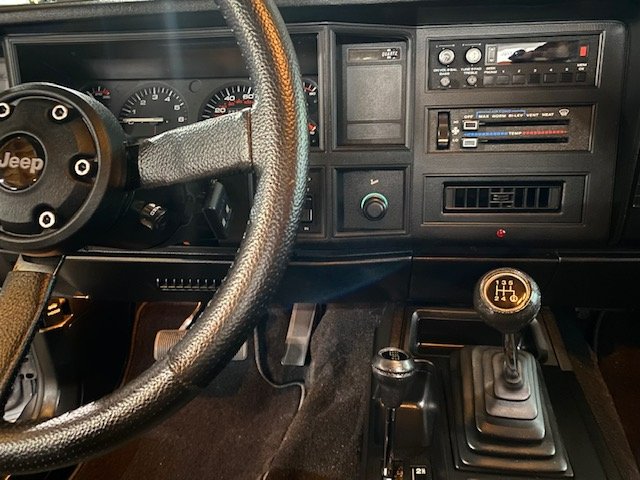
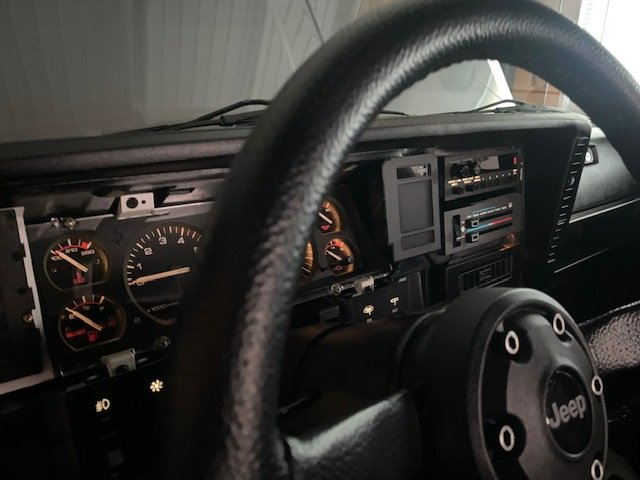
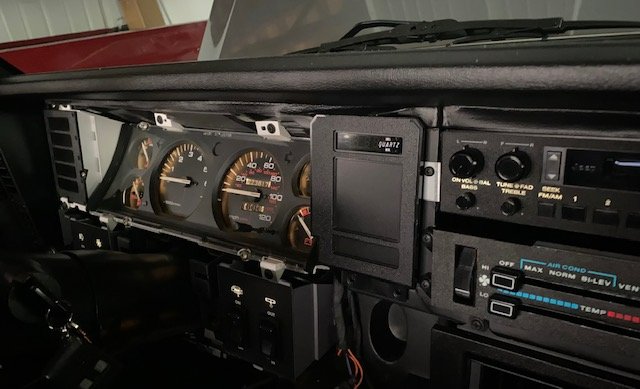
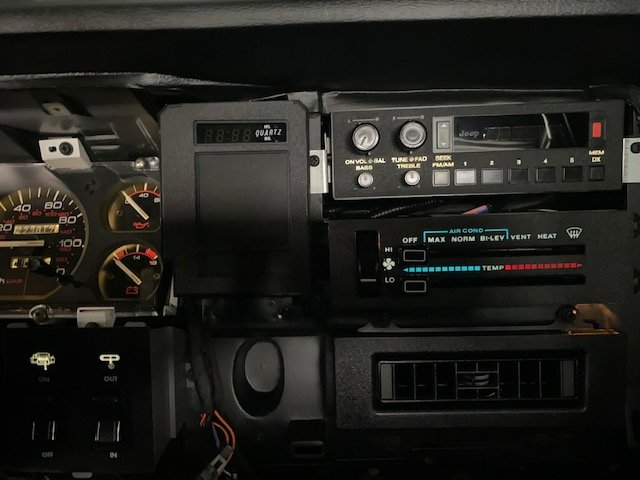
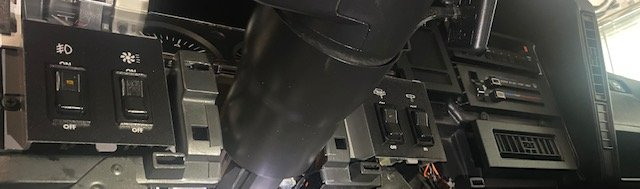
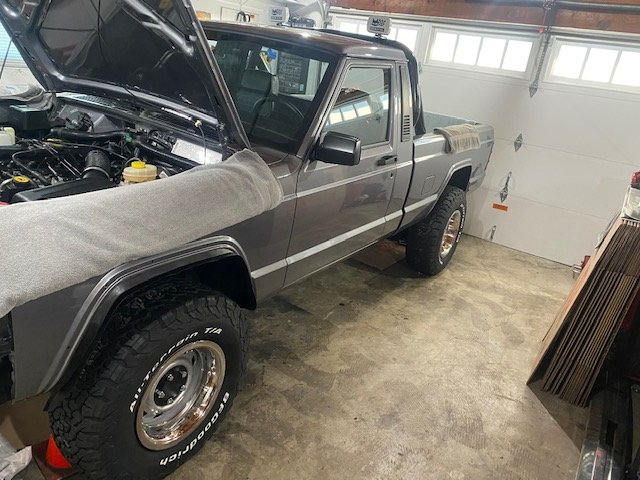
I decided it was time to finish up the interior. Fully aware that my MJ’s dashboard is 36 years old and made mostly of plastic, I made sure to grease both the dash overlay clip holes (dash side) and then overlay clips themselves for ease of install/ less risk of main dash breakage before installing the NOS piece. I also lowered the steering column for installation clearance and then clipped/ screwed the overlay into place. The lower dash panel is always a good time. I ended up drilling two new holes to get things lined up without tension or stress on that panel – one at the center most mount (behind the ashtray) and driver side far left screw under the HVAC vent. All else lined up perfectly. Had to be done, so those two off screws would lay flat as they should. Something I don’t like seeing is wiring, so I decided to cut-to-size/ install baffles for the lower dash grille openings (where XJ tweeters go). Nice and clean. No visible ugly. The lower steering column dash overlay insert I have is all wonky. Didn’t notice before refinishing. I guess my steering column must have been off-center for the first 230K and re-shaped the plastic. Yes, it looks like I can sand it true from the backside since there is some extra plastic, but front side is off too. Need to find another to refinish and pop into place. And there she be, 99% all together done on the inside. The final stretch is a long one and it’s tempting to just turn up the heat to get it done, but don’t want to make that mistake. If anything, I’m being extra cautious/ slow for that very reason. Ok…back to the graphics. Got to cut them.

-
Need AC kit fit engine swapped 88 MJ
Gjeep replied to Rory_301's topic in MJ Tech: Modification and Repairs
You need to get one from late 94 built xj as that’s when they went r134 from the factory. 95/ 96 xj same hvac components if you’re looking to match your trucks engine vintage. Otherwise you can get 91-96 xj hvac to bolt in. Just pick a year. -
Had to get it right – couldn’t reassemble the dash without getting the switch pods and lighting 100%. (Plus, I needed a break from cutting/ fitting Chief graphics.) The first rev of the overlays looked right but didn’t backlight in the exact color and illumination as factory jeep. Wasn’t right. Had to match factory white pale blue/green – or bust. Finally got it! And looks great! These pics were taken in a dark garage, with some lighting… so not true dead of night pics. Also addressed a nit of the manual efan override switch face indicator. Since grounding is what powers the efan on when the switch is thrown, the amber indicator light doesn't get power. Fix was swapping the rocker face with a NOS rear wash/wipe face (same one used for the winch in/out momentary). Life is good. Back to graphics cutting…
-
Driver side sun visor too long?
Gjeep replied to Warren99's topic in MJ Tech: Modification and Repairs
No lights. Just engagement. -
Driver side sun visor too long?
Gjeep replied to Warren99's topic in MJ Tech: Modification and Repairs
Ah, then maybe the visor board can loose from the post. Attaché the 3 screws again and wiggle the visor back and forth to the left (driver side). I’m assuming these visors came from the same vehicle prior? -
Driver side sun visor too long?
Gjeep replied to Warren99's topic in MJ Tech: Modification and Repairs
No, rotate the mounting base around so it will fit the existing 3 holes in the sheet metal. Looks like you may need to rotate it clock-wise. -
Driver side sun visor too long?
Gjeep replied to Warren99's topic in MJ Tech: Modification and Repairs
Those are both early year visors correct for '89. You just need to reposition the mounting point so it moves the visor in the direction you need it to go, then screw it down. -
Project “Tomahawk”
Gjeep replied to ghetdjc320's topic in MJ Hardcore Tech: Epic Journeys to Greatness
Good find. Sunroof install companies do the chopping. Only full length came from the factory. Some places put the tail end console lights other side of the sunroof too. I’ve only seen a few over the years. Actually made one for my MJ when I first got it. Recently passed it along to EagleScout. -
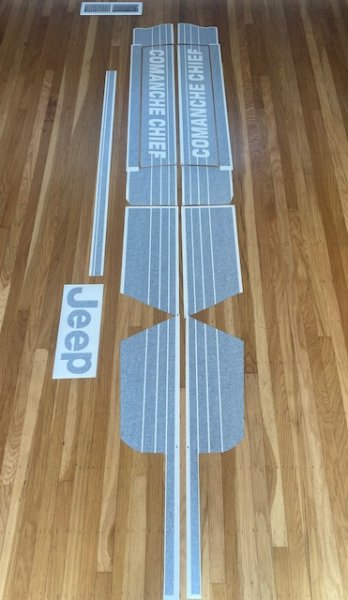
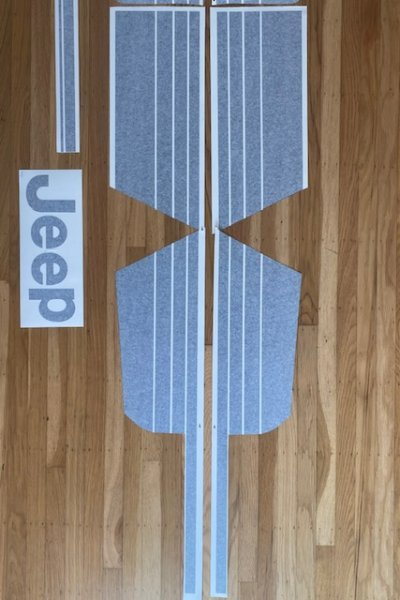
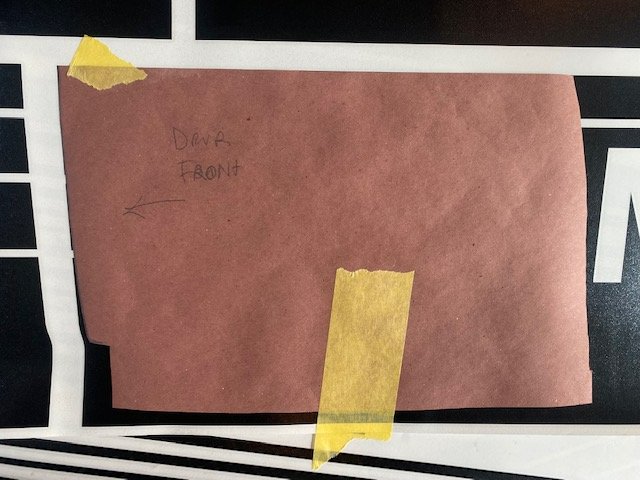
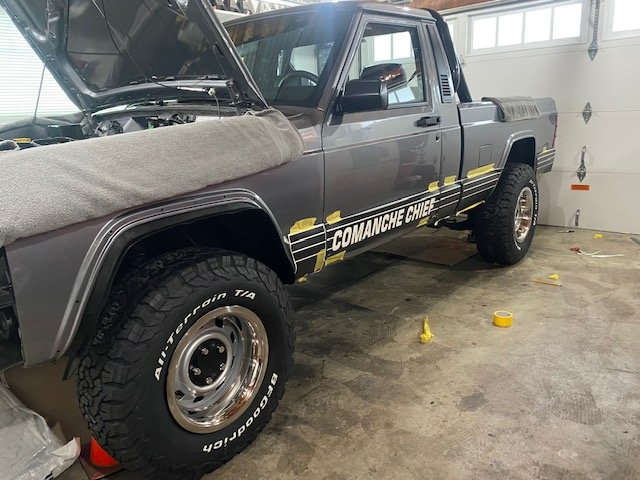
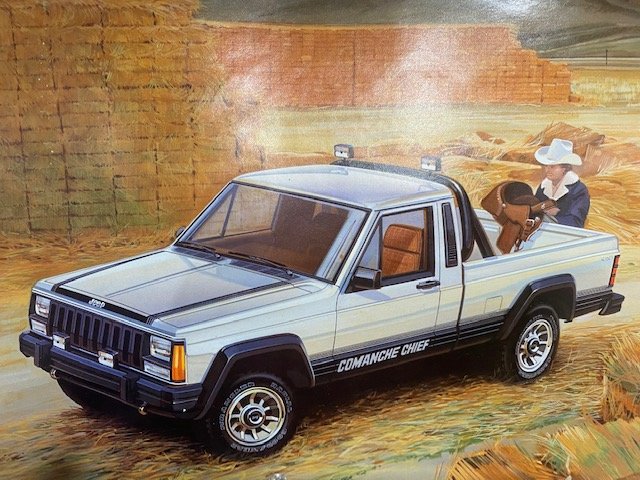
I decided to create graphic templates cut to size before trimming out the final. Three years ago I ordered several sets of gloss black graphics that I won’t be using, as matte black will match flares, etc better. These gloss black ones will be used as templates. Factory Chief graphics I learned didn’t wrap into the jamb areas of the door or bed gap; and the ‘top’ stripe of the main lower graphic panels are supposed to be centered in the sheet metals 45-degree angle lower body line. So I started trimming to size, driver side door graphic first. It took me all four driver side scrap door graphics to cut one out, 98% of how it should be. I still need to take a sliver off the rear most vertical line so it has the same gap/ paint reveal as the rest of the decals. I used paper to get the front and rear shape of the door correct and traced that on to the graphic before cutting/ test fitting to size. This panel took me close to 4 hours to get near dialed. Insane. Getting down to righting wrongs, it always bugged me how the factory handled the cab and bed corner on the Chief truck. They didn’t follow enough of the body shape and by doing so more paint was visible outside the graphic area than should have been. So, I cut how I felt it looked best, having more horizontal coverage. This one didn’t take nearly as long as the door – and the bed sides were God-sent by comparison. Simple lines, simple cuts. Step 1: Step 2: Step 3: Step 4: Finally got it: Will tackle the smaller band of stripes templates that are placed above these soon. Once I recover from these. And again, I realize I make it all harder than it needs to be. Jamb wrapped graphics would look just as good, but my crazy self prefers to lay these out in a way that I can sleep at night. Graphic Express and Phoenix Graphics do an amazing job on these. Couldn’t be building Chief’s 36 years later without them. Looks like a Chief is taking shape – and yes, there is a lower graphic panel that goes on the rocker. And here’s the inspiration behind it…from a Jeep calendar I got from Red Mistress. I can trace all the pain of this graphic cutting insanity back to him. 😊

-
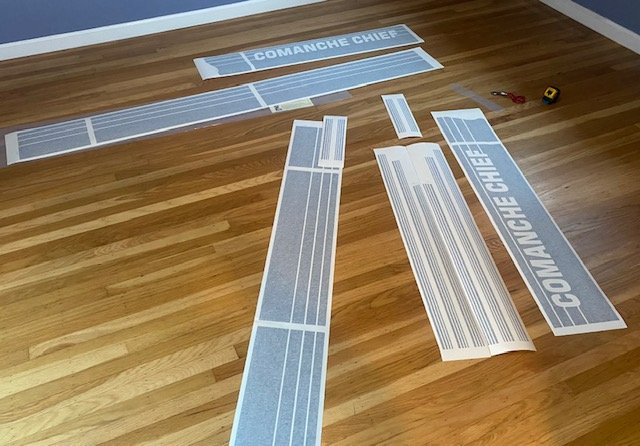
Unbagged the Chief decals and am beyond thrilled Graphics Express provided extended lengths of the body/ bed stripes so owners can trim where they feel is best. The only way to go. It’s going to be challenging getting the areas that need a little more attention right, specifically – door to rockers, cab and rear bed corners. I want to jambs and gaps proper also. Decided I’m going to start with paper templates in those areas for sanity to get everything dialed then trimmed prior to application. A 6’ cutting mat, metal ruler, and plethora of new x-acto blades are on the way.
-
My vote would be powder coating.
-
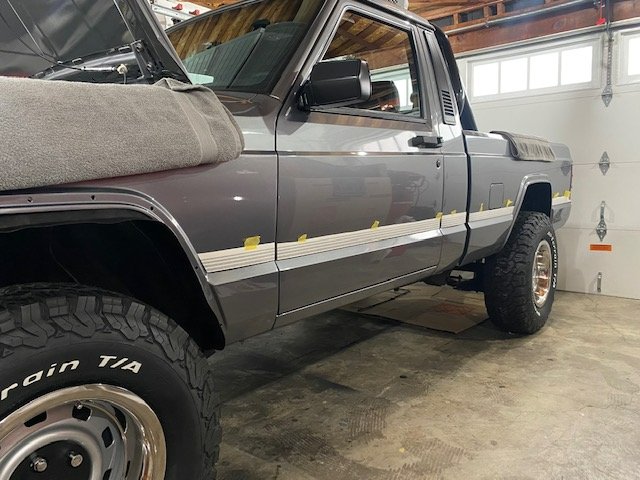
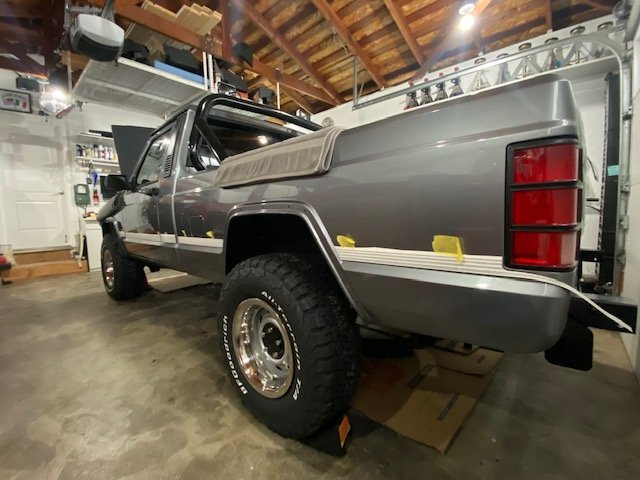
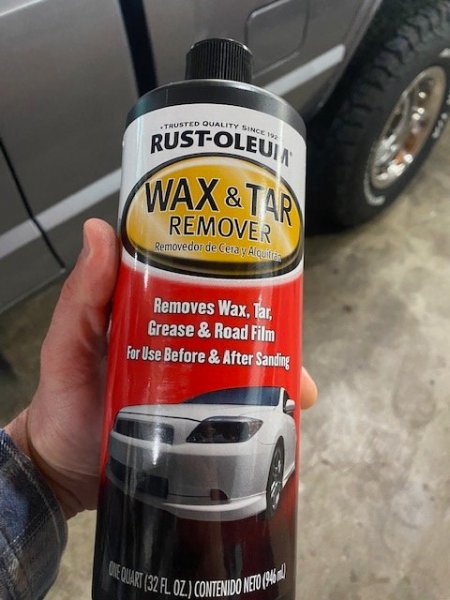
Many thanks! Currently taking a couple steps backward… Removing fender flares and degreasing paint where Chief decals will go. Never used a soy-based degreaser, but this stuff works great. Been studying up (watching YouTube videos) on laying graphics. First time doing it and want things to go well. The goal is to start next weekend.
-
True — also, Caddy and other GM luxury buzzers (the non-horrible sounding Jeep like buzzer noises) also fit our fuse box.