

relyt120
-
Posts
1004 -
Joined
-
Last visited
Content Type
Profiles
Forums
Gallery
Everything posted by relyt120
-
Diesel Jeep Comanche - $6500
relyt120 replied to Zebvance's topic in Craigslist/eBay... i.e. Not Your Stuff
pics and details please! -
Late Model Fenders ... Early Model Flares?
relyt120 replied to Rockfrog's topic in MJ Tech: Modification and Repairs
Should work, you will have to cut the though since the old flares are longer i the front. Use the old style brackets. -
not a fan of the rims or the system. Which seem to be why it cost so much. Nice truck but definitely too high if u don't like the speakers or rims.
-
Your MJ has gotten pretty dang nice looking recently. Its much less impressive in person. XD
-
Comanche Dually In Tx $2750
relyt120 replied to dancome433's topic in Craigslist/eBay... i.e. Not Your Stuff
88 with a v6 so rare! -
Got my remote start installation buttoned up with help from a few members in another thread. Remote start is working, wires are cleaned up, remote lock/unlock are working. I think that's a good day and a half right there! The module controls the locks with negative pulses out of two wires, I recently rewired my doors to work off of a bank of relays rather than using polarity reversing switches so i made sure they were triggered by ground so this guy would work :wrench:
-
:banana: remote start is working, wires are cleaned up, remote lock/unlock are working. I think thats a good day and a half right there! The module controls the locks with negative pulses out of two wires, i recently rewired my doors to work off of a bank of relays rather than using polarity reversing switches so i made sure they were triggered by ground so this guy would work :wrench:
-
Turns out the wire it wanted was the brown with black tracer. Got it working now, just got to tidy up the wiring :rock on: Thanks everyone.
-
I've looked through the manual and it looks like tach sensing and alt. sensing are options. I would like to do the alt sensing but i am having trouble finding the stator wire from the alt. the book describes it as: "The stator wire is found at the vehicles' alternator. Change your meter to DC before testing for the wire. A) At rest, with the iginition off, the stator wire should test 0v DC. B) Turn the ignition to run position. The stator wire should now test between 1-6v DC. C) Start the vehicle with the key. The stator wire should now test between 12-14vDC at idle." The alt has 3 wires. the big red one that goes to the battery through the starter relay, and two in a plug one yellow and one brown with black tracer. The red is obviously not it, the yellow gets 12v with the iginition in run position, and the brown with black tracer disappears into the harness and i don't want to cut it unless I know for sure that it is the stator. Anyone have any clue? Otherwise I may try the tach sensing mode, the reason i want to do the other is the tach mode requires programming. PS: Thank you all for your replies. I have tried several of the solutions suggested to no avail. I got the thing in diesel mode where it gives it 8 seconds before cranking. Have recently cleaned IAC and TB. I am afraid of the delay relay because it tries again and it may end up grinding or screwing up my starter Also i live and die by Cruiser's tips :bowdown:
-
Decided to install the remote start module I got for my birthday like 2 years ago and it seems to be working BUT my 89 4.0l auto truck takes so long to start that it times out without getting going. It tries 3 times increasing the crank time each time and even the longest pulse doesn't do the trick. Does anyone have any tips for getting the renix crank time down to 2 seconds? :rotf:
-
:rotf: "if you liked it, then you should have put a lid on it"
-
Empty Post
-
try providing an additional ground to the lower dash ground on the driver side. See cruisers renix tips.
-
that would have been nice! These zip ties were bought at a surplus store and now I know why they had so many...they suuuucckkk! Break really easily and don't always lock in place, never again.
-
Out with the old In with the new found a good way to supplement the factory zip ties
-
every day of the week , make sure its the right one for your truck (swb, lwb)
-
Simply post the IMG tag from photobucket to make images viewable.
-
this is going to be sick
-
Do you have seating in there??
-
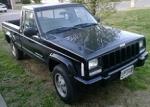
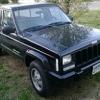
Picked up a little treat for this guy :yes: Have never been a huge fan of these but I think its going to look good. Also i have a set of a pillar lamp mounting brackets I picked up off of craigslist a while back. Once I get them mounted and the grill guard with lights this guy will light up the night.
-
the hoods are the same so you don't really need to replace it unless your hood is just jacked up.
-
I may have what you want but shipping cost may be prohibitive.
-
I just picked up and installed the kit from the dealer and it still leaks...and now I have screwed up the return line oring so its leaking too :doh: Leaking from the fuel rail side. I had picked up a few spare injectors from the JY to replace a mismatch from the previous owner and I know at one point they were the ones leaking but that was before the new orings and now I can't tell them from the originals :dunno: I think I might try to find a replacement fuel rail. Any thoughts?
-
Comanche Tail Lights Nightmare
relyt120 replied to drcomanche's topic in MJ Tech: Modification and Repairs
only way you're going to get a new harness is to make one, or by some stroke of luck come across a NOS one at a dealer or online, but I wouldn't hold my breath on that. -
So the injectors on one of my trucks have always leaked a little from the previous owner. Finally got tried of the fuel smell in cab so decided to change the o-rings. Looked in the Haynes manual and it says the kit should include 7 brown and 6 black o rings (or the other way around) With the brown going on the tip and the black going on the rail side. It very explicitly states that they are not interchangeable and designed for different purposes. I track down the mopar part no from a diagram online 8503637. All seems correct. Find a dealer who says they have it. Drive 25 miles out to get it and the plastic has 12 black o rings!? With a hole in the bag. I'm assuming one fell out... My question is will these black ones work for both ends of the injector despite the manual? Anyone use these?