
Gojira94
-
Posts
677 -
Joined
-
Last visited
Content Type
Profiles
Forums
Gallery
Everything posted by Gojira94
-
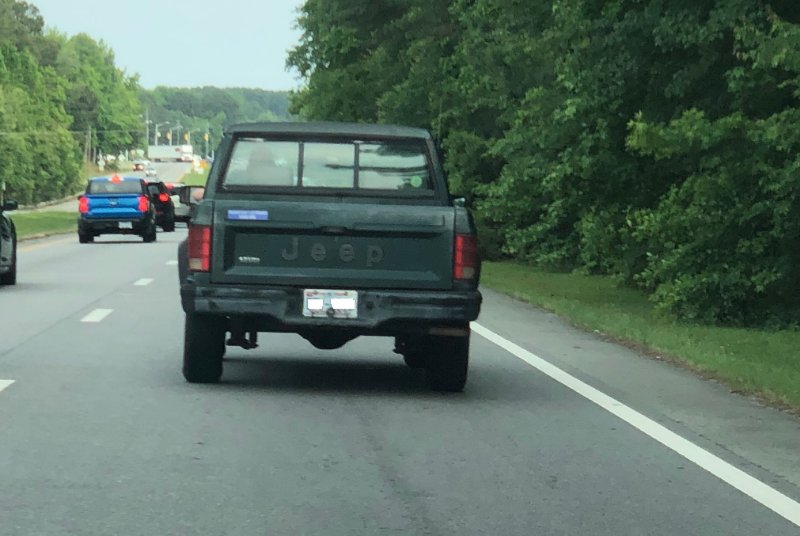
I spotted this one on the way from job #1 to job #2 last week. First one I've seen on the road in as long as I can remember. Only other one I've ever seen is sometimes parked at a commercial address on Hwy 58 about 8 miles east of Kinston, NC. I got next to him at the next light (long light) and chatted him up, all but begged him to come here and add it to the registry. He has a couple early 90s XJs as well. I guessed 91 or 92 because of the badge on the gate. He said it's a 92, but the PO added the HO badge, and it's a 2.5 manual, think he said 2WD, not sure. Straight body with factory rear bumper, unmolested body, no lift, factory steel wheels. Great survivor, don't recall ever seeing this color, perhaps not a factory color.
-
I've heard that one in reverse - with a porcupine, the pricks are on the outside. This one's not a car, but a corollary to the 'BMW vs porcupine': The difference between wingtips and cowboy boots? With cowboy boots, the bull$#!&'s on the outside.
-

87 COMANCHE 2.5L Tbi replacement
Gojira94 replied to Kikapoo's topic in MJ Tech: Modification and Repairs
Definitely. Several years ago I got a pair of rebuilt 80pph for my C1500. Running them vacuum referenced at 109pph@23psi WOT/16psi idle. Very nice conical spray pattern with the Rochesters. -
87 COMANCHE 2.5L Tbi replacement
Gojira94 replied to Kikapoo's topic in MJ Tech: Modification and Repairs
I admittedly haven't looked up the specs on the factory 2.5 injector and don't know the operating pressure but here's a really good resource: http://www.gearhead-efi.com/Fuel-Injection/showthread.php?81-GM-TBI-Injector-size-color-and-part-numbers Important to remember that the GM injectors ran at 12-13psi, except for the 94-95 454s which ran smaller ones at higher pressure. 242ci x .667 = 161.414ci (2.5l displacement in c.i.) Chevy 305ci / 2 = 152.5ci (similar displacement, 305 has 2x 54#/hr injectors) if fuel pressure is in the same ballpark, 12-15psi then yeah. -
86 2.5 Heated Intake
Gojira94 replied to TheDirtyJeep401's topic in MJ Tech: Modification and Repairs
GM had a butterfly 'pre-choke' of sorts on their thermostatic air cleaners ("Thermac"). The stove pipe warmed the valve, which closes partially in the snorkel section of the air cleaner when it's particularly cold. As the engine warmed up, the valve would close, removing the air restriction + warmer radiant heat from the exhaust manifold, that aided in very cold starts. Last used on the GM TBI trucks in '95. -
86 2.5 Heated Intake
Gojira94 replied to TheDirtyJeep401's topic in MJ Tech: Modification and Repairs
SBC example- a very small number of very early (1950s) SBC heads had a center water crossover, but the vast majority just carry heat from the lifter valley through a dry center port, or even just radiant heat from the intake face of the center of the head. Prevents carb icing. Mainly an issue above the 45th parallel... Most SBC manifolds for both 'early' and 'late' heads still retain the crossover, including the TBI engines from 87-95. Separate and distinct from any EGR provision on a SBC intake.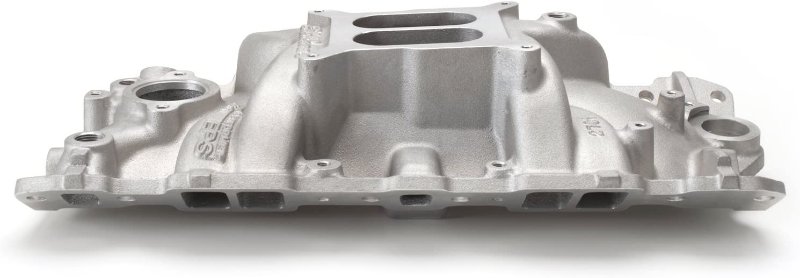
-
Looks like a '68 Satellite in the background of the Firebird pic...
-
The bellhousing would be $45 + tax + $2-3 environmental fee. I may take the shift tower and stick if it's still there this weekend. I could drop the trans on a 2WD truck without too much effort (famous last words). Couple of ratchet straps under it and long extensions to get to the bellhousing bolts. They're wanting $284 + tax (includes $30 core charge) + env fee for a manual trans. If it was a T56 in question, hells yeah for that price, even though I don't need a T56 or an AX-15 right now.
-
Dropping a Tank (What you don't see on YouTube)
Gojira94 replied to NC Tom's topic in MJ Tech: Modification and Repairs
I guess the first thing is whether the fuel pump is turning on and getting enough voltage. if you unplug the pump connector, set your meter for DC volts and probe the harness side with key on, see what you get. If it's a lot lower than what your battery reads between +/- posts, disconnect the ballast resistor and jump across it with wire instead and see if the voltage at the harness side of the pump changes to what your battery voltage is, or close to it. (That's task 1) -
Dropping a Tank (What you don't see on YouTube)
Gojira94 replied to NC Tom's topic in MJ Tech: Modification and Repairs
Do you have a decent multimeter that can measure ohms of resistance? The ballast resistor has a spec on it on the ceramic body if I recall correctly. If it’s way higher than spec it’ll only let the pump have a little voltage, not enough. But that’s problem 1. Problem 2 is apparent lack of spark. If you pull the coil wire off the dizzy and have an assistant crank it while you hold the wire against the head, do you see spark? If not go upstream and check the coil’s primary and secondary windings resistance. I can pull those specs and how to test from another post in the “things you’d share” thread. If the coil is good, the module is not easy to bench test, still looking for a way to get that. You can see if there’s 5V between its reference voltage signal from the ECU and its ground. If you do have good spark at the coil wire, distributor sync may be part of the issue. Re-indexing the dizzy couldn’t hurt, and I’m sure someone can chime in with info on testing the dizzy sync module itself. And proper testing/ adjustment of the CPS is always good to eliminate. And triple check the fuel pump ground lol… -
Dropping a Tank (What you don't see on YouTube)
Gojira94 replied to NC Tom's topic in MJ Tech: Modification and Repairs
You might want to step back for a minute and make a troubleshooting chart through fuel and spark. I don't have a stock pre-1991 rail to look at but if yours has a Schrader valve go ahead and see if you get fuel to the raIl and what the pressure is. Double check fuel pump ground, fuel pump ballast resistor, relay, etc. if not. See if you get spark from the coil wire during cranking. If you have good fuel pressure and spark but still no start- get going through the sensors testing guides on this site and Cruiser 54's site. At the very least so far, you've discovered and corrected an unsafe fuel condition you didn't know about beforehand. You'll get it! -
Dropping a Tank (What you don't see on YouTube)
Gojira94 replied to NC Tom's topic in MJ Tech: Modification and Repairs
Upside down pic, but here's mine. It's not in the corner, now that I'm looking at it, my bad. That raised hole should be there, though some aftermarket tanks may not have it, I suppose.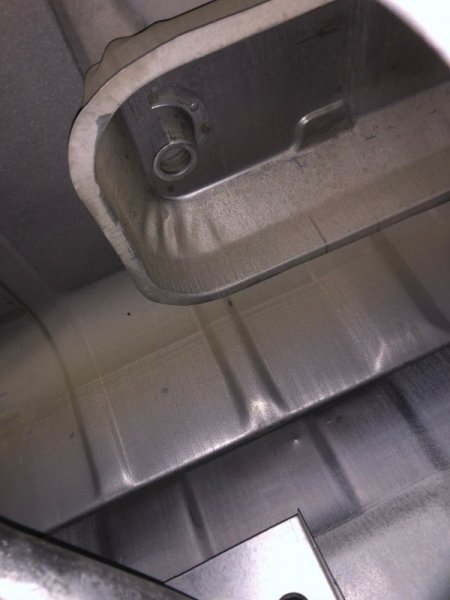
-
I have no use for any of it, except maybe the headrest-equipped bench seat, but this showed up at the LKQ near me. 2.5l engine with AX-15... *E1: Cloth Bench Seat; -D5: MEDIUM QUARTZ; 167: Zone 67-Charlotte; 1AA: U.S. Dealer Retail; 21B: Customer Preferred Package 21B; 2TB: Customer Preferred Package 2TB; 3VD: Customer Preferred Discount; 44H: T-300/AN Allocation Tracking; 4RT: Southern Discount Promotion; 4XH: Power Windows Bypass; 634: North Carolina State ; 934: North Carolina State ; AGG: DO NOT USE - SE application; APA: Monotone Paint; BAU: 117 Amp Alternator; BCE: 600 Amp Maintenance Free Battery; BGJ: Pwr Disc/Drum Rr Anti-Lock Brakes; BKE: 9x2.5 HD Rear Drum Brakes; CBA: Straight Back Bench Seat; CBW: Highline Door Trim Panel; CDE: DO NOT USE - See JWF in C6 Class; CGT: Driver Air Bag Only; CKE: Front Seat Area Carpet; DBB: All Manual Transmissions; DDQ: 5-Speed Manual Transmission; DMD: 3.55 Rear Axle Ratio; DRA: Corporate 8.25 Rear Axle; EAA: All Engines; EPE: Engine - 2.5L Power Tech I-4 Cyl.; GAC: Tinted Glass Windows; GBB: Tinted Windshield Glass; GCB: Front Door Tinted Glass; GNA: Rear View Day/Night Mirror; GRU: Left Manual Mirror; GSU: Right Manual Mirror; GTU: Open; GVA: All Vehicles W/O Power Mirrors; HAA: Air Conditioning; JAZ: DO NOT USE - See JP, KA classes; JCK: 110 MPH Primary Speedometer; JHA: Var Intermittent Windshield Wipers; JJA: Cigar Lighter; JKA: Locking Glove Box; KKE: No Description Available; KSE: GOLD METALLIC - DIMENSIONAL GRAPHIC; KTX: STRIPE/BADGE/MOLDING/COLOR; LAP: Shift Indicator Warning Lamp; LMB: Halogen Headlamps; LPS: CHMSL Lamp; MBA: Painted Front Bumper; MBD: Argent Rear Bumper; MDA: Front License Plate Bracket; MFN: Grille-Body Color; MHA: Black Windshield Moldings; NAA: Federal Emissions; NBK: EVAP Control System; NFS: 15.3 Gallon Fuel Tank; PR4: Flame Red Clear Coat; QR4: Flame Red Clear Coat; RAA: All Radio Equipped Vehicles; RAS: AM/FM Cassette Radio; RCD: 4 Speakers; RDD: Fixed Long Mast Antenna; SBA: Power Rack and Pinion Steering; SCD: Luxury Steering Wheel; SFA: Standard Duty Shock Absorbers; SGA: Rear Shock Absorbers; TBB: Full Size Spare Tire; TBM: Tire Carrier Winch; TME: 215/65R16 LBL All Season Tires; TZA: Goodyear Brand Tires; WJT: 15X6.0 Aluminum Wheels; WLZ: All Aluminum Wheels; XBS: Pickup Box; YAA: Build To U.S. Mkt. Specifications; YGE: 5 Additional Gallons of Gas; Z1A: GVW/Payload Rating; ZAC: Spring - Left Front; ZDR: Spring - Left Rear; ZNB: Spring - Right Front; ZSR: Spring - Right Rear
-
Dropping a Tank (What you don't see on YouTube)
Gojira94 replied to NC Tom's topic in MJ Tech: Modification and Repairs
Facing the hole in the tank, the float goes to the left in the ‘basin’ in the bottom of the tank and the rubber foot on the return pipe goes in the hole at the right corner of that basin. Shine a light in one vent hole and eyeball it through the other to get it seated. A very light smear of Vaseline on the o-ring and back side of the lock ring helps get that seated once the sending unit is in place. -
Dropping a Tank (What you don't see on YouTube)
Gojira94 replied to NC Tom's topic in MJ Tech: Modification and Repairs
because regular ‘fuel line’ is only good for low pressure fuel delivery < 20psi and our trucks make 39psi. FI hose is rated for a lot higher than our pressure but better safe than leaky. -
Dropping a Tank (What you don't see on YouTube)
Gojira94 replied to NC Tom's topic in MJ Tech: Modification and Repairs
The rollover valves serve 2 functions: 1) they prevent fuel flow out of the tank into the evaporative emission lines and toward the engine in the event of a vehicle rollover; 2) their 'normal' job to allow fuel vapors to get to the canister when the fuel temperature rises and the fuel vapor content of the tank needs a place to go. The valves aren't expensive and Dorman makes a replacement. Mine were ok after 35 years. I cleaned them off and blew them out gently. Flipped them upside down and blew through them and no flow. The grommets are not hard to find either. 7/32" emissions hose (1 bar rating) is what you want to replace the lines. Available at most parts stores by the foot. You won't need clamps on the lines to the valves, they're not going to go anywhere. You'll notice on the tank there is a recess around both valves. You can run new lines, the idea is to route them away from the tank in a way they don't get pinched with the tank secured. The front one can go toward the outboard side of the vehicle and come around the front of the tank. The rear one can drop inboard toward the driveshaft and then forward from there. Use a T junction to join both lines into one. Then the single line from the two joins the fuel feed and return lines' routing. There is a small plastic loop attached to the bottom of the bed from the factory that holds that line secure just above the front strap hole. That may be gone, just zip tie the line somewhere secure and up away from harm. Filler hoses are hard to find but it seems XJ hoses can be modified to serve the purpose. Dorman also makes the straps - Dorman 578-054, about $40-$45 on Amazon, etc. The j-bolts probably will clean up. I went to town with a wire brush on my filler neck, taped over the ends and hit it with engine enamel and then baked it with a heat gun to preserve it. 18 gallon tanks are easy to find, I think you already know about the MTS pump/sending units if you need one of those. Lock ring/ o-ring kit is same as GM stuff. If you replace the soft fuel lines from tank to hard lines, get fuel injection hose and use fuel injection clamps, not worm clamps, obviously. Sorry I'm not closer, I'd be happy to come help if I was! -
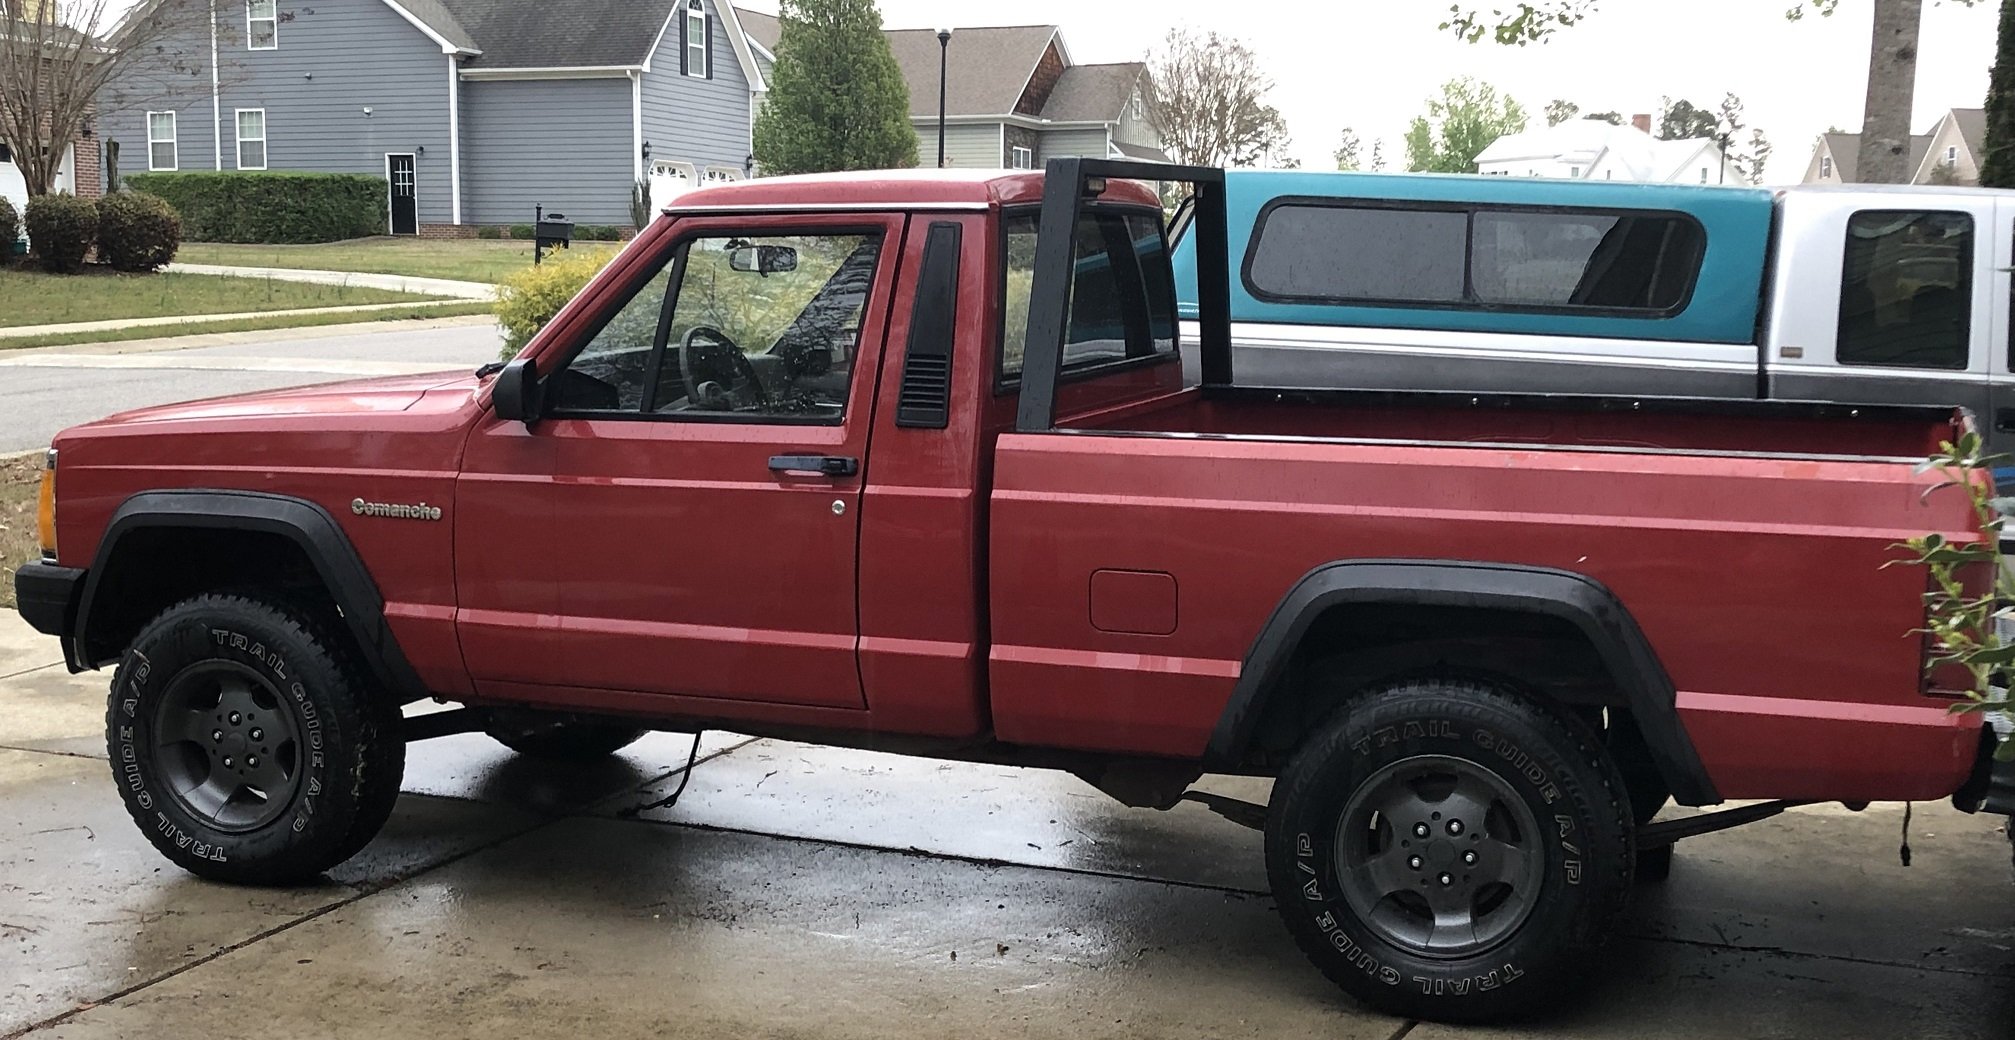
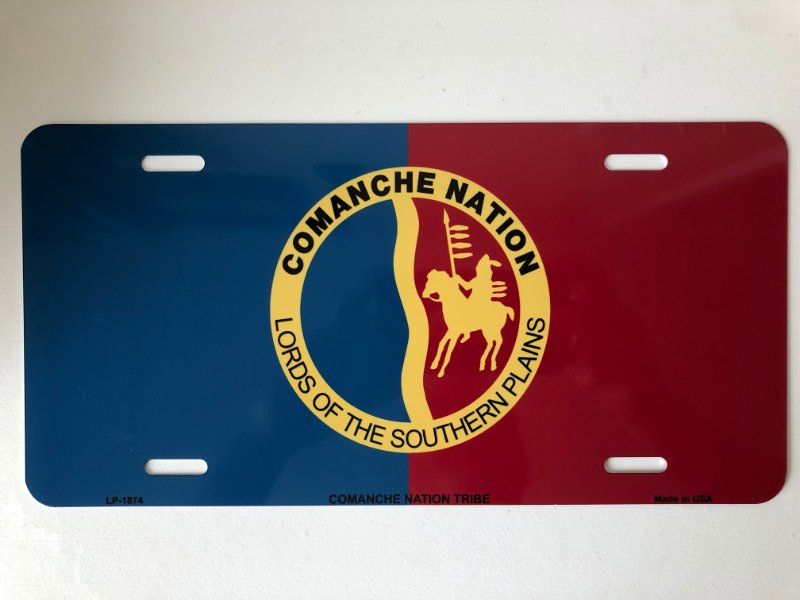
Since I'm not installing a winch (at least for now), I wanted some kind of plate to put on the front bumper. Front tags aren't issued/ required here in NC, so we can put whatever we want on the front. I looked for something with the AMC and/ or Comanche logo but kinda came up dry in that regard. Then I saw this plate and thought "why not?" Before anybody says 'cultural appropriation' let me say this- AMC, Daimler/Chrysler have borrowed the names of 2 Nations and never thought to pay a dime to either; it wasn't in the national consciousness then. I think it's entirely appropriate to give a nod to the people whose name was borrowed to give the MJ a name badge. It is what it is with these vehicles, we can't go back and pretend the SJ/XJ/KJ/KK/KL/MJ/ZJ/WJ/WK/WL are called something else, but sometimes a simple acknowledgement, at least, is called for. If when my rig becomes conversation-worthy, as these vehicles inevitably are, I wouldn't mind if someone thinks for a moment of the Comanche Nation and wonders how they're doing today. My mom's side has Cherokee (and African) in it, not uncommon in the southeast US. I'm not calling for any measures you see discussed in the news these days, but it might be nice for the Daimler automotive group to move on to other names for the remaining 2 platforms. I'm not choosing people vs. automobiles, I'm embracing both.
-
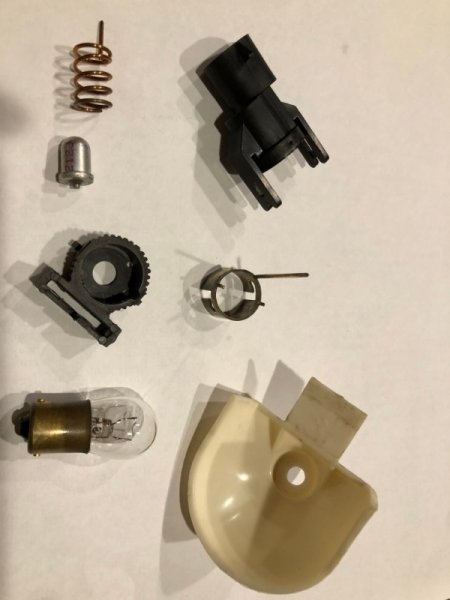
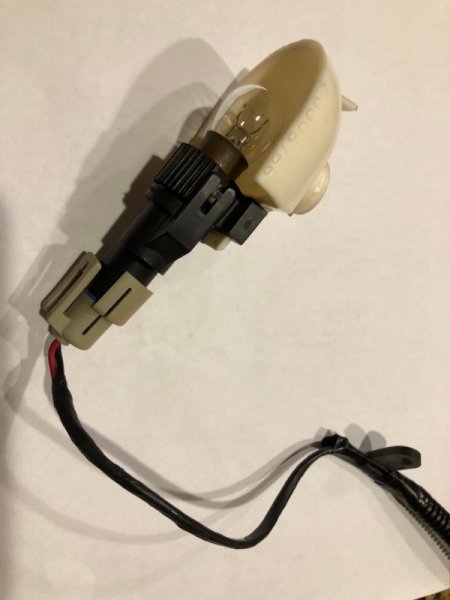
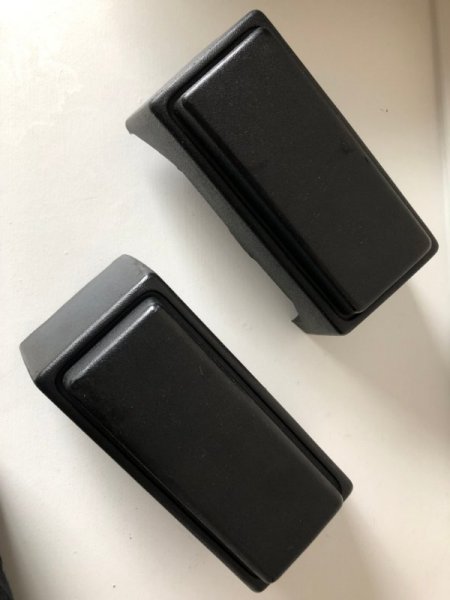
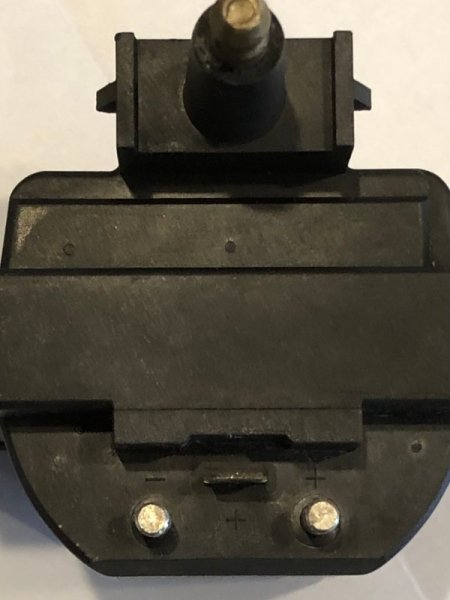
Finally had another XJ show up in the local yard last week. I scored a pair of bumper guards for $20- not perfect but very decent condition and cleaned up nicely. New ones are > $50/pair. I'm in a transient period of limited funding for this project so I'm picking off inexpensive odds and ends and doing mostly labor tasks for now. Also grabbed the underhood light. It's the 2-wire later version. I'll either ground it on the underside of the hood next to the light like early ones or ground it at the fender wall with the relocated blower motor ground. It has a mercury switch in it. I broke it all the way down to clean and test, and then reassembled it.
-
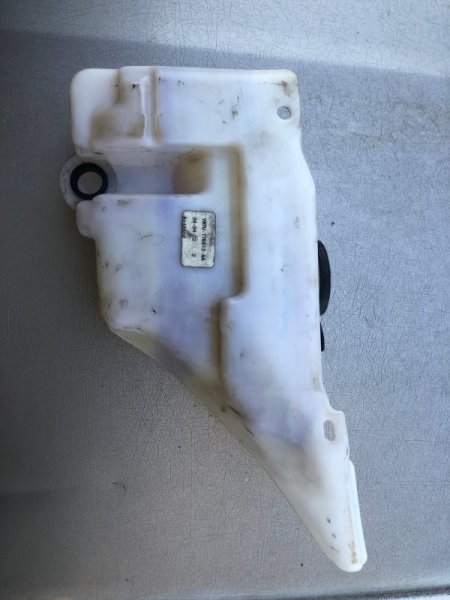
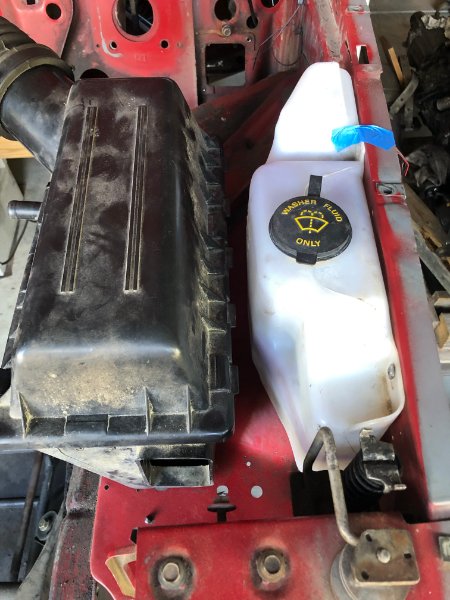
Experimental options for washer tank
Gojira94 replied to Gojira94's topic in MJ Tech: DIY Projects and Write-Ups
I might have, but the only XJ (98) I'd seen in the local yard in ages had a broken tank, and I wanted to explore other options available while I was there. -
Ignition coil resistance test and specs: Primary winding test is ohms resistance between the bottom 2 round posts. Secondary winding test is ohms resistance between either bottom round post and coil output (top). 87-90 2.5l and 4.0l both use the same coil (and ICM, btw). The 1990 FSM, on p.8D-17 states: primary should be 0.4 - 0.8 ohms secondary should be 2500 - 4000 ohms. On an auto-ranging digital multimeter like my Fluke 87, secondary will read as 2.5 - 4.0 k (thousand) ohms. Non auto-ranging meters will need to be set to k ohms range for secondary, 0 - 40/ 0 - 400 ohms for primary. My coil in the pic above tested 0.9 - 1.0 ohms primary, 5.68 k ohms secondary, too much in both windings (NFG). Testing the ICM is difficult without the factory DRB II. About all you can do is verify reference 5V ECU voltage going to it, and its ground. If I find more helpful info on testing the ICM, I'll update this post.
-
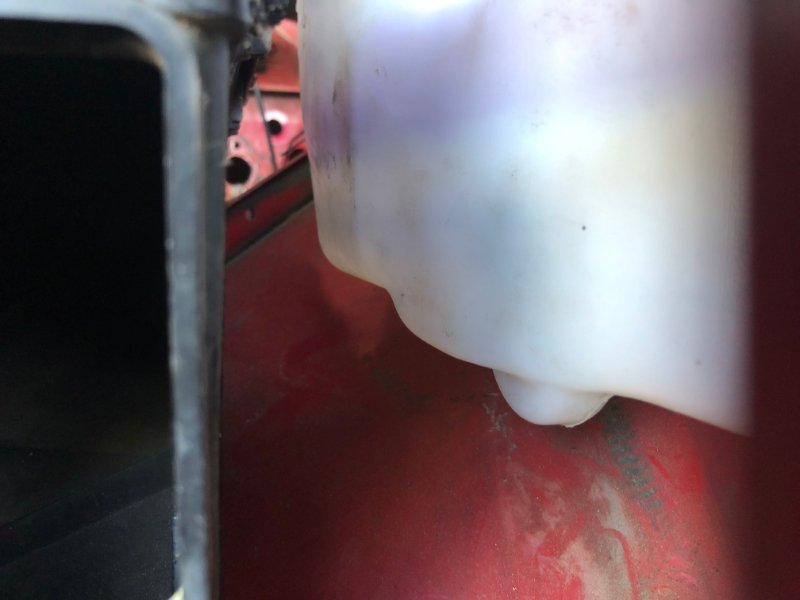
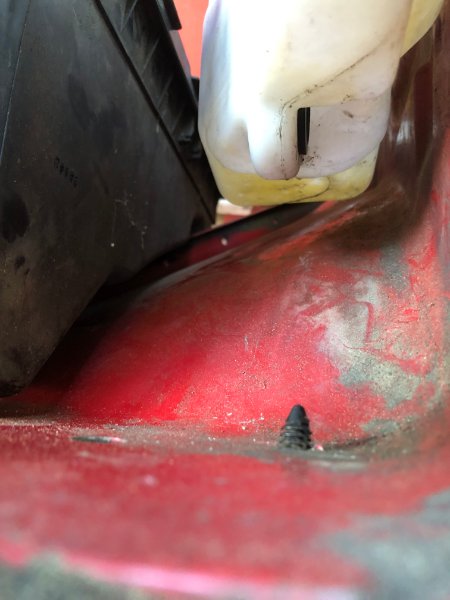
Experimental options for washer tank
Gojira94 replied to Gojira94's topic in MJ Tech: DIY Projects and Write-Ups
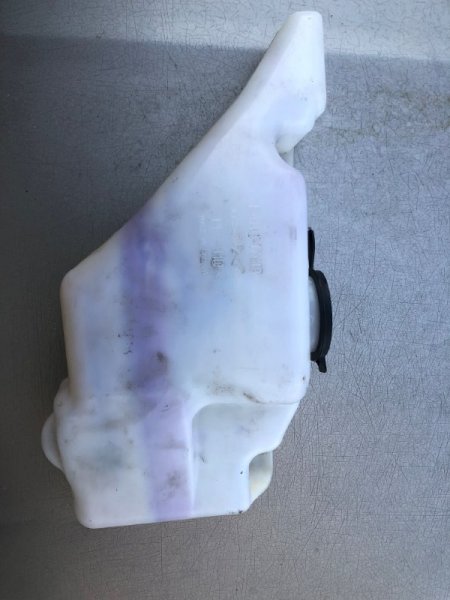
Pics of the tank: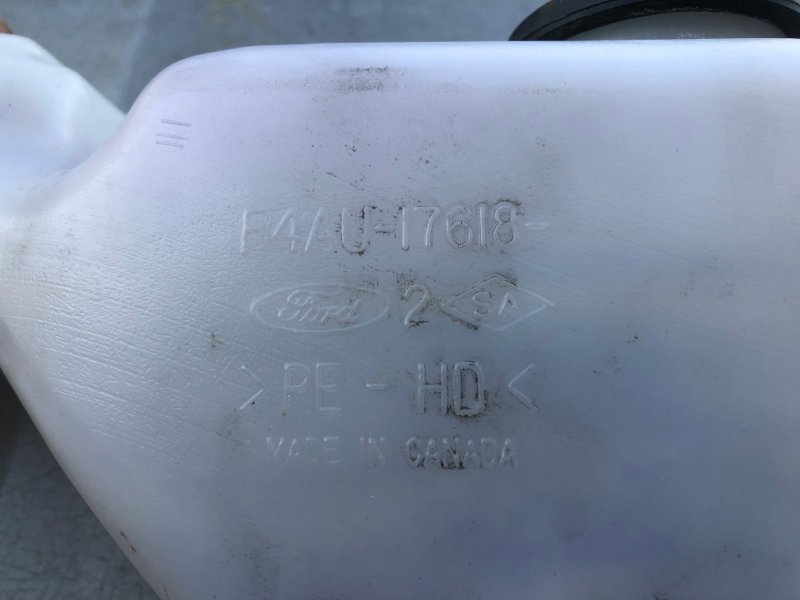
-
Since I've done the 96 XJ brake booster upgrade, I wanted to explore options for the washer tank, other than moving the old tank forward or going with the later style inside the fender. I started looking at the late 80s - early 90s Dodge Dakota, ZJ, WJ and nothing I thought to look at fit the bill. Then I stumbled across a 2002 Crown Vic/ Mercury Grand Marquis. The fit is almost as perfect as could be asked for. The downsides: 1) the wiring and washer fluid line will have to be extended; 2) the fuel pump ballast resistor will have to be relocated, probably to the area where the old tank was; 3) electric fan and fog lamps relay mounting points need to move; 4) EGR purge solenoid would have to move. My rig never had options for issue #3, I was going to put those somewhere else anyway. I'm deleting #4 due to the fact that I'm missing everything except that solenoid and it was for a 2.5l engine anyway (may be the same, don't know/care). There's plenty of room for the front lighting and engine harness to pass between the bottle and the air cleaner, more than you can tell by the pics below. The air box in the pics is from a 96 XJ that had the short inlet aperture and a block off plate in front of it. I'll be adding a hole to the back of the lid to accept the canister purge line when it all goes back together.
-
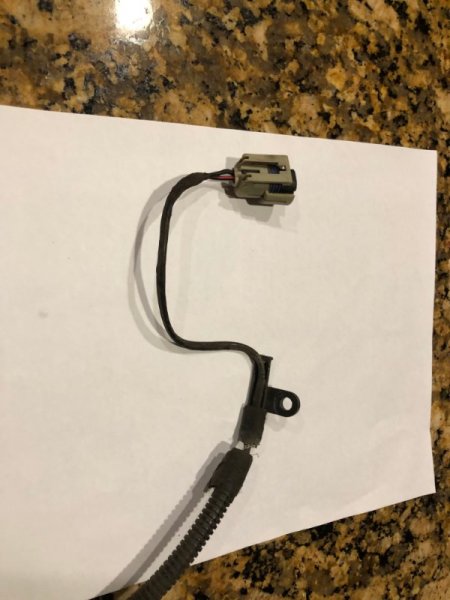
1st one is C115, all having to do with auto trans control. Tape it up out of the way. I ran into this one early on when I bought my rig. Second one I've seen but can't recall what it is. C115 BLK/YEL pin H - TCU fuse to auto trans gear selector switch and power/comfort switch TAN pin J - power input signal between TCU and power/comfort switch LT BLU w/TR pin K - power/comfort switch ground from G102
-
Cold Start Up Loop Fault Lean Code on REM
Gojira94 replied to oleskool's topic in MJ Tech: Modification and Repairs
I gotta get my rig running so I can quit talking and guessing about these problems and start enjoying them myself. -
Cold Start Up Loop Fault Lean Code on REM
Gojira94 replied to oleskool's topic in MJ Tech: Modification and Repairs
Heater circuits do indeed burn out but I don't think that's going to be your problem. For an 89 3-wire sensor I want to say red and black are the heater and grey is the 0-5V signal. I think the 89 electrical manual is around here somewhere, but should be the same as 88 & 87 and I know I've seen those manuals here. Cold weather and injector faults at cold start - not to send you down a rabbit hole, but it suggests to me a slim possibility of moisture in the fuel, especially if you're running any ethanol blend these days. Not to rant (again) about wishing to see the contents of the factory Renix calibrations, but I'd like to see if there is a cold start enrichment and corresponding stall saver IAC routine in there. IAC, TPS closed throttle, and idle screw relationship can jerk that cold start routine around if they're out of sync. The fact that your problem goes away when warm would suggest to me it's not sensors, since those would be out of the equation before closed loop. I have an IAC tester for the old GM pintle style IACs but you can test it manually with a lawn tractor battery and a couple 14 gauge wires. You can run the pintle off the gear with the GM IACs of old, not sure about our Renix system IACs. Wouldn't hurt to just pull it and clean it with electronics cleaner to be on the safe side, make sure it isn't trying to move and getting stuck from buildup that acts worse when cold.