


NC Tom
-
Posts
760 -
Joined
-
Last visited



NC Tom's Achievements
Comanche Addict (5/11)
-
Interesting.
-
I'll try that.
-
I know. I ran out and need to get some more sealer for that.
-
Oh no. Not that! Guess I'll check the "How-to" section.
-
Oh boy. That sounds fun.
-
I sealed that from the exterior. I guess I need to crawl up under the dash.
-

Powdered Comanche? Yes, please!
NC Tom replied to NC Tom's topic in MJ Tech: Modification and Repairs
Good to know. Finding those areas on the firewall is not a task I look forward to. -
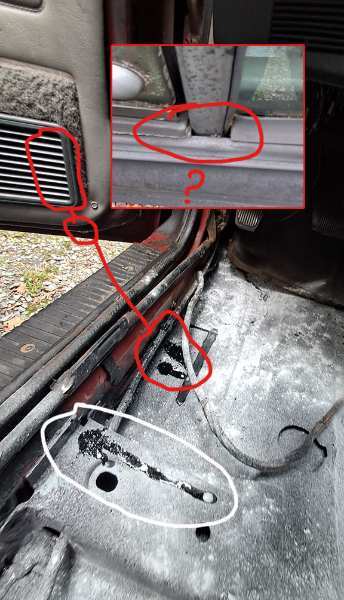
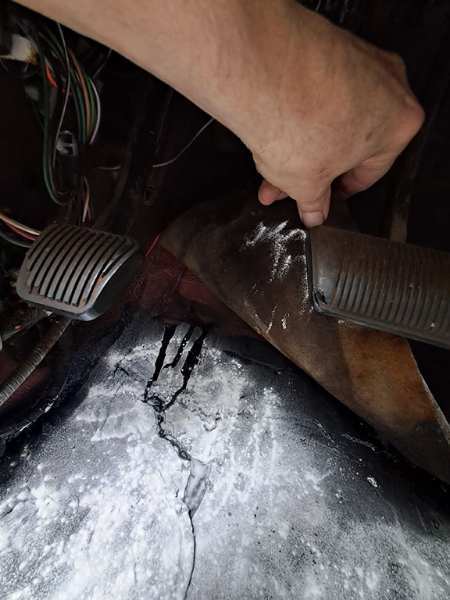
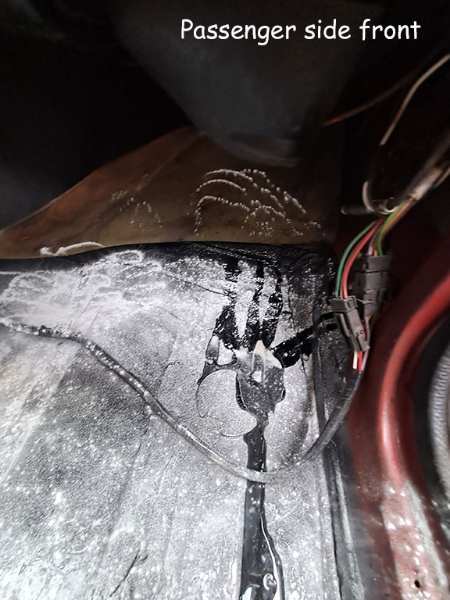
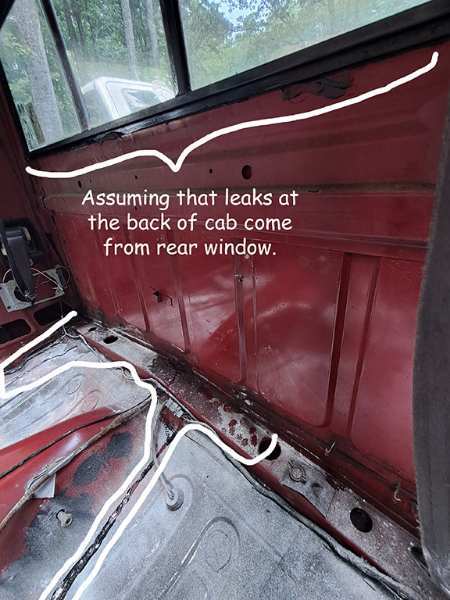
The baby powder trick worked great!!! Now I need to pinpoint the leaks for repair. Driver side had one up under the foam pad behind the pedals. It's likely coming from the firewall, correct? Also, Driver side had water on the door speaker grill as well as the floor. There is a small gap between the vent and main windows. Maybe leak is there? Last leak on driver side I think is coming in from the top of the door frame. don't know if the seal is bad or the door frame is bent or both. Water will come in through there if run through a car wash. The passenger side leak is also firewall, I think. Before the rain came through, I took off the antenna and coated the plastic parts with flex seal. Thinking that and potential leaks from there would be solved. Then there is the back window. Are the seals around the window the only areas water will leak? Is that repaired only with a new gasket?
-
Powdered Comanche? Yes, please!
NC Tom replied to NC Tom's topic in MJ Tech: Modification and Repairs
Well, everybody has opinions on how to do this. I read a lot, because the largest hole was fist-sized, welding was not really needed. I wire brushed the interior, coated the areas needed with KBS Rust Seal, as it's a chemical match to POR15 only cheaper. Let all that stuff dry and then used a metal Bondo patch with Bondo filler to repair the "big" hole. Small holes, pin holes, etc., just got Bondo. I used the KBS liberally, inside and out to help encapsulate the rust. I would have preferred to just get new pans welded in. My budget doesn't allow that and I didn't want to keep driving it as it was, so I did what I did. The Flex Seal was applied on top of the KBS and Bondo and some other rubber areas. Not against metal. It's not perfect, however, it will easily last for as long as I own her. -
Powdered Comanche? Yes, please!
NC Tom replied to NC Tom's topic in MJ Tech: Modification and Repairs
That's what I expect. I did go around with a brush and some flex seal to address tight areas like inside the rear windshield, vent windows and the antenna. Guess I'll know something Monday. -
I'm the first admit that I am slow to finish a project. I had an art teacher in high school named Mabel Bullock. Mrs. Bullock once described me thusly: "Tommy, you are slower than molasses in the winter time!" I can't disagree. However, ADD had not been labeled in the 80's and I was definitely a distracted kid. I mentioned this because I post project updates sporadically, or not at all. I am trying to do better because the feedback here is usually valuable and many of you are just flat-out Comanche nerds and like seeing what others are doing. So, I have been following the guides and comments about floor pan repair. Mine weren't too bad. I've cleaned, coated and Bondo-ed the holes. I sprinkled baby powder this morning because we're expecting rain tomorrow. I'm really interested to see how well the Magical Powdered Comanche can magically reveal the leak locations!!! I'm kidding. I know how it works. It's just a clever idea.
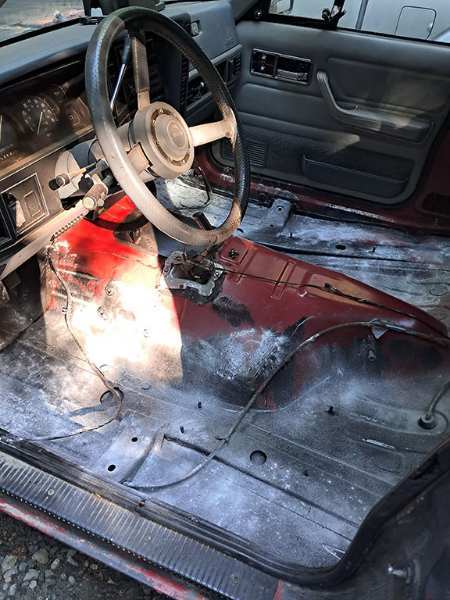
-
I FINALLY got around to pulling back the carpet and removing the headliner! The good news is that there is only one fist-sized hole to patch. The bad news is there was a considerable amount of wetness all around. I do like that clean, red transmission hump! Any suggested options for patching that hole. I would assume welding, but I don't know if there are other options due to the size. And check the image of those oversized maxi pads. Are those stock? They are soaked like a sponge!
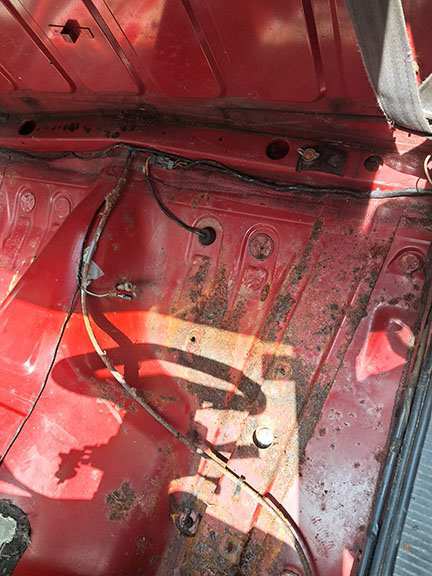
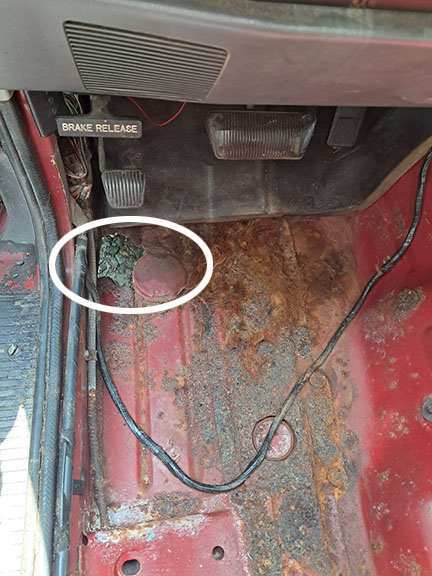
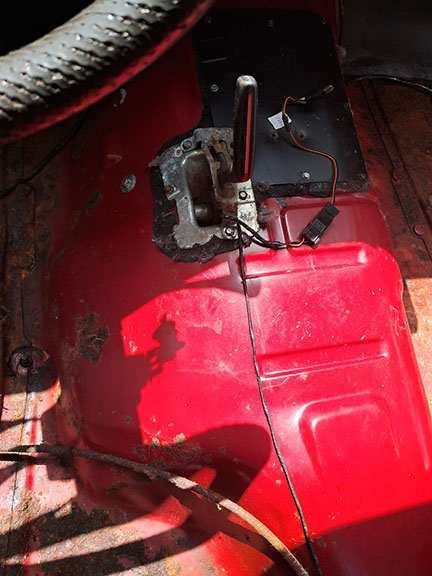
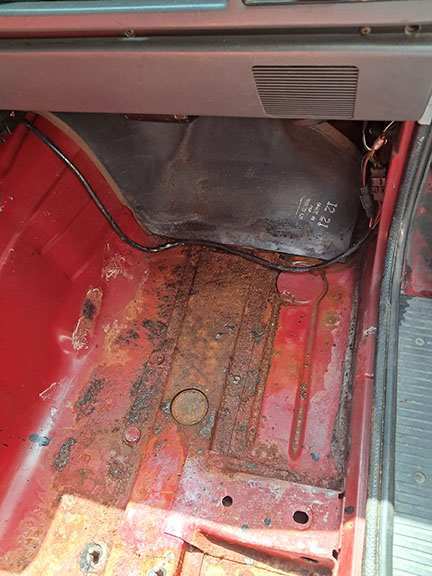
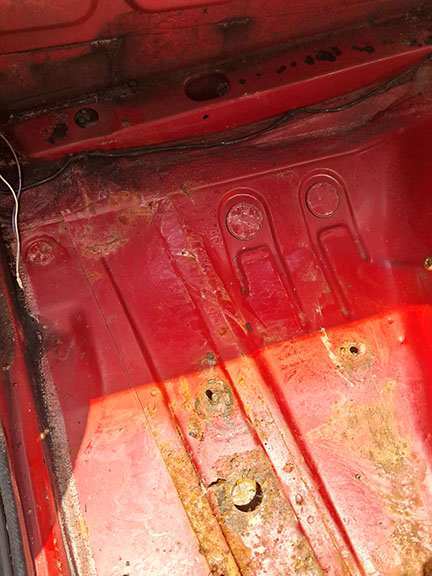
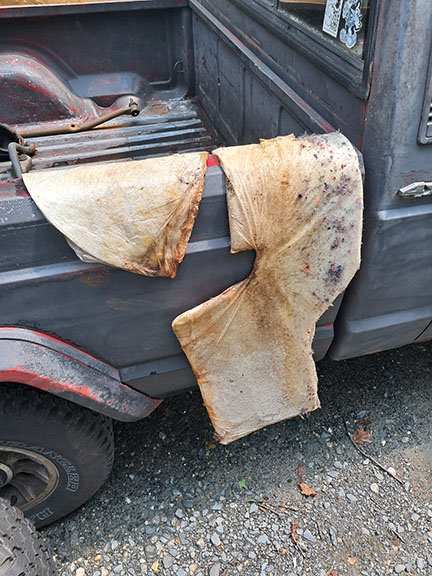
-
Another Starting issue thread, oh boy!
NC Tom replied to NC Tom's topic in MJ Tech: Modification and Repairs
Assuming that I did this correctly, continuity is there. I put the red probe on starter and used black probe to check all the connections on the relay. -
Another Starting issue thread, oh boy!
NC Tom replied to NC Tom's topic in MJ Tech: Modification and Repairs
I just removed and cleaned the cables and connections. They weren't too bad to start. Still no full start after the cleaning. I added the jump box back in and it eventually caught, but it took several tries. I checked all the reading from the REM while at idle ans the only one that was off is the TPS reading at 12 and not 17. -
Another Starting issue thread, oh boy!
NC Tom replied to NC Tom's topic in MJ Tech: Modification and Repairs
At the batt are solid. I'll have to get in there to check the others.