
Gojira94
-
Posts
677 -
Joined
-
Last visited
Content Type
Profiles
Forums
Gallery
Everything posted by Gojira94
-
Ok, wait a sec... 6.75" +/- .5" stock height for 2WD, 7.75" +/- .5" for 4WD? Taller coil and leaf springs on a 4WD? Parts catalog shows a staggering 38 different springs. Headed to tech section to ask...
-
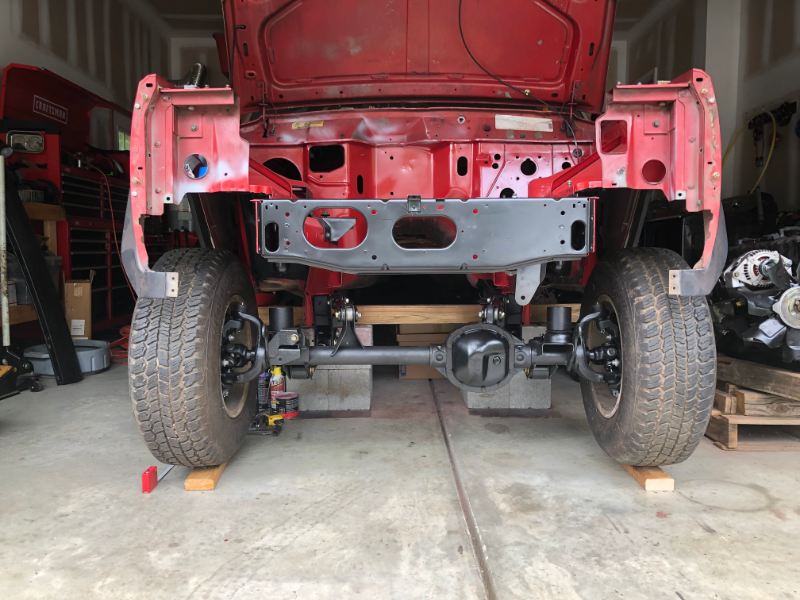
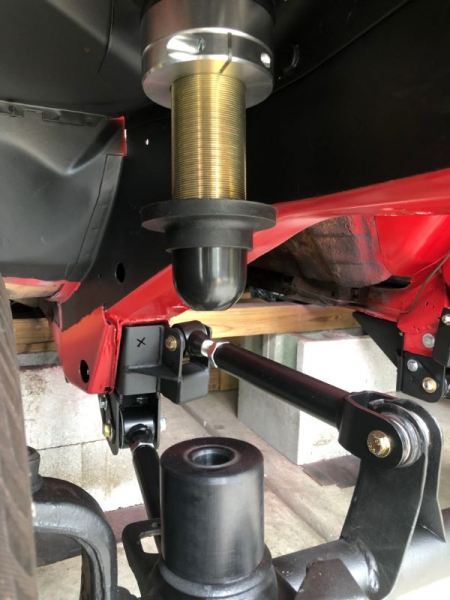
Front axle mock-up to get control arm lengths underway. The Rocky Road drop kit seems to want a stock lower arm length. Starting with passenger side wheelbase. I'm at 113.75-113.875." I'll need to lose .75" to get it right. The lower arms (Core 4x4) can lose about another .125" and the lower arm bracket is adjustable. I started with those perfectly centered so I could have adjustment either way I needed. That'll give me another .5" or so shorter. Front ride height is set at 12.75" which should be exactly 6" over stock. No springs, shocks or drivetrain, so that was easy lol. That toe isn't off as it looks in 2 dimensions... I haven't measured ACOS to lower bumpstop distance but it's closer than I expected. I may drop back to 2" on the lower. Please chime in if you have any thoughts/ experience.
-
Maybe start with removing the inner handle/ bezel and see if getting access to the rods helps make the issue more readily apparent or in getting the door open?
-
Jeez, I'm out of it. Just noticed it's 91+ and his vacuum tank is right there by the blower.
-
I'll let others more familiar with the valves answer that, but the gray line goes to the vacuum tank in the bumper. It's vital to all vacuum-fed doors and actuators in the heat/ AC system. One vacuum line from the engine to create the vacuum inside the tank, and lines going back out to things that need it (heat/AC doors, cruise control). Make sure your vacuum tank holds vacuum. Mine is seeping pressure and needs resealed along its seam.
-

Open cooling system fan switch
Gojira94 replied to Jdde's topic in MJ Tech: Modification and Repairs
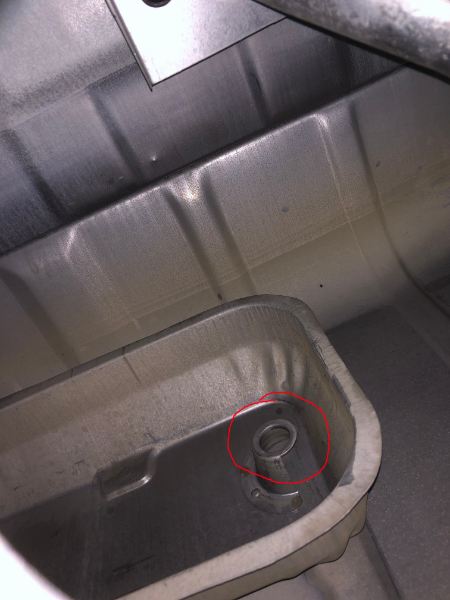
This is your radiator, and it doesn't fit the plugged hole circled in red? My rig had none of this, I bought essentially the same rad and SMP TS258 (or AutoZone SW594) fits fine. I thought it was cool that at some point they'd started making rads with the older closed system fan switch provision.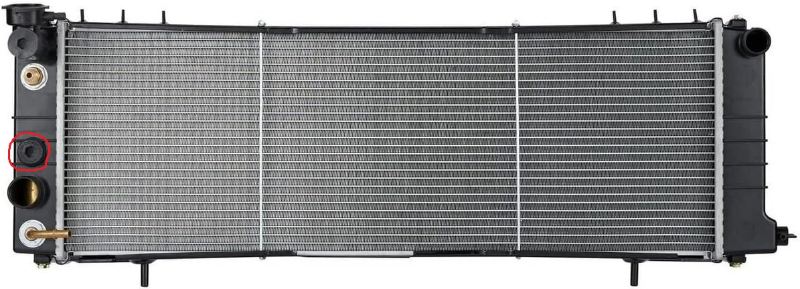
-
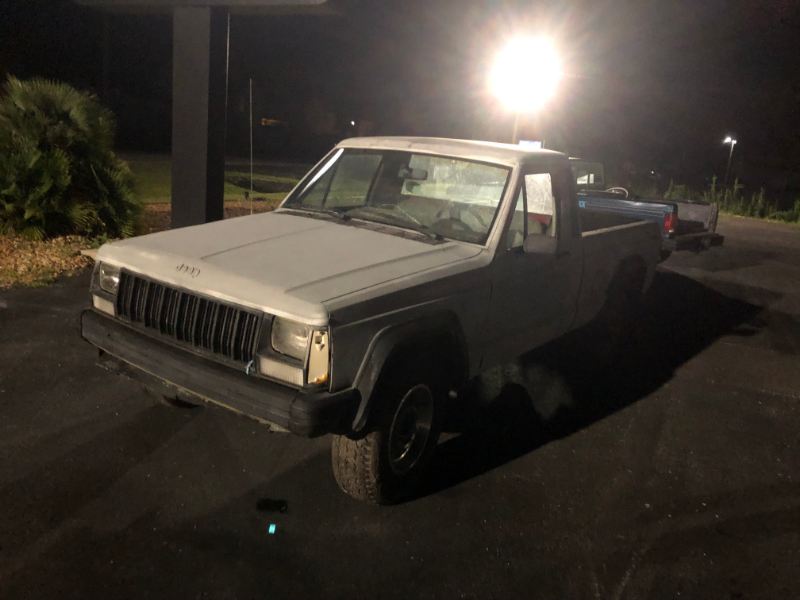
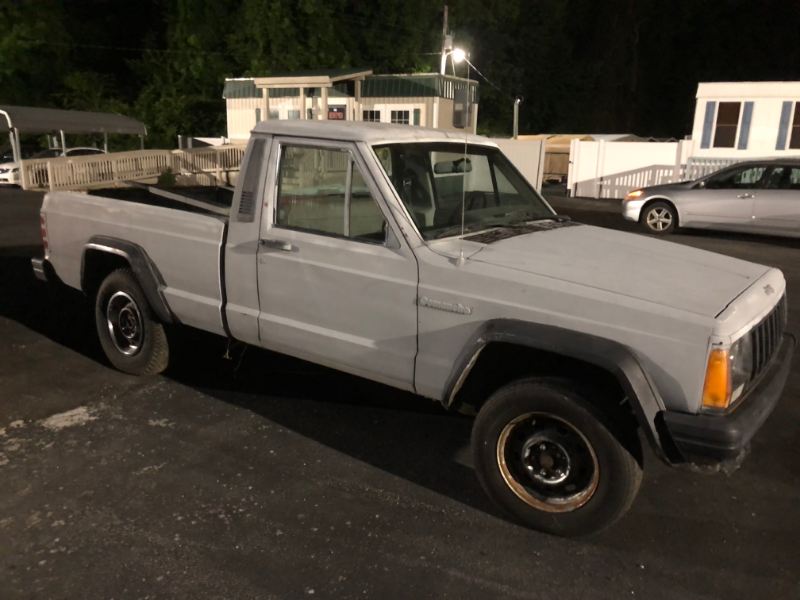
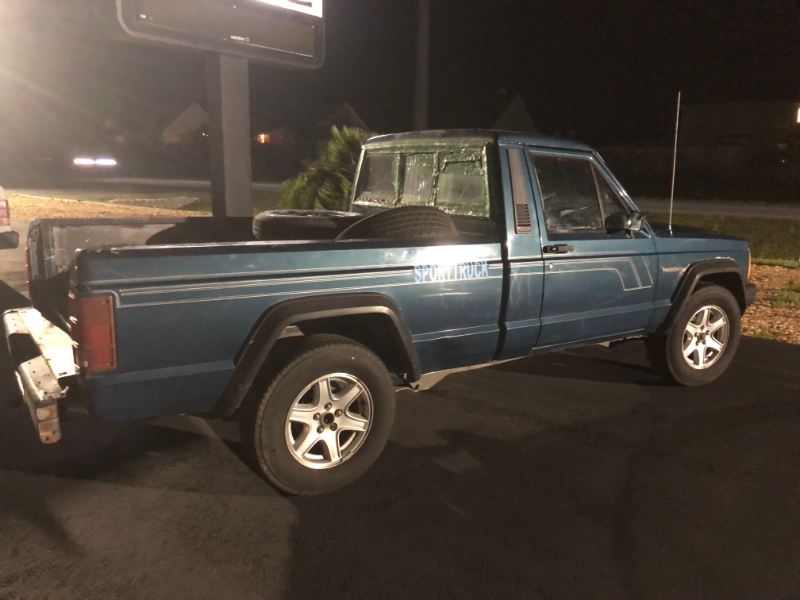
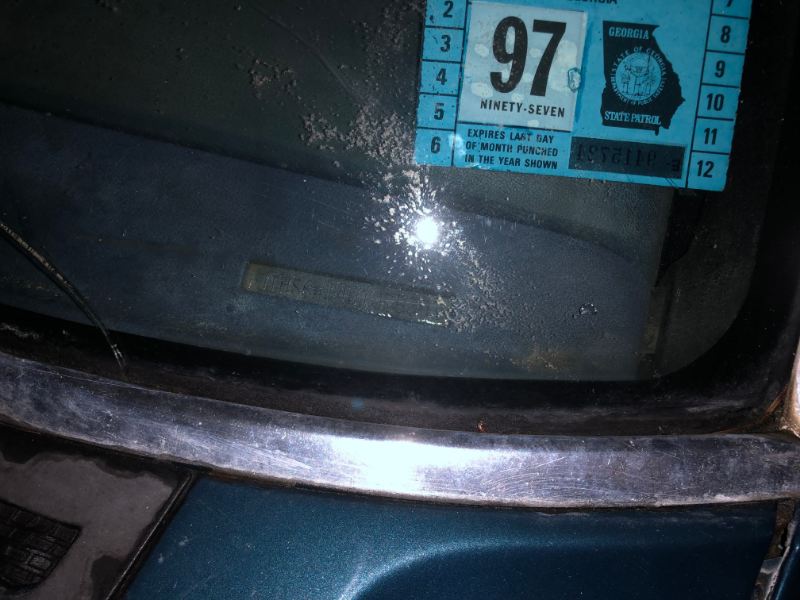
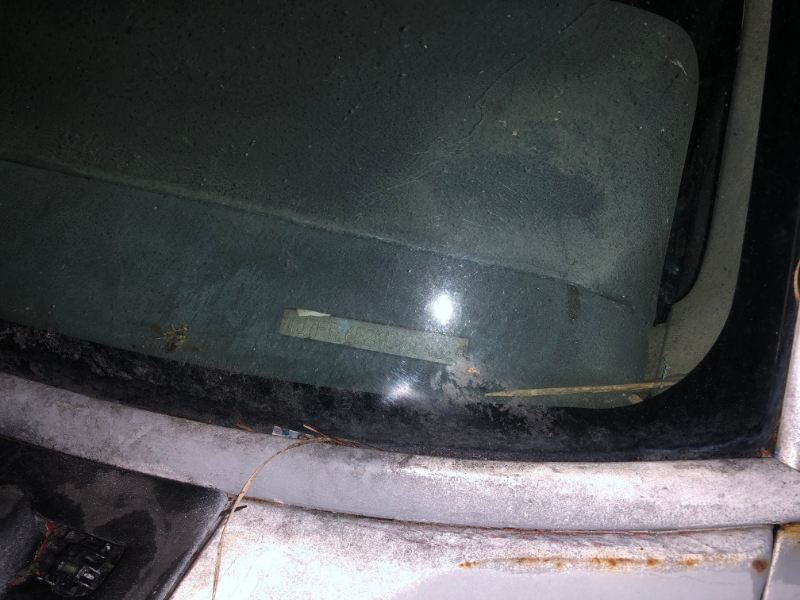
Late Saturday, coming back from Emerald Isle, NC. 2 parked together at (what at least used to be a small used car outfit) on NC Hwy 58, 5.3 miles NW of the NC 24 / NC 58 intersection. 2 parked together. I pulled in quick and snapped a few pics. Both looked like they are somebody's work trucks. The gray primer one I'm pretty sure I saw about a year ago coming out of the trash/ recycling center nearby at Fire Tower Rd. I got pics of VINs. One I'm having trouble deciphering the check digit, but I got the rest: Gray one (originally looks to be red) 1J7FT26E2KL488432 89 Base 2.5L Blue Sportruck 1JTHS641_JT075303 88 Base 2.5L

-
Vacuum looks a touch low, ideal would be between 16-18" steady idle. Your throttle blip looked normal but slightly low- vacuum drop and then jump to 20 when it snapped closed. Maybe 22-23" snapped closed with MAP reading in the 20s kPa would be closer to normal. Steady idle MAP about 50-55kPa. For what it's worth, if the OBDII system is intact, you can put a scanner/ code reader on it (the kind that costs about $80 or so) that can give you real time parameter readings from at least some of the various PIDs. Look for what the IAC counts and TPS % are, and what the fuel trim or basic AFR is. You'd be looking for a concurrent lean condition with the high idle. If IAC counts look like they're high (closing off additional air), pintle fully extended, you might try closing the throttle blade stop a bit until IAC counts are in the normal range and idle comes down, with either throttle body. And then adjust the TPS if needed to read 0% with throttle closed. Maybe also see what the CTS is reading just for giggles, in case it's skewing fuel trim. Also make sure you don't have any exhaust manifold leaks.
-
Valve Covers, Renix vs Stamped HO
Gojira94 replied to coolwind57's topic in MJ Tech: Modification and Repairs
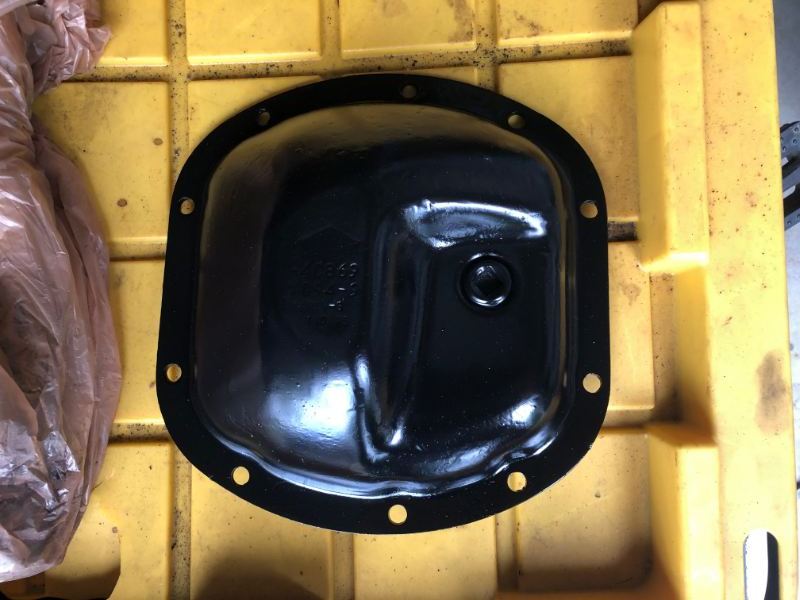
This is my '93 YJ cover. I haven’t pulled it off yet, I’m OCD for cleaning before I do that, so I’ll have to add pics for what the baffles look like inside later. EDIT: that cable guide is backwards, it's just sitting there. It was missing and i grabbed one in not-so-good shape from a ZJ in my local yard for mockup purposes. Flipped around, it lines up fine with the 99-01 horseshoe intake arrangement/ alignment with HO throttle bodies, for what it's worth.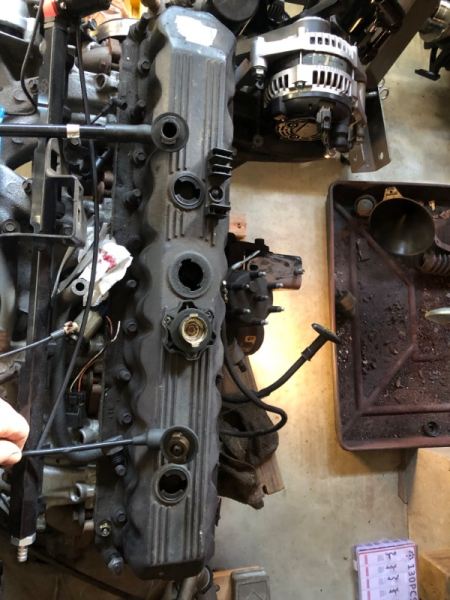
-
Valve Covers, Renix vs Stamped HO
Gojira94 replied to coolwind57's topic in MJ Tech: Modification and Repairs
Yeah, once your memory starts to go, you can forget it... "I heard there are 2 sure signs you're getting old- one, your memory starts to go, and the other... well, I forget." Interested to hear that my (donor engine) 93 YJ cover is different from the Renix cover. Hadn't thought of that. And I wonder what's different from the HO XJ aluminum and ZJ aluminum cover? And are they in any way different from the 91-95 YJ cover? -
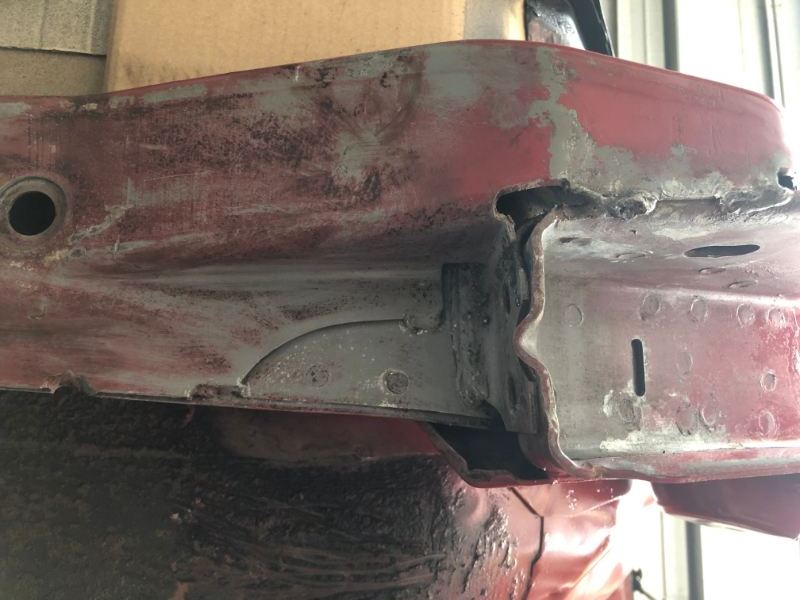
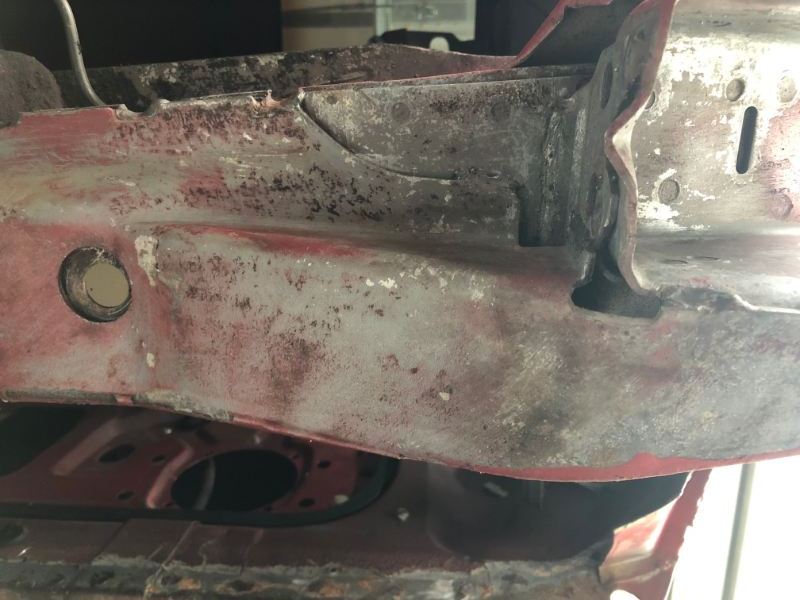
LCA pockets cleanup - 1st pass. Metal looks good. Passenger side: Driver's side:
-
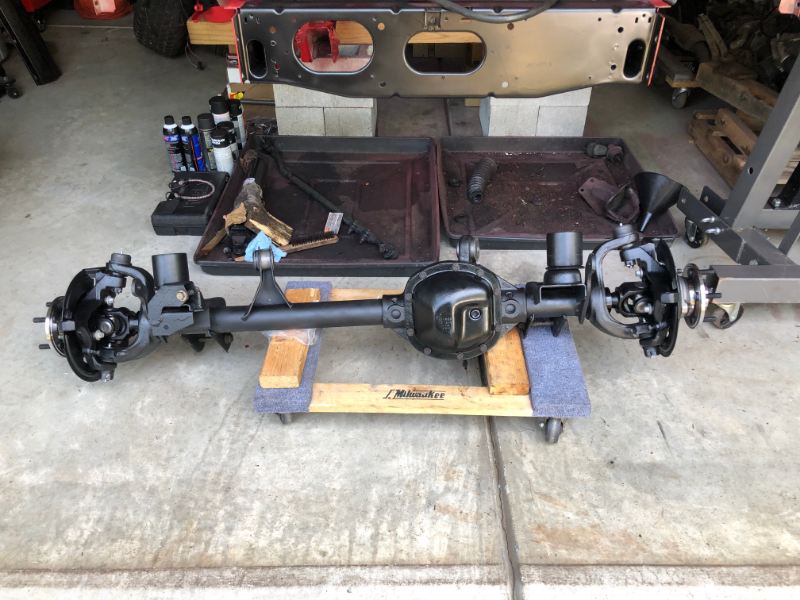
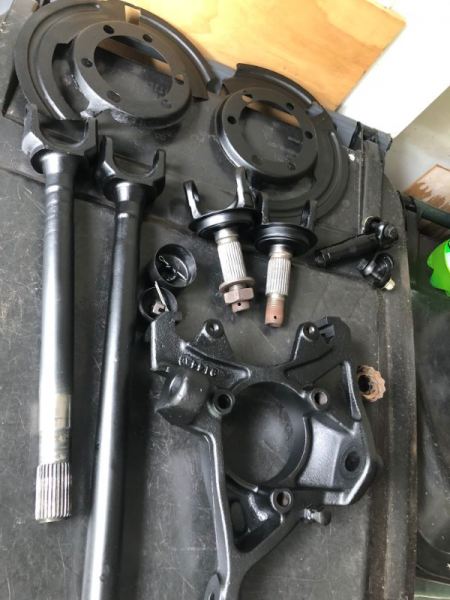
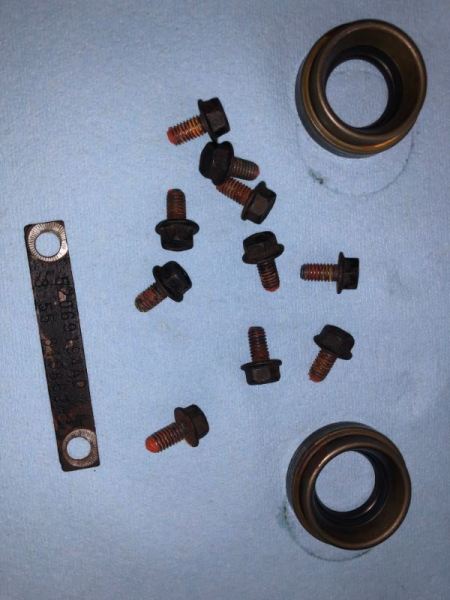
Dana 30 is 100% done. New ball joints, bushings, 5-760X u-joints, new unitized bearings, inner axle seals, pinion seal. The dust plates were trashed after dragging it onto a wheelbarrow in the boneyard back when but they cleaned up and straightened out. NOS RE1383 3" lower bump stops, If they're too much with the ACOS on a 6" lift I'll back down to 2". Next task is the Rocky Road control arm drop kit and then front suspension assembly. I'll ask this in the tech forum, but if anyone is running OME 2934 springs, is one different/ shorter? I've seen mention that a 10mm spacer is needed " for the pasenger side." IDK... And yes, those Dorman hub bolts have to be shortened about 4-5mm for acceptable clearance from the wheel studs. 40 grit flap disc made short work of that lol.
-
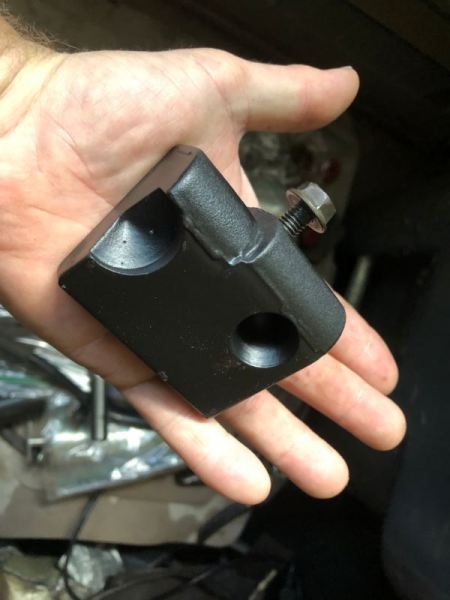
Just looked it up. No longer produced/ available - this support block for the Saginaw 800 was in MJ and XJ. Until you asked, I'd have just assumed it was on both from 84-01. It's aluminum, so I'd guess the bolt that holds it would be the only thing to rot away over time. 52000881 BLOCK 34201193 SCREW I see it for XJ up through 1996 on models with and without power steering, 4cyl and 6cyl. whether it was in the 97-01 XJ only a trip to the boneyard could tell, as it's not shown or listed for those years.
-
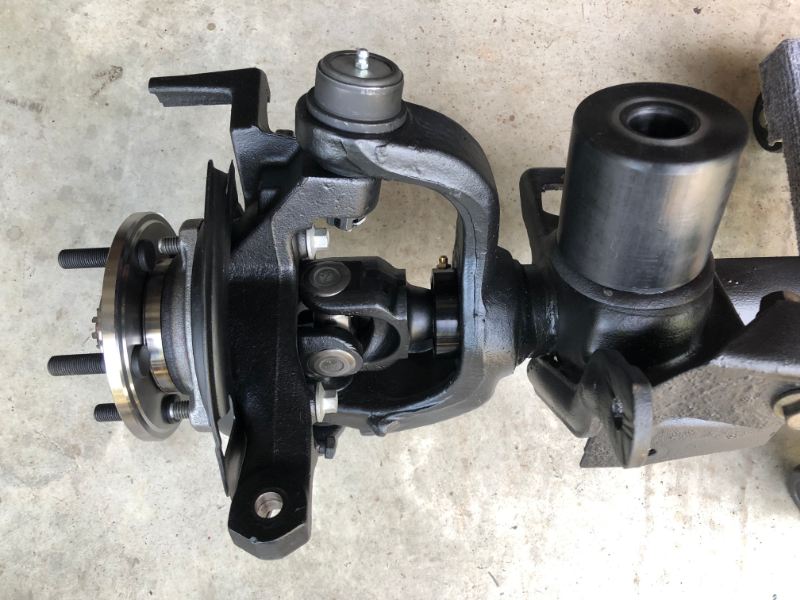
A little progress over the weekend. Some time with a flap disc, Duplicolor DE1634, 1635 and POR-15 TopCoat DTM lol. I have one more knuckle to clean and re-finish and then onto the housing. Then reassembly. And then (holy crap) I can have a rolling chassis again. As a first time Jeep owner, I was disappointed to learn this is non-serviceable. New Moog stuff, for now. Surprised that they don't come painted. Oh well. DE1635 to the rescue. Factory diff cover on this 99 XJ axle is thicker and stronger than I'd have expected.
-
Mystery Sudden Death & Resurrection
Gojira94 replied to BizarroStormy's topic in MJ Tech: Modification and Repairs
Which ICM did you get? Mine’s original and I’ve wondered who makes a decent quality replacement if I ever need one. -
My thought as well. The rubber foot at the bottom of the sending unit/ pump assembly on mine was rolling around when I opened up my tank. The fuel return empties out the bottom of the metal tube the rubber foot is installed on. If that rubber isolator/ locator gets dislodged, I could see a lot of vibration/ noise transmitted through the tank.
-
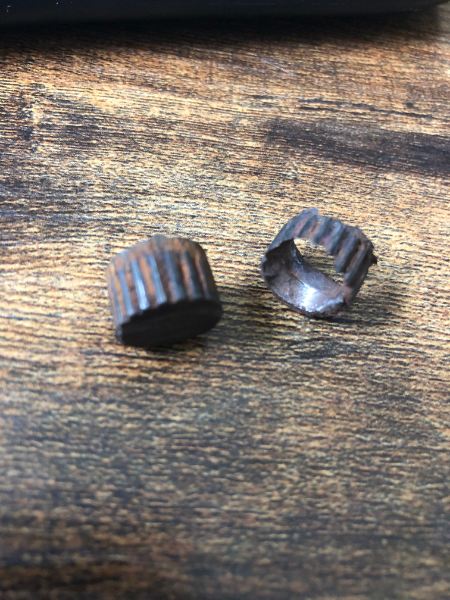
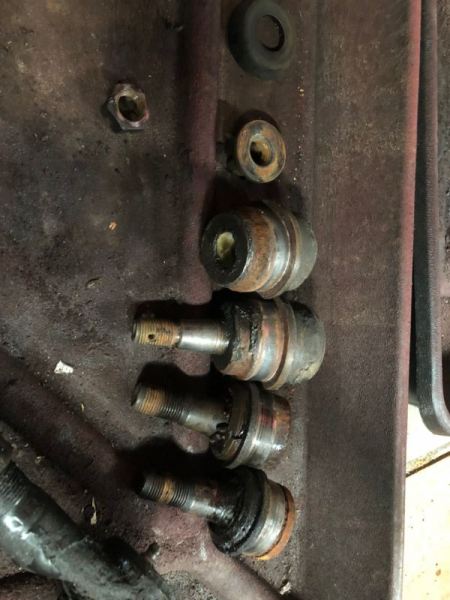
The leftover nubs from the sway bar link studs were a b@$tard to get out. One pressed out, had to drill some of the other one to get it press out. Now at the point where I can clean up the housing and put it back together, at least.
-
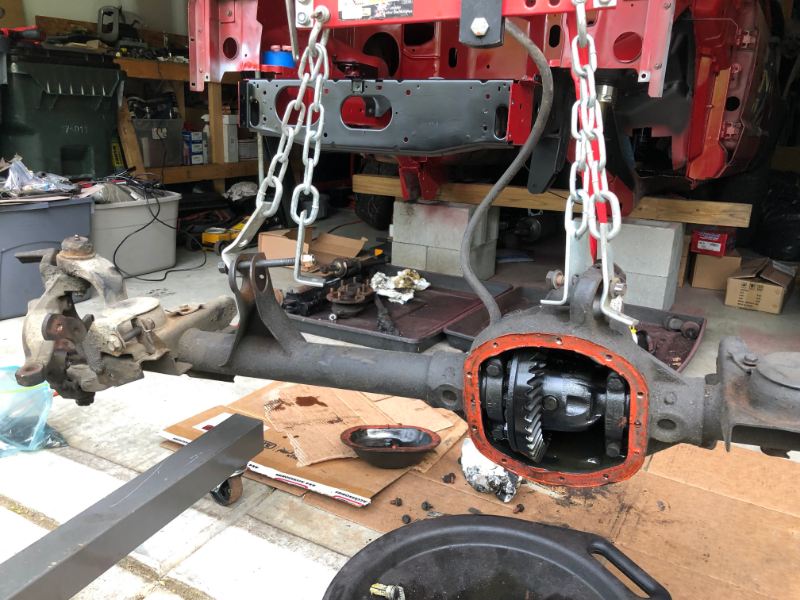
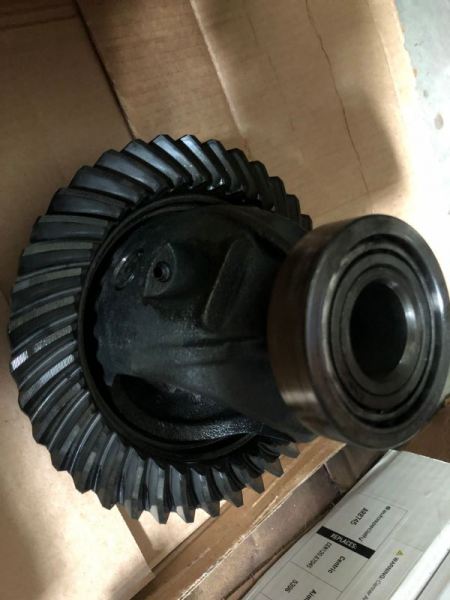
Pulling apart the boneyard Dana 30. Came from a good looking 99 XJ. The U-joints were no good and no way I was going to trust the ball joints or hubs. Everything on the outside is fighting me. Hub bolts had red loc-tite on them. I had to savagely beat the hubs out of the knuckles lol. Ball joints were a PITA but came out without an impact. Inside, everything is really really good. Ring gear backlash is between .007" - .008". Pinion bearing preload is right at 14 in. lbs. Carrier bearings are silky smooth and cherry. It's almost like this axle was never off-roaded, which is pretty much what I was looking to start with. Inner axle seals were so good I could re-use them (but I won't).

-
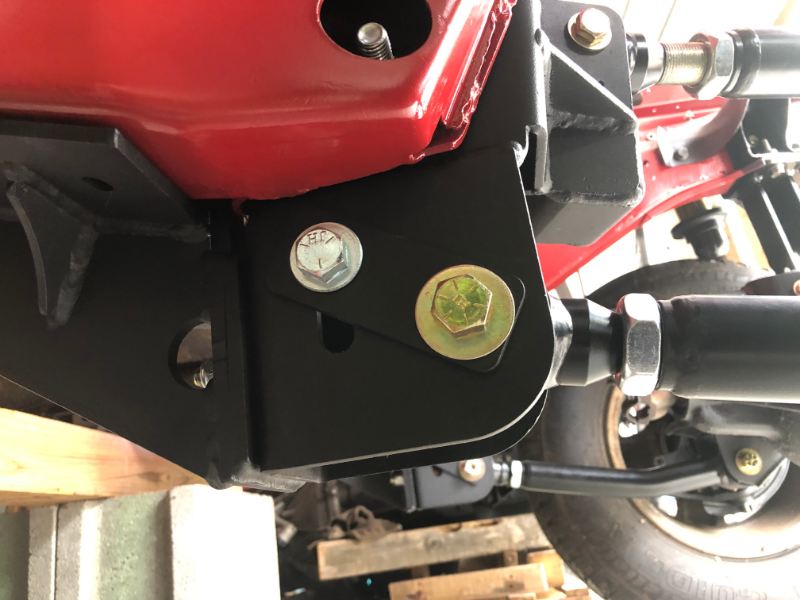
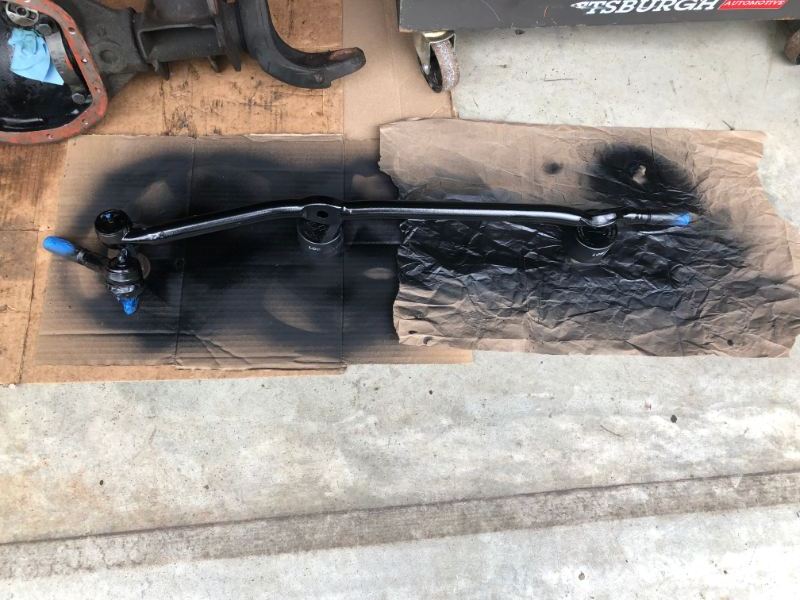
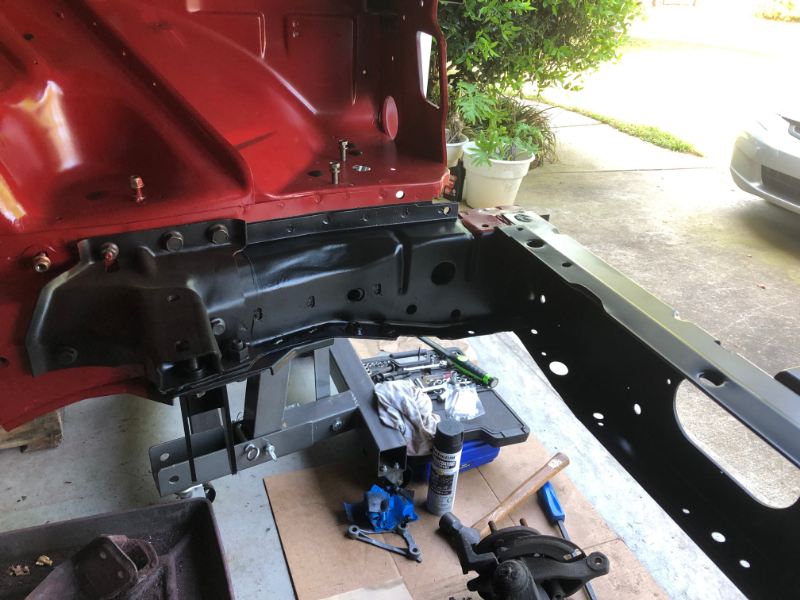
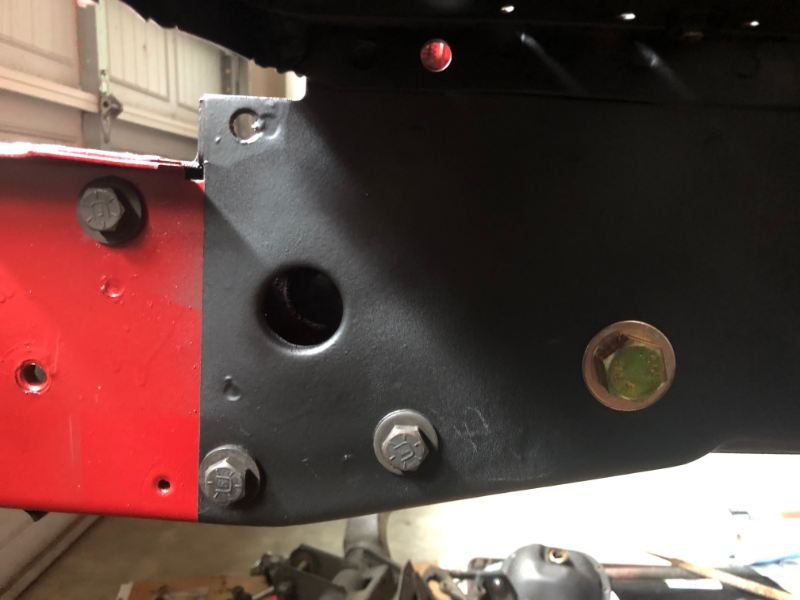
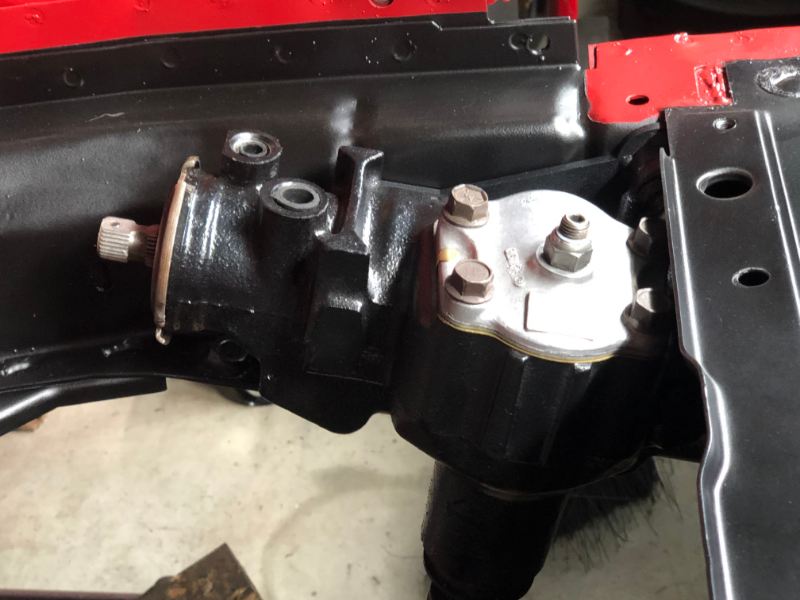
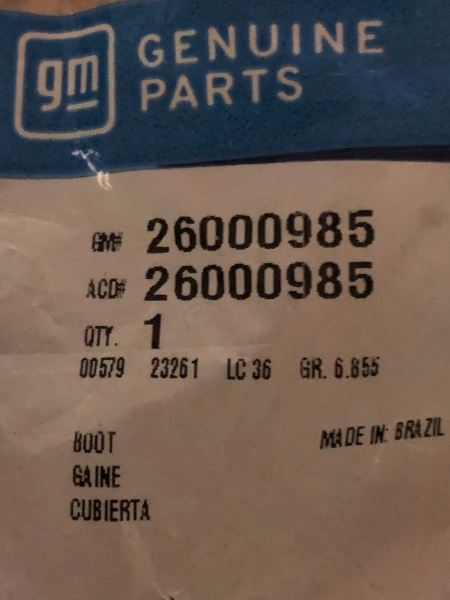
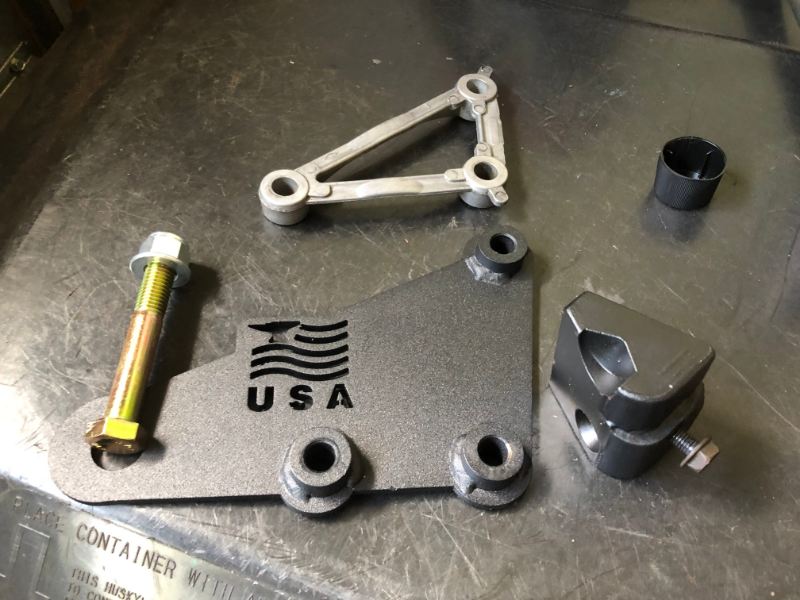
Steering box install- it's always a victory when something I fixed or rebuilt vacates the spot in the house it's taken up for over a year lol. I decided to wrap the undercoat up to cover the area where these boxes tend to soil things. This one shouldn't leak for a long time. I had to work the shape of the step in this piece to properly fit the seam it sits on top of in the front of the steering box. Then covered it in undercoat as well. New Pitman arm boot (was not nearly as cheap as I'd have liked it to be). Old brace/ new brace. The yellow zinc bolt is M14x2.00x90mm, with a lock nut. The shanks of the bolts that came with the IronMan brace were too long, not enough thread with the washer supplied. So I reused the pristine factory bolts and just added the extra.
-
Air conditioning addition confusion.
Gojira94 replied to Poweralth's topic in MJ Tech: Modification and Repairs
First, welcome to the forum! Second, please post the VIN number so we can add it to the registry, one or two of our members can pull some information about its origin and a high-level list of original specs. For the AC: first big item you'll need is the air box assembly inside the dash. I'm in the same boat as you, my 87 also came with no AC. The boxes are different, as there's no room/ provision for a location for the evaporator. Best advice there is to look for an AC equipped donor XJ. From that you'll need the dash controls, possibly the vacuum harness that'll be attached to the HVAC box. Also of course a new pair of low & high pressure hoses, compressor, condenser, plus more things I'm not thinking of at the moment. There should be a capped off plug on the driver's side inner fender well that could be used to essentially copy a dealer-installed AC setup and run all the digicals: Others should chime in and add all I'm forgetting. And again, glad you're here.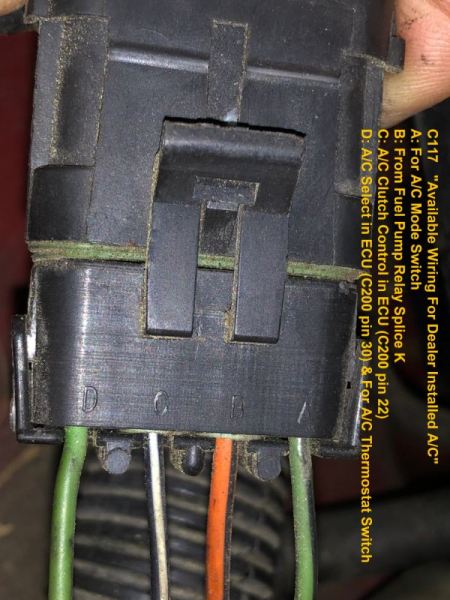
-
Apologies, points of clarity questions... 1) Aside from the length/ shape of the bars, XJ front and rear checks are otherwise the same as each other? 2) If #1 holds true, the 97-01 XJ checks are preferred, due to their 'rubber cushion included' design? 3) MJ bar can be swapped into either 84-96 or 97-01 XJ checks, front or rear, with the same result?
-
I'll throw this out there if it helps any with the Camaro - None of the 93-95 L32 cars (or 93-95 LT1 cars) had BCMs. Those showed up in 96. They do have a VATS module, though. Old GM Pass-Key II system that had a resistor pellet in the neck of the key. http://shbox.com/1/vats_bypass.jpg http://shbox.com/1/4th_gen_tech2.html#pass_key http://shbox.com/1/pass_key.html
-
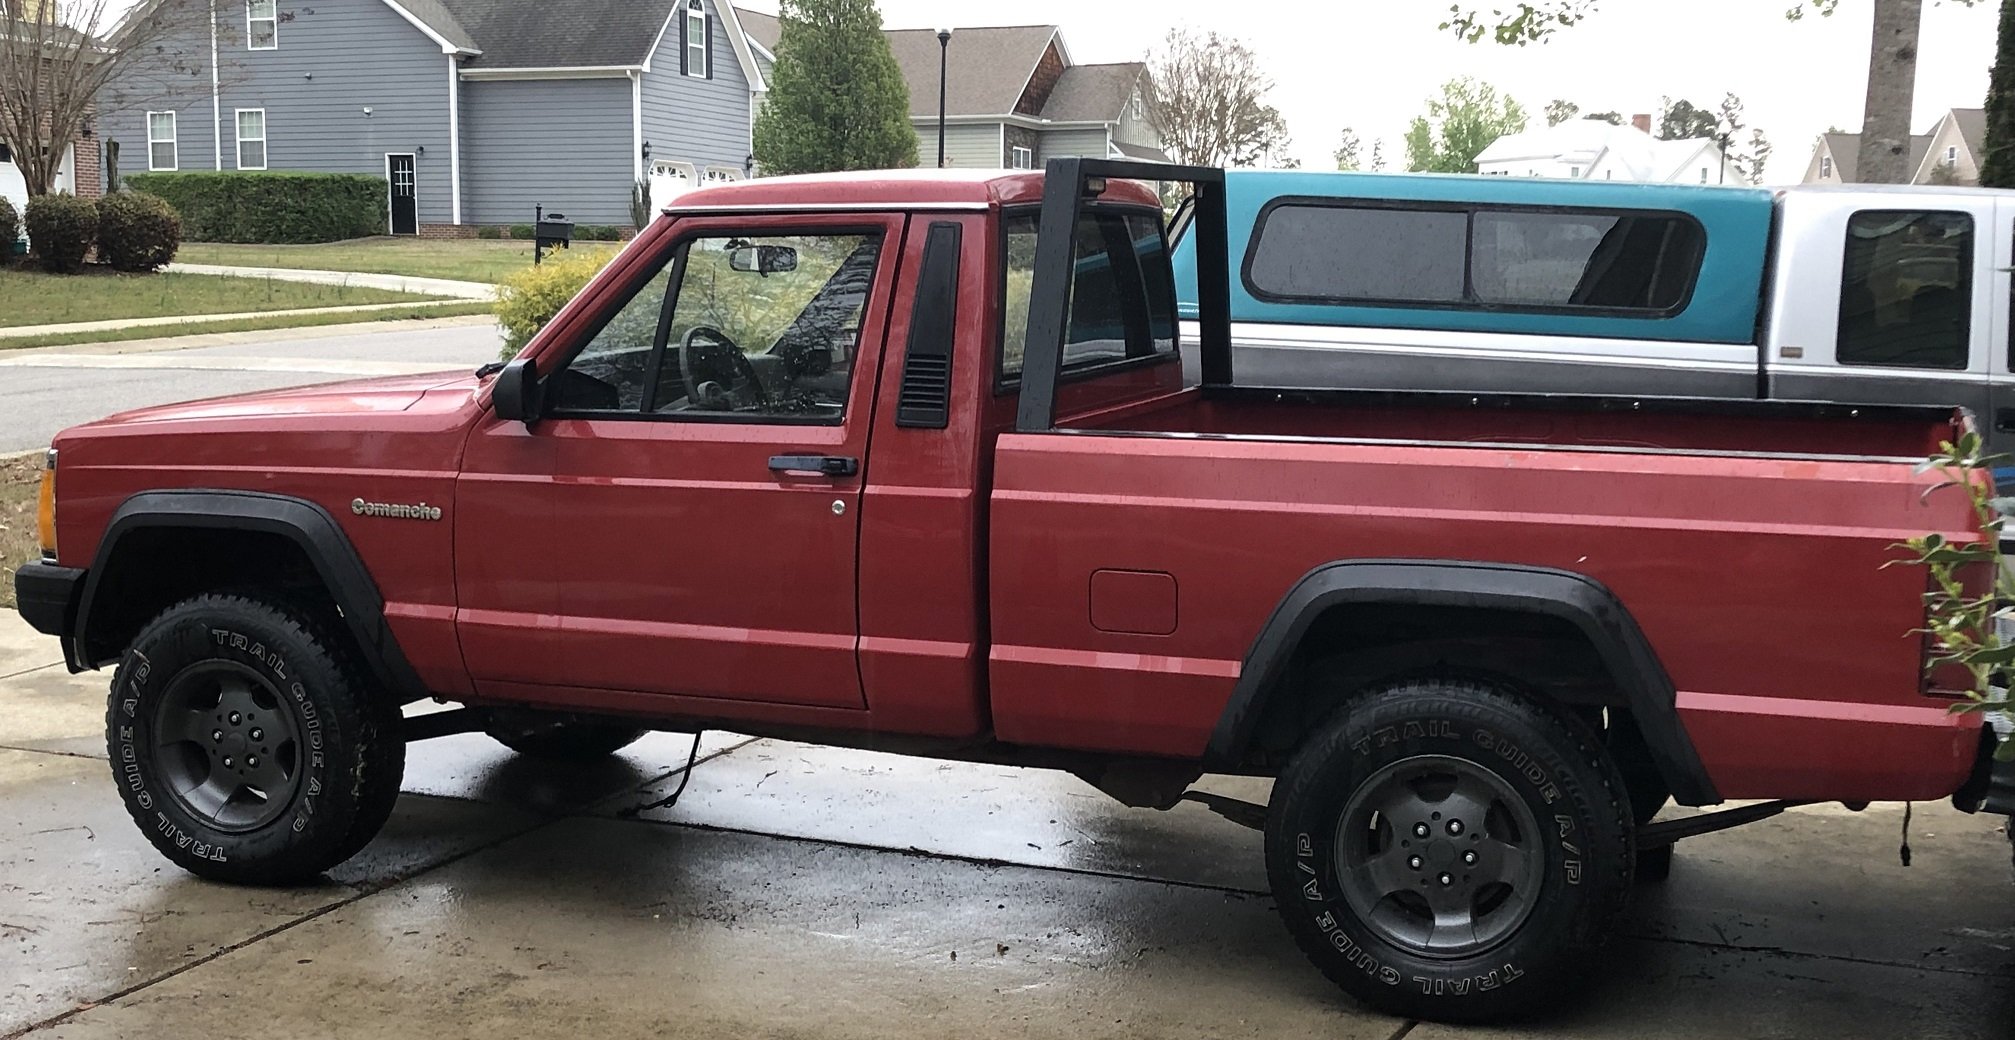
Asking $15,000 on FB Marketplace. N. Central NC
-
Very well stated.
-
Old 258 3.75 bore x 3.895 stroke, 5.875 rod (258.11 / 4.2L) 87-90 YJ 258 crank snout same as 4.0 crank snout, earlier ones are longer Our 242 4.0L 3.875 bore x 3.414 stroke, 6.150 rod (241.57 / 4.0L) Base 276 stroker (stroked, with shorter 258 rods, no additional bore) 3.875 bore x 3.895 stroke, 5.875 rod (275.61 / 4.5L) 281 stroker (base 276 bored .040 over) 3.915 bore x 3.895 stroke, 5.875 rod (281.33 / 4.6L) 284 stroker (base 276 bored .060 over) 3.935 bore x 3.895 stroke, 5.875 rod (284.21 / 4.7L)