
Gojira94
-
Posts
677 -
Joined
-
Last visited
Content Type
Profiles
Forums
Gallery
Everything posted by Gojira94
-

Injector loom rebuild
Gojira94 replied to dreaminbohemian's topic in MJ Tech: Modification and Repairs
I had no idea... and thanks for explaining. So he'll need to find the black ground wire in what's left of his harness nub, maybe 3 black ground wires, depending on how far up the splice with the O2 ground is? And make a total of 3 grounds, separate and distinct from the Brown w/ trace wire for the CTS sensor ground to ECU?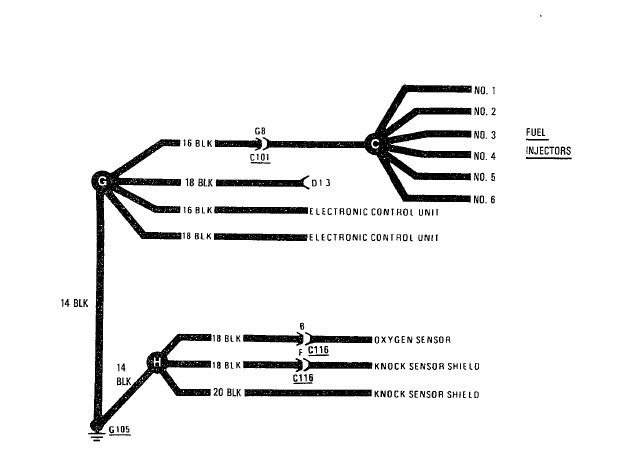
-
Injector loom rebuild
Gojira94 replied to dreaminbohemian's topic in MJ Tech: Modification and Repairs
Mine is 89-90, so no C101 but there should be no difference in dimensions from where injector 1 & 2 are and the end of the harness. From inj. 1 & 2's exit from the loom, I measure 38" to the tips of the connectors for knock, CTS and O2. 87 and 88 manual agree that the knock sensor wires are Yellow w/ trace, Violet w/trace. I didn't want to risk peeling open my knock sensor connector just yet, but the wire colors on my CTS and O2 connectors match up with 87-88 manuals as well. O2 (C229) - ABC is Orange, Black, Grey. CTS (C222) - AB is Brown w/ trace, Tan. Knock (C232) - AB is Yellow w/ trace, Violet w/ trace. Knock female connector is the same as any Jetronic/ EV1 injector connector, O2 male is same as any GM MAP sensor (and Jeep Renix up to 95 2.5/4.0), or 3-wire OBD1 GM O2 connector. CTS is common to many GM connectors, and is usually available in parts house stores, failing all else if your local boneyards come up dry.
-
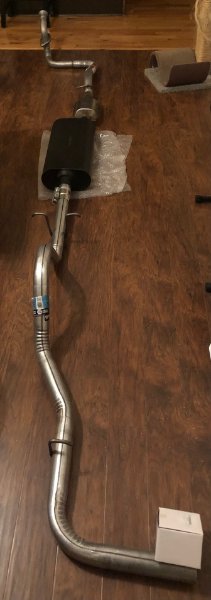
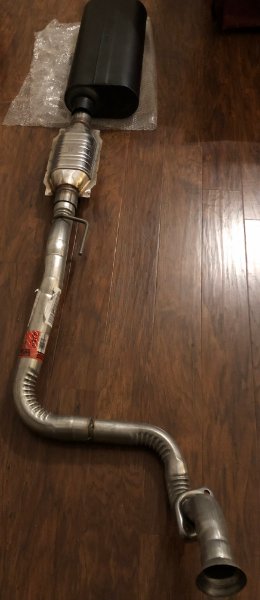
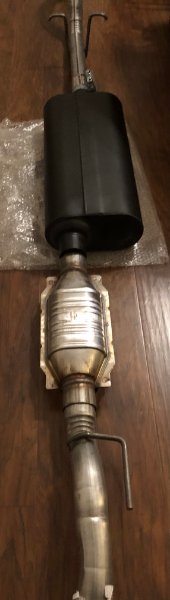
Exhaust mock-up: 55277 front pipe for post-Renix manifold, Magnaflow 94006 universal 2.5" cat, Flowmaster 70 series 2.5", Walker 46701 2.25" tailpipe. I may need to shorten the tailpipe at the head end 2-3" to make all the unions work. It'll still be a bit before I get to it though. I almost have a complete vehicle assembly staged with restored or new parts lol.
-
To me, looks like the rear diff ring is shimmed too close to the pinion for sure. At this point it’s not going to get any worse but backlash has probably opened itself up to > .020”. It probably ran somewhat hot soon after the installation but not really a concern with heat now. Likely a little too much backlash now, the R&P will wear out sooner than it otherwise would have but still many miles before you get to that point.
-
I did give him your regards, in person. Had a 3 day visit with him and his wife in Linville, NC December 11th-13th. Today is his 80th birthday, talked to him for quite a while earlier. We recalled his 40th birthday, which I remember (I was only 13). His side of the family were funeral directors, though he opted for a law degree after Vietnam and not too long ago retired from international finance law. Back then, my grandfather hooked my dad's law partners up with a hearse and pine casket to ferry him to his surprise party at a restaurant on College St. in downtown Charlotte. A good time was had by all. So... your birthday is coming up in a few weeks. Early Happy Birthday from me and my old man.
-
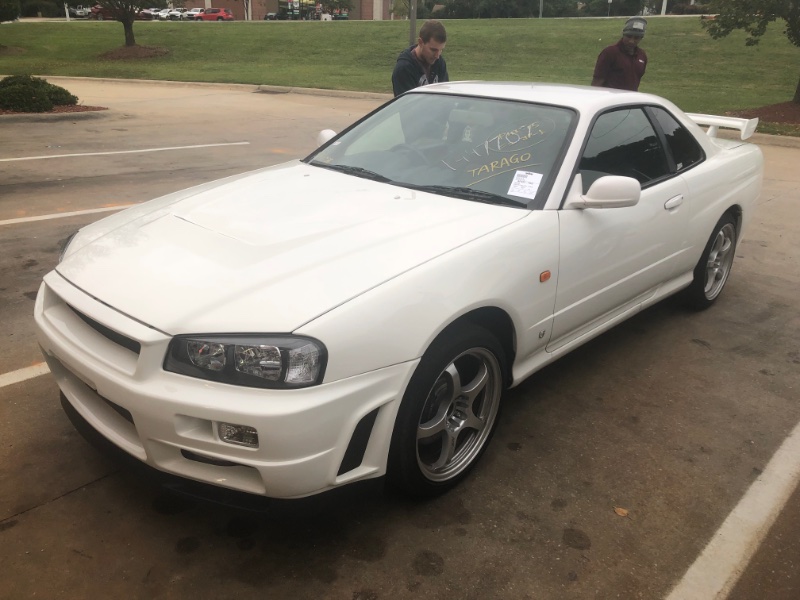
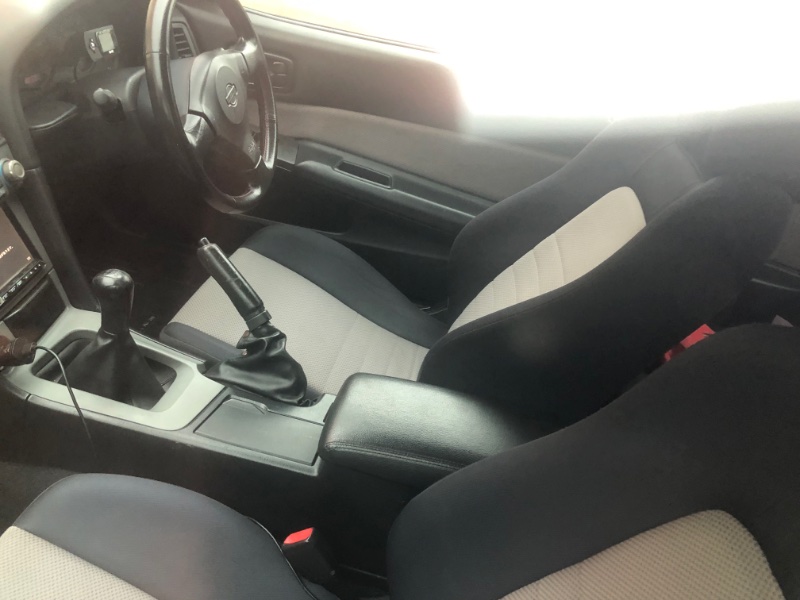
Fenders are hideous, interior is atrocious (30k for idiot light cluster and a dash cover??). Kinda the same class as a ridiculously overdressed hooker with cartoonishly sized b00bs.
-
Here's the setup I'm building - not exactly cheap with a $200 muffler but the rest is inexpensive, easily had, and adapted. What I'm doing works for 91-92 HO applications, while 87-90 4.0 would be a different story. 87-90 Manifold and downpipe options would be OE, but cutting off the converter flange would open up options for more custom 2.25" cat and muffler choices between downpipe and tailpipe as well. Mine: 91-99 HO manifold (already have one on the 93 YJ drivetrain I acquired, manifold is practically new) Walker 55277 96-99 XJ downpipe (largest inner diameter of all of them at 2.5" but it does neck down closer to 2.25" in a couple of spots and back up to 2.5" and no big dent behind the inlet flange) Magnaflow 94006 cat (15.75" overall length, 3.75" thick, 6.5" wide, 2.5" ID, rated for 6000lbs, 2-way ceramic honeycomb, 47-state OBD1 approved) Flowmaster 52571 (70 series, 2.5" offset inlet, center outlet, 28" overall length, 5" H x 10" W x 22" L body). I wanted something deep and quiet with minimal flow resistance. Walker 46701 86-92 2.8/2.5/4.0 tailpipe until I can have one duplicated in 2.5" at a local shop. Napa is tightly partnered with Walker so short wheelbase pipes are not hard to get. Long bed part is 47605, 86-92 2.8/2.5/4.0, availability somewhat less. Couple short pieces of 2.5" OD pipe and a 2.5" OD to 2.25" ID reducer in the meantime. I can size the joins at the downpipe to converter and converter to muffler so the overall distance between the downpipe and tailpipe remains the same without cutting either, or moving the tailpipe hangers before I have the 2.5" tailpipe made. I ripped out the glass matting under the carpet on the passenger side when I pulled the interior. To shield the passenger floor from converter heat I've found a neat resource in any boneyard, anywhere. I look for full-size GM trucks and pull one of their heat shields. Stick your head under one and you'll see what I'm talking about. You can trim them to whatever size and shape you want (they're huge). Use tin shears, plus eye and breathing protection, as there's fiberglass fill in them. Then roll and crimp the cut edges back together. Mounting one under the floor isn't rocket science, GM shields have at least 2-3 mounting tabs you can re-use. You can grab one very close to the size and shape you'd want anyway.
-
I've spent some time recently going through options myself, though I'm doing a blend of OE and custom parts. Here's what I found during that search: https://www.rockauto.com/en/moreinfo.php?pk=8626088&cc=1181775&pt=5860&jsn=857 Manifold with the flexible sections between 1-2, 5-6, less prone to cracking from what I've read here and there. It fits 91-92 MJ, 91-99 XJ, 91-96 YJ, 97-99 TJ, 93-98 ZJ. https://www.rockauto.com/en/moreinfo.php?pk=135706&cc=1181775&pt=10038&jsn=853 Walker front pipe for MJs with cat (square flange) Muffler- many choices for 2.25" offset in/ center out in a 21-ish inch length, whatever suits you https://www.rockauto.com/en/moreinfo.php?pk=129238&cc=1181775&pt=5808&jsn=867 Walker cat assembly. CARB compliant cats are over $600. What state are you in? Tailpipe- Walker has both 6' and 7' box pipes Rubber insulators are available for either/ both. Stock hangers are fine if they're intact and you're essentially doing OE replacement parts
-
Upper radiator mount fasteners Mopar part 11502722, need 4 discoed Hex flange nut M5x.8 Upper radiator mount fasteners 2 Mopar part 11503745, need 2 discoed Hex nut M6x1 Upper radiator mount fasteners 3 Mopar part J4001083, need 2 discoed M6 washer (for Renix or HO 4 litre)
-
How hard do you crank it?
Gojira94 replied to WranglerMangler's topic in MJ Tech: Modification and Repairs
You might consider using the plate for a crank hub puller as your leverage point instead of the crank bolt. 3 bolts to share the load and leave the crank bolt out of the equation. And a replacement crank bolt will need to be 10.9 strength. Almost nobody has ARP crank bolts as a stock item but you can get one shipped pretty quick. Install it once all is freed up. Pull the old one out now if you can, or make sure it's broke loose and leave it in, backed out about 1/4 turn. That way if you cause any more damage to the head it'll come out by hand. -
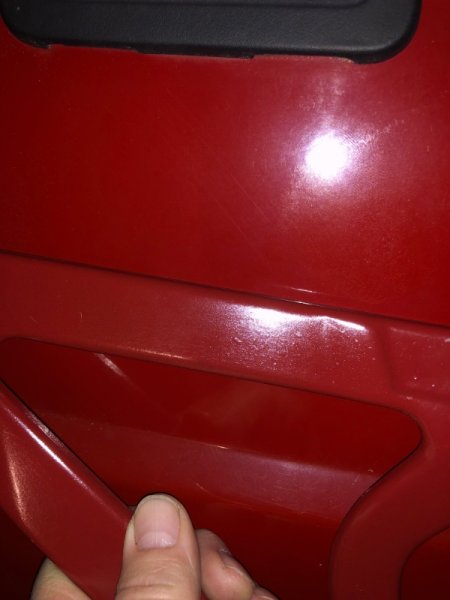
Other front end bits done. And I found the front splash shields at Detroit Muscle Technologies. They also have the main splash shield for early XJ and MJ as well as later XJ. I’m holding on that piece until I can figure out if it’ll work with some alteration after the big steering box brace kit and IronMan track bar brace go in. Rustoleum Colonial Red is a very very close match to what the last cheap paint job put on this rig.

-
Thanks! It is a sloooow project. I'm about at critical mass with parts that were missing for the whole drivetrain & 4X4 swap, multiple component upgrades, etc. As soon as I get the front frame and engine bay painted it'll pick up speed. Initial progress on the passenger side wheel well:
-
Have you drained the pan yet? I'm fearing a decent amount of water made its way to the bottom of the crankcase and found a pair of rod journals sitting low... Great find at a great price, regardless. Congrats and looking forward to more updates.
-
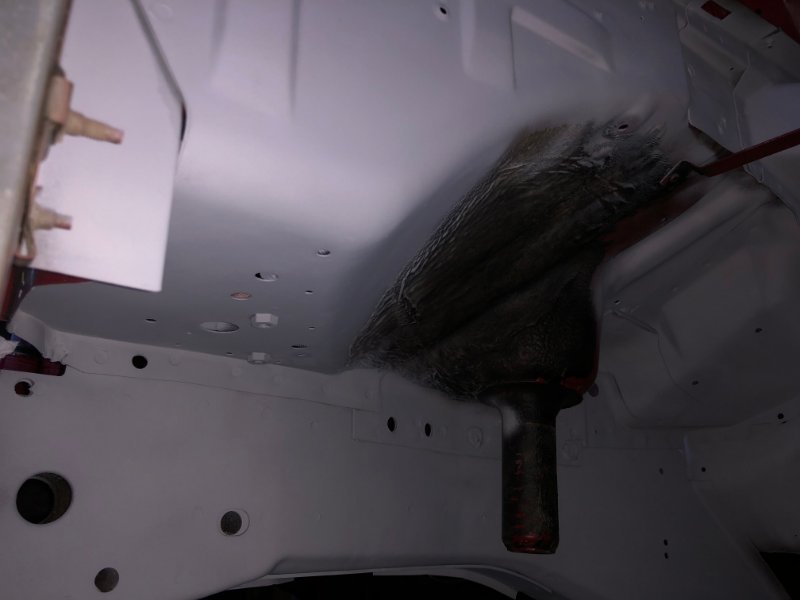
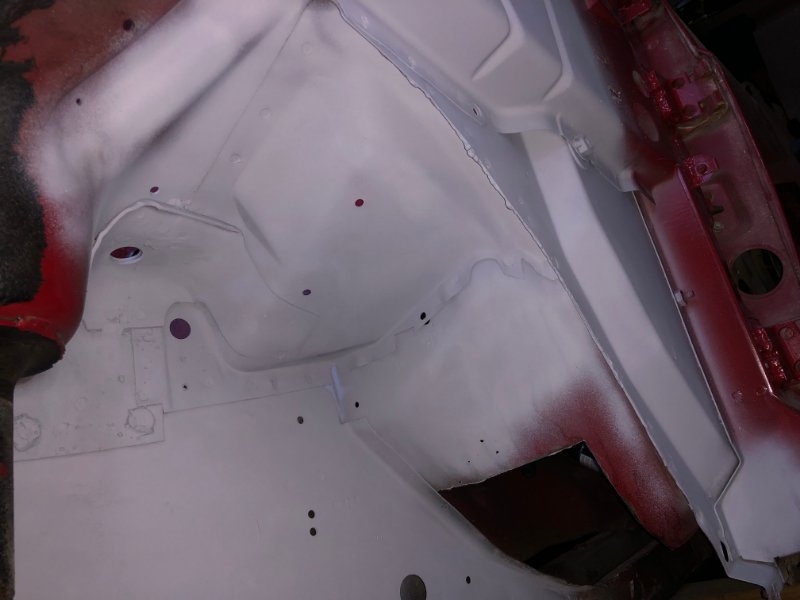
Getting there on the driver's side fender well. All the light rust is gone, now seeing the remaining floor pan pin holes better as well. I'll need to trim out a little more. The spring tower has a really thick layer of the original undercoating I decided to leave in place, I wire wheeled the surface layer off of it and it's still very thick and somewhat pliable. In the area I got down to paint, everything looks really good and I don't see any benefit to removing the rest of it. I'll feather in the red paint where it's primered and go back with POR-something undercoating in the rest of the wells, with an additional spritz on the old coating left in place. Top rear side of the driver's wheelhouse at the firewall- this is coming along as well. Everything in this corner has been cleaned out, sanded, steel tooth-brushed, hit with acetone and primered. The whole engine bay will be repainted red once everything is cleaned and prepped. Can't wait to post that pic, lol...

-
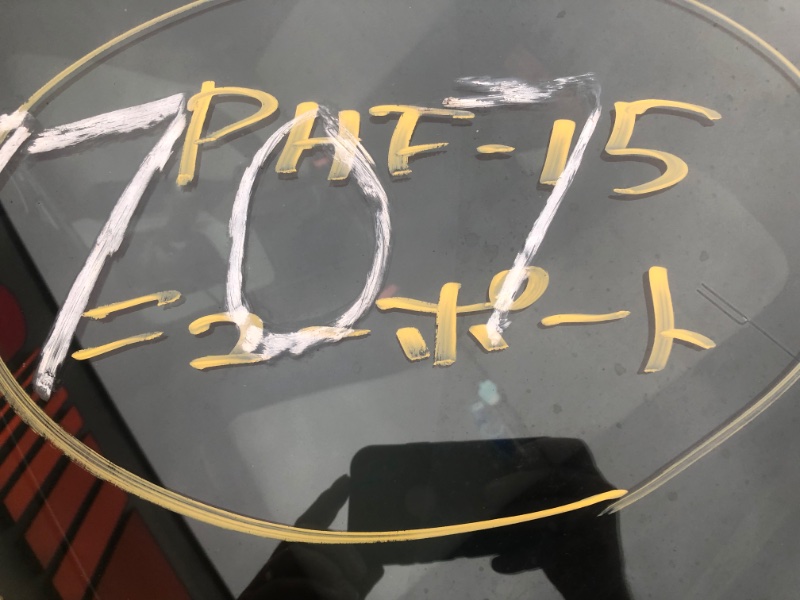
Spotted at the local Autozone in October. Apparently after 20 years (?) cars that were banned from import can be brought over. The owner buys, imports and flips for a staggering markup…


-
He still has a lot of his work posted on his site. https://nickintimedesign.com/renix-4l-ecu-datastream/
-
Routing of factory antenna cable?
Gojira94 replied to EUREKA's topic in MJ Tech: Modification and Repairs
I Think #4 is for power antenna wiring, power option might also route the antenna cable there, someone with that option would need to say for sure. My non-power equipped 87SWB has #4 capped. #1 and #3 don't go inside. #2 I'm pretty sure is where mine was routed when I took everything apart, though that may have been moved there by someone in the last 36 1/2 years. The door/ ctsy light switch wire for the pass. side can be felt inside #2. It goes inside the cab through a very small rubber grommet. Putting the antenna cable through #2 does make available another well-positioned opening just above below the door switch wire/ grommet.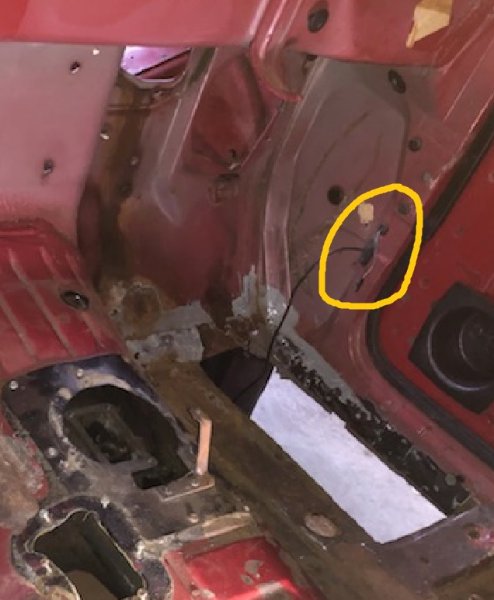
-
This may be a re-broadcast, but it solved another piece of my puzzle. My transplant NP231 is from a 93 YJ so it has a VSS unit and short gear in it. My one and only hope for something nearby was a 93 Dakota in the local yard. Then I'd need to find a new o-ring and inner seal if it was in decent shape. Most of these I've seen on Ebay are really old with blemishes/ minor damage and run from $25-$96, still needing new seal and o-ring. Apparently some sites selling early Hummer H1 parts have them, too. At least one Mopar restoration outfit in Michigan is selling a reproduction that comes with o-ring and seal, ready to go. John and Ryan are the guys who work the phones, I spoke with Ryan today. $65-ish shipped via UPS. https://www.rosevillemoparts.com/product/speedometer-pinion-adapter-only-1966-up-with-26-45-tooth-pinion-new/
-
High fuel trim and pinging
Gojira94 replied to Gubachoo's topic in MJ Tech: Modification and Repairs
A thought - do you think a ballast resistor with too much resistance might be excessively regulating/ restricting power to his pump? A bypass would be a quick and easy test in the field. Check KOEO pressure with it place, bypass, check again if a DVOM wasn't available? My 2 suspicions are a restriction in the lines (clogged filter or debris on the feed side) or inadequate fuel flow from the pump (weak pump, + feed or ground problem, resistor). -
High fuel trim and pinging
Gojira94 replied to Gubachoo's topic in MJ Tech: Modification and Repairs
I think the next step in the fuel delivery department is to verify fuel pressure. -
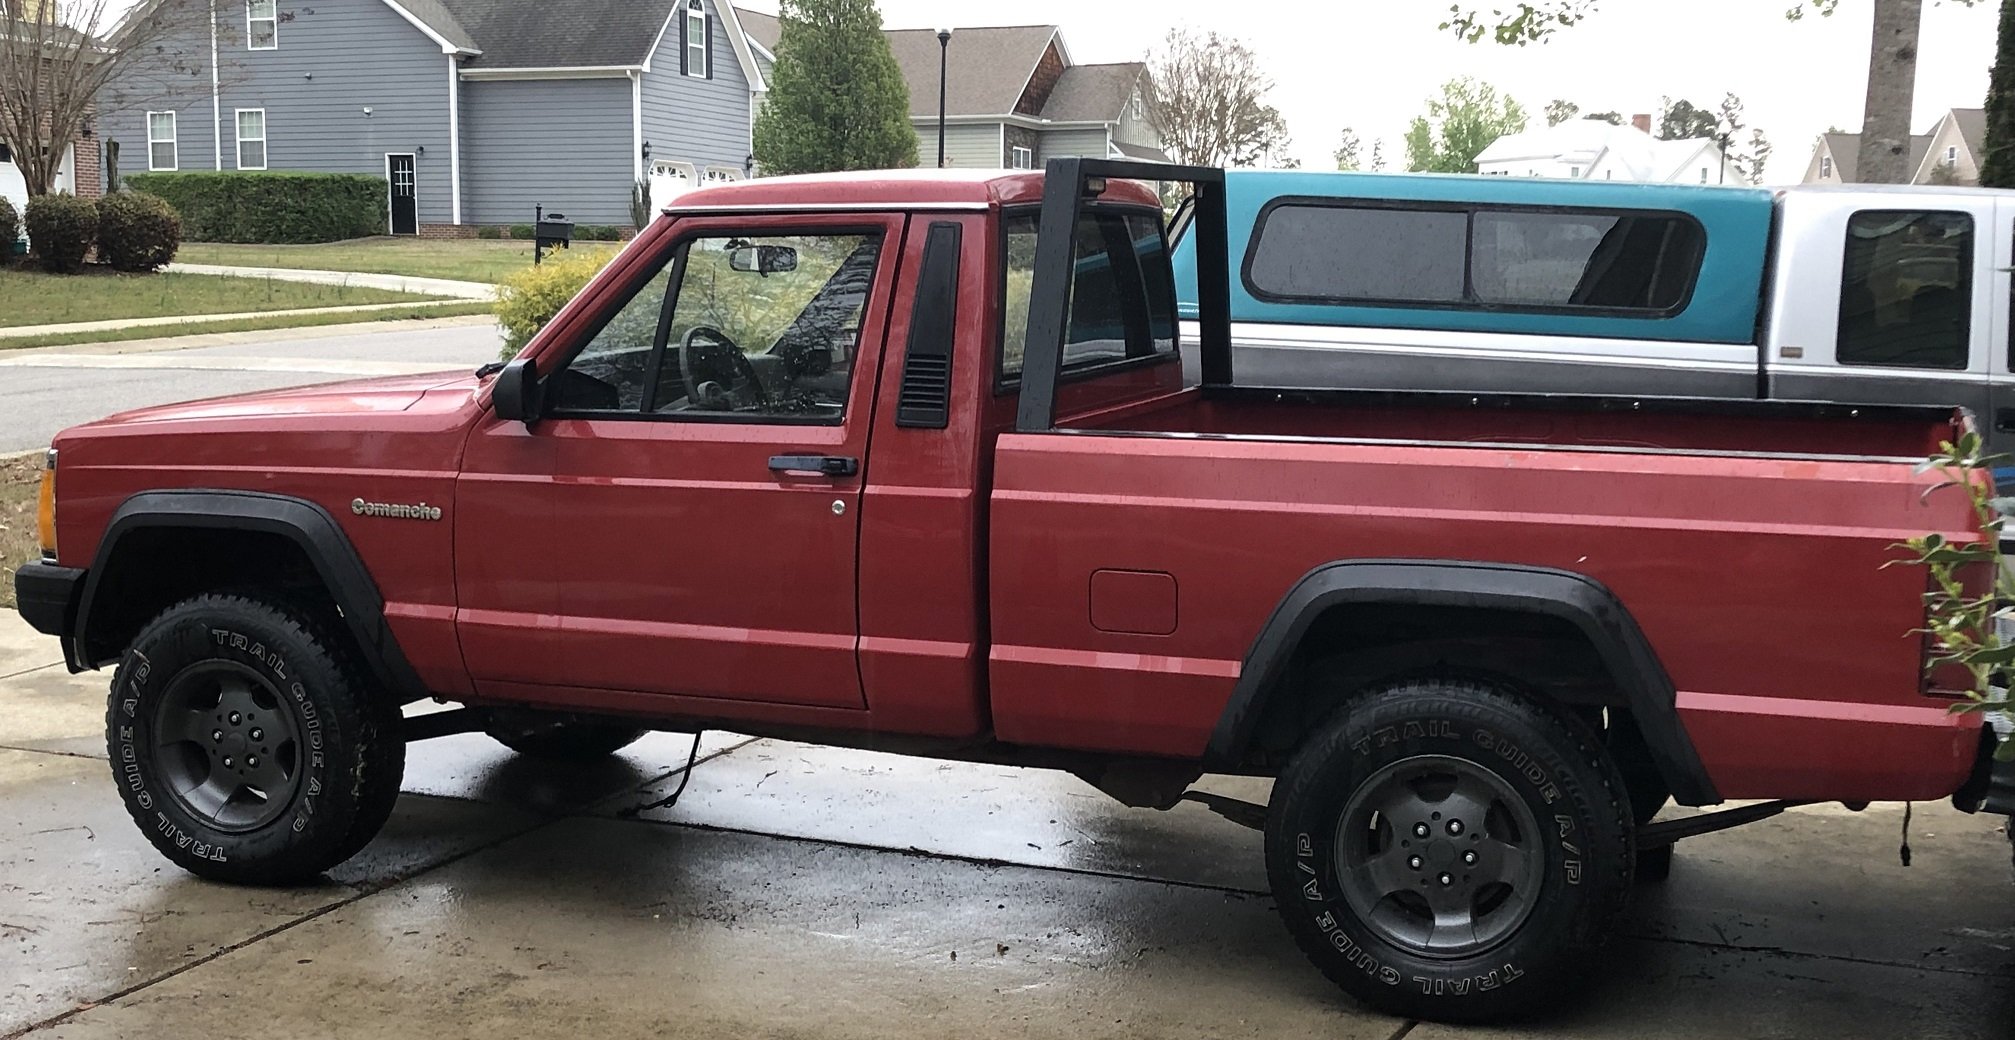
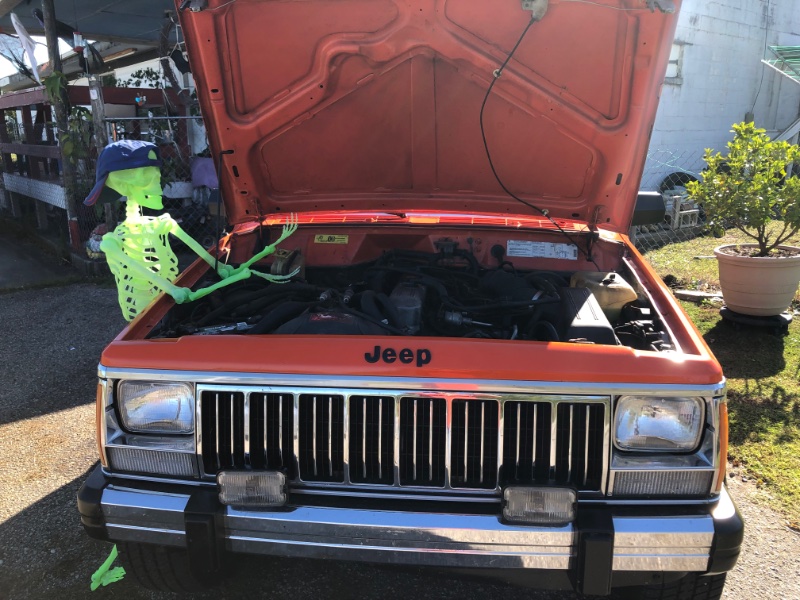
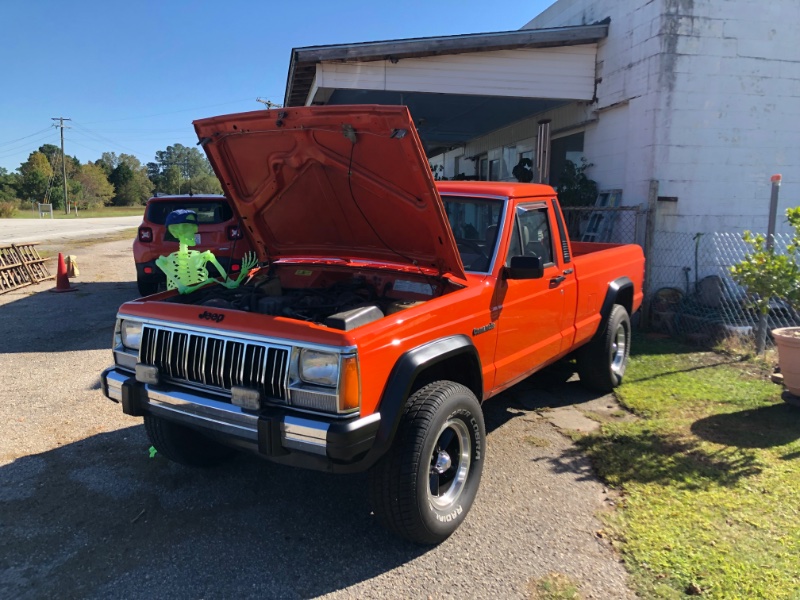
I saw the orange (yeah, I know) MJ just east of Kinston, NC that inspired me to find one for myself a couple weeks ago. This time it was mid-day and I had to stop. I admired from a respectful distance in a commercial parking lot and a couple minutes later the guy popped his head out (his place of business-ish). Seriously nice guy, kept it mostly original but ended up doing the 'option 2' swap with HO engine run by Renix ECU. Someone new asked about inexpensive lift kits in the tech section and it prompted me to take a random trip to Rough Country's site to see what was referred to in the thread. And there's the MJ in question on the RC site. https://www.roughcountry.com/gallery/3-inch-lifted-1990-jeep-comanche-mj-4wd-1130 Here's the 2 pics I took:
-
I appreciate the experience/ wisdom. I'd like to replace the windshield and go with the later rubber seal since the old chrome strips are the only chrome other than the roof drip rails, and the windshield isn't in great shape. I've never tackled removing a windshield from any vehicle. I'd like to have it out and all surfaces inspected/ repaired and prepped before a glass installer shows up. Good news for this MJ is it's been in NC all its life, now sits 22 min west of where it was sold in 1987. I've had an inspection camera everywhere inside the cowl and this spot is below the cowl envelope, and there's no rust at all coming in from above it, and the inside lip for the windshield is perfect.
-
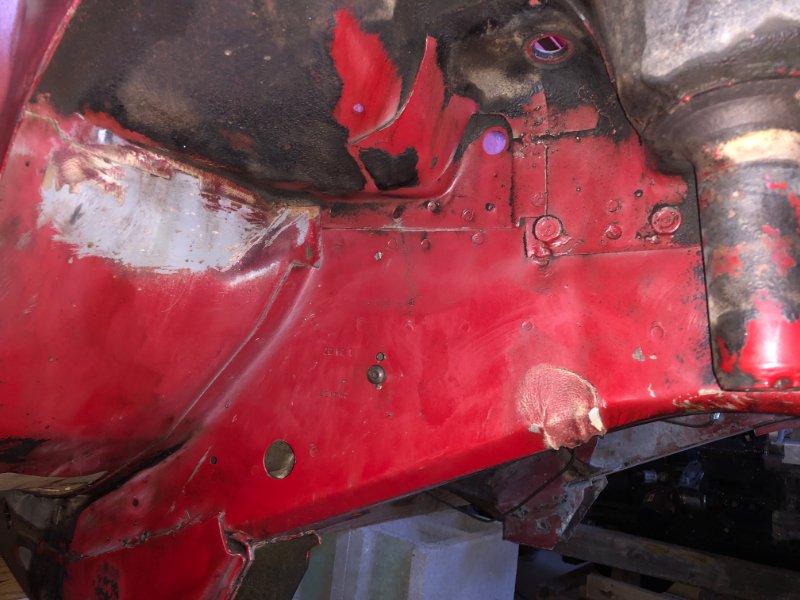
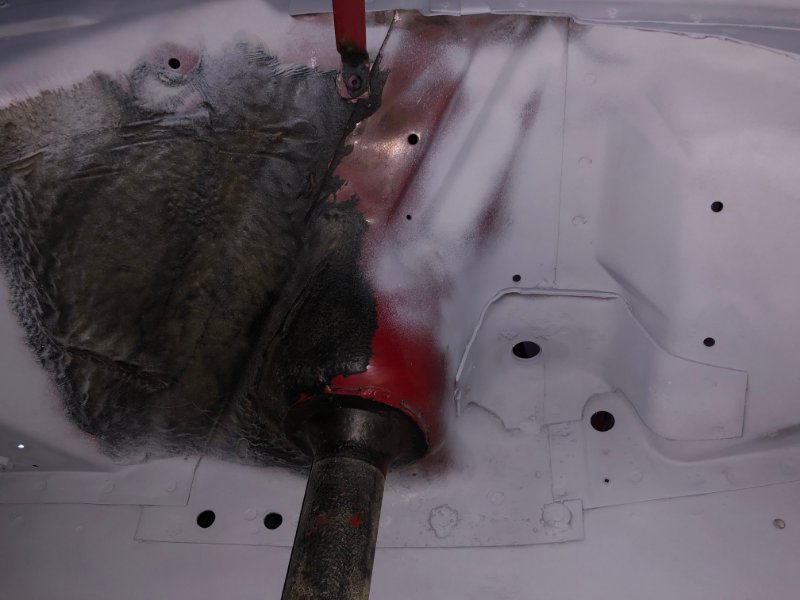
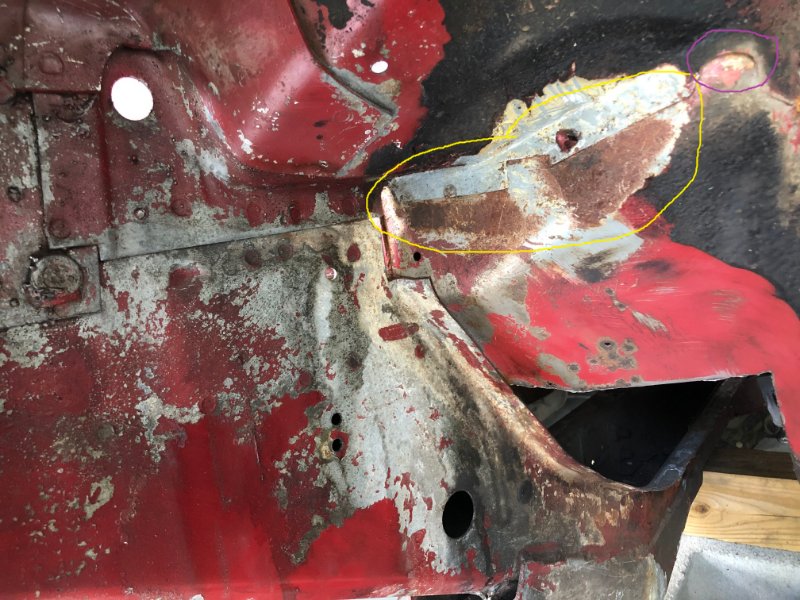
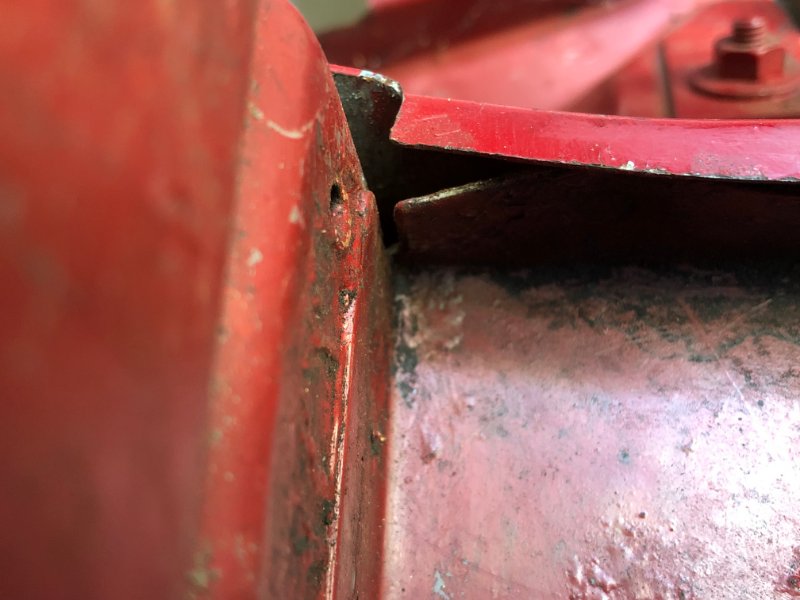
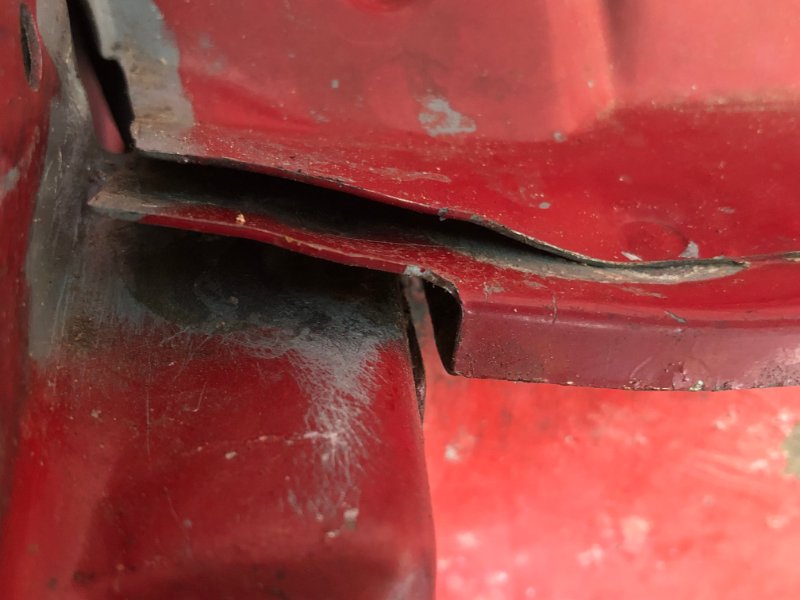
I've gathered a few ancillary parts here and there but I haven't spent any hands-on time since I started job #2 in April. Not a fun stage to be at, interior is ready to reinstall, fuel system is 100% restored, brake system 100% new. Have control arms and full suspension clean and ready. '99 Dana 30 needs a cleaning but it's ready to go an overhaul before it goes under. Main thing is cleaning down to paint/ metal from the front of the frame to the rear of the cab. Address any rust, prime, paint, re-undercoat. Then patch the floors, and everything can start going back together. So... in the corners at the firewall. I've always thought that's a horrible place to have water and dirt trapped, with all that seam sealer in there. Someone in another thread said maybe drilling a 1/16" hole or two might be good for drainage. Anyway, I wanted to get it all out and see what's what. My feeling is if there were a few small gaps to allow water to drain through, no seam sealer needed with a good coat of primer and top coat of enamel. Assembly plant guys plastered the bottom side, too. I pulled it all out both sides. Sure enough, the seam sealer on the bottom creates a reservoir for moisture once the top side loses adhesion after some years. I pulled the bottom edges out a hair and pushed a couple additional channels with a small punch between the layers for plenty of drainage. Circled in purple above, there is the drain channel that was designed into it, but assembly covered it both sides with seam sealer. This will all be stripped to metal, primed, painted and undercoated again, paying attention to maintain drainage afterward. It'll be behind new fender liners and easy to access, check and maintain as needed. But I think with good coating and easy drainage, rust won't be an issue afterward. I opened up the corner at the right of the channel as well after this pic. Passenger side below- the gaps aren't as large as they look, i backlit it with a really bright LED lamp for the pic.

-
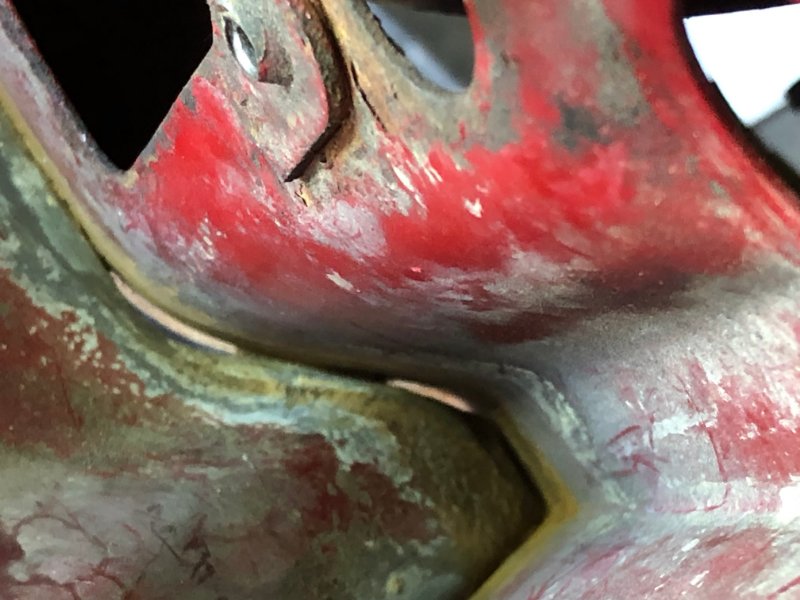
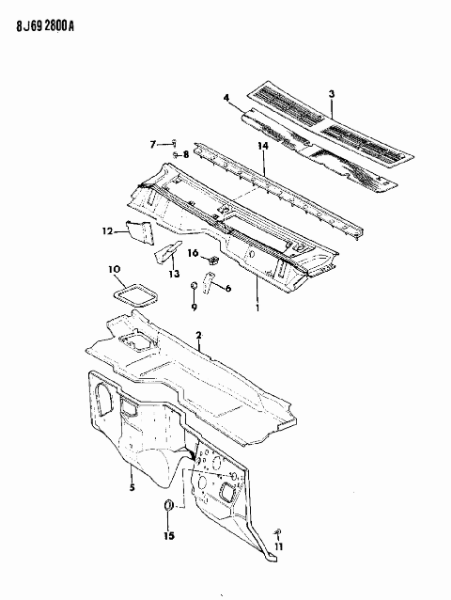
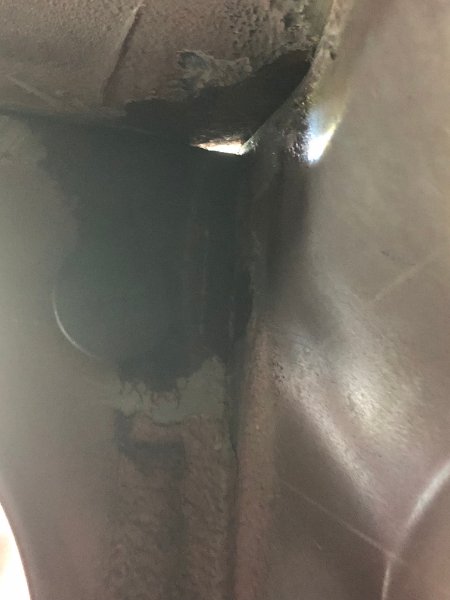
Here's how I'm going about it. One problematic issue is where the upper edge of the "Panel, Dash" joins under the "Panel, Air Chamber" with pinch/ spot welds all the way across. There are gaps in between the welds where parts 2 and 5 come together. Water and dirt settles in the gaps where 5 sags a bit between the welds: They're not bad or an issue except for a couple spots. In my case just this passenger end of the join. So what I'm doing is gently prying the layers of 1, 2, 5 apart just enough to get in there and treat the corner issue. Once clean with a coat of POR-15 I'm going to pump in seam sealer from both sides and pinch all the gaps completely flat again and wipe off the excess. With the layers opened up a bit I can get hobby files and a small steel engine brush in the corner gap to get the rust out from the inside:
-
Bulkhead junction block cleaning
Gojira94 replied to Dandxj's topic in MJ Tech: Modification and Repairs
I soaked both ends of mine in odorless mineral spirits. Brake parts cleaner and acetone evaporate way too quickly to do an effective job, unless you want to use a LOT of it... I did do a quick rinse with Brakekleen afterward though. And dielectric grease is fine, just don't go overboard with too much.