

Gojira94
-
Posts
718 -
Joined
-
Last visited
Content Type
Profiles
Forums
Gallery
Everything posted by Gojira94
-
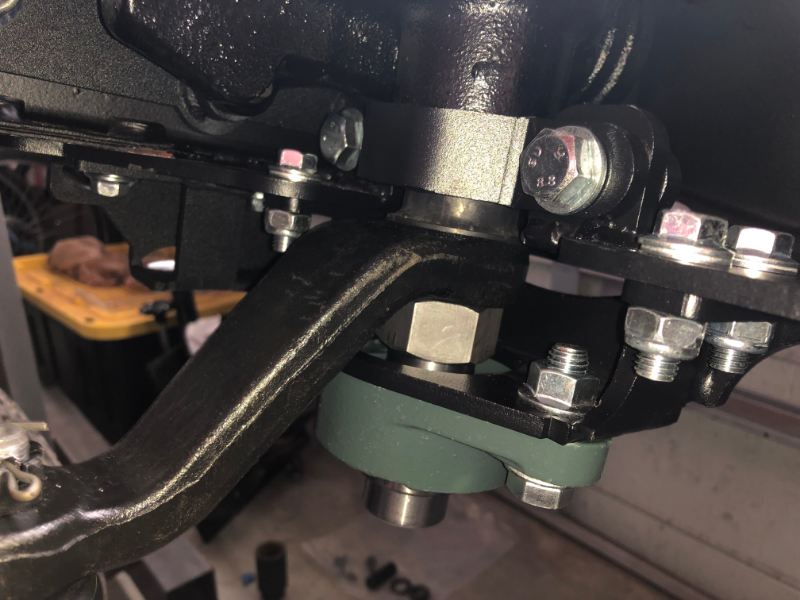
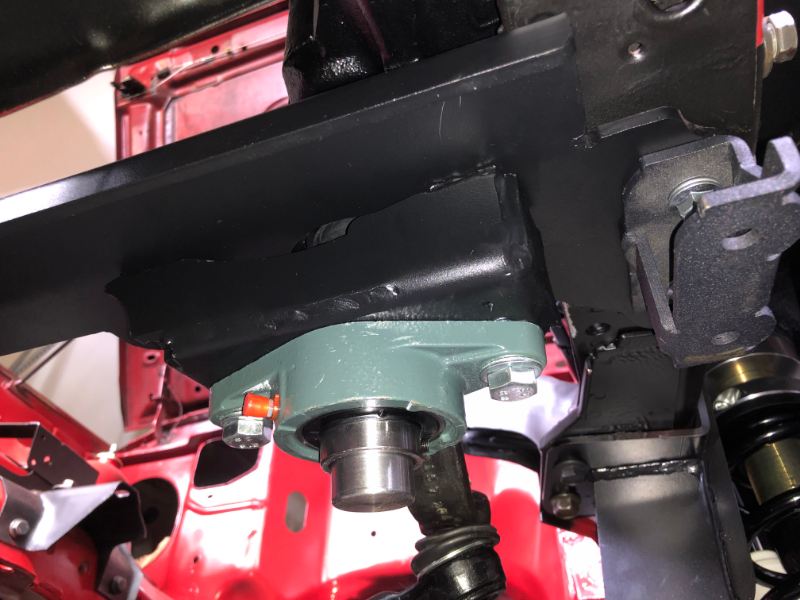
Steering box brace installed, with relocation brackets. Ran out of time today before I could get the sway bar and disconnects in.
-
Nope. You're the source here of some of the best stuff I thought I knew.
-
SENTINEL HEADLAMP FEATURE
-
Headlamp delay module.
-

Unknown Ground Wire Location
Gojira94 replied to Torq_Shep's topic in MJ Tech: Modification and Repairs
OPSU have a wire on it? Looks eerily similar and in about the right place… -
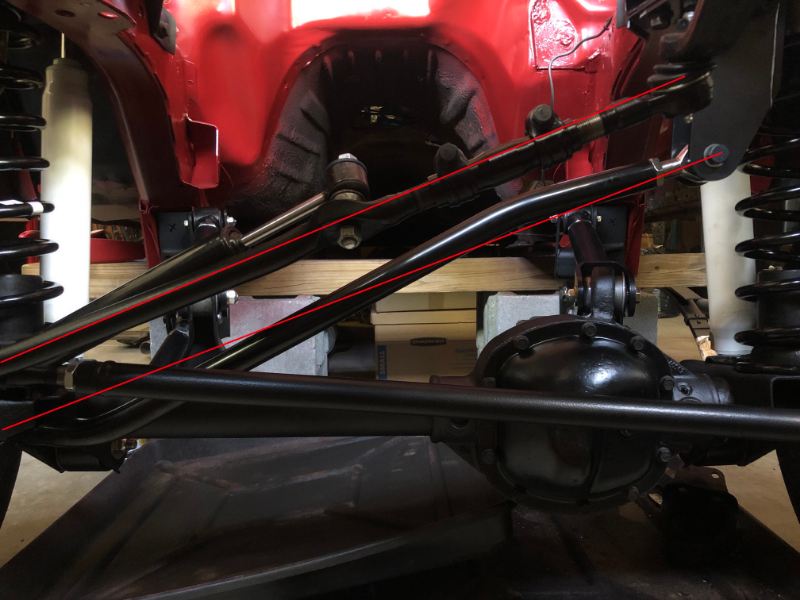
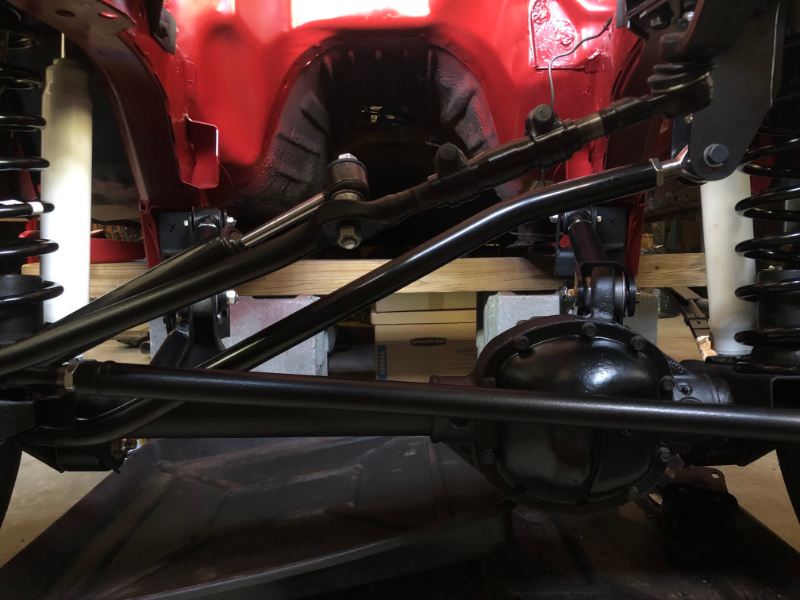
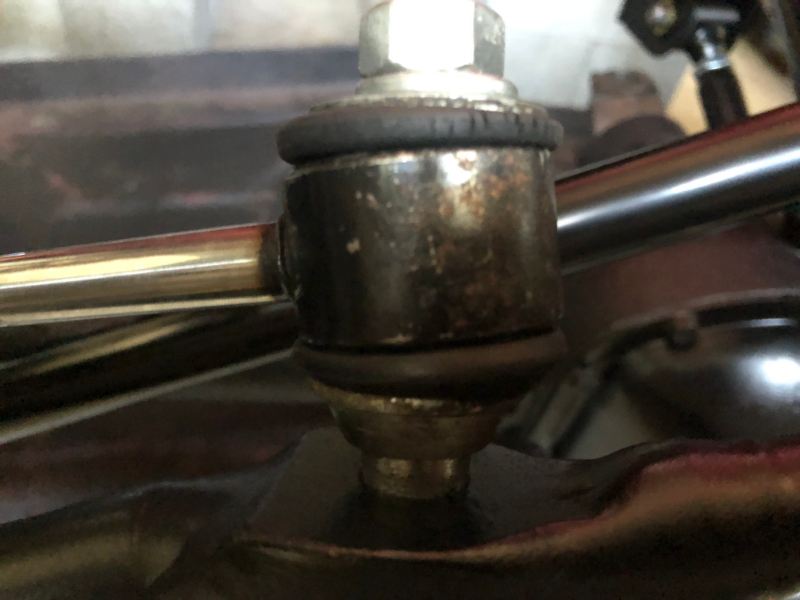
Steering gear in and pretty darn close on the alignment. I'll need to center the steering wheel when I get the column in but it's within about 20* as it is. I bought a version of the RC 6610 drop Pitman arm for dirt cheap to answer some questions. It mocked up too low so I reinstalled the OE Pitman arm. This is the STOCK Pitman arm: I threw the old steering stabilizer back on it to see how it the fitment is. It's cinched snug but not tightened and drawn all the way through (was a pain to get off the old drag link). I don't like the angle at all. I'd like suggestions on a replacement that might have a ball joint type attachment at the drag link.
-
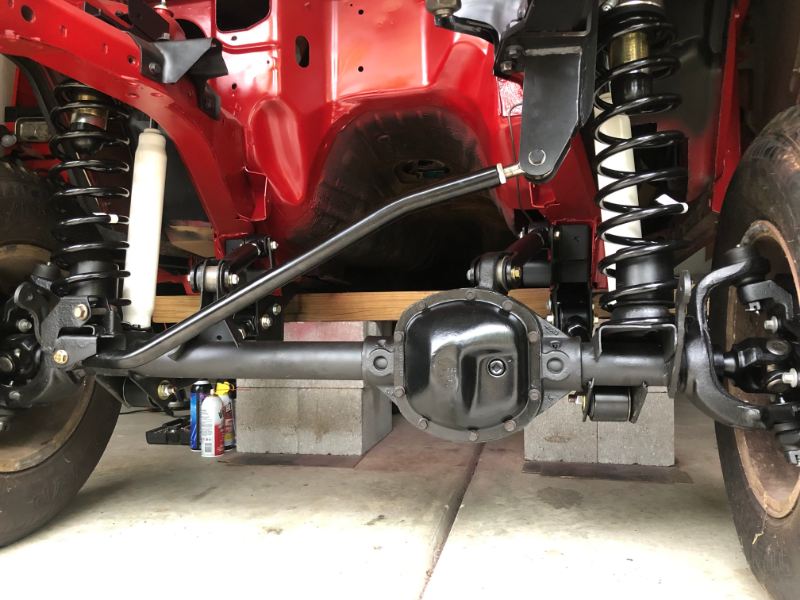
This is where I stopped for the day. As expected, without the weight of the engine with track bar length set, it's shifted to the passenger side. At least if I have to make adjustments with the engine in, it'll be already very close. It now stands on its own and I can pull the cribbing out from under it. Next is steering gear, and temporarily install the column, so I can roll it in/ out for more cleanup underneath the cab and prep for floor pan patches.
-
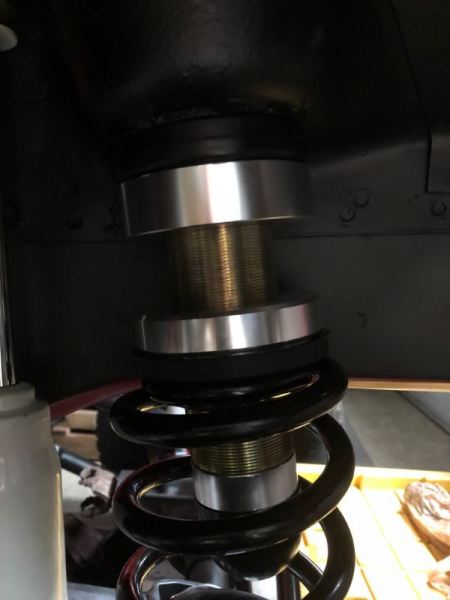
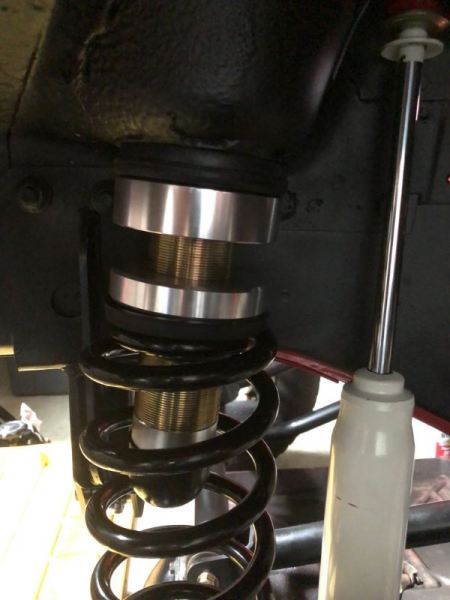
The temptation to get some more parts out of the den won out. Got the ACOS set, springs and shocks in. OME 2934 do have a height difference L/R. So to set the ACOS to fill out the desired 6" lift paired with 2934s, ACOS height is as follows: Passenger side: 94.7mm (3.728346") Driver's side: 82mm (3.22835") (12.7mm / .499996" difference) Measurement is from the top of the upper half to the lower edge of the lower cushion on the ACOS. I opted to use my new factory style upper spring cushions, so the measurement to compensate for removing them in a standard ACOS installation didn't need to be added 'back' to the ACOS height. I just didn't like the idea of slapping aluminum against steel at a heavy load point on the unibody. Passenger side: Driver side:
-
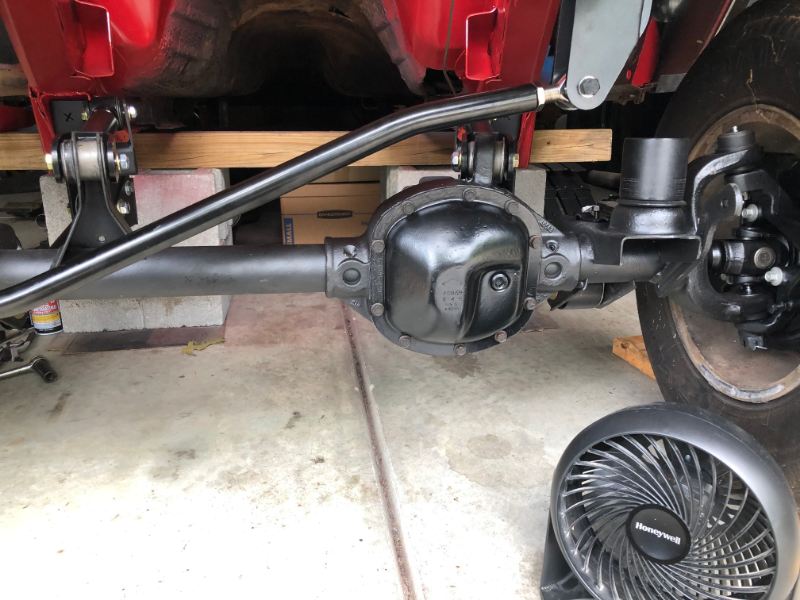
Moved the ride height to 13.75", got the wheelbase to 113.25" and set the track bar length with the axle centered. Debated whether or not to continue in the heat/ humidity. Central NC humidity is difficult to relate in words. Any higher and it'd be raining. Upper and lower bumpstop gap at this height is 5.75". Front shocks have 12.2" travel, so it'll be close to ideal and prevent bottoming them out with .45" to spare.
-
29-32psi sounds fine for a running engine, and it would probably start with some sputter that low at KOEO. But it'd be much better to see it in the 37-39psi range at KOEO. Unless you saw 32 some number of seconds after KOEO and it bled off a little before you observed it. x2 on cleaning and verifying grounds though. Cruiser54's fuel pump ground mod might help some as well, pretty quick and easy for the return benefit. And that brings to mind the ballast resistor. Might try bypassing that as part of secondary troubleshooting.
-
Front Coil Springs & Suspension (de)Codes?
Gojira94 replied to Gojira94's topic in MJ Tech: Modification and Repairs
Fair enough, as good information as I could ask for. I think what I need to do is double check my shock travel numbers, bumpstop distances and decide on front height of 12.75", 13.75" or in between for my 6"-ish lift. Thank you for chiming in. -
exterior trim strip, front of window ('88)
Gojira94 replied to brucecooner's topic in MJ Tech: Modification and Repairs
You used this kit after switching to fixed front glass? Looking to do this myself. I currently have fixed 2-piece, per door, arrangement. Being it was sold as a base 2WD/2.5/4-spd I doubt it ever had wings. -
So, yeah, I need to reset the shims under the tires and shoot for 13.75" ride height and then set the wheelbase on the lowers.
-
Front Coil Springs & Suspension (de)Codes?
Gojira94 replied to Gojira94's topic in MJ Tech: Modification and Repairs
Crap. This from a guy who had access to all the old tomes in the Chrysler dealership network for a long time... I'm screwed lol. Wish I knew C++ or C# better, I could generate the number of combos of wheelbase, drivetrain and 2WD/4WD. I bet it'd be around 35-40. More modern XJs and probably the 90-92 MJs build sheets list things like SDA, SDU, etc. for standard/ heavy duty suspension options. I bet the 2-letter codes from the AMC era are equivalent, but nobody we know has the decoder ring. Suffice it to say I suppose it was arbitrarily decided by AMC/ Chrysler design engineers that 4WD offerings should have an additional 1" of ride height/ ground clearance. And I also suppose that's all I need to know to set my ride height and wheelbase on my project, based on the amount of lift I'm adding. -
In looking for ride height, I found THIS thread, in which a member asked "This may be a stupid question but why is does one say front : 7.75 rear : 9.2 and the second answer say front: 6.75 and rear: 6" . Does anyone know or know how to find out what the 2-letter codes translate to? I ask because I'm setting wheelbase at what will be on a 6" lift and wondered what the difference is that makes the 4WD ride height 1" higher than 2WD. These differences, according to what @Eagle shared as "...M.R. 277 for the Comanche, I.S. Notes. Specifically, it's in I.S. 14E, which addresses spring identification and selection." Mainly, I'd like to know if it's just coil and leaf spring differences (taller/ more) and just explains how much more spring is needed to make that 1" difference in all the combinations of engine/ transmission/ transfer case, rear axle, short vs long wheelbase, etc. Parts Catalog list (38 different coil springs): 8 52001107 SPRING, Front Light Duty, Coded EF Require Quantity: 2 8 52001108 SPRING, Front Light Duty, Coded EG Require Quantity: 2 8 52001109 SPRING, Front Light Duty, Coded EH Require Quantity: 2 8 52001110 SPRING, Front Light Duty, Coded EJ Require Quantity: 2 8 52001111 SPRING, Front Light Duty, Coded EK Require Quantity: 2 8 Jeep 52001114 52001114 SPRING, Front Standard Duty, Coded FE Require Quantity: 2 Package Quantity: 1 8 Jeep 52001115 52001115 SPRING, Front Standard Duty, Coded FF Require Quantity: 2 8 Jeep 52001116 52001116 SPRING, Front Standard Duty, Coded FG Require Quantity: 2 Package Quantity: 1 8 Jeep 52001117 52001117 SPRING, Front Standard Duty, Coded FH Require Quantity: 2 8 Jeep 52001118 52001118 SPRING, Front Standard Duty, Coded FJ Require Quantity: 2 8 Jeep 52001119 52001119 SPRING, Front Standard Duty, Coded FK Require Quantity: 2 8 Jeep 52001122 52001122 SPRING, Front Heavy Duty, Coded GF Require Quantity: 2 Package Quantity: 1 8 Jeep 52001123 52001123 SPRING, Front Heavy Duty, Coded GG Require Quantity: 2 Package Quantity: 1 8 Jeep 52001124 52001124 SPRING, Front Heavy Duty, Coded GH Require Quantity: 2 8 Jeep 52001125 52001125 SPRING, Front Heavy Duty, Coded GJ Require Quantity: 2 8 52001784 SPRING, Front Light Duty, Coded EL Require Quantity: 2 8 52001785 SPRING, Front Light Duty, Coded EM Require Quantity: 2 8 52001786 SPRING, Front Light Duty, Coded EN Require Quantity: 2 8 52001787 SPRING, Front Light Duty, Coded EP Require Quantity: 2 8 52001788 SPRING, Front Light Duty, Coded ER Require Quantity: 2 8 52001789 SPRING, Front Standard Duty, Coded FL Require Quantity: 2 8 52001790 SPRING, Front Standard Duty, Coded FM Require Quantity: 2 8 Jeep 52001791 52001791 SPRING, Front Standard Duty, Coded FN Require Quantity: 2 Package Quantity: 1 8 Jeep 52001792 52001792 SPRING, Front Standard Duty, Coded FP Require Quantity: 2 8 Jeep 52001793 52001793 SPRING, Front Heavy Duty, Coded GK Require Quantity: 2 8 Jeep 52001794 52001794 SPRING, Front Heavy Duty, Coded GL Require Quantity: 2 8 52001795 SPRING, Front Heavy Duty, Coded GM Require Quantity: 2 8 52001796 SPRING, Front Heavy Duty, Coded GN Require Quantity: 2
-
Ok, wait a sec... 6.75" +/- .5" stock height for 2WD, 7.75" +/- .5" for 4WD? Taller coil and leaf springs on a 4WD? Parts catalog shows a staggering 38 different springs. Headed to tech section to ask...
-
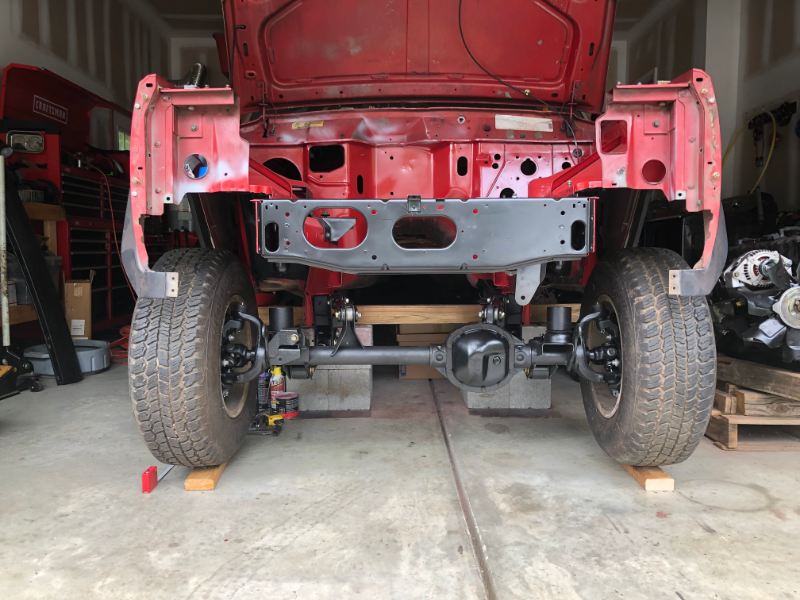
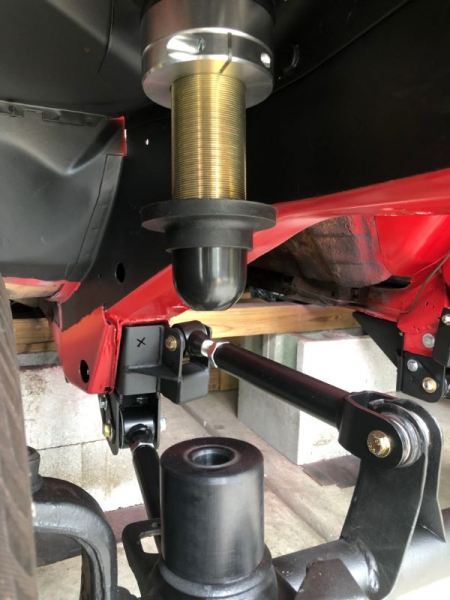
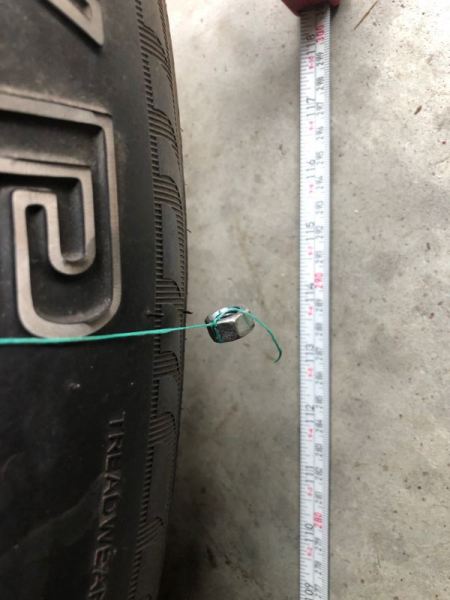
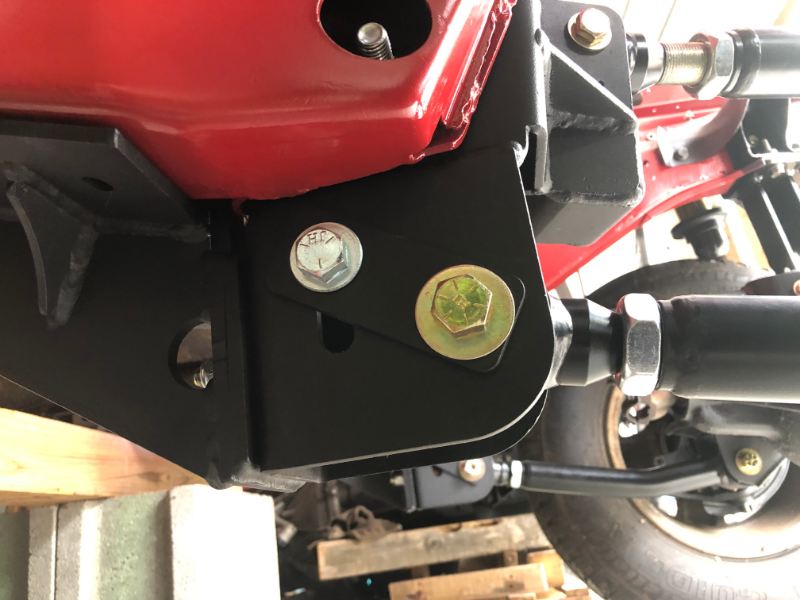
Front axle mock-up to get control arm lengths underway. The Rocky Road drop kit seems to want a stock lower arm length. Starting with passenger side wheelbase. I'm at 113.75-113.875." I'll need to lose .75" to get it right. The lower arms (Core 4x4) can lose about another .125" and the lower arm bracket is adjustable. I started with those perfectly centered so I could have adjustment either way I needed. That'll give me another .5" or so shorter. Front ride height is set at 12.75" which should be exactly 6" over stock. No springs, shocks or drivetrain, so that was easy lol. That toe isn't off as it looks in 2 dimensions... I haven't measured ACOS to lower bumpstop distance but it's closer than I expected. I may drop back to 2" on the lower. Please chime in if you have any thoughts/ experience.
-
Maybe start with removing the inner handle/ bezel and see if getting access to the rods helps make the issue more readily apparent or in getting the door open?
-
Jeez, I'm out of it. Just noticed it's 91+ and his vacuum tank is right there by the blower.
-
I'll let others more familiar with the valves answer that, but the gray line goes to the vacuum tank in the bumper. It's vital to all vacuum-fed doors and actuators in the heat/ AC system. One vacuum line from the engine to create the vacuum inside the tank, and lines going back out to things that need it (heat/AC doors, cruise control). Make sure your vacuum tank holds vacuum. Mine is seeping pressure and needs resealed along its seam.
-
Open cooling system fan switch
Gojira94 replied to Jdde's topic in MJ Tech: Modification and Repairs
This is your radiator, and it doesn't fit the plugged hole circled in red? My rig had none of this, I bought essentially the same rad and SMP TS258 (or AutoZone SW594) fits fine. I thought it was cool that at some point they'd started making rads with the older closed system fan switch provision.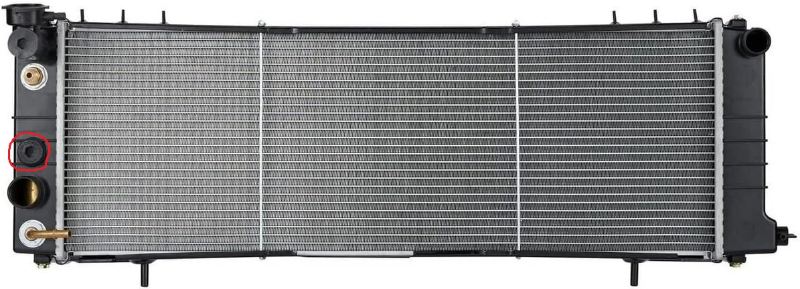
-
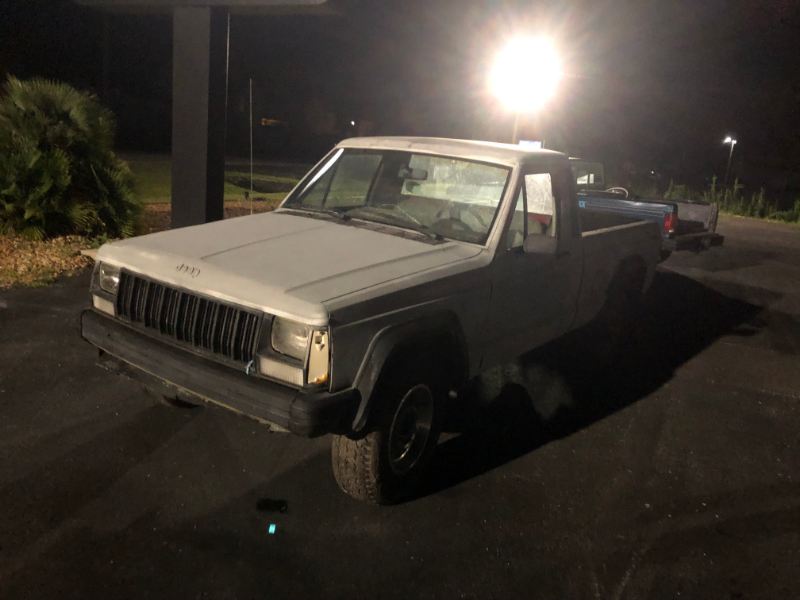
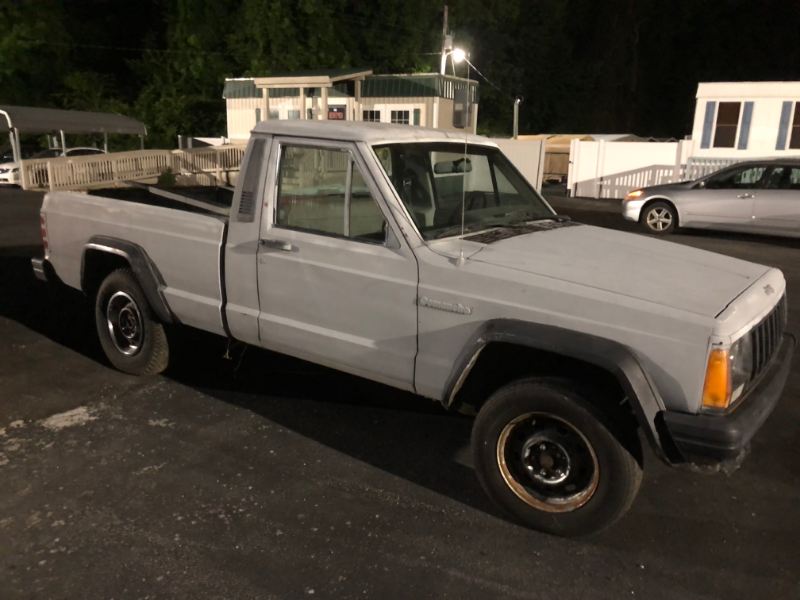
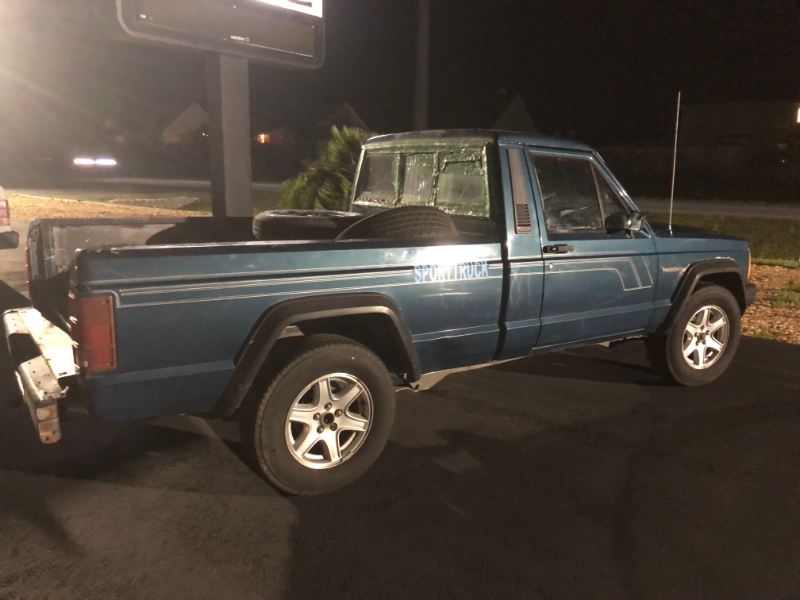
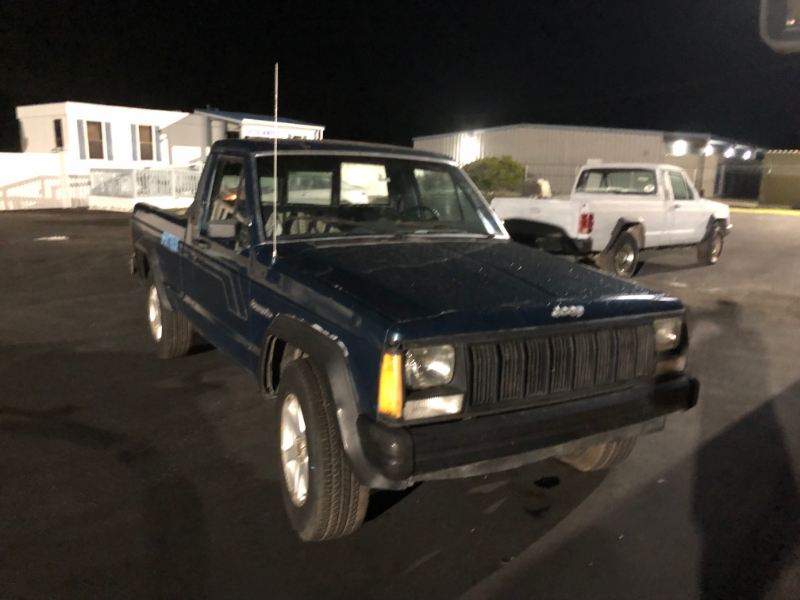
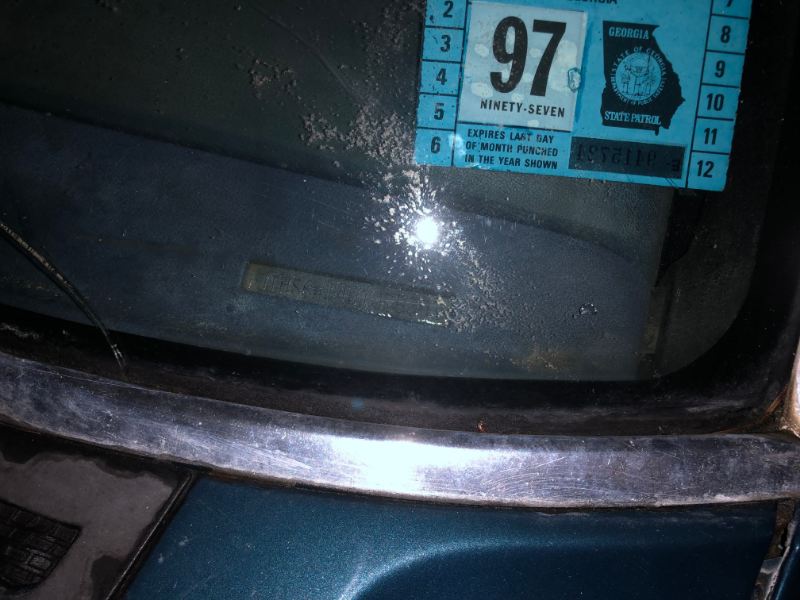
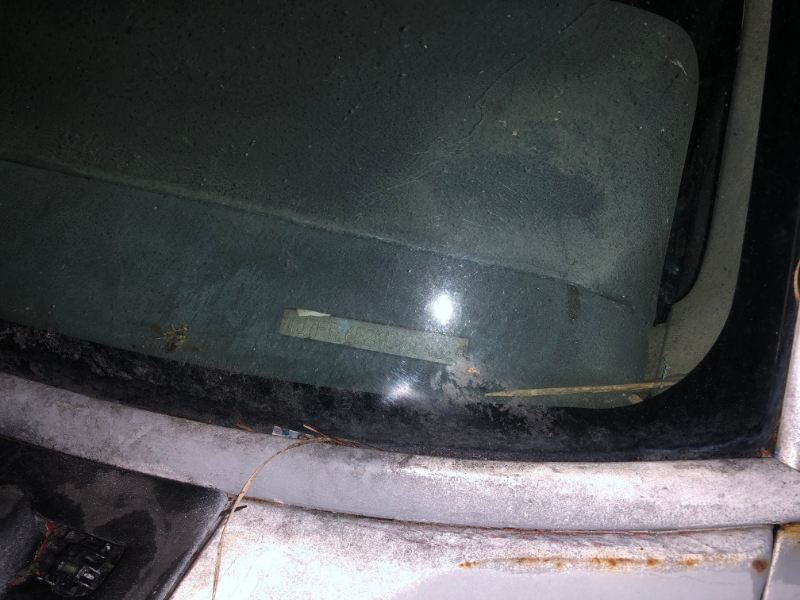
Late Saturday, coming back from Emerald Isle, NC. 2 parked together at (what at least used to be a small used car outfit) on NC Hwy 58, 5.3 miles NW of the NC 24 / NC 58 intersection. 2 parked together. I pulled in quick and snapped a few pics. Both looked like they are somebody's work trucks. The gray primer one I'm pretty sure I saw about a year ago coming out of the trash/ recycling center nearby at Fire Tower Rd. I got pics of VINs. One I'm having trouble deciphering the check digit, but I got the rest: Gray one (originally looks to be red) 1J7FT26E2KL488432 89 Base 2.5L Blue Sportruck 1JTHS641_JT075303 88 Base 2.5L
-
Vacuum looks a touch low, ideal would be between 16-18" steady idle. Your throttle blip looked normal but slightly low- vacuum drop and then jump to 20 when it snapped closed. Maybe 22-23" snapped closed with MAP reading in the 20s kPa would be closer to normal. Steady idle MAP about 50-55kPa. For what it's worth, if the OBDII system is intact, you can put a scanner/ code reader on it (the kind that costs about $80 or so) that can give you real time parameter readings from at least some of the various PIDs. Look for what the IAC counts and TPS % are, and what the fuel trim or basic AFR is. You'd be looking for a concurrent lean condition with the high idle. If IAC counts look like they're high (closing off additional air), pintle fully extended, you might try closing the throttle blade stop a bit until IAC counts are in the normal range and idle comes down, with either throttle body. And then adjust the TPS if needed to read 0% with throttle closed. Maybe also see what the CTS is reading just for giggles, in case it's skewing fuel trim. Also make sure you don't have any exhaust manifold leaks.
-
Valve Covers, Renix vs Stamped HO
Gojira94 replied to coolwind57's topic in MJ Tech: Modification and Repairs
This is my '93 YJ cover. I haven’t pulled it off yet, I’m OCD for cleaning before I do that, so I’ll have to add pics for what the baffles look like inside later. EDIT: that cable guide is backwards, it's just sitting there. It was missing and i grabbed one in not-so-good shape from a ZJ in my local yard for mockup purposes. Flipped around, it lines up fine with the 99-01 horseshoe intake arrangement/ alignment with HO throttle bodies, for what it's worth.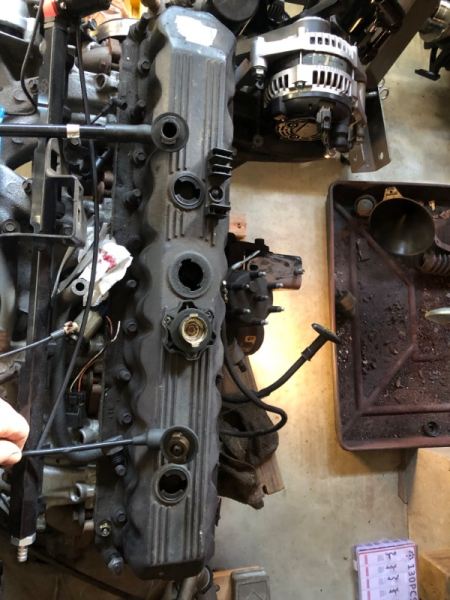
-
Valve Covers, Renix vs Stamped HO
Gojira94 replied to coolwind57's topic in MJ Tech: Modification and Repairs
Yeah, once your memory starts to go, you can forget it... "I heard there are 2 sure signs you're getting old- one, your memory starts to go, and the other... well, I forget." Interested to hear that my (donor engine) 93 YJ cover is different from the Renix cover. Hadn't thought of that. And I wonder what's different from the HO XJ aluminum and ZJ aluminum cover? And are they in any way different from the 91-95 YJ cover?