
Gojira94
-
Posts
718 -
Joined
-
Last visited
Content Type
Profiles
Forums
Gallery
Everything posted by Gojira94
-

TBI or Carb? '86 2.5L to 3.4L upgrade
Gojira94 replied to FigurativeGarbage's topic in MJ Tech: Modification and Repairs
The PCM choices from 93-95 are: 16172693, 16184164, 16184737, 16196397. Which one do you have? FlashHack for L32 can be used to retrieve the calibration and programming the PCM with any of these. You'll need an ALDL cable to connect to it. 94 should still be a 12 pin OBD-I interface. The shortcomings of the L32 right now at least is the lack of widely known/ supported definition files, which show the hex code in the PCM in human readable form in an editor like TunerPro RT. There is a well-known datastream definition for it which would allow you to datalog/ observe powertrain data. There are definition files out there on gearhead-efi.com and I can certainly assist you in getting what you need to edit the calibration if it's necessary. What transmission are you planning to run with this combo? That might really only be the thing you need to change, i.e. turn off auto trans features if running a manual. If engine and trans are from the same car and you can make it fit, you'd really not need to change the calibration much, if at all. EDIT: I see you said "flywheel." so it's manual of some sort... -
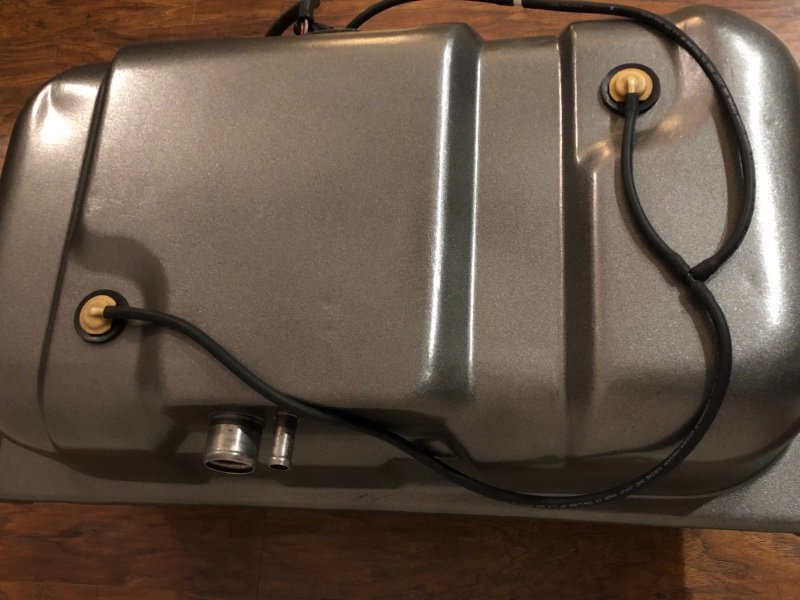
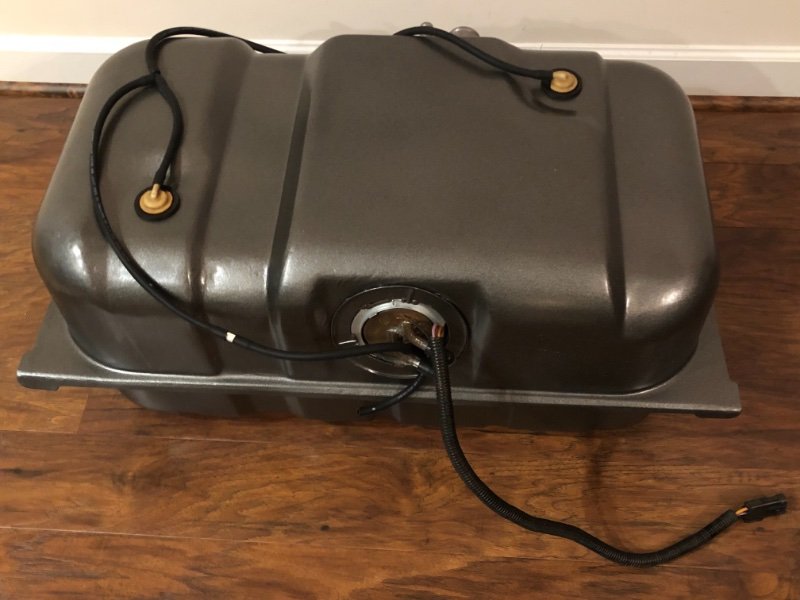
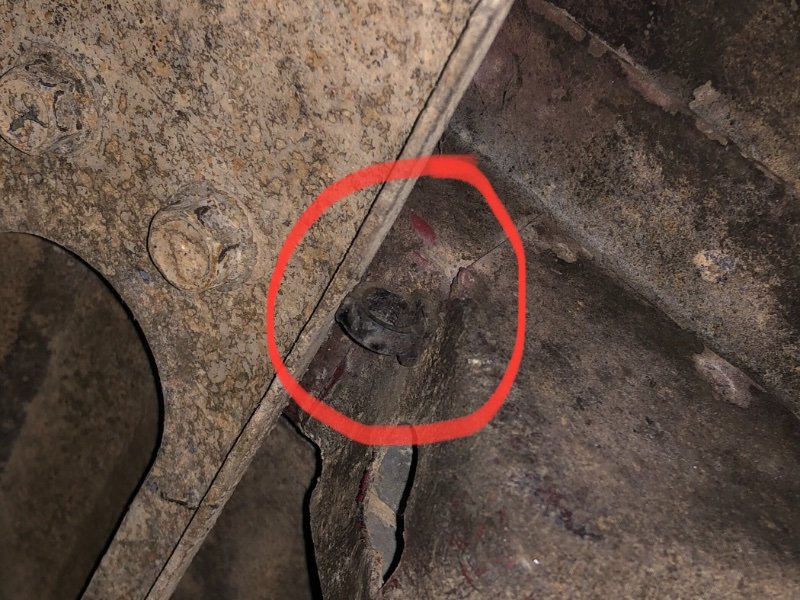
Finished product- I may replace the last segment of the vent line. I used the last of what I had and was a little short but then found another small piece of the same 7/32” in my toolbox. the loop that holds this line is still there and in good shape.
-
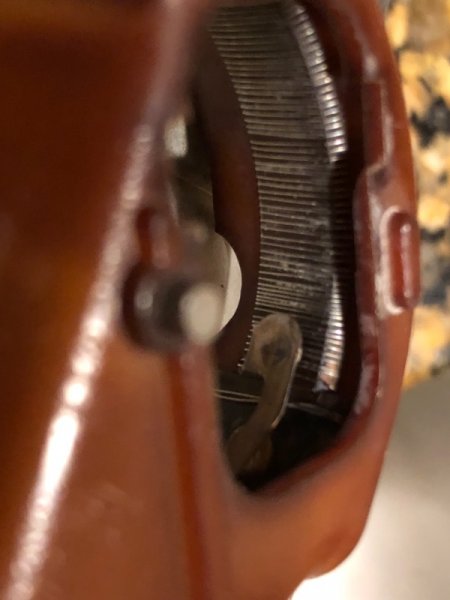
The cover on the side of the sender slides off so you can clean the internal elements. Spots of higher than normal resistance indicate buildup of grime. Before cleaning it read 2.4 to 146 ohms with a really big jump between 80 and the upper limit stop. After cleaning it now reads .4 to 91 ohms, very smooth across the sweep/ range. Empty should read as close to 0 as possible because the low fuel light comes on at 5 ohms and turns off above 16.
-
One more Siemens-Deka for Ford, on the larger end: 4F2E-A4B - 236cc/min@43.5psi, 12.6 ohm, 4 hole, USCAR connector; (192/199/223cc@29/31/39psi) for Ford 'Essex' 3.9 and 4.2 2 valve pushrod V6
-
I remember the ads for the Eagle when I was in Jr High school. The IROC wasn’t a thing yet and the early fox body Mustangs had restored the honor of the Ford pony cars after the Cobra II debacle. For some reason I really liked the Eagle, with its high stance and sensible looks. And you’re right, you’d better give everything you pull off an old vehicle proper treatment, even if it takes a week to run down what you need to do it right!
-
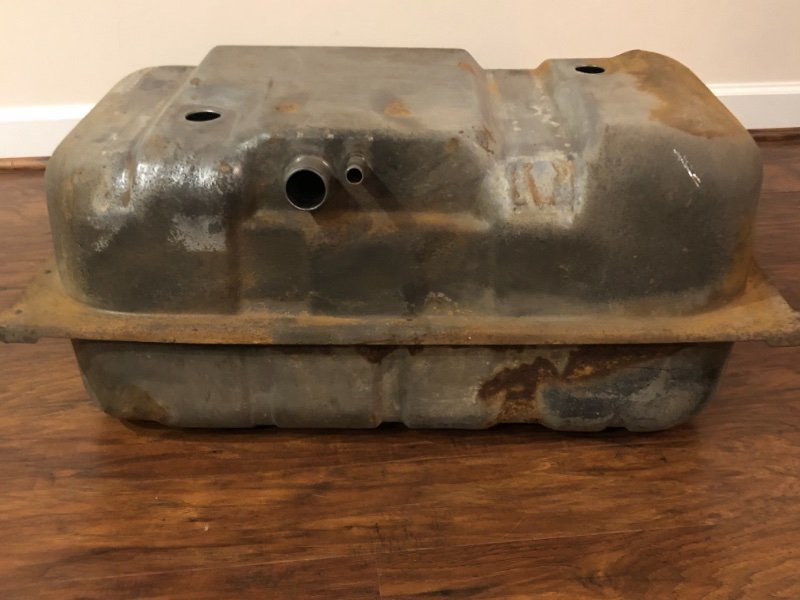
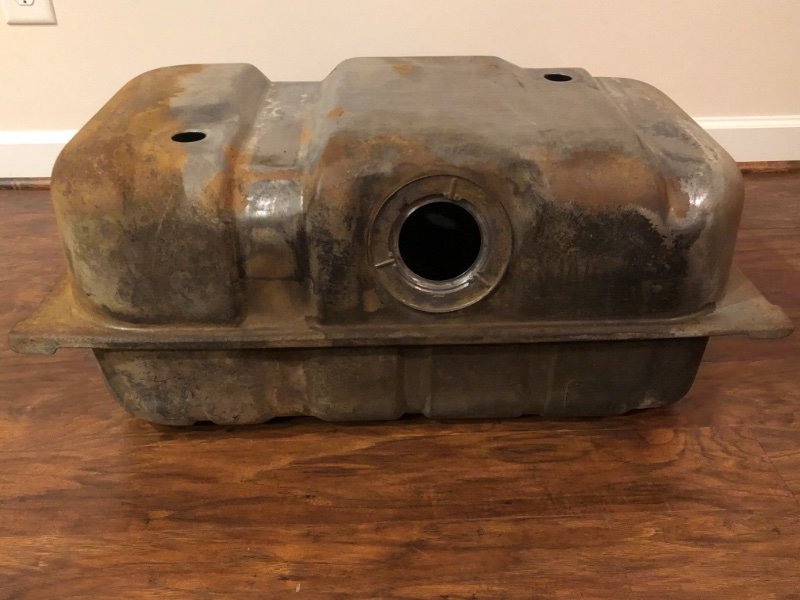
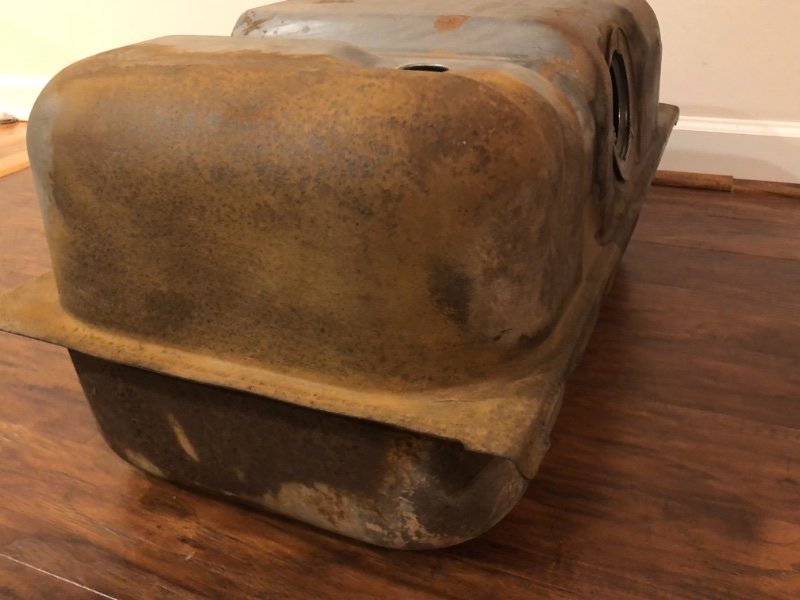
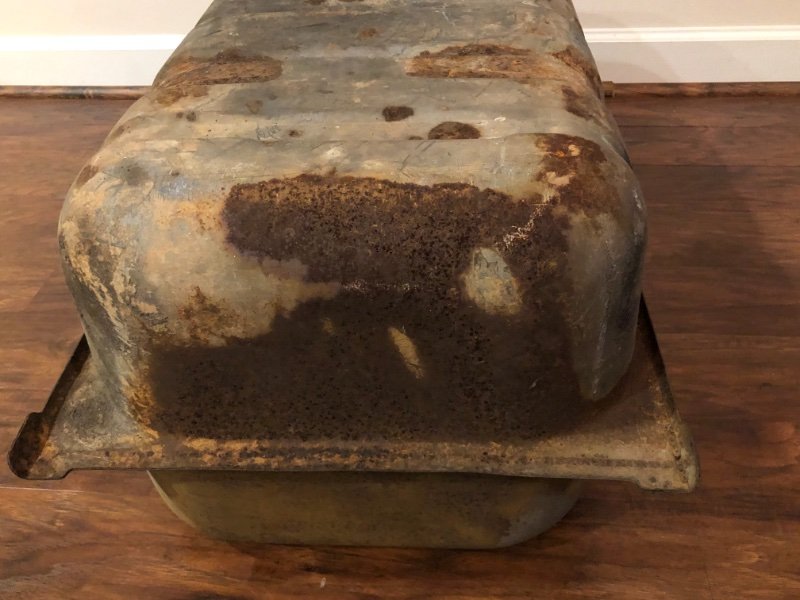
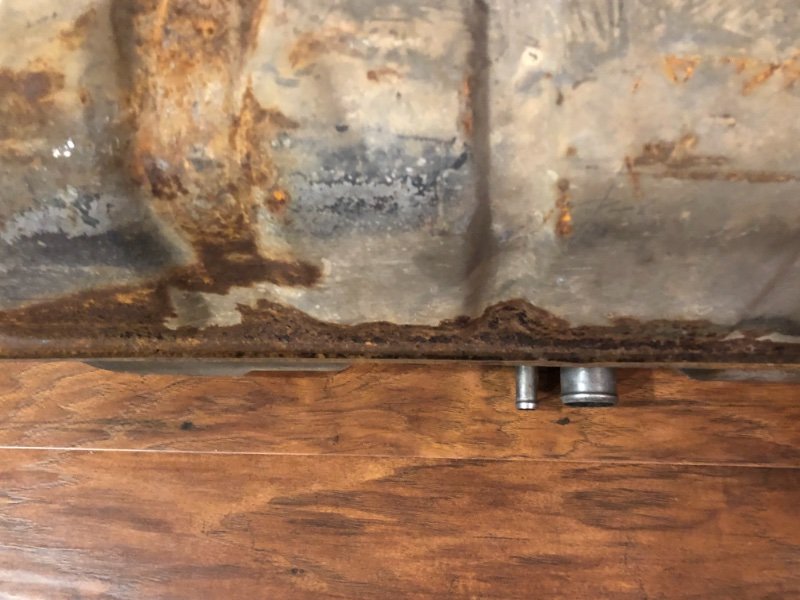
Great Scott!! I forgot the before pics.
-
Here are some of my favorite candidates. For those with USCAR connectors, you can get a set of 8 Jetronic to USCAR connectors cheap on Amazon. And I'll translate the 3 bar ratings to 29, 31 and 39psi as well. Larger: Bosch 0280156162 (Ford 3M6G-BA) - 240cc/min@43.5psi, 12 ohm, 4 hole, USCAR connector; (195/202/227cc@29/31/39psi) might be a tad too big, can't 100% confirm they're not "v-spray." Similar to the Neon injector: Bosch 0280155703 (Chrysler 5277739) - 241.3cc/min@43.5psi, 12 ohm, 4 hole, Jetronic connector; (197/203/228cc@29/31/39psi) A little on the smaller end: Bosch 0280156007 (Chrysler 04861454AA) - 219.1cc/min@43.5psi, 12 ohm, 4 hole, USCAR connector; (178/184/207cc@29/31/39psi) very good match Goldilocks: Bosch 280155972 (Chrysler 53031099) - 232.1cc/min@43.5psi, 12 ohm, 4 hole, USCAR connector; (189/195/219cc@29/31/39psi). Here's why I like this one so much - the application. It's the injector for the 3.7L crap EKG engine. Its displacement, power and torque specs are very close to the 4.0: 3.7 EKG - 210 HP @ 5200, 235 lb ft @ 4000 1987-90: 177 HP @ 4500, 224 lb ft @ 2500 1991-95: 190 HP @t 4750, 225 lb ft @ 4000 1996-01: 190 HP @ 4600, 225 lb ft @ 3000 2001-06: 190 HP @ 4600, 235 lb ft @ 3200 Similar VE, similar fueling requirements... And a Siemens-Deka for Ford: VDO FI11363S (Ford 4L3E-B4C) - 220.5cc/min@43.5psi, 12 ohm, 4 hole, USCAR connector; (180/186/208cc@29/31/39psi) for the Ford modular 4.6 SOHC like 02-11 Lincoln Town Car.
-
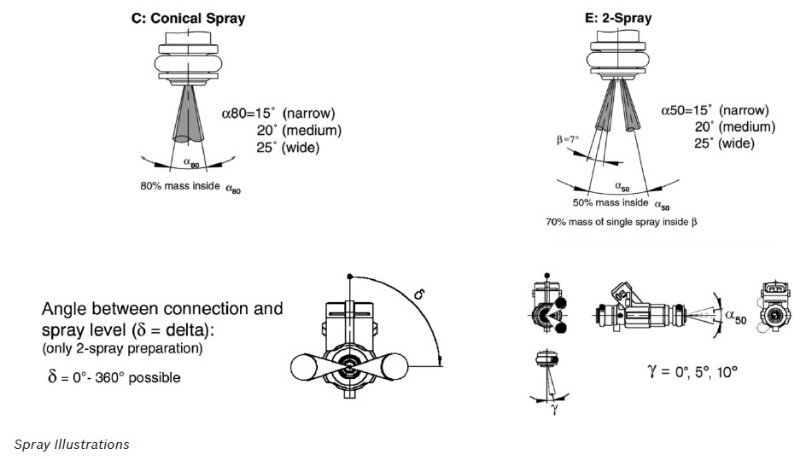
The author of the jeepforum thread hasn't responded or granted me access to his Google drive repo as of yet. In the meantime I've been putting together some research into the original injector. Flow specs are well known from real-world testingso there's a place to start with that. I can't find (after 2 weeks) the impedance rating on the original Siemens-Deka but it has to be in the low 12s ohms. That gives a guide to follow to keep battery voltage offset close to the originals. Anything above 12.6 ohms I'd not even consider, as pulse timings would be up the creek and unknowable. All references below to flow in cc/min are at the benchmark of 3 bar/ 43.5psi, not 29, 31 or 39: A forum member shared that the 241cc/min 12 ohm Neon injectors (0280155703) as being too rich after warm-up. Also said that the 200cc/min 16 ohm 702s (0280155702) were lean under load past 3000RPM. So I'm tossing both of those out of consideration. I believe a close to 12 ohm 4 hole EV6 in the 218-232cc/min range is what I'm looking for. Now... Bosch injectors come in one of 2 types, in terms of spray pattern: conical and 2-spray. These are sometimes also referred to as 'cone' and 'v spray.' The first type is straightforward to understand, and maybe what we're really shooting for. The cone can be 15, 20 or 25 degrees (in all directions from the centerline of the nozzle disc/ plate. Bosch expresses this as 80% of the fuel mass coming out falls within the cone, with as much as 20% falling outside that zone. 80% inside a 15* cone, or a 20* cone or a 25* cone. You get the idea. Why is this important? A narrower cone goes further before diffusing outward (think shotgun effect- muzzle choke vs none). The target is the intake airstream, shooting from the injector boss to roughly halfway between the center of the intake port cross section and the intake valve seat. Shoot the best mass of atomized fuel into the exact right spot to mix and enter the intake valve, with the most efficient shot you can make. This makes best power, torque and fuel efficiency, as long as the mass of fuel is correct, and it's timed right. The ECU will learn and adjust to fuel delivery, though it doesn't know what the fuel pressure is or how much fuel mass moves through the injector (except the one it was programmed for!!). Second type of Bosch injector (buckle your seatbelt, Dorothy...) splits the spray into 2 separate narrow streams. These 2 streams are also cone shaped but don't get hung up on that. This type keeps 50% of the fuel mass of each 'single spray' inside a 7* cone (half of half per pulse), with an arc between the center axis of each 'single spray' of either 15*, 20* or 25* (narrow, medium, wide). "Why the hell would you want to do that?" you might ask. Well, if you have 2 intake valves, splitting the fuel volume and getting it better directed to each intake valve would make very good sense. And the narrow/ medium/ wide choices allow you to tune for the distance from the injector boss to the sweet spot in the intake runner cross section just above each intake valve seat. Here's two more curveballs- 1) you can lean those 2 'single spray' streams from side to side, getting better aim at your intake valve if the injector boss angle isn't optimal; 2) you can rotate those 2 'single spray' streams about the center axis of the injector. I'm going to look at the injector boss to intake seat angle, but I think it's a pretty straight shot on the HO and late HO intakes, at least. I don't have a Renix intake in my possession. Not that a lot could be gained for the 2-spray type on the 4.0, as those are the Bosch "Motorsports" injectors that are custom order, with one very small flow rate and a number of very large flow rates. Though you can get them any way you want for the 2-spray type and whatever ohms, Jetronic or USCAR connector. This isn't for us, really, so further pursuit will be of the cone/ long type (long = 60.6mm from o-ring to o-ring).
-
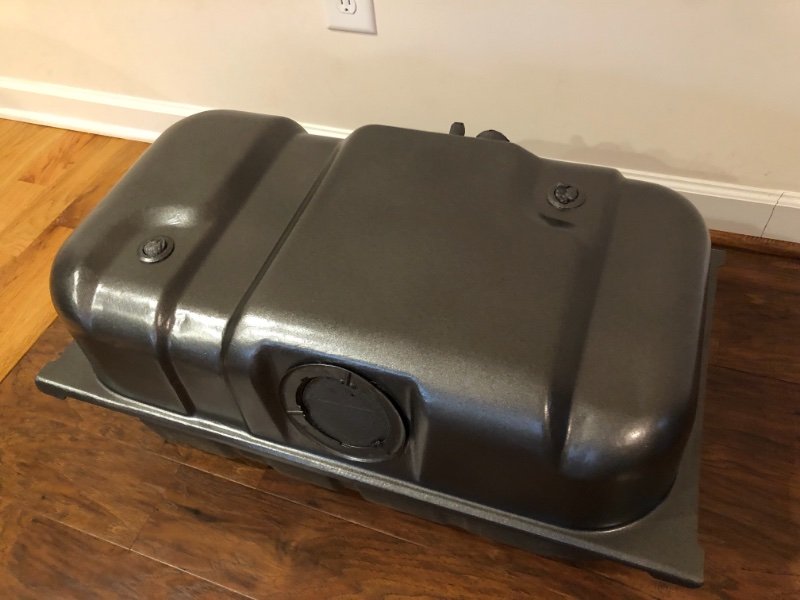
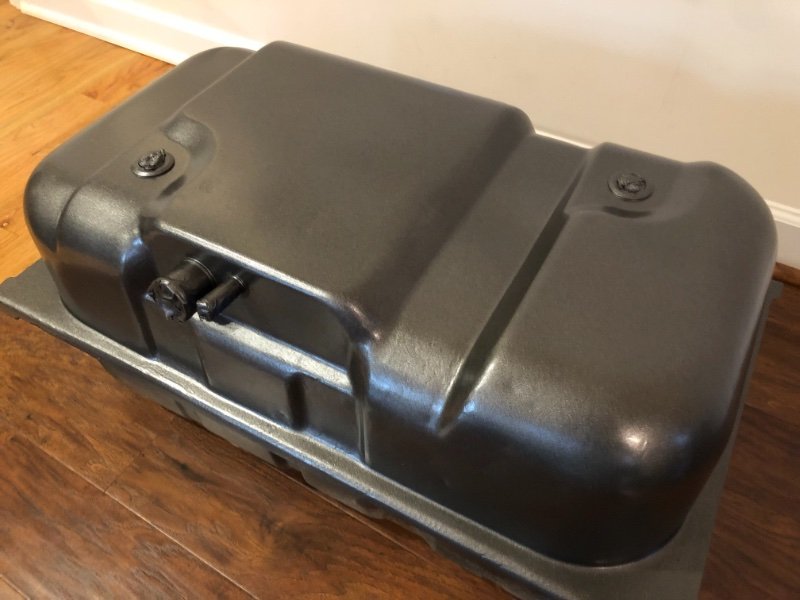
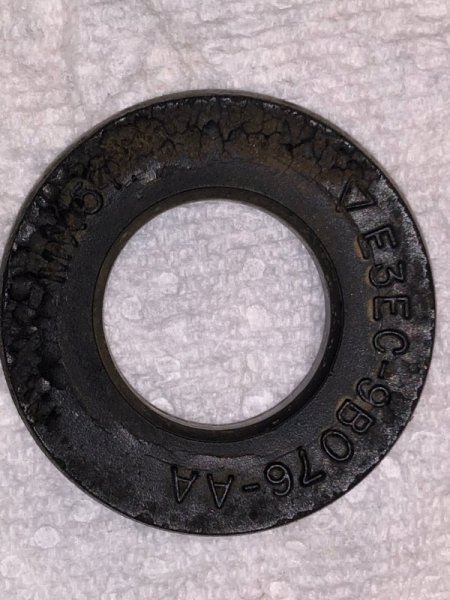
Fuel tank stage 1- the top half. I went ahead and shot it before it could flash rust. Flap disc, wire wheels and Dremel for the tight spots at the filler neck. Then rubbed down with acetone. EDIT: the grommets are the old ones. I put them back in upside down for painting. Top side is larger diameter and will get a smidge of aviation sealer under it to seal & protect it. Or I could use OxGard...
-
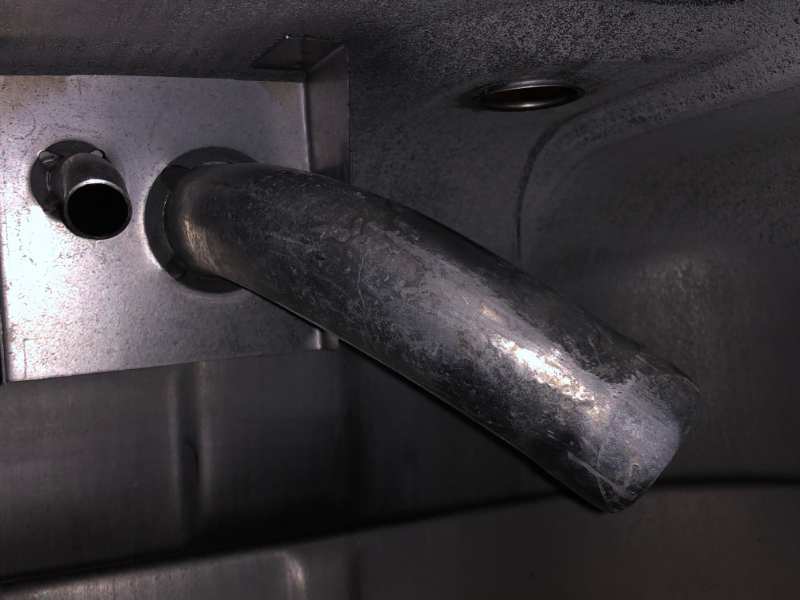
The vent/ rollover valves were fine and work great. The grommets are cracking and the bottom side of the bed showed a few small spots of evaporated fuel. Found a pair on Amazon for $9. I'm happy not to have to spend close to $350 on a tank and pump/ sender. Looks like the worst that could happen is needing to buy a good quality MPFI pump if this one won't make 39psi.
-
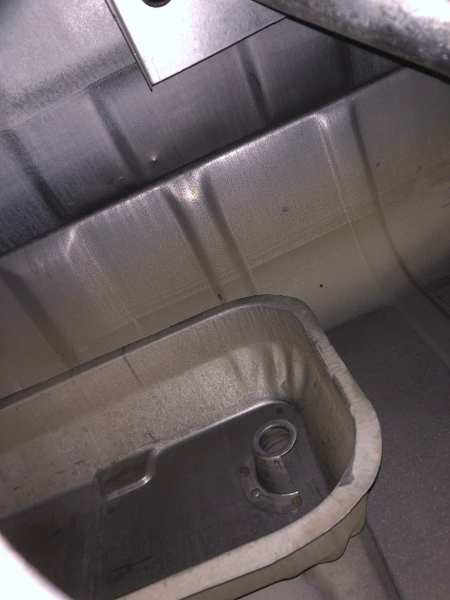
Finally got around to dropping the tank and checking the pump and sender. The outside has patches of rust scale that will come off ok but the inside was a pleasant surprise. The sending unit is accurate per my meter and the pump runs well. Not sure if it's a TBI or MPFI pump, as there's no number on it anywhere. Looks new-ish. I'm hoping it's a FI pump since this truck reportedly had a 4.0 in it somewhere in the past before the 2.5 was dropped back in. We'll see. There was about 8.5 gal. of fuel in it that smelled stale but not bad. I pumped it out with the pump in it and put it in my '03 Accord with another 4 gal. of fresh 87 non-E. Easier than trying to dispose of it somewhere.
-
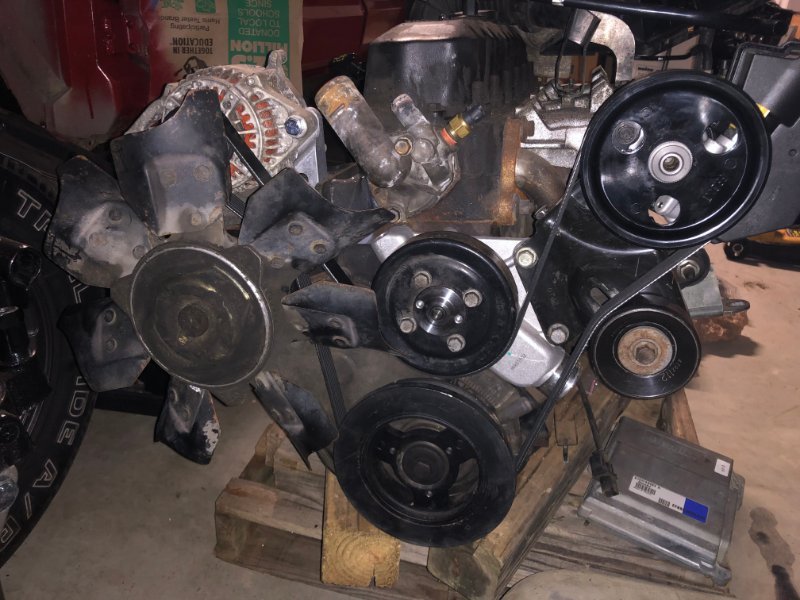
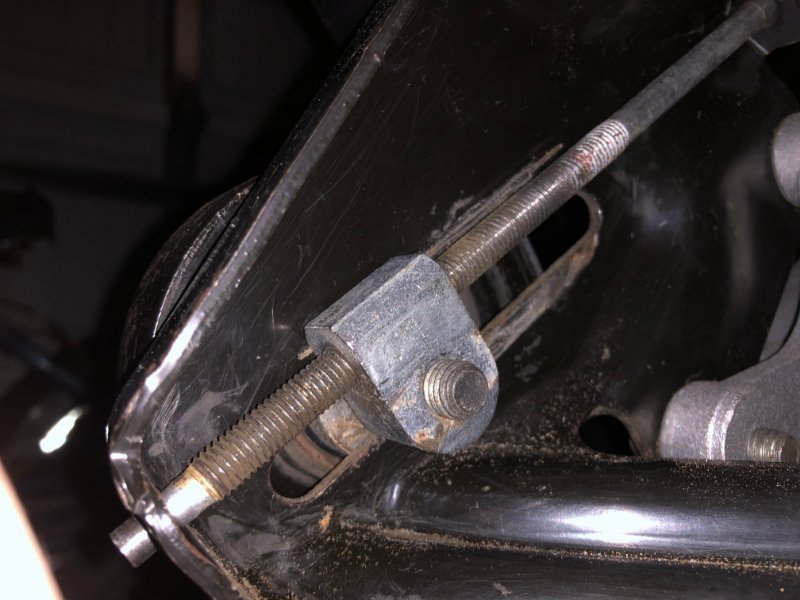
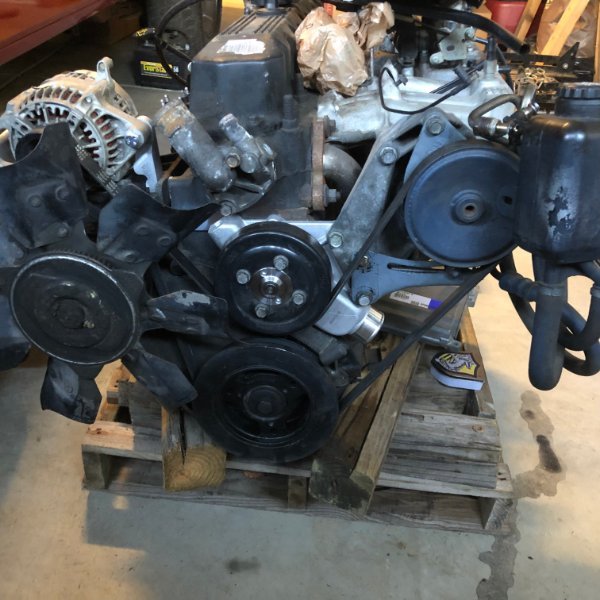
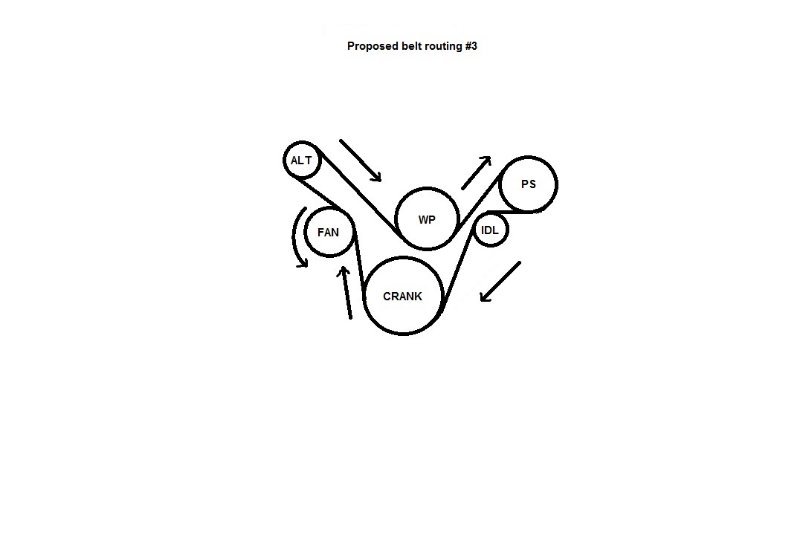
I got the final arrangement for front accessories mocked up. I had a 99-01 intake in the parts pile that came with the drive train purchase that matched the PS bracket so I'm swapping over to it. Everything now comes back off for cleaning and painting before install/ final assembly. The belt I used is 74". It's snugged but not all the way tight so it should sit in almost the exact middle of the adjustment range once the belt is tensioned correctly.
-
I stumbled across this thread on jeepforum from 2017. Guy said he got a good portion of the code dumped and he put a number of docs on his Google drive. I’ve requested read access to what he has. NickInTimeFilms and Cruiser54 had replies to the thread as well. https://www.jeepforum.com/threads/tuning-renix-bendix-ecu.3959225/
-
I guess what I'm seeking is just one part of the Renix calibration(s) to understand the characteristics of the original injector, as applied by the OE engineers. Fueling, with injector characterization at its core, is the literal foundation of all EFI tuning, period. Nearly all the sensors in an EFI system, with the exception of the obvious (knock sensor/ spark retard for detonation, etc.) tell the engine management system what adjustments are needed on the fly to manage control of the injector, based on facts of how the injector behaves. Facts about how the injector behaves is determined first by its design, and second by empirical observation/ testing and applying those facts as scalars, constants and tables in the calibration for a given application. I'm not looking for a way to turn the Renix ECU into something like a flash conversion of the 727/ 747 GM ECMs like the EBL Flash II from Dynamic EFI. Creating a standalone system with more modern sensors, wiring and parts would be far easier and cheaper. But understanding what's in the 'tune' would further understanding about diagnosing, improving drivability, reliability and even emissions on the Renix EMS platform. For me personally, I'd just like to be able to compare the original injector to almost anything else produced since. Doing a disassembly of any calibration and creating a definition framework to lay it out in human-readable format is difficult, time consuming and is admittedly beyond my own skill set.
-
What I'm after is the hex for: table for injector offset vs battery voltage, a scalar value for the injector constant, and if it exists a table for a low pulse width adder. A bonus would be a table for spark advance (probably a simple RPM vs MAP). A whitepaper/ datasheet on the 53003956 would be over the moon... SAE.org has a number of old papers from 1984-1988 but they're $33 each for full text and I'm not convinced I'd find calibration-level data there. Someday, maybe a pile of this old development data from that era may be unearthed but I'm not optimistic. I just want to select an injector with characteristics close to the 53003956, with a better spray pattern. Trying to avoid settling for an injector that 'works fine' but yields high NOX or HC due to a poor match to the way the factory injector is characterized in the Renix ECU calibration. Interesting old article from April 1989 about Bendix and what they were doing in the 80s with the new "Deka" injector https://www.dailypress.com/news/dp-xpm-19890410-1989-04-10-8904120150-story.html The biggest customers for Deka injectors are Jeep, which offers them as an option on its 4.0-liter engine, and Chrysler, which will offer them on its 1990 3.3-liter engine. "That order from Chrysler alone was for 2.2 million injectors annually, which more than doubles our business," Perry said. Here's a sample datasheet for a modern Siemens injector, in the same format Ford publishes for their Bosch-sourced injectors: http://www.usa.vdo.com/media/747298/fi114961-slope-offset-worksheet.pdf
-
Excellent read. It’s a general how-to for examining the 2 types Of injectors(peak & hold, saturated circuit) with an oscilloscope. It shows what certain problems with injectors look like on an o-scope. Prescient statement near the bottom of p.7 says the ‘latter’ type of injector that lacks an external resistor is slower, but durable and cheap to make. That’s the high impedance injector design we’ve lived with on through the 90s and beyond that are still popular and available for OE and aftermarket performance applications. It also states on p.7 that this ‘slower’ type can be compensated for by adding to the pulse width, which we’ve been doing for > 35 years lol. It’s a great general knowledge doc for its time, on how to scope and spot problem injectors, whether driven by amperage or voltage. Not helpful for unboxing the Renix calibration but a fun stroll down memory lane. And the science still applies. As for spray patterns, that’s why we use Bosch for Ford injectors on LT1 Chevy engines in the 93-97 Camaros and Firebirds and 92-96 Corvettes. Atomization is much better. And since Ford gives a data sheet with every injector, the calibration can be almost perfectly altered to use those Ford injectors effectively with accurate. characterization. I want the unicorn lol. An injector that’s essentially the 87-90, that’s doesn’t leak and has a 4 hole pattern, with the same voltage offset, minimum pulse width, breakpoint, etc.
-
Injector Voltage Offset The 1987 Inj. MPI manual states the following, but nothing else about shaping the behavior of the injectors: "Battery Voltage: The battery voltage to the ECU is monitored so that the injector is energized for the proper amount of time. As the battery voltage to the ECU varies, the ECU varies the injector pulse width to compensate." When the ECU commands the ground to an injector to be closed, it doesn't open instantly and begin happily flowing fuel. The universe doesn't work that way.There is a measurable delay until the injector begins to open. Once it begins to open it can start flowing fuel. The above excerpt suggest that AMC & Renault made some effort to characterize behavior of the Siemens injector used from 87-90. They at least found out what the voltage offset is across a range of voltages. I don't know what voltage values the ECU uses, but I'd assume it at least includes values from 10.5V to 16V. 14.2 - 14.4 would be ideal, but if you turn on the A/C or are running accessories that draw away available voltage, as low as 11.9 - 12.2 might have to do. So the Renix ECU is programmed to add the voltage offset value to the pulse width to open the injector longer if voltage is below 14.4V and less offset time if above 14.4V. Minimum Pulse Width How long the injector has to be energized at a given voltage to fully open (pintle as far off its seat as it can go). At idle, the injector may not (likely won't) ever reach this pulse width. Below the minimum pulse width, flow may be inconsistent and cause issues, especially with idle stability. Again, this pulse width can vary across a range of voltages, but is generally understood and accepted to be measured and specified at 14.4V in the injector industry. Linear flow The pulse width, ususally measured in milliseconds, at which fuel flow from the injector becomes consistent. The battery voltage offset (time it takes for the injector to respond and begin opening) is added to the requested pulse width, appropriate to engine sensor input and requested power according to MAP, IAT, TPS, ECT. This is the point in injector 'on time' where the only correction needed is the offset time for whatever battery voltage the ECU reads at injector pulse. This usually happens in the fairly low off-idle range Static flow rate Open the injector all the way and measure how much fuel is delivered over a given period of time, say, in milliseconds. This can also be measured in grams/second, cc/minute, etc. Lbs/hour is probably the most familiar. However, just measuring how much fuel comes out of a wide open injector in an hour's time is essentially garbage data. Offset Adder in the very low flow range (idle to theoretically below idle and during cranking), since the flow rate isn't consistent, a little more fuel can be added. This low flow range delivers LESS fuel at low pulse widths because the injector is spending most of its time waiting to begin to open, opening and closing again. Very little of that commanded pulse width time is actually flowing fuel. The solution is to add a little more fuel as 'added pulse width' to compensate. So the injector is left open a smidge longer. Add a few microseconds or fractions of a millisecond time to the base pulse width, and decrease it as the base pulse width time approaches the linear flow point, where it's no longer needed. This adder usually drops out just off idle and above. I don't know if the Renix ECU has an offset adder in its programming. All injectors are not created equal Siemens Deka/ Rochester vs Bosch/ Ford style vs mystery meat vs high end injector shops: Siemens injectors from the late 80s through the mid-90s generally have MUCH shorter voltage offsets than Bosch/ Ford style. To illustrate the point: Drop same 'size' Bosch injectors into a vehicle programmed for Siemens/ Rochester and a significant portion of any fuel commanded is delivered late because of the longer actual offset time the ECU doesn't know about. The fuel/ air charge that enters the cylinder is leaner than it should be, and the leftover 'late' fuel puddles on the intake valve, as it's likely already closed. Then consider low pulse widths at idle - how different injectors behave below their linear flow rate will be different. The point at which their flow becomes linear will be different. So IF there IS programming for adding fuel at pulsewidths below linear flow, it will be wrong. The Renix ECU is something of a black box and there is no practical means of altering its programming to properly characterize any injector other than the one it came with. A high end injector shop like Injector Dynamics gives you a sheet with all the data above. These days, you can plug those values into your Holley, FAST, whatever EMS you're running and get near perfect injector characterization. "So and so injector works best..." You know why? Because you've tried an injector whose characteristics above are close enough to the originals to work well and deliver the right amount of fuel at the right time. "It runs much better but my gas mileage isn't better, maybe slightly worse..." You know why? The fuel delivery window the ECU expects doesn't match the voltage offset or low adder. However, the injector flows enough to make idle smooth and acceleration enrichment has more fuel than it needs to keep from going lean cracking the throttle, and/or you've upped the pressure a bit to make the engine 'happy' but send a lot of fuel out the tailpipe. Conclusion: If we can get our hands on the original characterization data that Bendix and Renault had when designing the 87-90 ECU and injector spec, we can understand what injector(s) can take its place. I'd also LOVE to see the hexadecimal (?) data tables that model the injector in the 1987 calibration, and any changes to that the OE engineers made in 88-90.
-
I'm trying to decide what fuel injectors to run in my Renix-controlled 87 project. I've done a large amount of tuning for Bosch/ Ford injectors on GM PCMs from 1994-2004. I can't stand the thought of blindly throwing "they work good" injectors at it. I hope no one takes this fuel injector sermon the wrong way, but it helps to understand my approach to injector selection for this project.
-
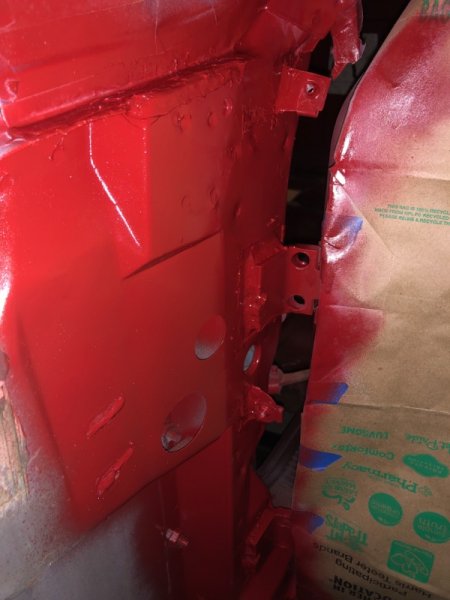
2 light coats of Colonial Red
-
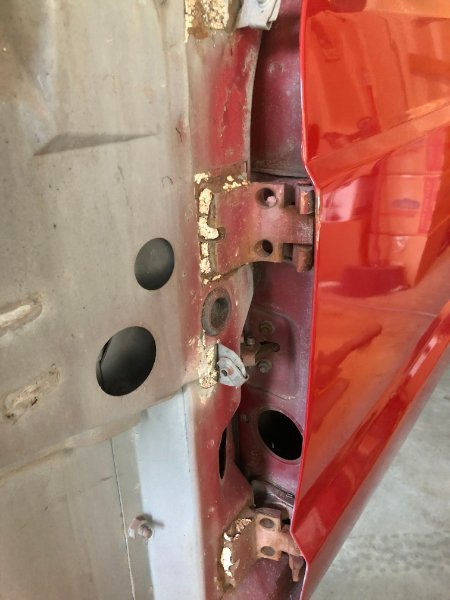
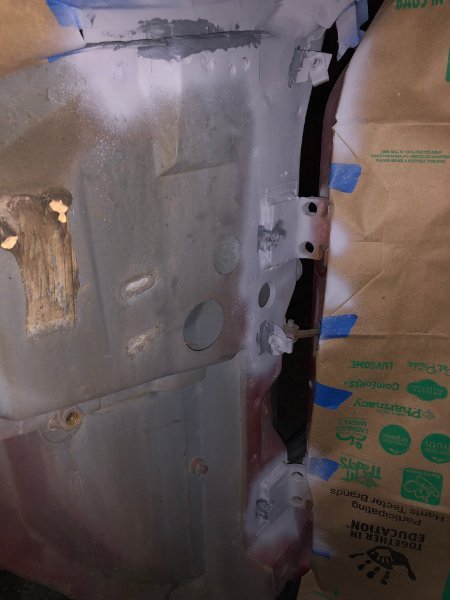
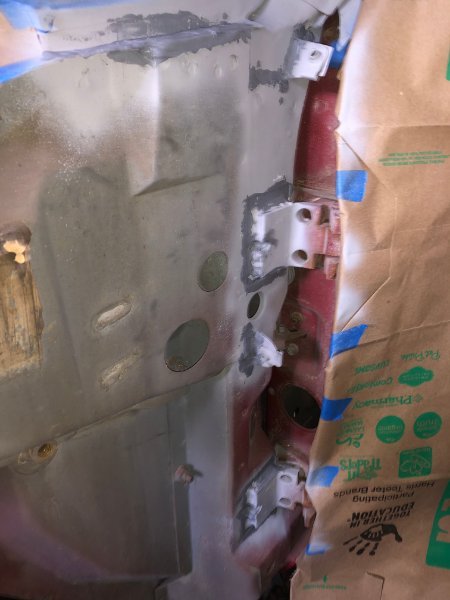
Door hinges and cowl seam sealer is like old crumbly mortar, I couldn't just pretend not to see it.
-
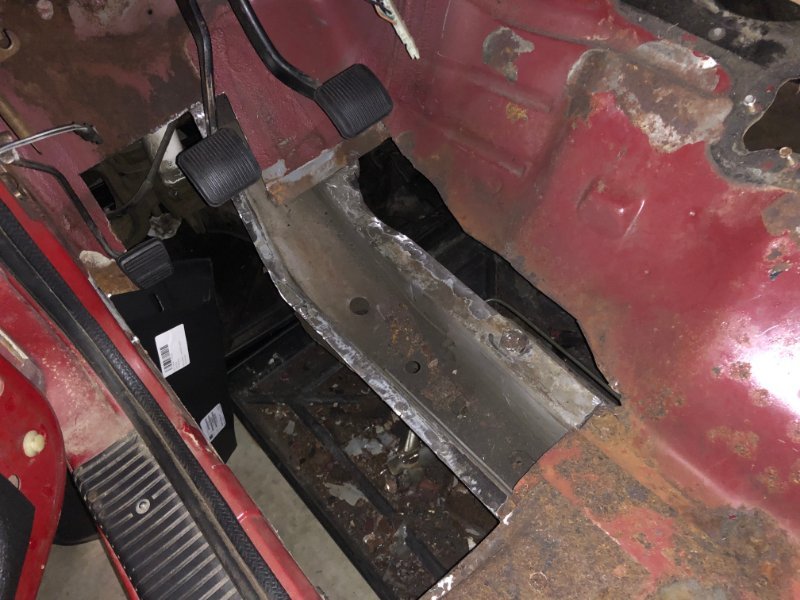
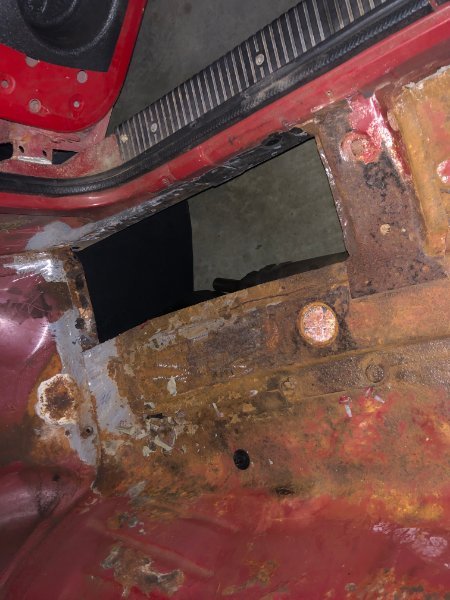
Main floor cutting done. Next I'll dress all the mating edges for welding in the patches and clean off the surface rust everywhere else.
-
Engine front accessories mocked up. Alternator relocated up top. Still has the YJ PS pump and brackets. I may swap that over to 96+XJ since I already have the bracket, and it'll give more belt clearance for the lower radiator hose. From this: To this:
-
I have another thread active, trying to identify a body tag screwed between the driver's fender behind the valance. ever seen anything like it? https://comancheclub.com/topic/70269-help-me-decode-this-tag/
-
@eaglescout526 thanks so much for pulling the report!
-
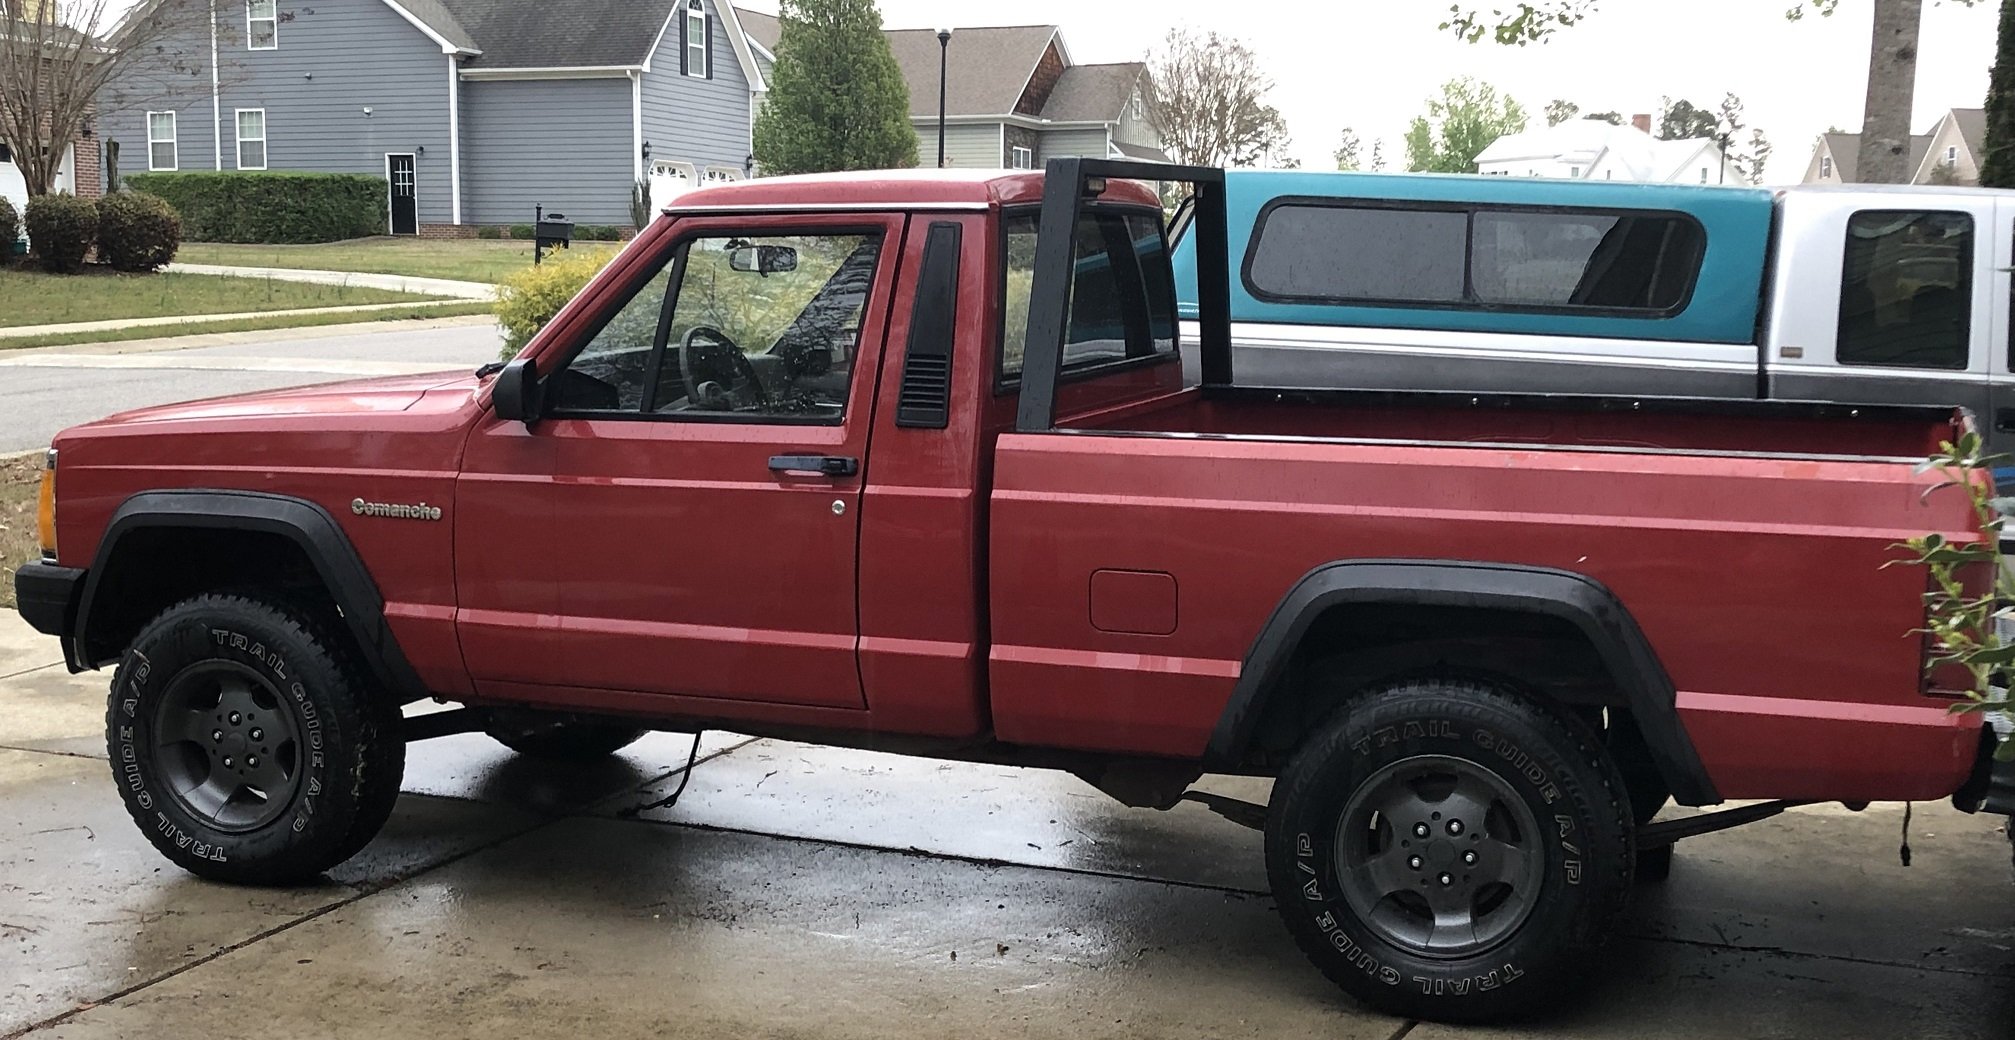
1987, 2WD, 2.5l. Not really sure of much else about it, as it's been swapped and un-swapped and it's a basket case. Making it 4WD with 99 XJ D30/ front brake parts, swap to 4.0 and NP231 from a 93 YJ. Build thread here.