
ThatJeepGuy
-
Posts
352 -
Joined
-
Last visited
-
Days Won
2
Content Type
Profiles
Forums
Gallery
Everything posted by ThatJeepGuy
-
Please don't be like too many others and just plop down your new metal over top the unibody cap and call it good. Atleast drill out the rozet welds and remove the unibody cap - then address replacing sheet metal. Seems far too often folks will utilize that little 1.25" lip of material for their new sheet metal and call it a day. The problem is with how the unibody layers stack up, from the inside sure it looks good to go. But after doing that - now from the underside there develops a slot where the original sheet metal continues to rust away and eventually dissapears leaving a gap for all the elements to make there way between the "repair" and into the unibody rail
-
could you stuff your V8 into just one thread? Are 2 threads in the same week span to discuss the same 327 V8 swap necessary??
-

Front aftermarket bumper opinions
ThatJeepGuy replied to Bugout 1's topic in MJ Tech: Modification and Repairs
Minot note to add to this statement - there are 2 style ARB Bull Bars mind you, the 97+ and the 96-. They obviously bolt up similarly as in my experience the 96- used adapters while the 97+ mounts were directly to the unibody like most current aftermarket bumpers. The point though about trimming to be noted is that I would imagine most folks would opt for buying one used vs new (new cost being ~$1k and used cost in my experience $200-400). The 97+ have a longer reaching end cap that extends back towards the wheels and ends just under the fender flares - similarly to the factory bumpers. The 96- however cap off just in front of the factory fender flares. Soo running a 97+ style on the older body would require some fender trimming while running the 96- style comparatively on the 97+ would not require trimming. -
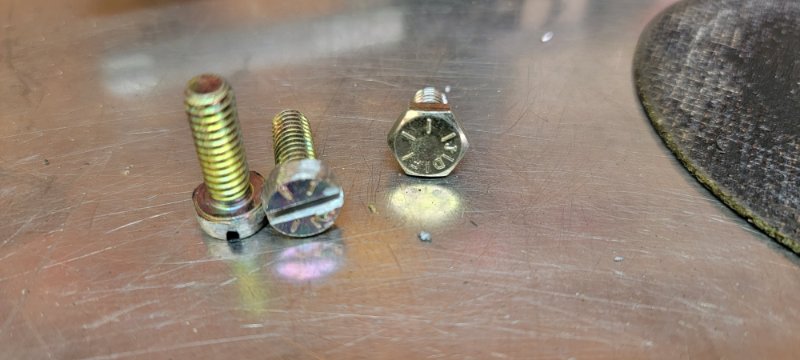
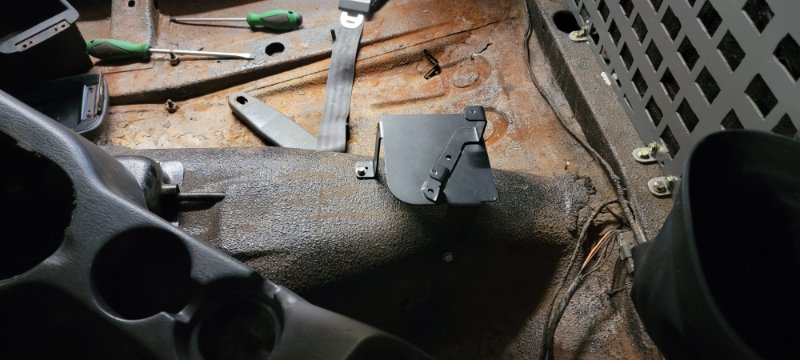
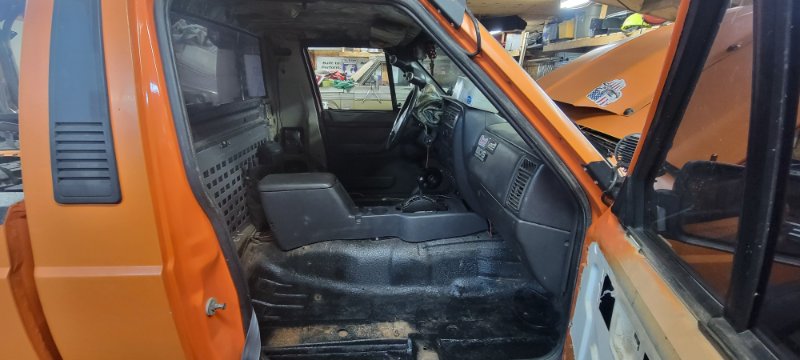
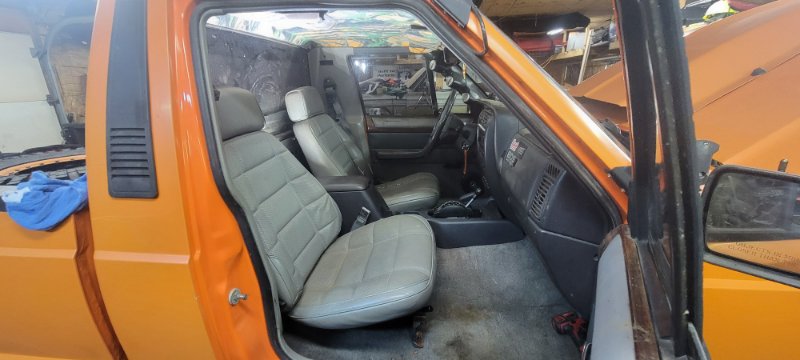
Well I have been pretty slow going lately. Working on other vehicles and projects. I snuck the truck back into the garage and got into some more of this interior stuff. Started out with trying to figure out a mounting bracket and overall fitment for a newer style xj console. Eventually succumbing to a ~$25 ebay/Amazon bracket. With a little modification I can atleast say it's mounts and sturdy at that! The top 2 mounting holes for the center console cubby itself weren't tapped for any specific thread so I went for 1/4-20 and modified some grade 8 hardware to fit because grade 8 is what I had 😜 Trial fitment was looking good Then came the actual install of some new to me MJ carpet I found for $50, All the trims and seats Now I'm gonna be on the lookout for another tcase shifter to hopefully replace or modify mine. One of the previous owners removed the gate for the lever itself so while this doesn't affect its ability to shift the tcase, but it will help in mounting a shifter bezel. Also this near endless amount of side to side play is a little clunky so it should mitigate that as well More to come
-
Thanks for sharing your repair. It's humbling to see it works for others
-
I used an xj headliner for mine. Build thread here has a few steps for the process https://comancheclub.com/topic/70493-that-orange-mj-bought-and-rebuild-project/
-
Masked up No photos of an all blacked out tail light but the finished product is looking good! and again, next to the other light from the pair so start to finish
-
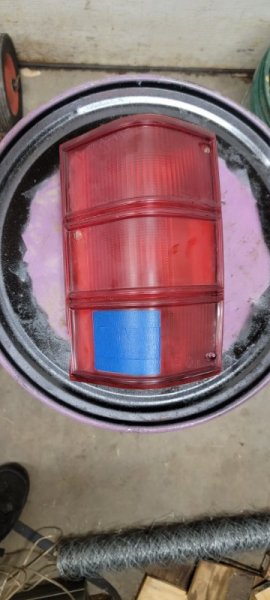
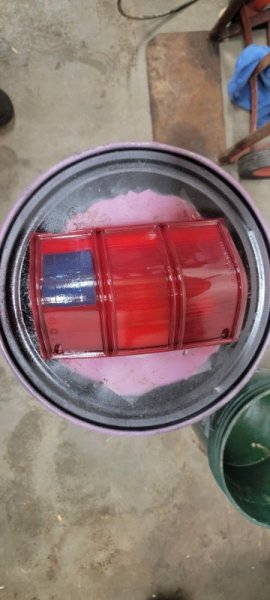
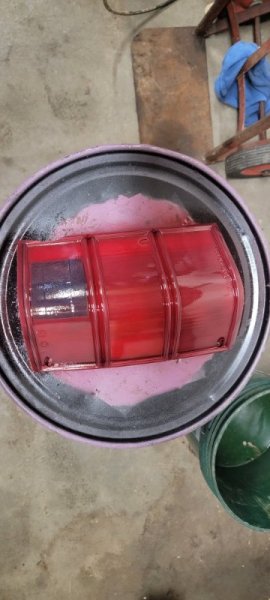
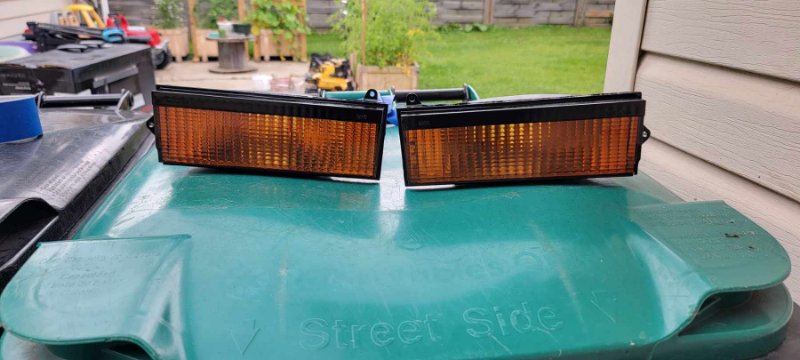
Recently refreshed my front turn signals and running lights. This Krylon Stained paint is a nice little refresh kit in a can. Just a dusty pair of spare tail lights I have laying. They have chips/cracks so I figure if it's a fail then not a huge loss. Started out with a dish soap and scotchbrite pad wash and scrub. Taped off the reverse lense and its ready for some stained paint. This is after just one coat of paint After the 2nd coat of paint you can really see the color changing on the painters tape. This was the 3rd coat of paint. Compared to the other light from this set it's a remarkable difference. Can of paint was $19 on amaAmazon. My plan now is to let this cure overnight and then I'm going to tape off the lenses and add some black paint to the borders for that factory black trim look.


-
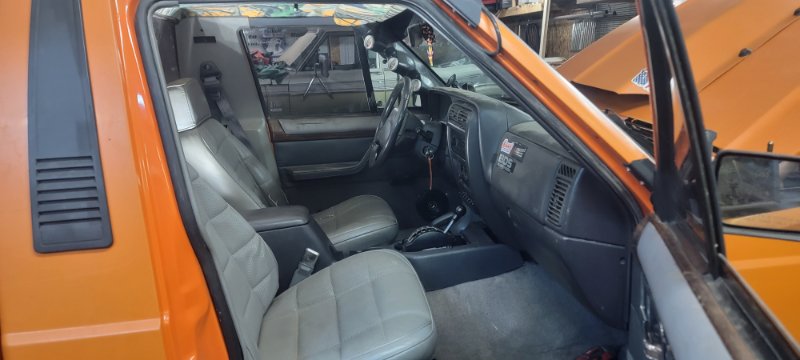
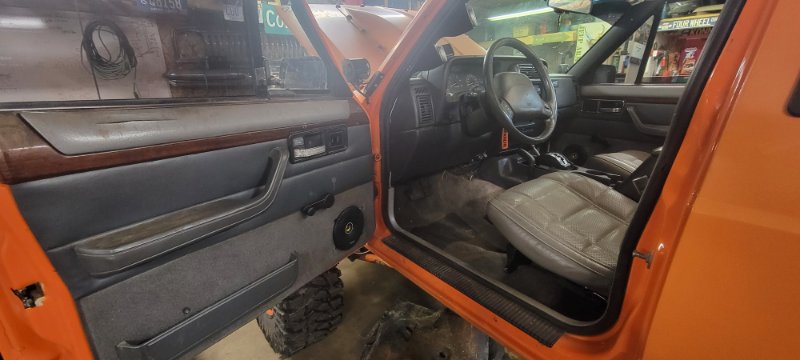
Thanks! The ability to lock the truck and everything on 1 key is a luxury that I appreciate more as a middle aged enthusiast than I ever considered as a teen or "20-something". The door panels with the country package wood trim I'm rather on the fence about. Initially I figured I would repaint the faux wood grain and repair the vinyl pad but the more I look at a pair of early Grey panels and the hockey stick arm rests the more I feel I may lean into some Rem paint and change up again. We'll see what drives my attention next. Recently started tackling getting a radio and speakers into the truck which resulted in a wiring nightmare trying to adapt 97+ dash wiring to 90- MJ wiring. The outcome isn't the cleanest of installs but it will be functional for the time being until I one day revamp/redo the entire wiring to a more "me understanding". Just one of those unfortunate hurdles when it comes to buying something highly modified vs building something highly modified yourself I'm still rather enjoying this rebuild process though despite the pitfalls of prior work.
-
No just defy all the early childhood toy lessons and push the square into the round.
-
Mechanical fan upgrade
ThatJeepGuy replied to DirtyComanche's topic in MJ Tech: Modification and Repairs
Soo fwiw I don't believe the bmw fan will work. The blades are facing the wrong way. With the mech clutch spinning counter clockwise it would pushing air through the rad. Not pulling it through. Thankfully I paid nothing for this bmw fan but as I was about the start figuring out an adapting plate to the jeep clutch I recognized blade orientation. Maybe if you figure a way to run a ribbed pulley and re route the serp. Belt then it could spin the correct way for the blades to pull air?? Otherwise if it's not already obvious - we're looking for ccw fans -
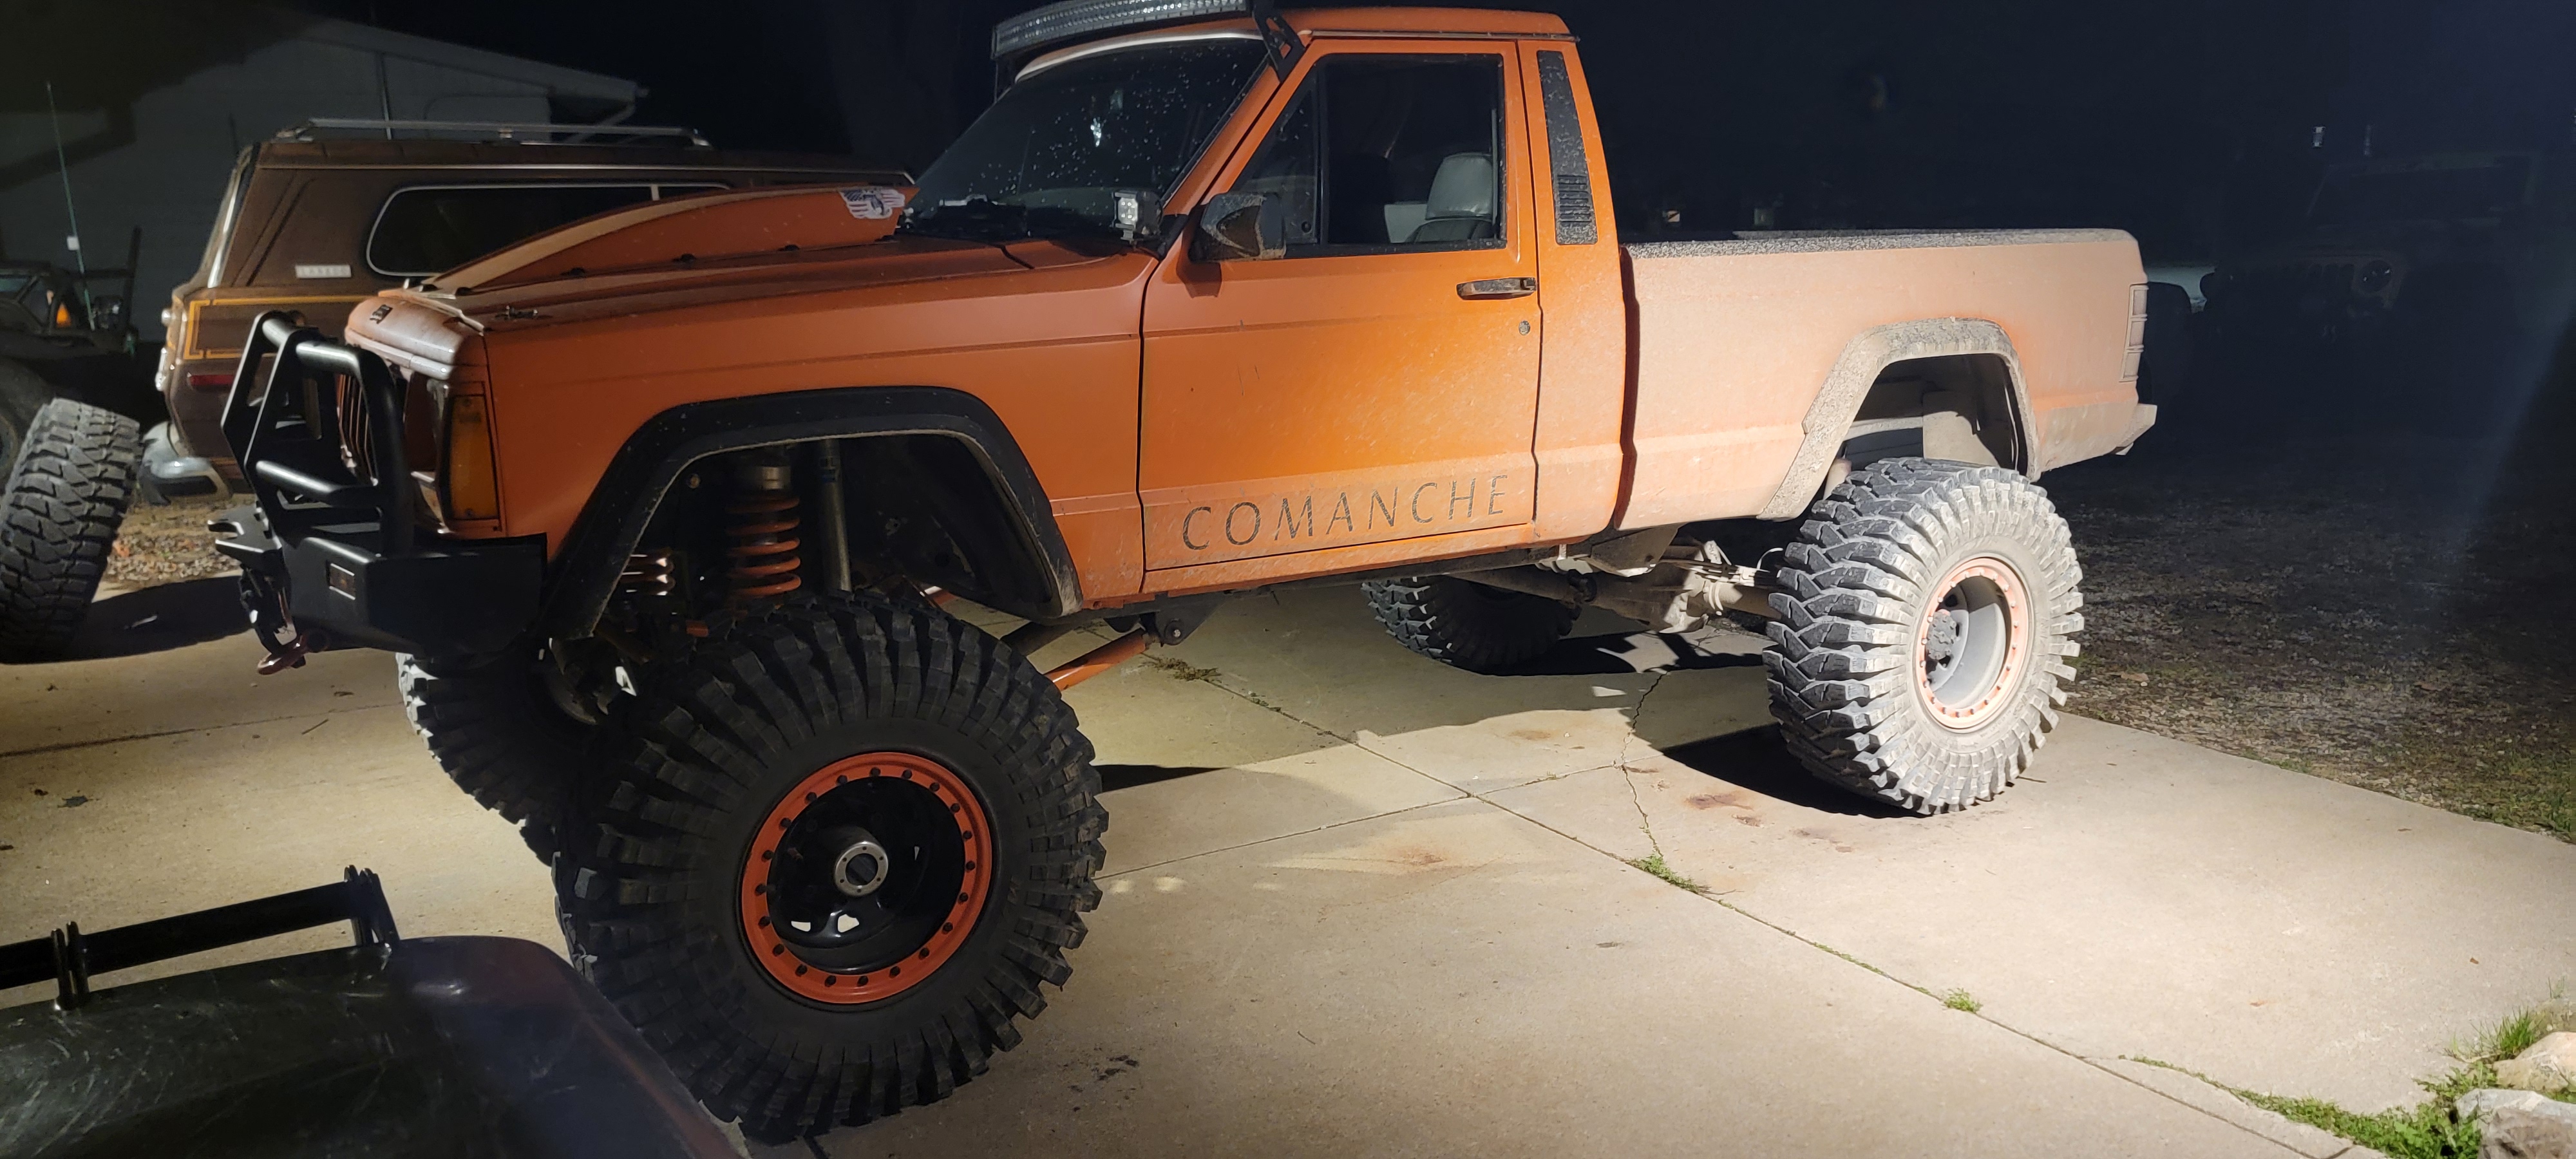
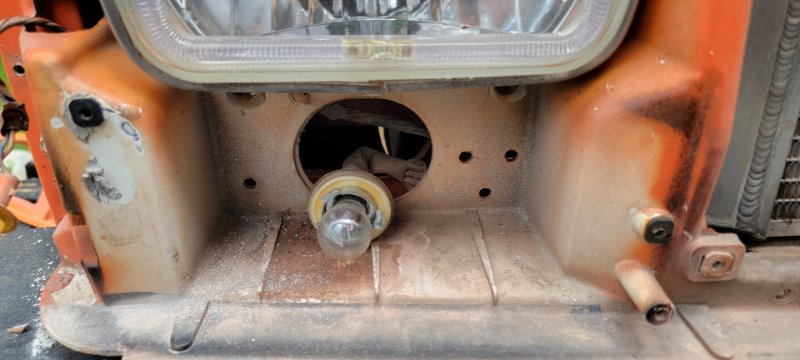
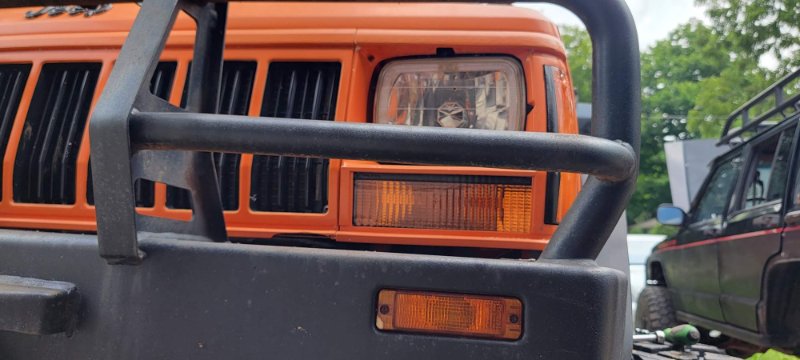
Ive had this in mind for soo long and while i was refreshing my front marker lights i finally had the time and excuse to give it a shot. Really not very difficult unless you have a bulky front brush guard like my ARB bull bar getting in the way for the drill. Can absolutely say this is how it should have come factory!
-
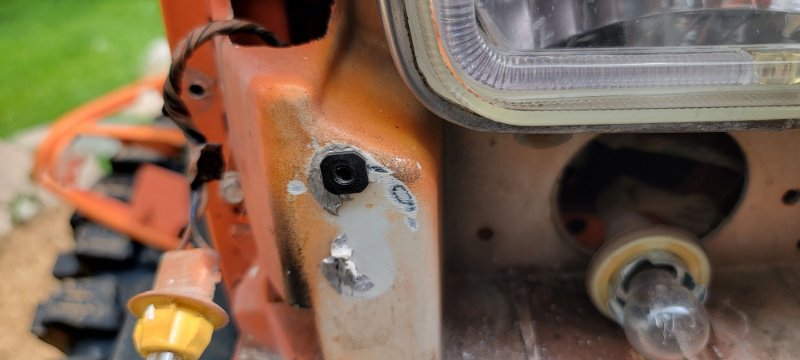
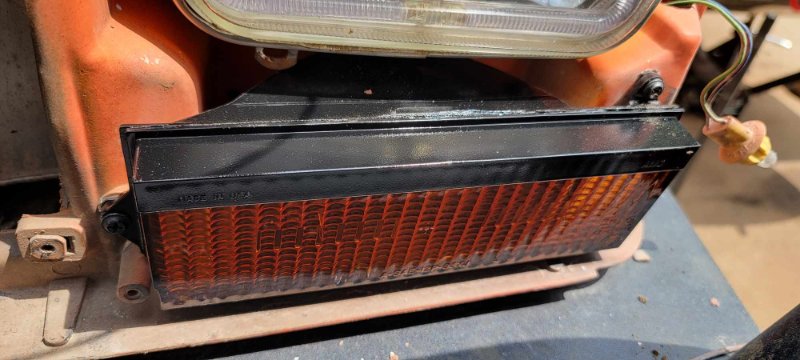
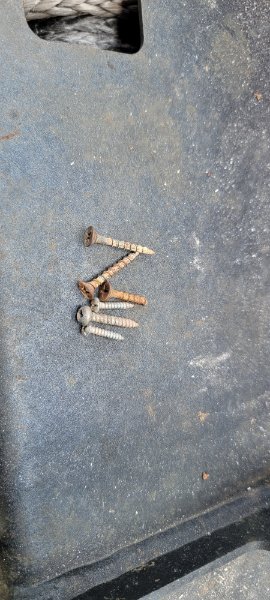
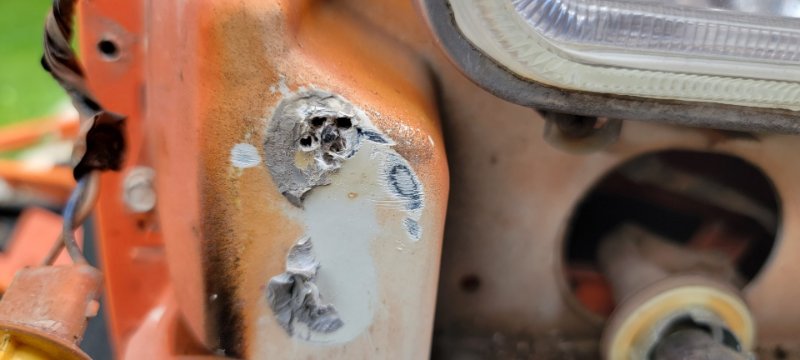
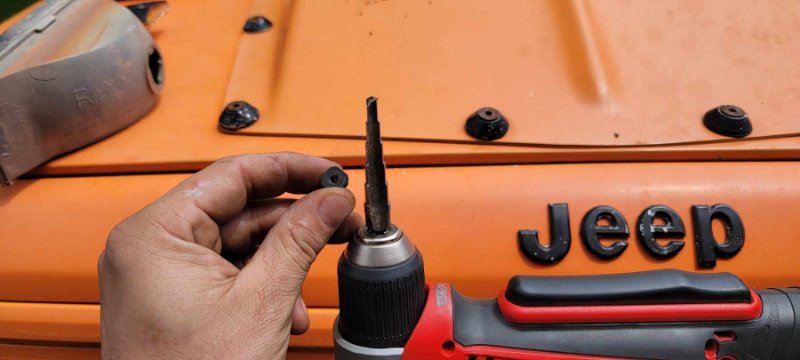
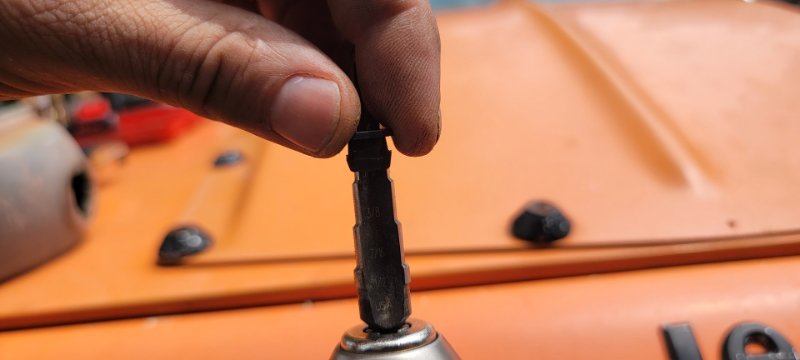
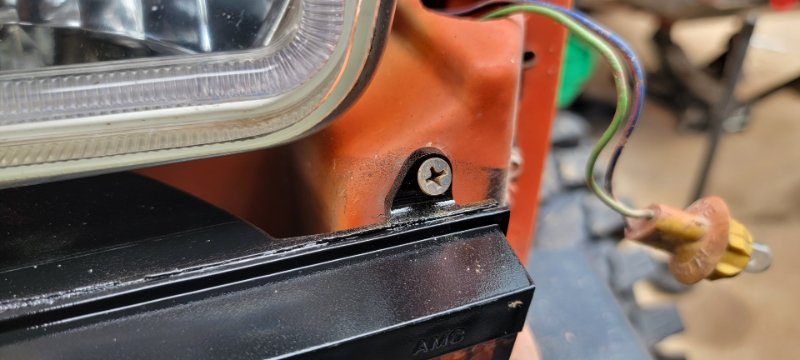
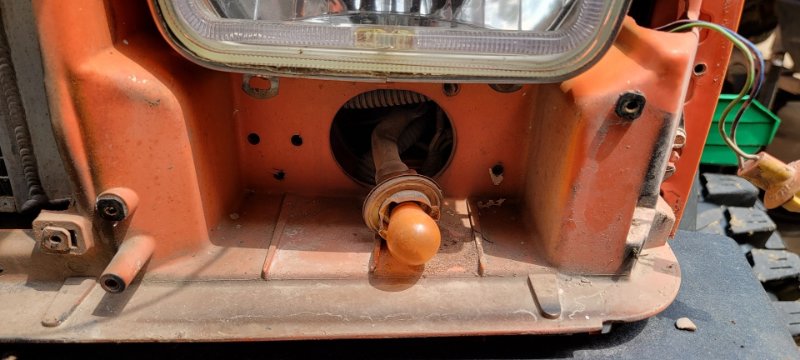
I know I'm not the only one that despises the factory screws for the front running lights. They are easily more often than not broken off flush in the fiberglass. Gotta love sourcing misc hardware at hand, w/e seams to fit and keep the stuff together right? Please absolutely no more of this! The starting point, broken off factory screw. utilizing a rather small drill bit (1/8" or soo) you'll start by drilling 4-5 holes as close to the broken screw. I don't even bother trying to drill out the screw itself, just direct the drill bit around/through the fiberglass. Careful not to break your drill bit off as it just becomes another small obstacle for the next drill bit to deal with. Once the 4-5 holes are drilled through, worked the drill bit on an angle to connect the dots essentially. Once you've gotten the holes connecting the old broken screw should wiggle/fall right out. Utilizing the same plastic thread insert that is used for the grill mounts and i like a step bit here going for the 5/16s depth. So i did touch into the 3/8 part of the step bit just a little bit, the 5/16s is a pretty tight fit for the plastic threaded insert. don't mind the off color light bulbs, they are on the list for replacement Just add your favorite black interior phillips head screws and its looking Soo good! Now you will be able to replace/maintain the marker lights and bulbs without worrying about broken hardware :D!
-
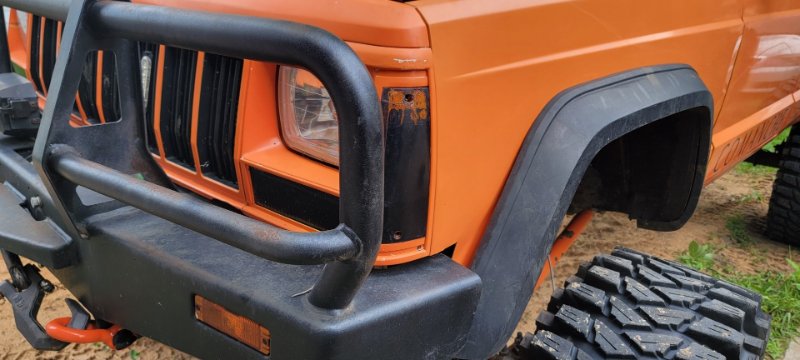
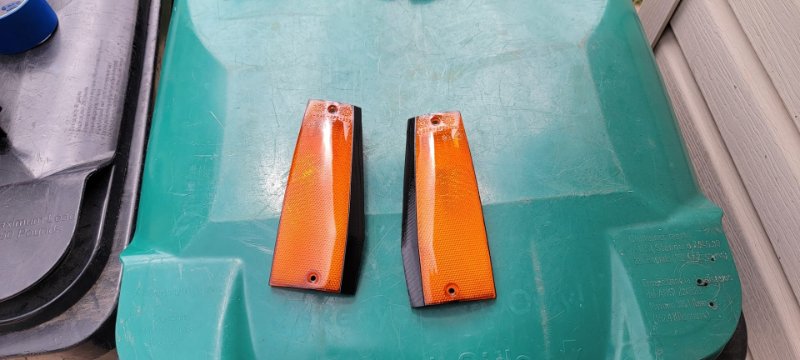
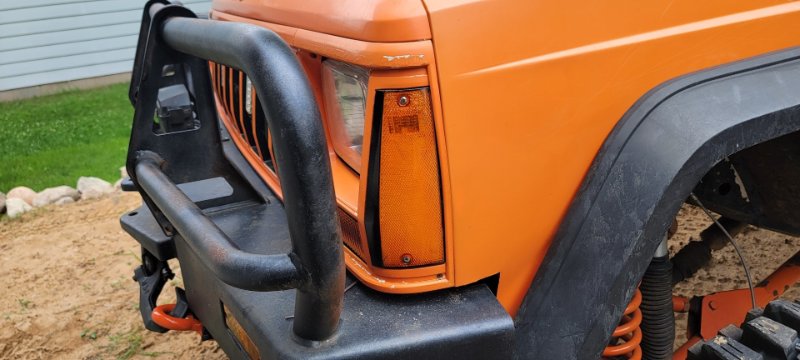
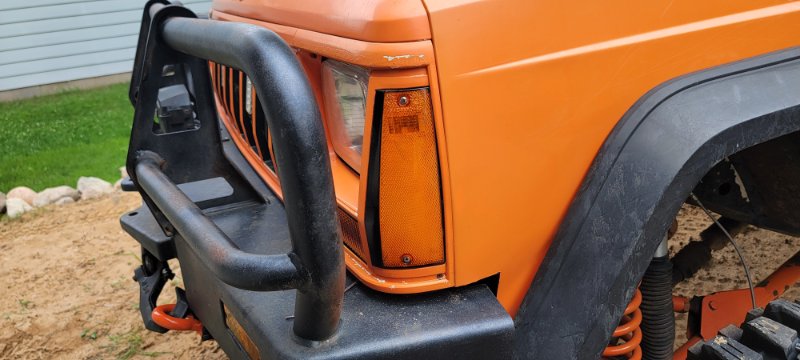
Little freshening up with the front signals. The tinted/smoked markers just arent doing it for me anymore. These were factory clear front marker lenses that i re-tinted and bordered with black for the Euro style. tagged the side markers too
-
export turn signals for under 20$
ThatJeepGuy replied to motownXJdad's topic in MJ Tech: Modification and Repairs
I could not resist, this was an excellent refresh for cheap!. Added a little black to mine 7 coats later Added the "euro strip"


-
amazon handles old and new style? ive done a pair of the old style and i'm happy with them thus far. New style handle should be in next week. Can update this after the install in need be??
-
Lower control arm brackets
ThatJeepGuy replied to DirtPoor's topic in MJ Tech: Modification and Repairs
3.55 gears in yours currently? Source a complete d30 out of a mid-later 4.0 auto XJ. 2000 and 2001 were a low pinion though so potentially not those. (level of complete can be up to you. Can re-use potentially everything for the next axle: brakes, hubs, knuckles, shafts) depending on your jeeps model year It could all swap over if your stuck buying a housing. Barnes4wd has lower control arm brackets for $48 part# B4WK0268 Ruffstuff Specialties also for $42.29 part# R2709 I'm not sure what a d30 pullout costs around you but for me they can be had for $100-$150. Vs the time or potentially labor if your not welding in new brackets yourself it sure would be quicker/simpler to just swap it out. -
Mechanical fan upgrade
ThatJeepGuy replied to DirtyComanche's topic in MJ Tech: Modification and Repairs
I'm very intrigued to see the outcome of this. My brother is a bmw nerd and I'm sure I could lean on him for some used parts resources if need be. -
Are these Turbines worth it?
ThatJeepGuy replied to robfg67's topic in MJ Tech: Modification and Repairs
Let the seller sit on them, that's an outrageous price. -
export turn signals for under 20$
ThatJeepGuy replied to motownXJdad's topic in MJ Tech: Modification and Repairs
I've been contemplating redoing the smoke on my signal lights but this is interesting. Never thought about essentially color stain in a can? Adding a clear coat after or just the multiple light coats and away you go? -
My shameless build thread plug The 4th post in i go into some details about cutting down a 97+ XJ headliner to fit in my truck. Now granted i went into the task with a very simple level of satisfaction for the outcome But i did learn after the fact if it wanted an even better fit - especially at the back of the cab it wouldn't be very difficult to do soo. The cost of an xj headliner and even the fanciest of fabrics to re-apolster to it beats the pants off what some expect to get out of their factory headliners. With that I have a factory headliner thats solid -no fabric- but as its basically made clear above, the shipping cost and difficult packing/level of Fragile outweighs the price in my opinion.
-
diy rear cab carpet panel
ThatJeepGuy replied to EUREKA's topic in MJ Tech: Modification and Repairs
The market for a factory deal was out of reach for me but I also wanted to make use of the space so I designed a molle panel that fits like factory and provides storage options.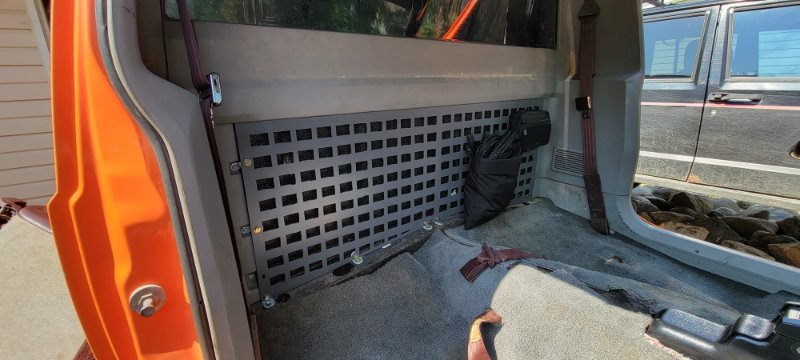
-
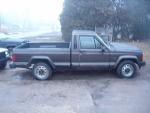
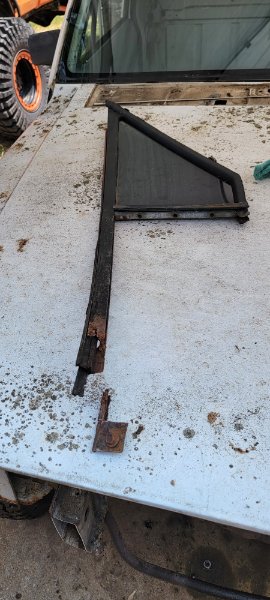
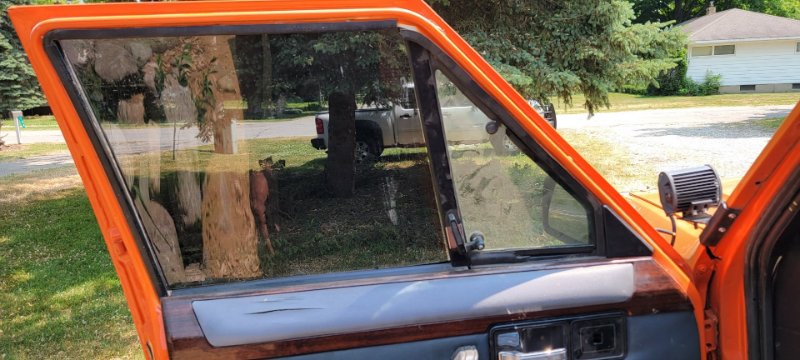
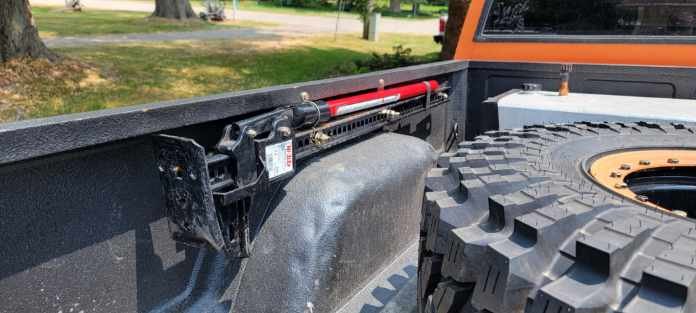
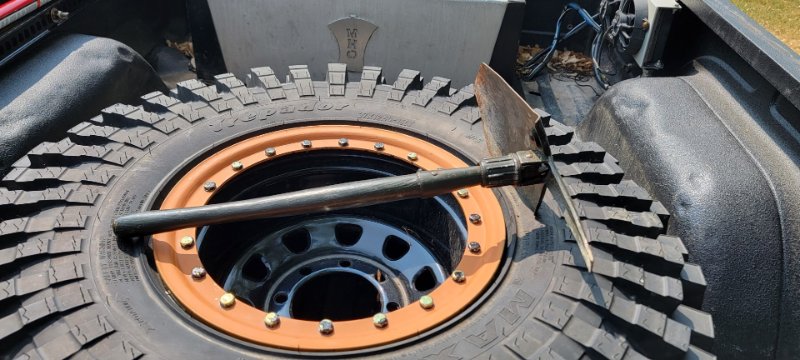
Oh boy we shall see won't we ;) That 90 parts MJ is the rust bucket that just keeps on giving! We planned to do some exploring tomorrow for fathers day and with that i figured i'd button up a couple small things i've had on my mind. Unfortunately not the intake tube just yet (waiting for the right deal on a bandsaw or portaband to do some clean pie cuts). The driver window only goes down till there is just over an inch of glass still exposed and then starts jumping the cable. Surprisingly this parts MJ has great crank windows! Unfortunately while swapping that out i found the bottom section of window track was completely rusted off! Mint vent window for the win! gonna look just a little funny without the tint for the time being but the benefits far outway the out of place appearance! Eventually after i get a new windshield and the sliding rear glass from the parts MJ installed I planned to take this jeep down for a new window tint job. Again the parts MJ just keeps on bleeding those useful little pieces and parts. Currently zero radio or speakers in this jeep, though i have yet to get a radio installed these door speakers sure are encouraging to get something going and see how they sound. Future high-lift jack mount. Simple L bracket pvc spacers L brackets secure to the inner lip of the bed rail and also through the top of the wheel well. This was a $50 marketplace score. High-lift brand jack in basically new condition. Also came across this military E-shovel/pick for a mere $10. Looking forward to some road and forest miles exploring tomorrow for the first time in this truck. Those good-ol-days memories of my early 20's driving my other MJ -now truggy- are something I'm sure this jeep will help me re-live and even more soo Now share with my son (5 yrs old now).
-
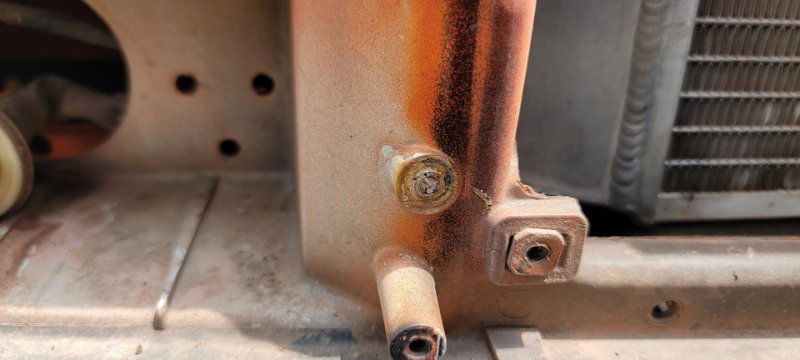
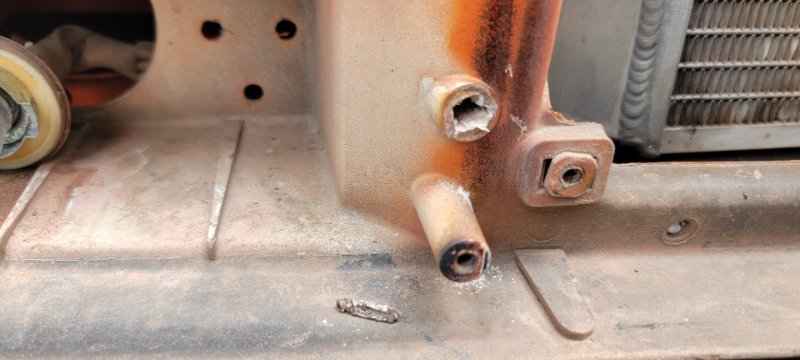
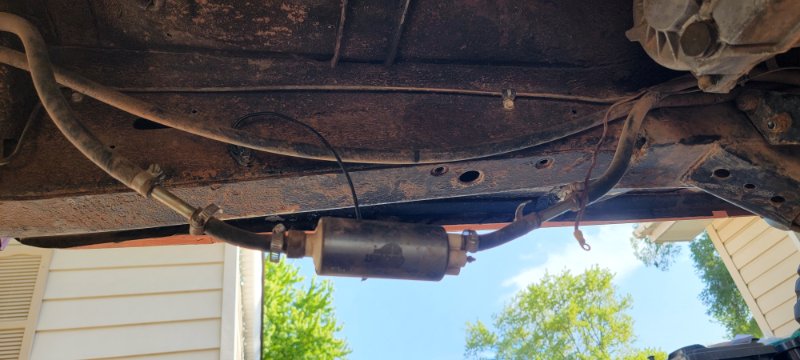
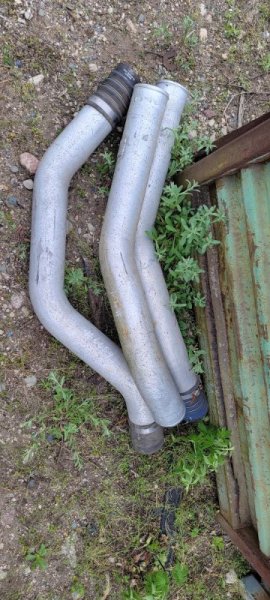
Time for some attention under the hood Again. Haven't been the most satisfied with the battery mounting in itself ( little wobbly as is so it could absolutely be done better) and while discussing other under the hood things with my brother we decided it was time for more change. On my list of want to do's was make a new intake tube, preferably less pieces as a whole. This conversation about routing lead to ditching the older factory style coolant reservoir in the driver front corner. The intake cone filter will stay in the driver side of the engine bay but this will give us a little more room to get the filter farther away from the exhaust header. Utilizing a later factory coolant reservoir in the later factory location proved simple enough and also makes for a much shorter overflow hose. This came with its own little changes because now the coolant hoses for the heater core would need to be re-routed as well. Those needed to be changed and managed a little better anyway so it was basically meant to be. Also wanted a more reliable and universal setup for wiring accesories (lights, elec fans etc) than the previous setup so an amazon special relay box was in store for sure. It was far too late for a finished product photo when all was done but this also came with another issue. The very noisy car quest fuel pump had locked up! Without any idea of its age or even a part number to reference it's capabilities I stuck to the interwebs for a preferred in line ls swap replacement. The walbro 392 pump was $125 and showed up in just a couple days. I didn't realize in-line fuel pumps could be this quiet! All said and done this truck runs and sounds better. Will sneak a few better photos in here for the engine bay once I start playing around with all this tube for the intake. Conveniently enough, semi trucks use 4" aluminum tube for their intercooler systems, just soo happens my truck needs 4" tube as well to match the throttle body and MAF Stay tuned for some potentially cringy aluminum tig work and this will be my first tig job other than messing around with test squares!


-
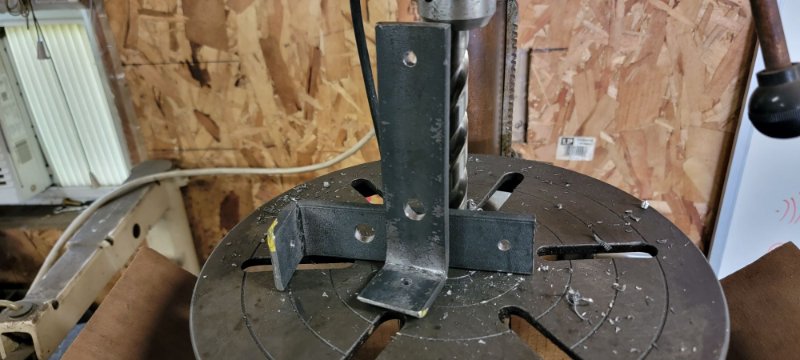
Jeep Comanche Behind the seat Molle Panel!
ThatJeepGuy replied to ThatJeepGuy's topic in MJ Tech: DIY Projects and Write-Ups
That's part of the idea 😉. The lack of molle equipped storage cases has me leaning towards a gun rack style setup... We will see what happens with that later