ThatJeepGuy
-
Posts
383 -
Joined
-
Last visited
-
Days Won
2
Content Type
Profiles
Forums
Gallery
Everything posted by ThatJeepGuy
-
Imagine pulling into an auto shop back in the day because there was a noise up front... the estimated bill reads out " 2 diff rebuilds, 2 new driveshafts" add the mechanical witchcraft that goes into that power divider behind the trans. I'd get a kick out of putting my greasy fingers into one of those for sure.
-
Doing the Dirty, 83 Cherokee LS Swap
ThatJeepGuy replied to ThatJeepGuy's topic in Member Projects: Other Cool Stuff
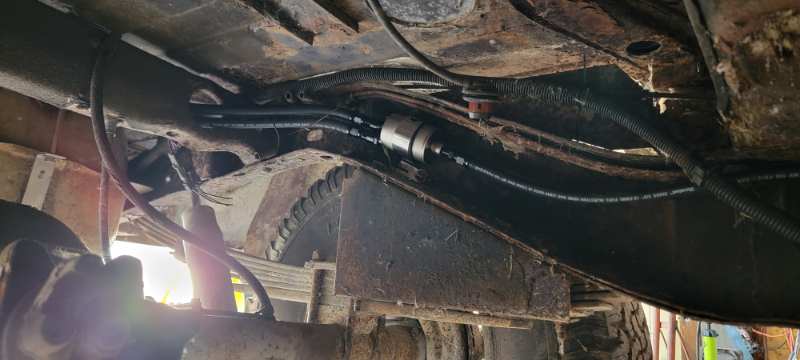
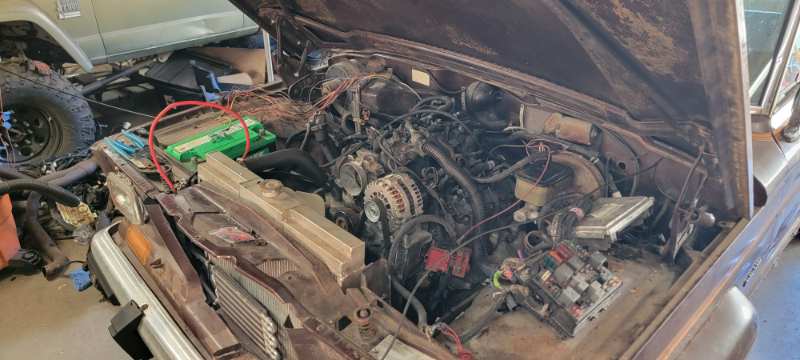
Cruising along over here! Tackling the fuel system setup i realized I needed to change my fuel rail setup. This 5.3 has a return system and I want the return-less setup soo a quick trip to the junkyard and I scored 2 of these cross over tubes. To my dismay though it turns out I need the fuel rails as well. Return rails have 2 ports while the return-less have only 1 port - don't it figure. Going with the corvette filter/regulator warrants the return-less fuel rail setup. This install went without issue. Using only the finest evil energy AN fittings and some Duralast HP fuel line. Finished off the afternoon with some sloppy LS harness placement. Wired the starter solenoid to fire off the FSJ harness, still need to find and wire the fuel pump through the LS harness and then make some power and grounds. I'm very wiring deficient soo I'm puzzled on the whole FSJ switched power from column and how that powers the LS harness??? Also ordered some pieces and parts to do the fuel filler. More to come!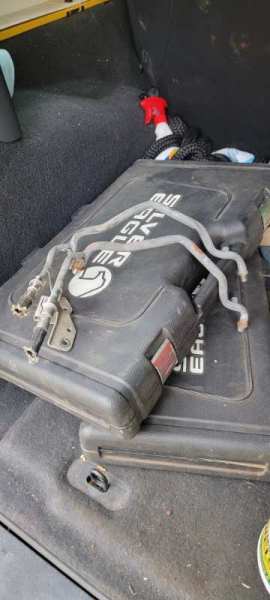
-
I've seen them time and time again on the 3d print pages... have yet to commit to any of them though, its Good to see them all next to eachother. Great scale for size
-
This was well before home alone 2 but thats what comes to mind potentially when operating that appliance
-
Doing the Dirty, 83 Cherokee LS Swap
ThatJeepGuy replied to ThatJeepGuy's topic in Member Projects: Other Cool Stuff
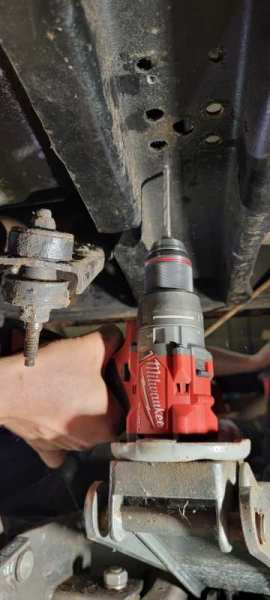
Yes little fella, you get to hang out in the garage for a while This weekend kicked off with manuevering this thing into the garage. Quickly got to work and drilled some new mounting holes in the factory crossmember with this custom "from the floor milwaukee drill press". Its a 2 man operation for sure. This was honestly a surprise - the XJ tank fits very nicely with factory XJ straps and a couple new holes to the environment. Other things like installing factory FSJ coolant temp and oil pressure sensors were checked off the list. Also slid a universal trans cooler in front of the radiator. The bulk items that remain on my immediate list are fuel lines, Wiring shenanigans and a once over on all the fluids.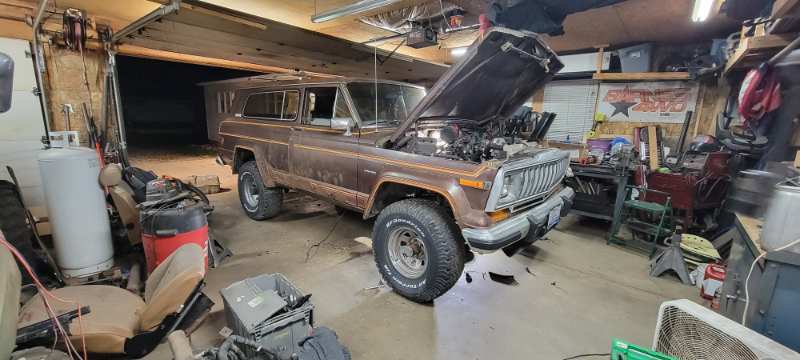
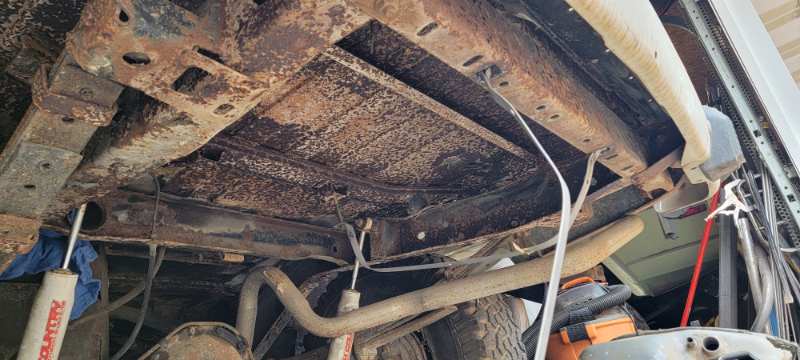
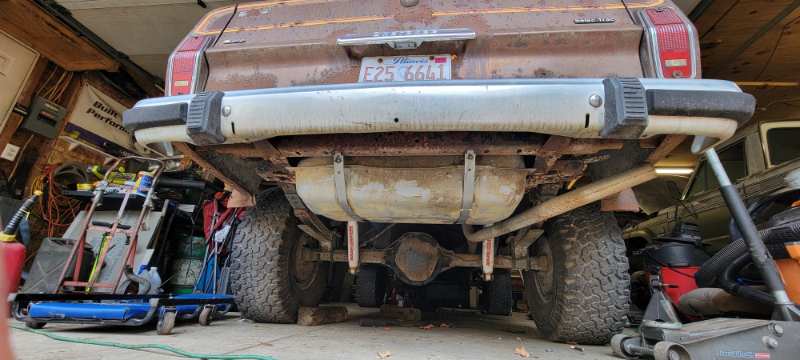
-
Doing the Dirty, 83 Cherokee LS Swap
ThatJeepGuy replied to ThatJeepGuy's topic in Member Projects: Other Cool Stuff
You know pete... Christmas is just around the corner and ive been a very good boy this year ;) Those look killer though! I'm currently floating my Amazon and rock auto cart(s) with essential parts though (potential gated floor shifter, O2 sensors, intake tube materials) - the mudflaps arent going to help empty those carts. -
I would encourage you to stress the condition as compared to most. If you truly believe its above par then keep reminding them. I'm not huge on being aggressive unless it calls for it. If they arent listening or you feel they are just trying to brush you off then absolutely turn it up! When my 14 caprice got peppered from someone else side window on the highway, it needed a lot of work to overcome the glass etching everywhere. All new paint job and all new plastic components, to include a new windshield as well (gm only btw, zero aftermarket avaialble). My insurance adjuster (nice fella btw) tried to cheaper out on me for the headlights because 1 had haze and in general tried to downplay the overall condition as typical wear and tear. NO sir this car has only 80k miles and has never seen salt, car was immaculate until this happened. Glass damage is everywhere regardless of a little haze. (Headlights were $1100 each btw.) I never let up and we came to an agreed value that i felt best represented the true value vs the current market.
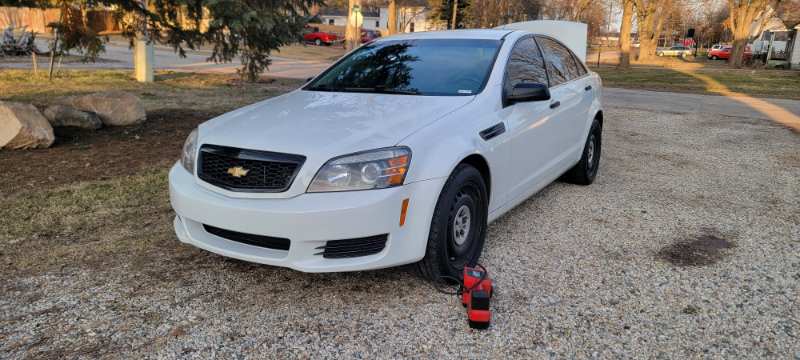
-
Doing the Dirty, 83 Cherokee LS Swap
ThatJeepGuy replied to ThatJeepGuy's topic in Member Projects: Other Cool Stuff
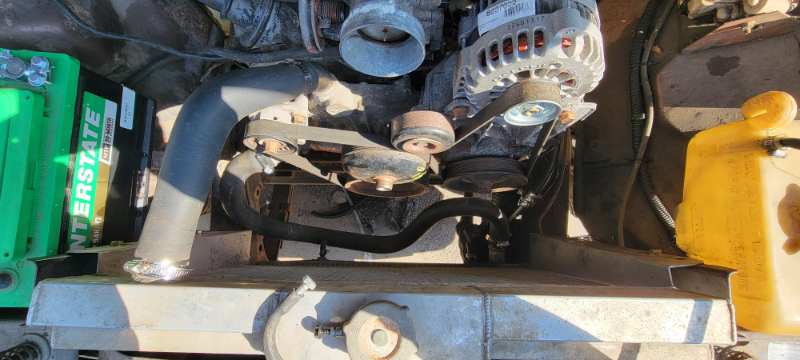
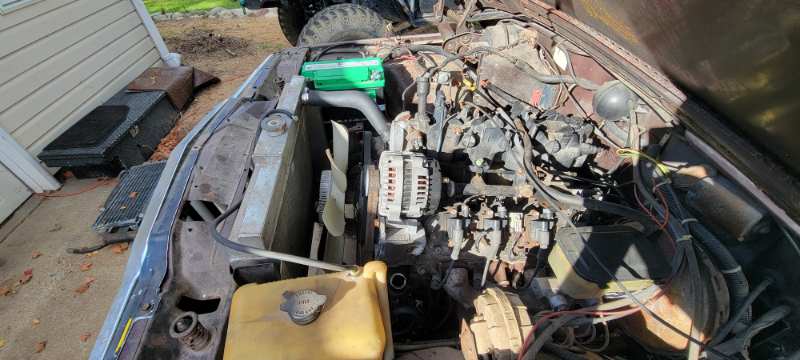
Slow going over here... other things needed to get done soo i managed to get just a couple little things done. Power steering lines - check! Factory 83 pressured line has this goofy arch but the fittings are tight and the lines arent rubbing anything. Alternator bracket and assy on and serpentine belt isntalled... i know - thrilling Radiator installed and plumbed minus the overflow tank which I'm torn on retaining the original or getting one of those cheapy Amazon ones because theyre smaller... I'm going to try the factory clutch fan setup and makeup a shroud for it, worst case scenario I default to e-fans but this stuff was free soo guess which setup wins.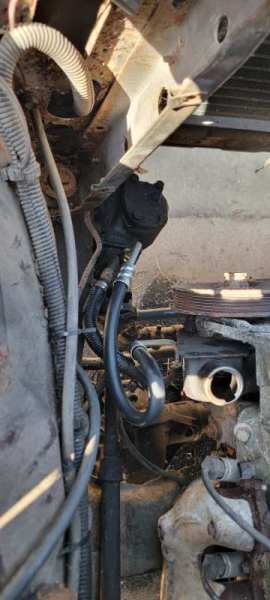
-
Best advice i can offer, argue up with no remorse.
-
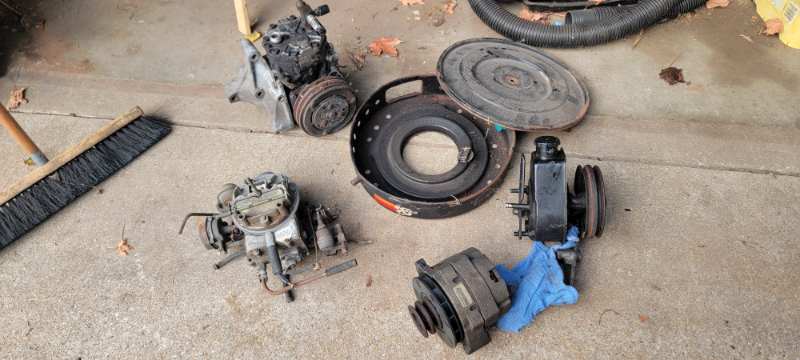
I may actually have one of those carbs sitting on the floor of my garage... The leftover bits from the 83 Cherokee I'm currently LS swapping. Either way I'm getting with the program and seeking a tbi truck then. I'm not much for the Diesel trucks, my buddies give me hell becuase its apparently the smarter move for a hauling rig but I do just a handful of trips a year and primarily in my home state (2hrs drive to the location(s)). I don't see the need for one in my situation, my gasser(s) have served me well enough
-
I'm guessing because I also want to use this truck to haul across country thats going to be the smarter move
-
Was the tbi considerd any better than a carburated version?
-
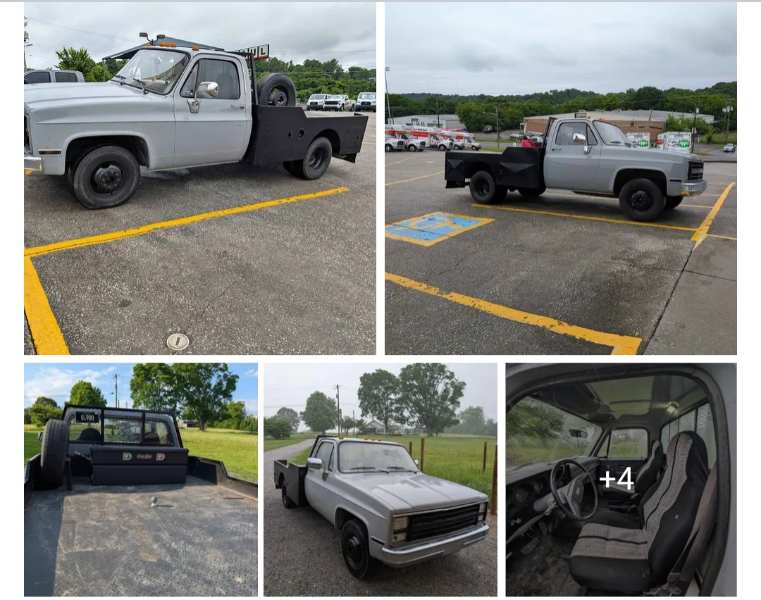
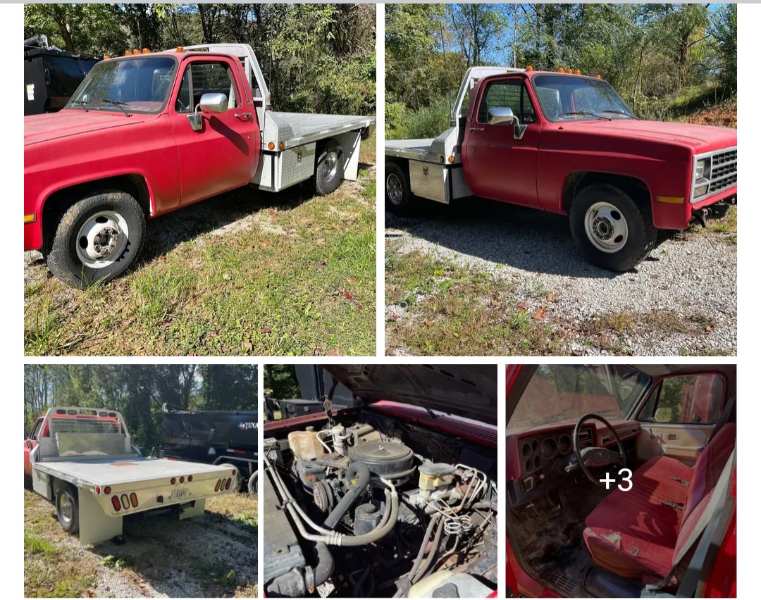
Hello all and welcome to my next predicament... I'm considering getting myself into another tow rig, in the passed I started out with a 2000 Chevy 2500 (6.0 and 4l80e) then moved onto a 2010 silverado (5.3 and 6l80e). Both of which did all the things I asked them to but both unfortunately succumbed to rust/mechanical failures. Currently ive been making all the things happen with my wife's 2013 Tahoe but it too is started to succumb to the rust belt demons. Now I'm no ford/dodge guy soo we arent gonna get into any of those options but considering the current truck market in my immediate area, I'm not exactly thrilled about spending money on another 99-13 GM truck. The 80s-early 90s chevy pickups however are really catching my eye! Primarily the big block 454 and auto/manual trans setups in nearly any configuration (srw/drw ext-crew cab and any bed configuration). Anyone care to sway me away or further into my search for one of these specimens?
-
Doing the Dirty, 83 Cherokee LS Swap
ThatJeepGuy replied to ThatJeepGuy's topic in Member Projects: Other Cool Stuff
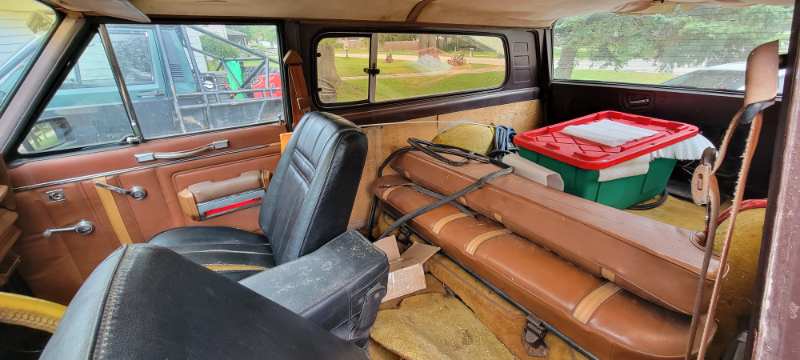
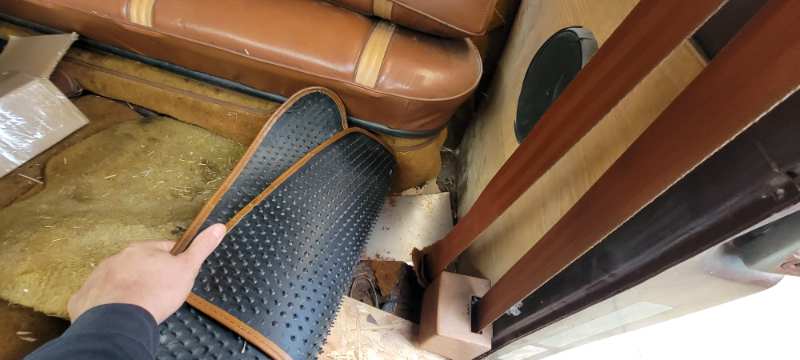
Interior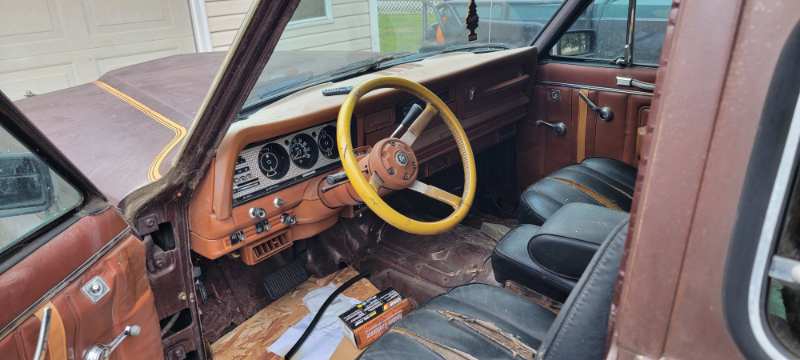
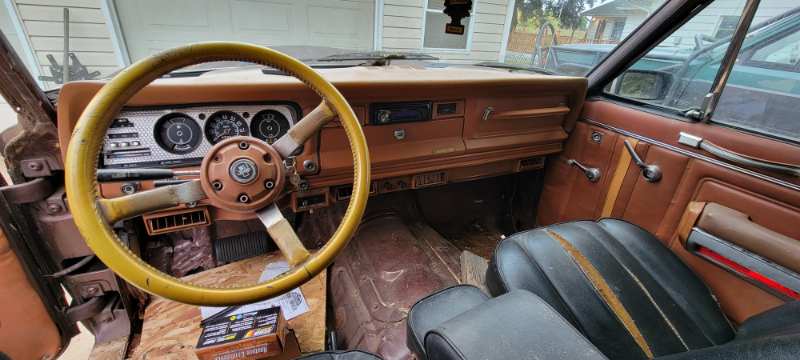
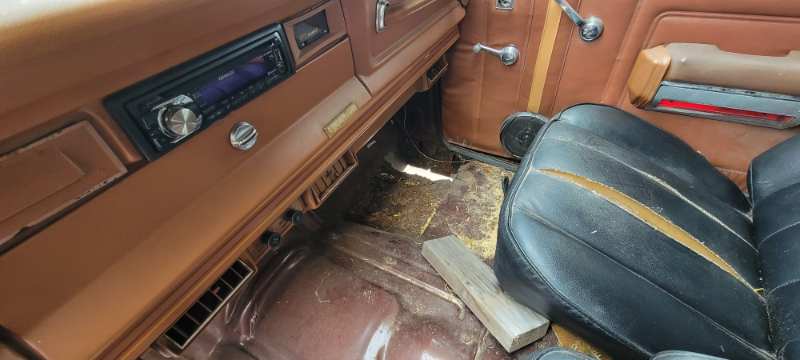
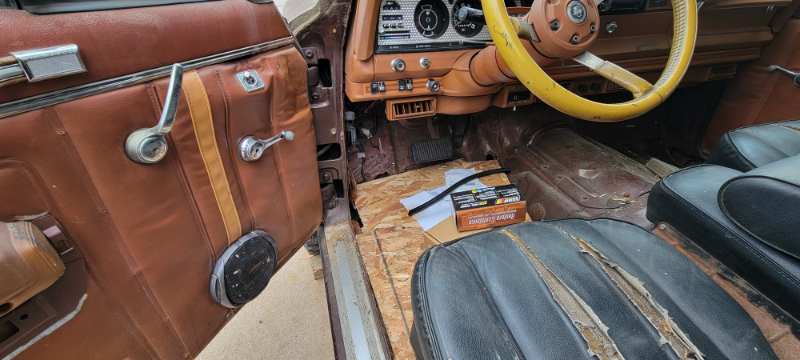
-
Doing the Dirty, 83 Cherokee LS Swap
ThatJeepGuy replied to ThatJeepGuy's topic in Member Projects: Other Cool Stuff
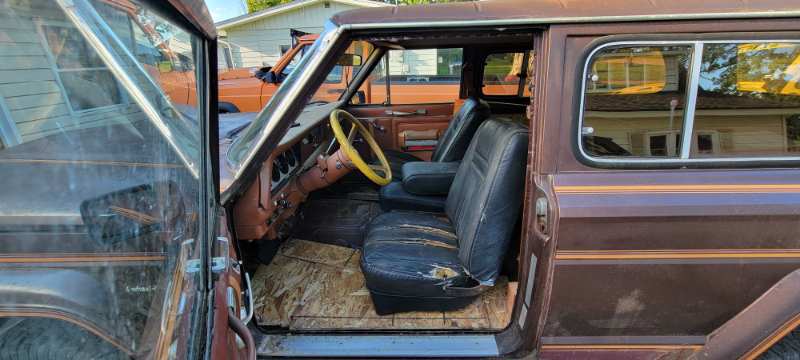
As luck would have it, I stumbled upon this deal, 2 sets of factory bucket seats w/the center console ($400 for all of it). Now not only do it get to resolve the seating situation in the Cherokee, but also the Jtruck hiding in the garage as well Hgeranium, this was the only pic I took thus far, ill get others this weekend. You can see the floor is a beautiful color tone of plywood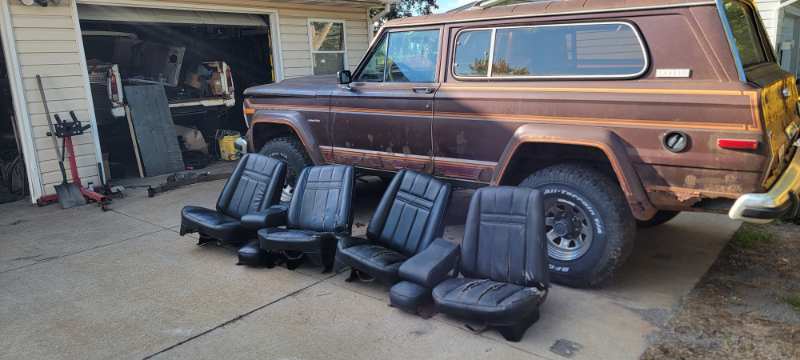
-
Doing the Dirty, 83 Cherokee LS Swap
ThatJeepGuy replied to ThatJeepGuy's topic in Member Projects: Other Cool Stuff
Surprisingly I have no pictures at the moment. The bulk of the floor pans are a couple sections of plywood thanks to PO. This jeep did come with a set of mastercraft front seats, actually pretty nice for my standards as well! I'll nab a few pictures this week/weekend though to establish the starting point for the inside as well. Haven't set much sight for any work inside just yet. My plan is to have this thing run and move under its own power before I bother with any floor pan or panel repairs. -
Doing the Dirty, 83 Cherokee LS Swap
ThatJeepGuy replied to ThatJeepGuy's topic in Member Projects: Other Cool Stuff
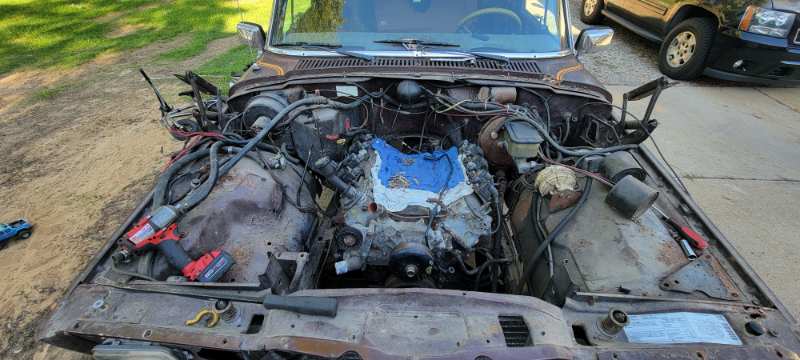
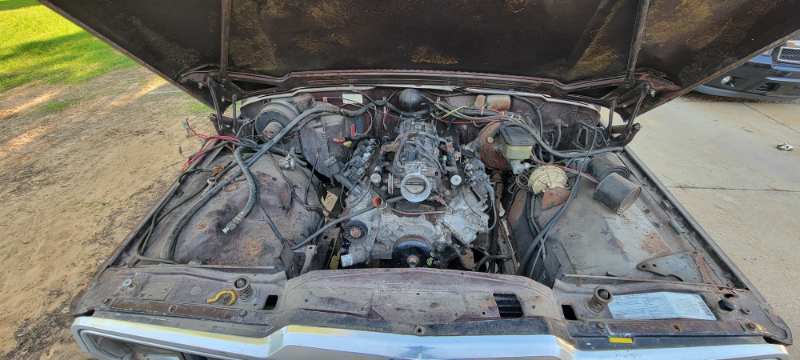
While this is supposed to be a cheap LS swap I splurged and got this set of swap motor mounts. Pretty sure they are still made by Flop Shop but BJs seemed to be the only way to get them? With the new mounts painted and ready for install it was time to pluck the original trans and tcase out And then we dump the new drivetrain in More to come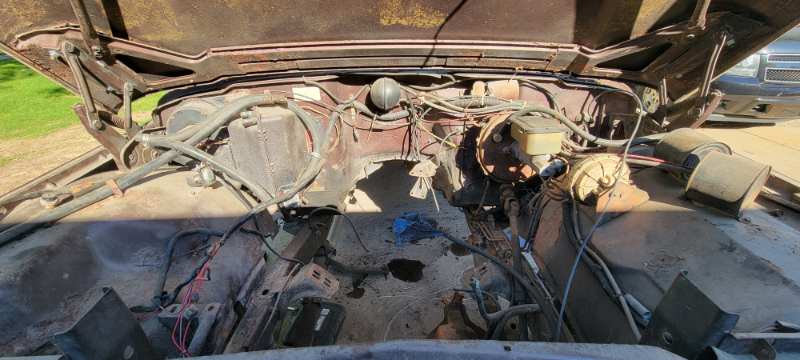
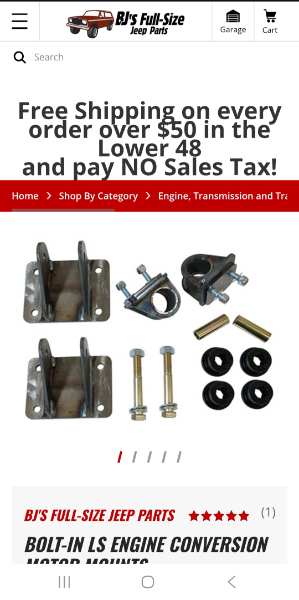
-
Definitely dig the look with the 35 geolanders. Love the progress and updates btw
-
I have a secret collection of arguably poorly thought out exo cages... this is one of the latest additions
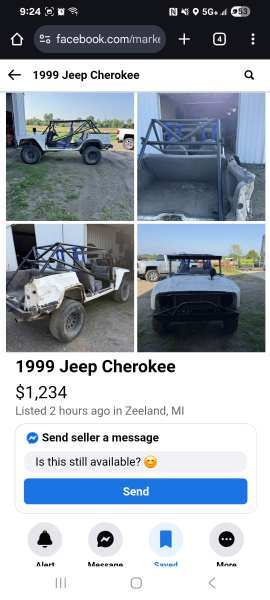
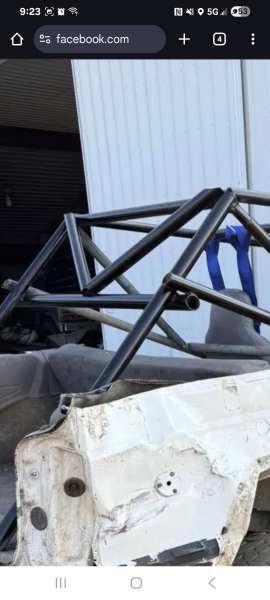
-
The hoodbrowvisor thing on this... its like a having a mullet, but the mullet is on the front
-
Doing the Dirty, 83 Cherokee LS Swap
ThatJeepGuy replied to ThatJeepGuy's topic in Member Projects: Other Cool Stuff
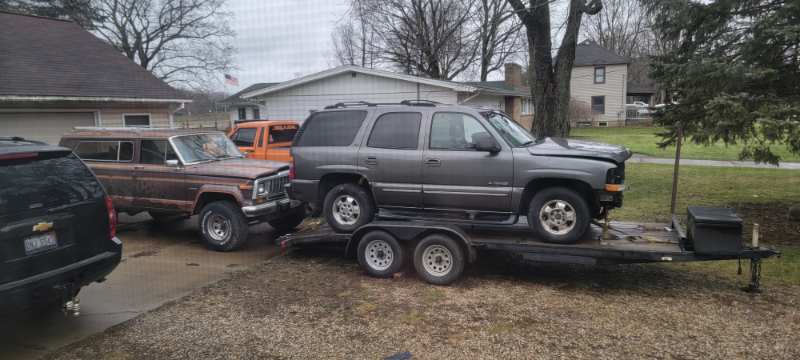
Than along comes the donor vehicle, a 2000s Chevy tahoe with a recently replaced engine just months before the PO had an accident and totalled it out. The relevant bits, 5.3 engine, 4l60e trans, complete engine bay harness and gas tank should be enough to get me through. All said and done after pulling my needs and partingout/scrapping whats left I'm pretty sure i actually made money off this thing, id have to check my notes for sure but definitely broke even at the least.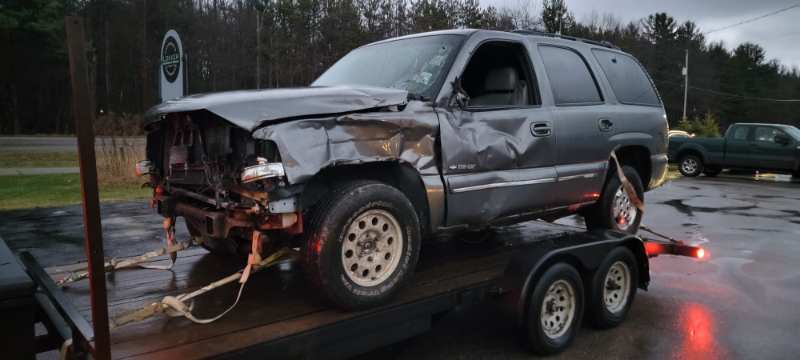
-
The factory 4.0 mounts from your donor should drop right into the 86 mounting holes.... How about that firewall clearance? And factory track bar upper mounting holes? And fitting the 4.0 radiator into that radiator support? I have a thread somewhere on this forum highlighting these things I'll see if I can find it
-
15"diameter, width depends on style but typically 7-8-9" wide. Best to check marketplace or even poke around car-part.com and get a look into the local part out yards.
-
Interesting swap in regards to source, what did the YJ come with for an auto Trans? Thats surely not a common package over an xj donor
-
Doing the Dirty, 83 Cherokee LS Swap
ThatJeepGuy posted a topic in Member Projects: Other Cool Stuff
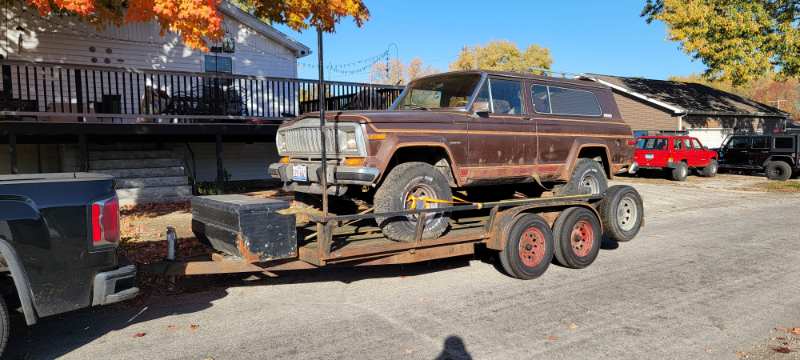
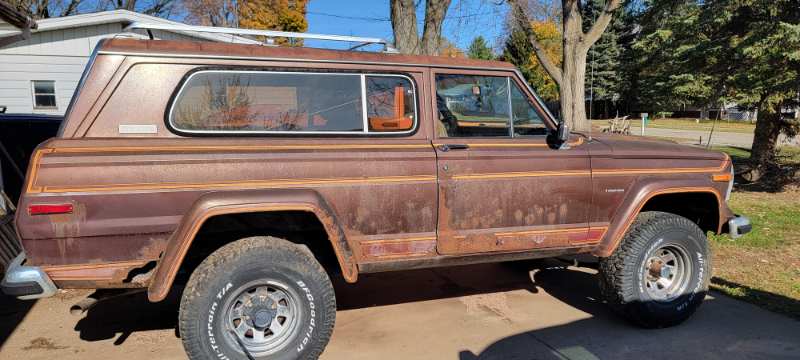
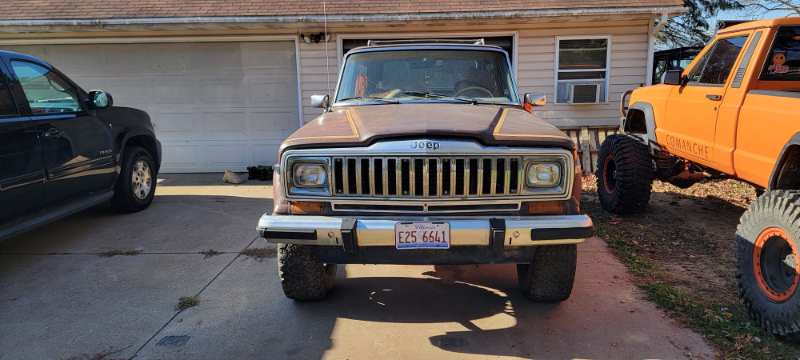
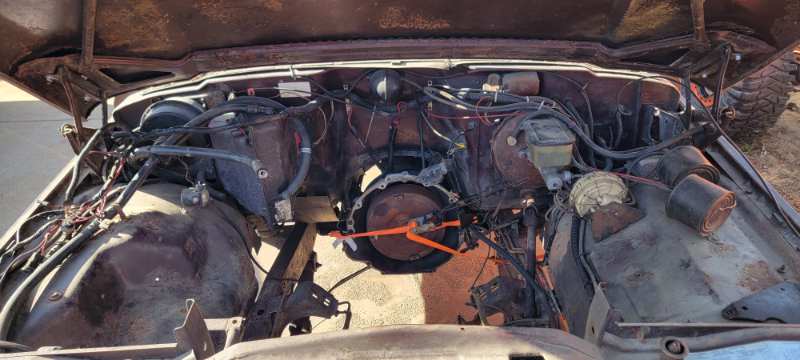
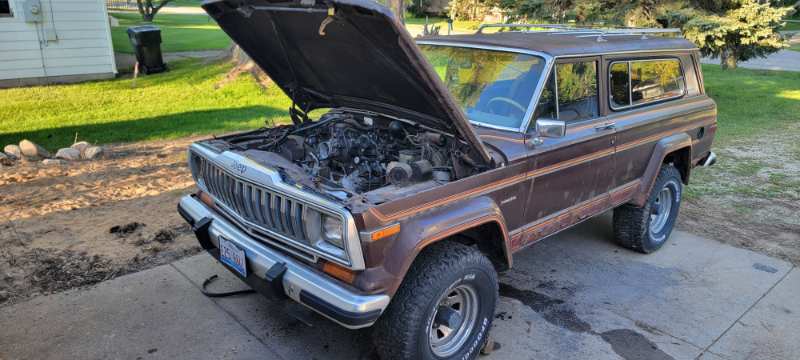
Stumbled upon this 83 FSJ through marketplace and watched it for a few months. Eventually talked myself into atleast asking questions... Naturally that lead me to making a day trip with a buddy of mine to another state, also convincing the guy to accept my reasonable offer. I've wanted one of these FS Cherokee's for some time now and finally have one to explore and modify. I did try and find a cheap amc360 to put into this engine bay BUT the amount of money i was willing to spend on a used engine and the actual availability of them were not even close. The plan is to do another one of them Jeep LS swaps. Nothing special just dirty and cheap. Honestly playing catch up making this thread but I absolutely wanted to document the evolution of what this jeep may become.