
ThatJeepGuy
-
Posts
352 -
Joined
-
Last visited
-
Days Won
2
Content Type
Profiles
Forums
Gallery
Everything posted by ThatJeepGuy
-
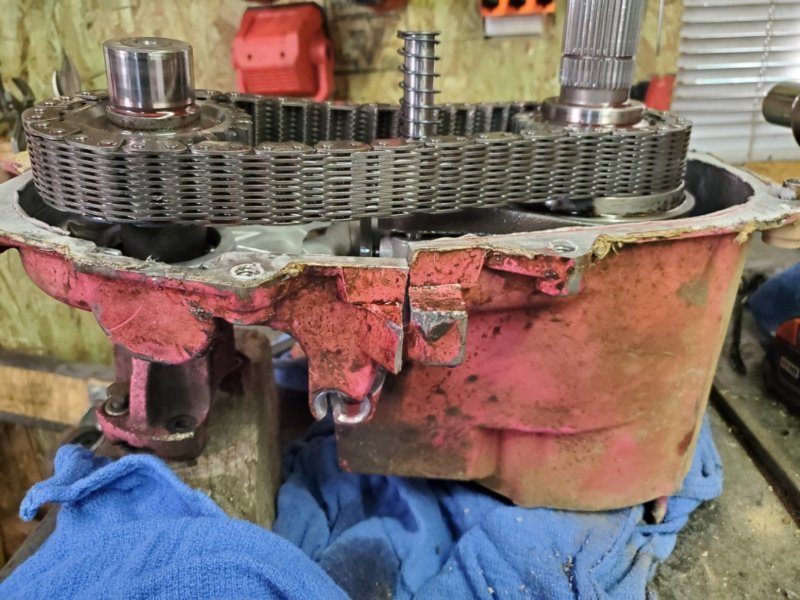
 Drivetrain out! This was a pleasant surprise Not enthused about finding a used trans and turning this in as a core for a rebuild isn't in the budget at the moment. Ideally i had planned to wait till after this truck was running and driving before i started to save funds for the rebuild so i'm only slightly torn on what to do at the moment. This is a driveable trans that held up well in my prior truck so i have that going for me - I also got a little TIG experience under my belt so i'm going to attempt to repair it and run with it for the time being. Waiting for a bare block from a buddy of mine and then its time to embrace the beginner welding photo shoot!
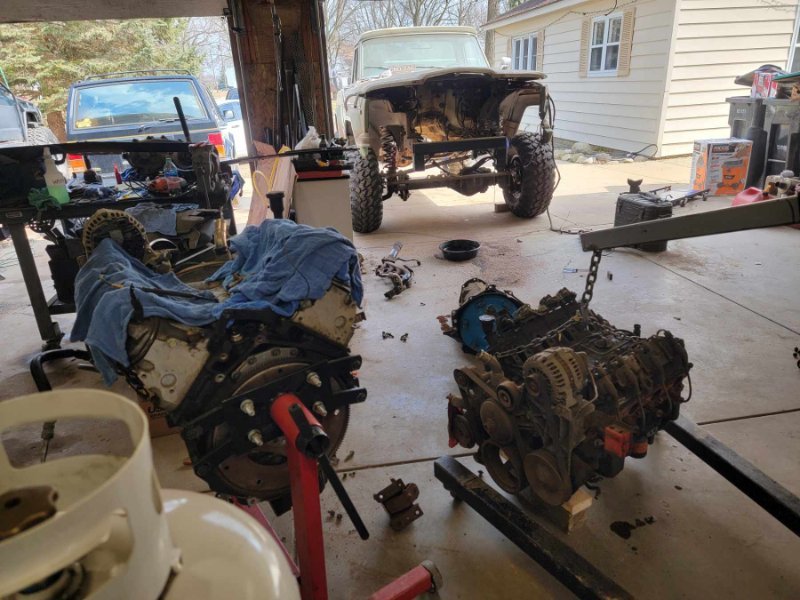
-
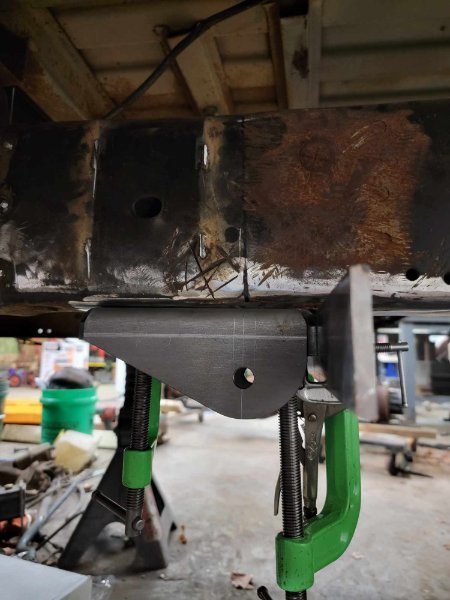
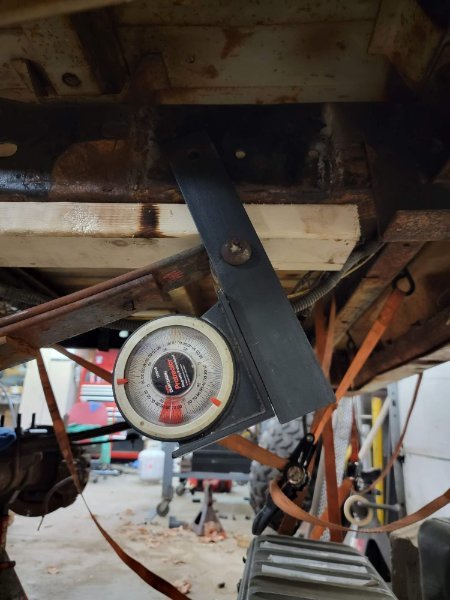
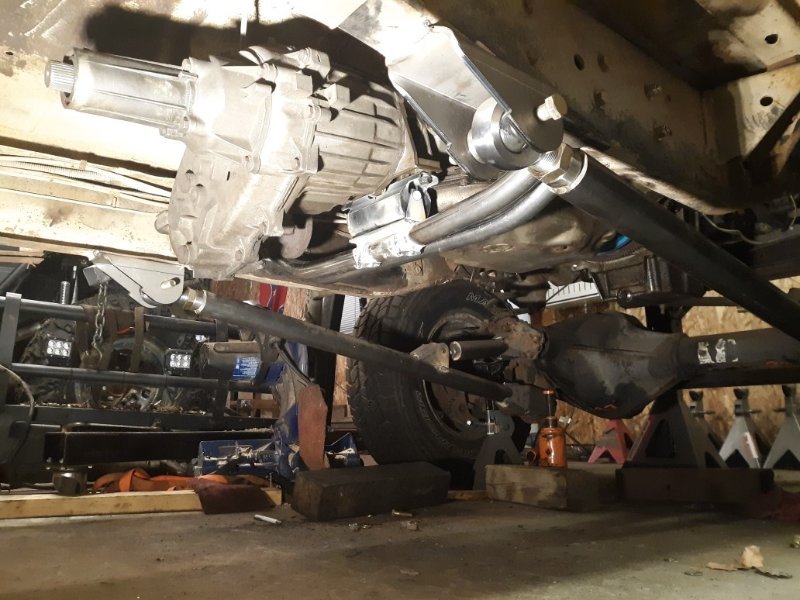
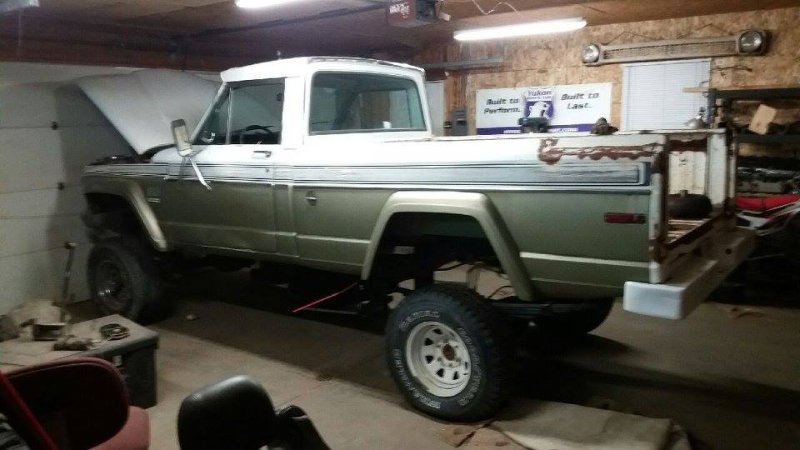
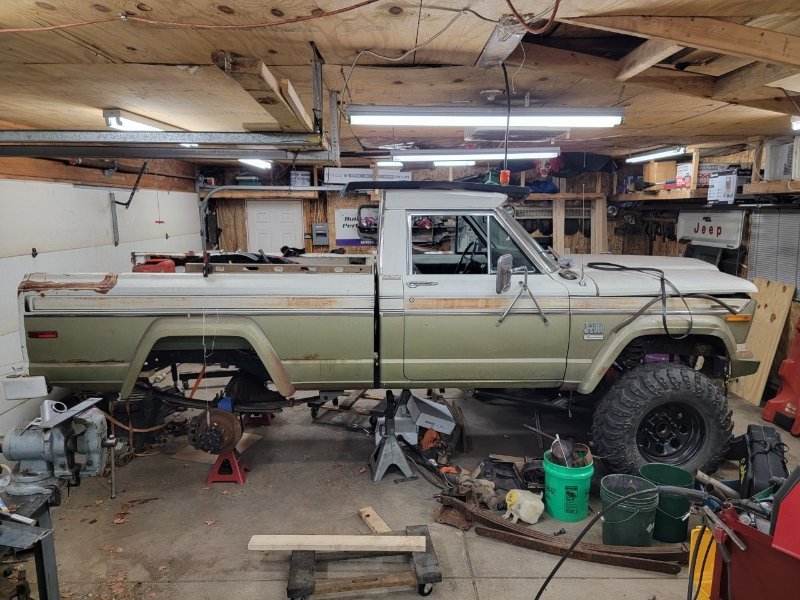
Finally got this rear suspension figured out! The leaf setup haunted me for some time but after a couple new ideas were shared my way i had a direction that i really liked! 1 pair of frenched mounts from RuffstuffSpecialties tacked up front Dumped the 3/4 ton chevy springs in favor of these 1/2 ton dodge springs, they are a little shorter but also softer which i like to start out as a base. Here i'm lining up for shackle bushing placement into the frame. Right at that 45* angle. Conveniently my ideal location was VERY close to a factory hole in the frame, this made for easy alignment from both sides, just cut some inner plates for the frame and then a couple 2" holes. Drilled some 1/4" plates for shackles and then installed bushings then set on its own weight It was such a nice da that i couldn't resist but to push the truck out and catch some sun for a few hours while i did some deep cleaning on this side of the garage. Tcase SYE and HD chain setup is getting finished up, also have the lower mileage motor sitting on the stand. Gonna shoot for pulling this old motor out and re-mating the trans then re-installing soon. I can then re-attach the built tcase and start re-making the x-member. I have the 5.13 gears and rear locker in hand so while i wait for the front locker to show up (3-months wait*) i can get this rear axle setup and under the truck.
-
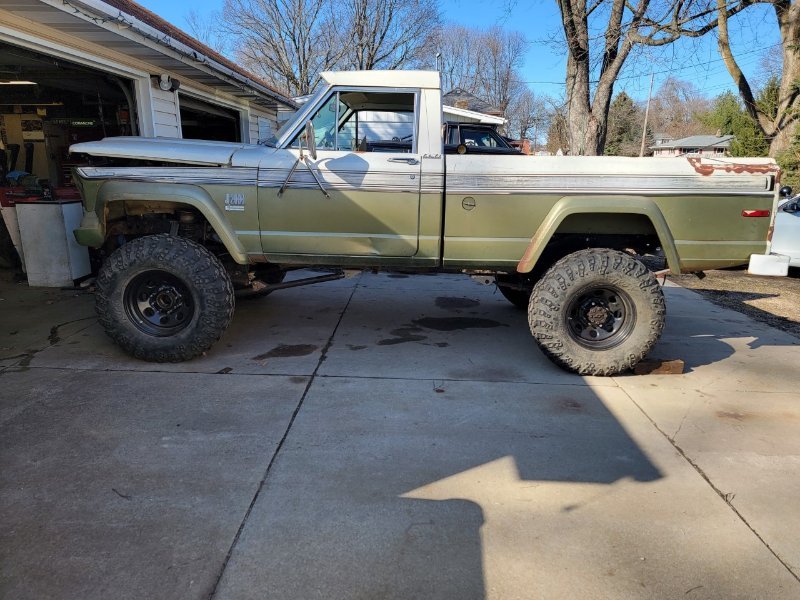
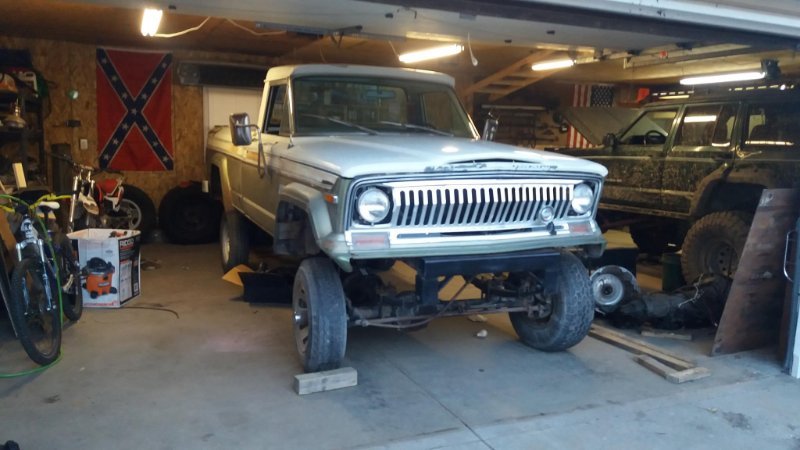
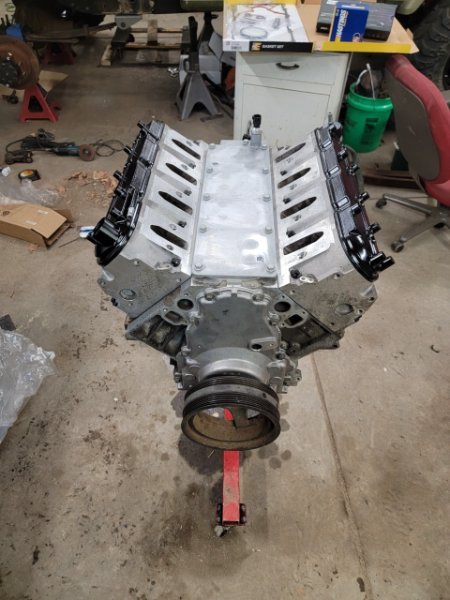
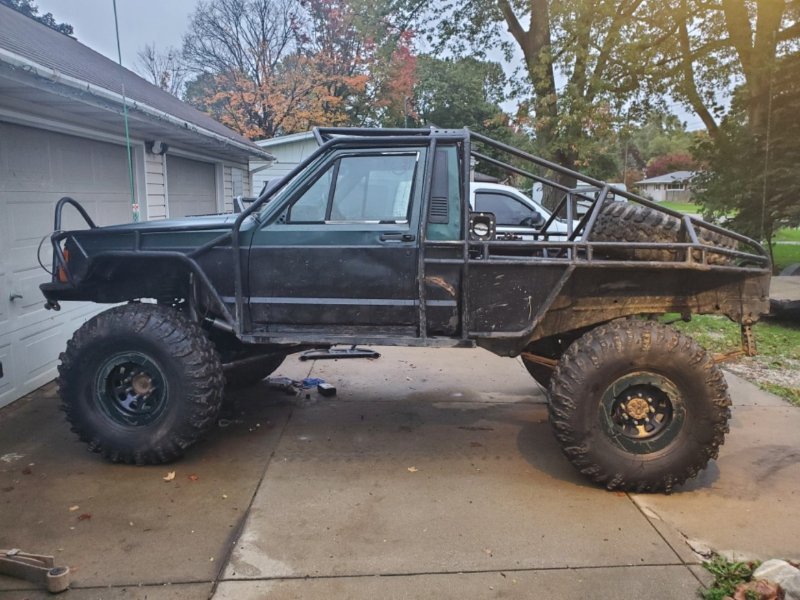
Its nice to catch this thread back up - I've finally worked through enough of my other projects and to-do's and also sold my winter DD so now not only do i have some more free space but also build $$! Setting my goals high and I'm shooting for making this truck drive out of the garage this year! So onto my direct plans Motor - A good friend of mine had decided to partout his 05 Denali. 6.0L motor just like whats setting in my jtruck now BUT this motor only has 160k miles and runs great compared to my 245k mile motor currently that hasn't moved in 4+ years. This and a few other engine bay parts only cost me $500 Trans - Well no immediate plans here, just retaining the 245k mile 4l80e, eventually prolly a rebuild but that'll come after this thing moves on its own Tcase - SYE and big chain upgrade to make it a "241CHD" Axles - I'm going with 5.13 gears and lockers front and rear. Front is getting an Eaton E-locker and the rear will get a Yukon Grizzly Locker. I've had the grizzly locker in a few different setups now and ive had nothing but good experience so I'm sticking with it. E-locker selectable front because lockouts are one thing but the option for open/locked diff is nice. Not huge on adding air components and lines to this rig other than an OBA for tire pressure so thats why an air locker loses its appeal for me. Changing the rear axle from the ford 10.5 to a factory disc brake 14B. Reasons why are because i want a bolt on pinion guard for the rear driveshaft and also I've got some prior experience with the 14B in my MJ project. Those are the immediate plans for now. I've committed the majority of the money i made off selling the winter DD to knocking out the big ticket items. I've also got a Dakota Digital Dash coming in that takes interfacing new gauges a breeze.
-
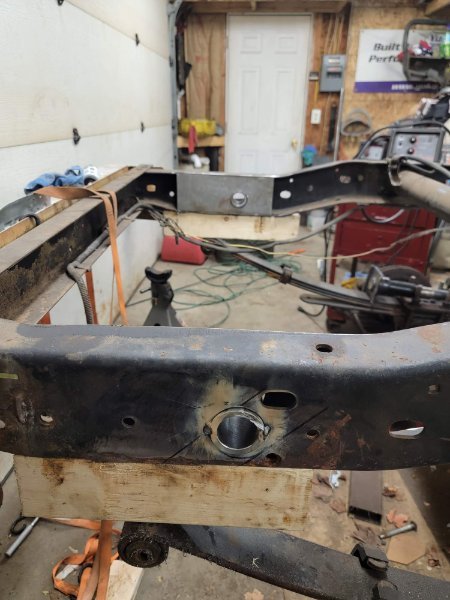
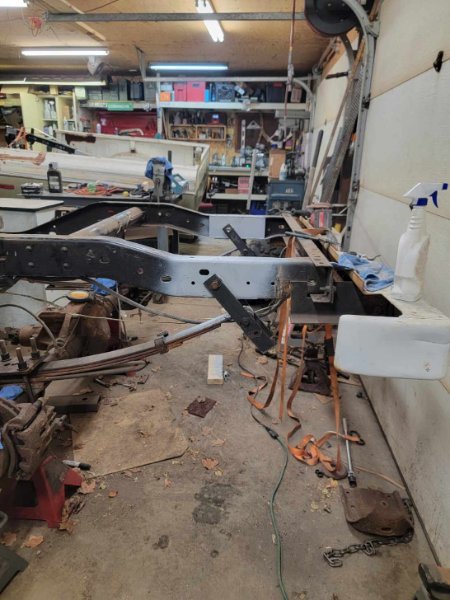
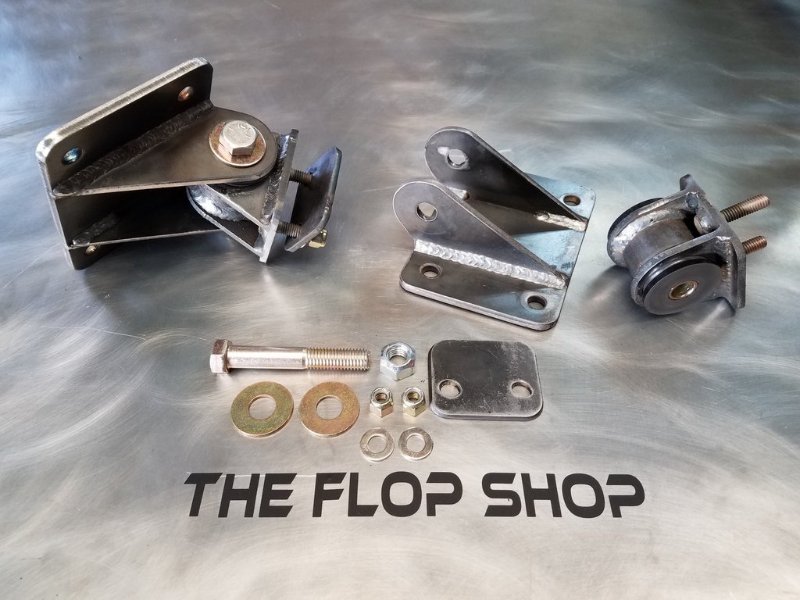
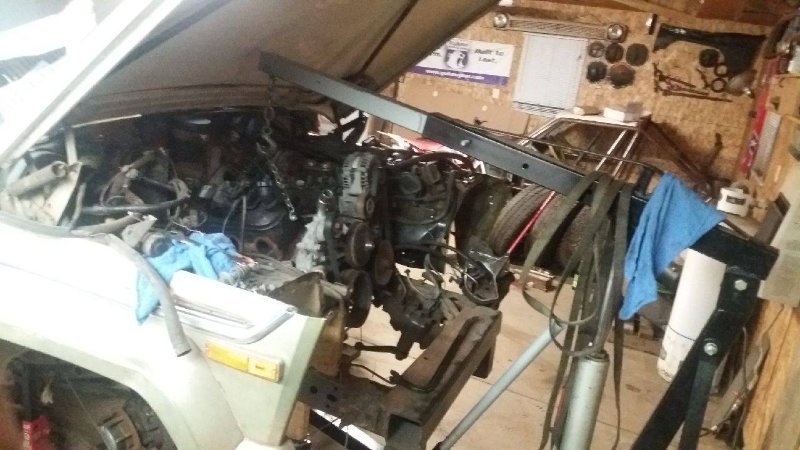
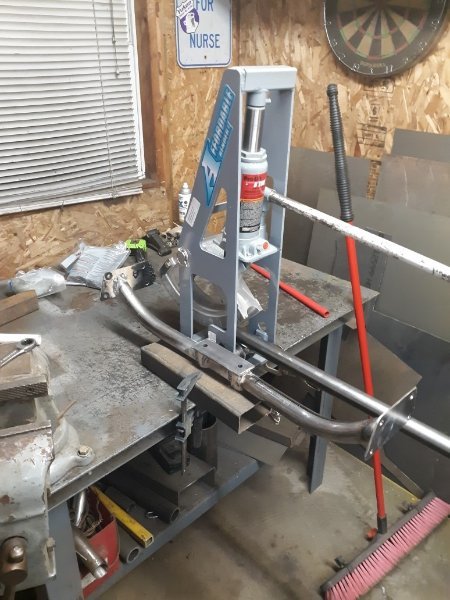
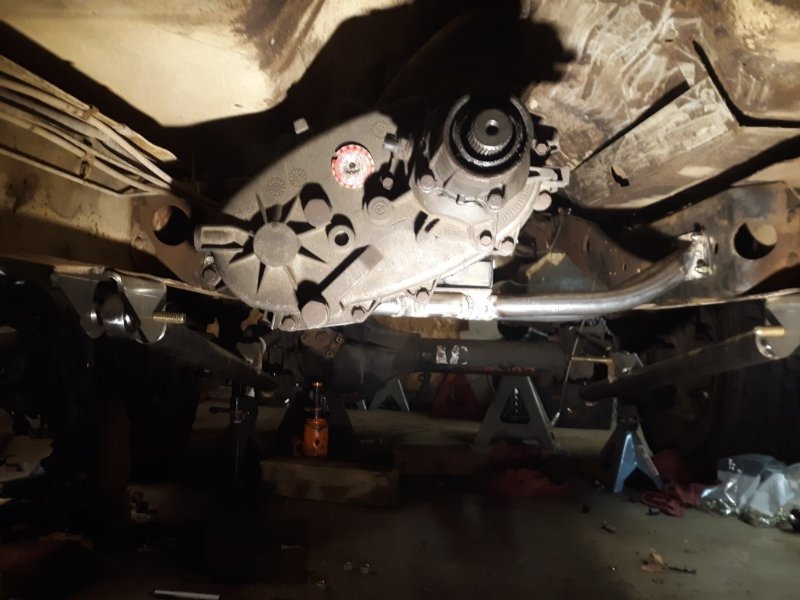
So the drivetrain inspiration for this project came from my old DD 2000 silverado 2500. The drivetrain was around the 235k mile range and the truck istelf wasn't in terrible shape - common fender rust, windows were a little finicky, door panels fell off when shutting the doors. The final straw though was the tcase on the way home from work one night. While trying to get through an intersection the chain started to skip! Having dealt with this before on the jeep and not wanting to deal with rebuilding the chevy electric shift case - i knew my search for a donor truck was over! This 6.0L and 4L80E would live on! Stripped the drivetrain and engine, trans wiring harness from the donor and away the donor went! Next came a pair of LS swap motor mounts from The Flop Shop. While these were a little pricey i was happy to have them because at the initial removal of the donor LS these were in fact no longer available! While flipping through my usual pages one morning though i had noticed they were listed as available once again! Per my doubt i made a phone call to verify and they were in fact up for grabs - Yes Please Take My Money! Temporary install was straight forward bolt them up and drop em on the factory frame mounts! Next came a couple bends and my V1 crossmember was in place I picked up a manual shift 241c from a co-worker that is supposed to be in good working order and also a brand new factory trans mount. At the time that i built this crossmember i was still very green to bending tube and having played with a few other projects since then i'm not sure this crossmember will be a permanent thing. More thank likely going to remake/revamp what will be hopefully not only be a better crossmember but also a belly skid plate

-
1987 Comanche The Long Hard Road
ThatJeepGuy replied to ThatJeepGuy's topic in MJ Hardcore Tech: Epic Journeys to Greatness
stay tuned - ill do my best to get and keep that one up to day date -
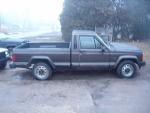
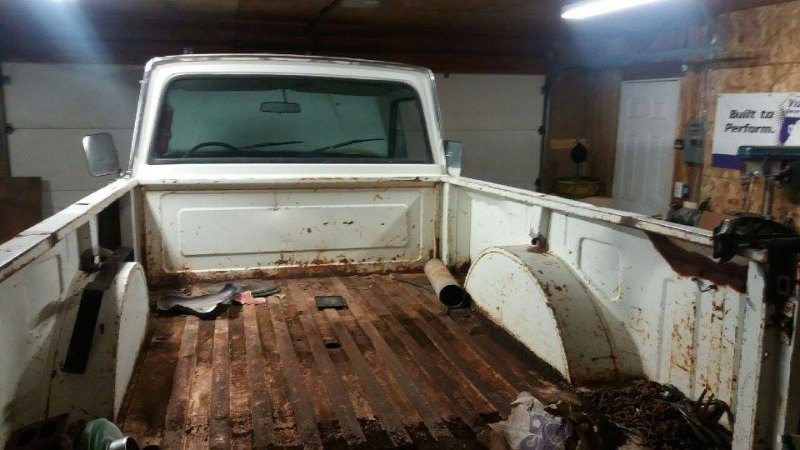
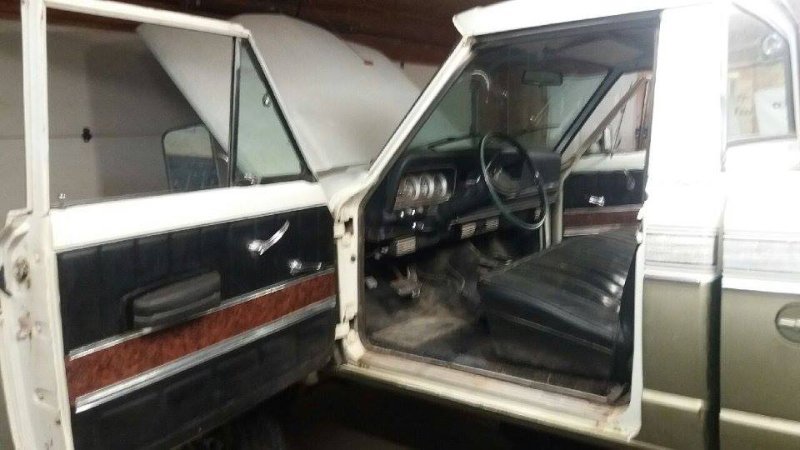
Finally sharing this one on this forum. So bear in mind this project is about 5 years old now - very slow progress But i would aspire to build this jeep into an Ultimate Adventure type of rig. DD reliable and absolutely capable for aggressive trails. This came to be because a close pair of friends who live out west (Wyoming) came across this truck for sale. Buddies gf having an obsession for these trucks had come across it for a pretty fair price as a crude roller and shortly afterwards found herself a complete and orginal truck instead. I cut a deal with her for this truck delivered while on one of the home visit trips for an even $1000. Interior is still very original and even has an AC setup under the dash - Hopefully i can utilize this! There was actually a "poor mans" gooseneck mount in the bed of the truck in the form of a nearly full 1/4" sheet of steel with the ball in the center bolted through. You can see the hole that was crudely cut to clear the nut The way this came to me was exactly how it was purchased from the PO - sitting on a less than ideal leaf spring setup and chevy half ton axles. This was intended to be someone's mud truck and a rather hillbilly attempt if you ask me. MY PLANS! LS drivetrain 1 ton ford axles Long arms and coil springs up front Not factory leaf spring setup rear Winch bumper and warn 8274 winch up front Rock sliders Some type of cage work
-
1987 Comanche The Long Hard Road
ThatJeepGuy replied to ThatJeepGuy's topic in MJ Hardcore Tech: Epic Journeys to Greatness
Its been some time since i've made it to a Dog Party and as much as id love to go I'm in the middle of rebuilding the motor in the towmobile. Full DOD delete, a good midrange cam, tighter compression aluminum heads and new pistons. Maybe if i sweet talk the wifey i'll get away with some long tube headers as well Between this engine rebuild and also trying to make progress on my J2000 project - i've got a feeling i prolly ought to share a thread here for the truck as well. - Ive had a busy fall/winter season with these 2 and havent been able to get the other jeeps/ projects in the garage.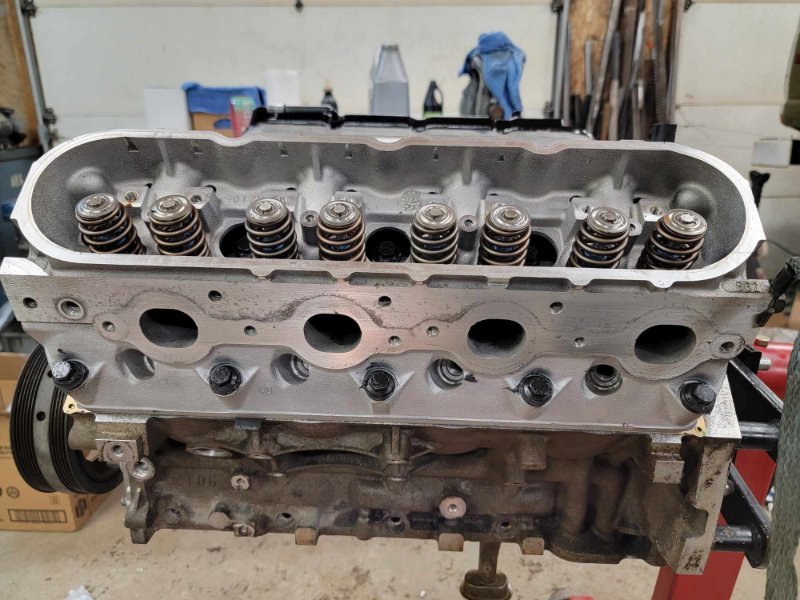
-
89 Comanche 4linked on 39s
ThatJeepGuy replied to briley_t's topic in Member Projects: Your Comanches
Good looking rig, the soft topper is a nice touch as well. Custom fitted or similar vehicle setup? -
1987 Comanche The Long Hard Road
ThatJeepGuy replied to ThatJeepGuy's topic in MJ Hardcore Tech: Epic Journeys to Greatness
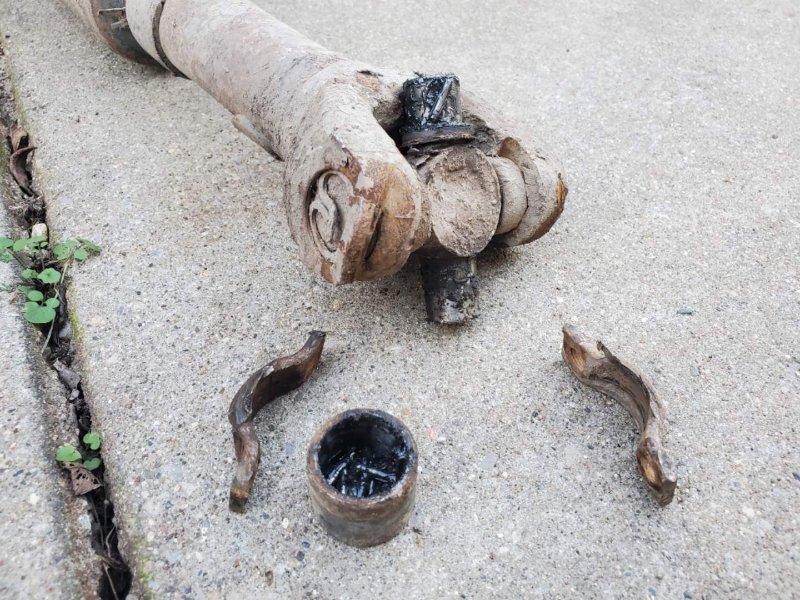
I wasnt very nice to the jeep on the last outing late fall of last year... In a series of not necessarily bad decisions I broke the front driveshaft and split my tcase. Then also bound and wrapped the rear axle/leaf springs. Added to that i broke on of the ujoint tabs on the rear yoke so i lost a ujoint cap... surprisingly though i don't think it was this trip because it looked to have been gone for a couple trips based on the surface rust. Also clipped a poorly routed trans cooler rubber line with the mechanical cooling fan and bled the jeep out. So in we go with a brand-used set of MJ leafs with a cut down dodge dakota main leaf added in -middle of the pack. Rebuilt and "straightened" rear driveshaft. Replaced the rear yoke with new and off course a new oil seal while i was in there. Rebuilt and straightened front driveshaft. Tcase guts survived the ordeal - HD built case with wide chain and 6pt planetary - so a fresh case with new bearings, fork pads, seals and front yoke. For far too long this thing had a little cali lean going on that wasn't terrible but i knew it was there. Thankfully its sitting a little more stout now! Immediate future plans are replacing and re-routing my trans cooler lines with steel lines. Some configuration of a traction bar/anti wrap bar to keep these new to me leafs in good shape. I have day dreamded and doodled a rear winch setup a plethora of times soo maybe this summer the time will finally come. I'd also like to utilize the space behind the panels just behind the cab because there is nothing besides open air there - maybe moving the battery and making an access door? Or simply just another storage option for tools/trail gear.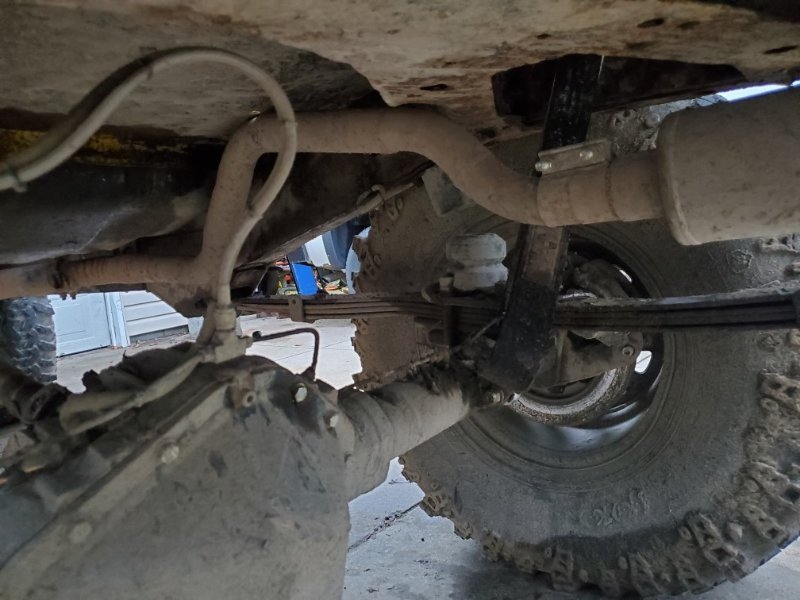

-
1987 Comanche The Long Hard Road
ThatJeepGuy replied to ThatJeepGuy's topic in MJ Hardcore Tech: Epic Journeys to Greatness
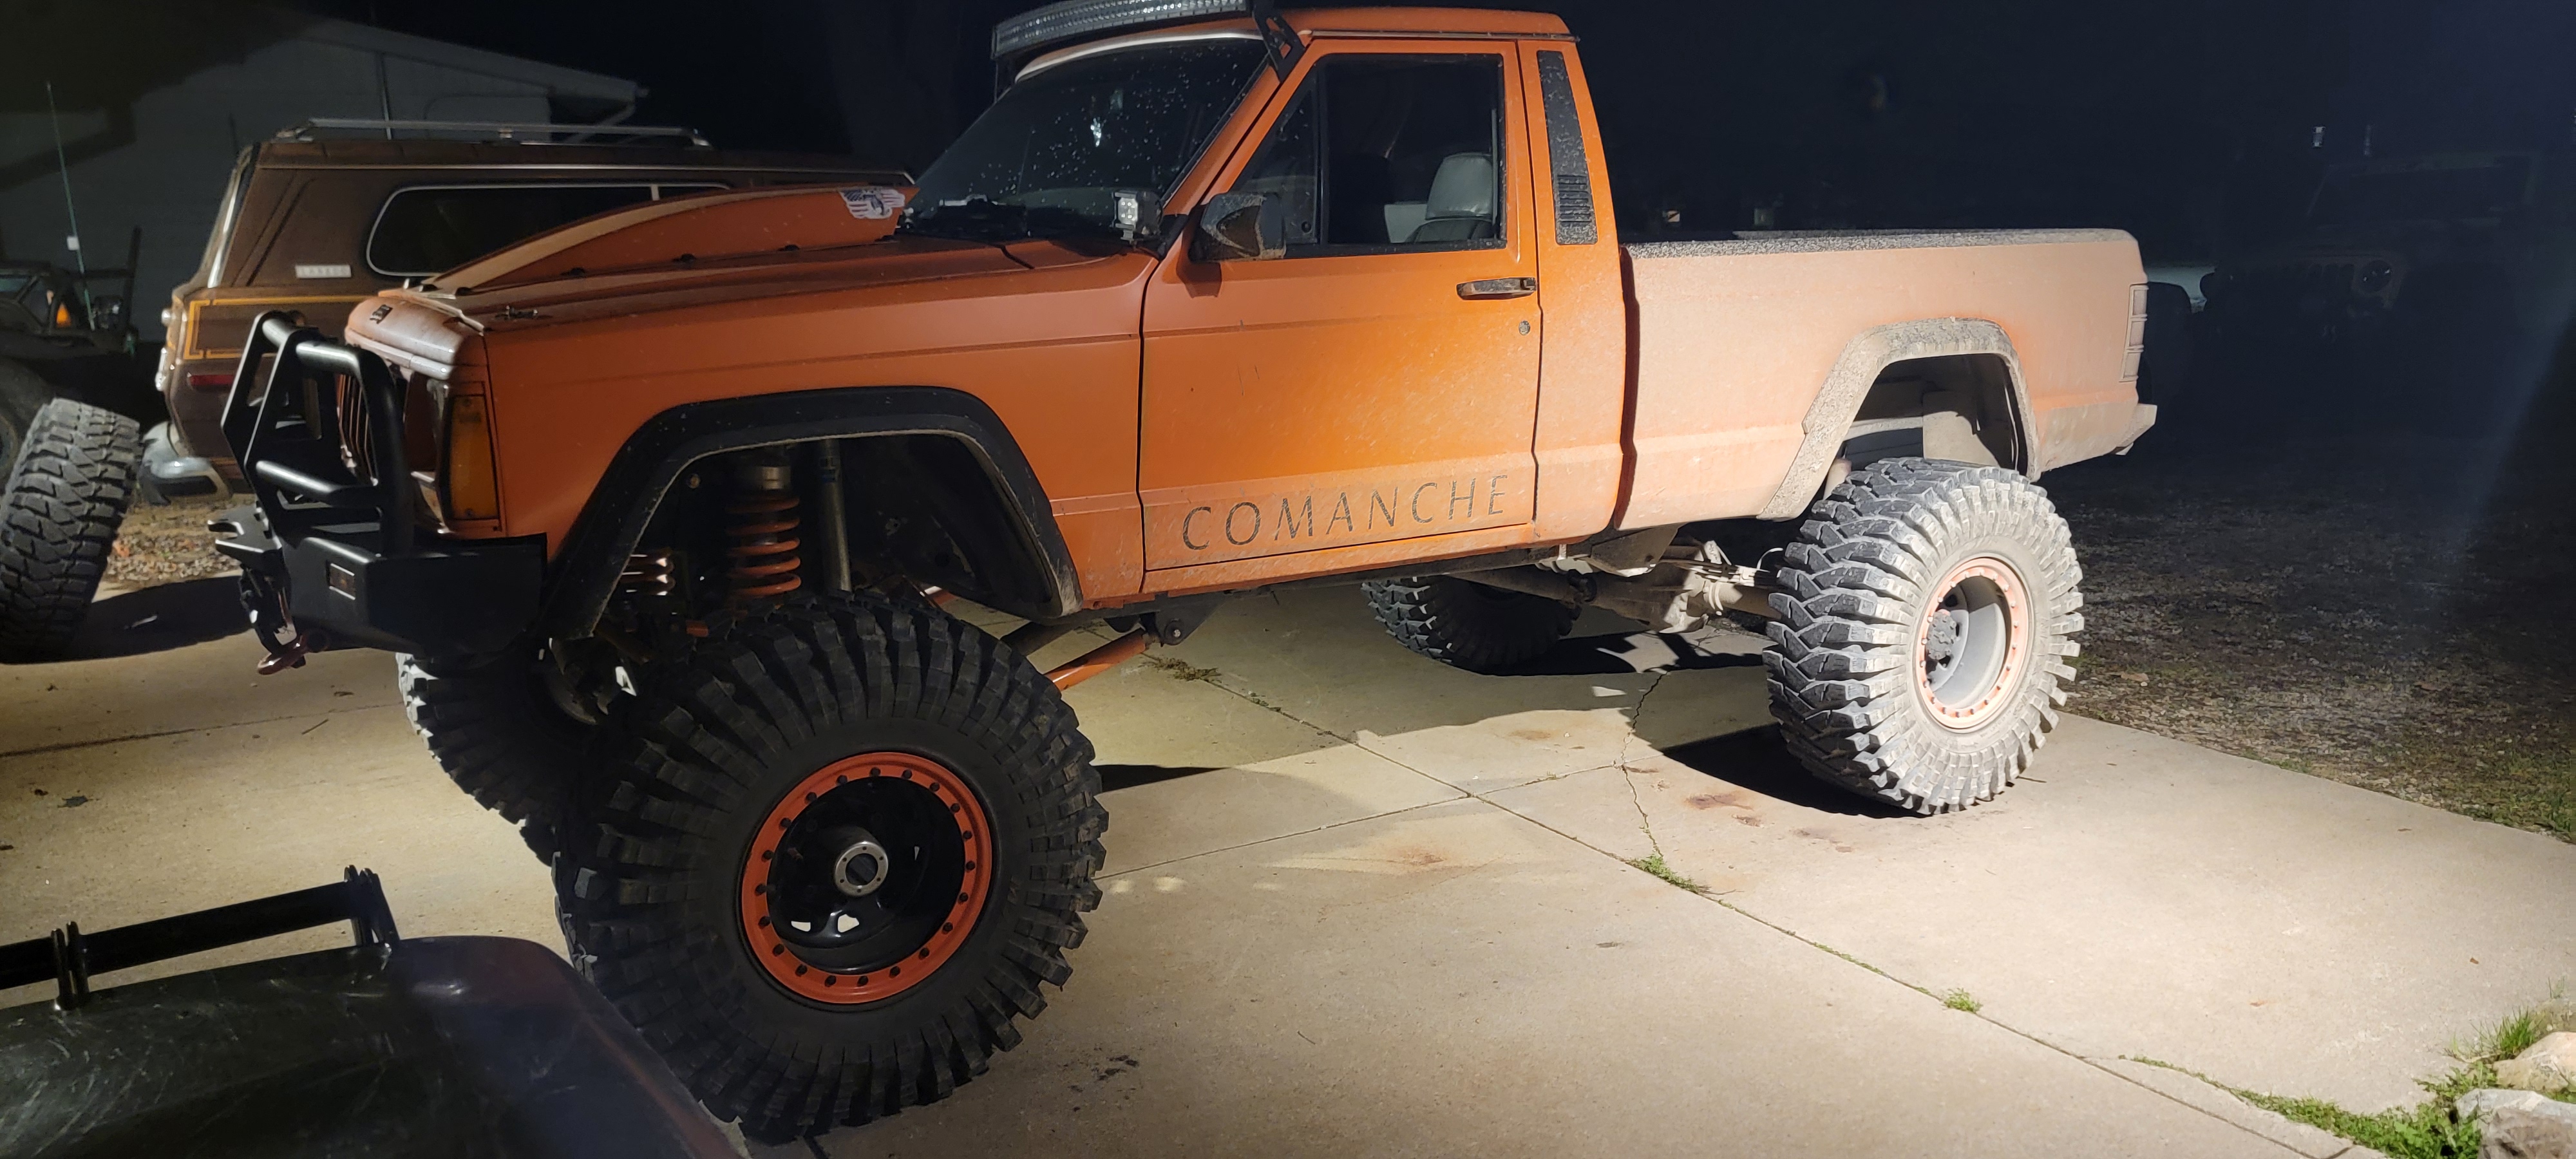
Standard for a project jeep... it truly is never finished! especially when your the one bending the tube ;) reality - I'm winging this stuff... I'm no expert by any means either. When it comes to tube work - and I'm sure others will know what i'm talking about - You seem to spend more time staring at the thing with artificial tubing in place (tape lines, broom handle, long level. imagination is everything) than you do actually cutting, notching and bending the tube. I love following the body lines and adding triangulation into the nodes/joints. Keeping a path of impact in mind and where the load gets spread to idealy minimal dead T-joints. Also - i can't add tubing there because it wouldn't clear the spare tire. It does well enough i suppose but could use more. It lives on 4-low most the time when its not in 2wd. its a healthy rebuilt 4.0 -HO that has a cam for the high end. 5.13 gears and its now on 39.5" sticky Iroks. The sticky tires make things SOO much easier when it comes to the rocks.
-
keep these old arena vids coming!
-
1987 Comanche The Long Hard Road
ThatJeepGuy replied to ThatJeepGuy's topic in MJ Hardcore Tech: Epic Journeys to Greatness
So its been a little while.... goodness I'm horrible at keeping this one up to date! So its been wheeling... And even more wheeling Then i started bending my own tube work And Covid got me so i spent a few days sleeping and doodling... then a week in the garage bending some more tube! Old and New

-
OMG The Crewcab 6x6 Comanche
ThatJeepGuy replied to ThatJeepGuy's topic in Member Projects: Your Comanches
I liked to think of it as improving the number of vehicles on my property that run. I sold 2 non running jeep comanche's, and then sold my 89 wagoneer. So now instead of having 6 jeeps that only half run - now i have 3 jeeps and 2 of them run - thats a 16% increase! i did however buy a cop car just slightly overtop the roof you can see 2/3 of the focus jeeps. The 87 Comanche truggy and my 73 J2000 ls swap and 1-ton axles. -
OMG The Crewcab 6x6 Comanche
ThatJeepGuy replied to ThatJeepGuy's topic in Member Projects: Your Comanches
It didn't seem like he was and i honestly wasn't gonna preach it up to him yet. Gonna keep in touch with though on progress and if he starts getting somewhere and enthused, i'll start leaning into him for joining. It really is an immense undertaking - so much friggin welding! I was literally and figuratively burned out *mua hahaha. -
OMG The Crewcab 6x6 Comanche
ThatJeepGuy replied to ThatJeepGuy's topic in Member Projects: Your Comanches
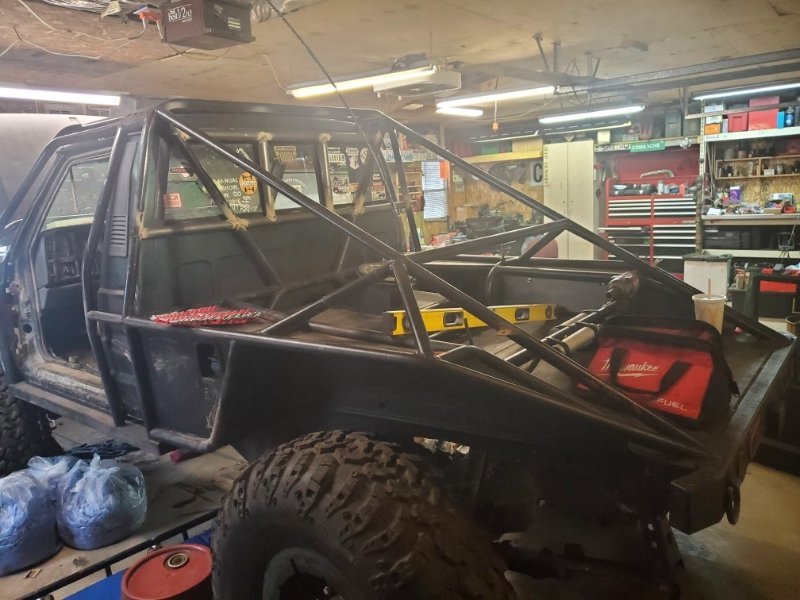
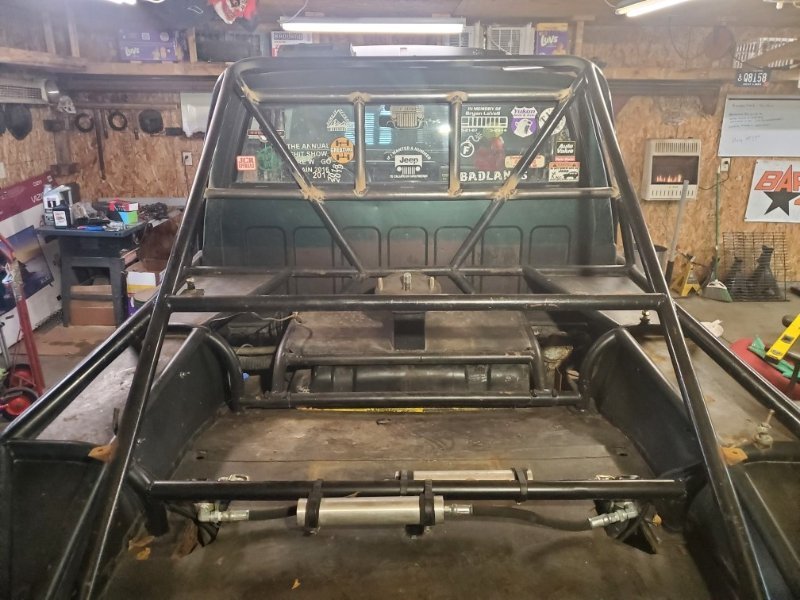
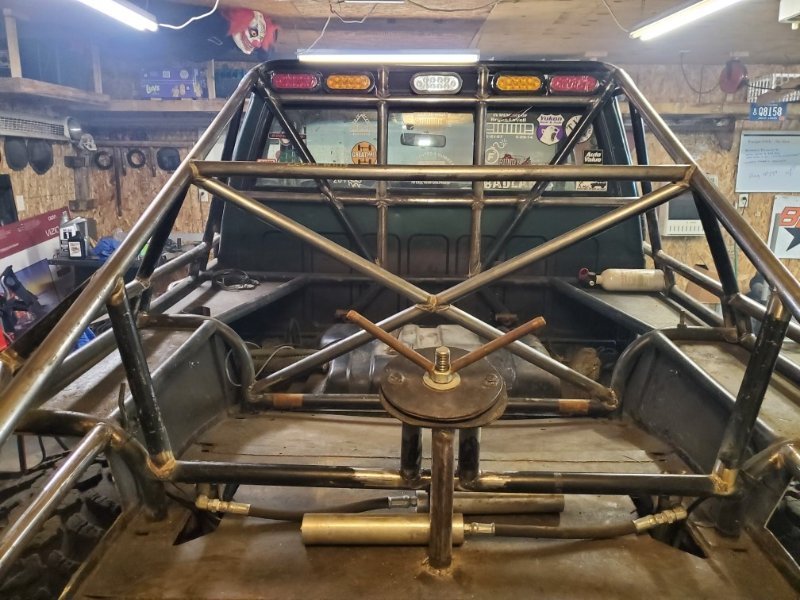
Alright fellas,Here we are at the end of this project for me. I'm sry - surprise i guess??Through some critical decision making and arguably some maturing on my behalf i have decided to cut some of the BS and focus on the things that matter to me - more. As it stands i currently have(had) 6 jeeps and then my silverado at my house. 3 of those jeeps mean absolutely everything to me while the other 3 - not soo much. While I'm not blind to my inability to pass up a cheap jeep or my temptation to take on other projects, I realistically getting no where on those 3 jeeps that mean everything to me. So to fix this i'm selling (sold) those 3 other jeeps.The 6x6 project is no more for me but the new owner is seeming excited to start working on what will be his crewcab MJ. I nabbed a couple pics to close this out. Pete you aren't kidding this project is a Huge undertaking! Far more than what i'd like to dedicate to atm. So its onto the next one!Thanks for all the comments, questions and conversation -
OMG The Crewcab 6x6 Comanche
ThatJeepGuy replied to ThatJeepGuy's topic in Member Projects: Your Comanches
Though the last week had been Brutal with the heat and i didn't get much done I did manage to get the passenger side rock slider welded in tonight. Tires aren't the best and neither is my compressor - mainly just used to pump up tires occasionally so i snuck the jack in there while i weld the underside seam. With the last scrap haul from the leftover bits of front half MJ and etc i scored some more budget $ and stopped by the steel yard for some steel plate to cut my frame stiffener's. I figure that's next on my list of to-do's. I'll be honest here - I'm kinda dreading the roof line :O Soo maybe after i'm sick and tired of laying on my creeper to wire wheel/grind and weld in those frame stiffeners I suppose i'll stretch my legs a bit and get the roof over with and maybe pickup this garage some. -
OMG The Crewcab 6x6 Comanche
ThatJeepGuy replied to ThatJeepGuy's topic in Member Projects: Your Comanches
Time to tackle this door sill. So with favoring the body line over the rocker alignment meant this had to be moved only about 1/4". This wasn't too difficult as i split it from in the inside of the rocker, placed where it was desired for alignment, marked the line for where it will now rest, cut and welded back in place. Now it was time for some rocker slider action! dual purpose this will also strengthen up the body and tie into the frame. I didn't however call my measurement correctly and shorted myself about 8" of material. My plan was to run this slider all the way out the back of the cab, which will still happen i will just need to add a chunk later on :/ The slider does taper into the body the further it goes towards the rear - thats the nature of how i've been doing my sliders because i like them butted up to the inside of the rocker where it meets the floor and gets seam welded there. The rear door isn't shut all the way because i still have the braces in place so it looks worse than it is. I didn't get it pictured but this thing is sitting on its own weight now, no jack stands, just flat tires hahaha. The joining of the 2 unibody frames, door sill adjustment(driver side), welding the inside of the "new" C-pillars together and driver rock slider getting welded in took all day. SOO MUCH WELDING! -
OMG The Crewcab 6x6 Comanche
ThatJeepGuy replied to ThatJeepGuy's topic in Member Projects: Your Comanches
I think technically atm you would be calling it a cheromanchexploder because that 8.8 out back -
OMG The Crewcab 6x6 Comanche
ThatJeepGuy replied to ThatJeepGuy's topic in Member Projects: Your Comanches
Here we go,After 4 hrs tonight we have a near close enough fit for some welds finally I'll interrupt your viewing for this disclaimer - I was faced with a dilemma, Either decision would contradict the other... It was either to keep the high body line (just below the door handle) true and have a slightly off rocker-frame rail OR it was keeping the rocker-frame straight and having to move metal to get the body line back to make it look right. I chose to keep the body line and modify the rocker-frame as those will need attention regardless.So you may also be wanting to point out that the rear door is overlapping some - i got this no worries... Should have some more progress pics tomorrow, aiming for having it sitting on its own weight! -
OMG The Crewcab 6x6 Comanche
ThatJeepGuy replied to ThatJeepGuy's topic in Member Projects: Your Comanches
The roof rack is something thats been on my mind and I've tempted planning that into the final result of the build BUT in the sense of trying to make this look clean (as I can) and challenging myself vs a quick patch job. I'm going for a presentable roof without one mounted. -
OMG The Crewcab 6x6 Comanche
ThatJeepGuy replied to ThatJeepGuy's topic in Member Projects: Your Comanches
Didn't care for the look of that roof so i chopped some more off the top. The roof height difference is no joke! I did save the old chunk of roof and i'm gonna try to make it fit without trimming the inner structure but if i have no luck - its getting cut some more for sure. Floor is a darn mess! For the time being just to get things rolling i cut out the top of the frame rail 6" in either direction. The MJ frame got cut just 1"~ in front of the front crossmember nut/stud. The XJ frame got cut at a seam line just about middle of the B-pillar. Slowly working the 2 hafs together cut by cut its getting closer! Soo to my surprise these 2 halfs are actually coming together fairly simple. I won't elaborate too many specifics as some of these things need to be left a surprise for those who chose to attempt their own crewcab build. Stay tuned! -
OMG The Crewcab 6x6 Comanche
ThatJeepGuy replied to ThatJeepGuy's topic in Member Projects: Your Comanches
Getting closer, meticulously removing metal and inching the 2 halves closer together -
OMG The Crewcab 6x6 Comanche
ThatJeepGuy replied to ThatJeepGuy's topic in Member Projects: Your Comanches
I have to trim a bit obviously but dang it barely fits in my garage! -
OMG The Crewcab 6x6 Comanche
ThatJeepGuy replied to ThatJeepGuy's topic in Member Projects: Your Comanches
Time for some body progress! Mapped out my cuts with plenty of material to spare. I will peck away at the not needed material once i get the lines figured out between the 2 halves. Dropped it like its hot and let the bodies hit the floor! -
OMG The Crewcab 6x6 Comanche
ThatJeepGuy replied to ThatJeepGuy's topic in Member Projects: Your Comanches
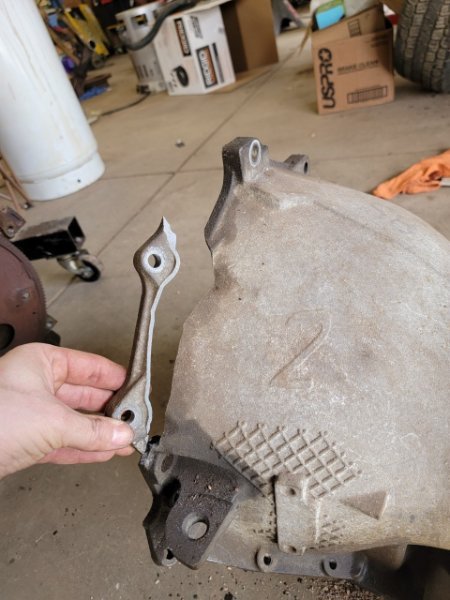
Today was gonna be my day to chop the shell up and start inching it closer to the MJ rear section but it was a wicked hot day out with the MI humidity so instead i flipped on the AC in the garage and got back into that tcase.The tcase took a little puzzle work but i got it all buttoned up this morning. The input(s) ride on a ball bearing thats pretty easy to install. Tap bearing into case - slide input shaft through bearing - install yoke - finished!The E-tape on the pictured input shaft is to keep the thrust washer tight to the gear because when the shaft falls over and the gear slides over on the shaft, ALL the needle bearings fall out. This only happened once thankfully. More loose needle bearings that sit inside the output. I was worried about how well they would line up when installing the output side but these were cake. For those that don't know these are considered pilot bearings and the very bottom of the shaft thats pictured above is the pilot that rides on those bearings. Just about finished up after snugging this one down and as i reached across my bench to grab a cotter pin the nut let go and exploded. I couldn't find the 3rd piece but these 2 didn't go too far. What a bummer! You can see the old dirty side vs the shiny side... this tells me this nut has been split for a little while now. It had me concerned the others might also pop but once i noticed the color difference i realized what was really going on here. I've read that Deez Nuts are hard to come by but supposedly they are the same as a Dana 35 pinion nut. Lucky me the axle still bolted in under the rear of the truck is a Dana 35 and the nuts still there. I'll be confirming this soon. Installed the shift rail seals and rubbed all my greasy hand prints off the unit. Looking pretty good if you ask me!