


Gjeep
-
Posts
1221 -
Joined
-
Last visited
-
Days Won
3
Content Type
Profiles
Forums
Gallery
Everything posted by Gjeep
-
Only area that will not fit perfectly with 98 carpet will be the rear ‘step’ at back of floor / cab wall.
-
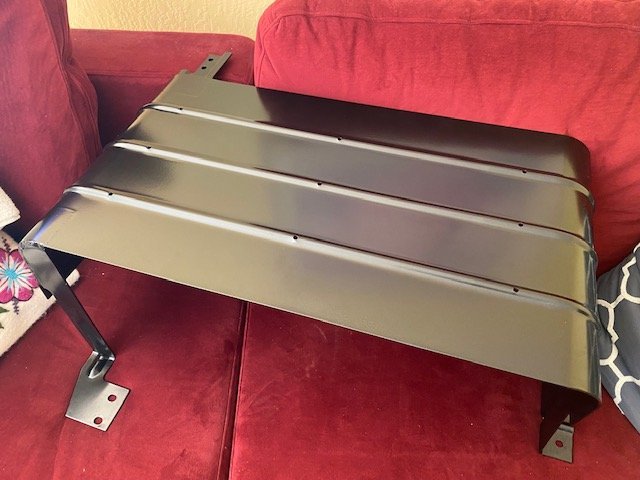
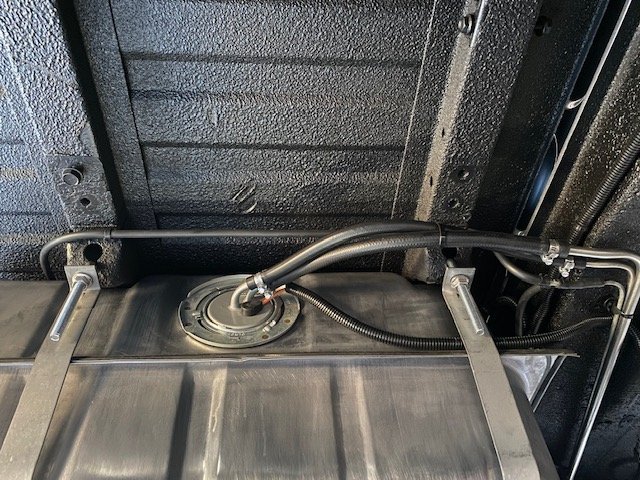
Keeping with theme of eliminating the use of rivets on the MJ, I nutserted the attaching brackets for the power door lock actuators. Routing the new hood release cable was a good time, getting around the clutch master and additional wiring. Still deciding if I want to install the factory under hood insulation or just keep the paint visible. I also got the fuel tank skid back from the powder coater. To keep from damaging it at install, I back-out the front leaf spring bolt as that’s a hang up/ damage spot when installing the skid.
-
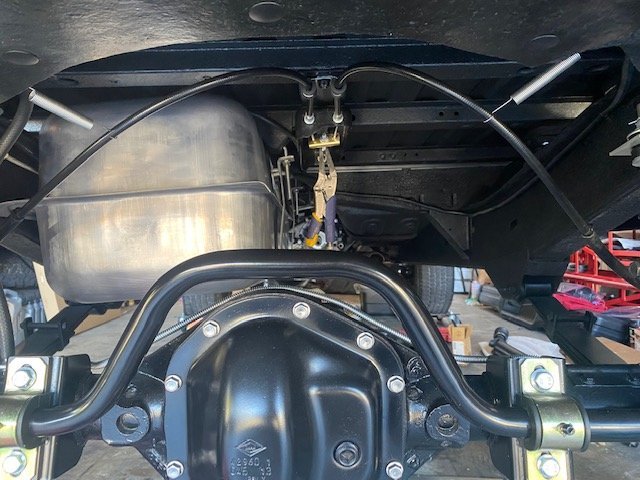
Got the XJ eBrake assembly installed. Cables are custom length (thanks to ControlCables.com) and the bracketry came from wrecking yard research… Chevy Beretta 2-door ebrake cable clevis and 3rd gen Camaro clevis pin/ retainer work perfectly with the factory XJ eBrake lever. I used hardware store springs to manage the cables off the X-member.
-
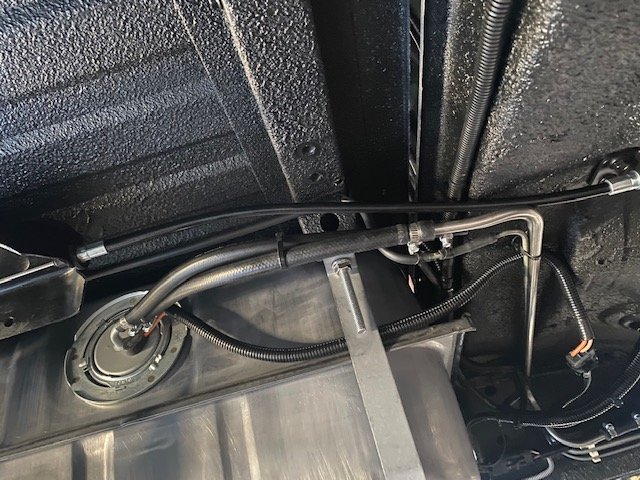
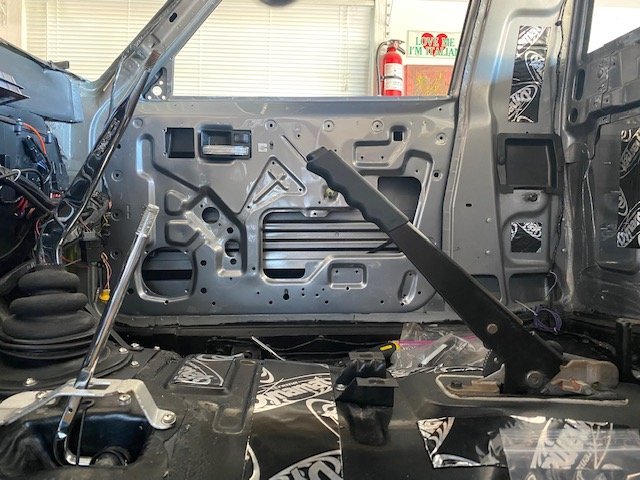
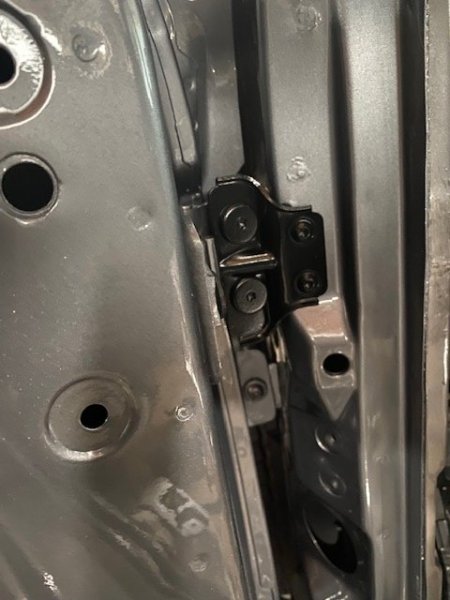
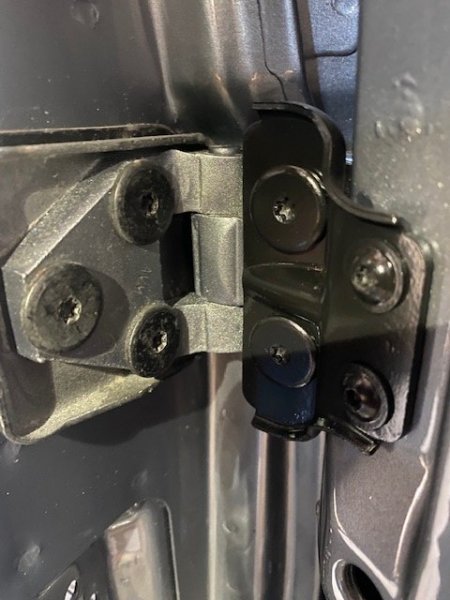
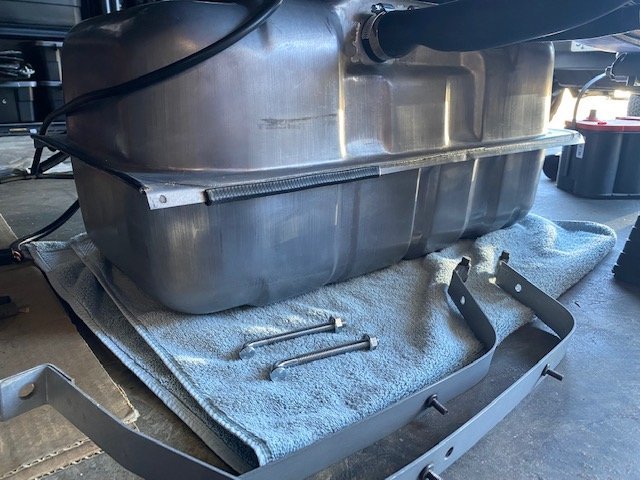
Been doing a mix of things over the past day or so… Almost done buttoning up the engine compartment – reinstalled the jack, ‘crank’ and Hobbs retractable light passenger side of the engine compartment. Also installed the XJ/ MJ TSB upper hinge repair kit both sides slightly modified. Nothing wrong with my hinges, I just wanted to show a piece of Jeep parts history. I used button head allen bolts over rivets and trimmed the backside nut strip so wasn't an eye sore. Originally the attaching nut strip showed an inch top and bottom, providing the installer something to hold. There was also an additional reinforcement plate to use that attached to the shoulder of the a-pillar that I decided was too much bracketry. The photo below is of the cut nut strip that installs backside of the hinge. Hardware door side still needs to be painted...Flat torx from the TSB kit replace factory button head torx each side of upper hinge. Who knows, maybe this TSB install will prove worthwhile as my doors will have a bit more weight in them with 97+ XJ full glass and power windows. Something unique anyway. A Spectra fuel tank went in, complete with new hoses and clamps. It’s a well-made tank, however every single one I got came with 2 different ‘hangers’ – one of them being too shallow for the MJ. They should be identical. I ended up having the mfg send me the proper hangers for the fuel tanks I got. Took a bit to get everything into place/ looking good but done.
-
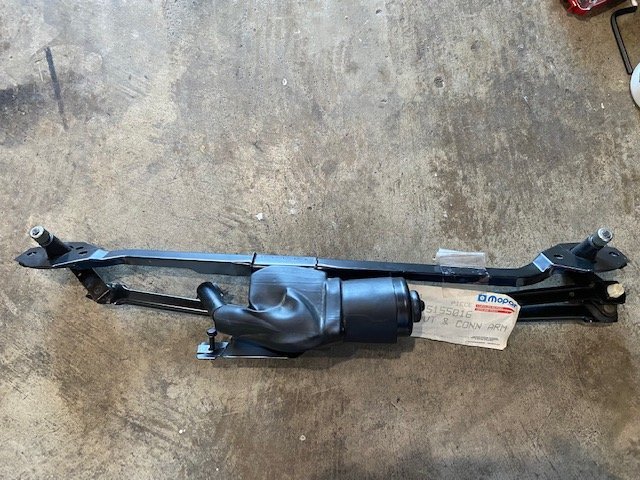
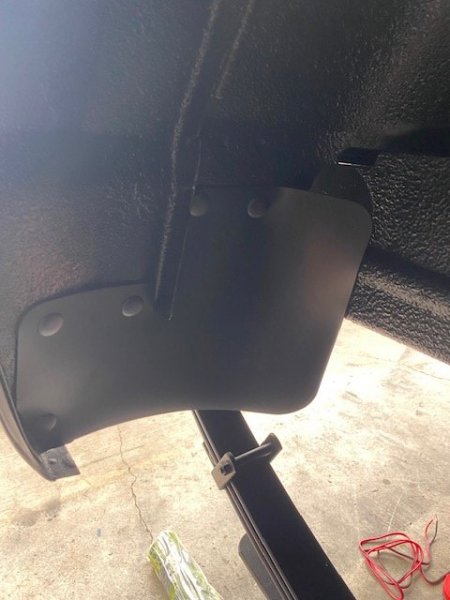
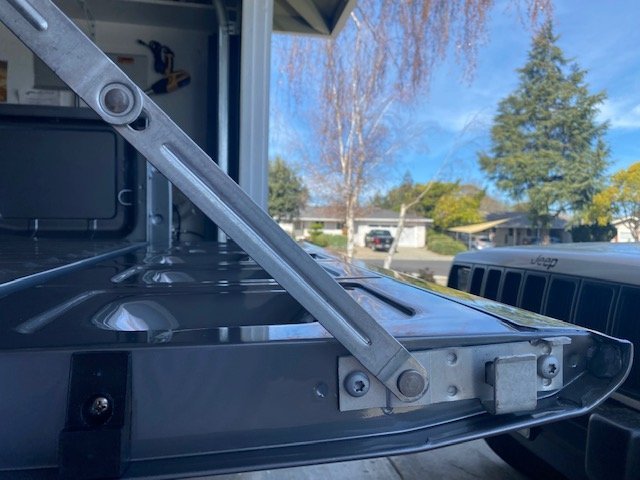
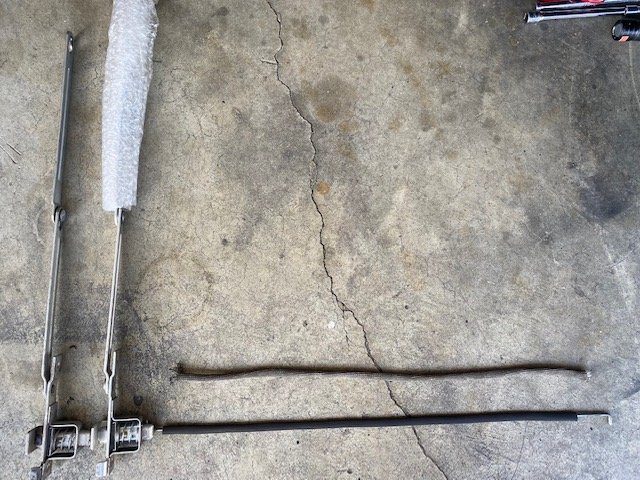
Found a incorrectly listed NOS windshield wiper linkage and motor assembly for the MJ. The person selling it believed it was for a ZJ. Perfect. Sliding it into place is a good time, especially when you’re trying to keep from scratching anything. But with my near final strand of patience, I managed to maneuver it into place. Stainless steel nuts and rubber washers behind them were used to fasten all the related bracketry to the firewall. Also installed the rear fender-well ‘flaps’. I know Jeep used everything from self-tapping bolts in the early MJ years to plastic rivets in the later…I don’t like either of those methods, so I drilled-out the supporting sheet metal and flaps themselves slightly to push a black retainer in. Done. Nice and clean. Finally, with the injectors pulled I decided to remove/ repaint the fuel rail satin black over the silver it was currently painted. Aiming to get that all back in this weekend – in addition to the fuel tank.

-
Nope. Considered it, but decided coarse wide threads better. If the nutsert spins for whatever reason it would be no fun to drill out the attaching screw. Near impossible not to damage the rubber bushing.
-
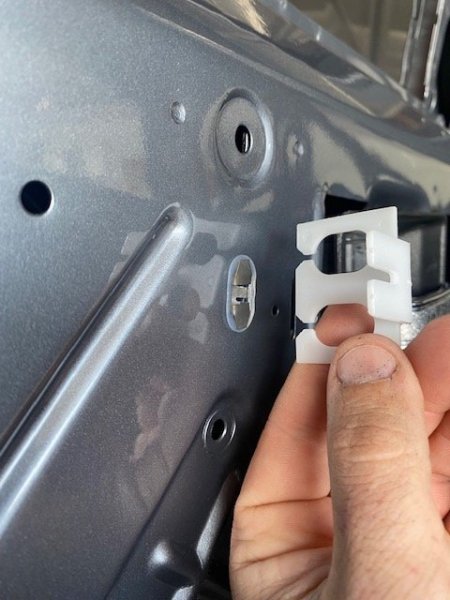
Re-assembly is the most terrifying part of the whole resto process – taking my sweet time as always to prevent damage. With the new tailgate linkage in-place it was time to finalize all at the rear by installing the rubber linkage bushings on the tailgate itself and body side. Way back in 1999 when I bought my ’89 MJ as daily driver I knew I’d rebuilt it and without a doubt end up buying another MJ as well. With that I doubled up on new/NOS purchases for each of the MJ’s, so these rubbers are the real Mopar deal. I decided against riveting the rubber busing into place, instead used a large head stainless screw. Should I need to remove these at any point there won’t be any damage or challenges getting them off. Inner door assembly is next up…84-96 XJ’s (and MJ’s) saw 2 styles of inner door rods connecting the latch to the inner and outer door handle. The first style was straight (for the most part) rod linkage supported by a plastic 2-slot support riveted into place near the inner door handle assembly. The later style rod linkage had a couple of hard zigs in it where a 2.25” diameter foam spacer was centered in each of the rod zigs. The goal of each was obviously to reduce rattle – which I never experienced with either rod/ support set up in the various MJs/ first gen XJ’s I’ve had. I prefer the first rod set up as that foam round eventually tears/ rots or moves significantly out of place. New cloth sleeves were installed on all just the same as the tailgate rods that recently installed. The plastic rod support was installed with a stainless self-tapping bolt (instead of a rivet as the factory did). Finally, new arm rest door screw inserts and hockey-style upper support plastic sleeve and metal clips installed. The rest of the inner door goodies will go in as I chug along...
-
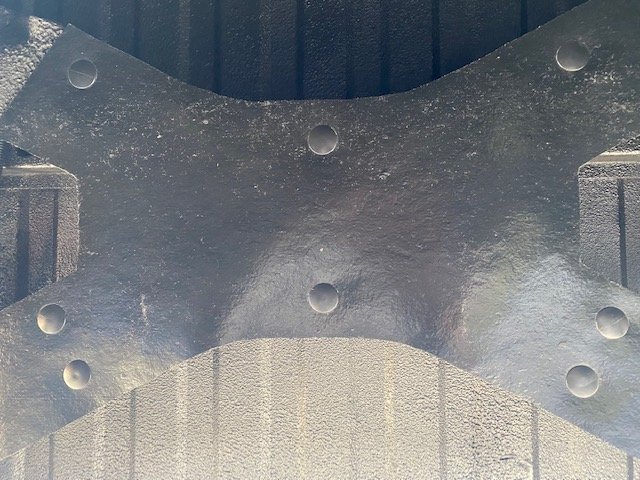
Getting a few things done between family time… Removed the maybe 75 miles on them new Mopar injectors from the stroker. Ridiculous how they look like they came of a 250K+ engine. Replacing them with new Bosch injectors having the same flow and psi as the other OBD1’s that came off – ZJ V8’s – but no ability to rust. A good thing. Also added masticated rubber that I cut to fit the under bed ‘X’. Drives me nuts, when lowering the spare tire and there are chunks of undercoat stuck to the tire and pulled from the from the frame. I used larger push-pin's in existing crossmember holes to secure the rubber piece. No photos, but cleaned up the inner door power window, mirror and lock wiring then wrapped them in OE-style Maxwell cloth tape. There are many brands of cloth tape I’ve tried, and Maxwell has proven the best, having the most ‘stick’. Onward with the little to do’s before I start taking whacks at larger tasks.
-
Power actuated tailgate lock write-up
-
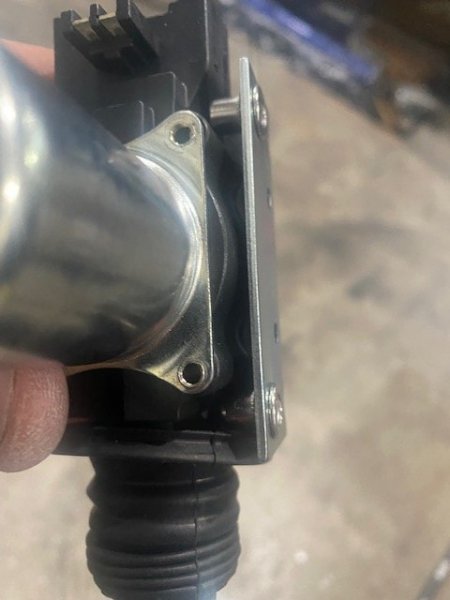
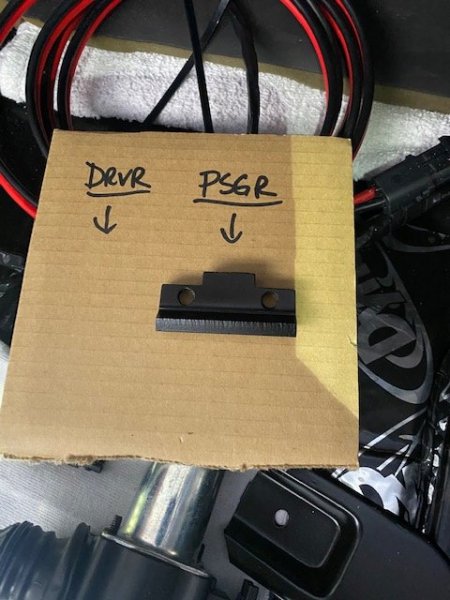
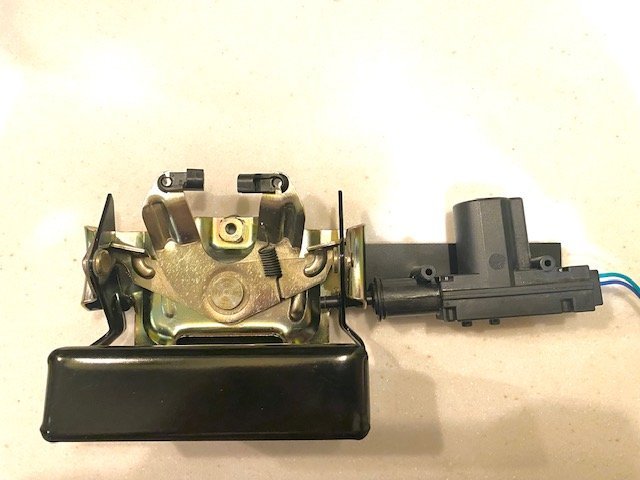
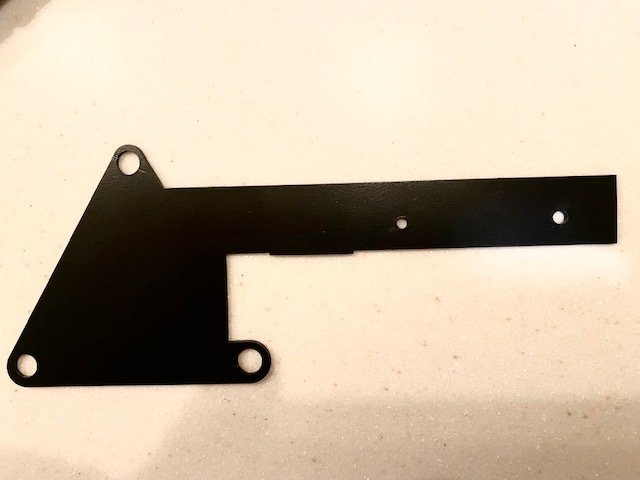
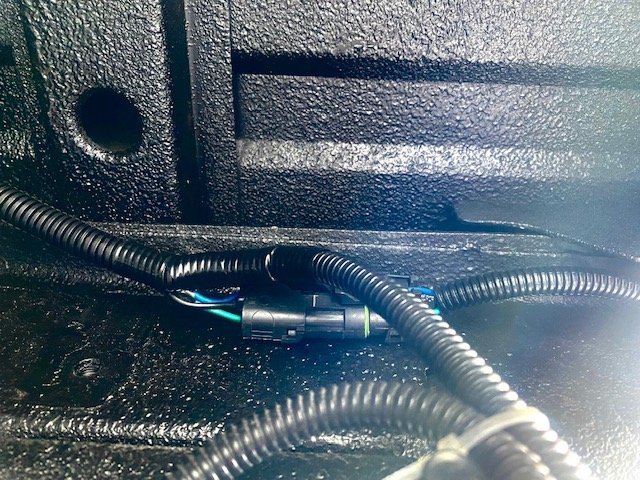
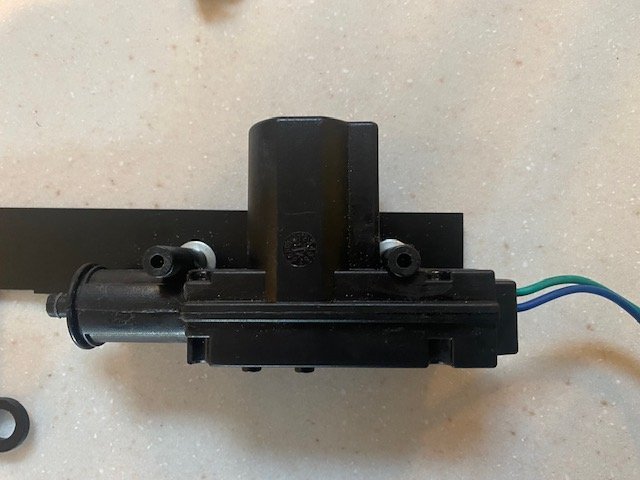
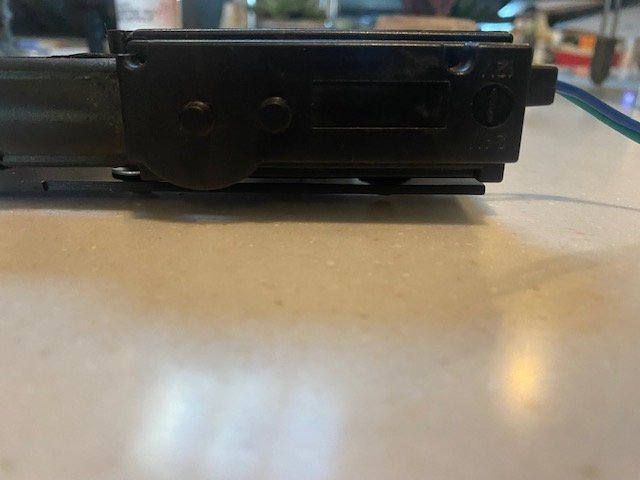
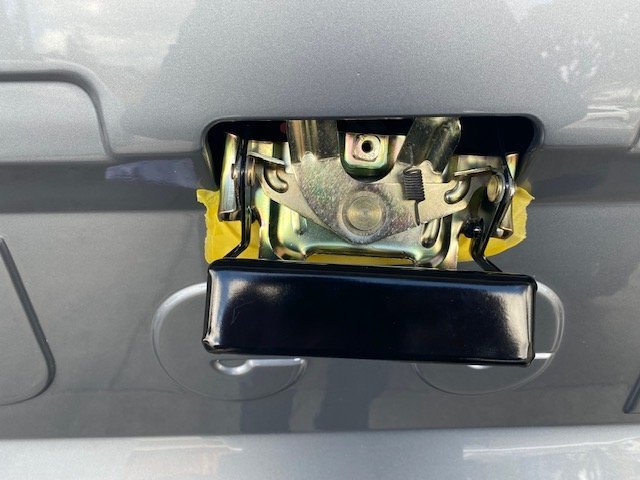
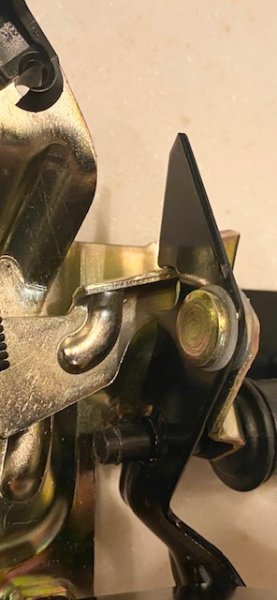
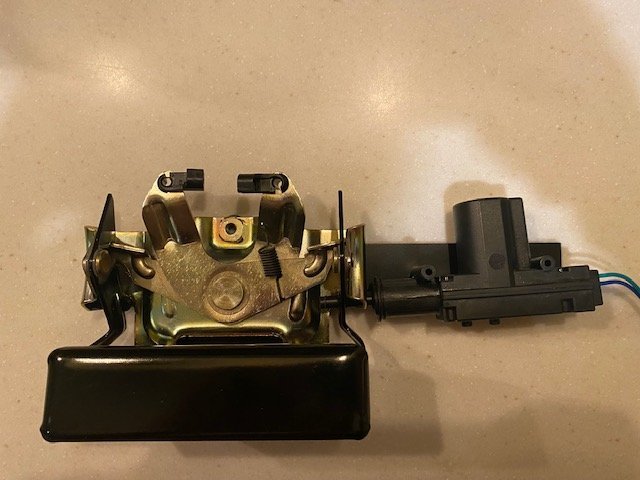
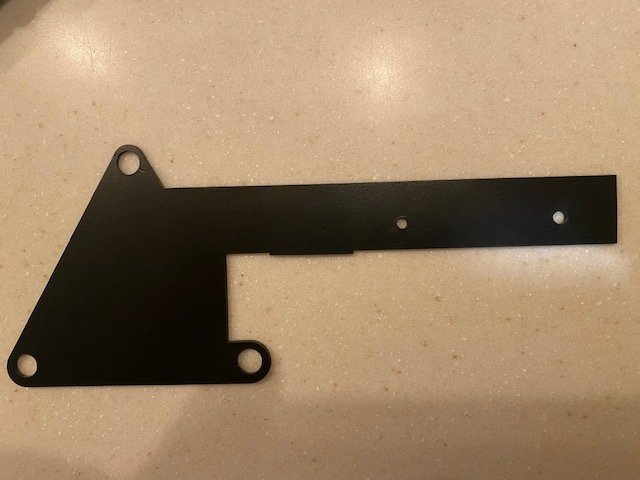
I’ll start by saying there are many ways you can make a power tailgate lock setup for an MJ…Different shape plate, flip the actuator the other way, etc. The below is simply the way I did it. The most influential factor for building it this way was how/ where the best place was for the actuator rod (aka the ‘lock’) to access through the tailgate handle. I have a scanned pdf of the actual plate size and hole locations attached at the bottom of this write-up. Trim out the actuator plate from a 16-gauge steel. The three tailgate handle holes on the plate are larger than the torx bolts that fill them so there is slight play when installing/ lining everything up. Paint or powdercoat your actuator plate so it doesn’t rust. I recommend you use your own measurements to locate/ drill holes for both the tailgate handle lock rod passage and the power actuator to plate holes, so all is spot-on based on the where holes land on your own tailgate handle. Note – the tailgate handle will be challenging to drill accurately through. Especially the black ‘handle’ part. The curves on the side of the handle make it challenging. Take your time to make sure all is lined up. The holes you make for the actuator rod to poke through should be just a hair larger than the rod itself. The power actuator rod itself will need to be trimmed down to 1” in length when fully extended. Once cut, line up the actuator with the rod fully extended into the holes of the tailgate handle you drilled. It’s at this point it will make sense to drill holes to secure the power actuator to the plate. Note, depending on the actuator you buy, you may need to shim between the actuator and actuator plate to level it out. I needed to shim and chose to use proper size washers with rubber backing. "Locked" "Unlocked" Washer shim/ spacing for actuator - Test fit the plate assembly with actuator. You’ll need to install the triangular (left side) of the plate first and go as far to the driver side as you can so the actuator can clear the opening. Remove the assembly one test fit is successful. Next up – run the wires. I added factory power windows and door locks to my MJ. Additionally, I installed a DEI Viper alarm system that has key fobs that lock/ unlock the doors. Factory wiring to tap involved for the ’91 and ’92 model year is OEM black/white wire to tailgate actuator BLUE; OEM pink/black wire to tailgate actuator GREEN wire. (Renix era will be different color wires.) I ran wiring for the power tailgate lock out the same factory grommet (essentially under the driver seat floor pan) that taillight and fuel pump/ sender wires go through. From there I ran them along back exterior side of the cab and down the passenger side frame rail up high. I chose to put a Delphi Weather-Pack connector there so I could disconnect and remove the tailgate should I need to. (Know if you do want to remove the tailgate from the truck, you’ll need to remove the two wires from the connector so they can slide through the factory hole near the tailgate swivel point they run through.) From there I ran the wires into the passenger side taillight area and to the tailgate itself via an existing hole near the factory tailgate swivel point, then along the bottom of the tailgate and up into the center drain hole. At the end of that wire (factoring in proper length) I added another Weather-Pack connector so I could swap out the actuator should it ever go bad. Final install – Connect the power actuator to the inner tailgate wiring. You don’t want to get everything installed and then realize you forgot to plug things in. Below is a photo of full assembly prior installation of tailgate. It would be a good idea to tighten down the bolts backside and make sure everything works/ clears as it should prior to installation. Before inserting the actuator plate into the tailgate handle access hole, make sure your tailgate latch rods are resting on the inner ledge atop the handle opening. It will be easier to get to them when they are up there when it’s time to attach the linkage to the handle once the actuator plate is in place. Now, with the electrical connected, insert the actuator plate (actuator still installed) into the handle opening of the tailgate. It can rest on the lower ledge inside the tailgate (it won’t fall straight down into the tailgate because it can’t, but it CAN fall to the right and into the abyss). Next, connect the tailgate handle linkage. With your right hand raise the actuator plate into place and with your left hand raise the handle to line up with the tailgate handle mounting holes on the gate itself. I suggest having some small screwdrivers in the bed so you can ‘catch’ the holes from the backside of the tailgate. Once all is lined up, install the factory torx bolts and test the lock/ unlock. Tailgate template.pdf


-
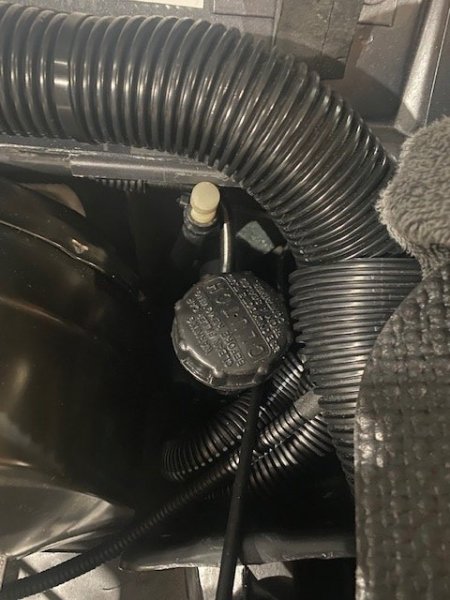
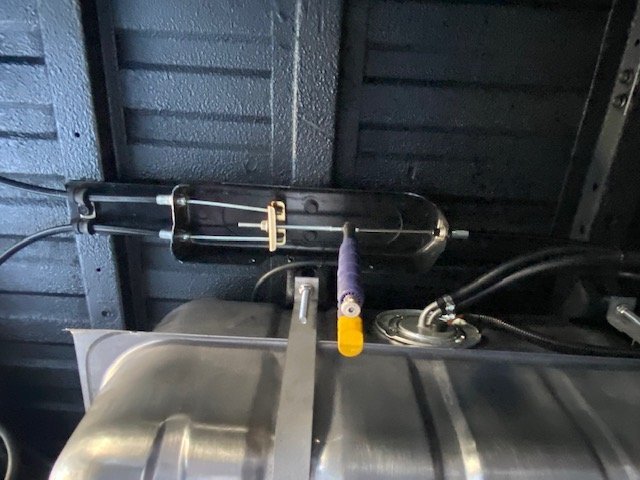
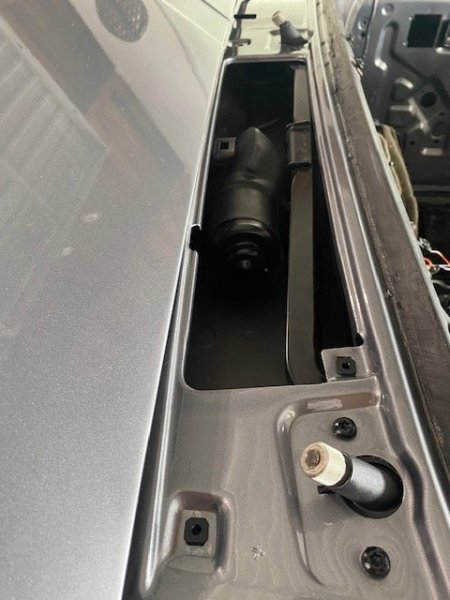
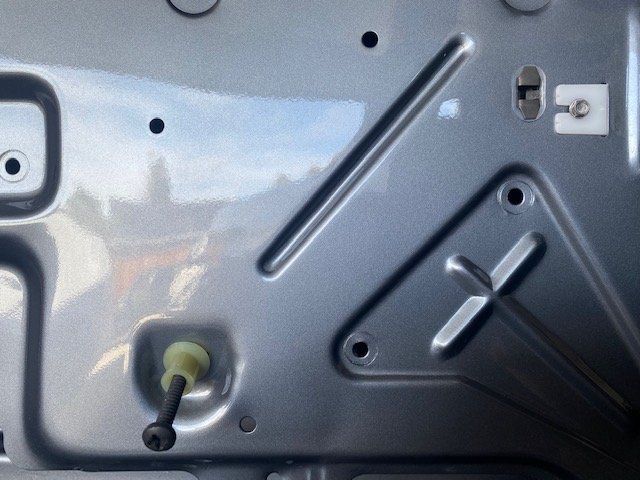
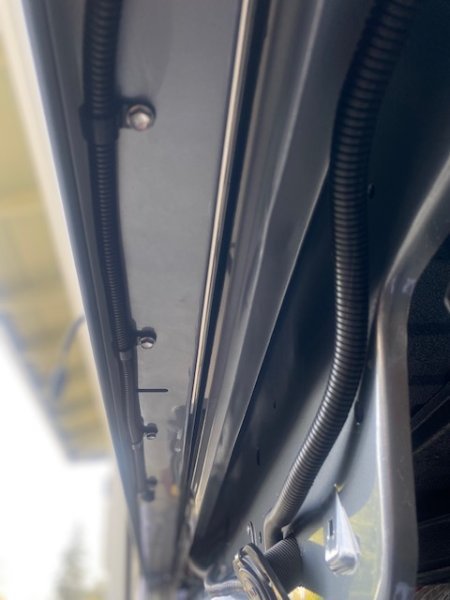
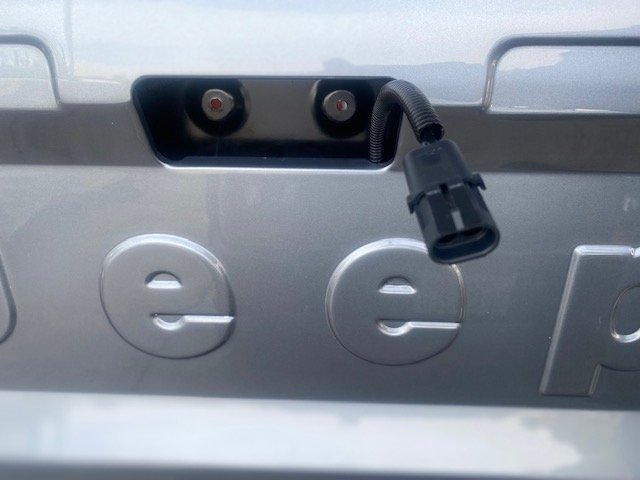
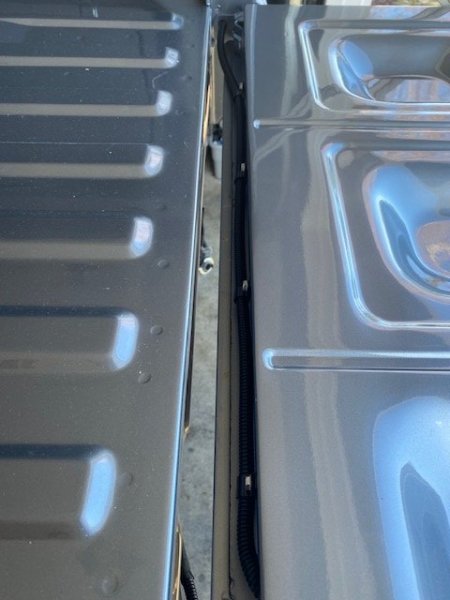
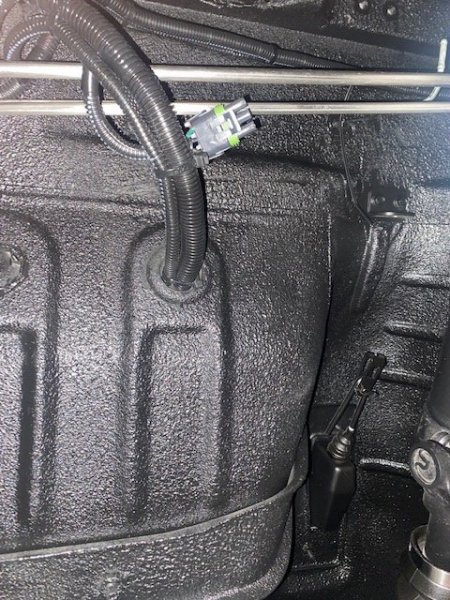
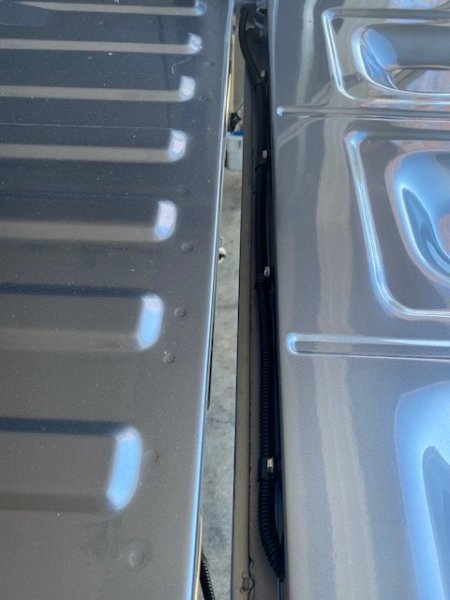
Will do on the DIY tailgate actuator write-up. Here's a shot of the actuator wiring with the tailgate down. Nice and neat. Short day of working on the MJ as heading out with the family -- Installed new 97+ windshield washer tank with dual front wiper motors so if one goes out, I can simply unplug the electrical and connect to the alternate motor. The fluid line has a "Y" splitter for the same reason. Also, swapped out tailgate linkage/ latch/ hardware for NOS. While doing so, I swapped out the ragged cloth anti-rattle rod sleeves for cut to length fuel injector heat sleeve. I still need to put the rubber bushings on the tailgate and body to keep things quiet and scratch-free.

-
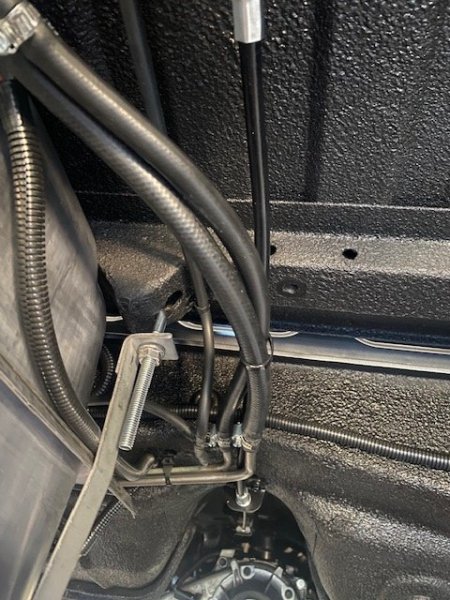
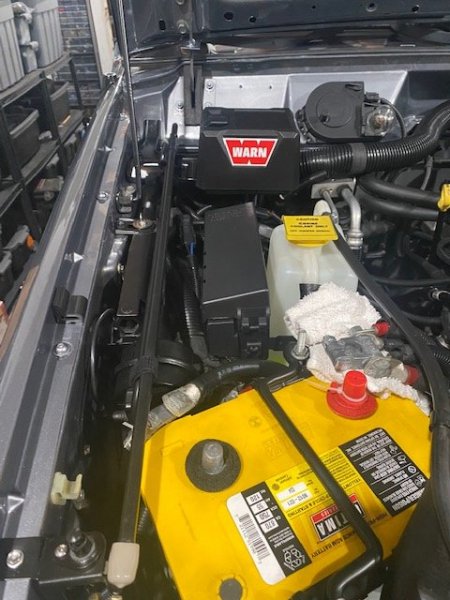
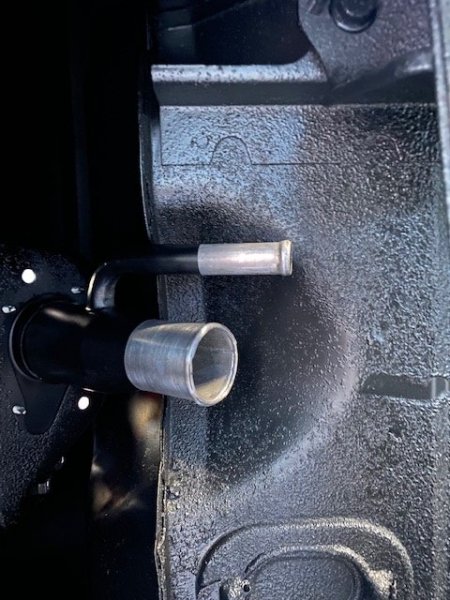
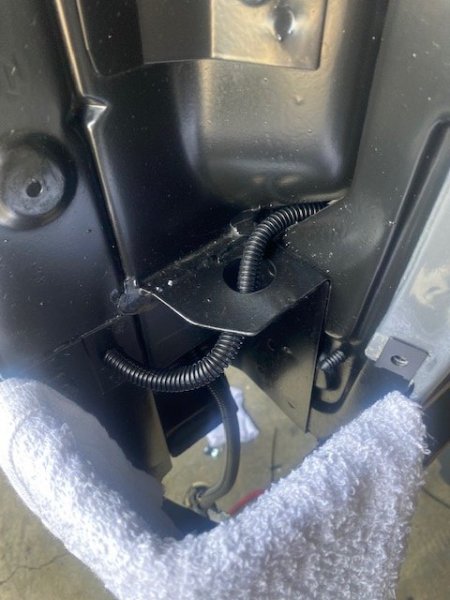
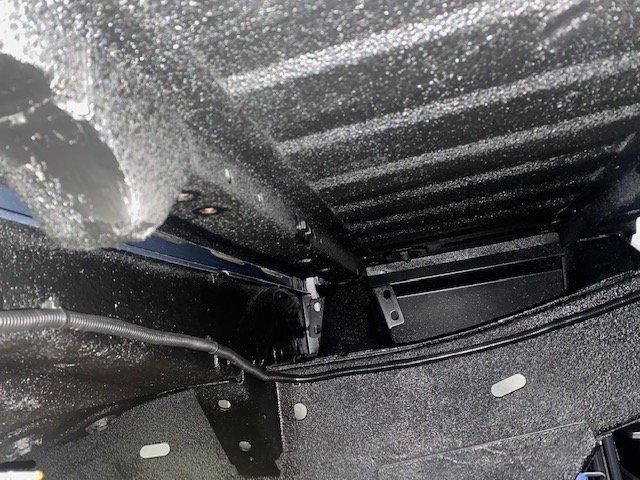
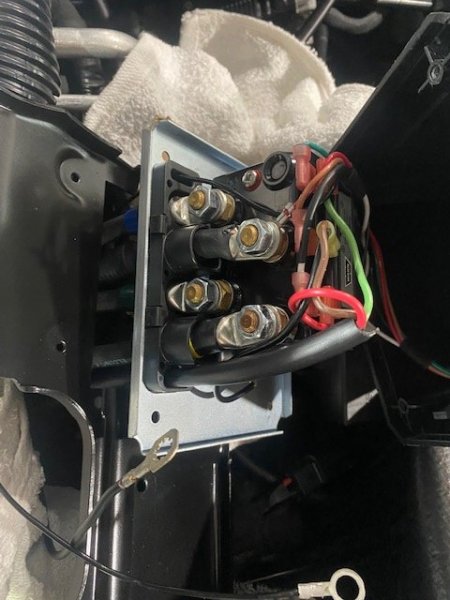
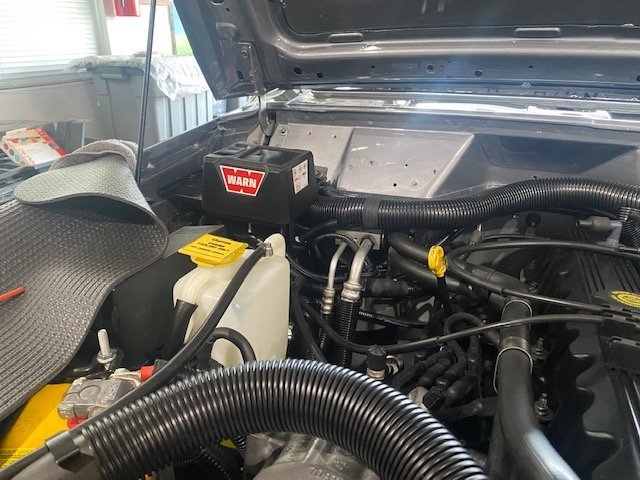
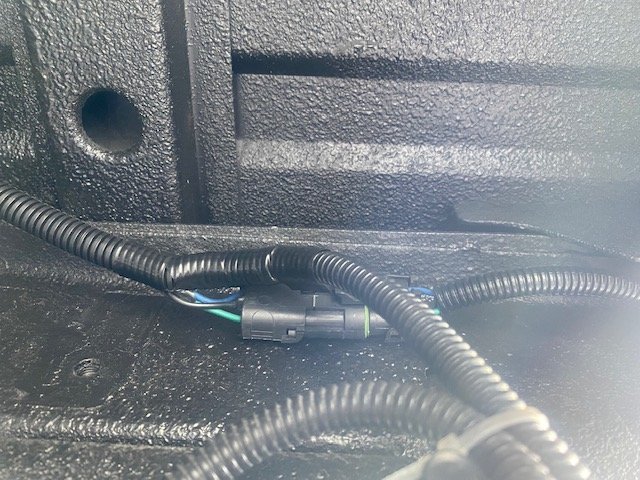
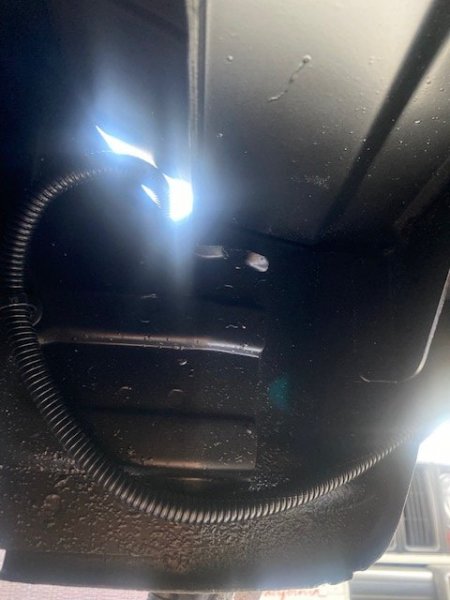
Got the winch solenoid, wiring and bracket into place, passenger side of the engine compartment. Also installed/ fastened the taillight wiring, tailgate power actuator wiring, and weatherproof 12V power port. A few CC members were asking how I ran the wiring for the tailgate actuator… From the cab – out the same factory grommet the taillight wiring/ fuel pump exits under the cab; then down the passenger side inside frame rail up high; into the passenger taillight area as there is an existing hole beside the tailgate swivel; finally, along the bottom of the tailgate and up through its center drain hole and up. Photo's below begin where the wiring harness ends at the end of the inside passenger frame.


-
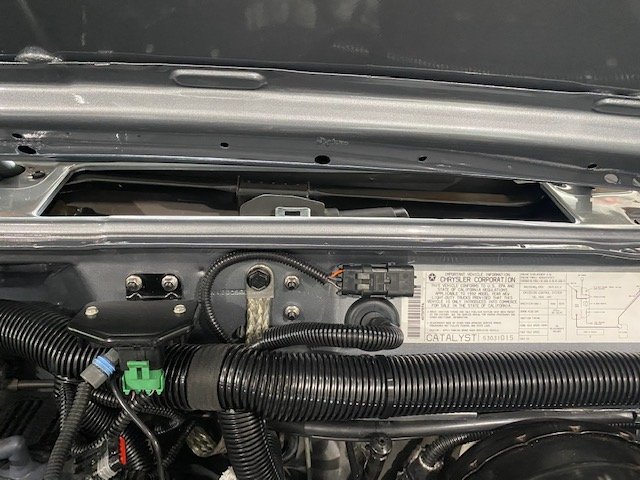
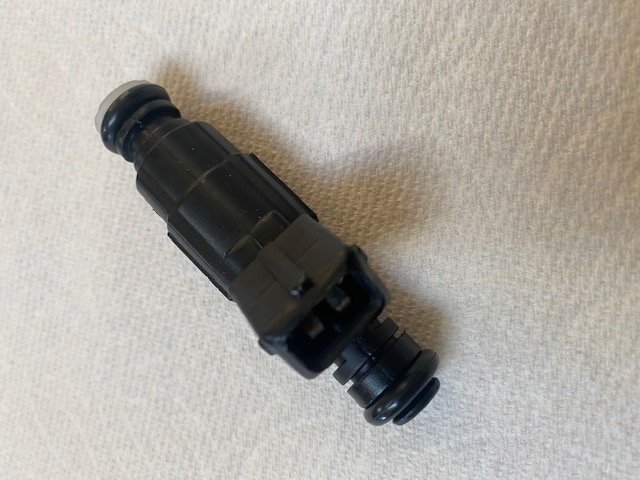
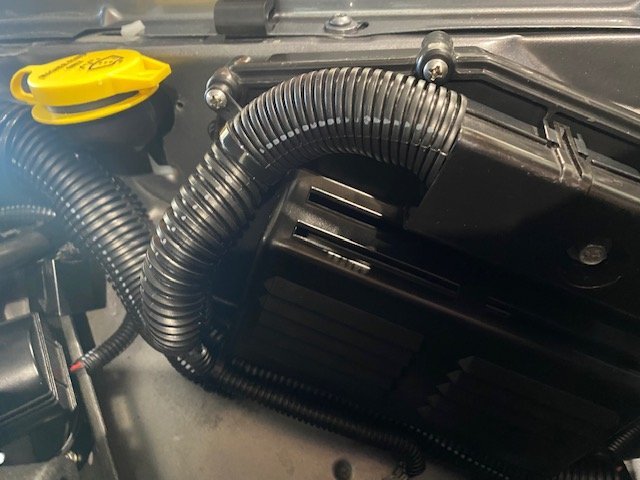
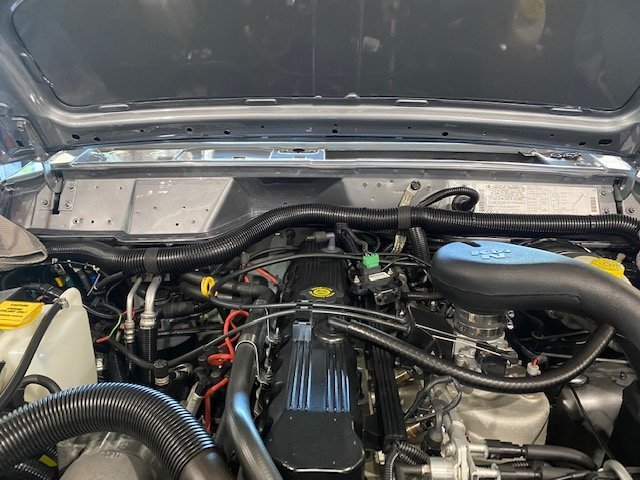
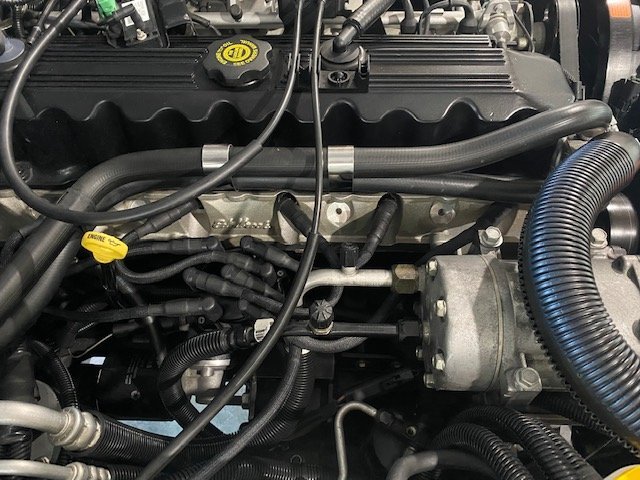
The 1.75” high temp wire loom was finally delivered – so now, instead of two separate looms running across the top of the firewall I have one that houses the factory harness and all the other wires from my add-on’s sourced power from the PDC. Looks cleaner. Still need to fasten it to the firewall after I reinstall the winch tray and solenoid on the upper passenger side but getting there. Also replaced the red Denso distributor wires with my now favorite “Live Wires” I'm running in the other Jeeps. I went with black and cleaned off the logos on all ends of the wires. Just prefer thing to be without logo’s. My new Bosch (plastic = won't rust) injectors arrived today for the Stroker. I just got the standard ZJ V8 OBD1 flow rate injectors recommended for this motor. I'll either swap those out tomorrow and install the fuel tank or finish up with the winch/ engine compartment looming and install the tailgate handle actuator setup. Will see...
-
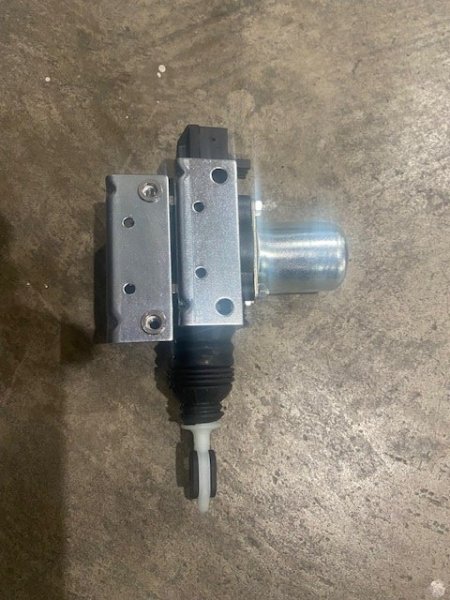
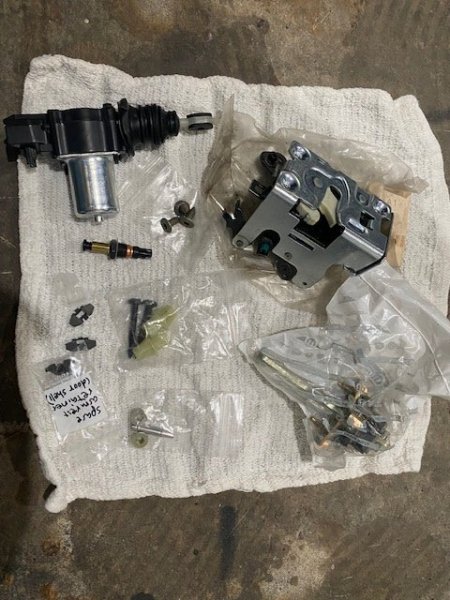
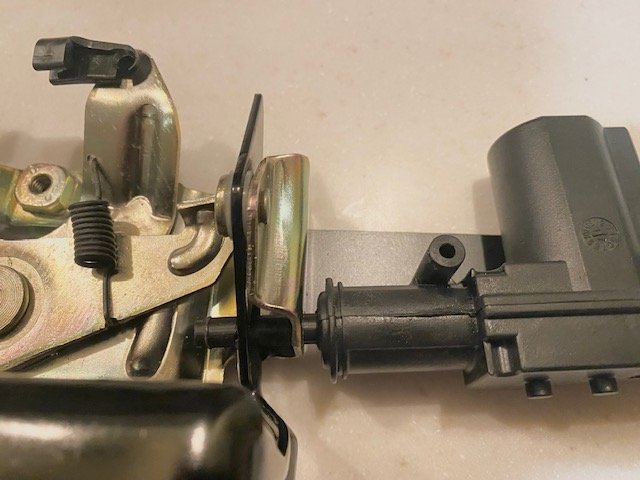
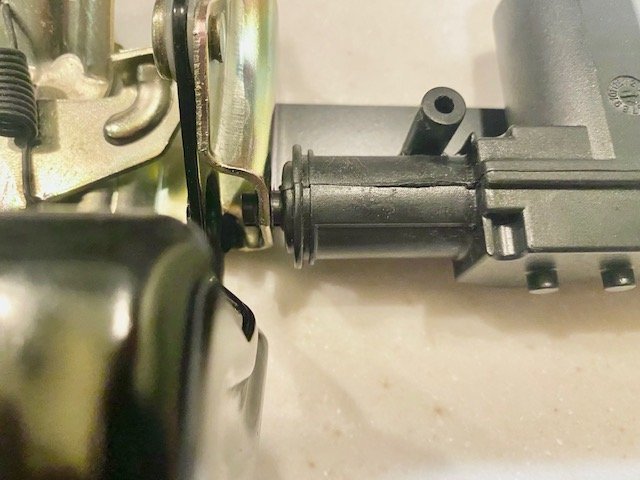
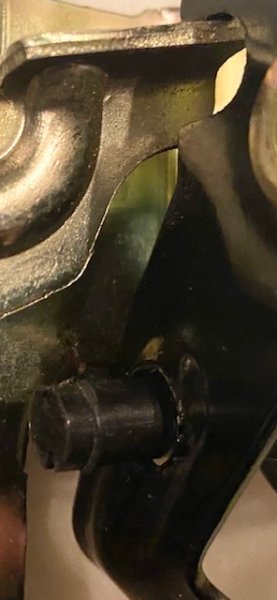
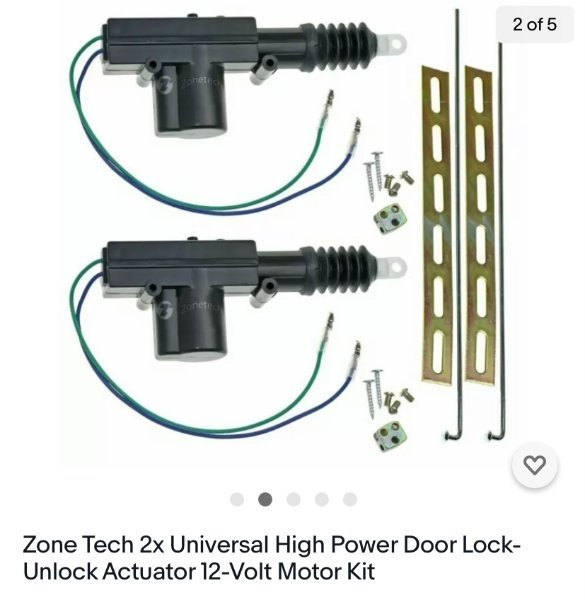
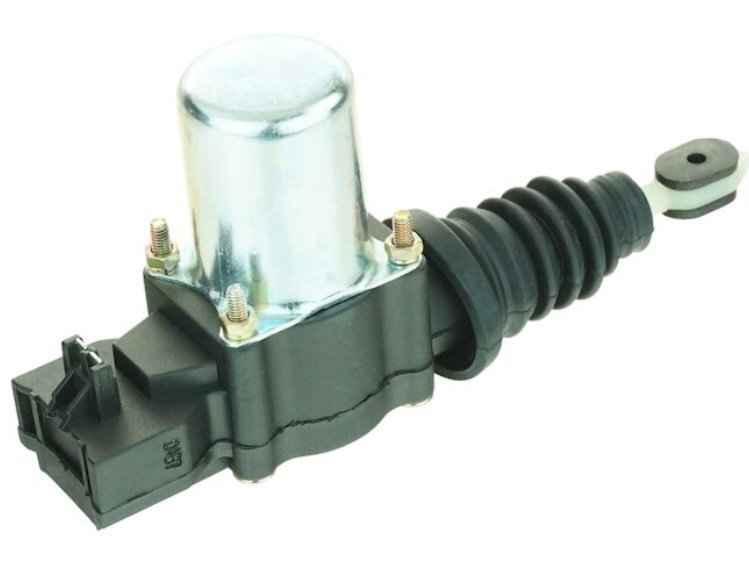
I tried to get a factory Jeep actuator in there, but they are huge. I had to go aftermarket, something like the below. I did have to do some searching to find an aftermarket actuator with a black actuator rod versus the white as shown below. Up to you, I'm crazy. You can also see I needed to do some minor modifying on the actuator to make it fit the application. I removed the rubber boot and cut the rod to the exact length I needed -- which when extended is exactly 1". Aftermarket actuator -- Factory style actuator --
-
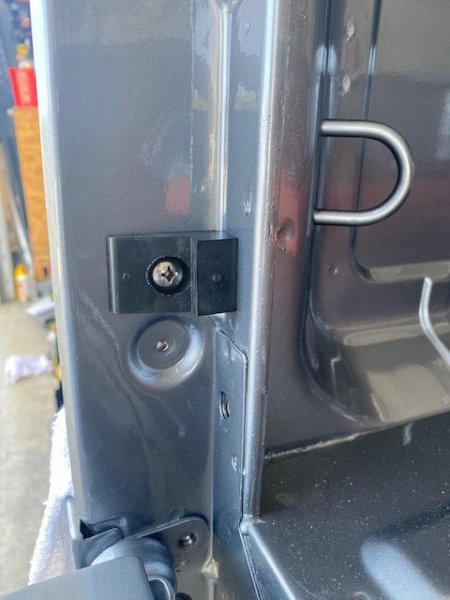
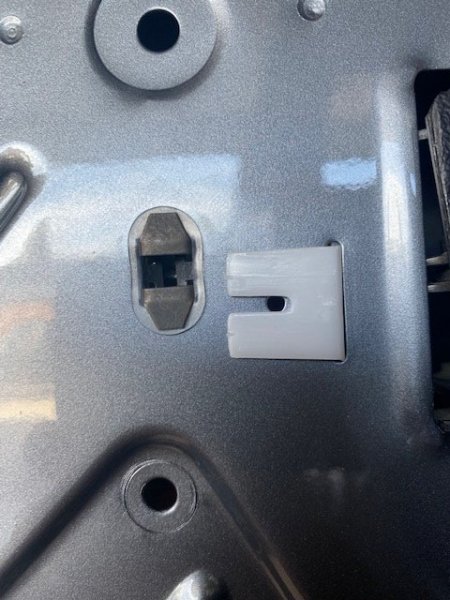
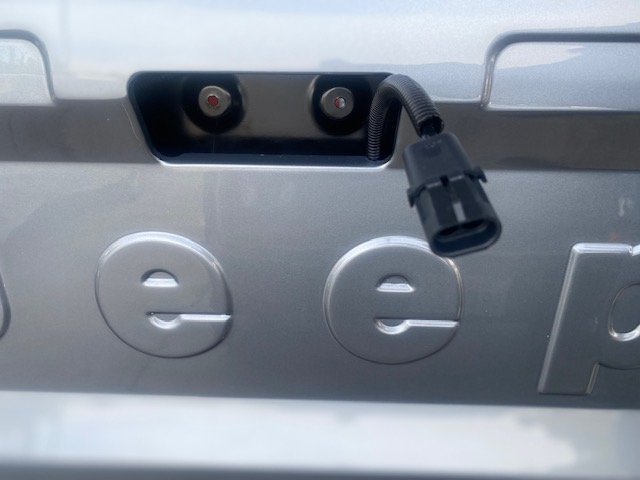
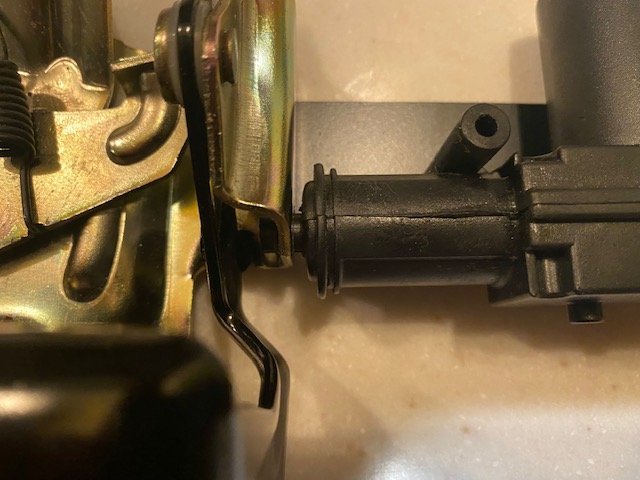
I think the chances of someone walking off with my MJ's tailgate is slim, so that said, this was more of a because I want to have a power actuator that locks my tailgate same as my doors project. Nothing as stressful as drilling on NOS -- Measure and mark a hundred times, drill once. The first hole through the zinc bracket serves as the actuator posts stability/ reinforcement. When the MJ’s power door locks are unlocked, the actuator post stays in the area between the zinc tailgate mounting bracket and the black tailgate handle itself. When doors are locked the actuator post slides into the tailgate handle hole that I also drilled. The bracket itself I carefully roughed-out/ tested so it’s not seen when installed. Then I had a machinist cut something proper. The lower notch in the area where the actuator is mounted keeps the rubber cushion end back-side of the handle bracket right where it should be. The actuator needs to be tipped downward slightly to get the assembly into the opening of the tailgate. Tomorrow I run the wires from a connector I have terminated at the end of the passenger frame rail from there, I’ll run the wires into the tailgate and up.

-
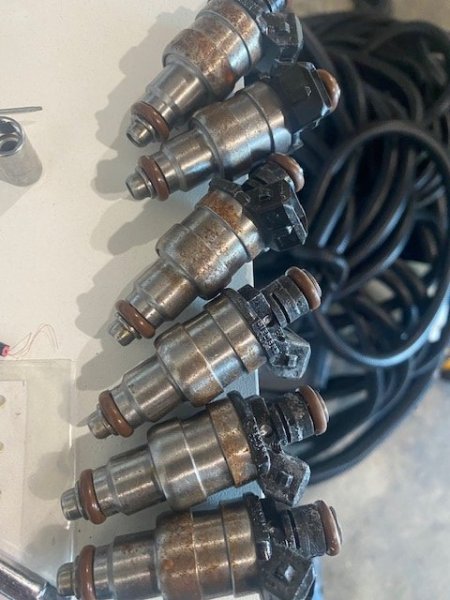
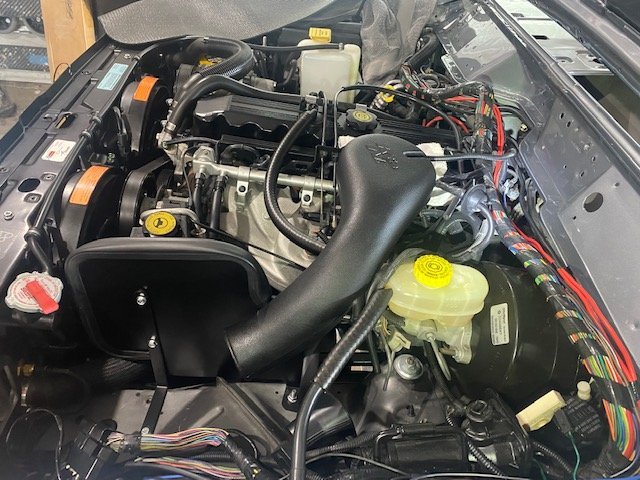
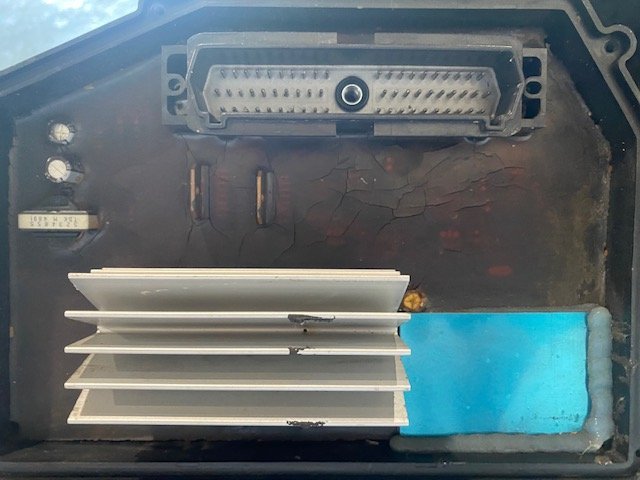
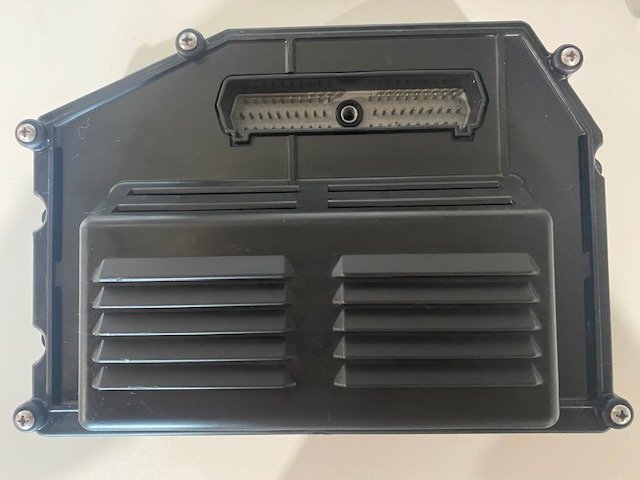
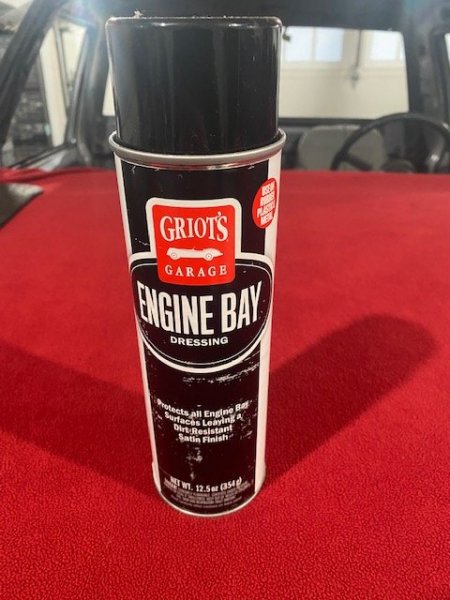
Finally, back to work on the MJ… Started cleaning up the dust and splatter from polishing. The suspension detailing was easy with the help of Groit’s Engine Bay Dressing. The engine compartment was a bit more challenging even when using the same great product. The corrugated wire loom was impossible. I spent an 45mins successfully cleaning a 2.5ft stretch using a small paint and toothbrush, but it still didn’t look good 100% clean. So, I decided to take a small step back to step forward…Removing all the engine bay wire loom and will consolidate the couple extra wire runs I have beside the main engine bay wiring from added-on accessories. Also, I’ll be replacing my fuel injectors. I’m disappointed with the Mopar Bosch ZJ V8 injectors I’m running – I’ve got what I’d consider a good amount of surface rust on all of them. I had read before installing the stroker that these rust-out but I wrongly assumed that only applied to salt states. Out here in sunny CA with I think maybe 100 miles on this motor it isn’t looking promising for these injectors…Plus it looks horrible. So, while fuel tank is out/ no pressure at the line I’ll be ordering Mopar replacement plastic equivalent injectors to swap out. It’s a shame because they looked good going in with contrasting silver and black. And while readying up the wiring, I figured I’d get the stroker-tuned PCM cleaned up and ready for install. You can see bottom right of the open case PCM where the mods were made. The tuner said he has to heat/ remove the entire siliconed board, make the programming mods and reinsert it all back into plastic shell. The cover plate wasn’t perfect so swapped it out with a spare minty one I had and fastened it back up with stainless screws. I won’t be able to get things fired up for a week or so as I’ll be prettying up wiring and then need to install fuel tank.
-
Black was available 86/ 87 for MJ with door panel differences on map pocket and overall stamped 'stitching'. Leather was only available in black on Limited XJ model (very rare to find and '87 year only), vinyl seats yes, cloth seat yes on MJ and XJ.
-
Removing black coating from windshield trim
Gjeep replied to fiatslug87's topic in MJ Tech: DIY Projects and Write-Ups
Those look great! -
An aluminum one was never offered by Jeep.
-
That’s PPG glass. Not original for sure.
-
First black briarwood I’ve seen. Congrats. Most seemed to be white. Occasional green or blue one.
-
Yep, a factory mopar accessory in the early to mid-90's. Basically it's the Lido (brand) box with the Jeep logo. Neat find. Rare for sure.
-
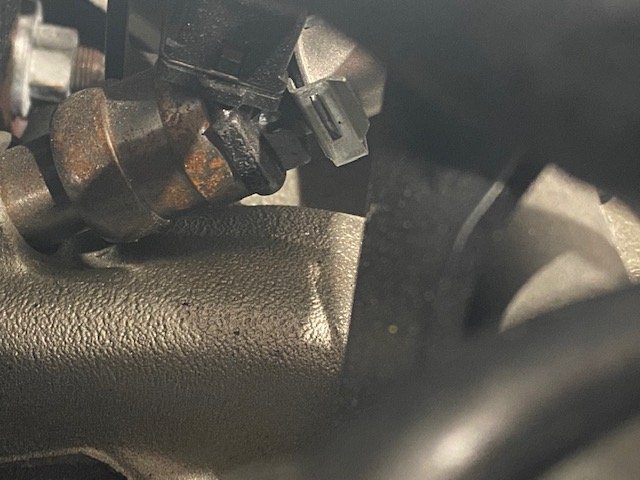
Interesting to note that this MJ has the dealer installed AC. That clear (though yellowed) sleeve over the AC hose under the hood is a give-away. I purchased the dealer installed AC long ago for my Renix MJ. The factory AC did not have this sleeve.
-
Been a while... First step in getting back to the MJ build is clean up from paint. No overspray, but masking tape sticky and plenty of 'dust' in the engine bay from sanding/ painting. Drives me nuts. Step one was a full vehicle wash, next area of focus is the engine bay. Griot's has some great stuff for cars -- and clean up. This dressing does an amazing job and isn't left wet so it'll attract dirt/ dust in the future. Happy almost 2022. Aiming to have this truck done end of summer. Will see...
-
Looks to be for the transfer case position/ illumination light on dashboard.