


Gjeep
-
Posts
1221 -
Joined
-
Last visited
-
Days Won
3
Content Type
Profiles
Forums
Gallery
Everything posted by Gjeep
-
89 Comanche "Country" LWB restomod project
Gjeep replied to Airborne Janitor's topic in Member Projects: Your Comanches
Lookin good -
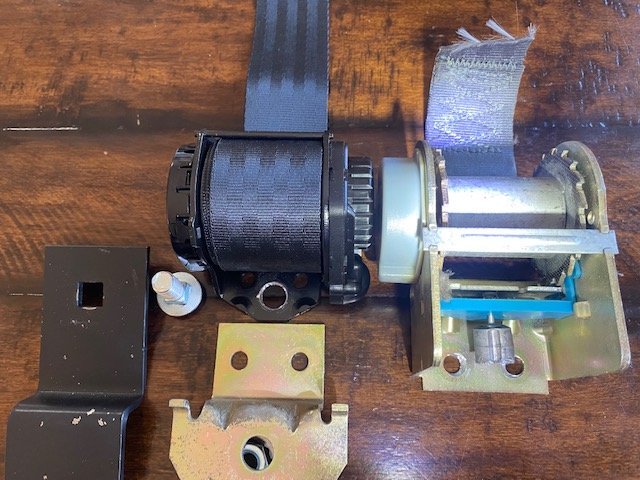
This is the new shoulder belt assembly and bracket disassembled with an original MJ shoulder belt retractor. The line of the dining room table serves as the on-center point through the square (original XJ aftermarket bracket) and the two holes of the aftermarket and original MJ assembly. Based on the removed MJ mounting bracket (positioned in the photo under the new seat belt) I can reuse the XJ bracket cut up and drilled out to accommodate the 4 mounting holes – 2 on the new assembly and 2 on the MJ B-pillar mounting bracket, plus the original large diameter hole. The way the aftermarket assembly bracket was mounted to the belt was odd…carriage bolt in a round hole that was tight as it could get but could wobble a good 1/4” in either direction. They really short-cut what could have been – that being, employing triangular strength using all 3 holes. I’m lucky this is an easy conversion as I’ve seen others converting XJ to MJ that weren’t quite as straight-forward. The new seatbelt assembly is an otherwise nicely made unit. I have found various sleeves for the bottom side of the should belt as it is fully exposed on the MJ, unlike the XJ. I also have new ‘buckle’ ends as well and various black hardcover sleeves to fit those. Need to confirm which sleeve will be the best fit, but I’m guessing the 3rd gen Camaro (which unfortunately has 2 different length sleeves driver to passenger side, so needed to purchase two of the kits to have a matching set for the MJ).
-
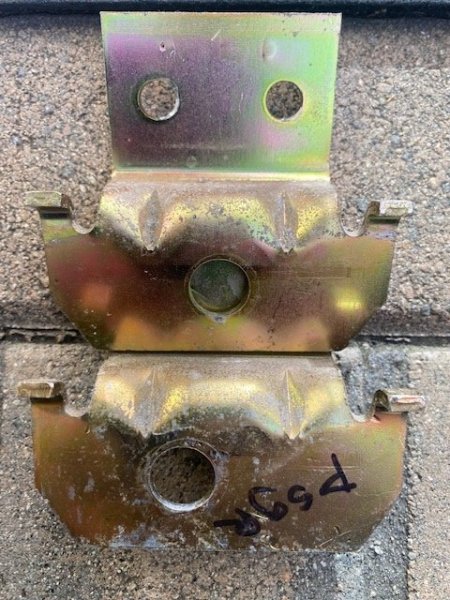
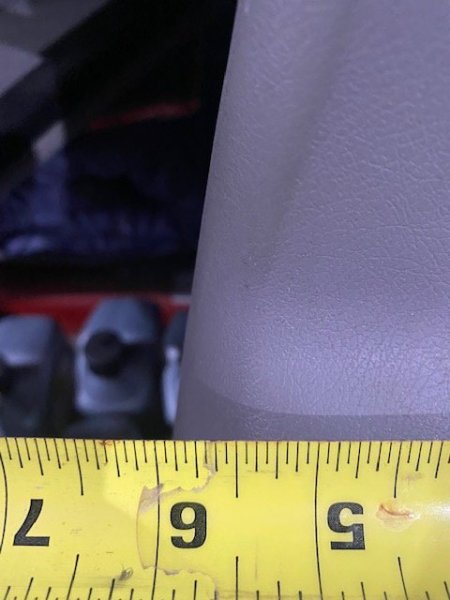
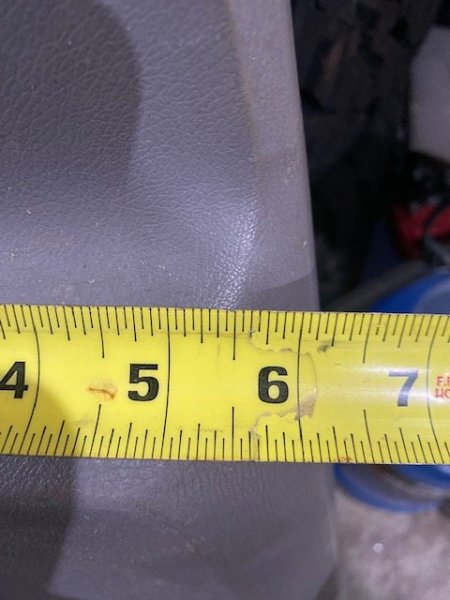
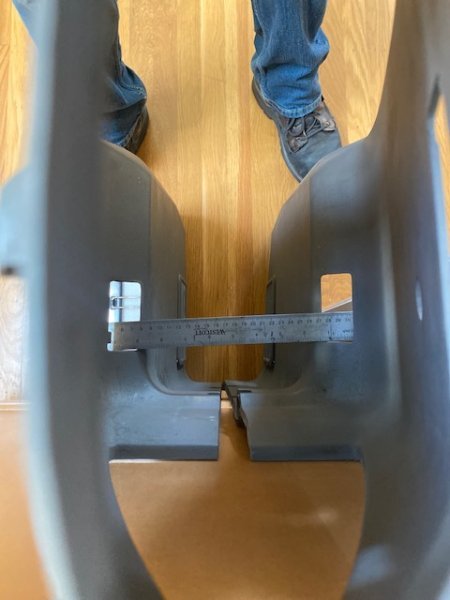
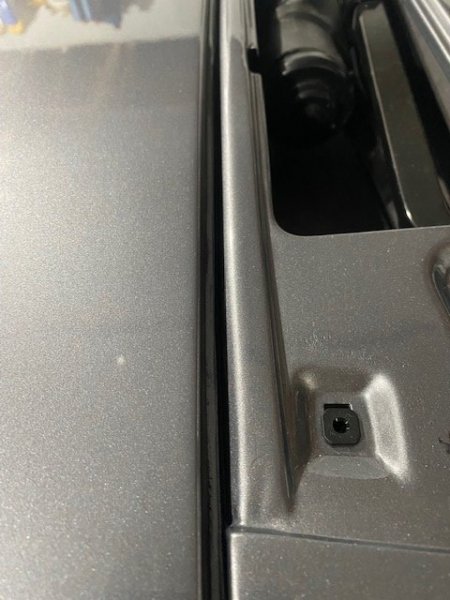
Learned something new on the MJ today…there’s a ¼” difference between driver and passenger side B-pillar seat belt depth. I was drilling out some scrap shoulder belt harness brackets (to swap over to new XJ-only shoulder belt assemblies) and noticed the passenger side bracket torx mount at the B-pillar was off center. I assumed it was a manufacturing error and found another set, also with the passenger mount hole off center. I looked closer and noticed they were indeed two different part numbers driver to passenger side. Assumed if the approx. 1/4” difference exists in brackets, it must also exist on the sheet metal and interior plastic…so I grabbed some sample panels and sure enough the 1/4” difference existed. I had always assumed they were symmetrical. Not clear on why Jeep would go more forward on the passenger side? Maybe so driver side access to the behind the seat area was mildly easier to navigate? The upside down tape measure is passenger side; right side up is driver.
-
They sell a couple styles and you can just use center piece of decal. https://www.mechanicsurplus.com/products/32502057?gclid=EAIaIQobChMI-J3zi7D09gIVqyCtBh0j_wxPEAQYECABEgLhK_D_BwE https://www.mechanicsurplus.com/products/100313095?gclid=EAIaIQobChMI9dvJ4bD09gIVzz2tBh3jDQXLEAQYCCABEgLB7vD_BwE
-
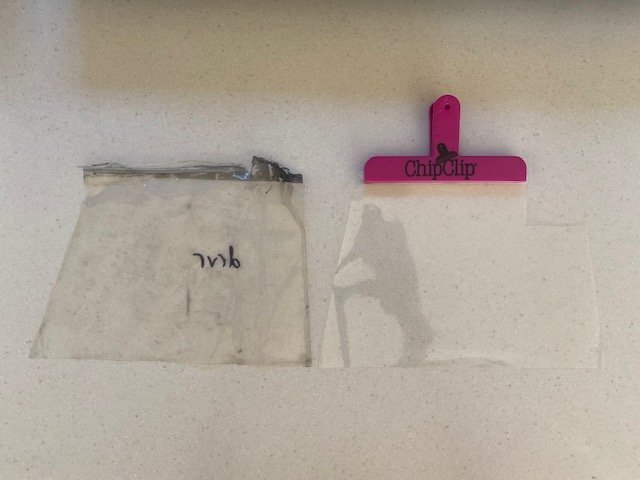
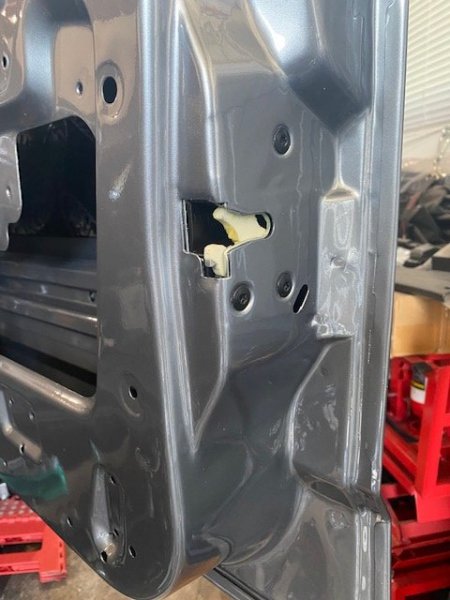
Got a small to-do done… The first gen MJ/XJ’s electrical of the power windows/ locks was in prime position to get we exposed in the inner door. One positive of the original set up was the factory vent windows was placed above that silicone electrical connector and for the most part shielded it. Despite being fully covered, Jeep thought it best to put a plastic bib on the upper window lip of the inner door that draped over the back side of the inner door handle and window/door lock connector. My setup by eliminating the vent window in favor of a full window truly exposes the electrical, so – I cut a modified version of the bib to ensure the inner door handle and electrical was protected from the elements. I used a medium duty mold-resistant plastic. The chip-clip you see below helped me keep the fold in the plastic until I was ready to apply the double-sided tape for installation. Final step is putting the inner door wipe/weatherstrip over the top of it all. Done.

-
All good, any time!
-
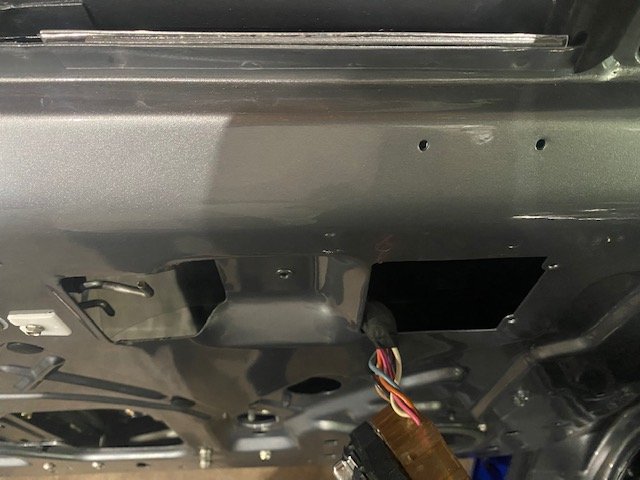
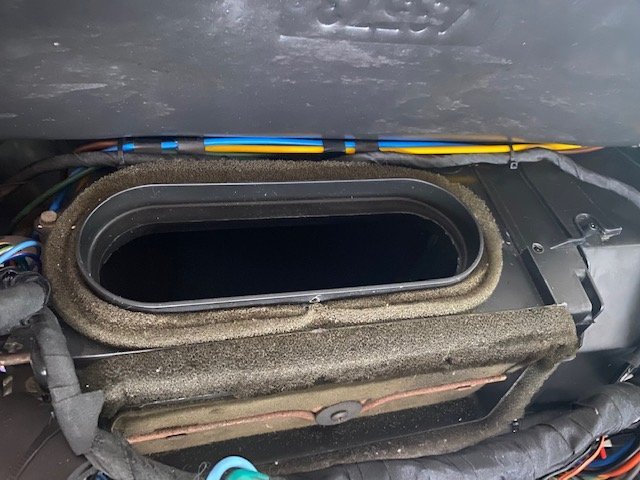
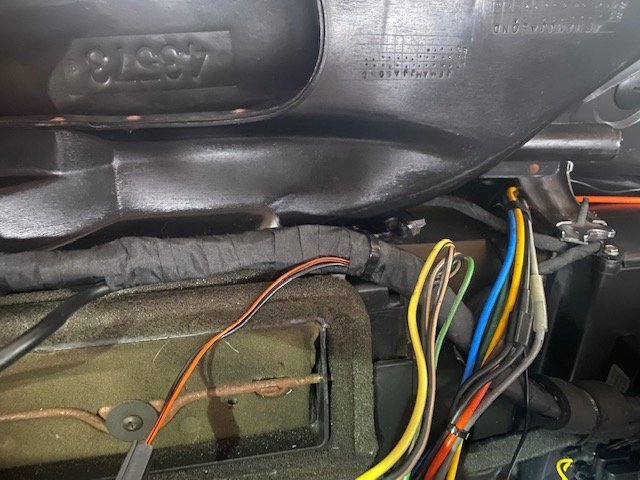
While I’ve got the opportunity, my aim is to make the dashboard wire routing easier to work with (now and in the future). The noticeable difference between the first gen and second gen dash (‘97+ XJ) is that first gen the wiring was significantly attached to the dashboard itself, making first gen dashboard removal unnecessarily difficult. (Whereas the second gen has the wiring near entirely unattached to the dash.) My goal is to not have any wiring attached to the back side of the dash. It doesn’t need to be there. In addition to aftermarket add-on’s, I’ve also got factory dashboard wiring add-on’s, such as the power antenna and overhead console. The overhead console wiring for example is routed around the inside ‘square’ of the radio/ HVAC control area of the XJ, fastened with 4 zip-tie push pins. Instead of installing it the same way in the MJ, it makes sense to simply route it behind the HVAC distributing funnel atop the HVAC box. I carefully fastened it to the vacuum lines in 2 locations. The main across wiring harness that runs the center section of the dash was fastened by drilling a small hole in the HVAC box (making sure all was out of harms way on the inside of the box) and attached using a pin-pin zip-tie. For the audio wiring, similar to the Renix era XJ/MJ’s, it’ll be tucked topside of the HVAC funnel with Velcro and plenty of foam padding. Seems once Chrysler got their hands on Jeep those little details disappeared…at least on all the Jeep’s I’ve had. AMC definitely paid better attention to the details.
-
I saw 2 last week and was surprised. Typically I see maybe 5-6 per year in Bay Area, CA.
-
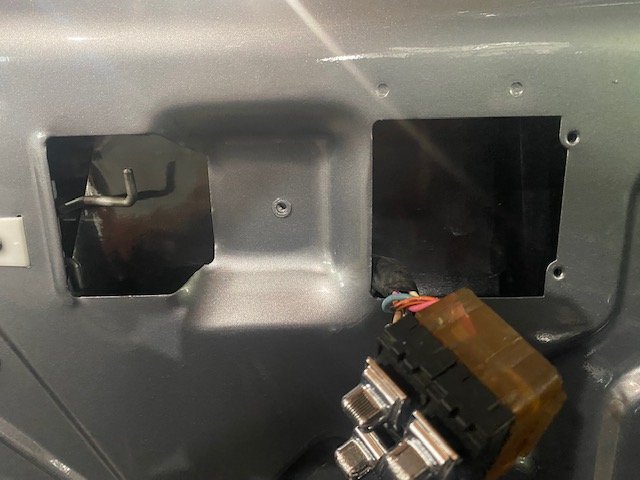
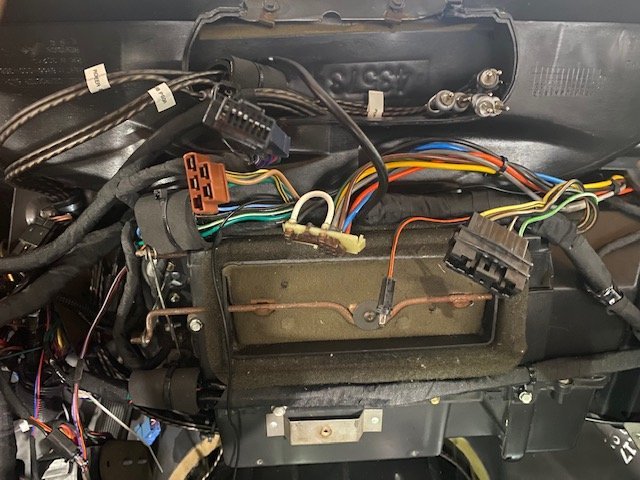
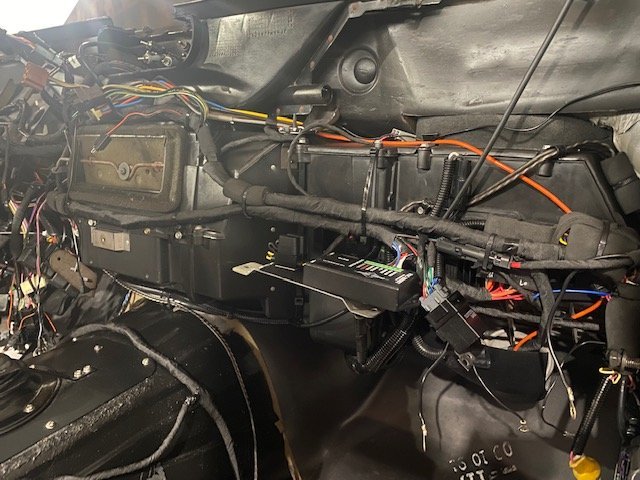
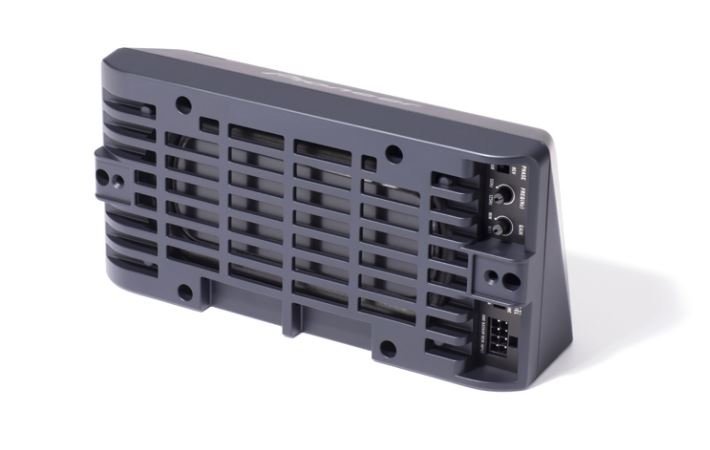
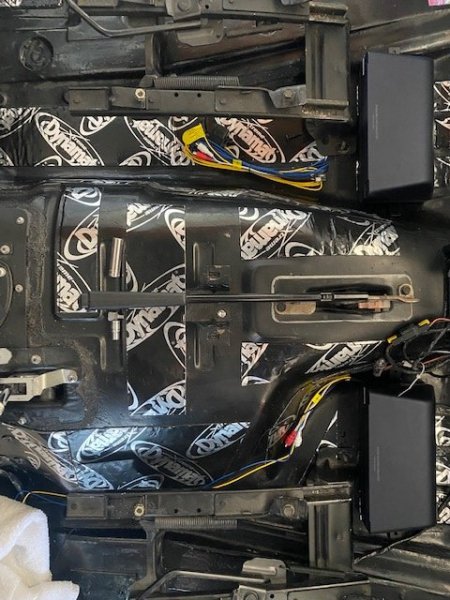
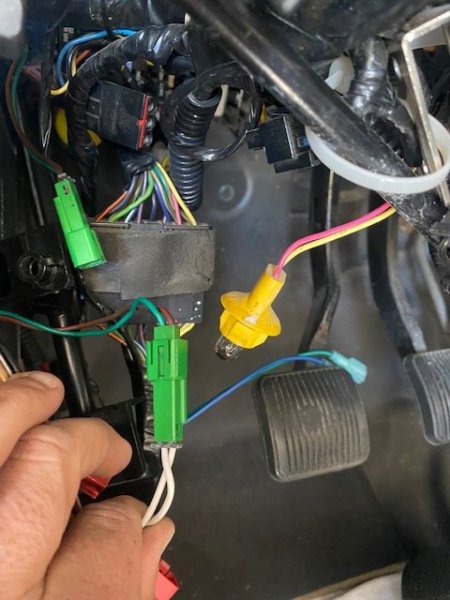
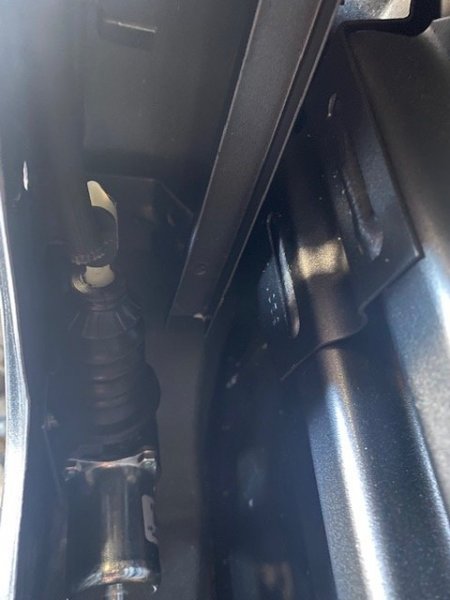
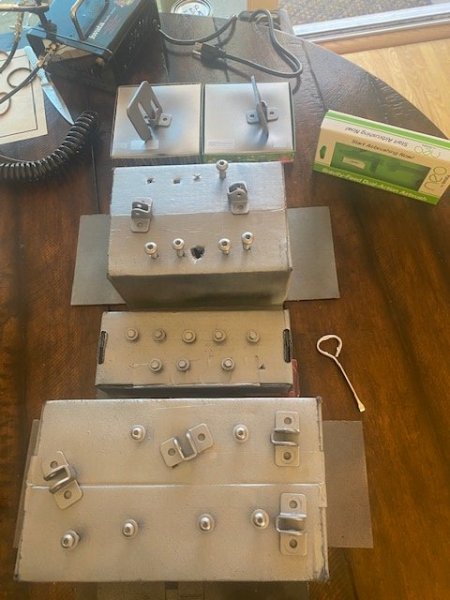
Incredible how long it takes to wrap and neaten wires— 3hrs of fun. Passenger side behind the dash houses the dual efan and amplifier/sub power set up (and alternatives). The MJ runs a Dakota Digital controller, but I have a SPAL efan controller as the failover. To alternate if needed, I simply unplug the 2-wire power connector for the Dakota Digital setup under the dash and connect it to an identical connector that can power up the SPAL. And under the hood I would unplug/plug the associated wiring at the efans themselves. (The Dakota Digital controller is mounted to an XJ/MJ AW4 TCM controller bracket with HI/ LOW relays on the HVAC box, while the SPAL controller is mounted to the HVAC box). And for the amplifier/sub setup… there is wiring and power for the Punch amp mounted on the inner passenger side kick panel to run a large subwoofer setup (wiring already laid to the back cab wall) if I decide the smaller dual under the seat subs don’t do the trick. Again, for power, it’s a swap of a single plug one to the other. For now, the under the seat subs will get power and the inline fuses for them are also mounted on TCM bracket. The relay my pinky finger is holding up in the photo is for the XJ power antenna. All large connectors, relays, etc are wrapped in self-adhesive foam pads to hopefully eliminate any in cab unwanted rattling noise.
.jpg.2f89e7d237ab69cab1b13f8ca2c1cef7.jpg)
-
Did a ton of digging to find the right sub for the MJ… After buying and listening to several, I went with the Pioneer TS-WX010A. This under the seat sub is downward firing with a built-in amp of 50W RMS/ 160W Max. I’ll be running one behind each seat. These subs were made specifically for compact/ subcompact cars. The goal is not to go deaf, but to have a discrete sub that adds good balanced thump. They’ll be painted black to match the MJ’s interior. This is a photo of the underside. Been working away connecting, cloth taping, sorting, and readying the interior wiring for a full test soon enough.
-
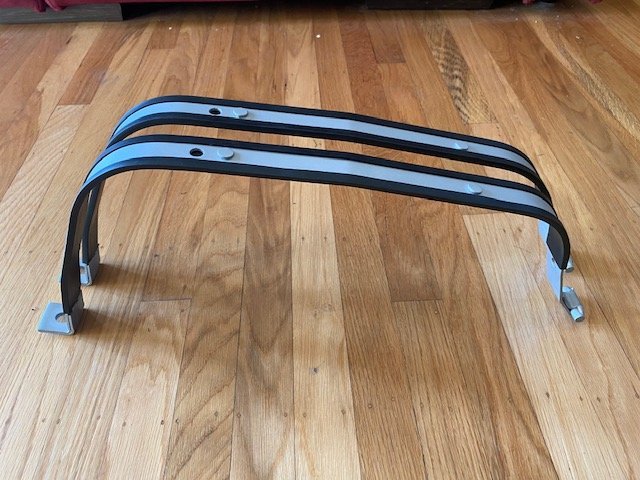
RedMistress got me thinking on the fuel tank straps, so since I’ll need to replace the ill-fitting Spectra straps on the MJ…I’ll go ahead and add some rubber strips off a ‘97+ XJ as they are proper width. Also been re-thinking the MJ ‘era appropriate’ sub boxes I was going to build off the cab back wall. I’m thinking these 160W tucked under the bucket seat enclosures will keep things cleaner in the tiny cab.
-
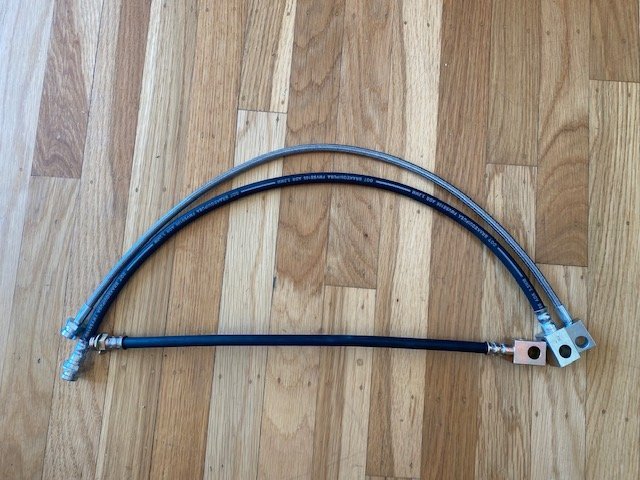
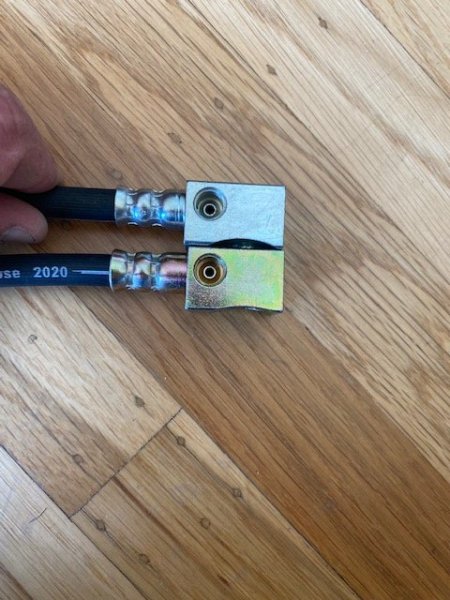
Installed my B-pillar speakers and connected speaker wiring. Whenever possible I try not to run new wiring if it already exists. An example is with the front speakers -- I used OEM green 2-in connectors on the wiring out of the aftermarket head unit and into the existing door wiring (keeping the factory radio speaker wiring intact). With the interior/ interior wiring I still need to wipe it down and sort it back to neat before reinstalling the dashboard and all else. I did cover it up during bodywork/ paint but dust has a way of making it's way in. Also took delivery of custom rear brake axle to chassis soft line. E.L. Johnston made it and it's spot-on perfect not only with length but hardware also -- and affordable -- $52. I had purchased the only existing 25" braded XJ/ MJ option out there and just didn't like the look or quality. Below is a pic of the E.L. made line, braided aftermarket, and YJ 17" (factory) line for comparison.
-
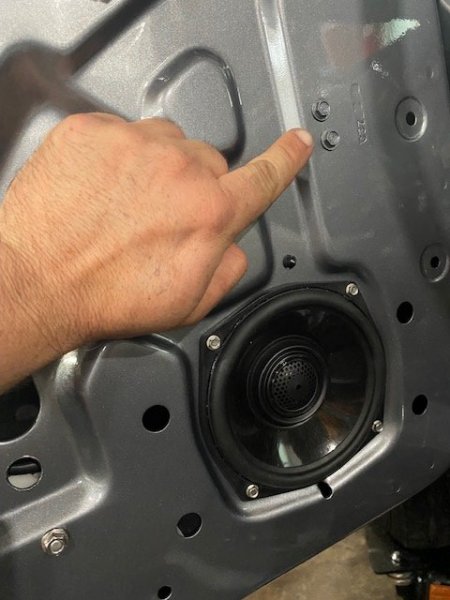
More fun inside the doors – installed the Rockford speaker and noticed it was in contact with the glass when in the down position. The 97+ XJ’s compensated for the full glass/ speaker issue by providing an extra ¾-1” additional space between the speaker and glass via sheet metal shape and angle. Our old MJ’s don’t have that luxury if you want to keep with the stock door panel. First pass I shimmed the speaker front side with a 3/32” shim to give the speaker to lower window 1/8” clearance. Didn’t like how that looked and remembered how much ‘play’ there is horizontally in the window channel, so I decided to shim the add-in 97+ XJ front channel I added on the inside of the door. Perfect. Didn’t look funky visually and achieved the 1/8” gap needed. Funny part is, I almost never ride around with my windows down, but wanted to get it right for my sanity.
-
Jim -- Sorry to say those TSB hinge repair kits are long gone. I got these back in 2001. I'd be shocked if there were any out there...
-
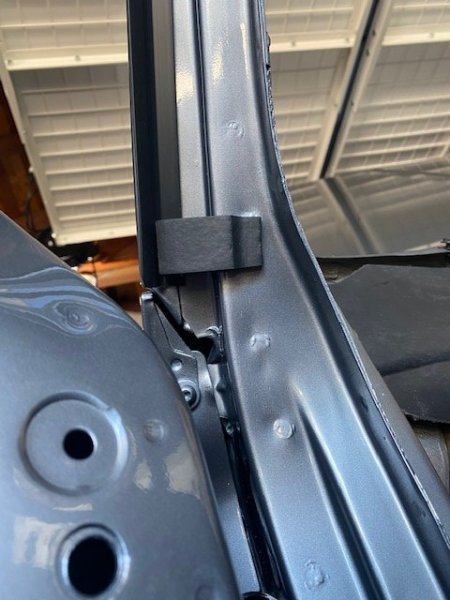
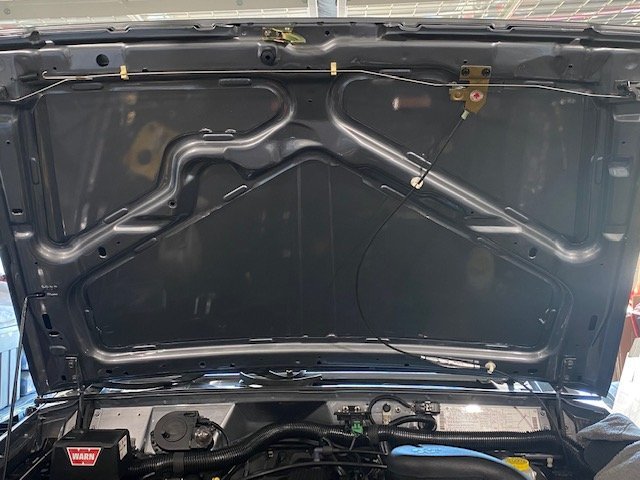
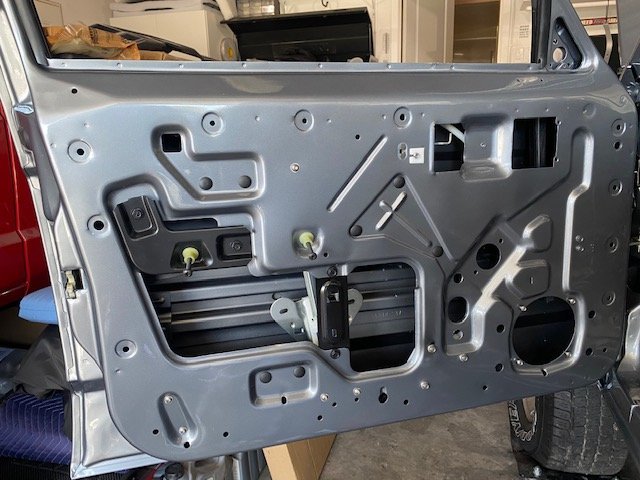
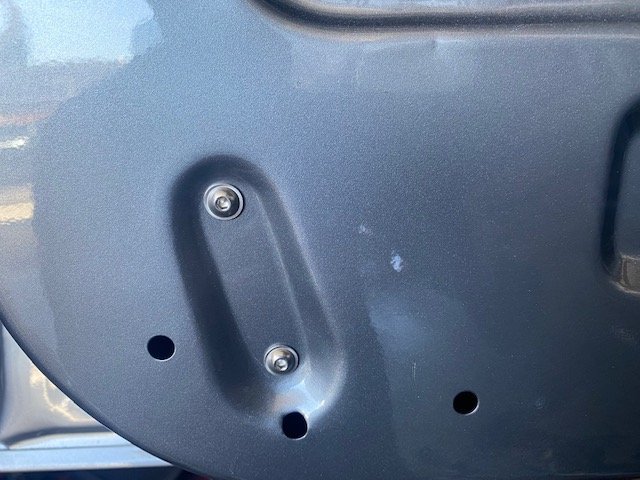
Made my way through some time consuming to do’s – Got everything installed/ wiring run in the doors. Everything except the speakers. The full side window glass wasn't offered on the the MJ, but to me it gives the truck a cleaner looking profile. A-pillar seals are on, as is the little foam block that assists with wind noise. Under the hood I decided to go with the 97+ XJ hood seal and no insulation. I like seeing the paint on this one. All NOS latches, cable, rod, etc used. (And yes, I removed the ‘Made in Canada’ sticker to keep things clean.) Finally, the hood had plenty of metal to thread for mounting the bellcrank. I didn't use rivets, instead used window regulator bolts as they have a good size flange and are stubby.
.jpg.3c8f62f4e760761280cfb43b37b5a364.jpg)
-
Great color. Looks awesome on the MJ!
-
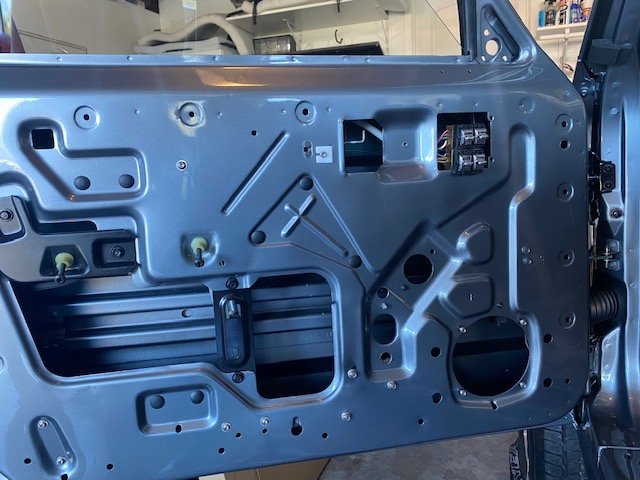
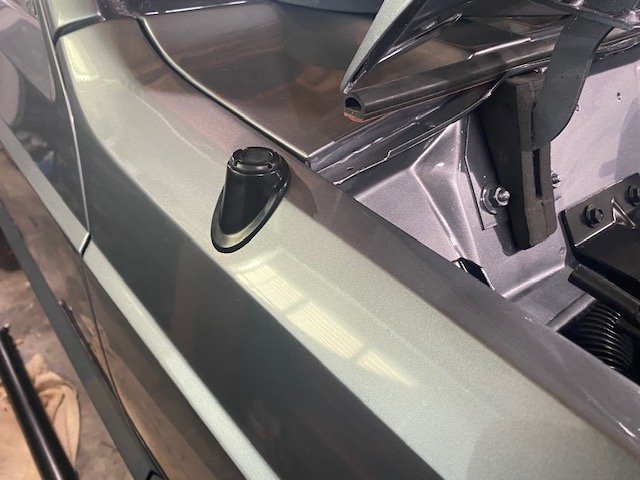
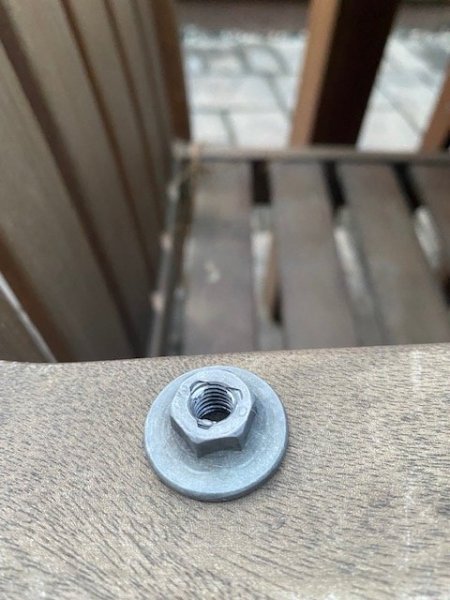
Been focused on refinishing interior/ exterior hardware for the Comanche. I’m sure most of you are familiar with EvapoRust and I can’t praise it enough on the hardware with light rust – specifically the nuts for the seat tracks to floorboard. Came out overnight looking like new, ready to be painted. Also installed a power antenna in the MJ, pulled/ ran the wiring sourced from a similar year XJ. Finally, I couldn’t bring myself to installing the Beijing regulators into the MJ. I decided to go the route of US ‘97+ XJ regulators with the full window. I had drilled the regulator holes prior to paint as I had reservations using the Beijing setup. For those not familiar with the old door using the newer XJ regulator, only the three mounting brackets (one upper; two lower) regulator-to-door bolts required a spacer. The upper requires a 3/4" spacer; and the bottom two need a 1/2" spacer to keep the window centered in the channel. The motor mount didn’t require it, though I did trim down the studs for the sake of the door panel. Now those studs are flush with the attaching nuts. For the sake of my memory, I plugged the holes for the old style regulator so in the future if I need to replace it, I’ll remember to install the correct XJ era regulator.
-
2.5 Borla header - SC - $200
Gjeep replied to scguy's topic in Craigslist/eBay... i.e. Not Your Stuff
Now that is rare. Didn't know Borla had made a header for the 2.5L. -
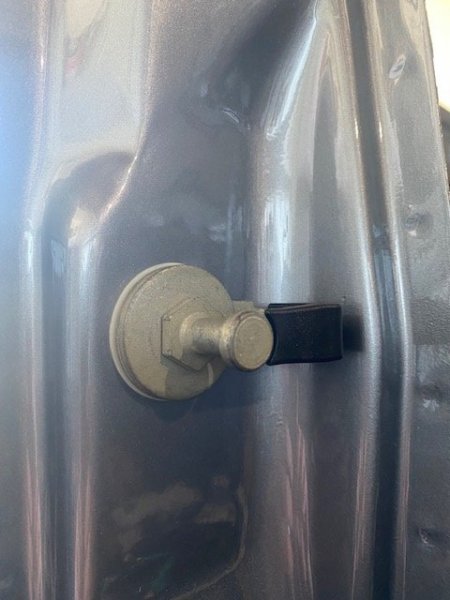
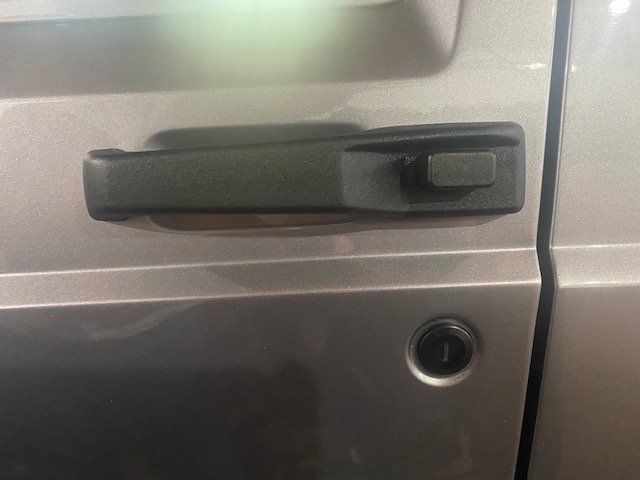
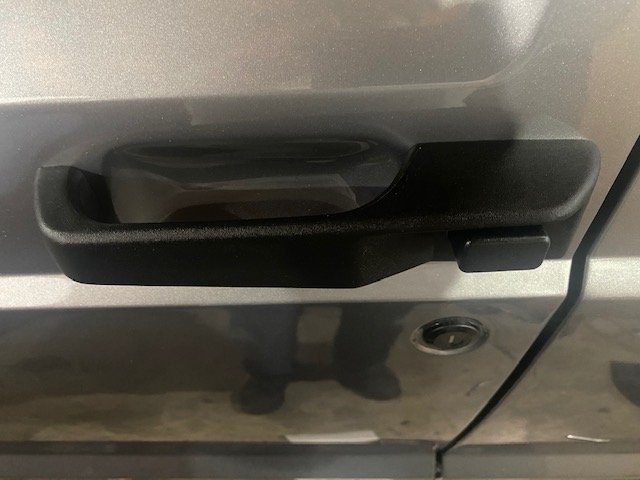
Slowly making my way through the assembly – I prefer the 97+ XJ door handle. Cleaner looking and for whatever reason is smoother functioning.
-
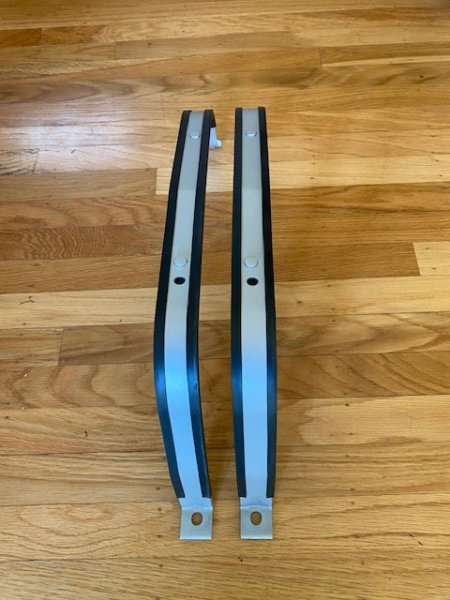
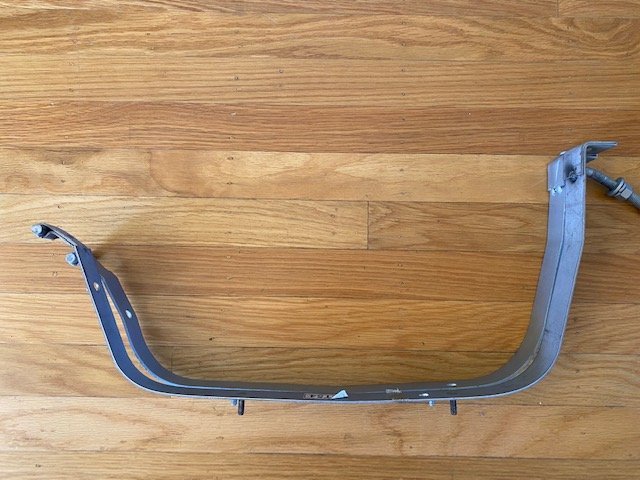
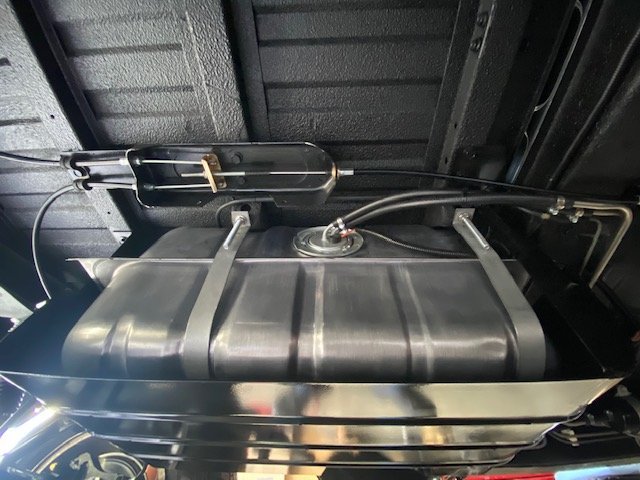
I couldn't get what RedMistress mentioned on the tank out of my head -- something wasn't right. I'm glad I took some pre-skid fuel tank photo's and hadn't tossed my original tank straps. Makes sense now why the tank is at at angle as I did more digging and measuring this afternoon -- no way the Spectra straps were going to work no matter how I bent them. Time to drop my skid and replace those straps. Dreadful. One step forward, two steps back... Original straps on the hardwood. Spectra strap on top.
-
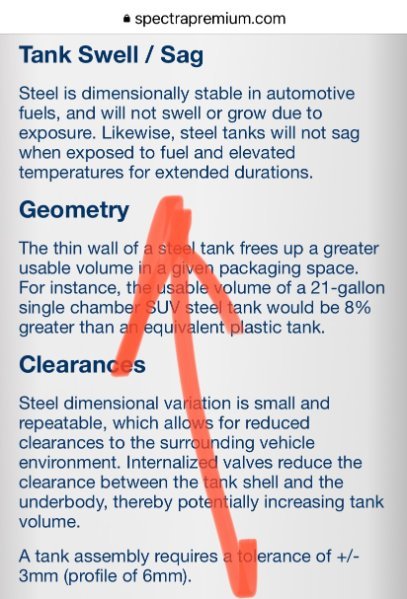
The plastic 'skid' bottom side of the factory tank was not there if MJ optioned with metal skid. As far as a expansion, I don't know, does a fuel tank swell with heat/ cold? Assumed that was part of the vent/ valves top side job. If not, it should be a spectacular explosion. Here's a snip from the Spectra fuel tank website around the topic. Will see.
-
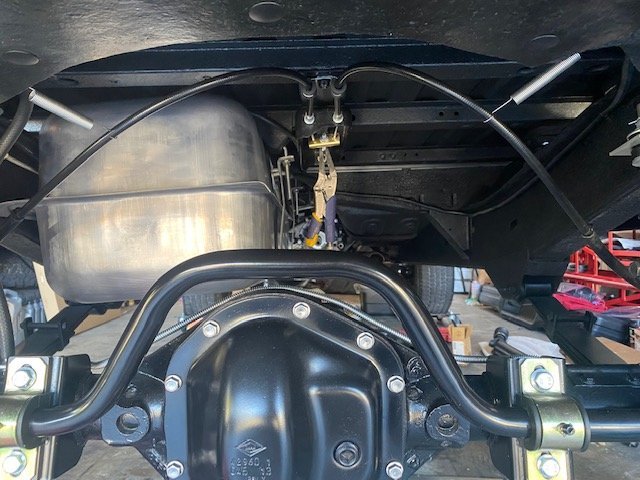
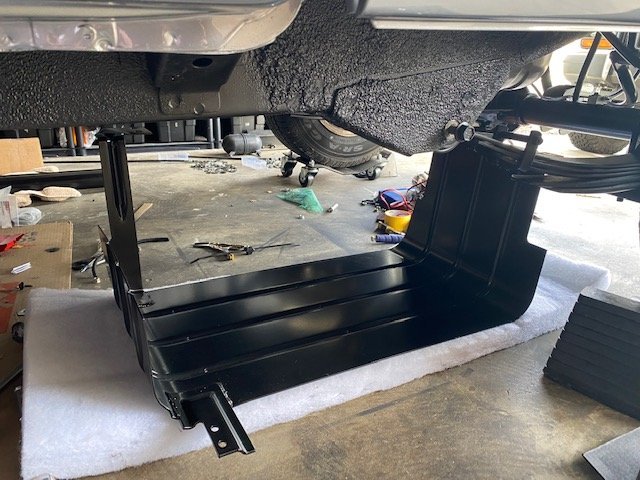
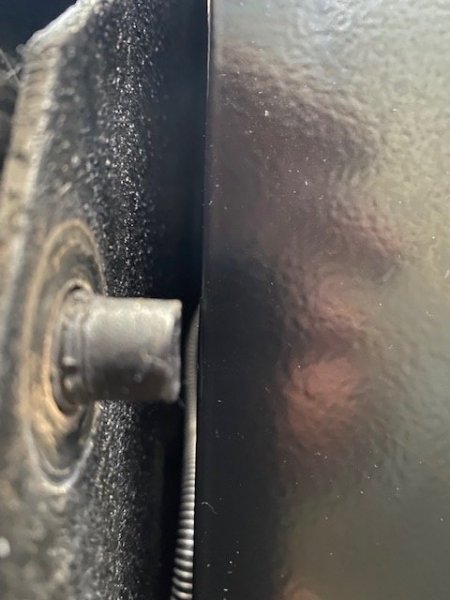
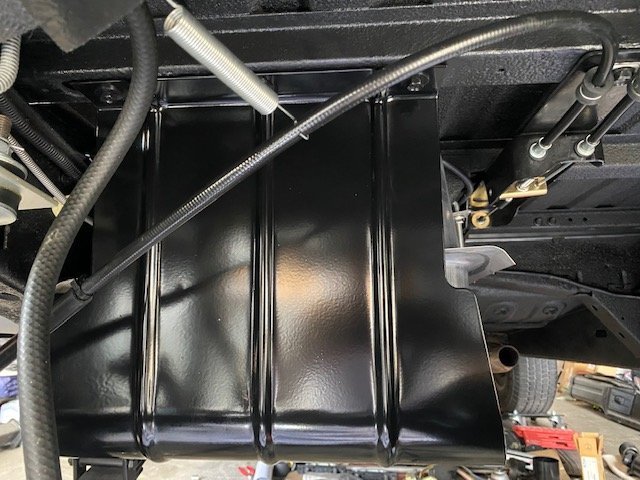
Got the fuel skid in place…Took a bit of navigating and patience. Many thanks to my eldest daughter helping me install it. The factory tank was almost 1/2” shorter than the Spectra replacement thanks to crinkles topside at I’m assuming factory install strapping it down. I had been able to keep the plastic “skid” between the original tank and the metal skid with the original tank, but no chance this round. 1/16” clearance tank bottom to skid; and 1/8” to skid at the straps. I needed to cut smooth the studs on the strap as they would have been an issue mounting the skid. All good. Also, as mentioned in a prior post, here’s the bolt (front driver side leaf) I back out so the skid can clear without damage.
-
So tell me about California Smog Checks and Registration...
Gjeep replied to ExpatMJGuy's topic in The Pub
Cali is good with a HO swap. Already check as that’s what I’m doing with my 89 MJ when I get to it. -
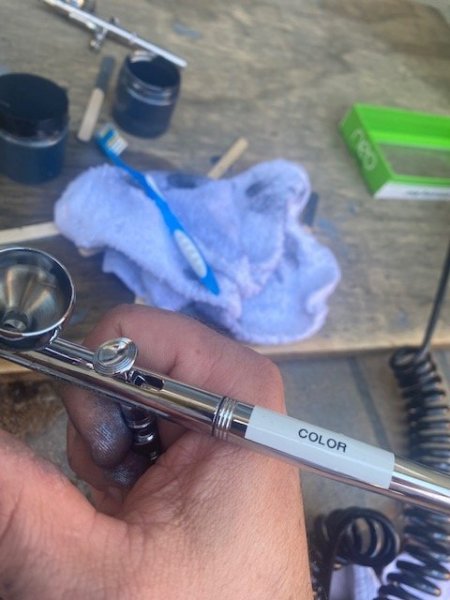
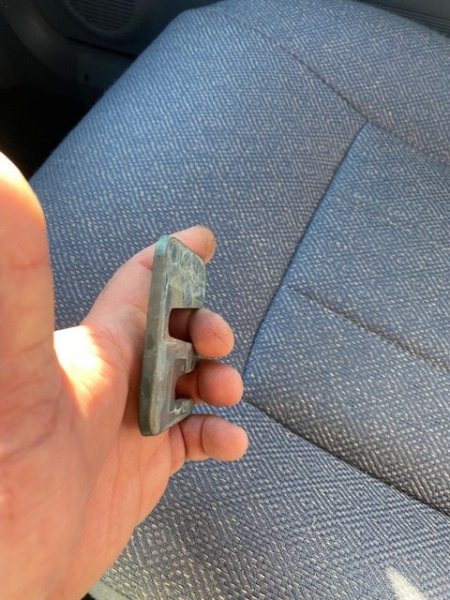
Dusted off my Iwata gravity feed airbrush and put it to good use. I always paint the final assembly hardware after I paint the vehicle (as doors, hoods, etc are removed and painted separately). When painting on any scale, I’m a fan of keeping things separate – meaning – metallic colors are for one gun, solid colors another, and clear yet another. What got me enrolled into autobody school 20+ years ago was an accident I was in. Took my XJ to the “best” body shop in the city – Brizio hot rods of the ‘90’s used them on some of their projects. Told them I was a crazy perfectionist on par with show car aficionados…No worries they said, first repair had green splatter in the black paint…WTF? Try again, missed color match, try again… metallic in the black. Stop. Just going to do it myself and off I enrolled in paint/body school and am now accountable for my own paint quality. The local wrecking yard had a couple fresh XJ’s land and I learned something new – ’00-’01 XJ’s rear door hinge shim is a solid 3-thin shim wide. And that’s exactly what I needed on my MJ driver’s door. So, I'm replacing those 6 existing shims with just 2.
-
Nope not painting the fuel tank itself.