


Gjeep
-
Posts
1221 -
Joined
-
Last visited
-
Days Won
3
Content Type
Profiles
Forums
Gallery
Everything posted by Gjeep
-
CRL Power Slider Rear Window
Gjeep replied to sammisox's topic in Craigslist/eBay... i.e. Not Your Stuff
Gjeep has two. Was hoping to get another for the '92 MJ... thanks for the heads up to the forum! Now need to decide between solid deep tinted glass and this CRL. Never thought another would turn up. -
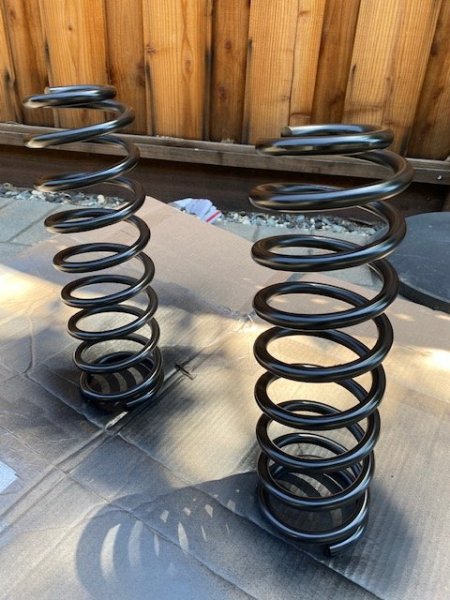
Exciting times...Just got my Coil Spring Specialties front springs. They're based off the Up Country springs and are 20% stiffer/ .5" lower. (Typically I go 1" lower, but keeping this one a pinch higher in the nose, but entirety of stance will still be a mild rake.) Rattle canned them another coat of Satin Black. My hope for the weekend is to have the front end entirely redone and done. NOS/ new everything... and what's not Jeep like the ball joints and I forget what else is Moog goodness. Again, high hopes to knock this out this weekend.

-
If I was into museum rarity type pieces, I'd be all over this. And would make sure to add the missing a-pillar trim before displaying it anywhere. Decent price for the rare beast it is -- and located in sunny CA so most likely zero rust. https://www.facebook.com/marketplace/item/443754940048346/?ref=search&referral_code=marketplace_search&referral_story_type=post&tracking=browse_serp%3A2c3c655f-9b33-4cae-98d5-25d6b6b4b12a
-
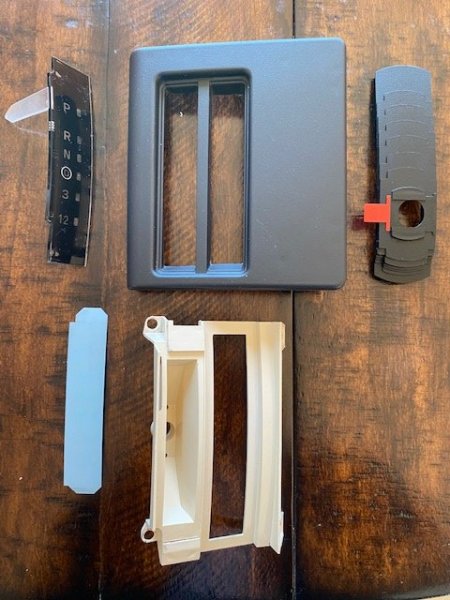
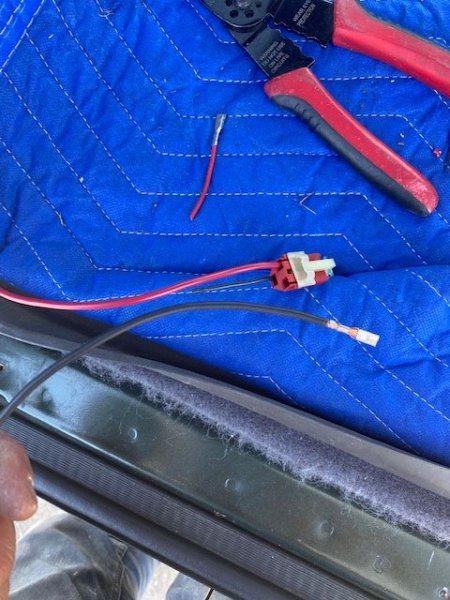
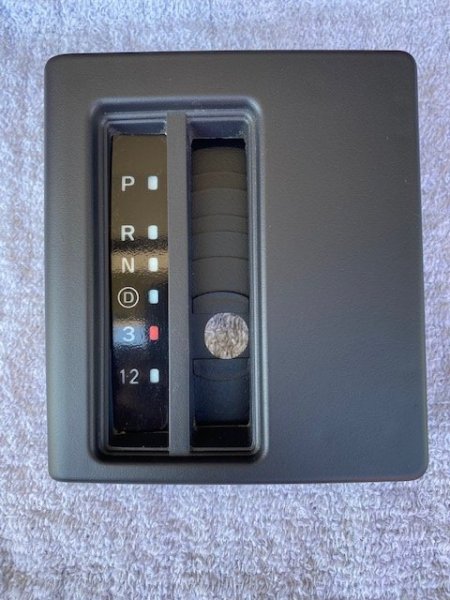
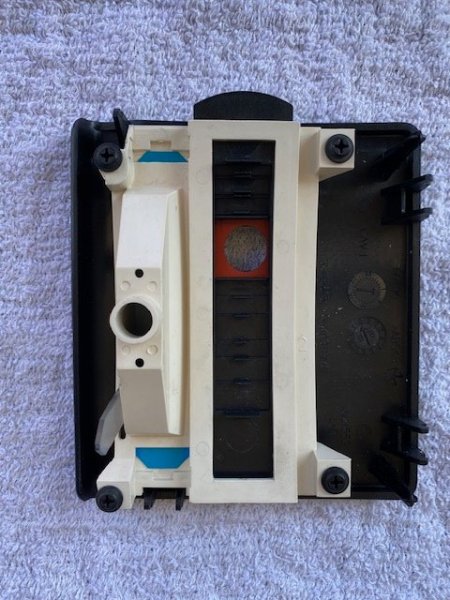
Took apart then put back together the AW4 shifter bezel -- painting/ detailing it to look as close to new as possible. Also ran wiring to the cargo area where I'll mount an XJ 12V socket.
-
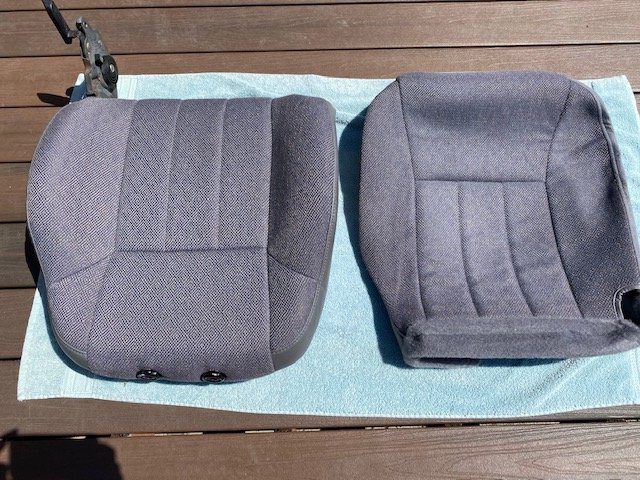
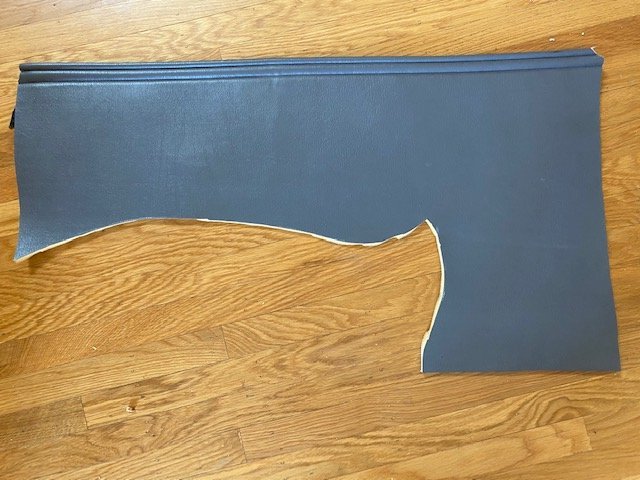
It's taking endless time to clean these seats. Driver's side done. I had two small cracks starting drivers side vinyl that I had the upholstery guy address. He mentioned something I'd never put much attention on -- Jeep made a mistake running the side strip of vinyl with the grain going vertical. That's why cracking on these panels is inevitable (except on the leather/ vinyl seats where the grain does run horizontally.) My passenger side was in good shape/ NOS issues but I had him run mist gray vinyl horizontally on that side strip as well. As most of you know, many of the Chry-co cars/trucks of this era shared the same color and grain interior. I found some mint vinyl off the seatback back-side of a Chrysler minivan. Finding this NOS isn't all that possible these days, so I go for the next best -- often untouched areas of the seats. And that minivan stretch was a good 46"x24".
-
Cost of the headliner/ overhead console recover was $300, but know I remove the old material and clean it up/ repair if needed before bringing it to him.
-
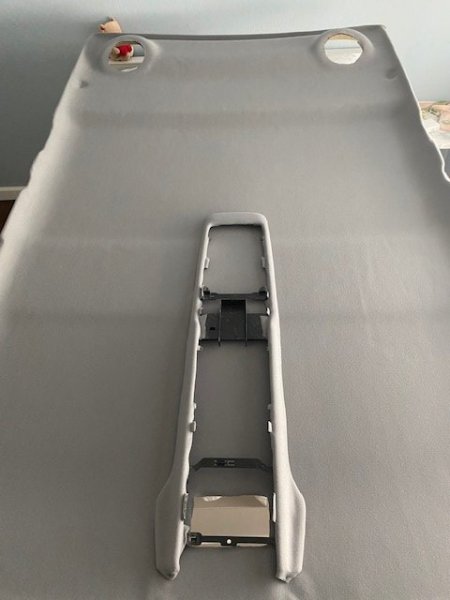
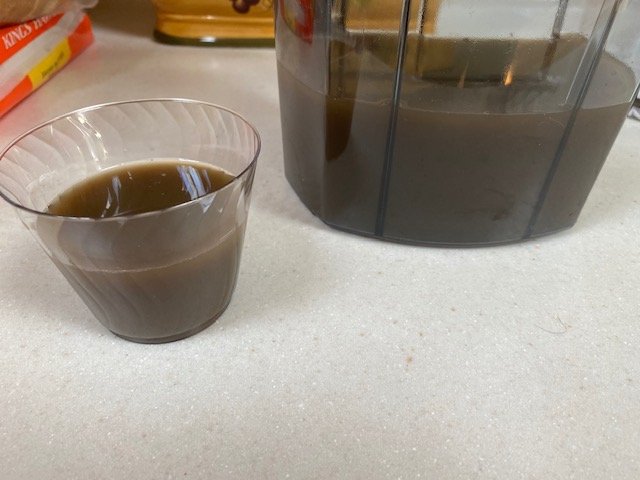
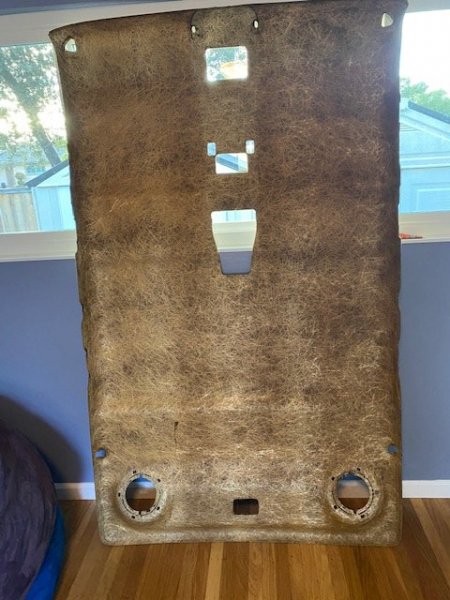
Got the recovered headliner, overhead console frame and visors back from Harold's Upholstery out in Santa Clara, CA. The guy is top notch, never an issue, even for this perfectionist. (He's the same guy that did my MJ seats and '97 XJ headliner et all.) Decided we're keeping the Country edition cloth seats over upgrading to Katzkin leather, so I took an upholstery cleaner/ vacuum to probably what I would consider the least used seat panel in the vehicle -- the back seat upper portion and after an hour and a half a cleaning the waste water was unbelievably filthy -- and these seats actually looked clean to the naked eye. I have a feeling the seat cleaning process is going to take a bit longer than expected. It's not clean until the waste water looks clean. Still waiting on the custom coil springs, and the new carpet I need is on back order until mid-May (color is out of stock).
-
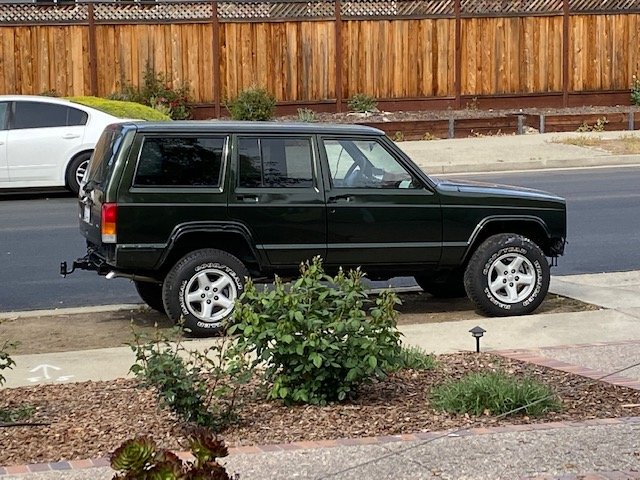
Removed the door handles, key cylinders, and roof rack so Mossy green got a much needed compound polish 3x, followed by wax. New badging to go on next. And headliner, overhead console and visor recover should be ready by end of week.
-
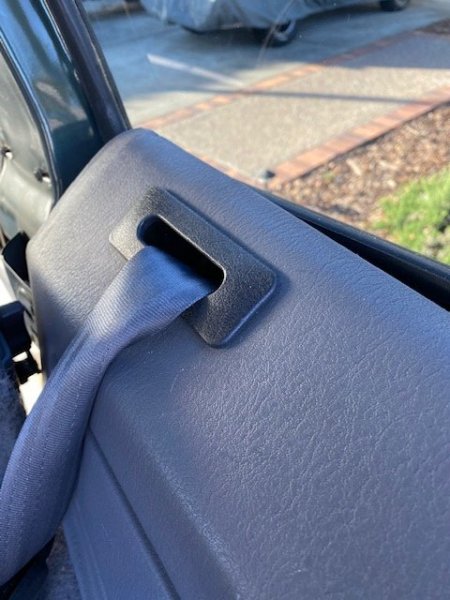
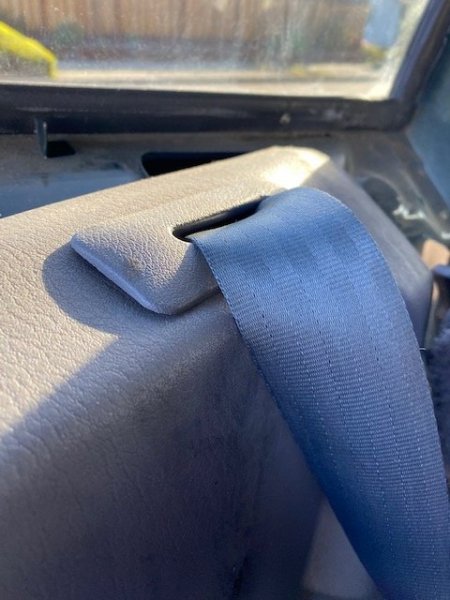
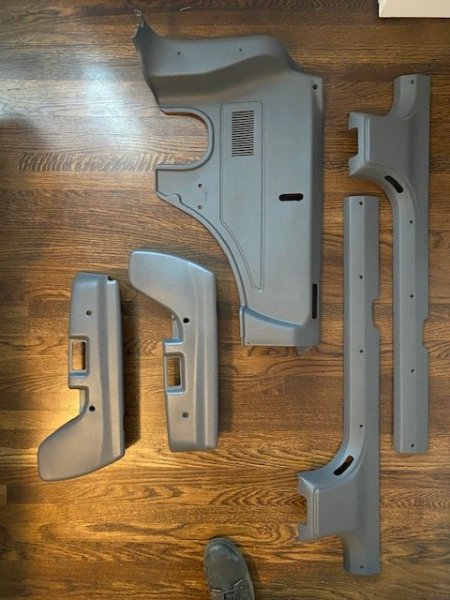
Been chipping away at a mix of things – added rear passenger factory footwell lighting – similar to the ’97 XJ I’ve got. Also ran the dual front power seat wiring for the Country edition mist gray seats. Dual power became available from the factory in ’00; Prior to that if there was a power seat option, it was driver’s seat only. As an FYI, there’s a guy in Ohio who rebuilds these seat tracks and does a heck of a good job freshening them up. NOS seat switches round up that upgrade. I couldn't help myself and decided to refresh the entirety of the interior panels with a fresh spray of color/low gloss clear coat. Started with the driver/passenger step-in trim, driver interior quarter panel, and power seat switch trim/bezels. Finally, as I dig through things it gives me the opportunity to clean up PO work. Rear sound bar wiring and replacement of one of the rear seat belts -- guessing this was a warranty repair, but difference was in the color of the seat belt quarter panel trim (one agate, one mist gray -- replaced the assembly with dual agate insert trim). Not terrible, but drives me nuts.
-
No doubt that's factory paint. Looks similar in texture to my '89 MJ when I got it.
-
HVAC wiring between years
Gjeep replied to TooManyProjects's topic in MJ Tech: Modification and Repairs
Box is the same, components are different. 92 and 89 components don't play together. You need Renix goodies. -
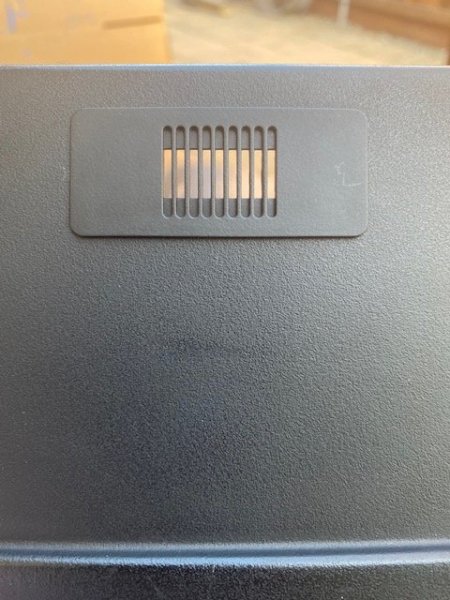
Interior side overhead console gets the same treatment as my '97 XJ... Handsfree mic. The microphone grille is from a '04-'10 BMW 5-series and looks right in the XJ. Headliner and overhead console will be out for a recover by end of this week.
-
I wish her luck getting the keys from me... I mean, yes, it is for my daughter.
-
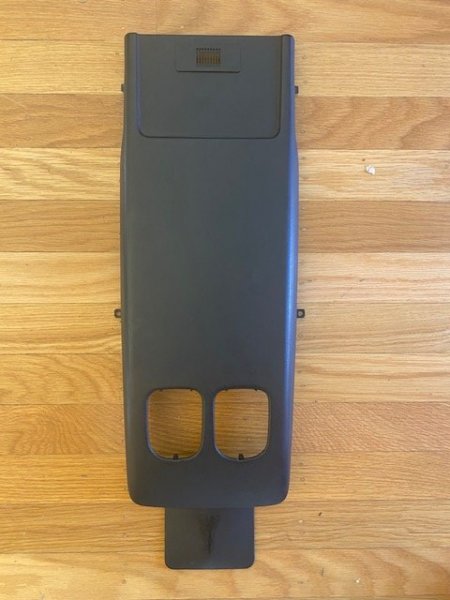
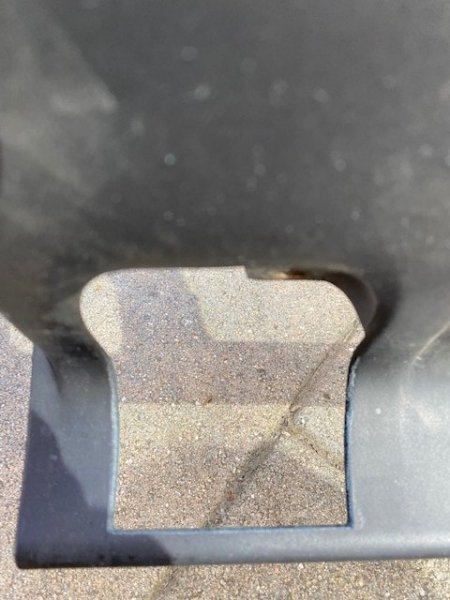
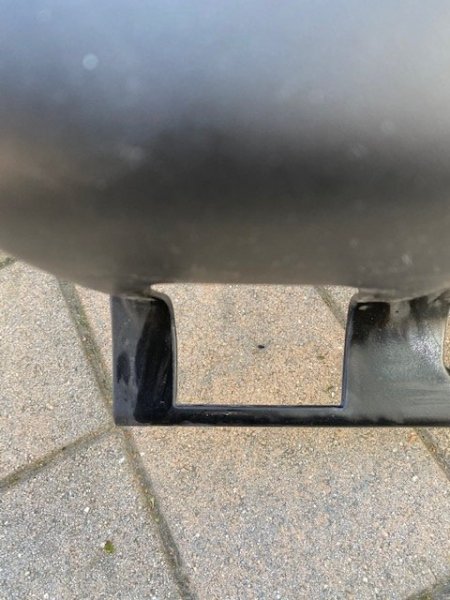
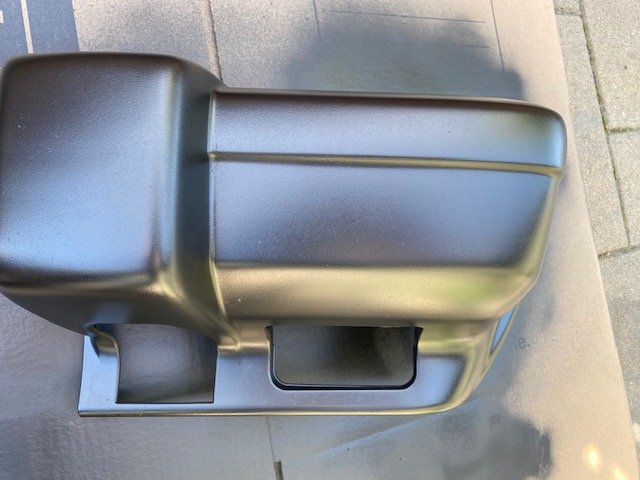
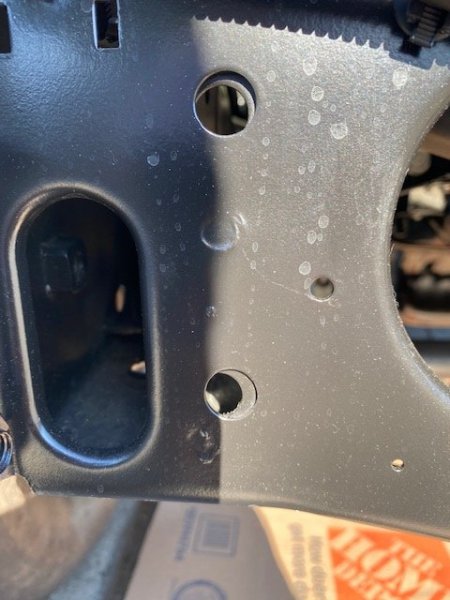
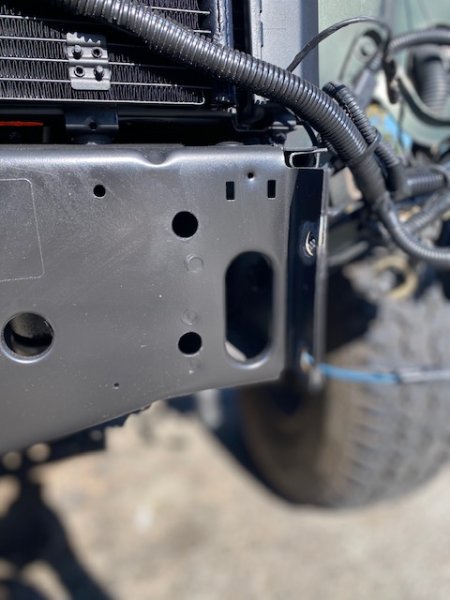
Had some quality Dremel tool time carving out the extra 1 3/8" needed for the factory 97+ XJ tow hooks to clear the bumper corners -- and the fog light openings. Dremel tool, followed by an assortment of flat and round files, and finished things out with a varied grit wet sanding. Final step is the SEM Trim Black rattle can to get things back to factory finish.
-
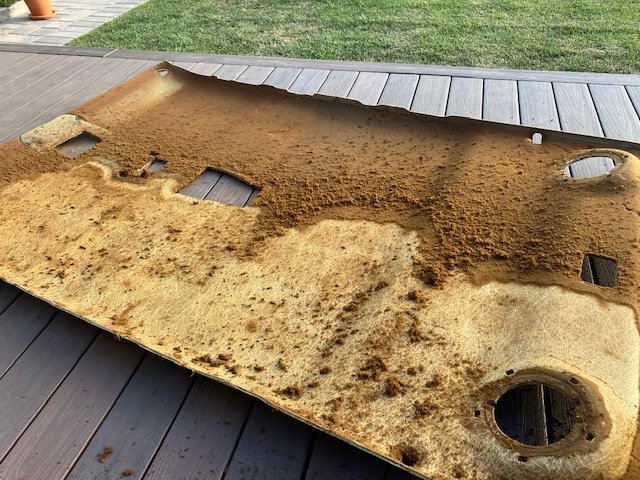
Fired up Mossy Green today after the make-over...Idled and sounded great. Couldn't drive it as the front suspension is bare minimum -- axle, springs and tires. Getting ready to swap over a low mileage Dana 30 and install all the new stuff. In between time, we pulled the overhead console and headliner. There were a couple small bubbles starting, and I just wanted to be done with it. The board was in near perfect shape once I buzzed off the old foam.
-
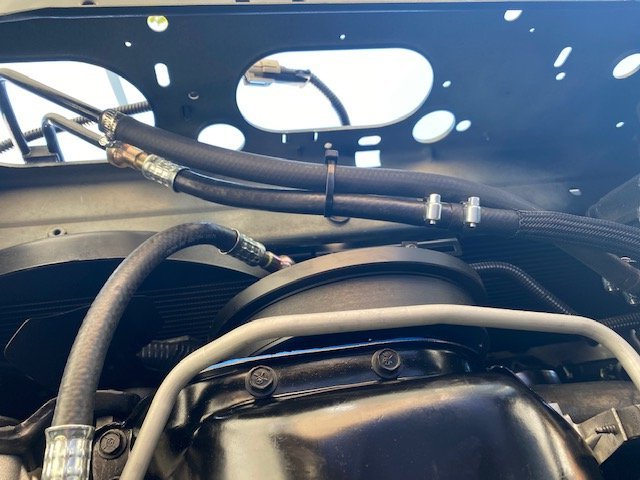
New transmission hard lines in and first gen XJ trans cooler connected up. I prefer this style of cooler over the newer XJ style that completely bypasses the radiator connections and is hung through the fins.

-
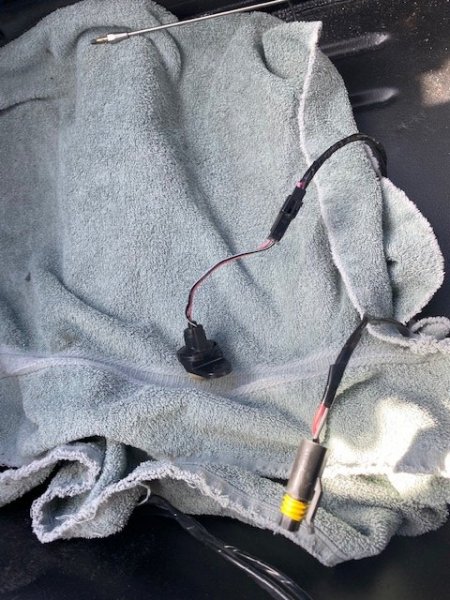
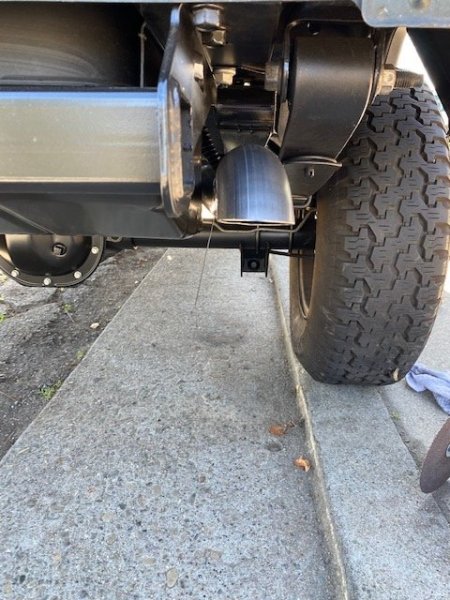
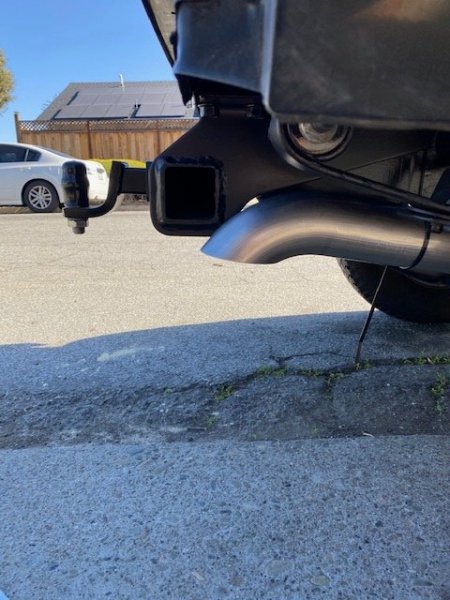
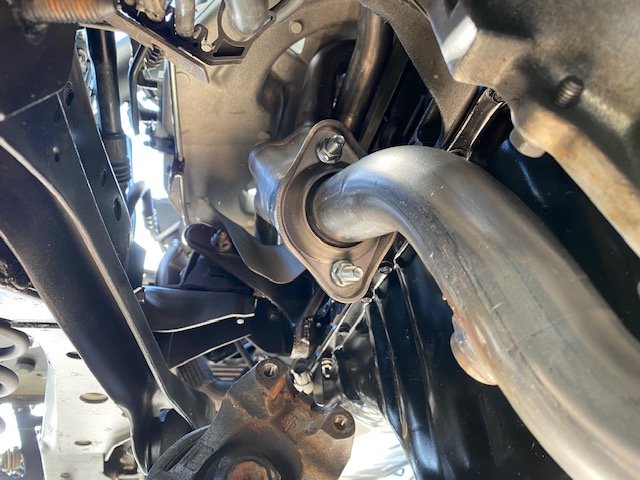
Banks doesn’t make a downpipe for their headers (not sure why)…so I had to source my own. Since I wanted to keep things stainless my search took me to Northeastern Exhaust (an ebay seller). Two thumbs up on the stainless steel 4.0L downpipe I got from them – zero issues with installation/ bends – absolutely perfect. From there the pipe connects to a Magnaflow California spec catalytic converter, then back into a Banks “Monster” stainless steel cat-back system. The pipe size is 2.5” and it’s a simple turn-down style tip same as stock under the rear bumper. After the muffler, the Banks exhaust system is a pre- and post- axle pipe joiner. The pre- pipe was exactly 4” too long out of the muffler. I can only guess this was done for those who don’t use a ‘universal’ (versus ‘direct-fit’) catalytic converter. No idea, but after trimming that down life was good. New Mopar oxygen sensors were installed and some additional high-temp wire loom was added around the wiring of those.


-
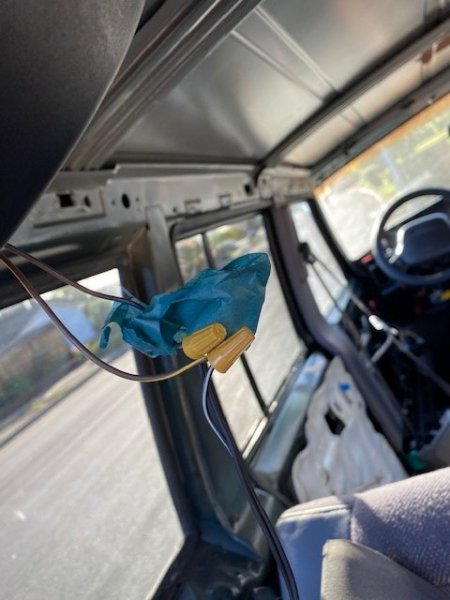
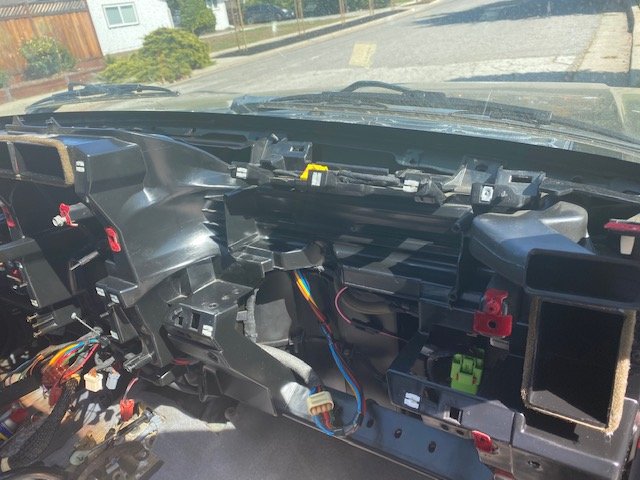
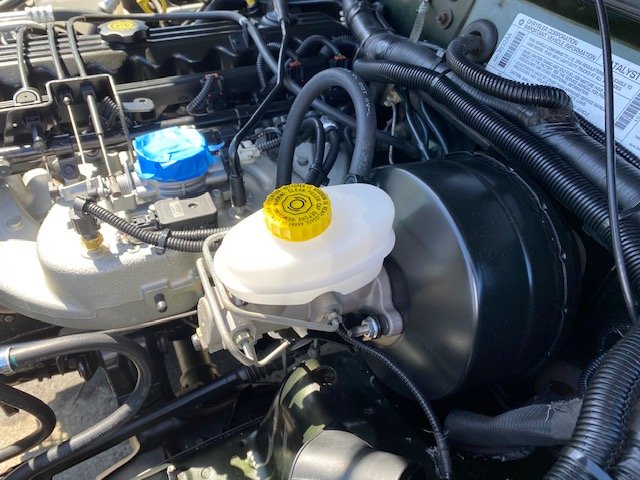
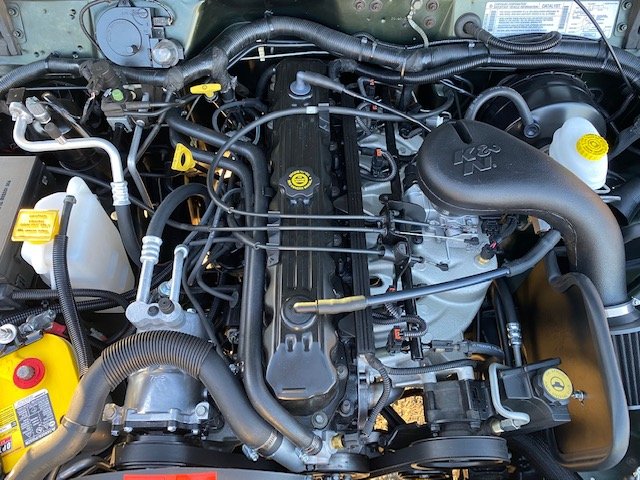
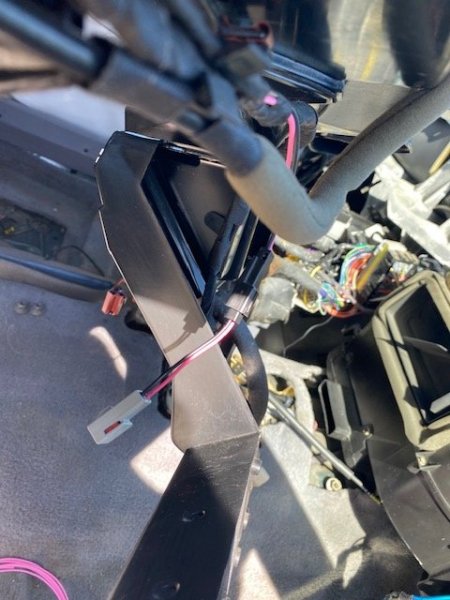
The dashboard is no longer hanging by a ziptie off the passenger side upper grab handle... back in place and buttoning up any displaced junction blocks/ wires. And with the dashboard back up, I was able to swap out some of the stopping essentials -- new brake booster/ master/ combo valve. While I was at it I bled the system several times to get the never changed fluid out (it was black in color). The entirety of the engine bay is shaping up too -- installed the K&N FIPK...and just waiting on a NOS efan to arrive. Trans lines will also be new and adding a first gen XJ style cooler to this XJ. Top side panels of the interior are being removed since the headliner, overhead console, and visors are soon to be recovered a near identical material to Jeep's 'mist gray' of the '97/'98 XJ's.
-
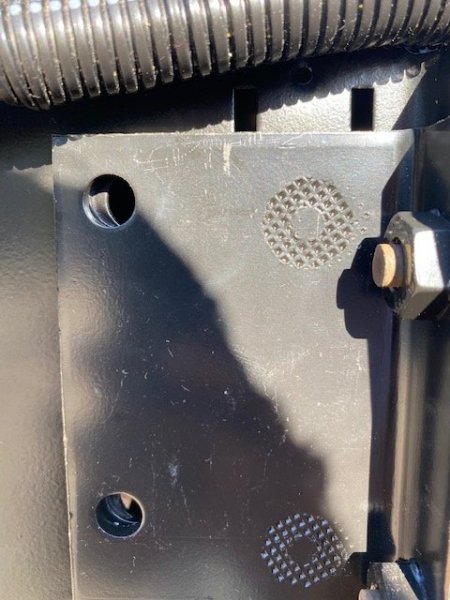
Had just a couple hours today to tinker, so I got the transmission line and o2 sensor brackets cleaned up and mounted to the oil pan. I also started to line up a NOS '97+ XJ tow hook bracket set I was lucky enough to find...but couldn't get things mounted up because the front cross member inboard support bracket holes needed to be fixed. The cross member is an over lay of 2 pieces of sheet metal... not at all -- no where near -- lined up properly before spot welded together. Easy fix to carve things out, but I lost my narrow window of time to get these mounted up. Next time... (As I side note, I didn't run into this issue with either MJ or past XJ's.)
-
A couple of spicy time capsule XJs
Gjeep replied to Minuit's topic in Craigslist/eBay... i.e. Not Your Stuff
All the stripes, emblems and moldings are crooked or wavy on the ‘88. -
Ok, it’s settled then... ‘96 was the first year. Thanks. Can cross that off my bucket list.
-
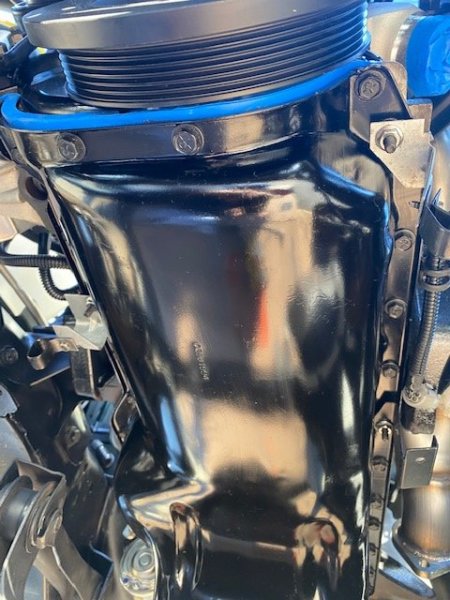
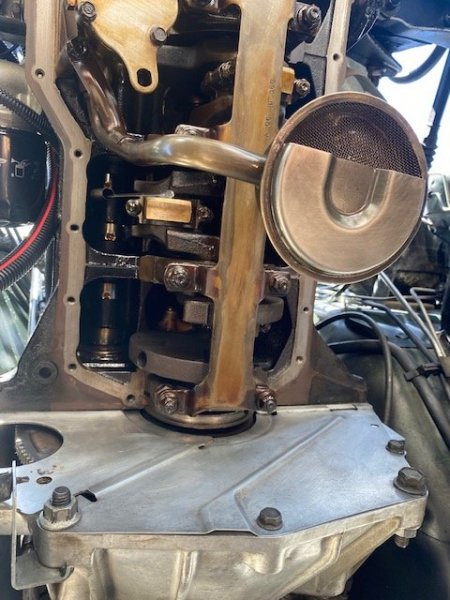
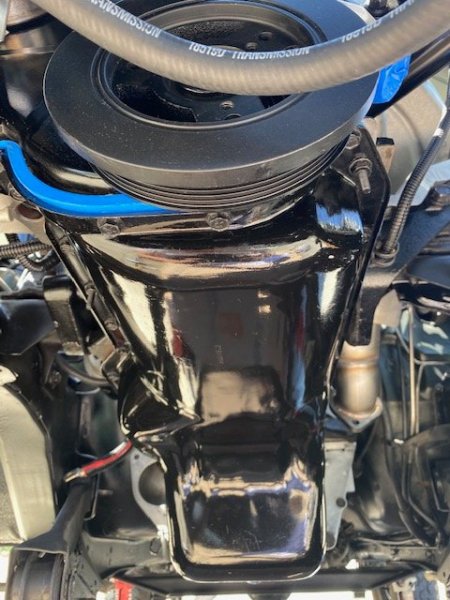
RMS/ new oil pan/ gasket and clean-up of that area – done. I have always seen on forums that the underside ‘girdle’ for the 4.0L arrived in ‘00/’01. My hunch has always been ’96 (when then lightened/ though ribbed the block). Seems like I’m getting closer to finding out the reality on this…the ’98 XJ has it. I didn’t need to do the RMS/ oil pan on my ’97 as the PO did it a year prior. Many moons ago when I had my ’95 XJ it did not have this piece. Anyone know for curiosities sake? And when I say ‘know’, I mean have seen first-hand? Now to get the new starter and transmission lines up, down-pipe and exhaust on. And then on to getting the dash back in place.
-
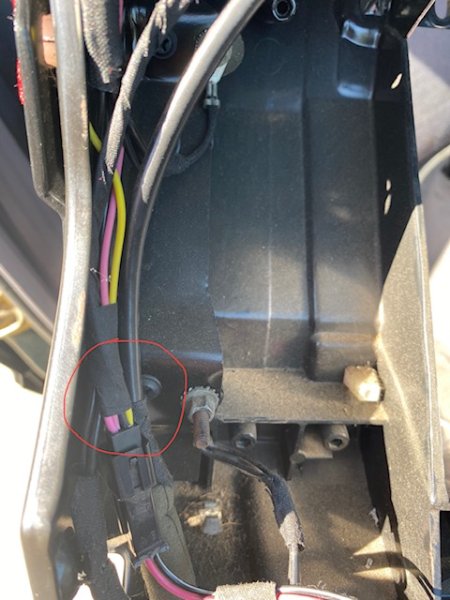
'97 and very early '98 XJ’s had a glove box light. My '98 doesn't...so adding it by dual wiring a factory connector with new terminals and running it over to a '97 XJ specific connector for the glove box light. I guess anything can be drilled out, but there's a specific '97 XJ specific glove box/ passenger side frame that would to replace the existing. It's an odd shape switch, square on one side and round on the other). I also did this mod on my '01 XJ long ago -- and now it's Mossy Green's turn.

-
Clean - '88 MJ eliminator CA
Gjeep replied to Gjeep's topic in Craigslist/eBay... i.e. Not Your Stuff
Correct, paint could use a refresh and only one mild bend (dent) passenger side bedside. -
I've seen this truck first hand. It's a nice, clean truck. Eliminator repainted. He bought the SnugTop shell I had on project 'Son of Stink'. $5500 is a great price. The BA-10 had been rebuilt by the PO he just didn't know exactly when. No issues driving. I was going to buy this for my daughter but decided an XJ would be better. https://www.facebook.com/marketplace/item/467599288009676/?ref=browse_tab&referral_code=marketplace_top_picks&referral_story_type=top_picks&tracking={"qid"%3A"6943956753276963860"%2C"mf_story_key"%3A"372554472967931270"%2C"commerce_rank_obj"%3A"{\"target_id\"%3A372554472967931270%2C\"target_type\"%3A6%2C\"primary_position\"%3A0%2C\"ranking_signature\"%3A6549120232072413184%2C\"commerce_channel\"%3A501%2C\"value\"%3A0%2C\"upsell_type\"%3A21%2C\"grouping_info\"%3Anull}"}