


gogmorgo
-
Posts
5984 -
Joined
-
Last visited
-
Days Won
4
Content Type
Profiles
Forums
Gallery
Everything posted by gogmorgo
-
Something something exhaust leak. Double check the manifold for cracks and leaks around the gasket. But you’re probably correct about a lifter.
-

Better Backup Lights
gogmorgo replied to AnotherOldJeepGuy's topic in MJ Tech: Modification and Repairs
There’s also the Key Parts replacement taillights now if you’ve got failing OEM housings and want the original look but taillights that are less than 35 years old. -
Better Backup Lights
gogmorgo replied to AnotherOldJeepGuy's topic in MJ Tech: Modification and Repairs
I haven’t done anything to enhance the reverse lights specifically, so take what I say with a grain of salt. In my experience, adding lights below a bumper is a great way to not keep them installed for very long. But other than recessing them inside the bumper, I don’t know of a better place if that’s the route you want to go. You might want to double check local regulations too in regards to adding reverse lights, you may not get away with having more than two in total in some places. Uncovered white lights facing rearwards that can be switched independently of reverse gear are also a definite no-no. There are lots of sketchy spots in the reverse light circuit that will reduce light output. The ground behind the driver’s taillight, old cloudy bulbs and scuzzy sockets, the taillight harness connector behind the driver’s rear wheel. With an automatic trans the reverse lights failing is one of the first signs of the neutral safety switch plugging up with road grime. Then factor in a cloudy plastic lens and failing reflectors in the taillight housing and probably a fair bit of dust inside it too if it’s never been cleaned out in 35 years. It all adds up. An alternator getting weak will also reduce light output. I’ve got no complaints about my reverse lights, but everything I listed above has been taken care of at some point. -
dimmer Dash Lights Work, but Dimmer Doesn't...
gogmorgo replied to NickyV's topic in MJ Tech: Modification and Repairs
I would stay away from used headlight switches myself, especially if you don’t have a relay harness installed. The issue with the headlight switches melting and catching fire is due to the switch arcing every time you make contact, and burning the contacts a little each time you switch it. This degrades the connection, and leads to increased resistance in the switch, which makes heat and decreases voltage available to your headlights. And sets things on fire. And back when my switch caught fire I dug through junkyards trying to find another connector and every single one I found was melted. I wouldn’t hold out much hope for finding a used switch that isn’t already on its way out. This isn’t strictly the fault of the switch design, although it could be better, but with halogen bulbs you could be pulling 12-15 amps through it so it’s a pretty decent arc. LED headlights will cut that in half or better if you’re buying decent ones, but doesn’t completely fix the issue, and they may not always be happy getting reduced voltage through a scabby old switch. Especially if you’re buying junk LEDs off Amazon. A relay harness shouldn’t interfere with factory fog lights. The way the circuit is set up the fog light switch only gets power from the low beam side of the dimmer switch, so the low beams have to be switched on to get power to the fog lights. If you’ve got aftermarket lights and/or custom wiring it’s anyone’s guess. What a relay harness will interfere with is daytime running lights. It’s probably not a concern for most of you, because it’s not common for US trucks to have them, but DRLs were federally mandated in Canada for anything built or imported after ~1989. I can go into more detail there, including workarounds, if anyone wants, but I don’t want to muddy up this thread for no reason when it’s not relevant to the OP. -
1989 Fuel Pump replacement
gogmorgo replied to Jeepers8606's topic in MJ Tech: Modification and Repairs
The ‘96+ returnless system should be easy enough to identify. You’d only have one fuel line going to the rail. If you’ve had a ‘91+ cluster installed you probably have a ‘91+ sending unit installed to go with. I don’t remember the actual result of mixing Renix and HO fuel gauge and sending unit, just know they’re not compatible. I’ve never confirmed either if MTS is making the ‘91+ sending unit, I’ve seen people say definitely yes and definitely no. To me your fuel pressure seems on the low side, but low fuel pressure doesn’t tend to throw all the codes you got, you just get symptoms of running really lean. You also don’t necessarily get a good pressure reading after a few seconds of priming, especially if you’re sucking air with a mostly drained fuel tank. I’d be suspicious of a wiring concern connecting all the sensors. There’s a ground at the back of the head/manifold (I don’t remember exactly where) with a few wires going to it. Of course you’d also get a bunch of codes if you’ve been unplugging stuff, creating vacuum leaks, etc. And just confirming you’ve got two instances of code 27? Looks like you said you cleared it and it both did and didn’t come back. -
Ugh. I hate how interconnected everything is now. For how much effort goes into locking everything down, it’s so easy to miss a step and leave the front door wide open. The continued spamming of notifications we just automatically close before reading can’t help either. Glad you got this step sorted and hopefully get some resolution over the situation soon.
-
Usually for something like that to happen you would have needed to allow a remote access connection from your end. It’s possible to force a connection through, although anyone capable of doing that probably wouldn’t just be using the remote access to control your computer, they wouldn’t make it obvious they were in there looking at stuff. Someone with physical access to your computer could have set up permissions so they could come back in later. It’s also possible to have a worm of some kind built into a sketchy file that’ll set the permissions if you open it. With the device disconnected from the internet, power it up and see if there are any allowed permissions for remote access and turn them off.
-
Mine leaked from where the filler nose connected to the tank, but the tank also had a rusty spot on the side that was constantly wet with gas. I put a new tank in it. The tank straps hang from the bed, so you either need to drop the tank or cut a hole in the bed to see the top of the tank. The tank isn’t that bad to drop as long as it isn’t full. if you don’t want to drive it until it’s almost out of fuel, disconnect the fuel line and run it into a container, and jumper the fuel pump relay. Wire brush the strap bolts and hit them with penetrating oil the day before you drop it. They’re hanging from J-bolts so you don’t need to back the nuts all the way off, just far enough you can lift the j-bolt out of the hanger.
-
Old to New Swap - Questions?
gogmorgo replied to 1999 MJ's topic in MJ Tech: Modification and Repairs
Just a heads up you know the MJ uses the 4-dr XJ doors, not the 2-dr ones off your donor, yes? -
Cold weather effects on starting
gogmorgo replied to NC Tom's topic in MJ Tech: Modification and Repairs
That’s pretty low, like it-may-be-a-problem-low, but shouldn’t be not-starting-low. But coupled with some extra resistance though the cables or a connection that could add up to a problem. Have you tried boosting it off another vehicle to see if it changes anything? -
Cold weather effects on starting
gogmorgo replied to NC Tom's topic in MJ Tech: Modification and Repairs
Not to like, warm climate shame anyone or anything, but I’ll just throw it out there that it’s supposed to hit -27°F tonight here. And this really doesn’t sound cold-related to me. Cold weather problems usually just act like dead batteries or plugged fuel lines. If cold means humidity, that opens up other possibilities. Water under the distributor cap could interfere with it, extra humidity could cause problems for spark plug wires with deteriorating insulation. It could screw with the ecu. If the insulation on the starter windings is failing it could short them out, cause it to crank slow or not at all, and draw a ton of current and drop battery voltage low enough to screw with fuel pump or the ecu. Any electrical windings, like an alternator or relay could be more prone to shorting. Do we know what’s missing when it won’t start? Spark, fuel? Do we know what battery voltage is at while it’s cranking? If you let it crank slow for 15 seconds does anything (starter, battery cables) get really hot? Does it change anything if you jump power direct to the starter trigger instead of going through the key switch? Try boosting off another vehicle, or using booster cables to parallel your battery cables? Renix has a starter/ignition relay that handles power for everything, yes? Have we tried bypassing that? I don’t know if we can discount the stumbly idle yet after correcting the fuel rail leaks. If it’s not the fuel leak causing that, unfortunately it would likely be a second problem over the starter cranking slow. -
X2 on Krusty’s hitches. https://m.facebook.com/profile.php?id=100063723510791&__n=K It’s a near perfect reproduction of the 5000lb Drawtite hitch from back in the day, and anywhere it’s not identical it’s better. I got one of his first batch what, nine years ago now I think? and no complaints at all. I’ve got pretty close to 5000lbs behind mine, which I don’t think I’d want to do again but the hitch wouldn’t be what I’m worried about there, more that most Comanches aren’t rated for much more than 3500lbs. The two things to watch out for though are that it is designed to complement and bolt to a factory bumper so if you have something else it might not fit the way you’d expect. The other thing is it’s not a rated tow product which may cause raised eyebrows in the unlikely event anyone official ever looks at it, although anyone expecting stickers to stay on a hitch on a 35 year old truck is out to lunch anyhow. Homemade or shop-built custom hitches aren’t illegal or even uncommon, you’re just on your own liability-wise if something fails. And if you’re towing something heavy enough to damage the thing on the road you’ll have much bigger problems than the lack of a sticker on your hitch.
-
Cold weather effects on starting
gogmorgo replied to NC Tom's topic in MJ Tech: Modification and Repairs
I don’t have a specific recommendation on brands, no. I’ve never had bad luck with whatever the closest parts store carried. Probably your best quality for dollar value would be to take it to a local automotive electrical shop that repairs and rebuilds starters and alternators, but those shops are getting few and far between anymore. -
Cold weather effects on starting
gogmorgo replied to NC Tom's topic in MJ Tech: Modification and Repairs
How cold is cold? Take a voltmeter and measure voltage between both battery posts, should be around 12.7 if you’re fully charged, but that’s not a great test of battery condition on its own. It might be Get a helper to hit the starter and watch the voltage dropping. If it goes below 10ish that’s not good. Either your battery isn’t charged or it’s toast. Heat and sitting discharged are the biggest killers of batteries, the cold reduces their output but as long as they’re not discharged it won’t damage them. A good battery should still crank your engine over enough to start it down to -40. If you do suspect your battery, most places that sell them should be able to test it for you if you bring it in. Ohm tests for battery cables are basically useless. They’re designed to carry hundreds of amps, but if a single strand of wire is connected you’ll still see zero ohms. You need a voltage drop test to confirm they’re good. If you test the voltage between the positive terminal on the starter and a good ground on the engine while it’s, cranking it shouldn’t be more than 1.5V below what you saw at the battery. If it is different, it tells you there’s a problem in the cables or connections somewhere. You can use your voltmeter again to test on either end of the cables or on either side of a connection while you’re cranking, and if you see much voltage difference between the two points that’s a bad point. Either clean up the connection or replace your cable. Just be careful not to overheat your starter. Don’t crank for more than 30 seconds, and give it a minute or two between cranking. Starters often get weak as they get old. The windings can internally short (especially if it’s been overheated) and it’ll still work but will turn slowly. If your battery and the cables check out, there’s a good chance it’s the starter itself. Any time I replace a starter the new one cranks over tons quicker than I’m used to. -
The coil rails are cheap enough online. But I’ve also had a couple vehicles recently with misfire codes where there was just a bit of corrosion on the tip of the coil where it connects to the spark plug, and it just took a squirt of electronics cleaner to take care of it and they’re running fine again. The problem with misfire codes is that you just have the knock sensor telling you the cylinder isn’t firing, without much else in the way to say what’s going on. Could be literally anything, from a fouled spark plug to a hole through the piston. But usually they’re ignition related. Usually for diagnosis I start with a visual inspection to make sure everything’s plugged in, then I’ll pull the coil and swap it to another hole if I can (don’t think that’s an option here) to see if the misfire follows. Then pull the spark plug. Usually a visual inspection of the plug is enough to diagnose but you can also swap them between cylinders to see if the misfire follows it. If a new plug and coil don’t solve it, then you’re looking at something deeper in the engine, stuck valves or whatnot. 1294 is an idle speed thing that I would expect will go away when you solve the misfire. 1494 is evap related. It indicates an issue with the leak detection pump. I don’t know if there’s anything super specific in the code itself, seems like it could be a circuit failure, or an actual leak somewhere. But it’s probably not related to the misfire.
-
Build Your Own Harness: A Step-By-Step Guide
gogmorgo replied to NickyV's topic in MJ Tech: DIY Projects and Write-Ups
Dang. Hard to believe I put this together ten years ago. I always intended to put together a write-up but got sidetracked trying to make a harness that wouldn’t interfere with the factory daytime running lights. Good on you. This is still IMO an excellent electrical project to tackle as a beginner. It’s a simple circuit that involves a lot of connections but it’s easily broken down into small steps. People are often apprehensive about taking on wiring projects, and I think this one really helps to build confidence. I think in the original threads where this diagram shows up I would have mentioned the 10awg wire is massively overkill for the stock headlights. I had decided at the time I was going to do something with high-powered H4 lights so I overbuilt my harness in anticipation, but after having the relays installed I haven’t ever felt I needed to upgrade beyond sealed beams. You could very happily make the entire harness out of 14 gauge to run sealed beams. Electrically I’m sure you wouldn’t even need 14 but for mechanical strength and corrosion resistance I don’t ever really use anything smaller. I hadn’t really figured out soldering irons either when I made that diagram. I crimped absolutely everything, and any soldering I did at the time was done with a torch. As I’ve since found out, the trick to soldering irons is cheating. Melt a blob of solder onto the iron, then use that blob to conduct heat into the wires. It works way better than just trying to heat up the wires with the iron. Keep the iron sitting in the blob on the wire until the solder pulls itself into the wire. Using a torch will heat up the wires more quickly but the flame is liable to melt and burn your insulation. It’s also going to be difficult to solder wires with corrosion on them, even using flux or resin core solder if the corrosion is heavy enough. Ideally you’d replace the wires entirely but that’s not always practical, so I try my best to scrape the wire back to shiny metal before twisting and soldering. I’ve had issues with my spade connectors coming off the relays, or bending and contacting other relay pins, or just getting loose over time. You can get relay pigtails that hold all the spade connectors together. Really seems to help keep everything connected. For making Y-splices, if you will, or a 2-into-1, instead of trying to splice into the middle of a wire I’ll snip it off so I effectively have three wires. This makes it much easier to slide on heat shrink tubing. I’ll pick two of the three wires to lay parallel next to each other and one pointing opposite. I’ll strip back one of the pair of wires further than the other two wires. This lets me twist it with the paired wire and leaves a longer untwisted tail that I can then twist into the opposite wire. Then I’ll solder the whole thing together, making sure the paired wires lay parallel and as close together as I can get them. If you’re splicing this way, it’s imperative to use dual-wall heat shrink tube, hold the parallel wires together, and make sure the adhesive lining melts. It may seem a little sketch but it will hold up under the business end of the trucks spreading the salt on the highways, and if it works there I’m pretty confident it’ll work anywhere. But it is possible to eliminate the need for a mid wire Y-splice entirely in this harness, and run separate wires for each headlight back to the relay. Two ways to go about it. The first is just to use a female spade terminal for a larger wire diameter at the relay and just push both wires into it. The second involves a fancier relay. You’ll notice the standard relay has both an 87 and 87a terminal. The 87 pin as you know gets power when the relay is energized, and the 87a gets power when the relay is not energized. There’s lot of functions you can use that for. For example if you had fog lights that you wanted to power only when the high beams aren’t operating (most jurisdictions require this) you could run the power for the fog lights off the 87a terminal of your high beam relay, so when you switch on the high beams the fog lights lose power. But you can also get relays that are externally identical to the standard relay but with a second 87 terminal in place of the 87a. This will allow you to run each headlight to separate 87 pins on the relays. You’d be running the extra length of wire up to the relay, but you’d have less complicated connections as a result. As far as crimp-and-seal, or the solder-and-seal connectors go, I’m a little skeptical. It’s very easy to compromise the heat shrink coating while crimping, even if you’re using the correct crimpers for insulated connections, and anywhere the crimp doesn’t get made securely leaves you a gap for any moisture that makes it way in to sit and corrode your wire. I’m also not convinced the low-temp solder used is enough to ensure a good connection, or firm enough to provide mechanical hold. For butt splicing wires I prefer to twist them together tightly for good mechanical hold, solder them for good electrical conduction and to fill all the gaps inside the connection to prevent moisture intrusion, and dual-wall heat shrink tube to seal them and provide strain relief to the connection. I try my best to twist both wires around each other, not just wrapping one around the other, for the tightest hold I can get. If I’m twisting together two wires of dissimilar sizes, I try to twist the larger one around the smaller, which usually forces the smaller one to bend as well, otherwise you generally just end up wrapping the small wire loosely around the larger. When I’m attaching terminals to the ends of wires, I prefer to start with an uninsulated terminal (or pull the insulation off it), crimp it on, fill the barrel of the crimp with solder, and then heat shrink tube it to seal it. This again results in a firm mechanical hold from the crimp, a good electrical connection and filled voids in the connection via the solder, and seal and strain relief from the heat shrink tube. If I remember when it comes up on something I’m working on, I’ll try to take pictures of what all I’m talking about to better illustrate. But that all said, there’s lots of ways to do everything. The method that is easy, efficient, and affordable for you and accomplishes what you need it to do is the correct method. Not everyone is dunking their wiring in salt water for half the year, or shaking the crap out of it, or covering it in lumps of mud or ice to dangle and put stress on it. As long as whatever you do works for you, it’s good. Don’t let perfect get in the way of good.
-
Nah that post was up for two days before I said anything. It’s the way of it. You get jumped on if you say anything that might be construed as an opposition to that cult of personality. The no politics rule is absolutely a one-way street, and that’s even more embarrassing than supporting the cult.
-
So why is it politics are okay when people are waving Trump flags?
-
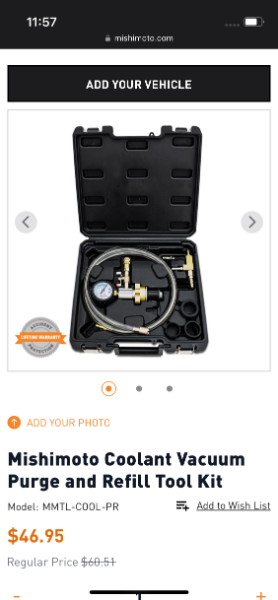
Best way to get all the air out is a vacuum fill. The name brand tools are not cheap but I see online they start under $50. They all kinda work the same, you need a decent enough compressor to ensure air flow and the venturi effect sucks your system down, then there’s a valve to block off the venturi and another to suck the coolant up a hose from a jug or pail. Simple system, hard to screw up. I’m sure the cheap ones are fine. https://www.mishimoto.com/mishimoto-coolant-vacuum-purge-refill-tool-kit.html?sku=MMTL-COOL-PR&srsltid=AfmBOop7c2Qg7rhbIjmrXtYHw_5jSmPk_9yOX7kVqc6sMfijqieNfnURIV8
-
We’re all embarrassed for you.
-
Sometimes latches won’t release if there’s pressure on them. Have you tried pushing inwards on the door?
-
I’ve definitely visited the appliance section at the local dump with a cordless death wheel.
-
Obviously all we can do is speculate, but I’d agree the wires likely were bent and pulled tight when installed. It’s also a stress concentration point and vibrations flexing it back and forth will do damage. It’s pretty common to see this sort of damage on sensors and connectors, anywhere wires are held firmly in place at the end but allowed to wiggle around. Its also possible it happened when they were bundled and jammed into the box. Some of these parts sit on shelves for years, and just unbending the insulation can sometimes cause damage. Just a little nick in the wire plus some road salt and corrosion will end the life of the wires in a hurry. The coiled wire in the sensor is tiny and won’t take much to corrode through. I’ve also seen similar damage from wire-piercing probes. The only context you’d do that is testing so unless someone installed and tested it and put it back in the box that’s unlikely.
-
Is a MJ reliable enough for a daily driver
gogmorgo replied to typicaljeepname's topic in MJ Tech: Modification and Repairs
No vehicle is 100% reliable. The only thing buying a new vehicle off the lot with a warranty gets you is someone else is responsible when it breaks down. Any vehicle can be reliable enough as a daily driver. If you look after it, keep up on maintenance, even a Yugo will last you a long time. The people buying Toyotas for reliability are also going back into the dealers for oil changes and having the whole thing looked over and signing blank checks to have every little problem addressed. If you don’t do that even they go to crap. But if you do keep up on maintenance, the little things will stay little and won’t turn into major problems. Very few things fail catastrophically with zero warning signs. And pretty well nothing on an MJ is too complicated for a home gamer. When you first acquire it you should expect a pile of deferred maintenance from the previous owner. That doesn’t really mean much. Doesn’t really matter how much you spend on it either. The expensive shiney ones are often just a quick flip with questionable mods and budget repairs hiding under the shiney paint that you’ll need to redo soon. I’d rather have one that’s solid but still mostly original, regardless of mechanical condition. Fixing things is usually easier when someone else hasn’t halfassed a repair first. Undoing someone else’s jenky work is always frustrating to me. I also wouldn’t worry about making it look nice until you know you can drive it safely. And then keep driving it. Faded paint and dents don’t stop you from driving, but brake failure does. Spending a whole pile of time, effort, and money making it look nice and having to tow it home every other time you go out is how projects get sold before they’re finished. I daily my longbed, at 558,000km. It’s not anywhere close to mint and I definitely don’t baby it. It’s been to both Minneapolis and Vancouver, BC this summer. Keep on top of regular maintenance and you’ll be fine. I won’t say it’s been perfect, but anything I’ve had happen is pretty minor, a half-hour fix in the parts store parking lot. Tools to fix whateverYou don’t need all the fancy tools the YouTube celebrities have. Impact wrenches are nice, but anything on an MJ can be repaired with wrenches, a good socket set, and a breaker bar. And don’t be afraid of failure. The only way you’ll learn to do things the right way is by doing them, and making mistakes is part of learning. Life is too short to drive boring cars for the sake of imaginary reliability. -
turn signals don't work when headlights are on
gogmorgo replied to trppy7's topic in MJ Tech: Modification and Repairs
X2 on bad grounds. With a dual filament setup you’ll end up with the one circuit grounding through the second filament’s circuit, and then when the second filament gets powered you lose the ground through it. You might also see all the marker lights blinking dimly with the turn signals. If they worked fine before the Oracles went in I would double check that they’re wired in correctly. I would also double check whether or not they say the Oracles are fine without an electronic flasher unit. A conventional flasher relay needs load to function, and LEDs aren’t always enough load. If you have a bad ground and it’s blinking the whole marker light circuit with your headlights off it’ll add load to the system, which might be enough to make a conventional flasher behave normally, but then with the headlights on you lose the extra load.