

gogmorgo
-
Posts
5984 -
Joined
-
Last visited
-
Days Won
4
Content Type
Profiles
Forums
Gallery
Everything posted by gogmorgo
-
The lights should work regardless of which tcase it came with, the cluster and wiring are the same down to where the tcase harness plugs into the main wiring harness. Is your CAD functional? On a CAD equipped model, the part-time light is triggered by the switch on the CAD, not by the tcase. If you locked the CAD, your light won't work. The wires are also somewhat exposed down there, so there's a chance they got caught on something and pulled out. That happened to me a long time ago and I decided it wasn't worth fixing, but then this summer I swapped in a 242, just plugged everything in the way it was for my 231 (minus the wires and vacuum going to the CAD... I swapped in a single-piece shaft) and to my surprise the part-time light was working again. Because on a 242 it's triggered by the tcase, not the CAD. But yeah, if you haven't locked your cad, check the wires running from the tcase to the front axle. Should be one orange and one black.
-
:D
-
Wrecking yards? A number of us (myself included) may have parts XJ's sitting around, and obviously wouldn't need a part from the back. You could try posting up a wanted add in the classifieds section here. Or also locally on craiglist. I'm not 100% certain what you're referring to, as beyond the tossing of useless parts into the back, I haven't spent much time in the back of the XJ. A picture would certainly help. As to the posting of pictures, Comanche Club doesn't provide hosting. In order to post a picture, you need to use a third-party host (imgur, photobucket, heck even facebook if you've got the right privacy settings) and then link it in from there. See this thread.
-
What, don't you take blurry photos as evidence?
-
Oh poo poo. Let them have their fun. My Lada is about 120,000 miles short of 150k. I'd be super excited to get it that far, too.
-
They're definitely better looking in person for sure. The new girl at work has one. I lean a little more towards the Renegade (Trailhawk, obviously) but I'm a long way from buying a new car. I may (slim chance) get to pick myself a new work vehicle though, and I'll be trying to get myself a KL Trailhawk too if they don't make me get a truck.
-
Arguably that's already the case. There are probably just as many J-trucks kicking around Saskatoon as there are MJ's. +1 on the Gladiator name. Every single Jeep truck out there will fight to the death :D
-
So some pics of the fog/flood light wiring. At some point I might try to make a DIY. Maybe. I likely won't get around to it. The factory switch wiring and connector is present, whether or not you have factory fogs... Grab the switch and plate at a wrecker. The three wires for the connector are: Black- ground for the indicator light Purple/white- low beam switch, i.e. The 12v feed. Brown/white- switch wire, triggers the relay. You'll notice there's a bit of @#$%ery going on, though. In order to make it independent of the low beams, I snipped the wire (taped it off and to the other wires so it didn't get lost in the unlikely event I want to reverse this) and spliced a wire to a free constant 12v spot on the fuse panel. Obviously that would be illegal for real fog lights in some jurisdictions. Also, I think the brown/white wire is a different colour for Renix. Red/green maybe? I'd have to look at the '88 diagrams. Back under the hood, this is the 10-pin connector for the headlight harness, near the air box. The brown/white wire from the headlight switch comes to the connector. I cut it a bit above and spliced a connector for the relay onto it. Next time I run into the city I'll pick up a proper relay socket and redo this, but it's good enough for proof-of-concept. And this is where I grounded both the relay and the flood lights. Easy to get at more than anything else. The red wire running along the edge of the header is the 12v feed to the relay. I'll stick in a higher gauge wire later, but I borrowed this because it conveniently already had a fuse-holder in it. I'll be changing it though because it's a mini fuse, like, the mini mini ones, not the regular mini ones... Je m'en câlisse du propre mot.
-
Did you crank down the bolts while the truck was still in the air and the axle was fully drooped? The bushings only have so much play in them, so not waiting until the weight of the truck was sitting on the springs before tightening the bolts could force the springs to stay somewhat drooped until the bushings had sorted themselves out... i.e. settled.
-
3.55 ratio with manual trans.
gogmorgo replied to 90MJ406's topic in MJ Tech: Modification and Repairs
3.73 is the more common ratio in KJ 8.25's, and as a bonus come with disc brakes. Just an FYI. My tentative plans just now are to put in a KJ 8.25 with 4.10's (less common) to match with an hp d30, eventually for 32's or 33's. But when I say tentative I mean this likely won't happen for another couple years if at all. -
Awesome! And in another 150,000 you can join my club! Kidding of course. It's a pretty good feeling hitting a milestone, especially if you're the one who put the miles there and looked after it so it could make it that far. I've only put the last 20,000 miles onto mine, but it's my intention to watch that odometer roll back to zero. I've got a little less distance to go than you do, but I wish you well on your journey.
-
I pulled mine at Wesman Salvage for $35 or so, but I'd have to check the receipt. It's not perfect, a few dings and some surface rust, but it's a lot better than what's on it. As to the bolts, the further forward (away from the bumper) they are, the harder they are to get out. You can't really drill them out with the bed installed, but the nuts are just tack welded to the inside of the frame. Given a long enough punch or chisel, it's pretty easy to just knock the nut off the inside. I had to do three of mine, the two side ones closest to the bumper and one of the bottom ones. I broke the bottom one myself a couple years ago, but the other two were already gone when I got there. The two came off the sides easily enough, but the bottom one just wouldn't go... eventually a combination of hitting the side of the nut and the broken end of the bolt got it out, and I realized it had a massive sloppy not-factory tack (likely the same culprit who "welded" on the "reinforcement") that not only welded the nut to the frame, but also to the bolt... which is probably why I broke it. I've broken quite a few bolts under my MJ as well. Now I'm at the point where if I'm going to have to take out a bolt I haven't touched before I hit it with PB'laster every day for a week before I touch it. And I still break bolts, although not as many as before. And in my defence, the bolt I broke on the bumper bracket was welded to the nut.
-
Yeah, that. When I swapped the '93 motor in, the pressure sender was something I had to reuse from my '91.
-
Yeah, I remember you posted some pics once. Yours was a lot cleaner than mine was, like they were deliberately cut to that size and shape from new metal and then professionally welded in place to reinforce a bumper in good condition. Mine looked like someone's realized the bumper was getting rusty, went out to the landfill, pulled a couple chunks of rust that were sorta the right length, and then closed his eyes and spattered weld all over the place hoping it would do something. The weld on one side is almost two inches in diameter. I've got another bumper I pulled last fall sitting at my parents place that I'll pick up tomorrow. I'll be running into the city for work sometime next week so I'll pick up a grinder. Hopefully I'll have the hitch and bumper installed next weekend, if the weather holds out. For the last couple days I've been driving around with my license plate zip-tied to the splash guard thing.
-
36 watts each, so that's 72 watts of LED. But yeah, hard to believe that much light is coming through a 15 amp fuse, and that the fuse is overkill by more than double...
-
Removable PreRunner tire carrier idea
gogmorgo replied to Jackrabbit41's topic in MJ Tech: Modification and Repairs
Pretty much same idea as mine, just didn't run to the top corner. Probably that was unnecessary anyhow, and hard to do cleanly.: And with a tire on it, -
50 inch curved light bar
gogmorgo replied to Jacob Ochs's topic in MJ Tech: Modification and Repairs
I'm assuming you mean the 50" bar, not my little ones. But if you're that interested, I did update my build thread with some photos of mine. -
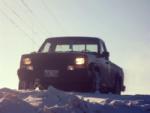
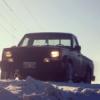
Geez, haven't updated this in a while. Well, tbh I haven't done much in a while. Picked up some ebay LED lights, out them on over the weekend. Holy $#!& they're bright. Basically I can see everything. Tops of old-growth spruce and pine ten feet off the edge of the road sort of everything. My phone hardly does it justice, especially with all the snow around, it struggles in the dark. On a road that dead ends at a trailhead, low beams: High beams: Floods + high beams: The benefit isn't so much in the brightness itself, but rather the spread of the brightness. Looking off to the side in the same spot as above, low beams: High beams: High beams + floods: Again, the phone doesn't do it justice. I can see further into the trees than I really need to, easily 30+feet in. Floods by themselves: And down at the dead end, ~100 ft from the tree line, low beams: High beams: High beams + floods: To illustrate the spread, high beams: Floods: And just for laughs, back in the driveway, low: High: And the floods, yeah, I forgot there was a branch there too: They seem to be of reasonable quality, with actual metal housings. I wired them in place of the factory fog lights. Used the factory switch, even though my MJ didn't come with factory fogs, the switch wires are still there. I snipped the switch wire just ahead of the ten-pin headlight harness connector, it's brown with a white stripe on an HO, but the 88 wiring manual I was referencing says it's light green with a black stripe. Used that to trigger a relay, with a fused 12V feed straight from the battery. I could have also snagged the factory's 12V feed out of the same spot, but I didn't want to cut into the harness more than I had to. Under the dash, the switch gets its power from the low-beam switch from the factory (this is so you don't run the fogs and high beams at the same time), so I snipped that wire (and taped it off) and ran a direct feed from a free spot on the fuse panel so I can turn the flood lights on independently of the low beams. Obviously this would be illegal to do with fog lights in most jurisdictions, but these aren't fog lights and aren't exactly legal for road use anyhow, so... :dunno: I'm likely going to need to come up with some kind of covers at some point, but I'll burn that bridge when I get to it. I'll throw some pictures of the wiring up later, maybe. Another update, got one of Krusty's hitches. Got it painted up, but not installed yet. It looks awesome, really solid, great welds, and the fit is just about perfect... except a previous owner (long long time ago) decided to booger weld in some useless gussets for the corners of the bumpers (still don't know why, and when I say useless I mean I grabbed one a while back to pull myself up and one of the welds cracked under my weight) so there's a whole bunch of welding snot preventing me from putting it into place. Finally an excuse to pick up a cheap grinder that I'll only use a couple times a year. Blaaaaaack: Also, don't spray paint in your basement, even when it's -1,000,000 outside. Your roommates will hate you. :doh:
-
50 inch curved light bar
gogmorgo replied to Jacob Ochs's topic in MJ Tech: Modification and Repairs
That's what, 250 watts or something? I just put a couple small 36W LED floods onto my brush guard and holy $#!& it's bright. Awesome for running down the grid roads in the dark, but I'd damn near get my @$$ thrown in jail if I got caught running with those on the highway... that 50" bar must be like having your own personal sun. -
Removable PreRunner tire carrier idea
gogmorgo replied to Jackrabbit41's topic in MJ Tech: Modification and Repairs
Check out Krusty's hitch for sure. Got one waiting to go in, great welds, looks awesome. But I've never had great experience with accessories that go into the receiver. To make them easy to slide in and out there's a bit of wiggle room, which turns into a lot of movement in a bike rack or tire carrier. For a swing-out carrier, use a three point mount. One mount attaches to the stake pocket in the back of the bedside, one mounts to the bumper right below that. Those are the hinges. Have a latch on the other side of the bumper. So you end up with kind of an A-frame shape, stick the tire wherever you want in the middle somewhere. Like this: No, my art isn't good enough to quit my day job. Made a quick two-view detail of a possible hinge/latch sort of thing. Four sides of a cube with two faces open for 90° of swing. Stick a hitch pin or similar down the middle for a latch, use something a little more permanent like a bolt for the hinges. Mounting everything out to the side means you can still use your tailgate with the tire carrier installed, since all the mounting points are out of the way of the tailgate. The carrier swings out of the way so you can still open the gate. Mounting to the stake pocket means you're not obstructing the tail light on that side, although thinking about it you might want a vertical brace in there somewhere, maybe at the end of the "door" part of the hinge, connecting the two sides of the A right at the edge of the tail gate. Depending on what bumper you have as well, you might want to forgo mounting to the bumper directly and instead figure out some kind of bracket to go between the bumper and body. I'd have to pull out a tape measure and check, but I think a 33" tire might be a little much for what I drew, as you'd have almost six inches of tire sticking out above and below the bumper if you centre it. I like the idea of slanting it pre-runner style the way that one works that neohic posted, but I don't like the idea of losing bed space, especially since it looks like you already have a toolbox in there... if you put a quad in there, you might have to leave your spare tire at home. -
Theres another thread about it. A few members have already made mention of selling their MJ when it comes out. That'll do one of two things. Either the quality of the MJs in question will drive up prices, or else sudden "flooding" of the market will push them down. Given that the plan would be to base it off the Wrangler, I don't really see Jeep calling it a Comanche, though. I expect the value of CJ-8's to go up a bit...
-
strange clunking after 3.5" lift
gogmorgo replied to 88eliminator's topic in MJ Tech: Modification and Repairs
Track bar is my guess. Throw an impact onto the bolts that go into the frame, and hammer them down as best you can. -
Any NP242 transfer case experts out there?
gogmorgo replied to schardein's topic in MJ Tech: Modification and Repairs
That and while the 231's shifter gate does have enough travel, the 242's shift pattern is really awkward in the 231 gate. Drove mine with the 231 gate for a couple weeks before I gave in and swapped in the shifter gate. -
Thou shalt horde taillights.
-
Oil pressure erratic until engine warm
gogmorgo replied to 91Pioneer's topic in MJ Tech: Modification and Repairs
The motor in question only had around 245,000 km, don't know what yours has but if it's been neglected it likely has a bit more bearing wear. Beyond having the crap beat out of it as a plow truck, the XJ I pulled it from seemed to have been reasonably well looked after. Also, I was running 10w40 at the time, if you're on 5w30 it's bound to be a bit lower. I'm not a costco member... I went with my roommate a whole bunch a few years back and was going to get my own membership after he moved out, but then they quit carrying the awesome mini pizzas, so I said screw it and haven't been back. Lol.