
All Activity
- Past hour
-
- Yesterday
-
1988 2.5l fuel problems
eaglescout526 replied to North Run's topic in MJ Tech: Modification and Repairs
Sounds like the injector isn’t pulsing. has the pump been tested? -

NOS Marchal fog lights with install kit
robfg67 replied to Eagle_SX4's topic in Craigslist/eBay... i.e. Not Your Stuff
Ha, $900 isn't enough-he also has to charge for shipping too!! -
no!!!!
-
So sorry to hear that!
-
I forgot to mention, when I add fuel directly to the throttle body, it will start and run until I run out of added fuel.
-

how many miles on your truck's factory engine?
North Run replied to Pete M's topic in MJ Tech: Modification and Repairs
245,813.8 kms, or 147,488.2 miles for my Southern neighbors. -
So I've had my Comanche off the road since 2013. Started it up and dove it around the storage yards annually. Until the pandemic I never had an issue. The new owners felt the need to siphon my full tank of fuel. So when I went to pick it up last summer it was no go. Had to winch it onto and off the trailer to bring it home. Due to a hip issue it's been parked and neglected since. Now I want to put it back on the road. It gets better fuel economy and funner to drive them my 2500HD. It'll crank all day long but not fire. Lots of spark, fuel pressure at the TBI, not sure how much. I know I replaced the fuel pump back in 2011 or 2012. I pulled the fuel filter and when I turn the key, it only cycles for maybe 3 seconds. Having not driven or worked on my baby since 2012, I can't remember if that is normal. I'm at the point of dropping the tank and testing and inspecting. The last 3 days have convinced me the world has indeed moved on since 2012, lol. 3 days to get in a fuel filter, & distributor cap. Amazingly they still had spark plugs and a rotor cap. I foresee a trip into the closest city tomorrow morning and the closest pick n pull. So long rambling story aside, is my pump running for 2-3 seconds normal? I wish I had not lent out my boroscope, it never came back :(, I know the tank was almost factory new when I replaced the pump the last time. Keeping a fuel tank completely full or completely empty makes a difference.
-
Hello, I'm really sorry for not responding sooner and to report that the trim piece is gone. I had a house fire back in January. It's been a challenging year, and I've been slowly working on putting my life back together.
-
No pics but a quick update - SYE ordered, will be here Monday. Angle of the rear diff will require some work for a double cardan shaft. The shorter XJshackle will draw the rear down another degree or two but I can work a fair amount of rotation adjustment into the SOA with slight modification. TC Plan: I have a 98 XJ 231 I bought super cheap from a NC4x4.com member back in 2022. Something's wrong inside, so I'd opted to use the 93 YJ's 231. I'll crack it open tomorrow. Front output won't move and it won't shift. Rear shaft is free. I'm going to try to cannibalize the shift rail, sector plate, rear drive sprocket and mode hub from the 98. The 98 shift rail won't need to be shortened for the SYE tail housing, and I won't have to mess with the caged needle bearings on the drive sprocket from the 93. And I'll have true neutral disconnect with the 98 sector plate.
-
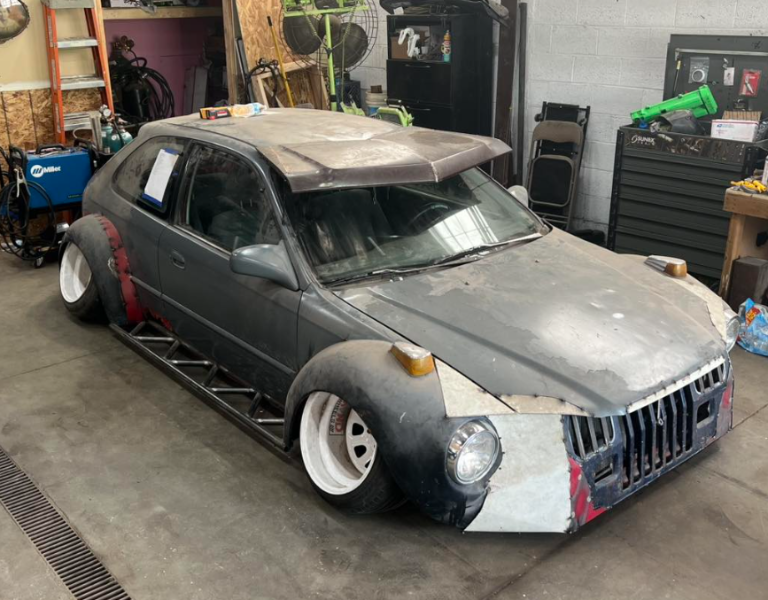
There is a lot going on with that Civic. VW beetle fenders and a YJ Wrangler grille. With maybe a square body Chevy hood used as a visor.
-
BODY: TL61 BUILD: 09/14/89 SELLING DEALER: SOUTH POINT JEEP INC AUSTIN, TX *X1 DESCRIPTION NOT AVAILABLE -H9 DESCRIPTION NOT AVAILABLE ALA ALK CBAP STRAIGHT BACK BENCH SEAT CKJP BLACK VINYL FLOOR COVERING DBBC ALL MANUAL TRANSMISSIONS DCK EAAC ALL ENGINES EAFC 2.5L I4 MPI EPD 5 SPEED MANUAL TRANSMISSION GRZP LEFT REMOTE MIRROR GSZP RIGHT REMOTE CONTROL MIRROR GTZ MANUAL REMOTE MIRRORS JJAA CIGAR LIGHTER MBJA FRONT BUMPER MDAP FRONT LICENSE PLATE BRACKET PW7 SBAA POWER STEERING TAAC ALL TIRES TBB FULL SIZE SPARE TIRE TPF P205/75R15 BSW ALL SEASON TIRES WLYC ALL STEEL WHEELS YGEA 5 ADDITIONAL GALLONS OF GAS Z01P REAR SPRING GROUP I Z56P LEFT FRONT SPRING GROUP VI Z75P RIGHT FRONT SPRING GROUP V 5KKA FIRST AMERICAN TITLE INSURANCE CO. APAS MONOTONE PAINT BAQS 115 AMP ALTERNATOR BCXS Maint. Free Battery BGAS POWER FRONT DISC/REAR DRUM BRAKES CSRS DO NOT USE - SEE CLASS JV CUMS MINI FLOOR CONSOLE DMDS 3.55 REAR AXLE RATIO DRJS DANA M235 WIDE REAR AXLE GACS TINTED GLASS WINDOWS GBBS TINTED WINDSHIELD GLASS GCBS FRONT DOOR TINTED GLASS GEHS FIXED DOOR VENT GLASS GNAS REAR VIEW DAY/NIGHT MIRROR HCDS DO NOT USE - SEE HCA JAZS DO NOT USE - SEE JP, KA CLASSES JCAS 85 MPH PRIMARY SPEEDOMETER KDDS MEDIUM SILVER DAKOTA R/T BADGE K3ZS STRIPE/BADGE/MOLDING/COLOR LAPS SHIFT INDICATOR WARNING LAMP LBCS GLOVE BOX LAMP LCJS OVERHEAD AMBIENT SURROUND LIGHTING LMAS HALOGEN HEADLAMPS MB1S BLACK FRONT BUMPER MFFS BLACK GRILLE MHBS FENDER FLARES MMCS MMGS BELT MOLDINGS MMJS MOLDED-IN-COLOR FENDER FLARES NAAS FEDERAL EMISSIONS NBKS EVAP CONTROL SYSTEM NF2S 18 GALLON FUEL TANK QW7S RA8S DELETE RADIO SCBS STEERING WHEEL SFAS STANDARD DUTY FRONT SHOCK ABSORBERS SGAS STANDARD DUTY REAR SHOCK ABSORBERS TBMS TIRE CARRIER WINCH WJKS 15X6.0 STYLED STEEL WHEELS WMCS OPEN XBSS PICKUP BOX YAAS BUILD TO U.S. MKT. SPECIFICATIONS Z1AS GVW/PAYLOAD RATING 1AAS U.S. DEALER RETAIL 162S ZONE 62-HOUSTON
-
BODY: JM61 BUILD: 09/19/88 SELLING DEALER: JARREL DAVIS CHRYSLER JEEP MERIDIAN, MS *X8 CLOTH LOW-BACK BUCKET SEATS -H9 DESCRIPTION NOT AVAILABLE ADLA SKID PLATE GROUP ALN BAYP 105 AMP ALTERNATOR BCYP 95 AMP BATTERY CACP LOW BACK BUCKET SEATS CDBP RECLINING FRONT SEATS DBBC ALL MANUAL TRANSMISSIONS DDX 5-SPEED HD MANUAL TRANSMISSION EAAC ALL ENGINES EAFC ERB 4.0L I6 MPI ENGINE GFDA REAR SLIDING WINDOW GRZP LEFT REMOTE MIRROR GSZP RIGHT REMOTE CONTROL MIRROR GTZA MANUAL REMOTE MIRRORS HAA AIR CONDITIONING JAYA DO NOT USE - SEE JP, KA CLASSES JGBP JHAA VAR INTERMITTENT WINDSHIELD WIPERS PE8 DESCRIPTION NOT AVAILABLE RAAC ALL RADIO EQUIPPED VEHICLES RABA OPEN RCDP 4 SPEAKERS TAAC ALL TIRES TBBA FULL SIZE SPARE TIRE TMWA TIRES XEEP FUEL TANK SKID PLATE SHIELD XEFP TRANSFER CASE SKID PLATE SHIELD XEUP FRONT SUSPENSION SKID PLATE YGGA 9 ADDITIONAL GALLONS OF GAS Z01P REAR SPRING GROUP I Z66P LEFT FRONT GROUP XV Z85P RIGHT FRONT SPRING GROUP XIV 5AMA JF/3450 VEHICLE FAMILY 5KNA METRO CARS OF DETROIT APAS MONOTONE PAINT BGAS POWER FRONT DISC/REAR DRUM BRAKES BJAS DESCRIPTION NOT AVAILABLE BKPS 10X2.5 REAR DRUM BRAKES CKAS CARPET CSRS DO NOT USE - SEE CLASS JV CUMS MINI FLOOR CONSOLE DHNS COMMAND-TRAC PART TIME 4WD SYSTEM DJHS 230MM FRONT AXLE DMMS 3.07 REAR AXLE RATIO DRJS DANA 35 REAR AXLE GACS TINTED GLASS WINDOWS GBBS TINTED WINDSHIELD GLASS GCBS FRONT DOOR TINTED GLASS GEHS FIXED DOOR VENT GLASS GNAS REAR VIEW DAY/NIGHT MIRROR JAAS INSTRUMENT PANEL JBDS INSTRUMENT PANEL SATIN SILVER BEZEL JCAS 85 MPH PRIMARY SPEEDOMETER JJAS CIGAR LIGHTER JKBS KKES DESCRIPTION NOT AVAILABLE K2XS STRIPE/BADGE/MOLDING/COLOR K3ES STRIPE/BADGE/MOLDING/COLOR LAFS SEAT BELT ALERT-DRIVER SEAT ONLY LAPS SHIFT INDICATOR WARNING LAMP LBCS GLOVE BOX LAMP LCJS OVERHEAD AMBIENT SURROUND LIGHTING LMAS HALOGEN HEADLAMPS MBJS BLACK FRONT BUMPER MB1S BLACK FRONT BUMPER MFGS HEADLAMP BEZEL MHAS BLACK WINDSHIELD MOLDINGS MMCS MMGS BELT MOLDINGS MMKS NAAS FEDERAL EMISSIONS NBAS UNDERGROUND CALIBRATION NBKS EVAP CONTROL SYSTEM NDAS CATALYTIC CONVERTER NF2S 18 GALLON FUEL TANK QE8S DESCRIPTION NOT AVAILABLE SBAS POWER STEERING SCES STEERING WHEEL SFAS STANDARD DUTY FRONT SHOCK ABSORBERS SGAS STANDARD DUTY REAR SHOCK ABSORBERS TBMS TIRE CARRIER WINCH WJDS WHEELS XBSS PICKUP BOX XFAS -35F PROTECTION ANTI-FREEZE YAAS BUILD TO U.S. MKT. SPECIFICATIONS Z5AS GVW/PAYLOAD RATING 1AAS U.S. DEALER RETAIL 165S ZONE 65-NEW ORLEANS
-
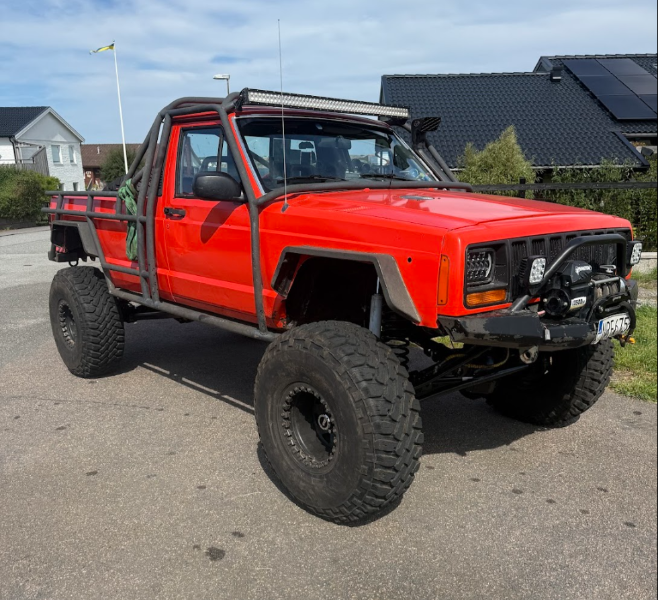
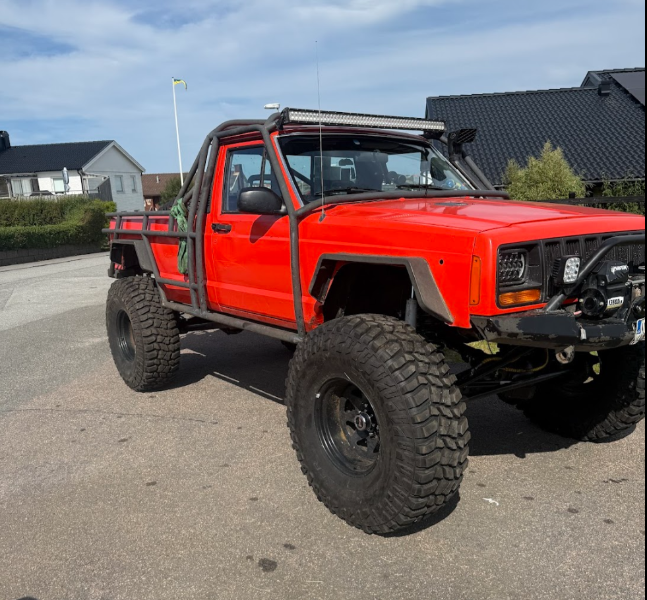
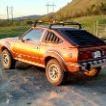
 I had welded my old rims to fit the new bolt pattern, but at around 110–120 km/h, the car started to wobble a bit. Today, I went to check out some new rims and a set of 38.5" Super Swampers. When I got there, the guy had a set of 40" Cooper tires already mounted on the rims. He wasn’t planning to sell them—but I managed to convince him. So now I'm rolling on 40s! 😄 My old rims and new ones, got to weld beadlocks on them but as sweden offroad tour is starting tomorrow I do not have time.
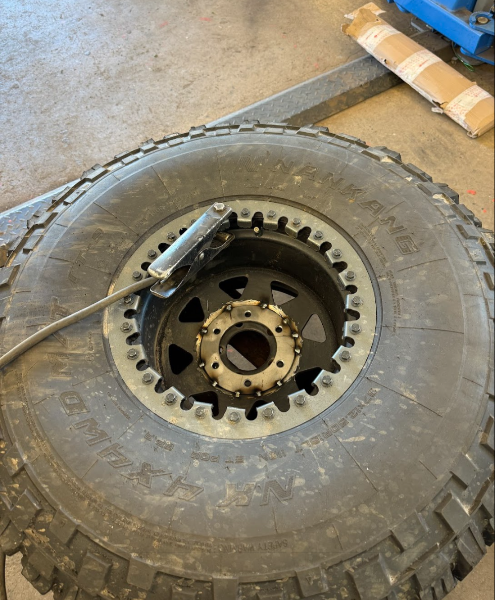
-
Just WTF.....
-
 nathan joined the community
 -
 woodard78 joined the community
 -
Fuel line problem, need part numbers.
Eagle_SX4 replied to Skylynx's topic in MJ Tech: Modification and Repairs
You can buy brand new hose ends with barbs on them from dorman. They are available in both 3/8 and 5/16. They look a little different but that is because they have tool less clips and can be removed with out any fuel line fitting tools. https://www.dormanproducts.com/p-16452-800-121.aspx https://www.dormanproducts.com/p-24796-800-120.aspx -
I run that exact kit with the add a leaf. It has a nice spring rate and blends well with the pack but there are a couple of items to note. The actual lift is only a hair over an inch as this not made specifically for an MJ. You will need to redrill the center pin in the add a leaf as it doesn’t line up with the offset of the MJ leaf pack. There are pictures somewhere in my build thread that document the whole process. Are you trying to match this to a BDS 2 or 3” front coil spring? I’m running the bds 3” complete kit. The front does indeed lift around 3”. The MJ has a stock rake of around 2” give or take. So adding 3” to the front and 1” to the rear leaves the truck pretty level but it will squat with any load. A 6.25” long shackle will help significantly and keep it looking a bit more like a truck. BDS also has the rear shock lengths incorrect for this application. The rear shocks in their 3” kit are too long once the springs settle and will bottom out. The BDS control arms, front springs, and add a leaf are all good quality and far better than most others but the bds stock shocks and track bar aren’t so good. The ride quality of the add a leaf in the stock pack is very good though. You could also go with the General Spring 4 leaf spring pack and add some longer (5.75-6.25” eye to eye) shackles. That would net around a solid 2-3” of rear lift which would couple nicely with some good 3” coils or even 4” if you wanted a more “leveled” stance. Here is a recipe for a really solid suspension setup for a low-mid lift: metal cloak 3.5” front XJ coils Currie (rock jock) adjustable XJ control arms or possibly metal cloak XJ or TJ arms Iron man fab track bar kit (standard drop no offset and no drop pitman arm) Iron man fab steering brace kit Moog jeep ZJ steering linkage black magic or centric posi-quiet brake pads GS 4 leaf spring pack (or a full length add a leaf like bds) 1” Chevy drop shackles (or teraflex shackles) Fox shocks valved for an MJ from accutune off-road. Later model XJ larger sway bar
-

Fuel line problem, need part numbers.
ghetdjc320 replied to Skylynx's topic in MJ Tech: Modification and Repairs
Nice video, I’d be concerned about not having a barb for the clamp though. I tried doing that in my YJ and even used two fuel clamps but it still came off after a few hundred miles spraying fuel everywhere. This was on a 58psi line pressure system though so I’d expect it to last longer with the lower MJ line pressure. If you have an appropriate size hydraulic crimper though, you could slide on a new steel ferule and crimp it down. -
Fuel line problem, need part numbers.
Skylynx replied to Skylynx's topic in MJ Tech: Modification and Repairs
Oh wow i actually watch your videos all the time! Your setup is pretty close to what i want to get to with mine! As ingenious as the solution in the video is i think i would rather try and replace things with the AN fittings, it’s the little steel crown with the tube that you reused that’s leaking for me, i’m hoping it’s just the o-rings and not the piece itself, though as i said i’m going to replace everything with new connectors and hose anyway -
Fuel line problem, need part numbers.
Skylynx replied to Skylynx's topic in MJ Tech: Modification and Repairs
Already ordered the fuel injection hose clamps and the hose itself too! Thanks for the tip, i’m definitely ditching these ones it’s got right now -
Fuel line problem, need part numbers.
Skylynx replied to Skylynx's topic in MJ Tech: Modification and Repairs
I think that’s what i’ll end up doing, i’ll get under the truck and tear everything out and see if i can reuse the tubes at all, if i do i saw these in amazon that i think could work, apparently these slide over the tubes and you tighten the half nut over them to compress it into a new a new AN thread fitting after which you can add a hose, i’m guessing these are the compression ones you meant?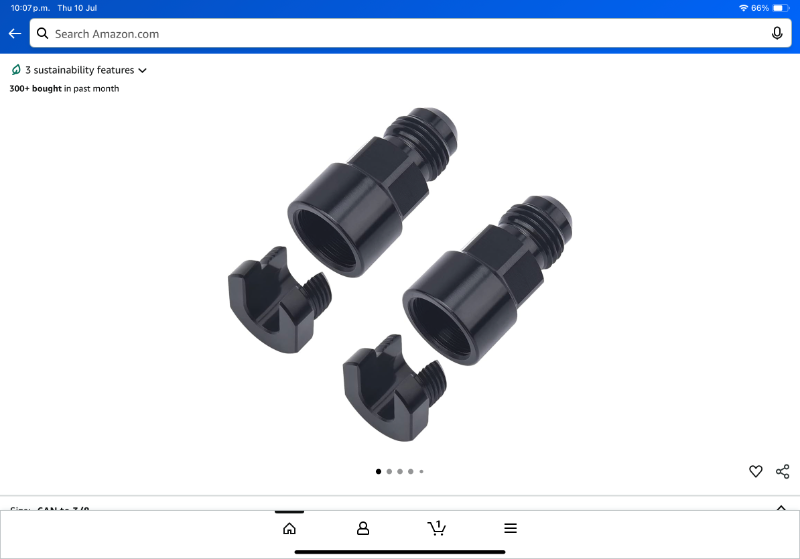
-
'86 Comanche Badges on Ebay
White_Comanche replied to Boilermaker's topic in Craigslist/eBay... i.e. Not Your Stuff
Yes, they did a good job of slicing the old adhesive. With a little TLC, these will be golden. -
Thank you Pete for the phone call. You explained it perfectly. In essence, in case someone else is ever searching for an answer, the add a leaf does “lower” the truck by about .25 inches while also lifting the truck about 3 inches due to the forcing the other springs to conform to the spring rate of the add a leaf. Thanks again Pete!
-
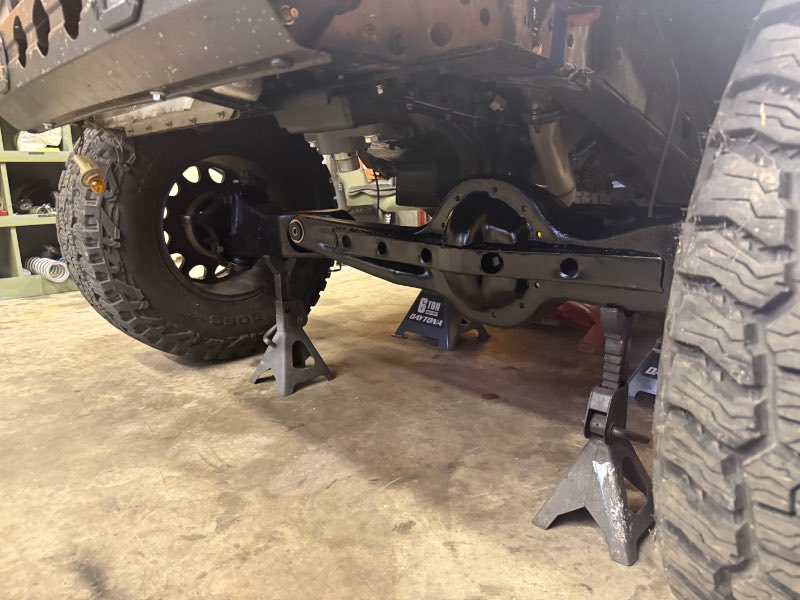
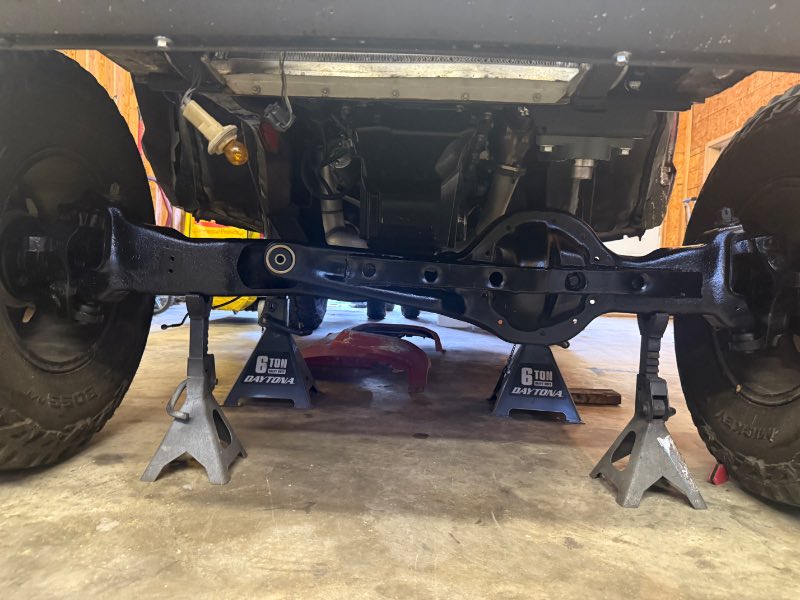
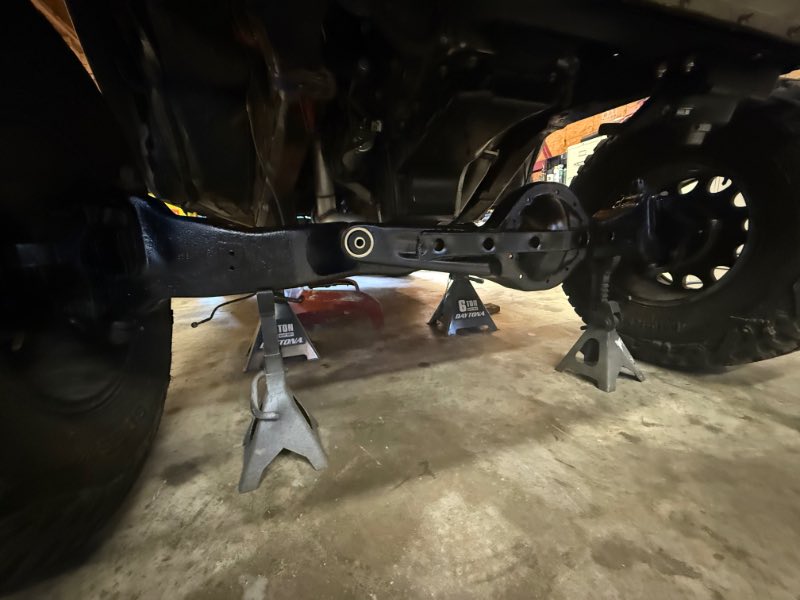
.thumb.jpg.809559baf7c47f3daaed1622c0992004.jpg) Just a sneak peak of the mockup stage. Lots of measuring to take place before having the crossmember plasma cut
Just a sneak peak of the mockup stage. Lots of measuring to take place before having the crossmember plasma cut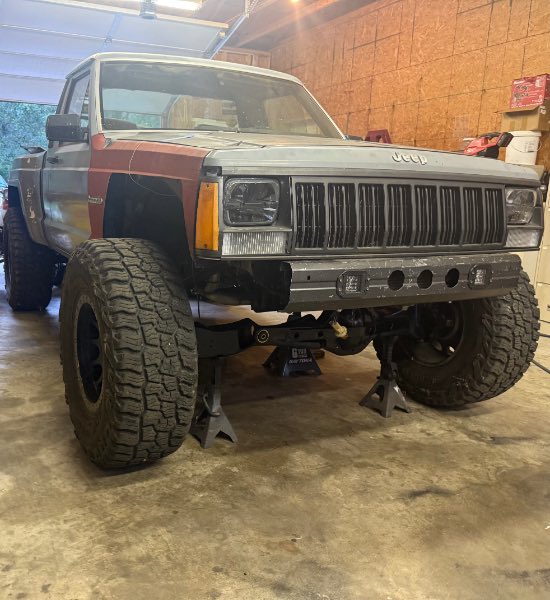
-
I'v towed some heavy trailers with my manual MJ, 4.0L, AX-15 with stock 3.08 rear gears on 29 inch tires. It works, but it's no tower of power, aerodynamics of the towed item matter a lot at highway speeds. 4000lbs is easy, 5000lbs is doable, 6000 lbs is straight up sketchy in my experience.
.thumb.jpg.4a4a3d2a5e43898c335ffcf8d669571d.jpg)

.thumb.jpg.1c80a5acd72f01d3b9ded3bfb499d0c9.jpg)

