

Blue88Comanche
-
Posts
2668 -
Joined
-
Last visited
Content Type
Profiles
Forums
Gallery
Everything posted by Blue88Comanche
-
It would take a hit job to be able to afford one of those, haha. Those where the good old days....
-
Any pics?
-
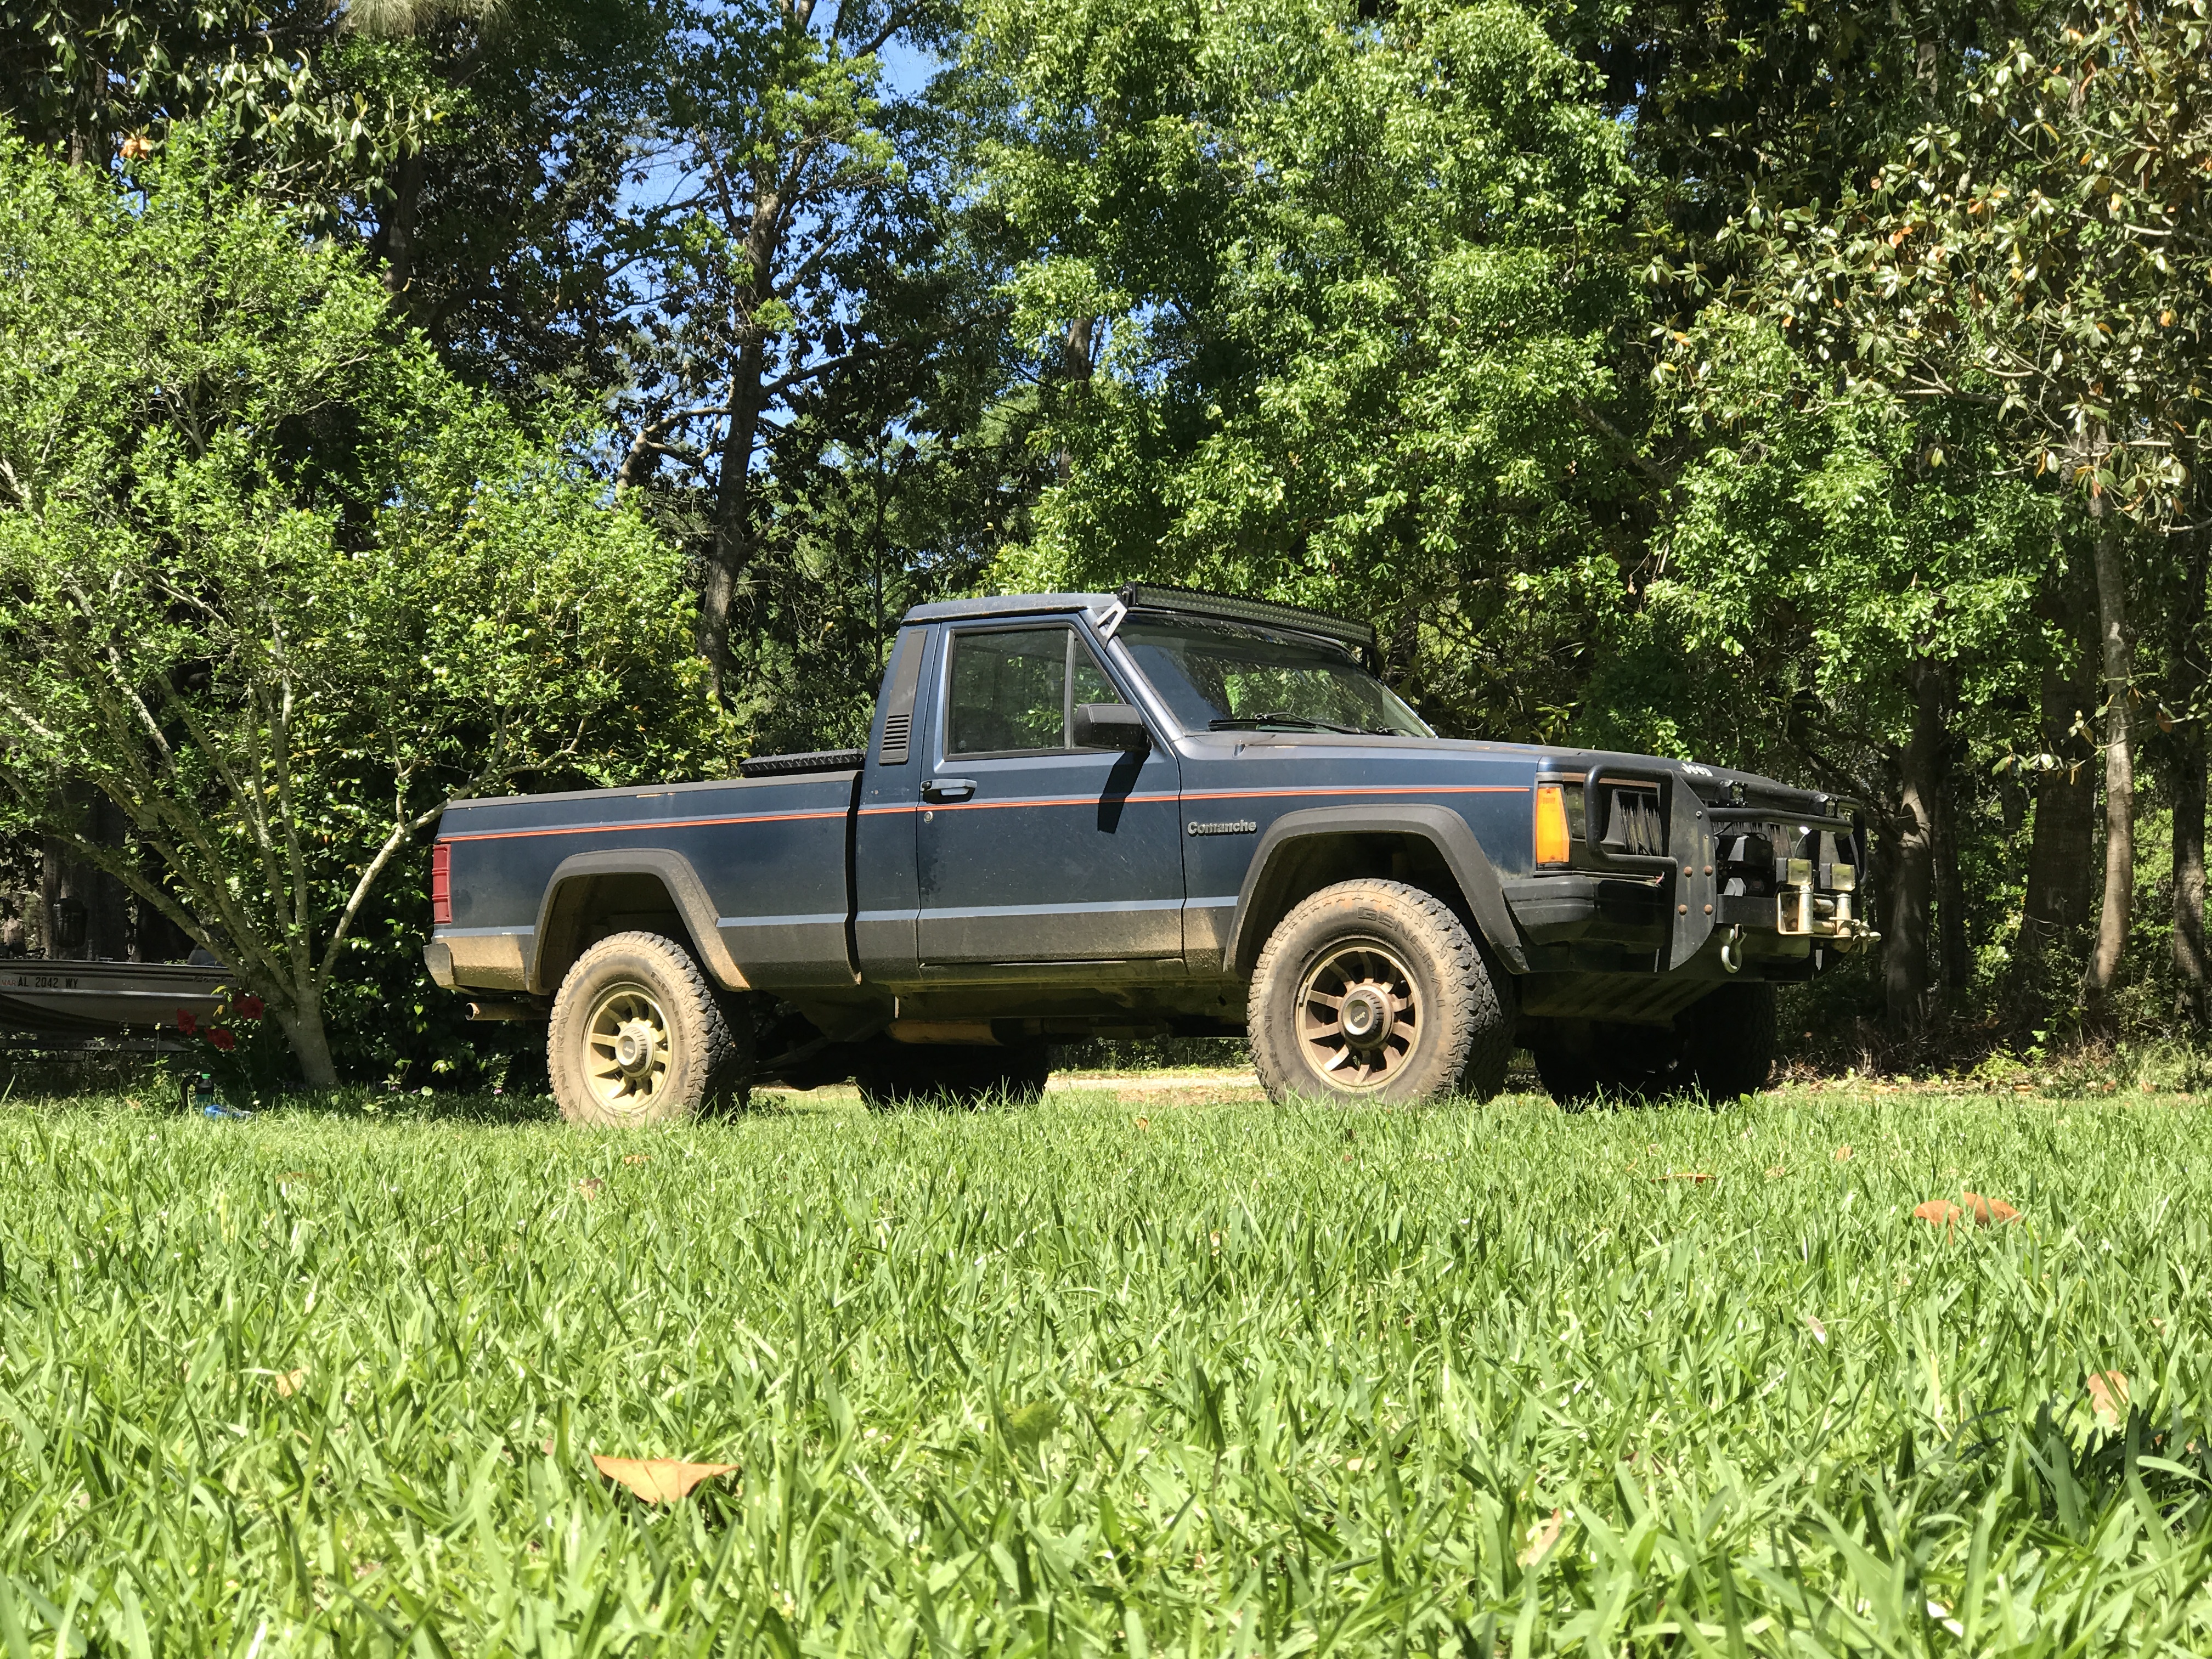
DIY convert from closed to open cooling. This Write up is how I converted from closed to open cooling. You may choose other parts to achieve the same end result. I am converting because I am tired of messing with the pressure bottle, to remove the heater flow valve, and replace old hoses. Parts: Radiator with filler neck $82.57 * Part number: CU1193 Radiator cap $24.99 * (I bought a fancy cap with built in thermometer.) Part number: 2471S 2 Gallons antifreeze coolant $14.99 ea ($24.98 for 2) *** Item number: 7020022 10' 5/16 hose $19.90 *** $1.99 per foot Item number: 5194083 4' 3/4 heater hose $5.56 *** $1.39 per foot item number: 5192978 4' 5/8 heater hose $5.56 *** $1.39 per foot Item number: 5192951 Two 3/4 to 5/8 hose adaptors $2.99 ea ($5.98 for 2)*** Part number: 80424 A junkyard radiator bottle (I think mine was from a ZJ or WJ dad snagged it for me) Total conversion cost: $169.54 + S&H and tax Optional Parts: Later model thermostat housing with temperature switch new water pump Dual Fan Controller Second Electric fan for dual conversion Wire Relay or Fan Controller Power Switch MJ or XJ 2.5L Radiator Bottle $16.99 ** Part number: 52003213 MJ or XJ Bottle Cap $7.97 ** Part number: J3223202 Ordered from: Amazon.com * Morris4x4.com ** Advanced Auto Parts *** Tools: Gloves Safety glasses Knife or box cutter Phillips and flat head screwdrivers Bucket T-25 T-30 8mm Socket and or wrench 10mm Socket and or wrench Getting Started Start by draining out the old radiator fluid, removing the upper and lower radiator hoses, fan temperature switch, and if you have an auto transmission the transmission cooler lines from the radiator. Use an 8mm socket or wrench to remove the electric fan and clutch fan shroud. The radiator support is held on by several bolts 10mm and T-25 or T-30 (sorry mine where all stripped before I started not exactly sure the actual size). The bolts removed connect the support to the frame and front clip, then they are all out remove the radiator support. The radiator should come out without much fuss. With the radiator out of the way now would be the perfect time to convert to Dual electric fans and replace the water pump. Sadly I was running out of time due to fighting with stripped bolts so i was not able to do ether.... Depending on the radiator you get you may not need to change the thermostat housing. My thermostat housing is from a later model XJ, and can use a temperature switch. However the radiator I purchased has the hole for the fan temperature switch. Remove the 3/4 hose and the 5/8 hose from the thermostat housing and the water pump. Remove the old coolant pressure bottle and the hoses going to the heater core. Cutting the hose may be needed. The new hoses will need to be adapted from 3/4 to 5/8, the reason for this is the thermostat housing outlet is 3/4 connecting to the heater core that is 5/8, and the heater core outlet is 3/4 connecting to the water pump inlet that is 5/8. After all the old hoses are removed take your new 3/4 and 5/8 hose and route it however you like, then measure where to cut the hose in half. Use the 3/4 to 5/8 adapters as needed. Again the hose routing is: 3/4 from thermostat housing 3/4 to 5/8 adapter 5/8 to heater core inlet 3/4 from heater core outlet 3/4 to 5/8 adapter 5/8 to water pump The new coolant bottle is the next challenge. I ordered a 2.5L MJ/XJ coolant bottle that should fit on the drivers side fender, I will likely need to go back to a cone air filter to make room for it. Till I decide for sure what bottle I am sticking with I used one from a Junk yard Jeep and slightly modified it to work. I had to remove the old pressure bottle "shelf" to make room. I used a self tapping screw to attach the radiator bottle to the back of the engine bay where the old bottle was located. I routed the 5/16 hose around the back of the bottle and used the heater hoses as a bridge, ending where the radiator filler neck will be. Install the new radiator and reconnect the upper and lower radiator hoses. Reattach the radiator support. Connect the Coolant bottle hose to the filler neck. For good measure I zip tied all the new hoses in place. Fill the radiator system with 12 quarts (3 Gallons) of coolant. Must be a 50/50 mix, you can use pre-mix or concentrate with distilled water. you may not be able to fit all 12 quarts as there will likely be some coolant still in the engine. Bleed the air out of the system, Renix engines have a coolant temperature sensor on the back of the head accessible from the engine compartment. Clean up and all done Prior to this conversion My Jeep would boil over in 20 minuets and interstate travel was a no go. Now the temperature has yet to pass the 210 mark while traveling 75 mph on the interstate. A side note, my A/C seems to be blowing cooler as well now....
-
 Upper and Lower Control arms are usable with minor modification, both are beefier, and the lowers will allow larger tires to be ran without rubbing while making turns. The Brake booster and master brake cylinder are also usable with minor modification.
 -
I have thought about doing that my self, I just haven't invested into LED lights yet.
-
The 242 is select-trac (has the option of full time 4wd and part time) and the 231 is command trac (part time 4wd)
-
RockMJ put one on his MJ, I think it also was usable as a 3rd brake light.
-
Blue88Comanche Pioneer 4X4
Blue88Comanche replied to Blue88Comanche's topic in Member Projects: Your Comanches
DIY convert from closed to open cooling. This Write up is how I converted from closed to open cooling. You may choose other parts to achieve the same end result. I am converting because I am tired of messing with the pressure bottle, to remove the heater flow valve, and replace old hoses. Parts: Radiator with filler neck $82.57 * Part number: CU1193 Radiator cap $24.99 * (I bought a fancy cap with built in thermometer.) Part number: 2471S 2 Gallons antifreeze coolant $14.99 ea ($24.98 for 2) *** Item number: 7020022 10' 5/16 hose $19.90 *** $1.99 per foot Item number: 5194083 4' 3/4 heater hose $5.56 *** $1.39 per foot item number: 5192978 4' 5/8 heater hose $5.56 *** $1.39 per foot Item number: 5192951 Two 3/4 to 5/8 hose adaptors $2.99 ea ($5.98 for 2)*** Part number: 80424 A junkyard radiator bottle (I think mine was from a ZJ or WJ dad snagged it for me) Total conversion cost: $169.54 + S&H and tax Optional Parts: Later model thermostat housing with temperature switch new water pump Dual Fan Controller Second Electric fan for dual conversion Wire Relay or Fan Controller Power Switch MJ or XJ 2.5L Radiator Bottle $16.99 ** Part number: 52003213 MJ or XJ Bottle Cap $7.97 ** Part number: J3223202 Ordered from: Amazon.com * Morris4x4.com ** Advanced Auto Parts *** Tools: Gloves Safety glasses Knife or box cutter Phillips and flat head screwdrivers Bucket T-25 T-30 8mm Socket and or wrench 10mm Socket and or wrench Getting Started Start by draining out the old radiator fluid, removing the upper and lower radiator hoses, fan temperature switch, and if you have an auto transmission the transmission cooler lines from the radiator. Use an 8mm socket or wrench to remove the electric fan and clutch fan shroud. The radiator support is held on by several bolts 10mm and T-25 or T-30 (sorry mine where all stripped before I started not exactly sure the actual size). The bolts removed connect the support to the frame and front clip, then they are all out remove the radiator support. The radiator should come out without much fuss. With the radiator out of the way now would be the perfect time to convert to Dual electric fans and replace the water pump. Sadly I was running out of time due to fighting with stripped bolts so i was not able to do ether.... Depending on the radiator you get you may not need to change the thermostat housing. My thermostat housing is from a later model XJ, and can use a temperature switch. However the radiator I purchased has the hole for the fan temperature switch. Remove the 3/4 hose and the 5/8 hose from the thermostat housing and the water pump. Remove the old coolant pressure bottle and the hoses going to the heater core. Cutting the hose may be needed. The new hoses will need to be adapted from 3/4 to 5/8, the reason for this is the thermostat housing outlet is 3/4 connecting to the heater core that is 5/8, and the heater core outlet is 3/4 connecting to the water pump inlet that is 5/8. After all the old hoses are removed take your new 3/4 and 5/8 hose and route it however you like, then measure where to cut the hose in half. Use the 3/4 to 5/8 adapters as needed. Again the hose routing is: 3/4 from thermostat housing 3/4 to 5/8 adapter 5/8 to heater core inlet 3/4 from heater core outlet 3/4 to 5/8 adapter 5/8 to water pump The new coolant bottle is the next challenge. I ordered a 2.5L MJ/XJ coolant bottle that should fit on the drivers side fender, I will likely need to go back to a cone air filter to make room for it. Till I decide for sure what bottle I am sticking with I used one from a Junk yard Jeep and slightly modified it to work. I had to remove the old pressure bottle "shelf" to make room. I used a self tapping screw to attach the radiator bottle to the back of the engine bay where the old bottle was located. I routed the 5/16 hose around the back of the bottle and used the heater hoses as a bridge, ending where the radiator filler neck will be. Install the new radiator and reconnect the upper and lower radiator hoses. Reattach the radiator support. Connect the Coolant bottle hose to the filler neck. For good measure I zip tied all the new hoses in place. Fill the radiator system with 12 quarts (3 Gallons) of coolant. Must be a 50/50 mix, you can use pre-mix or concentrate with distilled water. you may not be able to fit all 12 quarts as there will likely be some coolant still in the engine. Bleed the air out of the system, Renix engines have a coolant temperature sensor on the back of the head accessible from the engine compartment. Clean up and all done Prior to this conversion My Jeep would boil over in 20 minuets and interstate travel was a no go. Now the temperature has yet to pass the 210 mark while traveling 75 mph on the interstate. A side note, my A/C seems to be blowing cooler as well now.... -
+1 for Aussie lockers, I have one in the D44 and love it.
-
If these are what i think they are, then a mine spool will replace the spider gears in your current gear carrier. the spool Locks both axle shafts so they will always spin at the same rate. however because this will not unlock like an auto locker or selectable locker it cause the wheels to chirp and skip when making turns. the weakest link will be the gear carrier. auto lockers, when making a turn will allow the outside wheel (the faster spinning tire) to unlock, I have an auto locker in my rear D44 it handles good on and off road
-
this explains why google did not have much to say on this topic lol
-
I bought a new radiator for the MJ and it has the auto trans cooler, but I don't need it because I have the 5 speed. What are some clever uses I could use the auto trans cooler for?
-
Crusty Rubber Brake Lines
Blue88Comanche replied to Zenobian_84's topic in MJ Tech: Modification and Repairs
If you have a lift or plan on doing one you can use the YJ lines. As for the length difference i am not sure. -
Blue88Comanche Pioneer 4X4
Blue88Comanche replied to Blue88Comanche's topic in Member Projects: Your Comanches
All i did was ask her if she would help and she said sure! :banana: I am a very lucky guy lol Get a new one. :rotfl2: Currently its Closed with a leaking pressure bottle, the radiator is the first step to converting it to open. I need to find a good overflow bottle first. My plans are to replace the radiator, gather parts, then remove the heater flow valve and add the open system coolant bottle. While the radiator is off I may convert to dual electric fans. -
I know this is a year late and therefore may be a moot point. but with the Novak cable you should be able to "shorten" the cable using the jamnuts at the cable ends, which would also shorten the throw and from your pictures it appears that there might be enough adjustment at one or both ends of the cable end jamnuts to back it off the front of the shift gate. anyways just food for thought, i like this write-up its very informative. pictures are a plus. I haven't messed with it any after i did the install. But from the pictures it does look like i could back out the adjustment on the body bracket.
-
I had one of those, same color too. Only that one is in much better condition lol.
-
New Carpet options?
Blue88Comanche replied to dancome433's topic in MJ Tech: Modification and Repairs
I got a few samples from them in the past, one og the gray colors is an exact match.. i don't remember the name or cut but if the sample is still at the house i will post a pic and its item number -
Blue88Comanche Pioneer 4X4
Blue88Comanche replied to Blue88Comanche's topic in Member Projects: Your Comanches
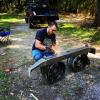
Ordered a new radiator, fuel injectors, radiator cap. Wednesday I plan to get the radiator installed and i managed to convince my Girlfriend to help out. -
Blue88Comanche Pioneer 4X4
Blue88Comanche replied to Blue88Comanche's topic in Member Projects: Your Comanches
Last weekend the MJ started running very rough and was acting like it was misfiring several cylinders. I was poking around the distributor while the engine was running and got a zap. I decided to replace the spark plugs and the plug wires at the same time. when i was removing the old plug wires 2 of the wires came apart at the metal crimp connector and the wire from the coil to the distro was cracked. After everything was installed it now runs smoothly again! -
Cleaning up the paint
Blue88Comanche replied to xmeatbagx's topic in MJ Tech: Modification and Repairs
You could also try a clay bar. It would be less aggressive than sanding it. Bit if the clear coat is shot then the clay bar won't help. -
Alt Relocation Renix
Blue88Comanche replied to 87manche1's topic in MJ Tech: DIY Projects and Write-Ups
unless they where fixed, the pictures work for me. -
Fail
-
painting alum turbine rims
Blue88Comanche replied to redwolf624's topic in MJ Tech: Modification and Repairs
You could use black plasti dip. If you don't like it just peel it off. it won't hurt anything. I have used the stuff on a couple of our jeeps. -
cv shafts. who's running them?
Blue88Comanche replied to shawn's topic in MJ Tech: Modification and Repairs
:yeah that: I also bought my CV shafts from rock auto. I use full time 4wd all the time and the CVs make it a much nicer drive. Mine where ordered for a ZJ. You will need to remove the ABS tone ring to make it fit properly on earlier D30s without ABS -
might as well replace the switch (can't find a price on rock auto) my AC was leaking through the switch it self; Accumulator ($11-$24) when i replaced my accumulator it did not have that valve, just an input, output, and a port for the switch; O-Rings ($4-$10) they are cheap, if you have the system depressurized might as well replace them. have a shop pull a vacuum if you can't, then recharge the system.